shift LINCOLN AVIATOR 2004 User Guide
[x] Cancel search | Manufacturer: LINCOLN, Model Year: 2004, Model line: AVIATOR, Model: LINCOLN AVIATOR 2004Pages: 336, PDF Size: 3.69 MB
Page 199 of 336
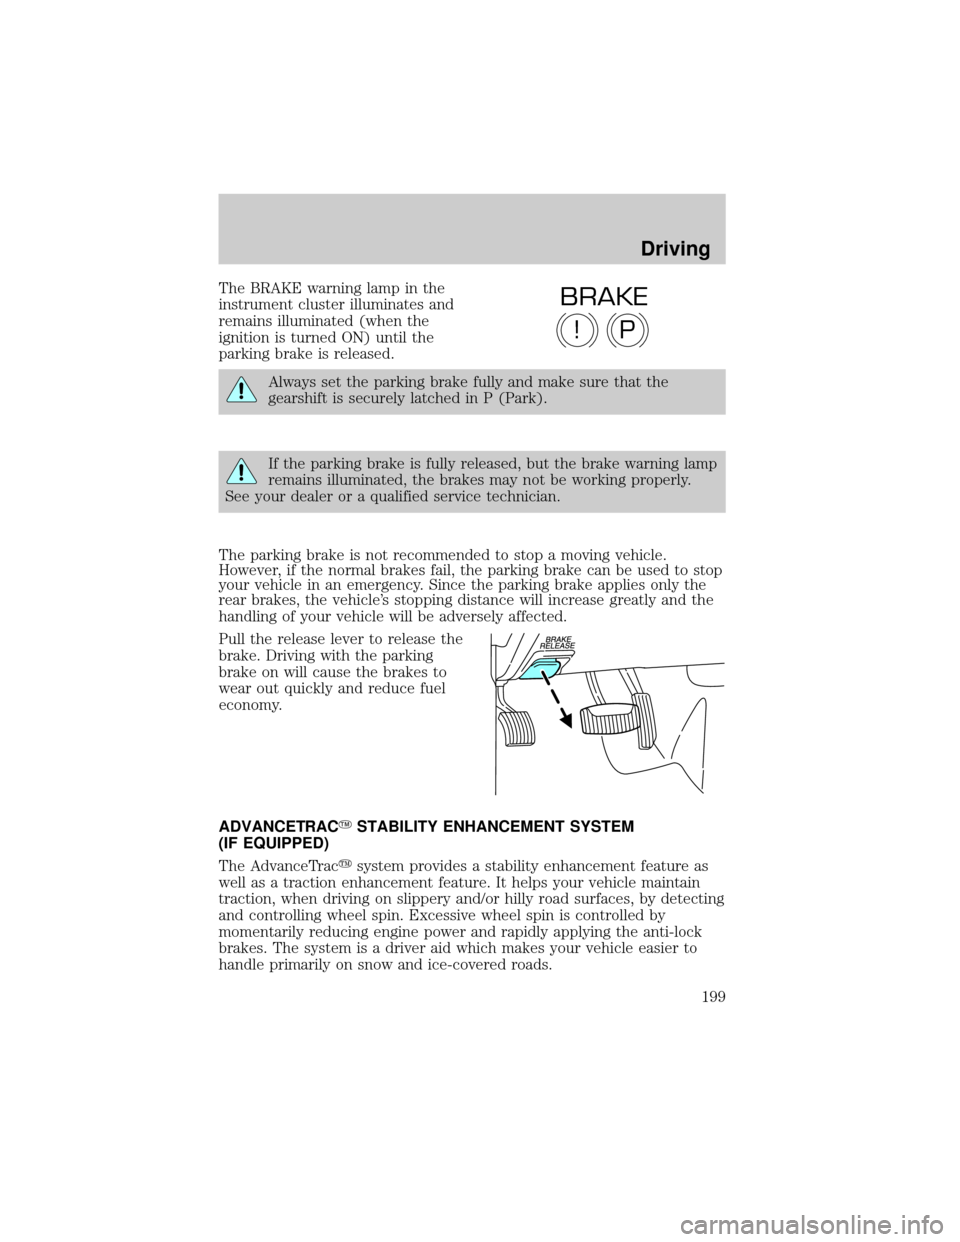
The BRAKE warning lamp in the
instrument cluster illuminates and
remains illuminated (when the
ignition is turned ON) until the
parking brake is released.
Always set the parking brake fully and make sure that the
gearshift is securely latched in P (Park).
If the parking brake is fully released, but the brake warning lamp
remains illuminated, the brakes may not be working properly.
See your dealer or a qualified service technician.
The parking brake is not recommended to stop a moving vehicle.
However, if the normal brakes fail, the parking brake can be used to stop
your vehicle in an emergency. Since the parking brake applies only the
rear brakes, the vehicle's stopping distance will increase greatly and the
handling of your vehicle will be adversely affected.
Pull the release lever to release the
brake. Driving with the parking
brake on will cause the brakes to
wear out quickly and reduce fuel
economy.
ADVANCETRACYSTABILITY ENHANCEMENT SYSTEM
(IF EQUIPPED)
The AdvanceTracysystem provides a stability enhancement feature as
well as a traction enhancement feature. It helps your vehicle maintain
traction, when driving on slippery and/or hilly road surfaces, by detecting
and controlling wheel spin. Excessive wheel spin is controlled by
momentarily reducing engine power and rapidly applying the anti-lock
brakes. The system is a driver aid which makes your vehicle easier to
handle primarily on snow and ice-covered roads.
P!
BRAKE
Driving
199
Page 204 of 336
Vehicles with a higher center of gravity such as utility and
four-wheel drive vehicles handle differently than vehicles with a
lower center of gravity. Utility and four-wheel drive vehicles arenot
designed for cornering at speeds as high as passenger cars any more
than low-slung sports cars are designed to perform satisfactorily under
off-road conditions. Avoid sharp turns, excessive speed and abrupt
maneuvers in these vehicles. Failure to drive cautiously could result in
an increased risk of loss of vehicle control, vehicle rollover, personal
injury and death.
Loaded vehicles, with a higher center of gravity, may handle
differently than unloaded vehicles. Extra precautions, such as
slower speeds and increased stopping distance, should be taken when
driving a heavily loaded vehicle.
Your vehicle has the capability to haul more cargo and people than most
passenger cars. Depending upon the type and placement of the load,
hauling people and cargo may raise the center of gravity of the vehicle.
Use extra caution while becoming familiar with your vehicle. Know the
capabilities and limitations of both you as a driver and your vehicle.
AUTOMATIC TRANSMISSION OPERATION
Brake-shift interlock
This vehicle is equipped with a brake-shift interlock feature that prevents
the gearshift lever from being moved from P (Park) when the ignition is
in the ON position unless brake pedal is depressed.
If you cannot move the gearshift lever out of P (Park) with ignition in
the ON position and the brake pedal depressed:
1. Apply the parking brake, turn the ignition to LOCK, then remove the
key.
Driving
204
Page 205 of 336
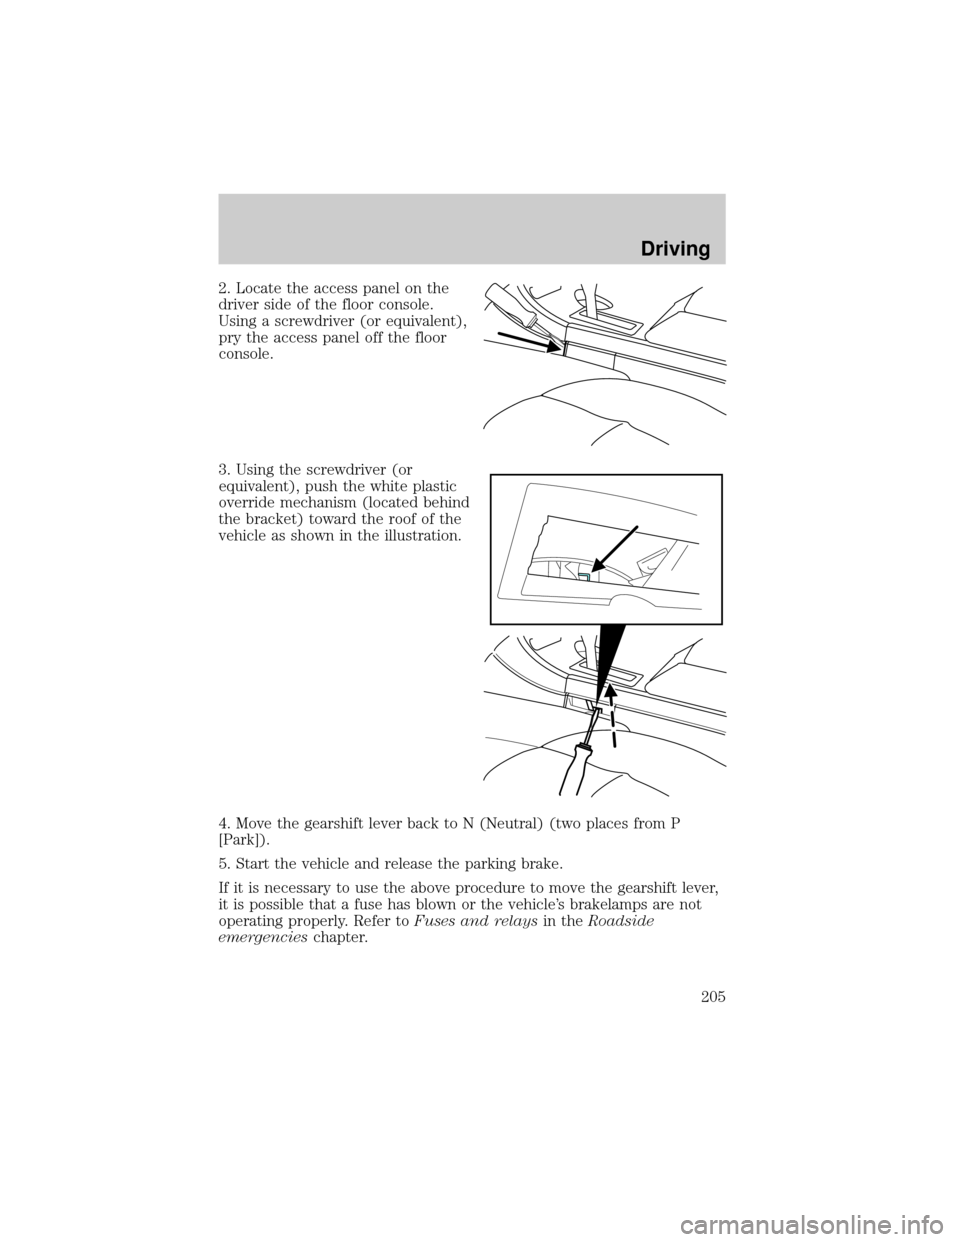
2. Locate the access panel on the
driver side of the floor console.
Using a screwdriver (or equivalent),
pry the access panel off the floor
console.
3. Using the screwdriver (or
equivalent), push the white plastic
override mechanism (located behind
the bracket) toward the roof of the
vehicle as shown in the illustration.
4. Move the gearshift lever back to N (Neutral) (two places from P
[Park]).
5. Start the vehicle and release the parking brake.
If it is necessary to use the above procedure to move the gearshift lever,
it is possible that a fuse has blown or the vehicle's brakelamps are not
operating properly. Refer toFuses and relaysin theRoadside
emergencieschapter.
Driving
205
Page 206 of 336
Do not drive your vehicle until you verify that the brakelamps
are working.
Always set the parking brake fully and make sure the gearshift is
latched in P (Park). Turn the ignition to the LOCK position and
remove the key whenever you leave your vehicle.
If the parking brake is fully released, but the brake warning lamp
remains illuminated, the brakes may not be working properly.
See your dealer or a qualified service technician.
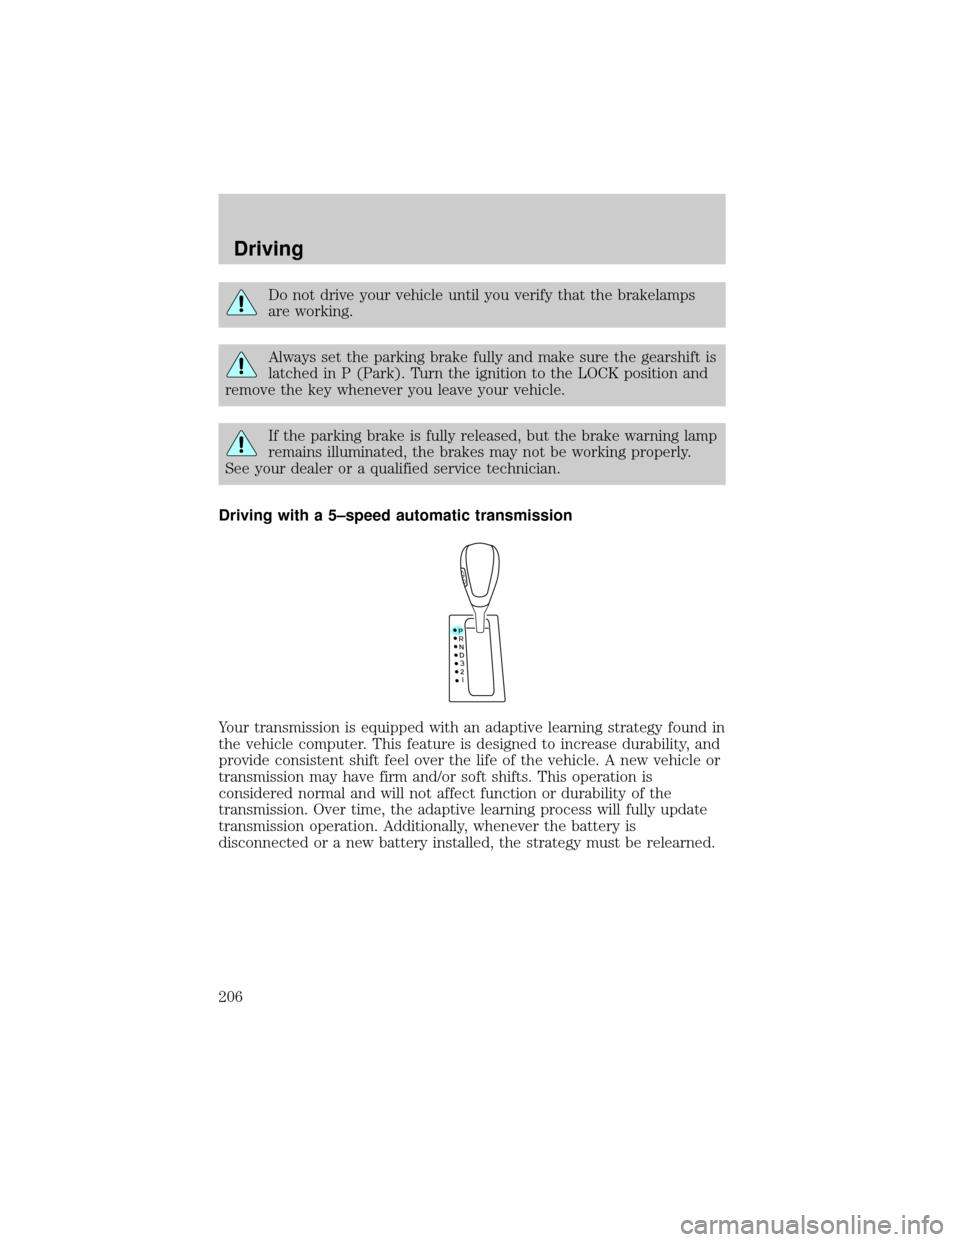
Driving with a 5±speed automatic transmission
Your transmission is equipped with an adaptive learning strategy found in
the vehicle computer. This feature is designed to increase durability, and
provide consistent shift feel over the life of the vehicle. A new vehicle or
transmission may have firm and/or soft shifts. This operation is
considered normal and will not affect function or durability of the
transmission. Over time, the adaptive learning process will fully update
transmission operation. Additionally, whenever the battery is
disconnected or a new battery installed, the strategy must be relearned.
O
D
Driving
206
Page 207 of 336
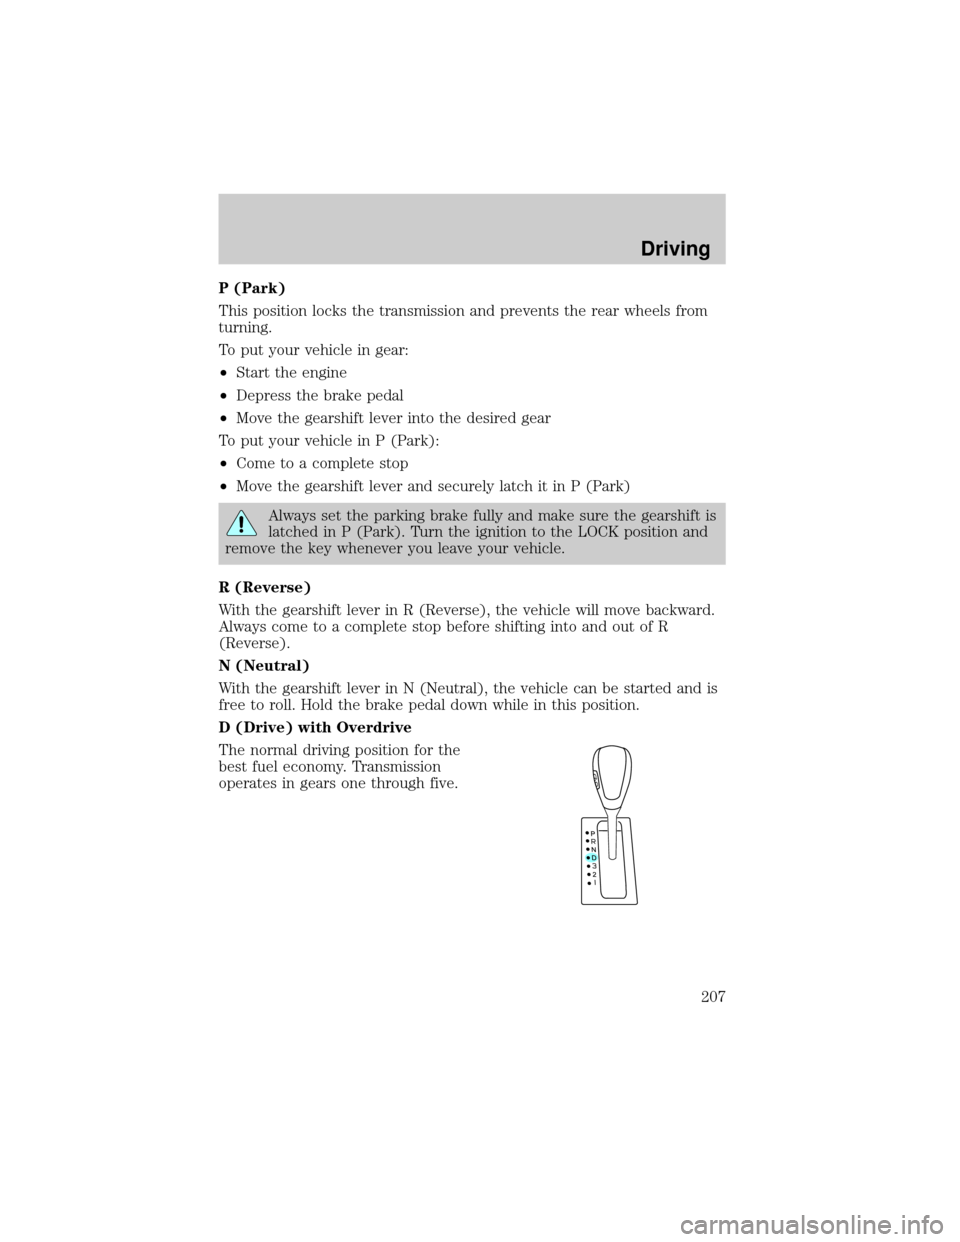
P (Park)
This position locks the transmission and prevents the rear wheels from
turning.
To put your vehicle in gear:
²Start the engine
²Depress the brake pedal
²Move the gearshift lever into the desired gear
To put your vehicle in P (Park):
²Come to a complete stop
²Move the gearshift lever and securely latch it in P (Park)
Always set the parking brake fully and make sure the gearshift is
latched in P (Park). Turn the ignition to the LOCK position and
remove the key whenever you leave your vehicle.
R (Reverse)
With the gearshift lever in R (Reverse), the vehicle will move backward.
Always come to a complete stop before shifting into and out of R
(Reverse).
N (Neutral)
With the gearshift lever in N (Neutral), the vehicle can be started and is
free to roll. Hold the brake pedal down while in this position.
D (Drive) with Overdrive
The normal driving position for the
best fuel economy. Transmission
operates in gears one through five.
Driving
207
Page 208 of 336
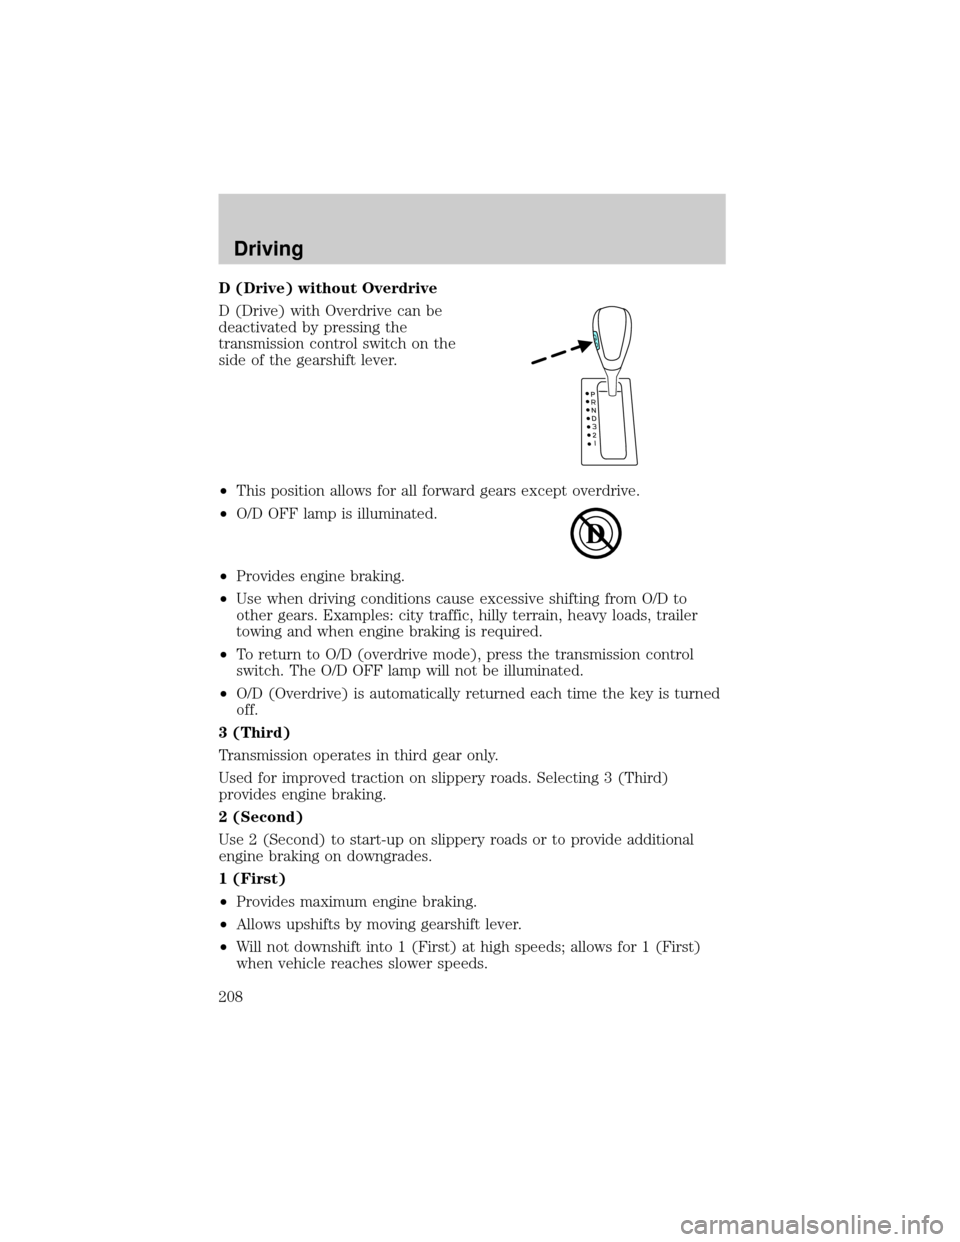
D (Drive) without Overdrive
D (Drive) with Overdrive can be
deactivated by pressing the
transmission control switch on the
side of the gearshift lever.
²This position allows for all forward gears except overdrive.
²O/D OFF lamp is illuminated.
²Provides engine braking.
²Use when driving conditions cause excessive shifting from O/D to
other gears. Examples: city traffic, hilly terrain, heavy loads, trailer
towing and when engine braking is required.
²To return to O/D (overdrive mode), press the transmission control
switch. The O/D OFF lamp will not be illuminated.
²O/D (Overdrive) is automatically returned each time the key is turned
off.
3 (Third)
Transmission operates in third gear only.
Used for improved traction on slippery roads. Selecting 3 (Third)
provides engine braking.
2 (Second)
Use 2 (Second) to start-up on slippery roads or to provide additional
engine braking on downgrades.
1 (First)
²Provides maximum engine braking.
²Allows upshifts by moving gearshift lever.
²Will not downshift into 1 (First) at high speeds; allows for 1 (First)
when vehicle reaches slower speeds.
Driving
208
Page 209 of 336
Forced downshifts
²Allowed in D (Drive) with Overdrive or D (Drive) without Overdrive.
²Depress the accelerator to the floor.
²Allows transmission to select an appropriate gear.
REAR PARK ASSIST
The Rear Park Assist sounds a tone to warn the driver of obstacles near
the rear bumper when the R (Reverse) is selected and the vehicle is
moving at speeds less than 5 km/h (3 mph). The system is not effective
at speeds above 5 km/h (3 mph) and may not detect certain angular or
moving objects.
To help avoid personal injury, please read and understand the
limitations of the Rear Park Assist system as contained in this
section. The Rear Park Assist is only an aid for some (generally large
and fixed) objects when moving in reverse on a flat surface at ªparking
speedsº. Inclement weather may also affect the function of the system;
this may include reduced performance or a false activation.
To help avoid personal injury, always use caution when in
reverse and when using the system.
This system is not designed to prevent contact with small or
moving objects. The system is designed to provide a warning to
assist the driver in detecting large stationary objects to avoid damaging
the vehicle. The system may not detect smaller objects, particularly
those close to the ground.
Certain add-on devices such as large trailer hitches, bike or
surfboard racks and any device that may block the normal
detection zone of the Rear Park Assist system may create false beeps.
Driving
209
Page 210 of 336
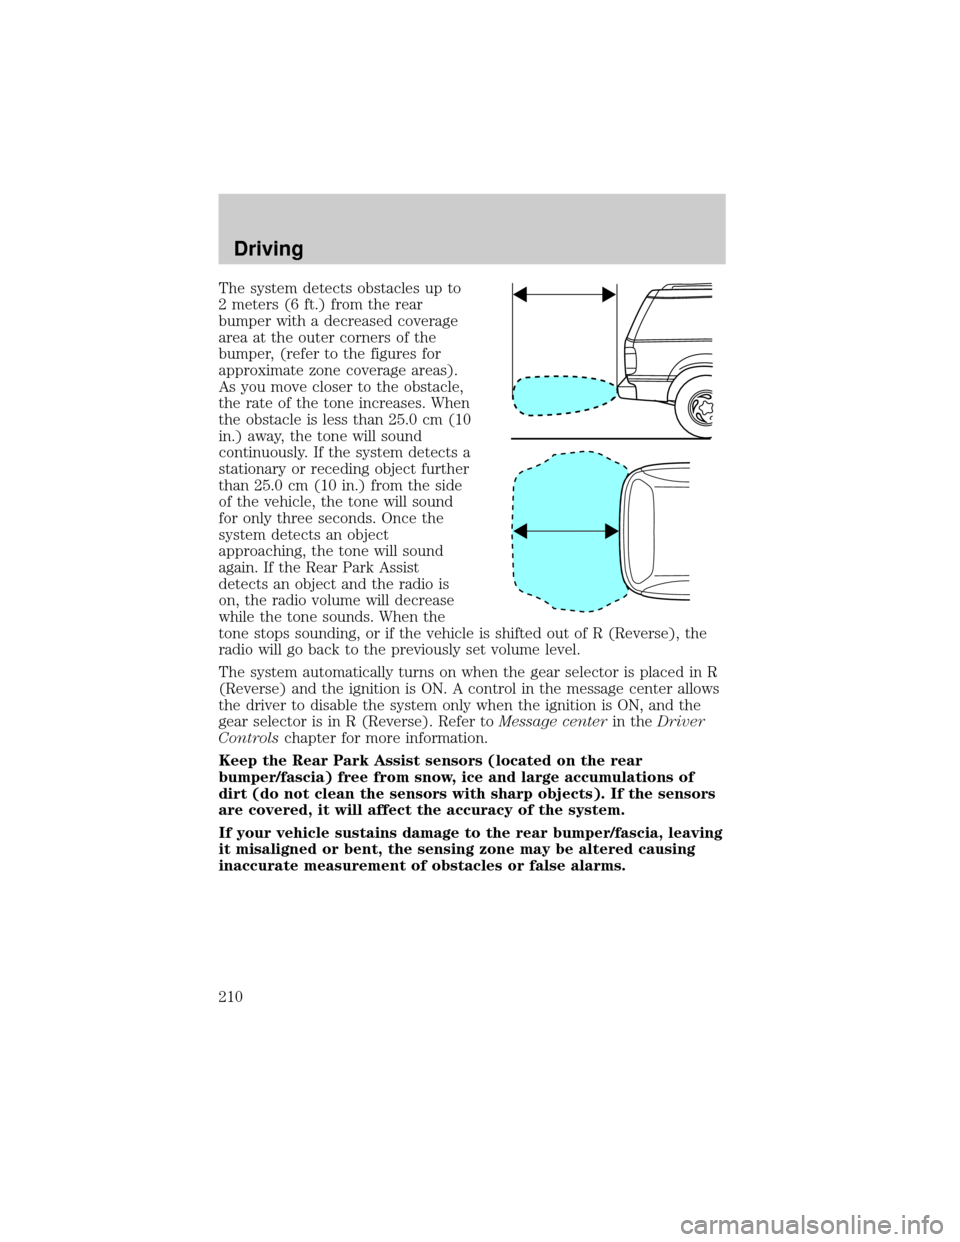
The system detects obstacles up to
2 meters (6 ft.) from the rear
bumper with a decreased coverage
area at the outer corners of the
bumper, (refer to the figures for
approximate zone coverage areas).
As you move closer to the obstacle,
the rate of the tone increases. When
the obstacle is less than 25.0 cm (10
in.) away, the tone will sound
continuously. If the system detects a
stationary or receding object further
than 25.0 cm (10 in.) from the side
of the vehicle, the tone will sound
for only three seconds. Once the
system detects an object
approaching, the tone will sound
again. If the Rear Park Assist
detects an object and the radio is
on, the radio volume will decrease
while the tone sounds. When the
tone stops sounding, or if the vehicle is shifted out of R (Reverse), the
radio will go back to the previously set volume level.
The system automatically turns on when the gear selector is placed in R
(Reverse) and the ignition is ON. A control in the message center allows
the driver to disable the system only when the ignition is ON, and the
gear selector is in R (Reverse). Refer toMessage centerin theDriver
Controlschapter for more information.
Keep the Rear Park Assist sensors (located on the rear
bumper/fascia) free from snow, ice and large accumulations of
dirt (do not clean the sensors with sharp objects). If the sensors
are covered, it will affect the accuracy of the system.
If your vehicle sustains damage to the rear bumper/fascia, leaving
it misaligned or bent, the sensing zone may be altered causing
inaccurate measurement of obstacles or false alarms.
Driving
210
Page 211 of 336
ALL WHEEL DRIVE (AWD) SYSTEM (IF EQUIPPED)
Your vehicle may be equipped with an All Wheel Drive (AWD) transfer
case. With the AWD option, power is supplied to all four wheels
automatically with no need to shift between two-wheel drive and
four-wheel drive. If your vehicle is equipped with the AdvanceTracy
stability enhancement feature, you can change AWD modes, if desired,
by selecting AWD options through the message center.
For the lubricant specification and refill capacity of the AWD transfer
case refer toMaintenance and specificationschapter.
If your vehicle is equipped with AWD, a spare tire of a different
diameter than the road tires should never be used. Such a tire
could make the vehicle difficult to control as well as result in damage
to driveline components.
Utility and four-wheel drive vehicles arenotdesigned for cornering
at speeds as high as passenger cars any more than low-slung sports
cars are designed to perform satisfactorily under off-road conditions.
Avoid sharp turns or abrupt maneuvers in these vehicles.
The following sections,Normal operation,Autolock operationand
Disabling AWD, apply only to vehicles which allow the driver to change
AWD modes through the message center.
Normal operation (vehicles equipped with AdvanceTracYonly)
During normal operation:
²the AWD system is in AWD AUTO mode (AWD LOCKED will
illuminate in the message center for four seconds when you first start
your vehicle). The AWD LOCKED indicator in the instrument cluster
will also come on.
²AWD AUTO mode can be overridden by pressing SETUP in the
message center. When you first press SETUP, AWD
displayed, then if you press RESET within four seconds of pressing
SETUP, AWD
power to all four wheels constantly which allows you to operate your
vehicle in severe winter or off-road conditions such as deep snow, ice
or shallow sand. It is not recommended that you use AWD
on dry pavement.
²AWD
center. (The AWD LOCKED display in the message center will then
turn off and the display will return to AWD
when the shift is complete.)
Driving
211
Page 214 of 336
²It often may be less risky to strike small objects, such as highway
reflectors, with minor damage to your vehicle rather than attempt a
sudden return to the pavement which could cause the vehicle to slide
sideways out of control or rollover. Remember, your safety and the
safety of others should be your primary concern.
Vehicles with a higher center of gravity such as utility and
four-wheel drive vehicles handle differently than vehicles with a
lower center of gravity. Utility and four-wheel drive vehicles arenot
designed for cornering at speeds as high as passenger cars any more
than low-slung sports cars are designed to perform satisfactorily under
off-road conditions. Avoid sharp turns, excessive speed and abrupt
maneuvers in these vehicles. Failure to drive cautiously could result in
an increased risk of loss of vehicle control, vehicle rollover, personal
injury and death.
If your vehicle gets stuck
If your vehicle gets stuck in mud or snow it may be rocked out by
shifting between forward and reverse gears, stopping between shifts, in a
steady pattern. Press lightly on the accelerator in each gear.
Do not rock the vehicle if the engine is not at normal operating
temperature or damage to the transmission may occur.
Do not rock the vehicle for more than a few minutes or damage
to the transmission and tires may occur or the engine may
overheat.
Always set the parking brake fully and make sure the gearshift is
latched in P (Park). Turn the ignition to the LOCK position and
remove the key whenever you leave your vehicle.
If the parking brake is fully released, but the brake warning lamp
remains illuminated, the brakes may not be working properly.
See your dealer or a qualified service technician.
Do not spin the wheels at over 56 km/h (35 mph). The tires may
fail and injure a passenger or bystander.
Driving
214