stop start LINCOLN AVIATOR 2020 Owner's Guide
[x] Cancel search | Manufacturer: LINCOLN, Model Year: 2020, Model line: AVIATOR, Model: LINCOLN AVIATOR 2020Pages: 609, PDF Size: 5.4 MB
Page 231 of 609
USING ALL-WHEEL DRIVE
WARNING: Vehicles with a higher
center of gravity (utility and four-wheel
drive vehicles) handle differently than
vehicles with a lower center of gravity
(passenger cars). Avoid sharp turns,
excessive speed and abrupt steering in
these vehicles. Failure to drive cautiously
increases the risk of losing control of your
vehicle, vehicle rollover, personal injury
and death.
The intelligent AWD system continuously
monitors vehicle conditions and adjusts the
power distribution between the front and
rear wheels. It combines transparent
all-surface operation with highly capable
all-wheel drive.
The AWD system is always active and
requires no driver input. It is capable of
handling all road conditions including street
and highway driving as well as off-road and
winter driving. You can optimize more AWD
control by selecting different drive modes.
See
Selecting a Drive Mode (page 306). Note:
A warning message displays in the
information display when an AWD system
fault is present. See Information Messages
(page
134). A AWD system fault causes the
AWD system to default to rear-wheel drive
only mode. When this warning message is
displayed, have your vehicle serviced at an
authorized dealer.
Note: A warning message displays in the
information display if the AWD system
overheats.
See Information Messages
(page 134). This condition could occur if the
vehicle is operated in extreme conditions
with excessive wheel slip, such as deep
sand. To resume normal AWD function as
soon as possible, stop the vehicle in a safe
location and stop the engine for at least 10
minutes. After the engine is restarted and
the AWD system is adequately cooled, the
warning message turns off and normal AWD
function returns. Operating All-Wheel Drive (AWD)
Vehicles With Spare Tires
Do not use a different size spare tire other
than the tire provided. If the mini-spare tire
is installed, the AWD system will disable and
enter rear-wheel drive only mode to protect
driveline components. Some limited AWD
traction could be provided if the mini-spare
is installed on one of the front wheels. If you
are in driving conditions where limited AWD
traction is needed while the mini-spare is
installed, it is recommended the mini-spare
be installed on the front axle.
If the mini-spare is installed, this condition is
indicated by a warning in the information
display.
The slip response system could activate if
the mini spare is installed on the front
wheels. If the mini spare was installed on the
rear wheels the slip response system will
fully disable. In situations where there is a
wintery mix or an off road situation, and you
need to use a mini spare, you must install
the mini spare in the front tire position and
move a full size tire to the rear tire position
for the slip response system to function.
228
Aviator (CTV) Canada/United States of America, enUSA, Edition date: 201902, Third-Printing- All-Wheel Drive
(If Equipped)
Page 236 of 609
Descend a hill in the same gear you would
use to climb up the hill to avoid excessive
brake application and brake overheating. Do
not descend in neutral; instead, disengage
overdrive or manually shift to a lower gear.
When descending a steep hill, avoid sudden
hard braking as you could lose control. The
front wheels have to be turning in order to
steer the vehicle.
Your vehicle has anti-lock brakes, therefore
apply the brakes steadily. Do not “pump
” the
brakes.
Driving on Snow and Ice WARNING: If you are driving in
slippery conditions that require tire chains
or cables, then it is critical that you drive
cautiously. Keep speeds down, allow for
longer stopping distances and avoid
aggressive steering to reduce the chances
of a loss of vehicle control which can lead
to serious injury or death. If the rear end
of your vehicle slides while cornering, steer
in the direction of the slide until you regain
control of your vehicle. Note:
Excessive tire slippage can cause
driveline damage.
AWD vehicles have advantages over 2WD
vehicles in snow and ice but can skid like
any other vehicle.
Should you start to slide while driving on
snowy or icy roads, turn the steering wheel
in the direction of the slide until you regain
control.
Avoid sudden applications of power and
quick changes of direction on snow and ice.
Apply the accelerator slowly and steadily
when starting from a full stop.
Avoid sudden braking as well. Although an
AWD vehicle could accelerate better than a
two-wheel drive vehicle in snow and ice, it
will not stop any faster, because as in other
vehicles, braking occurs at all four wheels.
Do not become overconfident as to road
conditions. Make sure you allow sufficient distance
between you and other vehicles for stopping.
Drive slower than usual and consider using
one of the lower gears. In emergency
stopping situations, apply the brake steadily.
Since your vehicle is equipped with a four
wheel (ABS), do not “pump
” the brakes. See
Hints on Driving With Anti-Lock Brakes
(page
236).
Maintenance and Modifications
The suspension and steering systems on
your vehicle have been designed and tested
to provide predictable performance whether
loaded or empty and durable load carrying
capability. For this reason, we strongly
recommend that you do not make
modifications such as adding or removing
parts (such as lowering kits or stabilizer bars)
or by using replacement parts not equivalent
to the original factory equipment.
233
Aviator (CTV) Canada/United States of America, enUSA, Edition date: 201902, Third-Printing- All-Wheel Drive
(If Equipped)
Page 238 of 609
GENERAL INFORMATION
Note:
Occasional brake noise is normal. If
a metal-to-metal, continuous grinding or
continuous squeal sound is present, the
brake linings may be worn-out and an
authorized dealer should check them. If the
vehicle has continuous vibration or shudder
in the steering wheel while braking, an
authorized dealer should check your vehicle.
Note: Brake dust may accumulate on the
wheels, even under normal driving
conditions. Some dust is inevitable as the
brakes wear and does not contribute to
brake noise. See Cleaning the Wheels
(page 384).
Wet brakes result in reduced braking
efficiency. Gently press the brake pedal a
few times when driving from a car wash or
standing water to dry the brakes. Brake Over Accelerator
In the event the accelerator pedal becomes
stuck or entrapped, apply steady and firm
pressure to the brake pedal to slow the
vehicle and reduce engine power. If you
experience this condition, apply the brakes
and bring your vehicle to a safe stop. Switch
the engine off, move the transmission to park
(P) and apply the parking brake. Inspect the
accelerator pedal and the area around it for
any items or debris that may be obstructing
its movement. If none are found and the
condition persists, have your vehicle towed
to the nearest authorized dealer.
Emergency Brake Assist
Emergency brake assist detects when you
brake heavily by measuring the rate at which
you press the brake pedal. It provides
maximum braking efficiency as long as you
press the pedal. Emergency brake assist
can reduce stopping distances in critical
situations.Note:
Depending on applicable laws and
regulations in the country for which your
vehicle was originally built, your brake lamps
could flash during heavy braking. Following
this, your hazard lights may also flash when
your vehicle comes to a stop.
Anti-lock Brake System
This system helps you maintain steering
control during emergency stops by keeping
the brakes from locking. This lamp momentarily illuminates
when you switch the ignition on.
If the light does not illuminate
during start up, remains on or flashes, the
anti-lock braking system may be disabled.
Have the system checked by an authorized
dealer. If the anti-lock brake system is
disabled, normal braking is still effective.
See
Warning Lamps and Indicators (page
125).
Note: Indicators vary depending on region.
235
Aviator (CTV) Canada/United States of America, enUSA, Edition date: 201902, Third-Printing- Brakes
Page 242 of 609
Switching the System On and Off
Vehicles with Manual Transmission
You can switch this feature on or off in the
information display. The system remembers
the last setting when you start your vehicle.
Vehicles with Automatic Transmission
You cannot turn the system on or off. When
you switch the ignition on, the system
automatically turns on.
AUTO HOLD
WARNING: The system does not
replace the parking brake. When you leave
your vehicle, always apply the parking
brake. WARNING: You must remain in your
vehicle when the system turns on. At all
times, you are responsible for controlling
your vehicle, supervising the system and
intervening, if required. Failure to take care
may result in the loss of control of your
vehicle, serious personal injury or death. WARNING:
The system turns off if
there is a malfunction or if you excessively
rev the engine.
The system is designed to apply the brakes
to hold your vehicle at a standstill after you
stop your vehicle and release the brake
pedal. This could be beneficial in certain
situations, for example when waiting on a hill
or in traffic.
Switching Auto Hold On and Off Press the button in the instrument
panel to access the Auto Hold
feature on the touchscreen.
Note: You can only switch the system on
after you close the driver door, fasten your
seatbelt and start the engine. Note:
The system remembers the last setting
when you start your vehicle.
Make sure you switch the system off before
towing with your vehicle or before using an
automatic car wash.
Using Auto Hold
1. Use the brakes to bring your vehicle to a complete stop. The auto hold active
indicator illuminates in the information
display.
2. Release the brake pedal. The system holds your vehicle at a standstill. The
auto hold active indicator remains
illuminated in the information display.
Note: The system only activates if you apply
enough brake pressure. If your vehicle is on
a steep slope, you need to press the brake
pedal harder before the system activates.
Note: Under certain conditions, the system
could apply the electric parking brake. The
brake system warning lamp illuminates. The
electric parking brake releases when you
press the accelerator pedal.
See Electric
Parking Brake (page 236).
239
Aviator (CTV) Canada/United States of America, enUSA, Edition date: 201902, Third-Printing- BrakesE287975
Page 243 of 609
Note:
If auto-start-stop turns off the engine,
auto hold remains active.
Note: The system deactivates if you shift into
reverse (R) and press the brake pedal.
3. Pull away in the normal manner. The system releases the brakes and the auto
hold active indicator turns off.
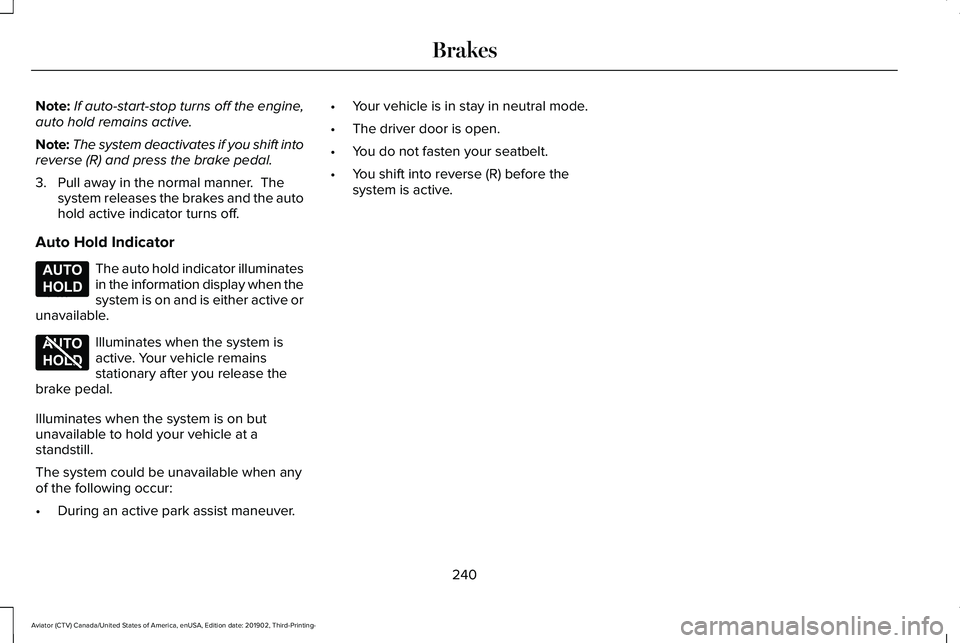
Auto Hold Indicator The auto hold indicator illuminates
in the information display when the
system is on and is either active or
unavailable. Illuminates when the system is
active. Your vehicle remains
stationary after you release the
brake pedal.
Illuminates when the system is on but
unavailable to hold your vehicle at a
standstill.
The system could be unavailable when any
of the following occur:
• During an active park assist maneuver. •
Your vehicle is in stay in neutral mode.
• The driver door is open.
• You do not fasten your seatbelt.
• You shift into reverse (R) before the
system is active.
240
Aviator (CTV) Canada/United States of America, enUSA, Edition date: 201902, Third-Printing- BrakesE197933 E197934
Page 283 of 609
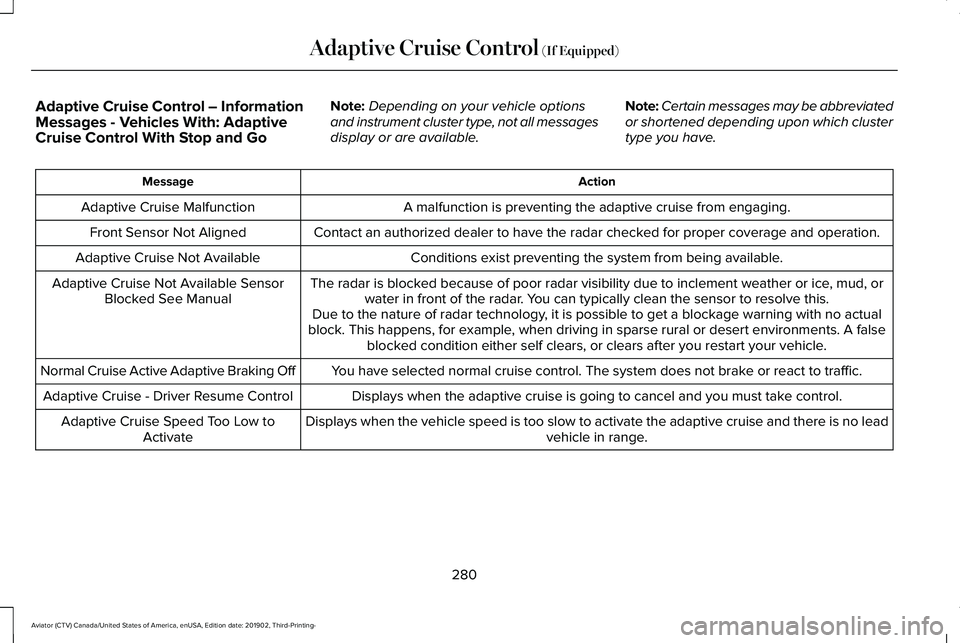
Adaptive Cruise Control – Information
Messages - Vehicles With: Adaptive
Cruise Control With Stop and Go
Note:
Depending on your vehicle options
and instrument cluster type, not all messages
display or are available. Note:
Certain messages may be abbreviated
or shortened depending upon which cluster
type you have. Action
Message
A malfunction is preventing the adaptive cruise from engaging.
Adaptive Cruise Malfunction
Front Sensor Not Aligned Contact an authorized dealer to have the radar checked for proper coverage and operation. Conditions exist preventing the system from being available.
Adaptive Cruise Not Available
The radar is blocked because of poor radar visibility due to inclement weather or ice, mud, orwater in front of the radar. You can typically clean the sensor to resolve this.
Adaptive Cruise Not Available Sensor
Blocked See Manual Due to the nature of radar technology, it is possible to get a blockage warning with no actual
block. This happens, for example, when driving in sparse rural or desert environments. A false blocked condition either self clears, or clears after you restart your vehicl\
e.
You have selected normal cruise control. The system does not brake or react to traffic.
Normal Cruise Active Adaptive Braking Off
Displays when the adaptive cruise is going to cancel and you must take control.
Adaptive Cruise - Driver Resume Control
Displays when the vehicle speed is too slow to activate the adaptive cru\
ise and there is no leadvehicle in range.
Adaptive Cruise Speed Too Low to
Activate
280
Aviator (CTV) Canada/United States of America, enUSA, Edition date: 201902, Third-Printing- Adaptive Cruise Control (If Equipped)
Page 302 of 609

The system displays recognizable traffic
signs in four stages as follows:
1.
All new traffic signs appear brighter than
the others in the display.
2. After a predetermined time they display normally.
3. After a predetermined distance they become greyed out.
4. After another predetermined distance, the system deletes them.
If the system detects a supplementary traffic
sign, it displays below the respective traffic
sign.
If your vehicle has speed sign recognition
with navigation, stored traffic sign data may
influence the indicated speed limit value.
Switching the System On and Off
You can switch the system on and off using
the information display. See General
Information (page 130).
Note: The system remembers the last setting
when you start your vehicle. STEERING
Electric Power Steering WARNING:
The electric power
steering system has diagnostic checks that
continuously monitor the system. If a fault
is detected, a message displays in the
information display. Stop your vehicle as
soon as it is safe to do so. Switch the
ignition off. After at least 10 seconds,
switch the ignition on and watch the
information display for a steering system
warning message. If a steering system
warning message returns, have the system
checked as soon as possible. WARNING:
If the system detects an
error, you may not feel a difference in the
steering, however a serious condition may
exist. Have your vehicle checked as soon
as possible. Failure to do so may result in
loss of steering control.
Your vehicle has an electric power steering
system. There is no fluid reservoir and
therefore requires no maintenance. If your vehicle loses electrical power when
you are driving, electric power steering
assistance is lost. The steering system still
operates and you can manually steer your
vehicle. Manually steering your vehicle
requires more effort.
Extreme continuous steering could increase
the effort you need to steer your vehicle. This
increased effort prevents overheating and
permanent damage to the steering system.
You do not lose the ability to manually steer
your vehicle. Typical steering and driving
maneuvers allow the system to cool and
operate as normal.
Steering Tips
If the steering wanders or pulls, check for:
•
Correct tire pressures.
• Uneven tire wear.
• Loose or worn suspension components.
• Loose or worn steering components.
• Improper vehicle alignment.
Note: A high crown in the road or high
crosswinds could also make the steering
seem to wander or pull.
299
Aviator (CTV) Canada/United States of America, enUSA, Edition date: 201902, Third-Printing- Driving Aids
Page 303 of 609
Adaptive Learning
The electronic power steering system
adaptive learning improves overall handling
and steering on roads with irregularities. It
communicates with the brake system to help
operate advanced stability control and
accident avoidance systems. When you
install a new battery or disconnect the
battery, you need to drive your vehicle a
short distance so it can relearn and reactivate
all systems.
Adaptive Steering
The adaptive steering system continually
changes the steering ratio with changes to
the vehicle speed, optimizing the steering
response in all conditions.
The adaptive steering system is designed
with a locking device. When the lock
engages, your vehicle returns to a fixed
steering ratio. Your vehicle may make a
sound when you start or switch off your
vehicle as the lock engages or disengages.
If your vehicle loses electrical power or
detects a fault when you are driving, the lock
engages and you are able to continue
steering. During this time, the steering wheel
may not be straight even when driving
straight ahead. You may need to use a
different steering wheel angle to properly
drive your vehicle. Extreme operating
conditions may cause the lock to engage.
This strategy prevents overheating and
permanent damage to the adaptive steering
system. Typical steering and driving
maneuvers allow the system to cool and
operate as normal.
Note:
The adaptive steering system has
diagnostic checks that continuously monitor
the system. If the system detects a fault, a
message displays in the information display.
If a red warning message displays, stop your
vehicle as soon as it is safe to do so. The
message may clear if the fault is no longer
present. If an adaptive steering system
warning message appears each time you
start your vehicle, have the system checked
as soon as possible. PRE-COLLISION ASSIST (IF EQUIPPED) WARNING:
You are responsible for
controlling your vehicle at all times. The
system is designed to be an aid and does
not relieve you of your responsibility to
drive with due care and attention. Failure
to follow this instruction could result in the
loss of control of your vehicle, personal
injury or death. WARNING:
The system does not
detect vehicles that are driving in a
different direction, cyclists or animals.
Apply the brakes when necessary. Failure
to follow this instruction could result in the
loss of control of your vehicle, personal
injury or death. WARNING:
The system does not
operate during hard acceleration or
steering. Failure to take care may lead to
a crash or personal injury.
300
Aviator (CTV) Canada/United States of America, enUSA, Edition date: 201902, Third-Printing- Driving Aids
Page 317 of 609
Special Loading Instructions for
Owners of Pick-up Trucks and Utility-
type Vehicles
WARNING: When loading the
roof racks, we recommend you evenly
distribute the load, as well as maintain
a low center of gravity. Loaded
vehicles, with higher centers of gravity,
may handle differently than unloaded
vehicles. Take extra precautions, such
as slower speeds and increased
stopping distance, when driving a
heavily loaded vehicle.
AIR SUSPENSION
(IF EQUIPPED) WARNING:
If your vehicle has
self-leveling air suspension, you must
switch the system off before carrying out
any maintenance or repair. Failure to follow
this warning could result in serious
personal injury or death. The air suspension system automatically
adjusts to maintain a constant frame height,
allows for ease of vehicle loading, provides
improved vehicle ride, and increased driver
comfort.
You can adjust different ride settings through
the selectable drive modes.
See Selecting
a Drive Mode (page 306).
Note: The air suspension system may not
operate properly if you exceed the load limit.
See
Load Limit (page 310).
Note: When your vehicle is off, the air
compressor may run for a short time. This is
normal.
Switching the systems on or off
You can access the air suspension, liftgate
and easy entry features through the
information display menu settings.
See
General Information (page 130).
Using the Service Mode
When the service mode is active, the air
suspension does not make any adjustments
while your vehicle is stationary. Note:
Always switch the air suspension
service mode to on before servicing your
vehicle.
Using Cargo Loading
The air suspension cargo loading feature
lowers your vehicle for easier access when
the system detects the liftgate is opening.
When the liftgate is closed your vehicle
returns to its normal height after a short time.
Note: To preserve your vehicle battery, your
vehicle may only lower for cargo mode one
to two times per ignition cycle.
Using Easy Entry
The air suspension can lower your vehicle
to an easier access entry height when the
system detects the intelligent access key,
you press the unlock button, use the remote
start, or use Phone as a Key.
The leveling process stops when you open
a door or the target level is achieved.
Note: To stop the leveling process, press the
lock button on the intelligent access key.
314
Aviator (CTV) Canada/United States of America, enUSA, Edition date: 201902, Third-Printing- Load Carrying
Page 320 of 609
RV & Trailer Towing Guide Online
http://www.fleet.ford.com/towing-guides/
Website
TRAILER SWAY CONTROL WARNING: Turning off trailer sway
control increases the risk of loss of vehicle
control, serious injury or death. Ford does
not recommend disabling this feature
except in situations where speed reduction
may be detrimental (such as hill climbing),
the driver has significant trailer towing
experience, and can control trailer sway
and maintain safe operation.
Note: This feature does not prevent trailer
sway, but reduces it when it begins.
Note: This feature cannot stop all trailers
from swaying.
Note: In some cases, if your vehicle speed
is too high, the system may turn on multiple
times, gradually reducing your vehicle speed. The system applies the brakes to the
individual wheels and reduces engine torque
to aid vehicle stability. If the trailer begins
to sway, the stability control warning lamp
flashes and a message appears in the
information display. See Information
Messages (page 134). Slow your vehicle
down, pull safely to the side of the road and
check for correct load distribution. See Load
Carrying
(page 308).
You can switch this feature off in the
information display. When you switch the
ignition on, the system automatically turns
on.
RECOMMENDED TOWING
WEIGHTS
Note: Do not exceed the trailer weight
for your vehicle configuration listed in
the chart below. Note:
Be sure to take into consideration
trailer frontal area. Do not exceed 20
ft² (1.86 m²) if your vehicle can tow a
class I trailer or 55 ft² (5.11 m²) if your
vehicle can tow a class III trailer.
Note: For high altitude operation,
reduce the gross combined weight by
2% per
1,000 ft (300 m) starting at the
1,000 ft (300 m) elevation point.
Note: Certain states require electric
trailer brakes for trailers over a specified
weight. Be sure to check state
regulations for this specified weight. The
maximum trailer weights listed may be
limited to this specified weight, as the
vehicle ’s electrical system may not
include the wiring connector needed to
activate electric trailer brakes.
317
Aviator (CTV) Canada/United States of America, enUSA, Edition date: 201902, Third-Printing- Towing