stop start LINCOLN AVIATOR 2020 Service Manual
[x] Cancel search | Manufacturer: LINCOLN, Model Year: 2020, Model line: AVIATOR, Model: LINCOLN AVIATOR 2020Pages: 609, PDF Size: 5.4 MB
Page 323 of 609
Trailer Lamps
WARNING: Never connect any trailer
lamp wiring to the vehicle's tail lamp wiring;
this may damage the electrical system
resulting in fire. Contact your authorized
dealer as soon as possible for assistance
in proper trailer tow wiring installation.
Additional electrical equipment may be
required.
Most towed vehicles require trailer lamps.
Make sure all running lights, brake lights,
direction indicators and hazard flashers are
working.
Before Towing a Trailer
Practice turning, stopping and backing up to
get the feel of your vehicle-trailer
combination before starting on a trip. When
turning, make wider turns so the trailer
wheels clear curbs and other obstacles. When Towing a Trailer
•
Do not drive faster than 70 mph
(113 km/h) during the first 500 mi
(800 km).
• Do not make full-throttle starts.
• Check your hitch, electrical connections
and trailer wheel lug nuts thoroughly after
you have traveled
50 mi (80 km).
• When stopped in congested or heavy
traffic during hot weather, place the
gearshift in park (P) to aid engine and
transmission cooling and to help A/C
performance.
• Turn off the speed control with heavy
loads or in hilly terrain. The speed control
may turn off automatically when you are
towing on long, steep grades.
• Shift to a lower gear when driving down
a long or steep hill. Do not apply the
brakes continuously, as they may
overheat and become less effective. •
If your transmission is equipped with a
Grade Assist or Tow/Haul feature, use
this feature when towing. This provides
engine braking and helps eliminate
excessive transmission shifting for
optimum fuel economy and transmission
cooling.
• Allow more distance for stopping with a
trailer attached. Anticipate stops and
brake gradually.
• Avoid parking on a grade. However, if
you must park on a grade:
1. Turn the steering wheel to point your vehicle tires away from traffic flow.
2. Set your vehicle parking brake.
3. Place the automatic transmission in park
(P).
4. Place wheel chocks in front and back of the trailer wheels. (Chocks not included
with vehicle.)
Launching or Retrieving a Boat or
Personal Watercraft (PWC)
Note: Disconnect the wiring to the trailer
before
backing the trailer into the water.
320
Aviator (CTV) Canada/United States of America, enUSA, Edition date: 201902, Third-Printing- Towing
Page 332 of 609
The fuel pump shutoff stops the flow of fuel
to the engine in the event of a moderate to
severe crash. Not every impact causes a
shutoff.
Should your vehicle shut off after a crash,
you may restart your vehicle.
If your vehicle has a key system:
1. Switch off the ignition.
2. Switch to start position.
3. Switch off the ignition.
4. Switch on the ignition to re-enable the
fuel pump.
5. If the vehicle does not start, repeat steps
1 through 4.
If your vehicle has a push button start
system:
1. Press START/STOP to switch off your
vehicle.
2. Press the brake pedal and
START/STOP
to switch on your vehicle.
3. Remove your foot from the brake pedal and press
START/STOP to switch off
your vehicle. 4. You can attempt to start the vehicle by
pressing the brake pedal and
START/STOP
, or press START/STOP
without pressing the brake pedal.
5. If the vehicle does not start, repeat steps
1 through 4.
JUMP STARTING THE VEHICLE WARNING:
Batteries normally
produce explosive gases which can cause
personal injury. Therefore, do not allow
flames, sparks or lighted substances to
come near the battery. When working near
the battery, always shield your face and
protect your eyes. Always provide correct
ventilation. WARNING:
Keep batteries out of
reach of children. Batteries contain sulfuric
acid. Avoid contact with skin, eyes or
clothing. Shield your eyes when working
near the battery to protect against possible
splashing of acid solution. In case of acid
contact with skin or eyes, flush immediately
with water for a minimum of 15 minutes and
get prompt medical attention. If acid is
swallowed, call a physician immediately. WARNING:
Use only adequately
sized cables with insulated clamps.
Preparing Your Vehicle
Do not attempt to push-start your automatic
transmission vehicle.
Note: Attempting to push-start a vehicle with
an automatic transmission may cause
transmission damage.
Note: Use only a 12-volt supply to start your
vehicle.
329
Aviator (CTV) Canada/United States of America, enUSA, Edition date: 201902, Third-Printing- Roadside Emergencies
Page 372 of 609
You may notice a reduction in vehicle speed
caused by reduced engine power in order
to manage the engine coolant temperature.
Your vehicle may enter this mode if certain
high-temperature and high-load conditions
take place. The amount of speed reduction
depends on vehicle loading, grade and
ambient temperature. If this occurs, there is
no need to stop your vehicle. You can
continue to drive.
The air conditioning may automatically turn
on and off during severe operating
conditions to protect the engine from
overheating. When the coolant temperature
decreases to the normal operating
temperature, the air conditioning turns on.
If the coolant temperature gauge moves fully
into the red zone, or if the coolant
temperature warning or service engine soon
messages appear in your information display,
do the following:
1.
Stop your vehicle as soon as it is safe to
do so. Fully apply the parking brake, shift
into park (P) or neutral (N). 2. Leave the engine running until the
coolant temperature gauge needle
returns to the normal position. If the
temperature does not drop after several
minutes, follow the remaining steps.
3. Switch the engine off and wait for it to cool. Check the coolant level.
4. If the coolant level is at or below the minimum mark, add prediluted coolant
immediately.
5. If the coolant level is normal, restart the engine and continue.
AUTOMATIC TRANSMISSION
FLUID CHECK
If required, have an authorized dealer check
and change the transmission fluid at the
correct service interval. See Scheduled
Maintenance (page 522).
The automatic transmission does not have
a transmission fluid dipstick. Refer to your scheduled maintenance
information for scheduled intervals for fluid
checks and changes. Your transmission does
not consume fluid. However, if the
transmission slips, shifts slowly or if you
notice a sign of leaking fluid, contact an
authorized dealer.
Do not use supplemental transmission fluid
additives, treatments or cleaning agents. The
use of these materials may affect
transmission operation and result in damage
to internal transmission components.
BRAKE FLUID CHECK
WARNING: Do not use any fluid other
than the recommended brake fluid as this
will reduce brake efficiency. Use of
incorrect fluid could result in the loss of
vehicle control, serious personal injury or
death.
369
Aviator (CTV) Canada/United States of America, enUSA, Edition date: 201902, Third-Printing- Maintenance
Page 374 of 609
CHANGING THE 12V BATTERY
WARNING: Batteries normally
produce explosive gases which can cause
personal injury. Therefore, do not allow
flames, sparks or lighted substances to
come near the battery. When working near
the battery, always shield your face and
protect your eyes. Always provide correct
ventilation. WARNING:
When lifting a
plastic-cased battery, excessive pressure
on the end walls could cause acid to flow
through the vent caps, resulting in personal
injury and damage to the vehicle or battery.
Lift the battery with a battery carrier or with
your hands on opposite corners. WARNING:
Keep batteries out of
reach of children. Batteries contain sulfuric
acid. Avoid contact with skin, eyes or
clothing. Shield your eyes when working
near the battery to protect against possible
splashing of acid solution. In case of acid
contact with skin or eyes, flush immediately
with water for a minimum of 15 minutes and
get prompt medical attention. If acid is
swallowed, call a physician immediately. WARNING:
Battery posts, terminals
and related accessories contain lead and
lead compounds, chemicals known to the
State of California to cause cancer and
reproductive harm. Wash your hands after
handling
. WARNING:
This vehicle may have
more than one battery. Removing the
battery cables from only one battery does
not disconnect your vehicle electrical
system. Make sure you disconnect the
battery cables from all batteries when
disconnecting power. Failure to do so may
cause serious personal injury or property
damage. WARNING:
For vehicles with
Auto-Start-Stop the battery requirement is
different. You must replace the battery with
one of exactly the same specification.
The battery is in the engine compartment.
See
Under Hood Overview (page 360).
Your vehicle has a maintenance-free battery.
It does not require additional water during
service.
If the vehicle battery has a cover and vent
hose, make sure you correctly install it after
cleaning or replacing the battery.
371
Aviator (CTV) Canada/United States of America, enUSA, Edition date: 201902, Third-Printing- Maintenance
Page 403 of 609
Safety Practices
WARNING: If your vehicle is
stuck in snow, mud or sand, do not
rapidly spin the tires; spinning the tires
can tear the tire and cause an
explosion. A tire can explode in as little
as three to five seconds. WARNING:
Do not spin the
wheels at over 34 mph (55 km/h). The
tires may fail and injure a passenger
or bystander.
Driving habits have a great deal to do
with your tire mileage and safety.
*Observe posted speed limits
*Avoid fast starts, stops and turns
*Avoid potholes and objects on the road
*Do not run over curbs or hit the tire
against a curb when parking Highway Hazards
No matter how carefully you drive, there
is always the possibility that you may
eventually have a flat tire on the
highway. Drive slowly to the closest safe
area out of traffic. This may further
damage the flat tire, but your safety is
more important.
If you feel a sudden vibration or ride
disturbance while driving, or you suspect
your tire or vehicle has been damaged,
immediately reduce your speed. Drive
with caution until you can safely pull off
the road. Stop and inspect the tires for
damage. If a tire is under-inflated or
damaged, deflate it, remove wheel and
replace it with your spare tire and wheel.
If you cannot detect a cause, have the
vehicle towed to the nearest repair
facility or tire dealer to have the vehicle
inspected.
Tire and Wheel Alignment
A bad jolt from hitting a curb or pothole
can cause the front end of your vehicle
to become misaligned or cause damage
to your tires. If your vehicle seems to
pull to one side when you are driving,
the wheels may be out of alignment.
Have an authorized dealer check the
wheel alignment periodically.
Wheel misalignment in the front or the
rear can cause uneven and rapid
treadwear of your tires and should be
corrected by an authorized dealer.
Front-wheel drive vehicles and those
with an independent rear suspension (if
equipped) may require alignment of all
four wheels.
The tires should also be balanced
periodically. An unbalanced tire and
wheel assembly may result in irregular
tire wear.
400
Aviator (CTV) Canada/United States of America, enUSA, Edition date: 201902, Third-Printing- Wheels and Tires
Page 408 of 609
TIRE PRESSURE MONITORING
SYSTEM
WARNING: The tire pressure
monitoring system is not a substitute for
manually checking tire pressures. You
should periodically check tire pressures
using a pressure gauge. Failure to correctly
maintain tire pressures could increase the
risk of tire failure, loss of control, vehicle
rollover and personal injury.
Note: You should only use tire sealants in
roadside emergencies as they may cause
damage to the tire pressure monitoring
system sensor.
Note: If the tire pressure monitoring system
sensor becomes damaged, it may not
function. Each tire, including the spare (if
provided), should be checked
monthly when cold and inflated to
the inflation pressure recommended by the
vehicle manufacturer on the vehicle placard
or tire inflation pressure label. (If your vehicle
has tires of a different size than the size
indicated on the vehicle placard or tire
inflation pressure label, you should
determine the proper tire inflation pressure
for those tires).
As an added safety feature, your vehicle has
been equipped with a Tire Pressure
Monitoring System (TPMS) that illuminates a
low tire pressure telltale when one or more
of your tires is significantly under-inflated.
Accordingly, when the low tire pressure
telltale illuminates, you should stop and
check your tires as soon as possible, and
inflate them to the proper pressure. Driving
on a significantly under-inflated tire causes
the tire to overheat and can lead to tire
failure. Under-inflation also reduces fuel
efficiency and tire tread life, and may affect
the vehicle ’s handling and stopping ability. Please note that the TPMS is not a substitute
for proper tire maintenance, and it is the
driver’
s responsibility to maintain correct tire
pressure, even if under-inflation has not
reached the level to trigger illumination of
the TPMS low tire pressure telltale.
Your vehicle has also been equipped with a
TPMS malfunction indicator to indicate when
the system is not operating properly. The
TPMS malfunction indicator is combined with
the low tire pressure telltale. When the
system detects a malfunction, the telltale will
flash for approximately one minute and then
remain continuously illuminated. This
sequence will continue upon subsequent
vehicle start-ups as long as the malfunction
exists.
When the malfunction indicator is illuminated,
the system may not be able to detect or
signal low tire pressure as intended. TPMS
malfunctions may occur for a variety of
reasons, including the installation of
replacement or alternate tires or wheels on
the vehicle that prevent the TPMS from
405
Aviator (CTV) Canada/United States of America, enUSA, Edition date: 201902, Third-Printing- Wheels and Tires
Page 414 of 609
4.
Turn the hazard flashers on then off three
times. You must accomplish this within
10 seconds. If you successfully enter the
reset mode, the horn sounds once, the
system indicator flashes and a message
shows in the information display. If this
does not occur, please try again starting
at step 2. If after repeated attempts to
enter the reset mode, the horn does not
sound, the system indicator does not
flash and no message shows in the
information display, seek service from
your authorized dealer.
5. Train the tire pressure monitoring system
sensors in the tires using the following
system reset sequence starting with the
left front tire in the following clockwise
order: Left front - driver side front tire,
Right front - passenger side front tire,
Right rear - passenger side rear tire, Left
rear - driver side rear tire.
6. Remove the valve cap from the valve stem on the left front tire. Decrease the
air pressure until the horn sounds. Note:
The single horn tone confirms that the
sensor identification code has been learned
by the module for this position. If a double
horn is heard, the reset procedure was
unsuccessful, and you must repeat it.
7. Remove the valve cap from the valve stem on the right front tire. Decrease the
air pressure until the horn sounds.
8. Remove the valve cap from the valve stem on the right rear tire. Decrease the
air pressure until the horn sounds.
9. Remove the valve cap from the valve stem on the left rear tire. Decrease the
air pressure until the horn sounds.
Training is complete after the horn
sounds for the last tire trained, driver side
rear tire, the system indicator stops
flashing, and a message shows in the
information display.
10. Turn the ignition off. If two short horn beeps are heard, the reset procedure
was unsuccessful and you must repeat
it. If after repeating the procedure and
two short beeps are heard when the
ignition is turned to off, seek assistance
from your authorized dealer. 11. Set all four tires to the recommended
air pressure as indicated on the Safety
Compliance Certification Label, affixed
to either the door hinge pillar,
door-latch post, or the door edge that
meets the door-latch post, next to the
driver seating position or Tire Label
located on the B-Pillar or the edge of
the driver door.
CHANGING A ROAD WHEEL WARNING: If the tire pressure
monitor sensor becomes damaged it may
not function.
Note: You should only use tire sealants in
roadside emergencies as they may cause
damage to the tire pressure monitoring
system sensor.
411
Aviator (CTV) Canada/United States of America, enUSA, Edition date: 201902, Third-Printing- Wheels and Tires
Page 501 of 609
SETTINGS
Press the button to enter the
settings menu.
Once you select a tile, press the
button next to a menu item to view
an explanation of the feature or
setting.
Sound
Select this tile to adjust the sound settings.
Clock
Select this tile to adjust the clock settings.
Bluetooth
Select this tile to switch Bluetooth on and off
and adjust settings.
Phone
Select this tile to connect, disconnect, and
manage the connected device settings. Audio
Select this tile to adjust the audio settings.
Driver Assist (If Equipped)
Select this tile to adjust Driver Assist features
like Parking Aids, Lane Keeping system,
Pedestrian Detection, and Auto-Start-Stop.
Vehicle
Select this tile to adjust vehicle settings like
windows, alarm, lighting, backup starting
passcode, and MyKey settings.
Lincoln Way
Select this tile to adjust the Lincoln Way
settings.
General
Select this tile to adjust settings like
language, measurement units, or to reset the
system.
911 Assist
(If Equipped)
Select this tile to switch 911 Assist on and off. Automatic Updates
Select this tile to adjust automatic update
settings.
Mobile Apps
Select this tile to adjust permissions, enable,
disable, and update mobile apps.
Display
Select this tile to adjust display settings like
brightness and auto dim.
Charge Settings
(If Equipped)
Select this tile to adjust the electric vehicle
charge setting.
Voice Control
Select this tile to adjust voice control settings
like command confirmations and displayed
lists.
Navigation
(If Equipped)
Select this tile to adjust navigation settings
like map preferences and route guidance.
498
Aviator (CTV) Canada/United States of America, enUSA, Edition date: 201902, Third-Printing- SYNC™ 3E280315 E268570
Page 513 of 609
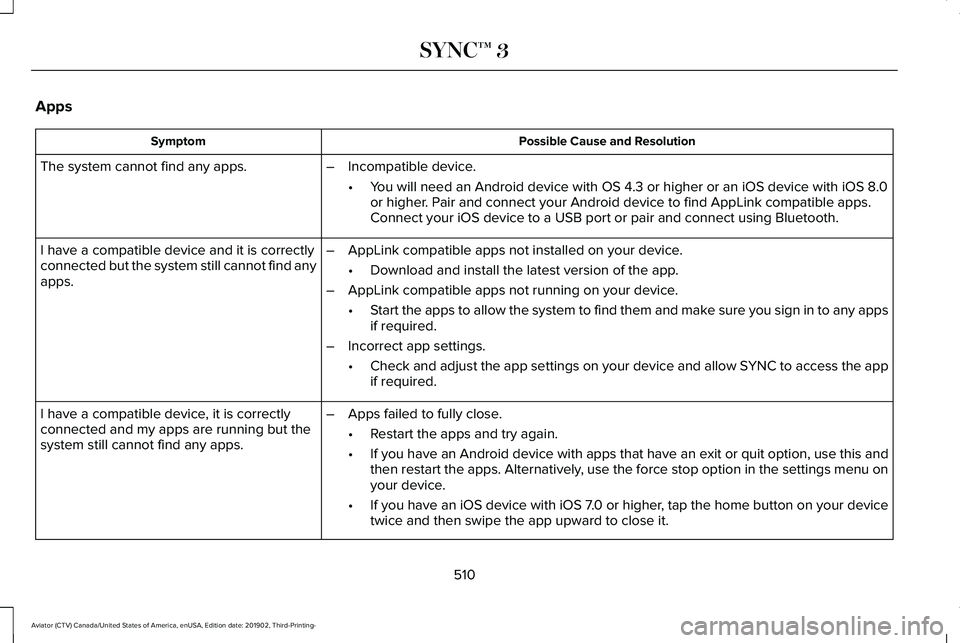
Apps
Possible Cause and Resolution
Symptom
The system cannot find any apps. –Incompatible device.
•You will need an Android device with OS 4.3 or higher or an iOS device wi\
th iOS 8.0
or higher. Pair and connect your Android device to find AppLink compatible apps.
Connect your iOS device to a USB port or pair and connect using Bluetoot\
h.
I have a compatible device and it is correctly
connected but the system still cannot find any
apps. –
AppLink compatible apps not installed on your device.
•Download and install the latest version of the app.
– AppLink compatible apps not running on your device.
•Start the apps to allow the system to find them and make sure you sign in to any apps
if required.
– Incorrect app settings.
•Check and adjust the app settings on your device and allow SYNC to access the app
if required.
I have a compatible device, it is correctly
connected and my apps are running but the
system still cannot find any apps. –
Apps failed to fully close.
•Restart the apps and try again.
• If you have an Android device with apps that have an exit or quit option\
, use this and
then restart the apps. Alternatively, use the force stop option in the settings menu on
your device.
• If you have an iOS device with iOS 7.0 or higher, tap the home button on your device
twice and then swipe the app upward to close it.
510
Aviator (CTV) Canada/United States of America, enUSA, Edition date: 201902, Third-Printing- SYNC™ 3
Page 596 of 609
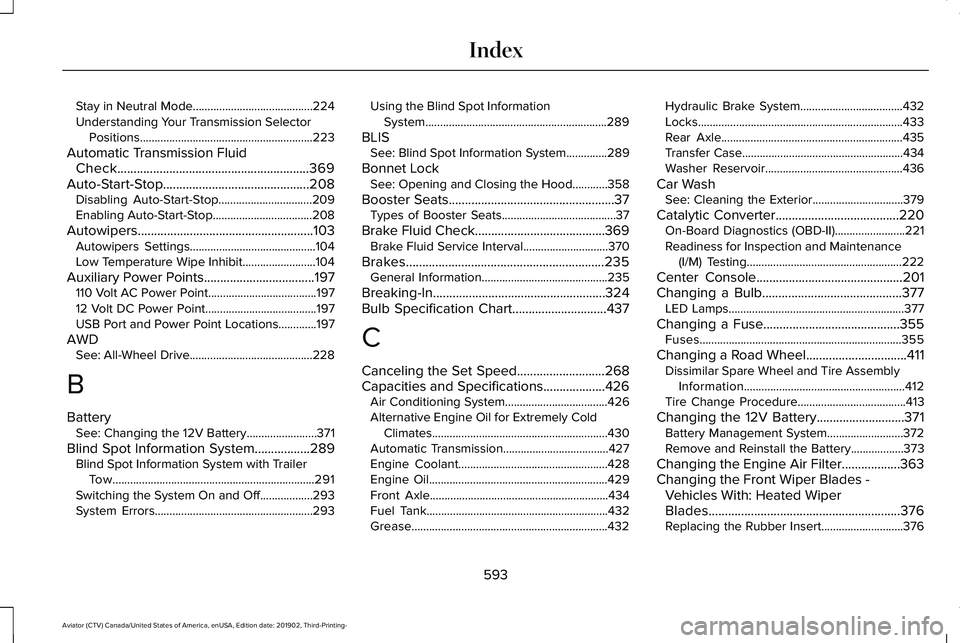
Stay in Neutral Mode.........................................224
Understanding Your Transmission Selector
Positions...........................................................223
Automatic Transmission Fluid Check...........................................................369
Auto-Start-Stop.............................................208 Disabling Auto-Start-Stop................................209
Enabling Auto-Start-Stop..................................208
Autowipers......................................................103 Autowipers Settings...........................................104
Low Temperature Wipe Inhibit.........................104
Auxiliary Power Points..................................197
110 Volt AC Power Point.....................................197
12 Volt DC Power Point......................................197
USB Port and Power Point Locations.............197
AWD See: All-Wheel Drive..........................................228
B
Battery See: Changing the 12V Battery........................
371
Blind Spot Information System.................289 Blind Spot Information System with Trailer
Tow.....................................................................291
Switching the System On and Off..................293
System Errors......................................................293 Using the Blind Spot Information
System..............................................................289
BLIS See: Blind Spot Information System..............289
Bonnet Lock See: Opening and Closing the Hood............358
Booster Seats...................................................37 Types of Booster Seats.......................................37
Brake Fluid Check........................................369 Brake Fluid Service Interval.............................370
Brakes.............................................................235 General Information...........................................235
Breaking-In.....................................................324
Bulb Specification Chart.............................437
C
Canceling the Set Speed...........................268
Capacities and Specifications...................426 Air Conditioning System...................................426
Alternative Engine Oil for Extremely Cold
Climates............................................................430
Automatic Transmission....................................427
Engine Coolant...................................................428
Engine Oil.............................................................429
Front Axle.............................................................434
Fuel Tank..............................................................432
Grease...................................................................432 Hydraulic Brake System...................................432
Locks......................................................................433
Rear Axle..............................................................435
Transfer Case.......................................................434
Washer Reservoir...............................................436
Car Wash See: Cleaning the Exterior...............................
379
Catalytic Converter......................................220 On-Board Diagnostics (OBD-II)........................221
Readiness for Inspection and Maintenance
(I/M) Testing.....................................................222
Center Console
.............................................201
Changing a Bulb...........................................377 LED Lamps............................................................377
Changing a Fuse..........................................355 Fuses.....................................................................355
Changing a Road Wheel...............................411 Dissimilar Spare Wheel and Tire Assembly
Information.......................................................412
Tire Change Procedure.....................................
413
Changing the 12V Battery...........................371 Battery Management System..........................372
Remove and Reinstall the Battery..................373
Changing the Engine Air Filter..................363
Changing the Front Wiper Blades - Vehicles With: Heated Wiper
Blades...........................................................376
Replacing the Rubber Insert............................376
593
Aviator (CTV) Canada/United States of America, enUSA, Edition date: 201902, Third-Printing- Index