ESP LINCOLN AVIATOR 2021 Owner's Guide
[x] Cancel search | Manufacturer: LINCOLN, Model Year: 2021, Model line: AVIATOR, Model: LINCOLN AVIATOR 2021Pages: 667, PDF Size: 7.01 MB
Page 263 of 667
HILL START ASSIST
WARNING: The system does not
replace the parking brake. When you leave
your vehicle, always apply the parking
brake. WARNING: You must remain in your
vehicle when the system turns on. At all
times, you are responsible for controlling
your vehicle, supervising the system and
intervening, if required. Failure to take care
may result in the loss of control of your
vehicle, serious personal injury or death. WARNING:
The system will turn off
if a malfunction is apparent or if you rev
the engine excessively. Failure to take care
may result in the loss of control of your
vehicle, serious personal injury or death.
The system makes it easier to pull away
when your vehicle is on a slope without the
need to use the parking brake. When the system is active, your vehicle
remains stationary on the slope for two to
three seconds after you release the brake
pedal. This allows time to move your foot
from the brake to the accelerator pedal. The
system releases the brakes automatically
once the engine has developed sufficient
torque to prevent your vehicle from rolling
down the slope. This is an advantage when
pulling away on a slope, for example from a
car park ramp, traffic lights or when reversing
uphill into a parking space.
The system activates on any slope that
causes your vehicle to roll.
Note:
There is no warning light to indicate
the system is either on or off.
Using Hill Start Assist
1. Press the brake pedal to bring your vehicle to a complete standstill. Keep the
brake pedal pressed and shift into first
gear when facing uphill or reverse (R)
when facing downhill.
2. If the sensors detect that your vehicle is on a slope, the system activates
automatically. 3. When you remove your foot from the
brake pedal, your vehicle remains on the
slope without rolling away for about two
to three seconds. This hold time
automatically extends if you are in the
process of driving off.
4. Drive off in the normal manner. The system releases the brakes automatically.
Note: When you remove your foot from the
brake pedal and press the pedal again when
the system is active, you will experience
significantly reduced brake pedal travel. This
is normal.
Switching the System On and Off
Vehicles with Manual Transmission
You can switch this feature on or off in the
information display. The system remembers
the last setting when you start your vehicle.
Vehicles with Automatic Transmission
You cannot turn the system on or off. When
you switch the ignition on, the system
automatically turns on.
260
Aviator (CTV) Canada/United States of America, enUSA, Edition date: 202007, Second-Printing Brakes
Page 264 of 667
AUTO HOLD
WARNING: The system does not
replace the parking brake. When you leave
your vehicle, always apply the parking
brake. WARNING: You must remain in your
vehicle when the system turns on. At all
times, you are responsible for controlling
your vehicle, supervising the system and
intervening, if required. Failure to take care
may result in the loss of control of your
vehicle, serious personal injury or death. WARNING:
The system turns off if
there is a malfunction or if you excessively
rev the engine.
The system is designed to apply the brakes
to hold your vehicle at a standstill after you
stop your vehicle and release the brake
pedal. This could be beneficial in certain
situations, for example when waiting on a hill
or in traffic. Switching Auto Hold On and Off Press the button in the instrument
panel to access the Auto Hold
feature on the touchscreen.
Note: You can only switch the system on
after you close the driver door and start the
engine.
Note: The system remembers the last setting
when you start your vehicle.
Make sure you switch the system off before
towing with your vehicle or before using an
automatic car wash.
Using Auto Hold
1. Use the brakes to bring your vehicle to a complete stop. The auto hold active
indicator illuminates in the information
display.
2. Release the brake pedal. The system holds your vehicle at a standstill. The
auto hold active indicator remains
illuminated in the information display. Note:
The system only activates if you apply
enough brake pressure. If your vehicle is on
a steep slope, you need to press the brake
pedal harder before the system activates.
Note: Under certain conditions, the system
could apply the electric parking brake. The
brake system warning lamp illuminates. The
electric parking brake releases when you
press the accelerator pedal.
See Electric
Parking Brake (page 258).
Note: If auto-start-stop turns off the engine,
auto hold remains active.
Note: The system deactivates if you shift into
reverse (R) and press the brake pedal.
3. Pull away in the normal manner. The system releases the brakes and the auto
hold active indicator turns off.
Auto Hold Indicator The auto hold indicator illuminates
in the information display when the
system is on and is either active or
unavailable.
261
Aviator (CTV) Canada/United States of America, enUSA, Edition date: 202007, Second-Printing BrakesE287975 E197933
Page 266 of 667
WHAT IS REVERSE BRAKING
ASSIST
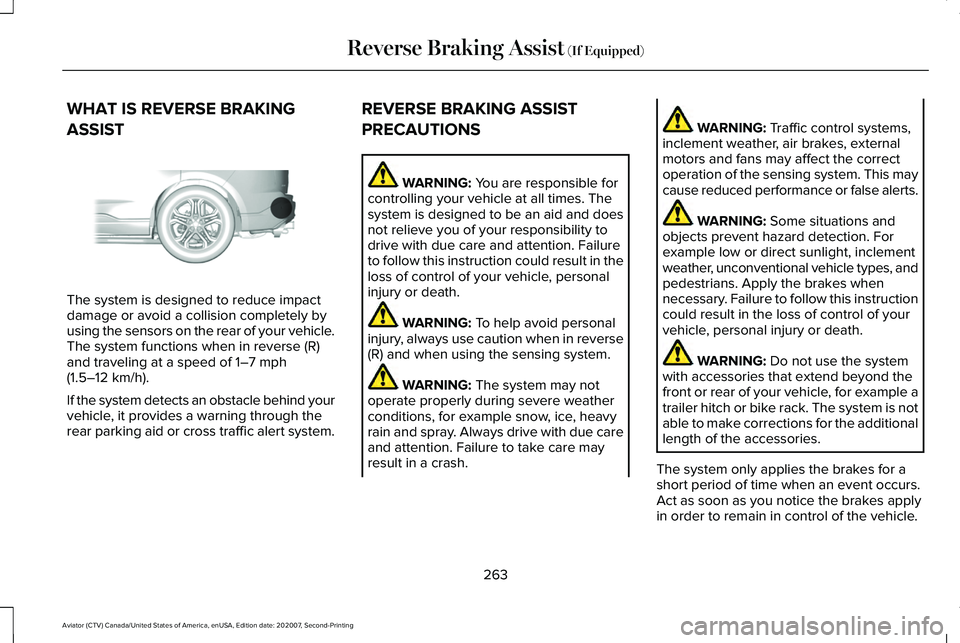
The system is designed to reduce impact
damage or avoid a collision completely by
using the sensors on the rear of your vehicle.
The system functions when in reverse (R)
and traveling at a speed of 1–7 mph
(1.5–12 km/h).
If the system detects an obstacle behind your
vehicle, it provides a warning through the
rear parking aid or cross traffic alert system. REVERSE BRAKING ASSIST
PRECAUTIONS WARNING:
You are responsible for
controlling your vehicle at all times. The
system is designed to be an aid and does
not relieve you of your responsibility to
drive with due care and attention. Failure
to follow this instruction could result in the
loss of control of your vehicle, personal
injury or death. WARNING:
To help avoid personal
injury, always use caution when in reverse
(R) and when using the sensing system. WARNING:
The system may not
operate properly during severe weather
conditions, for example snow, ice, heavy
rain and spray. Always drive with due care
and attention. Failure to take care may
result in a crash. WARNING:
Traffic control systems,
inclement weather, air brakes, external
motors and fans may affect the correct
operation of the sensing system. This may
cause reduced performance or false alerts. WARNING:
Some situations and
objects prevent hazard detection. For
example low or direct sunlight, inclement
weather, unconventional vehicle types, and
pedestrians. Apply the brakes when
necessary. Failure to follow this instruction
could result in the loss of control of your
vehicle, personal injury or death. WARNING:
Do not use the system
with accessories that extend beyond the
front or rear of your vehicle, for example a
trailer hitch or bike rack. The system is not
able to make corrections for the additional
length of the accessories.
The system only applies the brakes for a
short period of time when an event occurs.
Act as soon as you notice the brakes apply
in order to remain in control of the vehicle.
263
Aviator (CTV) Canada/United States of America, enUSA, Edition date: 202007, Second-Printing Reverse Braking Assist
(If Equipped)E205199
Page 273 of 667
WHAT IS HILL DESCENT CONTROL
WARNING: Hill descent control
cannot control descent in all surface
conditions and circumstances, such as ice
or extremely steep grades. Hill descent
control is a driver assist system and cannot
substitute for good judgment by the driver.
Failure to do so may result in loss of
vehicle control, crash or serious injury. WARNING:
The system does not
replace the parking brake. When you leave
your vehicle, always apply the parking
brake and shift the transmission into park
(P) for automatic transmission or first gear
for manual transmission.
Note: The system does not function below
3 mph (5 km/h)
.
Hill descent control allows the driver to set
and maintain vehicle speed while
descending steep slopes in various surface
conditions. The system can maintain vehicle speeds on
downhill slopes between
3–20 mph
(5–32 km/h). Above 20 mph (32 km/h), the
system remains on but the descent speed
cannot be set or maintained.
The system requires a cool down interval
after a period of sustained use. The amount
of time that the system can remain active
before cooling varies with conditions. The
system provides a warning in the message
center and a tone sounds when the system
is about to disengage for cooling. At this
time, manually apply the brakes as needed
to maintain descent speed.
SWITCHING HILL DESCENT
CONTROL ON AND OFF
You can switch the hill descent control on
and off through the touchscreen. SETTING THE HILL DESCENT
SPEED WARNING:
The system does not
replace the parking brake. When you leave
your vehicle, always apply the parking
brake and shift the transmission into park
(P) for automatic transmission or first gear
for manual transmission. WARNING:
The system does not
control speed in low traction conditions or
extremely steep slopes. The system is
designed to be an aid and does not relieve
you of your responsibility to drive with due
care and attention. Failure to follow this
instruction could result in personal injury.
To increase the descent speed, press the
accelerator pedal until you reach the speed
you prefer.
To decrease the descent speed, press the
brake pedal until you reach the speed you
prefer.
270
Aviator (CTV) Canada/United States of America, enUSA, Edition date: 202007, Second-Printing Hill Descent Control
(If Equipped)
Page 281 of 667
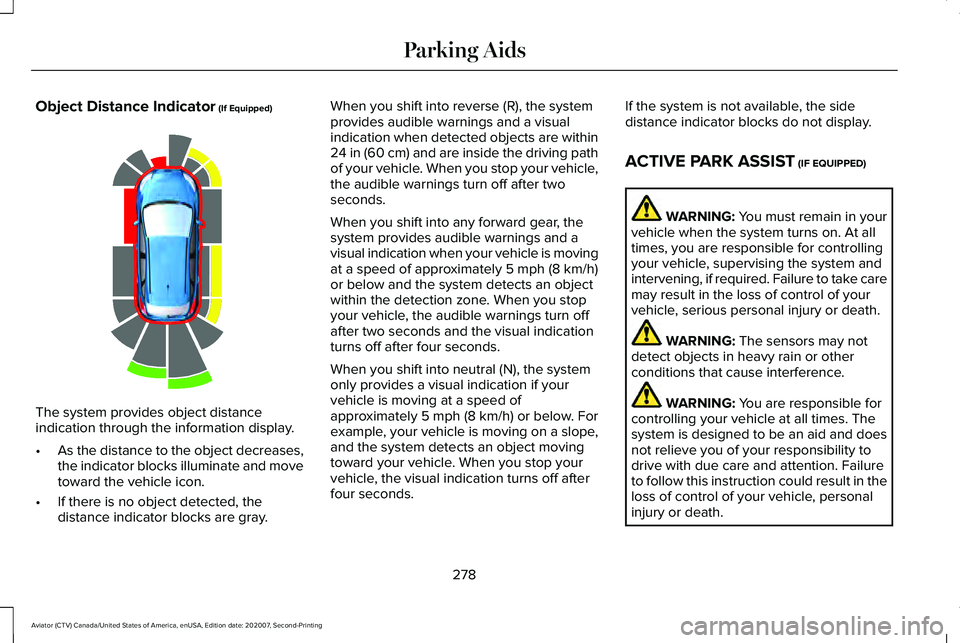
Object Distance Indicator (If Equipped)
The system provides object distance
indication through the information display.
•
As the distance to the object decreases,
the indicator blocks illuminate and move
toward the vehicle icon.
• If there is no object detected, the
distance indicator blocks are gray. When you shift into reverse (R), the system
provides audible warnings and a visual
indication when detected objects are within
24 in (60 cm)
and are inside the driving path
of your vehicle. When you stop your vehicle,
the audible warnings turn off after two
seconds.
When you shift into any forward gear, the
system provides audible warnings and a
visual indication when your vehicle is moving
at a speed of approximately
5 mph (8 km/h)
or below and the system detects an object
within the detection zone. When you stop
your vehicle, the audible warnings turn off
after two seconds and the visual indication
turns off after four seconds.
When you shift into neutral (N), the system
only provides a visual indication if your
vehicle is moving at a speed of
approximately
5 mph (8 km/h) or below. For
example, your vehicle is moving on a slope,
and the system detects an object moving
toward your vehicle. When you stop your
vehicle, the visual indication turns off after
four seconds. If the system is not available, the side
distance indicator blocks do not display.
ACTIVE PARK ASSIST
(IF EQUIPPED)
WARNING: You must remain in your
vehicle when the system turns on. At all
times, you are responsible for controlling
your vehicle, supervising the system and
intervening, if required. Failure to take care
may result in the loss of control of your
vehicle, serious personal injury or death. WARNING:
The sensors may not
detect objects in heavy rain or other
conditions that cause interference. WARNING:
You are responsible for
controlling your vehicle at all times. The
system is designed to be an aid and does
not relieve you of your responsibility to
drive with due care and attention. Failure
to follow this instruction could result in the
loss of control of your vehicle, personal
injury or death.
278
Aviator (CTV) Canada/United States of America, enUSA, Edition date: 202007, Second-Printing Parking AidsE190459
Page 289 of 667
This allows you to get a closer view of an
object behind your vehicle. The zoomed
image keeps the bumper in the image to
provide a reference. The zoom is only active
while the transmission is in reverse (R).
Rear Camera Delay
Selectable settings for this feature are ON
and OFF.
The default setting for the rear camera delay
is OFF.
When shifting the transmission out of reverse
(R) and into any gear other than park (P), the
camera image remains in the display until:
•
Your vehicle speed reaches
approximately 5 mph (8 km/h).
• You shift your vehicle into park (P). 360 DEGREE CAMERA
(IF EQUIPPED) WARNING: The 360 degree camera
system still requires the driver to use it in
conjunction with looking out of the
windows, and checking the interior and
exterior mirrors for maximum coverage. WARNING:
Objects that are close to
either corner of the bumper or under the
bumper, might not be seen on the screen
due to the limited coverage of the camera
system. WARNING:
Use caution when turning
camera features on or off when the
transmission is not in park (P). Make sure
your vehicle is not moving. WARNING:
You are responsible for
controlling your vehicle at all times. The
system is designed to be an aid and does
not relieve you of your responsibility to
drive with due care and attention. Failure
to follow this instruction could result in the
loss of control of your vehicle, personal
injury or death.
Note: Use caution using the 360 view when
any of the doors are ajar. If a door is ajar,
the camera will be out of position and the
video image may be incorrect.
The 360 degree camera system consists of
front, side and rear cameras. The system:
• Allows you to see what is directly in front
or behind your vehicle.
• Provides cross traffic view in front and
behind your vehicle.
286
Aviator (CTV) Canada/United States of America, enUSA, Edition date: 202007, Second-Printing Parking Aids
Page 295 of 667
ADAPTIVE CRUISE CONTROL
PRECAUTIONS - VEHICLES WITH:
ADAPTIVE CRUISE CONTROL
WITH STOP AND GO
WARNING: You are responsible for
controlling your vehicle at all times. The
system is designed to be an aid and does
not relieve you of your responsibility to
drive with due care and attention. Failure
to follow this instruction could result in the
loss of control of your vehicle, personal
injury or death. WARNING:
Pay close attention to
changing road conditions such as entering
or leaving a highway, on roads with
intersections or roundabouts, roads
without visible lanes of travel, roads that
are winding, slippery, unpaved, or steep
slopes. WARNING:
The system does not
control speed in low traction conditions or
extremely steep slopes. The system is
designed to be an aid and does not relieve
you of your responsibility to drive with due
care and attention. Failure to follow this
instruction could result in personal injury. WARNING:
The system is not a crash
warning or avoidance system. WARNING:
Do not use the system
when towing a trailer that has aftermarket
electronic trailer brake controls. Failure to
follow this instruction could result in the
loss of control of your vehicle, personal
injury or death. WARNING:
Do not use tire sizes
other than those recommended because
this can affect the normal operation of the
system. Failure to do so may result in a loss
of vehicle control, which could result in
serious injury. WARNING:
Do not use the system
with a snow plow blade installed. WARNING:
Do not use the system in
poor visibility, for example fog, heavy rain,
spray or snow.
When Following a Vehicle WARNING: When following a vehicle
that is braking, your vehicle does not
always decelerate quickly enough to avoid
a crash without driver intervention. Apply
the brakes when necessary. Failure to
follow this instruction could result in
personal injury or death.
292
Aviator (CTV) Canada/United States of America, enUSA, Edition date: 202007, Second-Printing Adaptive Cruise Control
(If Equipped)
Page 296 of 667
Hilly Condition Usage
You should select a lower gear when the
system is active in situations such as
prolonged downhill driving on steep grades,
for example in mountainous areas. The
system needs additional engine braking in
these situations to reduce the load on the
vehicle
’s regular brake system to prevent it
from overheating.
Note: An audible alarm sounds and the
system shuts down if it applies brakes for an
extended period of time. This allows the
brakes to cool. The system functions
normally again after the brakes cool.
ADAPTIVE CRUISE CONTROL
LIMITATIONS - VEHICLES WITH:
ADAPTIVE CRUISE CONTROL
WITH LANE CENTERING
Adaptive cruise control limitations apply to
lane centering unless stated otherwise or
contradicted by a lane centering limitation.
See Adaptive Cruise Control Limitations
(page 293). The system may not correctly operate in any
of the following conditions:
•
Your vehicle is not centered in the lane.
• The lane is too narrow or wide.
• The system does not detect at least one
lane marking or when lanes merge or
split.
• You switch the direction indicator on.
• Limited steering torque input is applied.
• Areas under construction or new
infrastructure.
• When modifications to the steering
system have been made.
• When using a spare tire.
Note: The driving assistance torque is limited
and may not be sufficient for all driving
situations such as driving through tight
curves or driving through curves at high
speeds.
Note: In exceptional conditions, the system
may deviate from the center line. ADAPTIVE CRUISE CONTROL
LIMITATIONS - VEHICLES WITH:
ADAPTIVE CRUISE CONTROL
WITH STOP AND GO
Sensor Limitations
WARNING:
On rare occasions,
detection issues can occur due to the road
infrastructures, for example bridges,
tunnels and safety barriers. In these cases,
the system may brake late or
unexpectedly. At all times, you are
responsible for controlling your vehicle,
supervising the system and intervening, if
required. WARNING:
If the system
malfunctions, have your vehicle checked
as soon as possible. WARNING: Large contrasts in outside
lighting can limit sensor performance.
293
Aviator (CTV) Canada/United States of America, enUSA, Edition date: 202007, Second-Printing Adaptive Cruise Control
(If Equipped)
Page 300 of 667
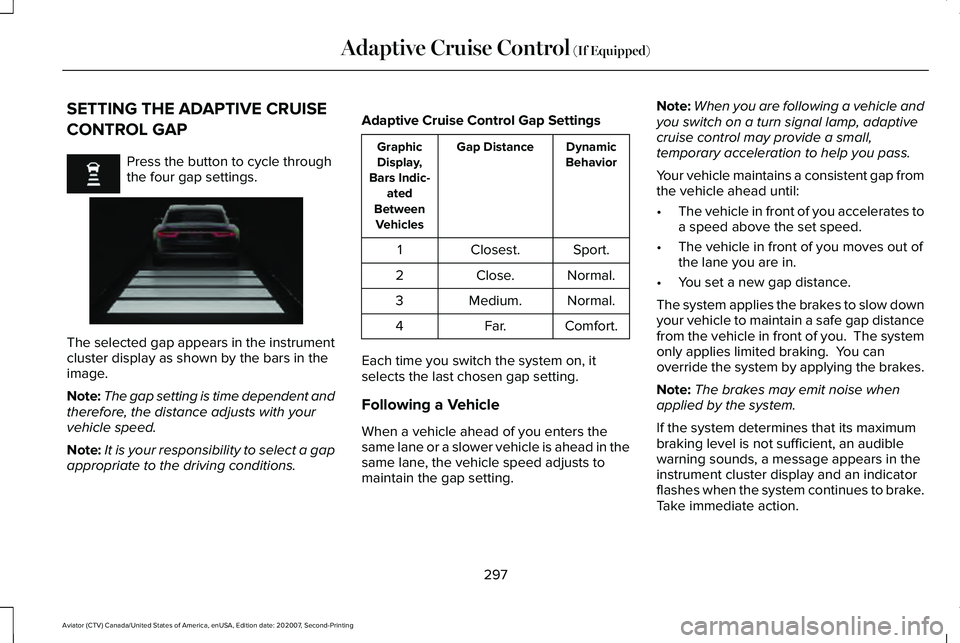
SETTING THE ADAPTIVE CRUISE
CONTROL GAP
Press the button to cycle through
the four gap settings.
The selected gap appears in the instrument
cluster display as shown by the bars in the
image.
Note:
The gap setting is time dependent and
therefore, the distance adjusts with your
vehicle speed.
Note: It is your responsibility to select a gap
appropriate to the driving conditions. Adaptive Cruise Control Gap Settings Dynamic
Behavior
Gap Distance
Graphic
Display,
Bars Indic- ated
Between Vehicles
Sport.
Closest.
1
Normal.
Close.
2
Normal.
Medium.
3
Comfort.
Far.
4
Each time you switch the system on, it
selects the last chosen gap setting.
Following a Vehicle
When a vehicle ahead of you enters the
same lane or a slower vehicle is ahead in the
same lane, the vehicle speed adjusts to
maintain the gap setting. Note:
When you are following a vehicle and
you switch on a turn signal lamp, adaptive
cruise control may provide a small,
temporary acceleration to help you pass.
Your vehicle maintains a consistent gap from
the vehicle ahead until:
• The vehicle in front of you accelerates to
a speed above the set speed.
• The vehicle in front of you moves out of
the lane you are in.
• You set a new gap distance.
The system applies the brakes to slow down
your vehicle to maintain a safe gap distance
from the vehicle in front of you. The system
only applies limited braking. You can
override the system by applying the brakes.
Note: The brakes may emit noise when
applied by the system.
If the system determines that its maximum
braking level is not sufficient, an audible
warning sounds, a message appears in the
instrument cluster display and an indicator
flashes when the system continues to brake.
Take immediate action.
297
Aviator (CTV) Canada/United States of America, enUSA, Edition date: 202007, Second-Printing Adaptive Cruise Control (If Equipped) E255686
Page 303 of 667
The cruise control indicator
replaces the adaptive cruise
control indicator if you select
normal cruise control. The gap setting does
not display, and the system does not respond
to lead vehicles. Automatic braking remains
active to maintain set speed. The system
remembers the last setting when you start
your vehicle.
SWITCHING LANE CENTERING ON
AND OFF
The cruise controls are on the steering
wheel. See Cruise Control (page 102). Press the button.
The indicator appears in the information
display. When the system is on, the color of
the indicator changes to indicate the system
status.
See Adaptive Cruise Control
Indicators (page 298).
Note: Adaptive cruise control must be on
before you can switch lane centering on. Activating Lane Centering
The system only activates when all of the
following occur:
•
You have adaptive cruise control with
stop-and-go on.
• Your hands are on the steering wheel.
• The system detects both lane markings.
Note: If it does not detect valid lane
markings, the system stays inactive until
valid markings are available.
You can override the system at any time by
steering your vehicle.
System Alerts and Automatic
Cancellation
You must keep your hands on the steering
wheel at all times.
When the system is active and detects no
steering activity for a certain period of time,
the system alerts you to put your hands on
the steering wheel. If you do not react to the
warnings the system cancels and slows your
vehicle down to idle speeds while
maintaining steering control. The system also alerts you if your vehicle
crosses lane markings without detected
steering activity.
Note:
The system may detect a light grip or
touch on the steering wheel as hands-off
driving.
When an external condition cancels the
system, for example, no lane markings
available, a tone sounds as the icon turns
amber then gray, and a message appears in
the information display.
Note: There are instances where the system
can cancel without displaying a message in
the information display. If your vehicle starts to slow down,
you must provide steering input to
the wheel and press and release
the button to regain full system performance.
Automatic cancellation can also occur if:
• The lane becomes too wide or too
narrow.
• The system cannot detect valid lane
markings.
• Lane markings are crossed.
300
Aviator (CTV) Canada/United States of America, enUSA, Edition date: 202007, Second-Printing Adaptive Cruise Control
(If Equipped)E71340 E297977 E281472