Changing tire LINCOLN AVIATOR 2023 Owners Manual
[x] Cancel search | Manufacturer: LINCOLN, Model Year: 2023, Model line: AVIATOR, Model: LINCOLN AVIATOR 2023Pages: 681, PDF Size: 9.33 MB
Page 11 of 681
Cleaning the Exterior .................................422
Waxing ...........................................................423
Cleaning the Engine ...................................424
Cleaning the Windows and Wiper Blades
......................................................................4 2 4
Cleaning the Interior ..................................425
Cleaning the Instrument Panel and
Instrument Cluster Lens ........................425
Cleaning Leather Seats .............................426
Repairing Minor Paint Damage ................427
Cleaning the Wheels ..................................427
Vehicle Storage ............................................427
Body Styling Kits ..........................................429
Wheels and Tires
General Information ....................................430
Tire Care ........................................................432
Using Summer Tires ...................................444
Using Snow Chains .....................................445
Tire Pressure Monitoring System ............447
Changing a Road Wheel ............................451
Technical Specifications ............................458
Capacities and Specifications
Engine Specifications - Excluding: Plug-In
Hybrid Electric Vehicle (PHEV) ............460
Engine Specifications - Plug-In Hybrid
Electric Vehicle (PHEV) ...........................461
Motorcraft Parts - Excluding: Plug-In Hybrid
Electric Vehicle (PHEV) ..........................462
Motorcraft Parts - Plug-In Hybrid Electric
Vehicle (PHEV) .........................................464
Vehicle Identification Number .................465
Capacities and Specifications - Excluding:
Plug-In Hybrid Electric Vehicle (PHEV)
......................................................................465
Capacities and Specifications - Plug-In
Hybrid Electric Vehicle (PHEV) ............477
Bulb Specification Chart ............................488
Vehicle Identification
Installing the Vehicle Identification Card
......................................................................489
Network Connectivity
Connecting the Vehicle to a Mobile
Network .....................................................490Network Connectivity – Troubleshooting
.......................................................................491
Vehicle Wi-Fi Hotspot
Creating a Vehicle Wi-Fi Hotspot ............494
Changing the Vehicle Wi-Fi Hotspot Name
or Password ..............................................494
Audio System
General Information ...................................496
Audio Unit ......................................................497
Digital Radio .................................................499
Satellite Radio ..............................................502
USB Port ........................................................505
SYNC™ 3
General Information ....................................507
Using Voice Recognition ...........................509
Entertainment ................................................521
Climate ...........................................................533
Phone .............................................................536
Navigation .....................................................538
Electric Vehicle Information ......................546
8
Table of Contents
Page 309 of 681
ADAPTIVE CRUISE CONTROL
PRECAUTIONS - VEHICLES WITH:
ADAPTIVE CRUISE CONTROL
WITH STOP AND GO
WARNING: You are responsible for
controlling your vehicle at all times. The
system is designed to be an aid and does
not relieve you of your responsibility to
drive with due care and attention. Failure
to follow this instruction could result in the
loss of control of your vehicle, personal
injury or death.
WARNING: Pay close attention to
changing road conditions such as entering
or leaving a highway, on roads with
intersections or roundabouts, roads
without visible lanes of travel, roads that
are winding, slippery, unpaved, or steep
slopes.
WARNING: The system does not
control speed in low traction conditions or
extremely steep slopes. The system is
designed to be an aid and does not relieve
you of your responsibility to drive with due
care and attention. Failure to follow this
instruction could result in personal injury.
WARNING: The system is not a crash
warning or avoidance system.
WARNING: Do not use the system
when towing a trailer that has aftermarket
electronic trailer brake controls. Failure to
follow this instruction could result in the
loss of control of your vehicle, personal
injury or death.
WARNING: Do not use tire sizes
other than those recommended because
this can affect the normal operation of the
system. Failure to do so may result in a loss
of vehicle control, which could result in
serious injury.
WARNING: Do not use the system
with a snow plow blade installed.
WARNING: Do not use the system in
poor visibility, for example fog, heavy rain,
spray or snow.
When Following a Vehicle
WARNING: When following a vehicle
that is braking, your vehicle does not
always decelerate quickly enough to avoid
a crash without driver intervention. Apply
the brakes when necessary. Failure to
follow this instruction could result in
personal injury or death.
306
Adaptive Cruise Control (If Equipped)
Page 346 of 681
WHAT IS DRIVE MODE CONTROL
The system delivers a driving experience
through a suite of sophisticated electronic
vehicle systems. These systems optimize
steering, handling and powertrain response.
This provides a single location to control
multiple systems performance settings.
Changing the drive mode automatically
changes the functionality of the following
systems:
• Electronically power-assisted steering
system adjusts steering effort and feel
based on the mode you select. See
Steering (page 336).
• Electronic stability control and traction
control maintains your vehicle control in
adverse conditions or high performance
driving. See Stability Control (page 282).
• Electronic throttle control enhances the
powertrain response to your driving
inputs.
• Transmission controls optimize with shift
schedules tuned to each mode.
• AWD settings become optimized and
tuned to each mode.The system automatically tailors your vehicle
configuration for each mode you select.
Note:Not all settings, or modes, may be
available.
Note:The system has diagnostic checks that
continuously monitor the system for proper
operation. If a mode is unavailable due to a
system fault, the mode defaults to Normal.
SELECTING A DRIVE MODE
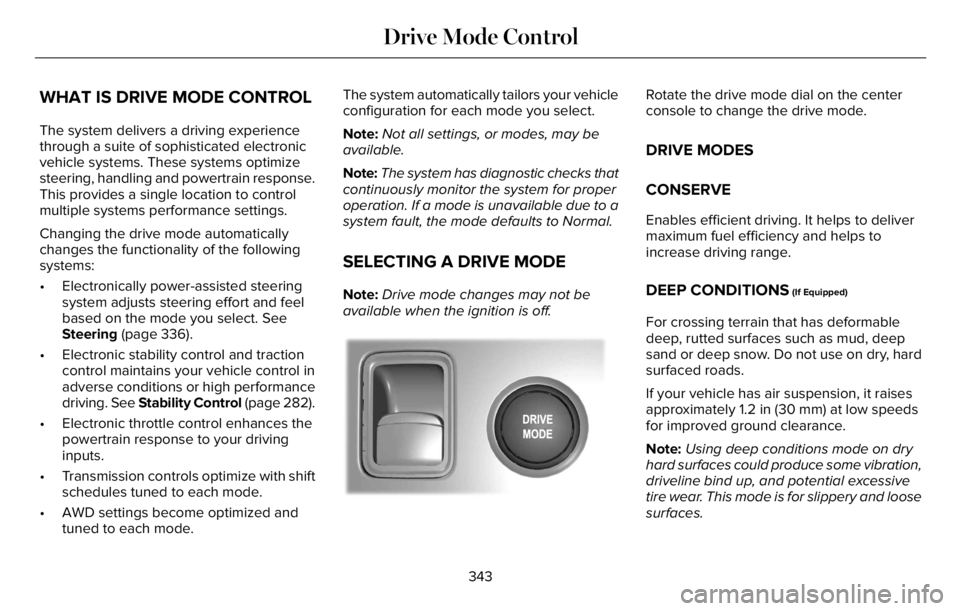
Note:Drive mode changes may not be
available when the ignition is off.
E297680E297680
Rotate the drive mode dial on the center
console to change the drive mode.
DRIVE MODES
CONSERVE
Enables efficient driving. It helps to deliver
maximum fuel efficiency and helps to
increase driving range.
DEEP CONDITIONS (If Equipped)
For crossing terrain that has deformable
deep, rutted surfaces such as mud, deep
sand or deep snow. Do not use on dry, hard
surfaced roads.
If your vehicle has air suspension, it raises
approximately 1.2 in (30 mm) at low speeds
for improved ground clearance.
Note:Using deep conditions mode on dry
hard surfaces could produce some vibration,
driveline bind up, and potential excessive
tire wear. This mode is for slippery and loose
surfaces.
343
Drive Mode Control
Page 451 of 681
functioning properly. Always check the TPMS
malfunction telltale after replacing one or
more tires or wheels on your vehicle to
ensure that the replacement or alternate tires
and wheels allow the TPMS to continue to
function properly.
This device complies with Part 15 of the FCC
Rules and with License exempt RSS
Standards of Industry Canada. Operation is
subject to the following two conditions:
1. This device may not cause harmful
interference, and
2. This device must accept any interference
received, including interference that may
cause undesired operation.
WARNING: Changes or modifications
not expressively approved by the party
responsible for compliance could void the
user's authority to operate the equipment.
The term "IC:" before the radio certification
number only signifies that Industry Canada
technical specifications were met.
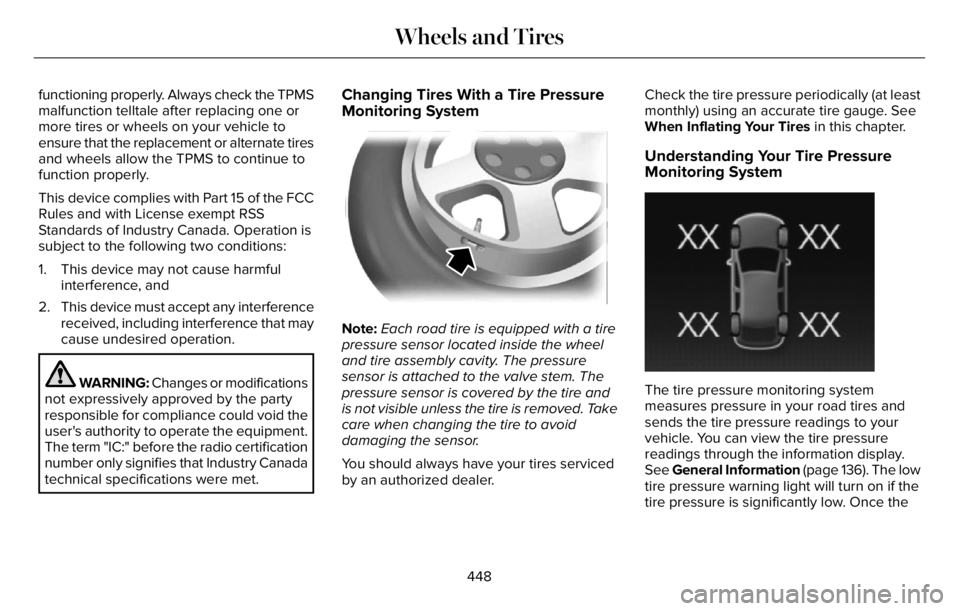
Changing Tires With a Tire Pressure
Monitoring System
Note:Each road tire is equipped with a tire
pressure sensor located inside the wheel
and tire assembly cavity. The pressure
sensor is attached to the valve stem. The
pressure sensor is covered by the tire and
is not visible unless the tire is removed. Take
care when changing the tire to avoid
damaging the sensor.
You should always have your tires serviced
by an authorized dealer.Check the tire pressure periodically (at least
monthly) using an accurate tire gauge. See
When Inflating Your Tires in this chapter.
Understanding Your Tire Pressure
Monitoring System
E250820E250820
The tire pressure monitoring system
measures pressure in your road tires and
sends the tire pressure readings to your
vehicle. You can view the tire pressure
readings through the information display.
See General Information (page 136). The low
tire pressure warning light will turn on if the
tire pressure is significantly low. Once the
448
Wheels and Tires
Page 454 of 681
When Inflating Your Tires
WARNING: Do not use the tire
pressure displayed in the information
display as a tire pressure gauge. Failure to
follow this instruction could result in
personal injury or death.
When putting air into your tires (such as at a
gas station or in your garage), the tire
pressure monitoring system may not respond
immediately to the air added to your tires.
It may take up to two minutes of driving over
20 mph (32 km/h) for the light to turn off after
you have filled your tires to the
recommended inflation pressure.
How Temperature Affects Your Tire
Pressure
The tire pressure monitoring system monitors
tire pressure in each pneumatic tire. While
driving in a normal manner, a typical
passenger tire inflation pressure may
increase about 2–4 psi (14–28 kPa) from a
cold start situation. If the vehicle is stationary
overnight with the outside temperaturesignificantly lower than the daytime
temperature, the tire pressure may decrease
about 3 psi (21 kPa) for a drop of 30°F (17°C)
in ambient temperature. This lower pressure
value may be detected by the tire pressure
monitoring system as being significantly
lower than the recommended inflation
pressure and activate the system warning
light for low tire pressure. If the low tire
pressure warning light is on, visually check
each tire to verify that no tire is flat. If one or
more tires are flat, repair as necessary.
Check the air pressure in the road tires. If
any tire is under-inflated, carefully drive the
vehicle to the nearest location where air can
be added to the tires. Inflate all the tires to
the recommended inflation pressure.
CHANGING A ROAD WHEEL
If you get a flat tire when driving, do not
apply the brake heavily. Instead, gradually
decrease your speed. Hold the steering
wheel firmly and slowly move to a safe place
on the side of the road.Have a flat serviced by an authorized dealer
in order to prevent damage to the tire
pressure monitoring system sensors. See
Tire Pressure Monitoring System (page 447).
Replace the spare tire with a road tire as
soon as possible. During repairing or
replacing of the flat tire, have the authorized
dealer inspect the tire pressure monitoring
system sensor for damage.
Note:You should only use tire sealants in
roadside emergencies as they may cause
damage to the tire pressure monitoring
system sensor.
Note:The tire pressure monitoring system
indicator light illuminates when the spare
tire is in use. To restore the full function of
the monitoring system, all road wheels
equipped with tire pressure monitoring
sensors must be mounted on the vehicle.Dissimilar Spare Wheel and Tire
Assembly Information
WARNING: Failure to follow these
guidelines could result in an increased risk
of loss of vehicle control, injury or death.
451
Wheels and Tires
Page 456 of 681
When driving with the full-size dissimilar
spare wheel and tire assembly additional
caution should be given to:
• Towing a trailer.
• Driving vehicles equipped with a camper
body.
• Driving vehicles with a load on the cargo
rack.
Drive cautiously when using a full-size
dissimilar spare wheel and tire assembly and
seek service as soon as possible.
Tire Change Procedure
WARNING: The jack supplied with
this vehicle is only intended for changing
a flat tire in an emergency. Do not attempt
to do any other work on your vehicle when
it is supported by the jack, as your vehicle
could slip off the jack. Failure to follow this
instruction could result in personal injury
or death.
WARNING: To help prevent your
vehicle from moving when changing a
wheel, shift the transmission into park (P),
set the parking brake and use an
appropriate block or wheel chock to
secure the wheel diagonally opposite to
the wheel being changed. For example,
when changing the front left wheel, place
an appropriate block or wheel chock on
the right rear wheel.
WARNING: Only use the jack
provided as original equipment with your
vehicle.
WARNING: Failure to follow these
guidelines could result in an increased risk
of loss of vehicle control, injury or death.
WARNING: Only use the specified
jacking points. If you use any other
locations you could damage vehicle
components, such as brake lines.
WARNING: Never place anything
between the vehicle jack and your vehicle.
WARNING: Never place anything
between the vehicle jack and the ground.
WARNING: Do not attempt to change
a tire on the side of the vehicle close to
moving traffic. Pull far enough off the road
to not obstruct the flow of traffic and avoid
the danger of being hit when operating the
jack or changing the wheel.
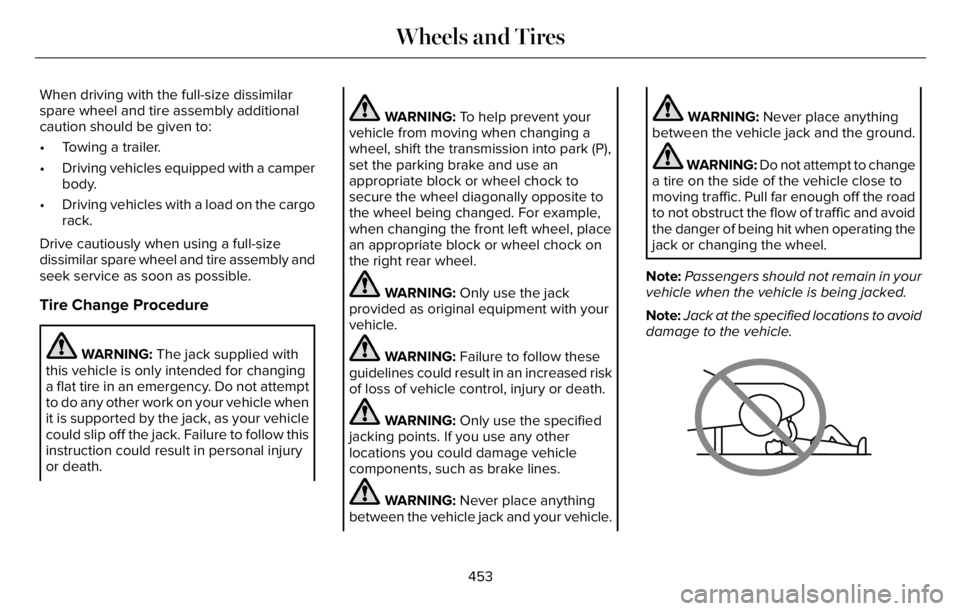
Note:Passengers should not remain in your
vehicle when the vehicle is being jacked.
Note:Jack at the specified locations to avoid
damage to the vehicle.
66E166722
453
Wheels and Tires
Page 459 of 681
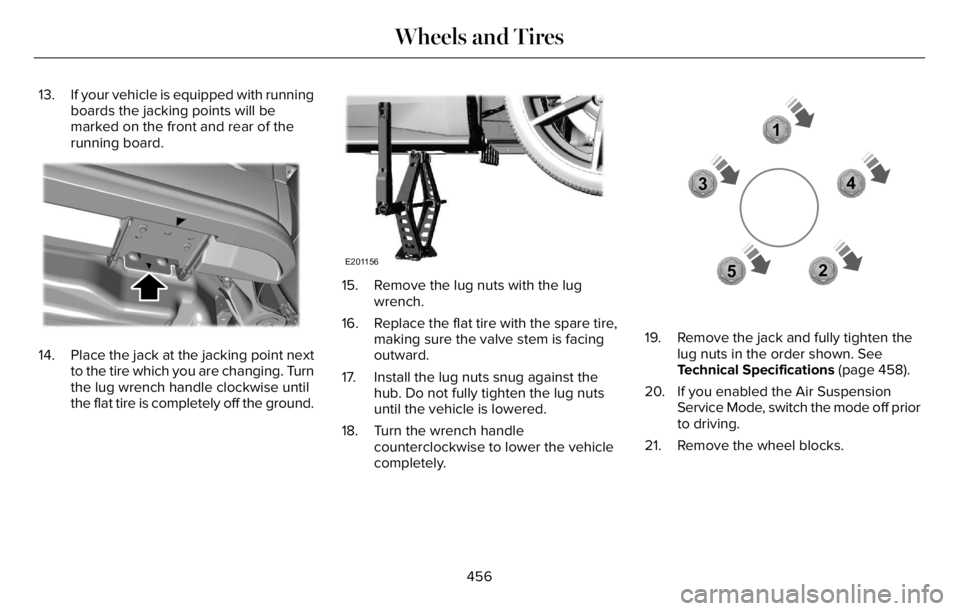
13. If your vehicle is equipped with running
boards the jacking points will be
marked on the front and rear of the
running board.
E310613E310613E310E310E310E31011100613613613613
14. Place the jack at the jacking point next
to the tire which you are changing. Turn
the lug wrench handle clockwise until
the flat tire is completely off the ground.
E201156
15. Remove the lug nuts with the lug
wrench.
16. Replace the flat tire with the spare tire,
making sure the valve stem is facing
outward.
17. Install the lug nuts snug against the
hub. Do not fully tighten the lug nuts
until the vehicle is lowered.
18. Turn the wrench handle
counterclockwise to lower the vehicle
completely.
1
2 34
5
E306781E306781
19. Remove the jack and fully tighten the
lug nuts in the order shown. See
Technical Specifications (page 458).
20. If you enabled the Air Suspension
Service Mode, switch the mode off prior
to driving.
21. Remove the wheel blocks.
456
Wheels and Tires
Page 461 of 681
TECHNICAL SPECIFICATIONS
Wheel Lug Nut Torque Specifications
WARNING: When you install a wheel, always remove any corrosion, dirt or foreign materials present on the mounting surfaces of the
wheel or the surface of the wheel hub, brake drum or brake disc that contacts the wheel. Make sure to secure any fasteners that attach
the rotor to the hub so they do not interfere with the mounting surfaces of the wheel. Installing wheels without correct metal-to-metal contact
at the wheel mounting surfaces can cause the wheel nuts to loosen and the wheel to come off while your vehicle is in motion, resulting in
loss of vehicle control, personal injury or death.
lb.ft (Nm)*Bolt size
150 lb.ft (204 Nm) M14 x 1.5
*Torque specifications are for nut and bolt threads free of dirt and rust. Use only our recommended replacement fasteners.
Retighten the lug nuts to the specified torque within 100 mi (160 km) after any wheel disturbance (such as tire rotation, changing a flat tire,
wheel removal).
458
Wheels and Tires
Page 650 of 681
iii. is harmful, threatening, abusive, harassing,
tortuous, defamatory, vulgar, obscene,
libelous, or otherwise objectionable; and (f )
lease, rent out, or otherwise permit
unauthorized access by third parties to the
TeleNav Software without advanced written
permission of TeleNav.
4. Disclaimers
• To the fullest extent permissible pursuant
to applicable law, in no event will
TeleNav, its licensors and suppliers, or
agents or employees of any of the
foregoing, be liable for any decision
made or action taken by you or anyone
else in reliance on the information
provided by the TeleNav Software.
TeleNav also does not warrant the
accuracy of the map or other data used
for the TeleNav Software. Such data may
not always reflect reality due to, among
other things, road closures, construction,
weather, new roads and other changing
conditions. You are responsible for the
entire risk arising out of your use of the
TeleNav Software. For example but
without limitation, you agree not to relyon the TeleNav Software for critical
navigation in areas where the well-being
or survival of you or others is dependent
on the accuracy of navigation, as the
maps or functionality of the TeleNav
Software are not intended to support
such high risk applications, especially in
more remote geographical areas.
• TELENAV EXPRESSLY DISCLAIMS AND
EXCLUDES ALL WARRANTIES IN
CONNECTION WITH THE TELENAV
SOFTWARE, WHETHER STATUTORY,
EXPRESS OR IMPLIED, INCLUDING ALL
WARRANTIES WHICH MAY ARISE FROM
COURSE OF DEALING, CUSTOM OR
TRADE AND INCLUDING, BUT NOT
LIMITED TO, THE IMPLIED WARRANTIES
OF MERCHANTABILITY, FITNESS FOR
A PARTICULAR PURPOSE AND
NON-INFRINGEMENT OF THIRD PARTY
RIGHTS WITH RESPECT TO THE
TELENAV SOFTWARE.
• Certain jurisdictions do not permit the
disclaimer of certain warranties, so this
limitation may not apply to you.5. Limitation of Liability
• TO THE EXTENT PERMITTED UNDER
APPLICABLE LAW, UNDER NO
CIRCUMSTANCES SHALL TELENAV OR
ITS LICENSORS AND SUPPLIERS BE
LIABLE TO YOU OR TO ANY THIRD
PARTY FOR ANY INDIRECT,
INCIDENTAL, CONSEQUENTIAL,
SPECIAL OR EXEMPLARY DAMAGES
(INCLUDING IN EACH CASE, BUT NOT
LIMITED TO, DAMAGES FOR THE
INABILITY TO USE THE EQUIPMENT OR
ACCESS DATA, LOSS OF DATA, LOSS
OF BUSINESS, LOSS OF PROFITS,
BUSINESS INTERRUPTION OR THE LIKE)
ARISING OUT OF THE USE OF OR
INABILITY TO USE THE TELENAV
SOFTWARE, EVEN IF TELENAV HAS
BEEN ADVISED OF THE POSSIBILITY OF
SUCH DAMAGES. NOTWITHSTANDING
ANY DAMAGES THAT YOU MIGHT
INCUR FOR ANY REASON
WHATSOEVER (INCLUDING, WITHOUT
LIMITATION, ALL DAMAGES
REFERENCED HEREIN AND ALL DIRECT
OR GENERAL DAMAGES IN CONTRACT,
TORT (INCLUDING NEGLIGENCE) OR
647
Appendices
Page 673 of 681
Engine Oil Dipstick.......................................401
Engine Specifications - Excluding: Plug-In
Hybrid Electric Vehicle (PHEV)..............460
Engine Specifications - Plug-In Hybrid
Electric Vehicle (PHEV).............................461
Entertainment.................................................521
Environment.....................................................23
EPB
See: Electric Parking Brake..............................272
Essential Towing Checks............................357
Event Data.........................................................19
Export Unique Options...................................16
Exterior Mirrors..............................................122
F
Fastening the Seatbelts................................47
Flat Tire
See: Changing a Road Wheel..........................451
Floor Mats......................................................362
Fog Lamps - Front
See: Front Fog Lamps.........................................113
Front Fog Lamps............................................113
Front Parking Aid.........................................288
Front Passenger Sensing System..............58Front Wiper Blades
See: Changing the Front Wiper Blades - Vehicles
With: Heated Wiper Blades..........................419
See: Changing the Front Wiper Blades - Vehicles
Without: Heated Wiper Blades....................418
Fuel and Refueling.......................................223
Fuel Consumption........................................233
Fuel Filler Funnel Location........................224
Fuel Filter.........................................................418
Fuel Quality....................................................224
Fuel Shutoff...................................................365
Fuses...............................................................382
Fuse Specification Chart............................382
G
Garage Door Opener...................................195
Garage Door Opener Introduction...........195
Garage Door Opener Precautions and
Frequencies.................................................195
Gauges.............................................................128
Gearbox
See: Transmission..............................................259
General Information on Radio
Frequencies..................................................68
General Maintenance Information...........579
Getting Assistance Outside the U.S. and
Canada..........................................................377Getting the Services You Need.................373
Global Opening and Closing......................122
H
Hazard Flashers............................................365
Headlamp Adjusting
See: Adjusting the Headlamps........................416
Headlamp Exit Delay.....................................113
Headrest
See: Head Restraints..........................................177
Head Restraints..............................................177
Heated Exterior Mirrors................................171
Heated Rear Window....................................171
Heated Seats...................................................191
Heated Steering Wheel...............................106
Heating
See: Climate Control..........................................165
High Voltage Battery...................................238General Information...........................................238
Hill Descent Control....................................284
Hill Descent Control Indicator...................285
Hill Start Assist..............................................274
Hints on Controlling the Interior
Climate..........................................................168
Hints on Driving With Anti-Lock
Brakes...........................................................272
670
Index