display LINCOLN AVIATOR 2023 User Guide
[x] Cancel search | Manufacturer: LINCOLN, Model Year: 2023, Model line: AVIATOR, Model: LINCOLN AVIATOR 2023Pages: 681, PDF Size: 9.33 MB
Page 82 of 681
Note:Not every feature applies to every
vehicle in every market. When they are
available for your vehicle, then they appear
in the information display, providing choices
to switch them on or off, or to select a more
specific setting.
• Various vehicle speed limits so the
MyKey driver cannot exceed certain
speeds. The information display shows
warnings followed by an audible tone
when the MyKey driver reaches the set
speed. You cannot override the set
speed by fully depressing the accelerator
pedal.
WARNING: Do not set MyKey
maximum speed limit to a limit that will
prevent the driver from maintaining a safe
speed considering posted speed limits and
prevailing road conditions. The driver is
always responsible to drive in accordance
with local laws and prevailing conditions.
Failure to do so could result in accident or
injury.• Various vehicle speed reminders so
MyKey drivers know when their vehicle
speed approaches the limits. Warnings
appear in the information display and a
tone sounds when the MyKey drivers
exceed the set vehicle speed.
• The audio system's maximum volume
limits to 45% so MyKey drivers can
concentrate on the road. A message
appears in the information display when
MyKey drivers attempt to exceed the
limited volume. MyKey also disables the
automatic volume control. Note: If your
vehicle includes an AM/FM radio or a
very basic audio system, then the radio
may not limit.
• Always on setting. This setting forces
certain features to remain on and active
for MyKey drivers. For example, E911 or
emergency assistance and the do not
disturb features stay on even if a MyKey
driver uses the feature's control to switch
it off. When selected, you will not be able
to turn off Advance Trac or traction
control (if your vehicle has this feature).
CREATING A MYKEY
Use the touchscreen to create a MyKey:
1. Insert the key you want to program into
the ignition. If your vehicle has a push
button start, place the remote control into
the backup slot. See Starting a Gasoline
Engine (page 206).
2. Switch the ignition on.
3. Press SETTINGS.
4. Press Vehicle.
5. Press MyKey.
6. Press Create MyKey.
7. Press Ye s.
8. Switch the ignition off.
You have successfully created a MyKey.
Make sure you label it so you can distinguish
it from the admin keys.
You can also program configurable settings
for the key.
79
MyKey™
Page 83 of 681
Programming and Changing
Configurable Settings
Use the touchscreen to access your
configurable MyKey settings.
1. Switch the ignition on using an admin key
or the remote control you want to
program.
2. Press SETTINGS.
3. Press Vehicle.
4. Press MyKey.
5. Select a setting and configure it by
following the instructions on the
touchscreen.
The programmed restrictions apply when
you switch the vehicle off, open and close
the driver door and restart your vehicle with
the programmed key or remote control.Note: You can clear or change your MyKey
settings at any time during the same key
cycle as you created the MyKey. Once you
have switched the vehicle off, you need an
admin key to change or clear your MyKey
settings. When you make any changes to
your MyKey settings, you change the settings
for every MyKey. You cannot make
individual changes to apply to specific
MyKeys.
CLEARING ALL MYKEYS
When you clear your MyKeys, you remove
all restrictions and return all MyKeys to their
original admin key status at once. To clear
all MyKeys of all MyKey settings, use the
touchscreen.
1. Switch the ignition on using an admin
key.
2. Press SETTINGS.
3. Press Vehicle.
4. Press MyKey.
5. Press Clear All MyKeys.
6. Press Ye s.7. A confirmation message appears in the
display after you finish clearing your
MyKeys.
CHECKING MYKEY SYSTEM
STATUS
You can find information about your
programmed MyKeys by using the
touchscreen. See Settings (page 555).
MyKey Distance
Tracks the distance when drivers use a
MyKey. The only way to delete the
accumulated distance is by using an admin
key to clear all MyKeys. If the distance does
not accumulate as expected, then the
intended user is not using the MyKey, or an
admin key user recently cleared and then
recreated a MyKey.
80
MyKey™
Page 87 of 681
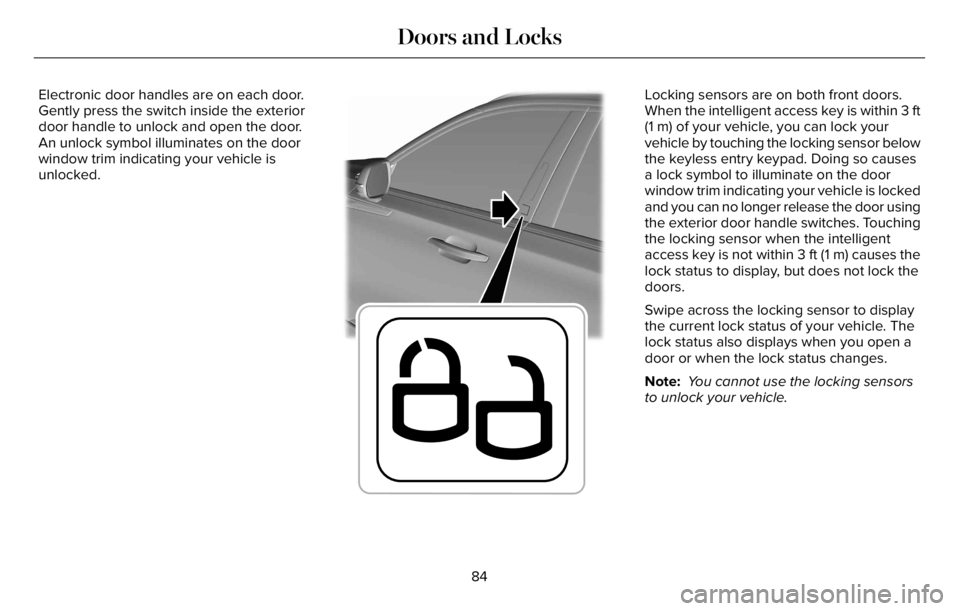
Electronic door handles are on each door.
Gently press the switch inside the exterior
door handle to unlock and open the door.
An unlock symbol illuminates on the door
window trim indicating your vehicle is
unlocked.
E295770
Locking sensors are on both front doors.
When the intelligent access key is within 3 ft
(1 m) of your vehicle, you can lock your
vehicle by touching the locking sensor below
the keyless entry keypad. Doing so causes
a lock symbol to illuminate on the door
window trim indicating your vehicle is locked
and you can no longer release the door using
the exterior door handle switches. Touching
the locking sensor when the intelligent
access key is not within 3 ft (1 m) causes the
lock status to display, but does not lock the
doors.
Swipe across the locking sensor to display
the current lock status of your vehicle. The
lock status also displays when you open a
door or when the lock status changes.
Note: You cannot use the locking sensors
to unlock your vehicle.
84
Doors and Locks
Page 88 of 681
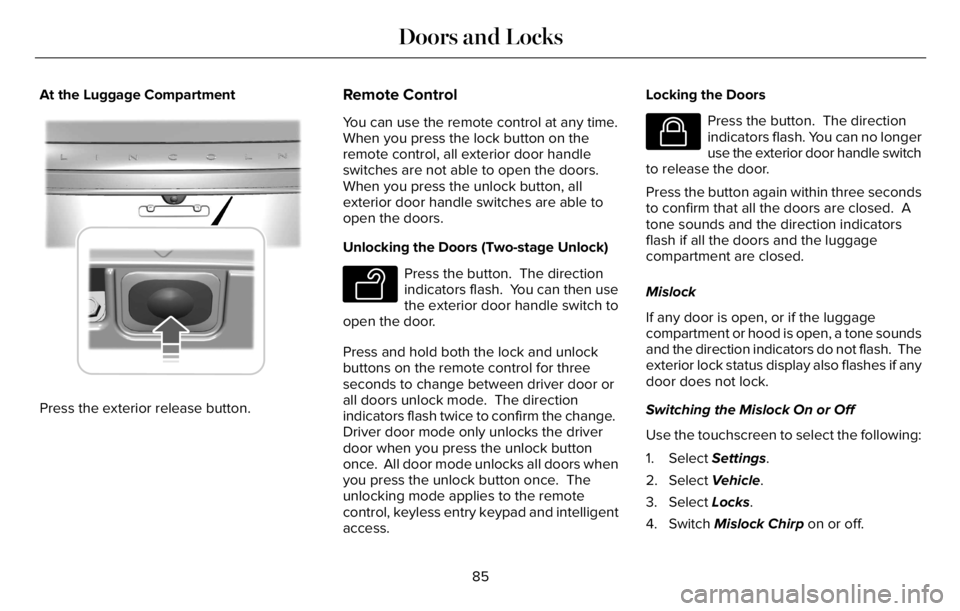
At the Luggage Compartment
E291416E291416
Press the exterior release button.
Remote Control
You can use the remote control at any time.
When you press the lock button on the
remote control, all exterior door handle
switches are not able to open the doors.
When you press the unlock button, all
exterior door handle switches are able to
open the doors.
Unlocking the Doors (Two-stage Unlock)
E138629
Press the button. The direction
indicators flash. You can then use
the exterior door handle switch to
open the door.
Press and hold both the lock and unlock
buttons on the remote control for three
seconds to change between driver door or
all doors unlock mode. The direction
indicators flash twice to confirm the change.
Driver door mode only unlocks the driver
door when you press the unlock button
once. All door mode unlocks all doors when
you press the unlock button once. The
unlocking mode applies to the remote
control, keyless entry keypad and intelligent
access.Locking the Doors
E138623
Press the button. The direction
indicators flash. You can no longer
use the exterior door handle switch
to release the door.
Press the button again within three seconds
to confirm that all the doors are closed. A
tone sounds and the direction indicators
flash if all the doors and the luggage
compartment are closed.
Mislock
If any door is open, or if the luggage
compartment or hood is open, a tone sounds
and the direction indicators do not flash. The
exterior lock status display also flashes if any
door does not lock.
Switching the Mislock On or Off
Use the touchscreen to select the following:
1. Select Settings.
2. Select Vehicle.
3. Select Locks.
4. Switch Mislock Chirp on or off.
85
Doors and Locks
Page 102 of 681
PASSIVE ANTI-THEFT SYSTEM
Note: The system is not compatible with
non-Ford aftermarket remote start systems.
Use of these systems may result in vehicle
starting problems and a loss of security
protection.
Note:Metallic objects, electronic devices or
a second coded key on the same key chain
may cause vehicle starting problems if they
are too close to the key when starting the
engine. Prevent these objects from touching
the coded key while starting the engine.
Switch the ignition off, move all objects on
the key chain away from the coded key and
restart the engine if a problem occurs.
Note:Do not leave a duplicate coded key
in the vehicle. Always take your keys and
lock all doors when leaving the vehicle.
SecuriLock®
The system is an engine immobilization
system. It is designed to help prevent the
engine from being started unless a coded
key programmed to your vehicle is used.
Using the wrong key may prevent the engine
from starting. A message may appear in the
information display.
If you are unable to start the engine with a
correctly coded key, a malfunction has
happened and a message may appear in the
information display.
Automatic Arming
The vehicle arms immediately after you
switch the ignition off.
Automatic Disarming
Switching the ignition on with a coded key
disarms the vehicle.
Replacement Keys
Note:Your vehicle comes equipped with two
intelligent access keys.The intelligent access key functions as a
programmed key that operates the driver
door lock and activates the intelligent access
with push button start system, as well as a
remote control.
If your programmed transmitters are lost or
stolen and you do not have an extra coded
key, you will need to have your vehicle
towed to an authorized dealer. You need to
erase the key codes from your vehicle and
program new coded keys.
Store an extra programmed key away from
the vehicle in a safe place to help prevent
any inconveniences. See your authorized
dealer to purchase additional spare or
replacement keys.
Programming a Spare Intelligent Access
Key
See your authorized dealer to have
additional keys programmed to your vehicle.
99
Security
Page 103 of 681
ANTI-THEFT ALARM
The active anti-theft system is designed to
warn you in the event of unauthorized
vehicle entry and is also designed to help
prevent unwanted towing of your vehicle.
You can choose what is monitored by arming
the system in different ways. See
Information Displays (page 136).
The turn signals flash and the horn sounds
if the system triggers while the alarm is
armed.
Take all remote controls to an authorized
dealer if there is any potential alarm problem
with your vehicle.
Using the System
You can select two levels of alarm security.
You can change the level of security when
the ignition is switched off through the
information display with the two options
below:Perimeter Sensing (If Equipped)
Perimeter sensing monitors the following:
• Doors.
• Hood.
• Liftgate.
All Sensors (If Equipped)
All sensors monitors the following:
• Doors.
• Hood.
• Liftgate.
• Movement inside your vehicle.
• Change in vehicle inclination, for
example, unwanted towing.
Note:Do not choose all sensors monitor
mode when the vehicle is in transport or if
movement within the vehicle is likely to
occur.Note:For correct operation of the interior
motion detection system, make sure you
close all the windows prior to arming the
system. This helps prevent accidental alarm
activation due to external influences.
Additionally, the interior motion sensing
system does not arm if any door is ajar.
Arming the Alarm
The alarm is ready to arm when there is not
a key in the ignition. Lock your vehicle using
the remote control or keyless entry keypad.
You can also lock your vehicle using the lock
sensor on the exterior door handle if your
vehicle is equipped with intelligent access.
See Locking and Unlocking (page 83).
The turn signals flash once after you lock
your vehicle. This indicates the alarm is in
the pre-armed mode. It fully arms after 20
seconds.
100
Security
Page 109 of 681
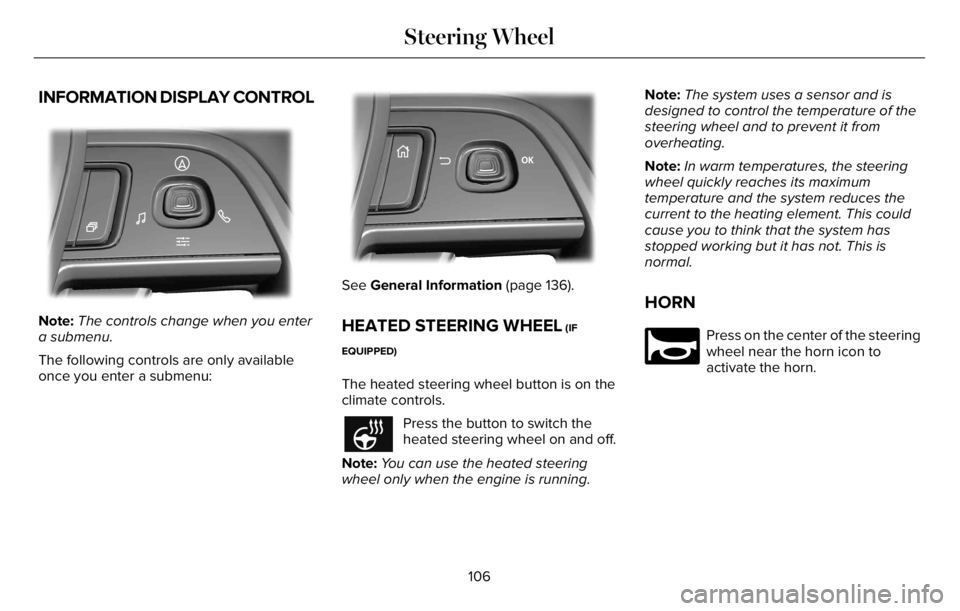
INFORMATION DISPLAY CONTROL
EE28128181818181811111822022220220222022022220
Note:The controls change when you enter
a submenu.
The following controls are only available
once you enter a submenu:
EE2992999999999999999999701707070170100701701
See General Information (page 136).
HEATED STEERING WHEEL (IF
EQUIPPED)
The heated steering wheel button is on the
climate controls.
Press the button to switch the
heated steering wheel on and off.
Note:You can use the heated steering
wheel only when the engine is running.Note:The system uses a sensor and is
designed to control the temperature of the
steering wheel and to prevent it from
overheating.
Note:In warm temperatures, the steering
wheel quickly reaches its maximum
temperature and the system reduces the
current to the heating element. This could
cause you to think that the system has
stopped working but it has not. This is
normal.
HORN
E270945
Press on the center of the steering
wheel near the horn icon to
activate the horn.
106
Steering Wheel
Page 116 of 681
HEADLAMP EXIT DELAY
After you switch the ignition off, you can
switch the headlamps on by pulling the
direction indicator lever toward you. You will
hear a short tone. The headlamps will switch
off automatically after three minutes with any
door open or 30 seconds after the last door
has been closed. You can cancel this feature
by pulling the direction indicator lever toward
you again or switching the ignition on.
DAYTIME RUNNING LAMPS -
VEHICLES WITH: CONFIGURABLE
DAYTIME RUNNING LAMPS
WARNING: The daytime running
lamps system does not activate the rear
lamps and may not provide adequate
lighting during low visibility driving
conditions. Make sure you switch the
headlamps on, as appropriate, during all
low visibility conditions. Failure to do so
may result in a crash.Switch the daytime running lamps on or off
using the touchscreen:
1. Select Settings. See Settings (page 555).
2. Select Vehicle.
3. Select Lighting.
The daytime running lamps turn on when:
1. The lamps are on in the information
display.
2. You switch the ignition on.
3. The transmission is not in park (P) for
vehicles with automatic transmissions or
you release the parking brake for
vehicles with manual transmissions.
4. The lighting control is in the autolamps
position.
5. The headlamps are off.
The other lighting control switch positions
do not turn on the daytime running lamps.
If the daytime running lamps are off in the
information display, the lamps stay off in all
switch positions.
DAYTIME RUNNING LAMPS -
VEHICLES WITH: DAYTIME
RUNNING LAMPS (DRL)
WARNING: The daytime running
lamps system does not activate the rear
lamps and may not provide adequate
lighting during low visibility driving
conditions. Make sure you switch the
headlamps on, as appropriate, during all
low visibility conditions. Failure to do so
may result in a crash.
The system turns the lamps on in daylight
conditions.
To switch the system on, switch the lighting
control to any position except headlamps.
FRONT FOG LAMPS (IF EQUIPPED)
Switching the Front Fog Lamps On or
Off
Only switch the front fog lamps on during
reduced visibility.
113
Lighting
Page 122 of 681
WHAT IS AUTOMATIC HIGH BEAM
CONTROL
The system turns on high beams if it is dark
enough and no other traffic is present. If it
detects an approaching vehicle’s headlamps
or tail lamps, or street lighting ahead, the
system turns the high beams off. Low beams
remain on.
A camera sensor, centrally mounted behind
the windshield of your vehicle, continuously
monitors conditions to turn the high beams
on and off.
SWITCHING AUTOMATIC HIGH
BEAM CONTROL ON AND OFF
WARNING: Do not use the system in
poor visibility, for example fog, heavy rain,
spray or snow.
Use the touchscreen to select the following:
1. Select Settings.
2. Select Vehicle.3. Select Lighting.
Activating the Automatic High Beam
Control
E281240
Switch the lighting control to the
autolamps position. See
Autolamps (page 112).
Note:The lighting control defaults to
autolamps each time you switch your vehicle
on.
When active, the high beams turn on if all
the following conditions occur:
• The ambient light level is low enough.
• There is no traffic in front of your vehicle.
• The vehicle speed is greater than
approximately 25 mph (40 km/h).
When active, the high beams turn off if at
least one of the following conditions occur:
• The ambient light level is high enough
that you do not require high beams.
• The system detects an approaching
vehicle's headlamps or tail lamps.
• The system detects severe rain, snow or
fog.• A blocked vehicle camera.
• The vehicle speed falls below
approximately 19 mph (30 km/h).
Note:The deactivation speed is lower on
curves.
Note:Certain curvy road situations may
delay high beam reactivation.
Note:If you have a blocked sensor, the
system may not operate properly. Keep the
windshield free from obstruction or damage.
Note:The system may not operate properly
in cold or inclement conditions. You can
switch on the high beams by overriding the
system.
Note:If the system detects a blockage, for
example bird droppings, bug splatter, snow
or ice, the system goes into low beam mode
until you clear the blockage. If you have a
blocked camera, a message may appear in
the information display.
Note:Using much larger tires or equipping
vehicle accessories such as snowplows can
modify your vehicle's ride height and
degrade automatic high beam control
performance.
119
Automatic High Beam Control
Page 125 of 681
Window Lock
E295318
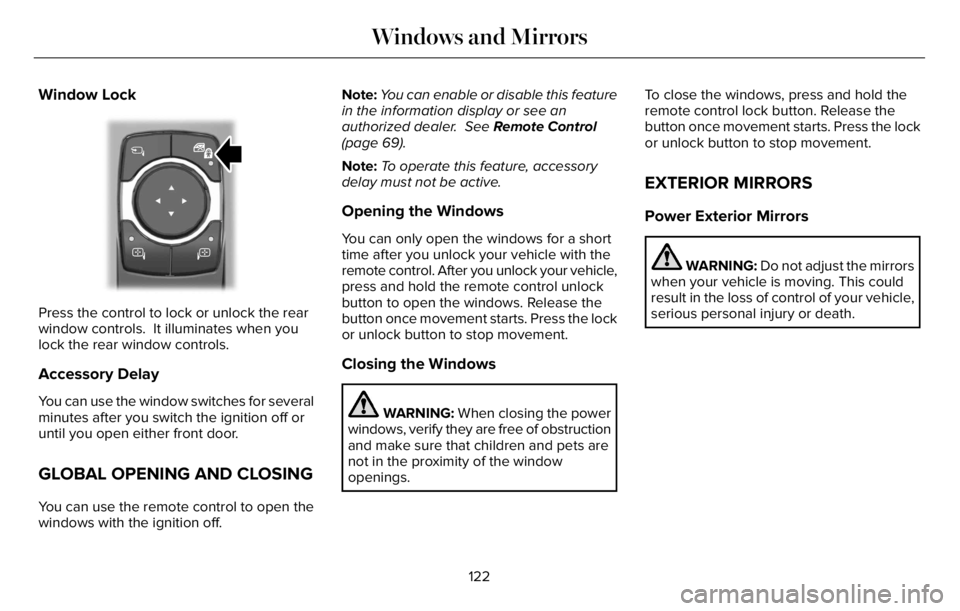
Press the control to lock or unlock the rear
window controls. It illuminates when you
lock the rear window controls.
Accessory Delay
You can use the window switches for several
minutes after you switch the ignition off or
until you open either front door.
GLOBAL OPENING AND CLOSING
You can use the remote control to open the
windows with the ignition off.Note:You can enable or disable this feature
in the information display or see an
authorized dealer. See Remote Control
(page 69).
Note:To operate this feature, accessory
delay must not be active.
Opening the Windows
You can only open the windows for a short
time after you unlock your vehicle with the
remote control. After you unlock your vehicle,
press and hold the remote control unlock
button to open the windows. Release the
button once movement starts. Press the lock
or unlock button to stop movement.
Closing the Windows
WARNING: When closing the power
windows, verify they are free of obstruction
and make sure that children and pets are
not in the proximity of the window
openings.To close the windows, press and hold the
remote control lock button. Release the
button once movement starts. Press the lock
or unlock button to stop movement.
EXTERIOR MIRRORS
Power Exterior Mirrors
WARNING: Do not adjust the mirrors
when your vehicle is moving. This could
result in the loss of control of your vehicle,
serious personal injury or death.
122
Windows and Mirrors