instrument panel LINCOLN AVIATOR 2023 Owners Manual
[x] Cancel search | Manufacturer: LINCOLN, Model Year: 2023, Model line: AVIATOR, Model: LINCOLN AVIATOR 2023Pages: 681, PDF Size: 9.33 MB
Page 4 of 681
Introduction
About This Manual ..........................................11
Symbols Glossary ............................................11
Perchlorate .......................................................14
Lincoln Automotive Financial Services
..........................................................................14
Replacement Parts Recommendation
..........................................................................14
Special Notices ...............................................15
Mobile Communications Equipment .........16
Export Unique Options ..................................16
Data Privacy
Data Privacy .....................................................18
Service Data .....................................................19
Event Data ........................................................19
Settings Data ..................................................20
Connected Vehicle Data ...............................21
Mobile Device Data ........................................21
Emergency Call System Data .....................22
Environment
Protecting the Environment ........................23
At a Glance
Instrument Panel ............................................24
Child Safety
General Information ......................................27
Installing Child Restraints ............................29
Booster Seats .................................................40
Child Restraint Positioning ..........................42
Child Safety Locks .........................................44
Seatbelts
Principle of Operation ..................................46
Fastening the Seatbelts ...............................47
Seatbelt Height Adjustment .......................49
Seatbelt Warning Lamp and Indicator
Chime ...........................................................49
Seatbelt Reminder ........................................50
Child Restraint and Seatbelt Maintenance
........................................................................5 2
Seatbelt Extensions ......................................53
Personal Safety System™
Personal Safety System™ .............................54
Supplementary Restraints System
Principle of Operation ..................................55
Driver and Passenger Airbags ...................56
Front Passenger Sensing System .............58
Side Airbags ...................................................60
Driver and Passenger Knee Airbags .........61
Safety Canopy™ ...............................................61
Crash Sensors and Airbag Indicator .........63
Airbag Disposal ..............................................64
Pedestrian Protection - Plug-In
Hybrid Electric Vehicle (PHEV)
Pedestrian Alert System ..............................65
911 Assist
What Is 911 Assist ...........................................66
How Does 911 Assist Work ..........................66
Emergency Call Requirements ..................66
Emergency Call Limitations .........................67
1
Table of Contents
Page 11 of 681
Cleaning the Exterior .................................422
Waxing ...........................................................423
Cleaning the Engine ...................................424
Cleaning the Windows and Wiper Blades
......................................................................4 2 4
Cleaning the Interior ..................................425
Cleaning the Instrument Panel and
Instrument Cluster Lens ........................425
Cleaning Leather Seats .............................426
Repairing Minor Paint Damage ................427
Cleaning the Wheels ..................................427
Vehicle Storage ............................................427
Body Styling Kits ..........................................429
Wheels and Tires
General Information ....................................430
Tire Care ........................................................432
Using Summer Tires ...................................444
Using Snow Chains .....................................445
Tire Pressure Monitoring System ............447
Changing a Road Wheel ............................451
Technical Specifications ............................458
Capacities and Specifications
Engine Specifications - Excluding: Plug-In
Hybrid Electric Vehicle (PHEV) ............460
Engine Specifications - Plug-In Hybrid
Electric Vehicle (PHEV) ...........................461
Motorcraft Parts - Excluding: Plug-In Hybrid
Electric Vehicle (PHEV) ..........................462
Motorcraft Parts - Plug-In Hybrid Electric
Vehicle (PHEV) .........................................464
Vehicle Identification Number .................465
Capacities and Specifications - Excluding:
Plug-In Hybrid Electric Vehicle (PHEV)
......................................................................465
Capacities and Specifications - Plug-In
Hybrid Electric Vehicle (PHEV) ............477
Bulb Specification Chart ............................488
Vehicle Identification
Installing the Vehicle Identification Card
......................................................................489
Network Connectivity
Connecting the Vehicle to a Mobile
Network .....................................................490Network Connectivity – Troubleshooting
.......................................................................491
Vehicle Wi-Fi Hotspot
Creating a Vehicle Wi-Fi Hotspot ............494
Changing the Vehicle Wi-Fi Hotspot Name
or Password ..............................................494
Audio System
General Information ...................................496
Audio Unit ......................................................497
Digital Radio .................................................499
Satellite Radio ..............................................502
USB Port ........................................................505
SYNC™ 3
General Information ....................................507
Using Voice Recognition ...........................509
Entertainment ................................................521
Climate ...........................................................533
Phone .............................................................536
Navigation .....................................................538
Electric Vehicle Information ......................546
8
Table of Contents
Page 27 of 681
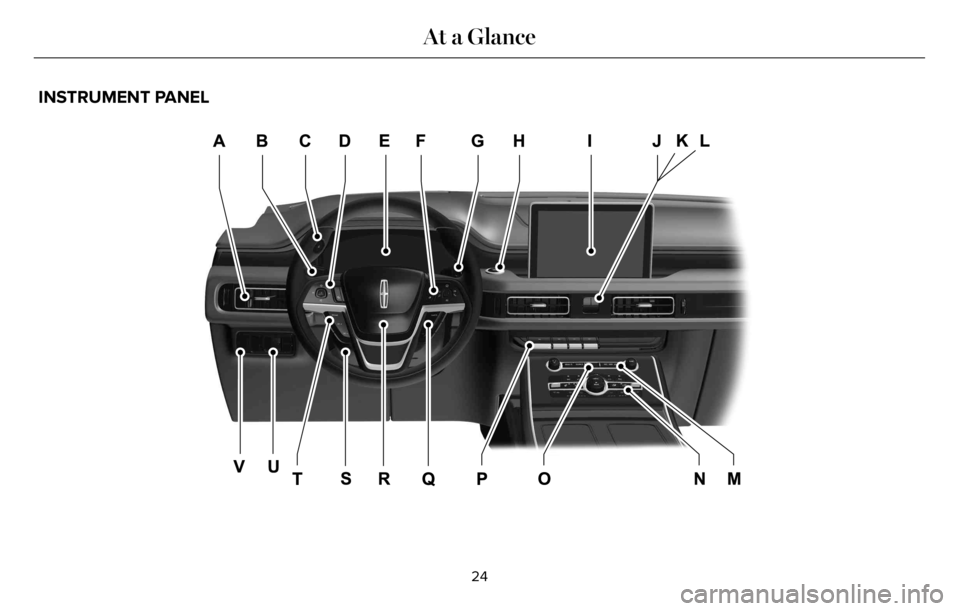
INSTRUMENT PANEL
E282064E282064
24
At a Glance
Page 64 of 681
E152533
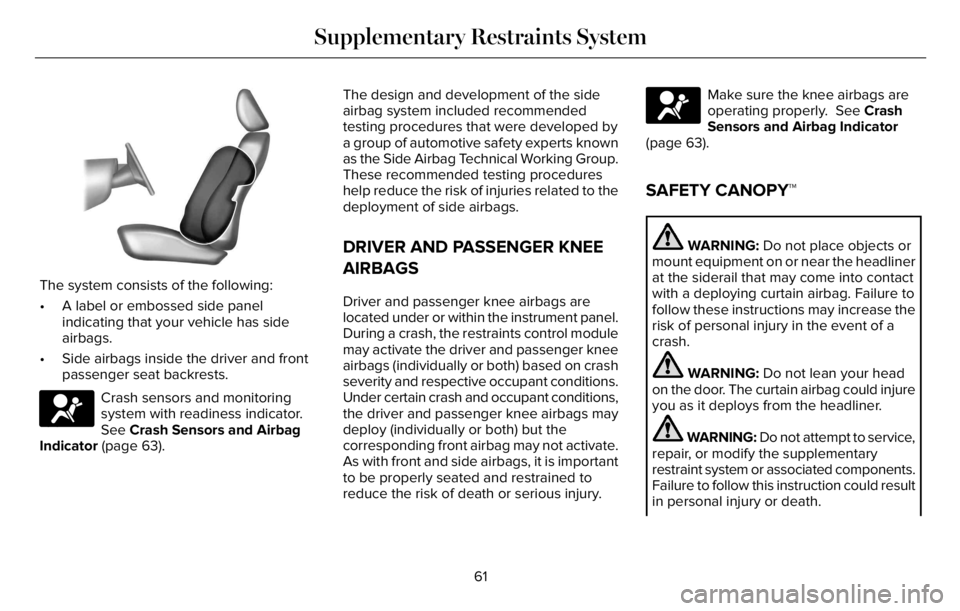
The system consists of the following:
• A label or embossed side panel
indicating that your vehicle has side
airbags.
• Side airbags inside the driver and front
passenger seat backrests.
E67017
Crash sensors and monitoring
system with readiness indicator.
See Crash Sensors and Airbag
Indicator (page 63).The design and development of the side
airbag system included recommended
testing procedures that were developed by
a group of automotive safety experts known
as the Side Airbag Technical Working Group.
These recommended testing procedures
help reduce the risk of injuries related to the
deployment of side airbags.
DRIVER AND PASSENGER KNEE
AIRBAGS
Driver and passenger knee airbags are
located under or within the instrument panel.
During a crash, the restraints control module
may activate the driver and passenger knee
airbags (individually or both) based on crash
severity and respective occupant conditions.
Under certain crash and occupant conditions,
the driver and passenger knee airbags may
deploy (individually or both) but the
corresponding front airbag may not activate.
As with front and side airbags, it is important
to be properly seated and restrained to
reduce the risk of death or serious injury.
E67017
Make sure the knee airbags are
operating properly. See Crash
Sensors and Airbag Indicator
(page 63).
SAFETY CANOPY™
WARNING: Do not place objects or
mount equipment on or near the headliner
at the siderail that may come into contact
with a deploying curtain airbag. Failure to
follow these instructions may increase the
risk of personal injury in the event of a
crash.
WARNING: Do not lean your head
on the door. The curtain airbag could injure
you as it deploys from the headliner.
WARNING: Do not attempt to service,
repair, or modify the supplementary
restraint system or associated components.
Failure to follow this instruction could result
in personal injury or death.
61
Supplementary Restraints System
Page 75 of 681

The remote start system does not work if any
of the following occur:
• The ignition is on.
• The anti-theft alarm triggers.
• You switch the feature off through the
touchscreen.
• The hood is open.
• The transmission is not in park (P).
• The battery voltage is below the
minimum operating voltage.
Note:Do not use remote start if your fuel
level is low.
Remote Control Feedback
An LED on the remote control provides status
feedback of remote start or stop commands.
Status LED
Remote start
successful Solid green
Remote stop
successful Solid red
Request failed or
status not received Blinking red
Status incomplete Blinking green
Remote Starting Your Vehicle
E138626
1. Press the lock button to lock all the
doors.
2. Press the remote start button twice. The
exterior lamps flash twice.A tone sounds if the system fails to start.
Note: You must press each button within
three seconds of each other. If you do not
follow this sequence, your vehicle does not
start remotely, the direction indicators do
not flash twice and the horn does not sound.
Note:Press the push button ignition switch
on the instrument panel as you apply the
brake pedal before driving your vehicle.
The power windows do not work during
remote start and the radio does not turn on.
The parking lamps remain on and your
vehicle runs for 5, 10 or 15 minutes,
depending on the setting.
Extending the Engine Running Time
To extend the engine running time duration
of your vehicle during remote start, repeat
steps 1 and 2 while the engine is running. If
the duration is set to 15 minutes, the duration
extends by another 15 minutes. For example,
if your vehicle had been running from the
first remote start for 5 minutes, your vehicle
continues to run now for a total of 30
minutes. You can extend the engine running
time duration to a maximum of 30 minutes.
72
Keys and Remote Controls
Page 92 of 681
Illuminated Entry
The interior lamps and some exterior lamps
illuminate when you unlock the doors with
the remote control.
The illuminated entry system turns off the
lights if:
• The ignition is on.
• You press the remote control lock button.
• More than 25 seconds have elapsed.
The lights do not turn off if:
• You turn them on with the lamp control.
• Any door is open.
Illuminated Exit
The interior lamps and some exterior lamps
illuminate when all doors are closed and you
switch the ignition off.
The lamps turn off if all the doors remain
closed and:
• More than 25 seconds have elapsed.
• You press the push button ignition
switch.
Battery Saver
If you leave the courtesy lamps, interior
lamps or headlamps on, the battery saver
shuts them off 10 minutes after you switch
the ignition off.
Battery Saver for Intelligent Access Keys
If you leave the ignition switched on, it shuts
off when it detects a certain amount of
battery drain, or after 30 minutes.
Opening the Luggage Compartment
From Inside Your Vehicle
E138633
With the transmission in park (P),
press the button on the instrument
panel.
With the Remote Control
E306276
Press twice within three seconds
to open the luggage compartment.From Outside Your Vehicle
E291416E291416
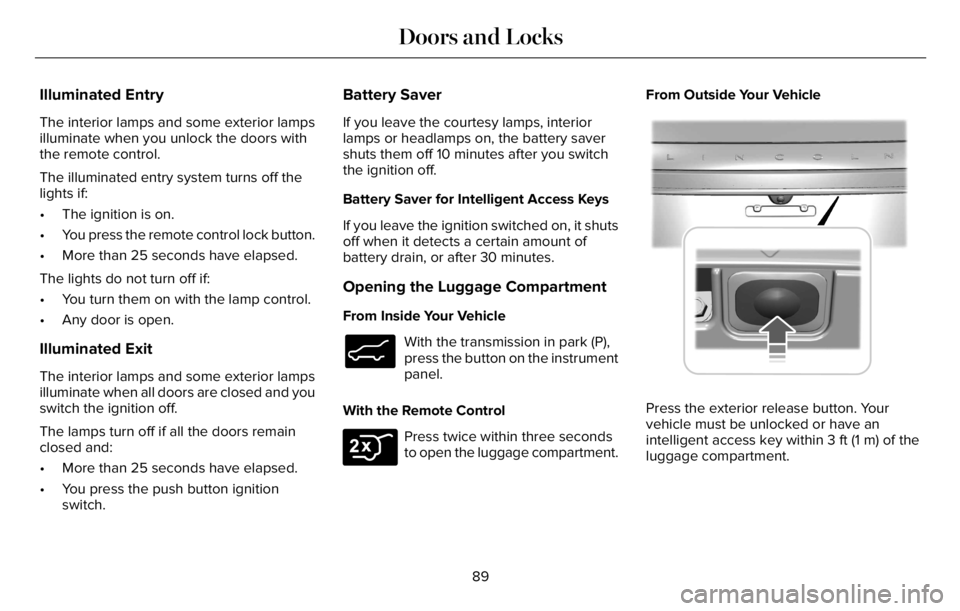
Press the exterior release button. Your
vehicle must be unlocked or have an
intelligent access key within 3 ft (1 m) of the
luggage compartment.
89
Doors and Locks
Page 93 of 681
Closing the Luggage Compartment
From Inside Your Vehicle
E138633
Press the button on the instrument
panel to close the luggage
compartment.
With the Remote Control
E306276
Press twice within three seconds
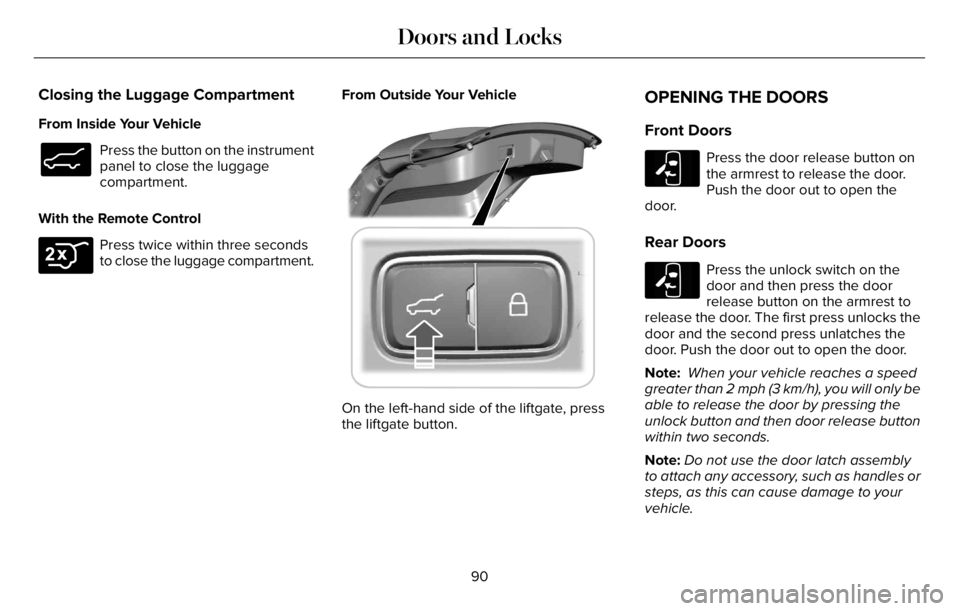
to close the luggage compartment.From Outside Your Vehicle
E29559919E295295959199591995919
On the left-hand side of the liftgate, press
the liftgate button.
OPENING THE DOORS
Front Doors
E232417Press the door release button on
the armrest to release the door.
Push the door out to open the
door.
Rear Doors
E232417Press the unlock switch on the
door and then press the door
release button on the armrest to
release the door. The first press unlocks the
door and the second press unlatches the
door. Push the door out to open the door.
Note: When your vehicle reaches a speed
greater than 2 mph (3 km/h), you will only be
able to release the door by pressing the
unlock button and then door release button
within two seconds.
Note:Do not use the door latch assembly
to attach any accessory, such as handles or
steps, as this can cause damage to your
vehicle.
90
Doors and Locks
Page 98 of 681
Note:Make sure the area behind your
vehicle is free from obstruction and that
there is enough room for you to operate the
liftgate. Make sure the area behind your
vehicle is free from obstruction and that
there is enough room for you to operate the
liftgate.
Note:Be careful when opening or closing
the liftgate in a garage or other enclosed
area to avoid damaging the liftgate.
Note: Do not leave the liftgate open when
you are driving. This could damage the
liftgate and its components.
Opening from the Instrument Panel
E138633
With the transmission in park (P),
press the button on the instrument
panel.
Opening with the Remote Control
E267940
Press the button twice within three
seconds.Opening with the Outside Control Button
1. Unlock the liftgate with the remote
control or power door unlock control. If
a passive key is within 3 ft (1 m) of the
liftgate, the liftgate unlocks when you
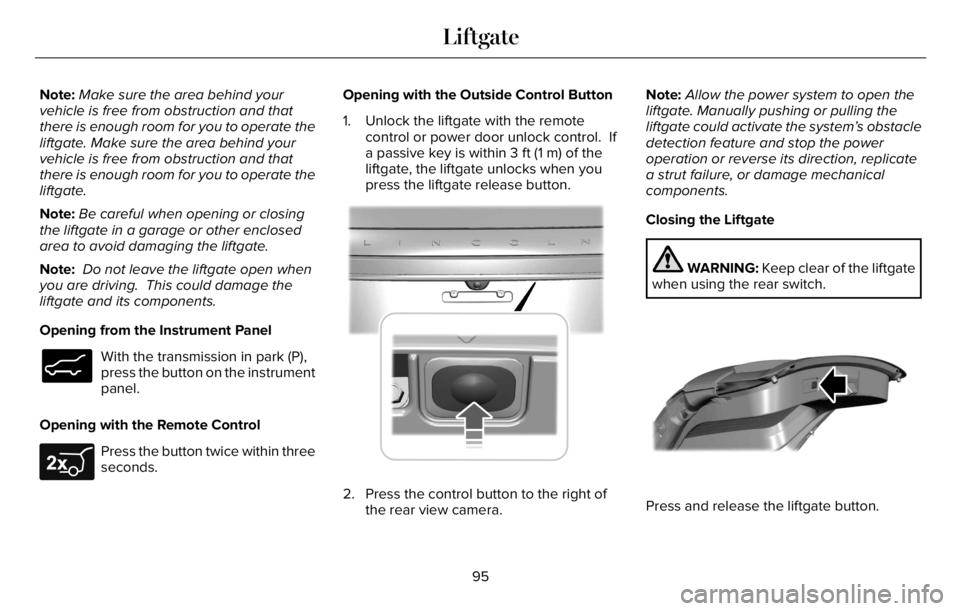
press the liftgate release button.
E291416E291416
2. Press the control button to the right of
the rear view camera.Note:Allow the power system to open the
liftgate. Manually pushing or pulling the
liftgate could activate the system’s obstacle
detection feature and stop the power
operation or reverse its direction, replicate
a strut failure, or damage mechanical
components.
Closing the Liftgate
WARNING: Keep clear of the liftgate
when using the rear switch.
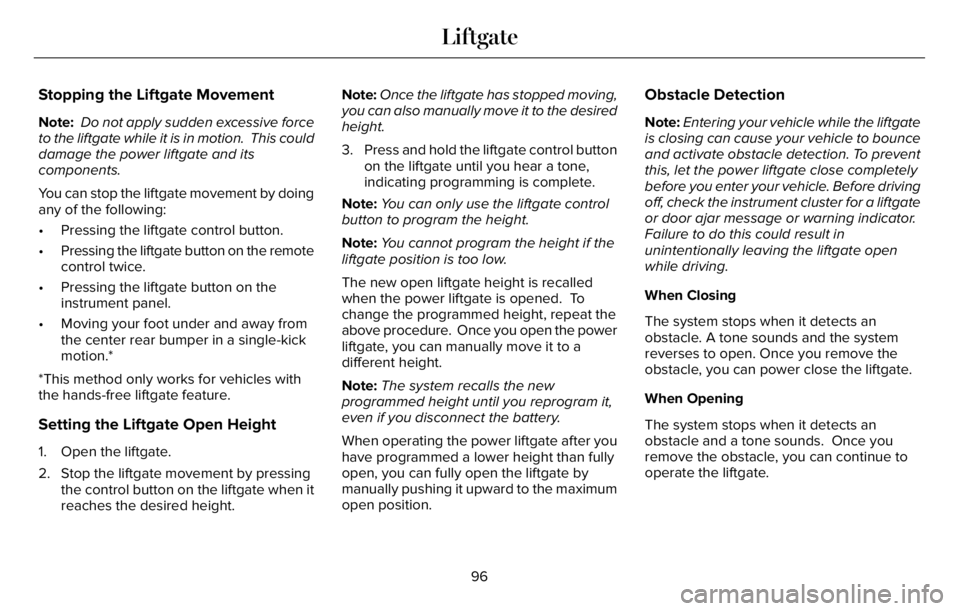
E291417
Press and release the liftgate button.
95
Liftgate
Page 99 of 681
Stopping the Liftgate Movement
Note: Do not apply sudden excessive force
to the liftgate while it is in motion. This could
damage the power liftgate and its
components.
You can stop the liftgate movement by doing
any of the following:
• Pressing the liftgate control button.
• Pressing the liftgate button on the remote
control twice.
• Pressing the liftgate button on the
instrument panel.
• Moving your foot under and away from
the center rear bumper in a single-kick
motion.*
*This method only works for vehicles with
the hands-free liftgate feature.
Setting the Liftgate Open Height
1. Open the liftgate.
2. Stop the liftgate movement by pressing
the control button on the liftgate when it
reaches the desired height.Note:Once the liftgate has stopped moving,
you can also manually move it to the desired
height.
3. Press and hold the liftgate control button
on the liftgate until you hear a tone,
indicating programming is complete.
Note:You can only use the liftgate control
button to program the height.
Note:You cannot program the height if the
liftgate position is too low.
The new open liftgate height is recalled
when the power liftgate is opened. To
change the programmed height, repeat the
above procedure. Once you open the power
liftgate, you can manually move it to a
different height.
Note:The system recalls the new
programmed height until you reprogram it,
even if you disconnect the battery.
When operating the power liftgate after you
have programmed a lower height than fully
open, you can fully open the liftgate by
manually pushing it upward to the maximum
open position.
Obstacle Detection
Note:Entering your vehicle while the liftgate
is closing can cause your vehicle to bounce
and activate obstacle detection. To prevent
this, let the power liftgate close completely
before you enter your vehicle. Before driving
off, check the instrument cluster for a liftgate
or door ajar message or warning indicator.
Failure to do this could result in
unintentionally leaving the liftgate open
while driving.
When Closing
The system stops when it detects an
obstacle. A tone sounds and the system
reverses to open. Once you remove the
obstacle, you can power close the liftgate.
When Opening
The system stops when it detects an
obstacle and a tone sounds. Once you
remove the obstacle, you can continue to
operate the liftgate.
96
Liftgate
Page 114 of 681
GENERAL INFORMATION
Condensation in the Exterior Front
Lamps and Rear Lamps
Exterior front lamps and rear lamps have
vents to accommodate normal changes in
air pressure.
Condensation can be a natural by-product
of this design. When moist air enters the
lamp assembly through the vents, there is a
possibility that condensation can occur when
the temperature is cold. When normal
condensation occurs, a fine mist can form on
the interior of the lens. The fine mist
eventually clears and exits through the vents
during normal operation.
Clearing time may take as long as 48 hours
under dry weather conditions.
Examples of acceptable condensation are:
• The presence of a fine mist (no streaks,
drip marks or large droplets).
• A fine mist covers less than 50% of the
lens.Examples of unacceptable condensation are:
• A water puddle inside the lamp.
• Streaks, drip marks or large droplets
present on the interior of the lens.
If you see any unacceptable condensation,
have your vehicle checked by an authorized
dealer.
LIGHTING CONTROL
Lighting Control Selections
E281338
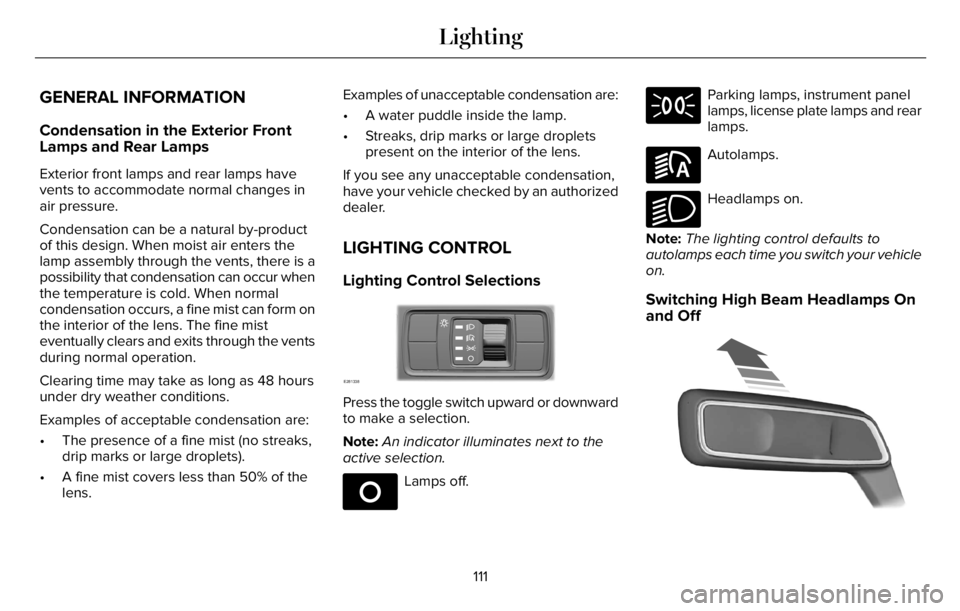
Press the toggle switch upward or downward
to make a selection.
Note:An indicator illuminates next to the
active selection.
E265031
Lamps off.
Parking lamps, instrument panel
lamps, license plate lamps and rear
lamps.
E281240
Autolamps.
E270968
Headlamps on.
Note:The lighting control defaults to
autolamps each time you switch your vehicle
on.
Switching High Beam Headlamps On
and Off
EE2731182
111
Lighting