maintenance reset LINCOLN AVIATOR 2023 Owners Manual
[x] Cancel search | Manufacturer: LINCOLN, Model Year: 2023, Model line: AVIATOR, Model: LINCOLN AVIATOR 2023Pages: 681, PDF Size: 9.33 MB
Page 10 of 681

Driving Hints
Reduced Engine Performance ..................361
Cold Weather Precautions .........................361
Breaking-In .....................................................361
Driving Economically ...................................361
Driving Through Shallow Water ..............362
Floor Mats .....................................................362
Roadside Emergencies
Roadside Assistance ..................................364
Hazard Flashers ..........................................365
Fuel Shutoff ..................................................365
Jump Starting the Vehicle .........................366
Collision, Damage or Fire Event ..............368
Post-Crash Alert System ............................370
Transporting the Vehicle ...........................370
Crash and Breakdown
Information
Post Impact Braking ....................................372
Customer Assistance
Getting the Services You Need ...............373In California (U.S. Only) ..............................374
The Better Business Bureau (BBB) Auto
Line Program (U.S. Only) .......................375
Utilizing the Mediation/Arbitration Program
(Canada Only) ..........................................376
Getting Assistance Outside the U.S. and
Canada .......................................................377
Ordering Additional Owner's Literature
......................................................................3 7 9
Reporting Safety Defects (U.S. Only) ......380
Reporting Safety Defects (Canada Only)
......................................................................380
Fuses
Fuse Specification Chart ...........................382
Changing a Fuse .........................................395
Maintenance
General Information ....................................398
Opening and Closing the Hood ..............398
Under Hood Overview ..............................400
Engine Oil Dipstick ......................................401
Engine Oil Check .........................................401
Oil Change Indicator Reset ......................402Changing the Engine Air Filter ................402
Engine Coolant Check ...............................404
Automatic Transmission Fluid Check ......408
Brake Fluid Check ......................................409
Power Steering Fluid Check ....................409
Changing the 12V Battery - Gasoline ......410
Changing the 12V Battery - Plug-In Hybrid
Electric Vehicle (PHEV) ...........................413
Adjusting the Headlamps ..........................416
Washer Fluid Check .....................................417
Fuel Filter ........................................................418
Checking the Wiper Blades .......................418
Changing the Front Wiper Blades -
Vehicles Without: Heated Wiper Blades
.......................................................................418
Changing the Front Wiper Blades -
Vehicles With: Heated Wiper Blades
.......................................................................419
Changing the Rear Wiper Blades ............419
Changing a Bulb ..........................................420
Vehicle Care
General Information .....................................421
Cleaning Products .......................................421
7
Table of Contents
Page 21 of 681

WARNING: Do not connect wireless
plug-in devices to the data link connector.
Unauthorized third parties could gain
access to vehicle data and impair the
performance of safety related systems.
Only allow repair facilities that follow our
service and repair instructions to connect
their equipment to the data link connector.
We respect your privacy and are committed
to protecting it. The information contained
in this publication was correct at the time of
release, but as technology rapidly changes,
we recommend that you visit the local Ford
website for the latest information.
Your vehicle has electronic control units that
have data recording functionality and the
ability to permanently or temporarily store
data. This data could include information on
the condition and status of your vehicle,
vehicle maintenance requirements, events
and malfunctions. The types of data that can
be recorded are described in this section.
Some of the data recorded is stored in event
logs or error logs.Note:Error logs are reset following a service
or repair.
Note:We may provide information in
response to requests from law enforcement,
other government authorities and third
parties acting with lawful authority or through
a legal process. Such information could be
used by them in legal proceedings.
Data recorded includes, for example:
• Operating states of system components,
for example fuel level, tire pressure and
battery charge level.
• Vehicle and component status, for
example wheel speed, deceleration,
lateral acceleration and seatbelt status.
• Events or errors in essential systems, for
example headlamps and brakes.
• System responses to driving situations,
for example airbag deployment and
stability control.
• Environmental conditions, for example
temperature.Some of this data, when used in combination
with other information, for example an
accident report, damage to a vehicle or
eyewitness statements, could be associated
with a specific person.
Services That We Provide
If you use our services, we collect and use
data, for example account information,
vehicle location and driving characteristics,
that could identify you. We transmit this data
through a dedicated, protected connection.
We only collect and use data to enable your
use of our services to which you have
subscribed, with your consent or where
permitted by law. For additional information,
see the terms and conditions of the services
to which you have subscribed.
For additional information about our privacy
policy, refer to the local Ford website.
18
Data Privacy
Page 405 of 681

Do not use supplemental engine oil
additives. They could cause engine damage
that the vehicle warranty may not cover.
1. Clean the area surrounding the engine
oil filler cap before you remove it.
2. Remove the engine oil filler cap.
3. Add engine oil that meets our
specifications. See Capacities and
Specifications (page 465).
4. Reinstall the engine oil filler cap. Turn it
clockwise until you feel a strong
resistance.
Note: Do not add oil further than the
maximum mark. Oil levels above the
maximum mark may cause engine damage.
Note:Soak up any spillage with an
absorbent cloth immediately.
OIL CHANGE INDICATOR RESET
Use the information display controls on the
steering wheel to reset the oil change
indicator.From the main menu scroll to:
Action and description Message
Press the right arrow button,
then from this menu scroll to
the following message. Settings
Press the right arrow button,
then from this menu scroll to
the following message. Vehicle
Press the right arrow button,
then from this menu scroll to
the following message. Oil Life
Press and hold the OK button
until the instrument cluster
displays the following
message. Hold OK to
Reset
Reset Successful
When the oil change indicator
resets the instrument cluster
displays 100%.
Remaining Life
{00}%
Action and description Message
If the instrument cluster
displays one of the following
messages, repeat the
process.
Not Reset
Reset Cancelled
CHANGING THE ENGINE AIR
FILTER
WARNING: To reduce the risk of
vehicle damage and personal burn injuries,
do not start your engine with the air
cleaner removed and do not remove it
while the engine is running.
When changing the engine air filter, do not
allow debris or foreign material to enter the
air induction system. Engine components
are susceptible to damage not covered by
the vehicle Warranty.
402
Maintenance
Page 409 of 681
Recycled Coolant
We do not recommend the use of recycled
coolant as an approved recycling process is
not yet available.
Note:Dispose of used coolant in the
appropriate manner.
Follow your community's regulations and
standards for recycling and disposing of
automotive fluids.
Severe Climates
If you drive in extremely cold climates:
• It may be necessary to increase the
coolant concentration above 50%.
• A coolant concentration of 60% provides
improved freeze point protection.
• Coolant concentrations above 60%
decrease the overheat protection
characteristics of the coolant and may
cause engine damage.If you drive in extremely hot climates:
• You can decrease the coolant
concentration to 40%.
• A coolant concentration of 40% provides
improved overheat protection.
• Coolant concentrations below 40%
decrease the overheat and corrosion
protection characteristics of the coolant
and may cause engine damage.
Vehicles driven year-round in non-extreme
climates should use prediluted coolant for
optimum cooling system and engine
protection.
Coolant Change
At specific mileage intervals, as listed in the
scheduled maintenance information, the
coolant should be changed. Add prediluted
coolant approved to the correct specification.
See Capacities and Specifications (page
460).
Fail-Safe Cooling
Fail-safe cooling allows you to temporarily
drive your vehicle before any incremental
component damage occurs. The fail-safe
distance depends on ambient temperature,
vehicle load and terrain.
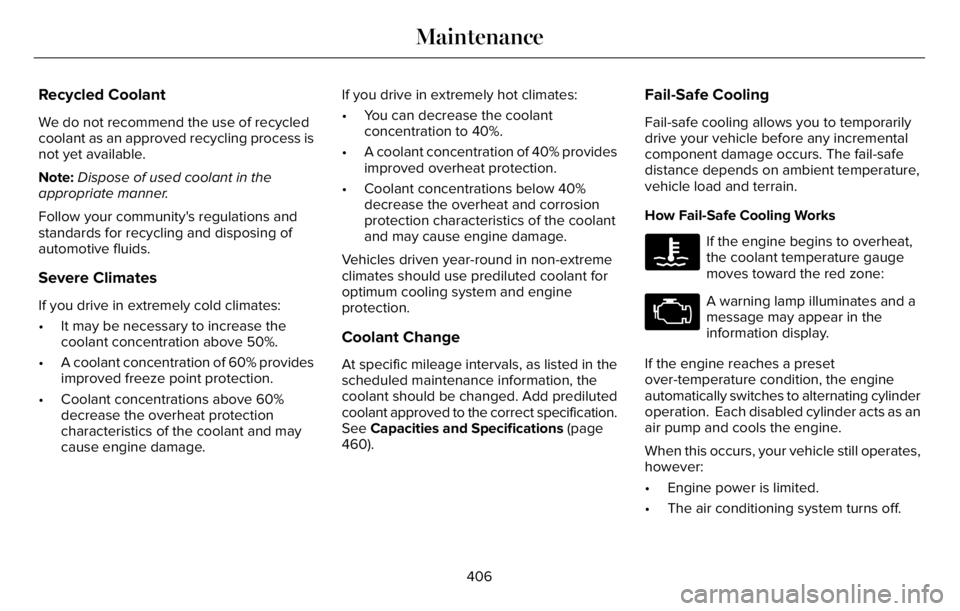
How Fail-Safe Cooling Works
If the engine begins to overheat,
the coolant temperature gauge
moves toward the red zone:
A warning lamp illuminates and a
message may appear in the
information display.
If the engine reaches a preset
over-temperature condition, the engine
automatically switches to alternating cylinder
operation. Each disabled cylinder acts as an
air pump and cools the engine.
When this occurs, your vehicle still operates,
however:
• Engine power is limited.
• The air conditioning system turns off.
406
Maintenance
Page 414 of 681

For longer, trouble-free operation, keep the
top of the battery clean and dry and the
battery cables tightly fastened to the battery
terminals. If any corrosion is present on the
battery or terminals, remove the cables from
the terminals and clean with a wire brush.
You can neutralize the acid with a solution
of baking soda and water.
We recommend that you disconnect the
negative battery cable terminal from the
battery if you plan to store your vehicle for
an extended period.
Note:If you only disconnect the negative
battery cable terminal, make sure it is
isolated or placed away from the battery
terminal to avoid unintended connection or
arcing.
If you replace the battery make sure it
matches the electrical requirements of your
vehicle.If you disconnect or replace the battery and
your vehicle has an automatic transmission,
it must relearn its adaptive strategy. Because
of this, the transmission may shift firmly when
first driven. This is normal operation while
the transmission fully updates its operation
to optimum shift feel.
Battery Sensor Reset
When you install a new battery, reset the
battery sensor by doing the following:
1. Switch the ignition on, and leave the
engine off.
Note:Complete Steps 2 and 3 within 10
seconds.
2. Flash the high beam headlamps five
times, ending with the high beams off.
3. Press and release the brake pedal three
times.
The battery warning lamp flashes three times
to confirm that the reset is successful.
Battery Management System (If Equipped)
The system monitors battery conditions and
takes actions to extend battery life. If
excessive battery drain is detected, the
system temporarily disables some electrical
systems to protect the battery.
Systems included are:
• Heated rear window.
• Heated seats.
• Climate control.
• Heated steering wheel.
• Audio unit.
• Navigation system.
A message may appear in the information
display to alert you that battery protection
actions are active. This message is only for
notification that an action is taking place, and
not intended to indicate an electrical problem
or that the battery requires replacement.
411
Maintenance
Page 415 of 681

After battery replacement, or in some cases
after charging the battery with an external
charger, the battery management system
requires eight hours of vehicle sleep time to
relearn the battery state of charge. During
this time, your vehicle must remain fully
locked with the ignition switched off.
Note:Prior to relearning the battery state of
charge, the battery management system
may temporarily disable some electrical
systems.
Electrical Accessory Installation
To make sure the battery management
system works correctly, do not connect an
electrical device ground connection directly
to the battery negative post. This can cause
inaccurate measurements of the battery
condition and potential incorrect system
operation.
Note:If you add electrical accessories or
components to the vehicle, it may adversely
affect battery performance and durability.
This may also affect the performance of
other electrical systems in the vehicle.Remove and Reinstall the Battery
Install a battery approved for use by our
specifications. See Capacities and
Specifications (page 460).
To disconnect or remove the battery, do the
following:
1. Apply the parking brake and switch the
ignition off.
2. Switch all electrical equipment off, for
example lights and radio.
3. Wait a minimum of two minutes before
disconnecting the battery.
Note:The engine management system has
a power hold function and remains powered
for a period of time after you switch the
ignition off. This is to allow the system to
store diagnostic and adaptive tables.
Disconnecting the battery without waiting
can cause damage not covered by the
vehicle warranty.
4. Disconnect the negative battery cable
terminal.
5. Disconnect the positive battery cable
terminal.6. Remove the battery securing clamp.
7. Remove the battery.
8. To install, reverse the removal procedure.
Note:Before reconnecting the battery, make
sure the ignition remains switched off.
Note:Make sure to fully tighten the battery
cables.
If you disconnect or replace the vehicle
battery, you must reset the following
features:
• Window bounce-back. See Power
Windows (page 121).
• Clock Settings.
• Pre-set radio stations.
Battery Disposal
E107998
Make sure that you dispose of old
batteries in an environmentally
friendly way. Seek advice from
your local authority about recycling old
batteries.
412
Maintenance
Page 417 of 681

39E371794
Your vehicle has a maintenance-free battery.
It does not require additional water during
service.If the vehicle battery has a cover and vent
hose, make sure you correctly install it after
cleaning or replacing the battery.
For longer, trouble-free operation, keep the
top of the battery clean and dry and the
battery cables tightly fastened to the battery
terminals. If any corrosion is present on the
battery or terminals, remove the cables from
the terminals and clean with a wire brush.
You can neutralize the acid with a solution
of baking soda and water.
We recommend that you disconnect the
negative battery cable terminal from the
battery if you plan to store your vehicle for
an extended period.
Note:If you only disconnect the negative
battery cable terminal, make sure it is
isolated or placed away from the battery
terminal to avoid unintended connection or
arcing.
If you replace the battery make sure it
matches the electrical requirements of your
vehicle.If you disconnect or replace the battery and
your vehicle has an automatic transmission,
it must relearn its adaptive strategy. Because
of this, the transmission may shift firmly when
first driven. This is normal operation while
the transmission fully updates its operation
to optimum shift feel.
Battery Sensor Reset
When you install a new battery, reset the
battery sensor by doing the following:
1. Switch the ignition on, and leave the
engine off.
Note:Complete Steps 2 and 3 within 10
seconds.
2. Flash the high beam headlamps five
times, ending with the high beams off.
3. Press and release the brake pedal three
times.
The battery warning lamp flashes three times
to confirm that the reset is successful.
414
Maintenance
Page 419 of 681

6. Remove the battery securing clamp.
7. Remove the battery.
8. To install, reverse the removal procedure.
Note:Before reconnecting the battery, make
sure the ignition remains switched off.
Note:Make sure to fully tighten the battery
cables.
If you disconnect or replace the vehicle
battery, you must reset the following
features:
• Window bounce-back. See Power
Windows (page 121).
• Clock Settings.
• Pre-set radio stations.
Battery Disposal
E107998
Make sure that you dispose of old
batteries in an environmentally
friendly way. Seek advice from
your local authority about recycling old
batteries.
ADJUSTING THE HEADLAMPS
Vertical Aim Adjustment
If your vehicle has been involved in a crash,
have the aim of the headlamp beam checked
by an authorized dealer.
E142592
8 ft (2.4 m). A
Ground to the center of the
headlamp high beam bulb. B
25 ft (7.6 m). C
Horizontal reference line. DVertical Aim Adjustment Procedure
1. Park your vehicle on level ground
approximately 25 ft (7.6 m) from a wall or
screen.
2. Measure the distance from the ground
to the center of the headlamp high beam
bulb and mark an 8 ft (2.4 m) long
horizontal reference line on the wall or
screen at this height.
Note:There may be an identifying mark on
the lens to help you locate the center line of
the headlamp high beam bulb.
Note:To see a clearer light pattern for
adjusting, you may want to block the light
from one headlamp while adjusting the
other.
3. Switch on the low beam headlamps and
open the hood.
416
Maintenance
Page 447 of 681

Tire Rotation
WARNING: If the tire label shows
different tire pressures for the front
and rear tires and the vehicle has a
tire pressure monitoring system, then
you need to update the settings for
the system sensors. Always perform
the system reset procedure after tire
rotation. If you do not reset the system,
it may not provide a low tire pressure
warning when necessary.
Note:If your tires show uneven wear,
ask an authorized dealer to check for
and correct any wheel misalignment,
tire imbalance or mechanical problem
involved before tire rotation.Note:Your vehicle may be equipped
with a dissimilar spare wheel and tire
assembly. A dissimilar spare wheel and
tire assembly is defined as a spare
wheel and tire assembly that is different
in brand, size or appearance from the
road tires and wheels. If you have a
dissimilar spare wheel and tire
assembly, it is intended for temporary
use only and should not be used in a
tire rotation.
Note:After having your tires rotated,
inflation pressure must be checked and
adjusted to the vehicle requirements.
Rotating your tires at the recommended
interval will help your tires wear more
evenly, providing better tire performance
and longer tire life. Sometimes irregular
tire wear can be corrected by rotating
the tires. See Scheduled Maintenance
(page 579).
Tire Rotation Diagram
Rear-wheel drive and all-wheel drive
vehicles, front tires at left of diagram.
E142548
USING SUMMER TIRES
Summer tires provide superior performance
on wet and dry roads. Summer tires do not
have the Mud and Snow (M+S or M/S) tire
traction rating on the tire side wall. Since
summer tires do not have the same traction
performance as All-season or Snow tires, we
do not recommend using summer tires when
temperatures drop to approximately 45°F
(7°C) or below (depending on tire wear and
environmental conditions) or in snow and ice
444
Wheels and Tires
Page 583 of 681

of the message appearing. Make su")
When the oil change message appears in
the information display, it is time for an oil
change. Make sure you perform the oil
change within two weeks or 500 mi (800 km)
of the message appearing. Make sure you
reset the Intelligent Oil-Life Monitor after
each oil change. See Oil Change Indicator
Reset (page 402).
If your information display resets prematurely
or becomes inoperative, you should perform
the oil change interval at six months or
5,000 mi (8,000 km) from your last oil
change. Never exceed one year or 10,000 mi
(16,000 km) between oil change intervals,
Your vehicle is very sophisticated and built
with multiple, complex performance systems.
Every manufacturer develops these systems
using different specifications and
performance features. That is why it is
important to rely upon your dealership to
properly diagnose and repair your vehicle.We have recommended maintenance
intervals for various parts and component
systems based upon engineering testing.
We rely upon this testing to determine the
most appropriate mileage for replacement
of oils and fluids to protect your vehicle at
the lowest overall cost to you and
recommends against maintenance schedules
that deviate from the scheduled maintenance
information.
We strongly recommend the use of only our
genuine manufactured or our authorized
re-manufactured replacement parts
engineered for your vehicle.
Additives and Chemicals
This owner's manual and our Workshop
Manual list the recommended additives and
chemicals for your vehicle. We do not
recommend using chemicals or additives not
approved by us as part of your vehicle’s
normal maintenance. Please consult your
warranty information.Oils, Fluids and Flushing
In many cases, fluid discoloration is a normal
operating characteristic and, by itself, does
not necessarily indicate a concern or that the
fluid needs to be changed. However, a
qualified expert, such as the factory-trained
technicians at your dealership, should
inspect discolored fluids that also show signs
of overheating or foreign material
contamination immediately.
Make sure to change your vehicle’s oils and
fluids at the specified intervals or in
conjunction with a repair. Flushing is a viable
way to change fluid for many vehicle
sub-systems during scheduled maintenance.
It is critical that systems are flushed only with
new fluid that is the same as that required
to fill and operate the system or using our
approved flushing chemical.
Owner Checks and Services
Make sure you perform the following basic
maintenance checks and inspections every
month or at six-month intervals.
580
Scheduled Maintenance