display LINCOLN CORSAIR 2020 User Guide
[x] Cancel search | Manufacturer: LINCOLN, Model Year: 2020, Model line: CORSAIR, Model: LINCOLN CORSAIR 2020Pages: 591, PDF Size: 6 MB
Page 72 of 591
How does a valet drive my car if I only use
my phone as a key?
Have the valet use the temporary valet
passcode that you created when using
valet mode. See Using the Valet Mode
(page 67).
How do I delete a phone as a key
programmed to my vehicle? If the phone as a key belongs to your
account, you can delete it from your
phone. If not, reset phone as a key from
the touchscreen display menu.
I uninstalled my Lincoln Way app and
reinstalled it. Why am I not able to get a
new phone as a key? Remove the phone as a key that was
previously associated with your phone
or reset phone as a key from your
vehicle, and then request a new phone
as a key. Why can I not remotely start the vehicle
with my phone as a key?
Using the Lincoln Way app, verify your
phone as a key to be active and enabled
via Bluetooth connection on at least one
phone. If Bluetooth has connected but
phone as a key is not active, activate
your phone as a key where prompted
from the Lincoln Way app.
See Using
the Backup Starting Passcode (page
68).
69
Corsair (CTF) Canada/United States of America, enUSA, Edition date: 201906, Second-Printing Phone as a Key
Page 73 of 591
PRINCIPLE OF OPERATION
MyKey allows you to program keys with
restricted driving modes to promote good
driving habits. You can program the
restrictions to all keys except one. Any keys
that you did not program are administrator
keys or admin keys.
You can use admin keys to:
•
Create a MyKey with certain vehicle
restrictions.
• Program certain MyKey settings.
• Clear all MyKey restrictions.
After you program a MyKey, you can view
the following information through the
information display:
• The total number of admin keys and
MyKeys for your vehicle.
• The total distance a MyKey driver
traveled with your vehicle.
Note: Every MyKey receives the same
restrictions and settings. You cannot
program them individually. Note:
For vehicles equipped with a
push-button start switch: When both a MyKey
and an admin key are present when you
start your vehicle, the system recognizes the
admin key only.
Standard Settings
Not every vehicle includes the features listed
below. If your vehicle has this equipment,
then you cannot change the following
settings when using a MyKey:
• Seatbelt reminder or Belt-Minder™. MyKey
mutes the audio system until drivers, and
in some instances, passengers, fasten
their seatbelts. Note: If your vehicle
includes an AM/FM radio or a very basic
audio system, then the radio may not
mute.
• Earlier low-fuel warning. The low-fuel
warning activates earlier for MyKey
drivers, giving them more time to refuel. •
Certain driver alerts, stability systems or
parking aids turn on automatically when
you use the MyKey system. For example,
Blind Spot Information System (BLIS),
cross traffic alert, lane departure warning
or forward collision warning. Note: MyKey
drivers may be able to turn the lane
departure warning feature off, but this
feature turns back on automatically with
every new key cycle.
• Restricted touchscreen operation in some
markets. For example, MyKey may
prevent manual navigation destination
input while the vehicle is in any gear
other than park (P) or when the vehicle
reaches a certain rate of speed.
• Satellite radio adult content restrictions,
if this feature is available in your market.
Optional Settings
You can configure certain vehicle feature
settings when you first create a MyKey. You
can also change the settings afterward with
an admin key.
70
Corsair (CTF) Canada/United States of America, enUSA, Edition date: 201906, Second-Printing MyKey™
Page 74 of 591
Note:
Not every feature applies to every
vehicle in every market. When they are
available for your vehicle, then they appear
in your information display, providing choices
to switch them on or off, or to select a more
specific setting.
• Various vehicle speed limits so the
MyKey driver cannot exceed certain
speeds. The information display shows
warnings followed by an audible tone
when the MyKey driver reaches the set
speed. You cannot override the set
speed by fully depressing the accelerator
pedal. WARNING: Do not set MyKey
maximum speed limit to a limit that will
prevent the driver from maintaining a safe
speed considering posted speed limits and
prevailing road conditions. The driver is
always responsible to drive in accordance
with local laws and prevailing conditions.
Failure to do so could result in accident or
injury. •
Various vehicle speed reminders so
MyKey drivers know when their vehicle
speed approaches the limits. Warnings
appear in your information display and a
tone sounds when the MyKey drivers
exceed the set vehicle speed.
• The audio system's maximum volume
limits to 45% so MyKey drivers can
concentrate on the road. A message
appears in the information display when
MyKey drivers attempt to exceed the
limited volume. MyKey also disables the
automatic volume control.
Note: If your
vehicle includes an AM/FM radio or a
very basic audio system, then the radio
may not limit.
• Always on setting. This setting forces
certain features to remain on and active
for MyKey drivers. For example, E911 or
emergency assistance and the do not
disturb features stay on even if a MyKey
driver uses the feature's control to switch
it off. When selected, you will not be able
to turn off Advance Trac or traction
control (if your vehicle has this feature). CREATING A MYKEY
Use the touchscreen to create a MyKey:
1. Insert the key you want to program into
the ignition. If your vehicle has a
push-button start, place the remote
control into the backup slot. See Starting
a Gasoline Engine
(page 184).
2. Switch the ignition on.
3. Access the main menu in the touchscreen and then scroll through the
menus to change the settings of your
MyKey. From the MyKey menu select the
option Create MyKey.
See Settings
(page 478).
4. When prompted, hold the OK button until
you see a message informing you to label
this key as a MyKey. The programmed
restrictions apply when you key off, open
and close the driver door and restart your
vehicle with the programmed key or
remote control.
You have successfully created a MyKey.
Make sure you label it so you can distinguish
it from the admin keys.
71
Corsair (CTF) Canada/United States of America, enUSA, Edition date: 201906, Second-Printing MyKey™
Page 75 of 591
You can also program configurable settings
for the key(s). See Programming and
Changing Configurable Settings.
Programming and Changing
Configurable Settings
Use the touchscreen to access your
configurable MyKey settings.
1. Switch the ignition on using an admin key
or remote control you want to program.
2. Access the main menu in the information
display and then scroll through the
menus to change the settings of your
MyKey.
See Settings (page 478).
3. Follow the instructions in the touchscreen. The programmed
restrictions apply when you switch the
vehicle off, open and close the driver
door and restart your vehicle with the
programmed key or remote control. Note:
You can clear or change your MyKey
settings at any time during the same key
cycle as you created the MyKey. Once you
have switched the vehicle off, however, you
will need an admin key to change or clear
your MyKey settings. When you make any
changes to your MyKey settings, you change
the settings for every MyKey. You cannot
make individual changes to apply to certain
MyKeys.
CLEARING ALL MYKEYS
When you clear your MyKeys, you remove
all restrictions and return all MyKeys to their
original admin key status at once. To clear
all MyKeys of all MyKey settings, use the
touchscreen.
1. Switch the ignition on using an admin key.
2. Access the main menu in the touchscreen and then scroll through the
menus to begin clearing your MyKey
programming.
See Settings (page 478).
3. Follow the instructions in the display. 4. A confirmation message appears in the
display after you finish clearing your
MyKeys.
Note: When you clear your MyKeys, you
remove all restrictions and return all MyKeys
to their original admin key status. You cannot
remove the MyKey restrictions individually.
CHECKING MYKEY SYSTEM
STATUS
You can find information about your
programmed MyKeys by using the
touchscreen.
See Settings (page 478).
MyKey Distance
Tracks the distance when drivers use a
MyKey. The only way to delete the
accumulated distance is by using an admin
key to clear all MyKeys. If the distance does
not accumulate as expected, then the
intended user is not using the MyKey, or an
admin key user recently cleared and then
recreated a MyKey.
72
Corsair (CTF) Canada/United States of America, enUSA, Edition date: 201906, Second-Printing MyKey™
Page 84 of 591
The anti-scan feature turns off after any of
the following occur:
•
One minute of keypad inactivity passes.
• You press the unlock button on the
remote control.
• You switch the ignition on.
• You unlock the vehicle using intelligent
access.
Unlocking and Locking the Doors
To Unlock the Driver Door
Enter the factory-set five-digit code or your
personal code. You must press each number
within five seconds of each other. The
interior lamps illuminates.
Note: All doors unlock if the two-stage
unlocking feature is disabled. See Locking
and Unlocking (page 75).
To Unlock All Doors
Enter the factory-set code or your personal
code, then press
3•4 control within five
seconds. To Lock All Doors
Press and hold
7•8 and 9•0 at the same time
with the driver door closed. You do not need
to enter the keypad code first.
Displaying the Factory-Set Code
Note: You need to have two programmed
intelligent access keys for this procedure.
To display the factory-set code in the
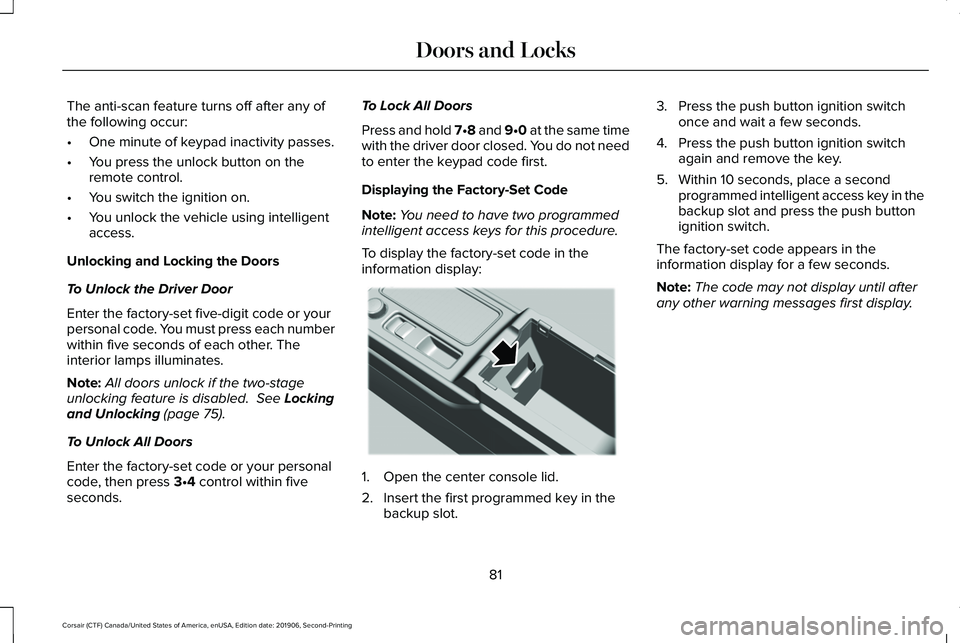
information display: 1. Open the center console lid.
2. Insert the first programmed key in the
backup slot. 3. Press the push button ignition switch
once and wait a few seconds.
4. Press the push button ignition switch again and remove the key.
5. Within 10 seconds, place a second programmed intelligent access key in the
backup slot and press the push button
ignition switch.
The factory-set code appears in the
information display for a few seconds.
Note: The code may not display until after
any other warning messages first display.
81
Corsair (CTF) Canada/United States of America, enUSA, Edition date: 201906, Second-Printing Doors and LocksE306288
Page 90 of 591
PASSIVE ANTI-THEFT SYSTEM
Note:
The system is not compatible with
non-Lincoln aftermarket remote start
systems. Use of these systems may result in
engine starting problems and a loss of
security protection.
Note: Metallic objects, electronic devices or
a second coded key on the same key chain
may result in vehicle starting problems,
especially if they are too close to the key
when starting your vehicle. Prevent these
objects from touching the coded key when
starting your vehicle. Switch the ignition off,
move all objects on the key chain away from
the coded key and restart your vehicle if a
problem occurs
Note: Do not leave a duplicate coded key
in your vehicle. Always take your keys and
lock all doors when leaving your vehicle. SecuriLock®
The system helps prevent the engine from
starting unless you use a coded key
programmed to your vehicle. Using the
wrong key may prevent your vehicle from
starting. A message may appear in the
information display.
If you are unable to start your vehicle with a
coded key, it is not operating correctly. A
message may appear in the information
display.
Automatic Arming
The system arms when you switch the
ignition off.
Automatic Disarming
The system disarms when you switch the
ignition on with a coded key.
Replacement Keys
Note:
Your vehicle comes with two keys. The intelligent access key functions as a
programmed key that operates the driver
door lock and turns on the intelligent access
with push button start system, as well as a
remote control.
If your programmed transmitters are lost or
stolen and you do not have an extra coded
key, you will need to have your vehicle
towed to an authorized dealer to program
new coded keys.
Store a spare intelligent access key away
from your vehicle in a safe place. You can
purchase replacement keys or remote
controls from an authorized dealer.
Programming a Spare Key
Note:
You can program a maximum of four
keys to your vehicle.
You must have two previously programmed
intelligent access keys inside your vehicle
and the new unprogrammed intelligent
access keys readily accessible. Contact an
authorized dealer to have the spare key
programmed if two previously programmed
keys are not available.
87
Corsair (CTF) Canada/United States of America, enUSA, Edition date: 201906, Second-Printing Security
Page 97 of 591
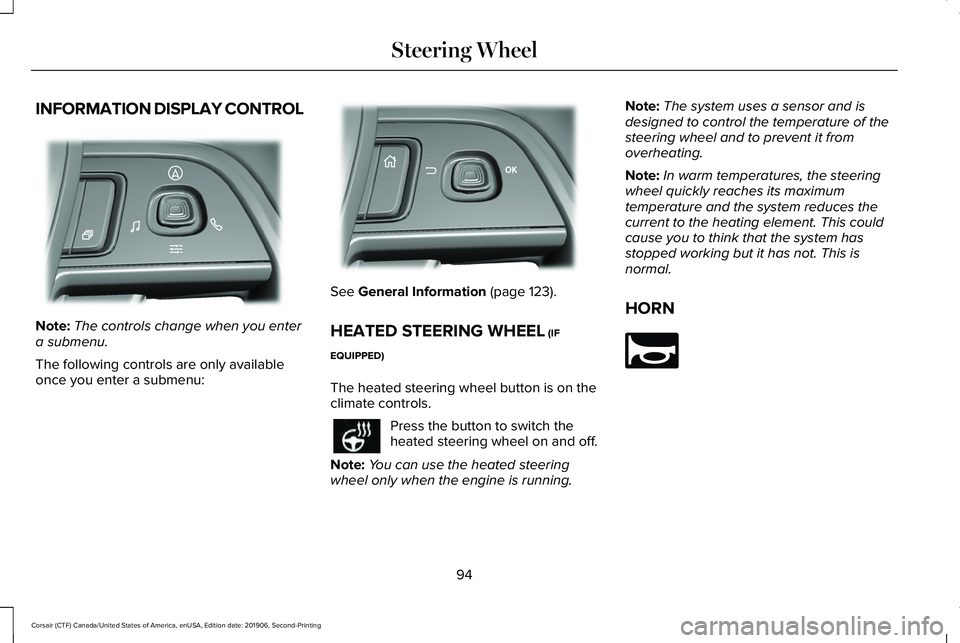
INFORMATION DISPLAY CONTROL
Note:
The controls change when you enter
a submenu.
The following controls are only available
once you enter a submenu: See General Information (page 123).
HEATED STEERING WHEEL
(IF
EQUIPPED)
The heated steering wheel button is on the
climate controls. Press the button to switch the
heated steering wheel on and off.
Note: You can use the heated steering
wheel only when the engine is running. Note:
The system uses a sensor and is
designed to control the temperature of the
steering wheel and to prevent it from
overheating.
Note: In warm temperatures, the steering
wheel quickly reaches its maximum
temperature and the system reduces the
current to the heating element. This could
cause you to think that the system has
stopped working but it has not. This is
normal.
HORN 94
Corsair (CTF) Canada/United States of America, enUSA, Edition date: 201906, Second-Printing Steering WheelE281220 E299701 E270945
Page 103 of 591
HEADLAMP EXIT DELAY (IF EQUIPPED)
After you switch the ignition off, you can
switch the headlamps on by pulling the
direction indicator lever toward you. You will
hear a short tone. The headlamps will switch
off automatically after three minutes with any
door open or 30 seconds after the last door
has been closed. You can cancel this feature
by pulling the direction indicator toward you
again or switching the ignition on.
DAYTIME RUNNING LAMPS -
VEHICLES WITH: CONFIGURABLE
DAYTIME RUNNING LAMPS WARNING:
The daytime running
lamps system does not activate the rear
lamps and may not provide adequate
lighting during low visibility driving
conditions. Make sure you switch the
headlamps on, as appropriate, during all
low visibility conditions. Failure to do so
may result in a crash. Switch the daytime running lamps on or off
using the touchscreen:
1.
Select Settings. See Settings (page
478).
2. Select
Vehicle.
3. Select
Lighting.
The daytime running lamps turn on when:
1. The lamps are on in the information display.
2. You switch the ignition on.
3. The transmission is not in park (P) for vehicles with automatic transmissions or
you release the parking brake for
vehicles with manual transmissions.
4. The lighting control is in the autolamps position.
5. The headlamps are off.
The other lighting control switch positions
do not turn on the daytime running lamps.
If the daytime running lamps are off in the
information display, the lamps stay off in all
switch positions. DAYTIME RUNNING LAMPS -
VEHICLES WITH: DAYTIME
RUNNING LAMPS (DRL) WARNING:
The daytime running
lamps system does not activate the rear
lamps and may not provide adequate
lighting during low visibility driving
conditions. Make sure you switch the
headlamps on, as appropriate, during all
low visibility conditions. Failure to do so
may result in a crash.
The system turns the lamps on in daylight
conditions.
To switch the system on, switch the lighting
control to any position except headlamps.
FRONT FOG LAMPS
(IF EQUIPPED)
Switching the Front Fog Lamps On or
Off
Only switch the front fog lamps on during
reduced visibility.
100
Corsair (CTF) Canada/United States of America, enUSA, Edition date: 201906, Second-Printing Lighting
Page 109 of 591
WHAT IS AUTOMATIC HIGH BEAM
CONTROL
The system turns on high beams if it is dark
enough and no other traffic is present. If it
detects an approaching vehicle
’s headlamps
or tail lamps, or street lighting ahead, the
system turns the high beams off. Low beams
remain on.
A camera sensor, centrally mounted behind
the windshield of your vehicle, continuously
monitors conditions to turn the high beams
on and off.
SWITCHING AUTOMATIC HIGH
BEAM CONTROL ON AND OFF WARNING: Do not use the system in
poor visibility, for example fog, heavy rain,
spray or snow.
1. Press
Settings on the touchscreen.
2. Press
Vehicle.
3. Press
Lighting. Activating the Automatic High Beam
Control Switch the lighting control to the
autolamps position.
See
Autolamps (page 99).
Note: The lighting control defaults to
autolamps each time you switch your vehicle
on.
When active, the high beams turn on if:
• The ambient light level is low enough.
• There is no traffic in front of your vehicle.
• The vehicle speed is greater than
approximately
32 mph (51 km/h).
When active, the high beams turn off if:
• The ambient light level is high enough
that high beams are not required.
• The system detects an approaching
vehicle's headlamps or tail lamps.
• The system detects severe rain, snow or
fog.
• The camera is blocked.
• The vehicle speed falls below
approximately
27 mph (44 km/h). Note:
The deactivation speed is lower on
curves.
Note: High beam reactivation may be
delayed in certain curvy road situations.
Note: The system may not operate properly
if the sensor is blocked. Keep the windshield
free from obstruction or damage.
Note: The system may not operate properly
in cold or inclement conditions. You can
switch on the high beams by overriding the
system.
Note: If the system detects a blockage, for
example bird droppings, bug splatter, snow
or ice, the system goes into low beam mode
until you clear the blockage. A message may
appear in the information display if the
camera is blocked.
Note: Using much larger tires or equipping
vehicle accessories such as snowplows can
modify your vehicle's ride height and
degrade automatic high beam control
performance.
106
Corsair (CTF) Canada/United States of America, enUSA, Edition date: 201906, Second-Printing Automatic High Beam Control
(If Equipped)E281240
Page 112 of 591
Resetting Bounce-Back
WARNING: Bounce-back is off until
you reset the memory. Take care when
closing the windows to avoid personal
injury or damage to your vehicle.
If you have disconnected the battery, you
must reset the bounce-back memory
separately for each window.
1. Lift and hold the switch until the window
is fully closed.
2. Release the switch.
3. Lift and hold the switch again for a few seconds.
4. Release the switch.
5. Lift and hold the switch again for a few seconds.
6. Release the switch.
7. Press and hold the switch until the window is fully open.
8. Lift and hold the switch until the window
is fully closed.
9. Release the switch. 10.
Open the window and then try to close
it using one-touch close.
Note: Repeat the procedure if the window
does not close when you use one-touch.
Accessory Delay
You can use the window controls for several
minutes after switching off the ignition or
until opening either front door.
GLOBAL OPENING AND CLOSING
You can use the remote control to operate
the windows with the ignition off.
Note: You can switch this feature on and off
in the information display or contact an
authorized dealer. See
General Information
(page 123).
Note: To operate this feature, make sure the
accessory delay is not switched on. Opening the Windows
You can open the windows only for a short
time after you unlock your vehicle with the
remote control. After you unlock your vehicle,
press and hold the remote control unlock
button to open the windows. Release the
button once movement starts. Press the lock
or unlock button to stop movement.
Closing the Windows
WARNING:
When closing the
windows, you should verify they are free
of obstructions and make sure that children
and pets are not in the proximity of the
window openings.
To close the windows, press and hold the
remote control lock button. Release the
button once movement starts. Press the lock
or unlock button to stop movement.
109
Corsair (CTF) Canada/United States of America, enUSA, Edition date: 201906, Second-Printing Windows and Mirrors