LINCOLN CORSAIR 2021 Owners Manual
Manufacturer: LINCOLN, Model Year: 2021, Model line: CORSAIR, Model: LINCOLN CORSAIR 2021Pages: 638, PDF Size: 5.7 MB
Page 231 of 638
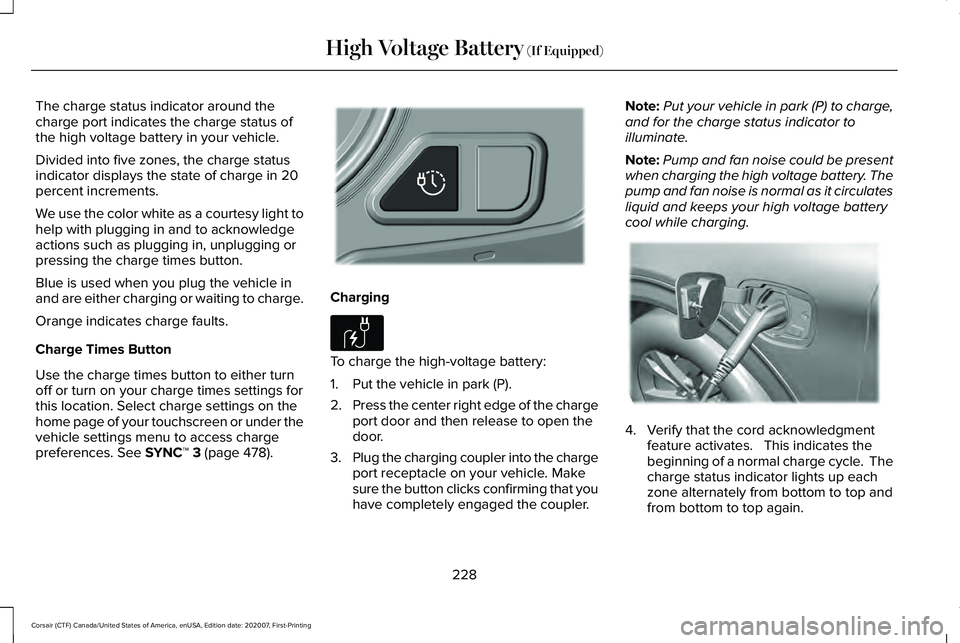
The charge status indicator around the
charge port indicates the charge status of
the high voltage battery in your vehicle.
Divided into five zones, the charge status
indicator displays the state of charge in 20
percent increments.
We use the color white as a courtesy light to
help with plugging in and to acknowledge
actions such as plugging in, unplugging or
pressing the charge times button.
Blue is used when you plug the vehicle in
and are either charging or waiting to charge.
Orange indicates charge faults.
Charge Times Button
Use the charge times button to either turn
off or turn on your charge times settings for
this location. Select charge settings on the
home page of your touchscreen or under the
vehicle settings menu to access charge
preferences. See SYNC™ 3 (page 478).
Charging
To charge the high-voltage battery:
1. Put the vehicle in park (P).
2.
Press the center right edge of the charge
port door and then release to open the
door.
3. Plug the charging coupler into the charge
port receptacle on your vehicle. Make
sure the button clicks confirming that you
have completely engaged the coupler. Note:
Put your vehicle in park (P) to charge,
and for the charge status indicator to
illuminate.
Note: Pump and fan noise could be present
when charging the high voltage battery. The
pump and fan noise is normal as it circulates
liquid and keeps your high voltage battery
cool while charging. 4. Verify that the cord acknowledgment
feature activates. This indicates the
beginning of a normal charge cycle. The
charge status indicator lights up each
zone alternately from bottom to top and
from bottom to top again.
228
Corsair (CTF) Canada/United States of America, enUSA, Edition date: 202007, First-Printing High Voltage Battery
(If Equipped)E301111 E306676 E295257
Page 232 of 638
5. If using a charging station, follow the
instructions on the charge station to
begin the charging process.
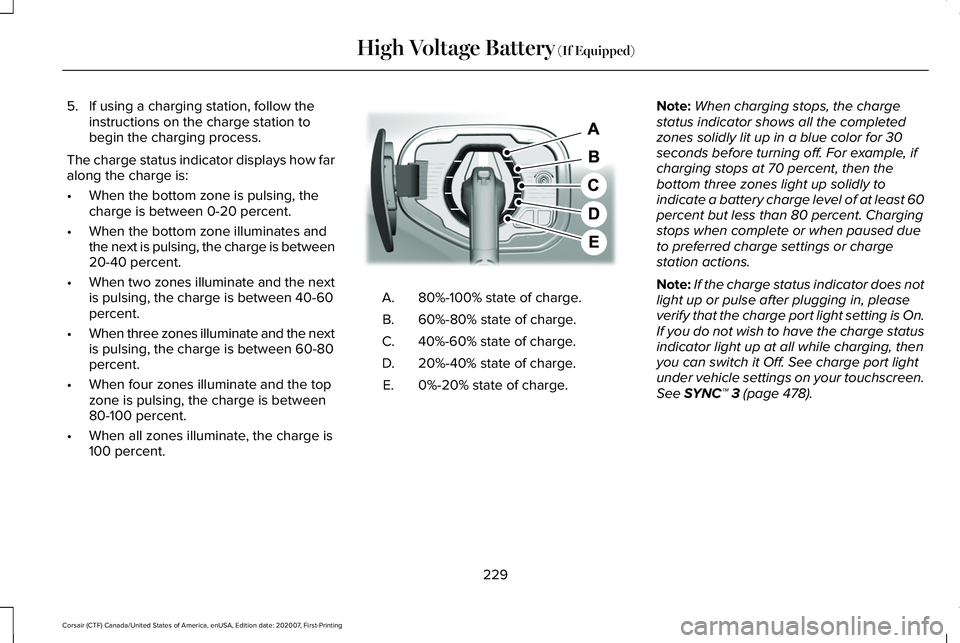
The charge status indicator displays how far
along the charge is:
• When the bottom zone is pulsing, the
charge is between 0-20 percent.
• When the bottom zone illuminates and
the next is pulsing, the charge is between
20-40 percent.
• When two zones illuminate and the next
is pulsing, the charge is between 40-60
percent.
• When three zones illuminate and the next
is pulsing, the charge is between 60-80
percent.
• When four zones illuminate and the top
zone is pulsing, the charge is between
80-100 percent.
• When all zones illuminate, the charge is
100 percent. 80%-100% state of charge.
A.
60%-80% state of charge.
B.
40%-60% state of charge.
C.
20%-40% state of charge.
D.
0%-20% state of charge.
E. Note:
When charging stops, the charge
status indicator shows all the completed
zones solidly lit up in a blue color for 30
seconds before turning off. For example, if
charging stops at 70 percent, then the
bottom three zones light up solidly to
indicate a battery charge level of at least 60
percent but less than 80 percent. Charging
stops when complete or when paused due
to preferred charge settings or charge
station actions.
Note: If the charge status indicator does not
light up or pulse after plugging in, please
verify that the charge port light setting is On.
If you do not wish to have the charge status
indicator light up at all while charging, then
you can switch it Off. See charge port light
under vehicle settings on your touchscreen.
See SYNC™ 3 (page 478).
229
Corsair (CTF) Canada/United States of America, enUSA, Edition date: 202007, First-Printing High Voltage Battery
(If Equipped)E301197
Page 233 of 638
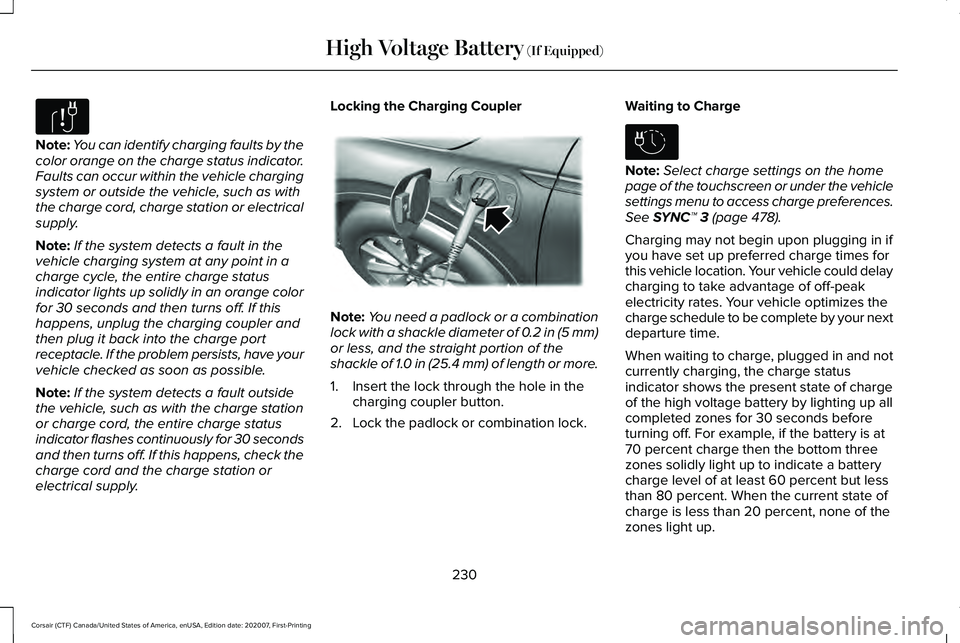
Note:
You can identify charging faults by the
color orange on the charge status indicator.
Faults can occur within the vehicle charging
system or outside the vehicle, such as with
the charge cord, charge station or electrical
supply.
Note: If the system detects a fault in the
vehicle charging system at any point in a
charge cycle, the entire charge status
indicator lights up solidly in an orange color
for 30 seconds and then turns off. If this
happens, unplug the charging coupler and
then plug it back into the charge port
receptacle. If the problem persists, have your
vehicle checked as soon as possible.
Note: If the system detects a fault outside
the vehicle, such as with the charge station
or charge cord, the entire charge status
indicator flashes continuously for 30 seconds
and then turns off. If this happens, check the
charge cord and the charge station or
electrical supply. Locking the Charging Coupler
Note:
You need a padlock or a combination
lock with a shackle diameter of 0.2 in (5 mm)
or less, and the straight portion of the
shackle of 1.0 in (25.4 mm) of length or more.
1. Insert the lock through the hole in the charging coupler button.
2. Lock the padlock or combination lock. Waiting to Charge Note:
Select charge settings on the home
page of the touchscreen or under the vehicle
settings menu to access charge preferences.
See SYNC™ 3 (page 478).
Charging may not begin upon plugging in if
you have set up preferred charge times for
this vehicle location. Your vehicle could delay
charging to take advantage of off-peak
electricity rates. Your vehicle optimizes the
charge schedule to be complete by your next
departure time.
When waiting to charge, plugged in and not
currently charging, the charge status
indicator shows the present state of charge
of the high voltage battery by lighting up all
completed zones for 30 seconds before
turning off. For example, if the battery is at
70 percent charge then the bottom three
zones solidly light up to indicate a battery
charge level of at least 60 percent but less
than 80 percent. When the current state of
charge is less than 20 percent, none of the
zones light up.
230
Corsair (CTF) Canada/United States of America, enUSA, Edition date: 202007, First-Printing High Voltage Battery
(If Equipped)E306677 E295451 E306678
Page 234 of 638
Note:
When your vehicle is waiting to
charge, the charge status indicator turns off
30 seconds after displaying the present state
of charge. When your vehicle begins
charging, the charge status indicator turns
on and displays the status of the charge, as
described above.
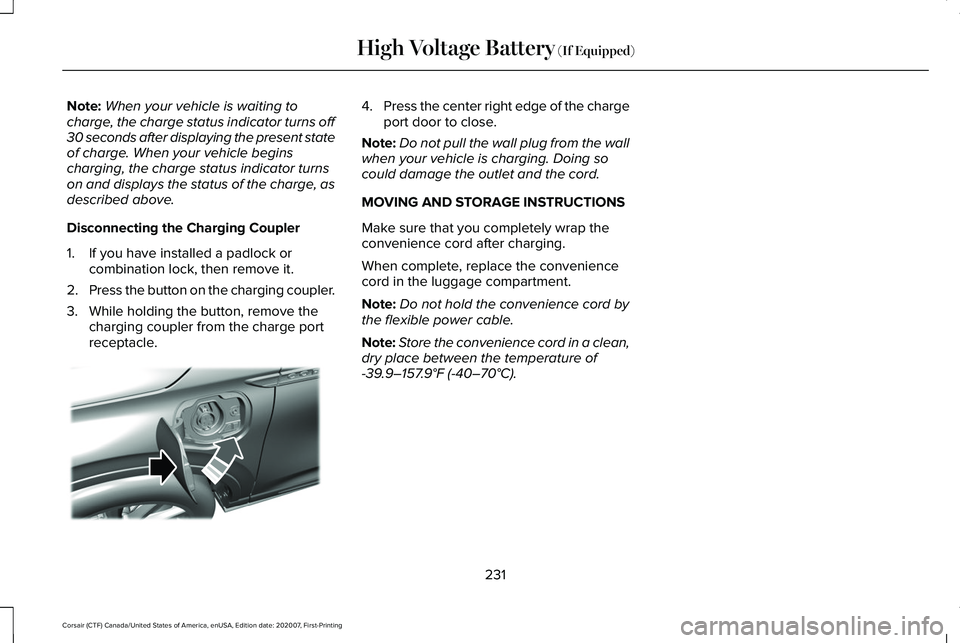
Disconnecting the Charging Coupler
1. If you have installed a padlock or combination lock, then remove it.
2. Press the button on the charging coupler.
3. While holding the button, remove the charging coupler from the charge port
receptacle. 4.
Press the center right edge of the charge
port door to close.
Note: Do not pull the wall plug from the wall
when your vehicle is charging. Doing so
could damage the outlet and the cord.
MOVING AND STORAGE INSTRUCTIONS
Make sure that you completely wrap the
convenience cord after charging.
When complete, replace the convenience
cord in the luggage compartment.
Note: Do not hold the convenience cord by
the flexible power cable.
Note: Store the convenience cord in a clean,
dry place between the temperature of
-39.9–157.9°F (-40–70°C).
231
Corsair (CTF) Canada/United States of America, enUSA, Edition date: 202007, First-Printing High Voltage Battery
(If Equipped)E295444
Page 235 of 638
AUTOMATIC TRANSMISSION -
EXCLUDING: PLUG-IN HYBRID
ELECTRIC VEHICLE (PHEV)
WARNING: Always fully apply the
parking brake and make sure you shift into
park (P). Failure to follow this instruction
could result in personal injury or death. WARNING:
When your vehicle is
stationary, keep the brake pedal fully
pressed when shifting gears. Failure to
follow this instruction could result in
personal injury, death or property damage. WARNING:
Do not apply the brake
pedal and accelerator pedal
simultaneously. Applying both pedals
simultaneously for more than a few
seconds will limit engine performance,
which may result in difficulty maintaining
speed in traffic and could lead to serious
injury. Note:
You may not be able to shift out of
park (P) unless the intelligent access key is
inside your vehicle.
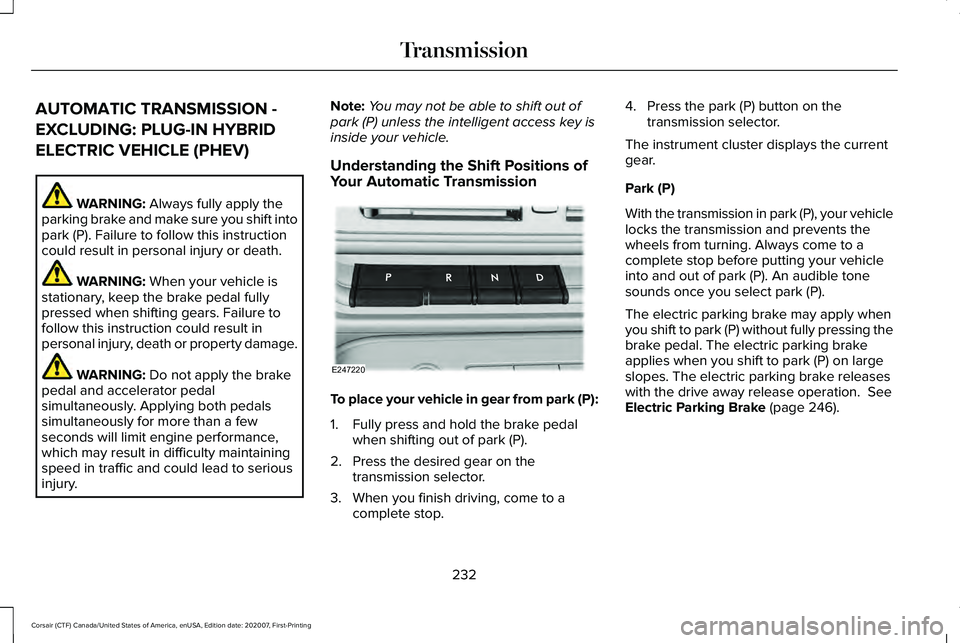
Understanding the Shift Positions of
Your Automatic Transmission To place your vehicle in gear from park (P):
1. Fully press and hold the brake pedal
when shifting out of park (P).
2. Press the desired gear on the transmission selector.
3. When you finish driving, come to a complete stop. 4. Press the park (P) button on the
transmission selector.
The instrument cluster displays the current
gear.
Park (P)
With the transmission in park (P), your vehicle
locks the transmission and prevents the
wheels from turning. Always come to a
complete stop before putting your vehicle
into and out of park (P). An audible tone
sounds once you select park (P).
The electric parking brake may apply when
you shift to park (P) without fully pressing the
brake pedal. The electric parking brake
applies when you shift to park (P) on large
slopes. The electric parking brake releases
with the drive away release operation.
See
Electric Parking Brake (page 246).
232
Corsair (CTF) Canada/United States of America, enUSA, Edition date: 202007, First-Printing TransmissionE247220
Page 236 of 638
Automatic Return to Park
The transmission returns to park (P) if any of
the following occur:
•
You switch the ignition off.
• Your seatbelt is not fastened, and you
open the driver door.
• The driver door is open, and you
unfasten your seatbelt.
Note: This feature does not operate if your
vehicle is in Stay in Neutral mode.
Note: If you switch the ignition off when your
vehicle is moving, your vehicle shifts into
neutral (N) until it slows down enough to shift
in park (P).
Note: If you have waited for more than two
minutes before switching the ignition on,
unfastening your seatbelt causes this feature
to activate, even with the driver door closed.
Note: This feature may not work properly if
the door ajar switch is malfunctioning. If your
door ajar indicator does not illuminate when
you open the driver door, or the indicator
illuminates with the driver door closed, see
your authorized dealer. Reverse (R)
With the selector in reverse (R), your vehicle
moves backward. Always come to a
complete stop before shifting into and out
of reverse (R).
Neutral (N)
WARNING: In neutral (N) your vehicle
has the ability to roll freely. If you intend to
leave your vehicle, make sure you apply
the parking brake.
In neutral (N), power does not transmit to the
driven wheels, but the transmission is not
locked. You can start the engine with the
transmission in this position.
Stay in Neutral Mode
Use this feature to keep your vehicle in
neutral (N) when you exit the vehicle. To enter stay in neutral mode:
•
Bring your vehicle to a complete
standstill.
• Press the neutral (N) button on the
transmission selector.
• Press the neutral (N) button again to
enter stay in neutral mode.
Note: Stay in neutral mode is a temporary
vehicle state with the ignition off. Once in
this mode, sufficient battery voltage must be
maintained, or your vehicle returns to park.
Extended usage of stay in neutral mode may
result in a battery voltage reduction to a
level where the vehicle may no longer start,
and the vehicle returns to park (P). Do not
tow your vehicle in this mode.
Note: When entering an automatic car wash,
always shift into neutral (N). If you are exiting
the vehicle by the car wash, stay in neutral
mode is available. Failure to do this could
result in vehicle damage not covered by the
vehicle warranty.
Note: A confirmation message appears in
the information display when your vehicle
enters stay in neutral mode.
233
Corsair (CTF) Canada/United States of America, enUSA, Edition date: 202007, First-Printing Transmission
Page 237 of 638
To exit stay in neutral mode, press the brake
pedal and shift into park (P).
Drive (D)
Drive (D) is the normal driving position for
the best fuel economy.
SelectShift™ Automatic Transmission
About SelectShift™
Use this feature to upshift or downshift using
the paddle shifters.
Note:
SelectShift™ could upshift automatically
if you fully press the accelerator pedal.
Note: Engine damage may occur if you
maintain excessive engine revving without
shifting.
Note: SelectShift™ downshifts automatically
to avoid engine stall, or if you fully press the
accelerator pedal.
Using SelectShift™
You can only use this feature in drive (D). Note:
Selectshift™ in drive (D) provides
temporary manual control of the gear
selection.
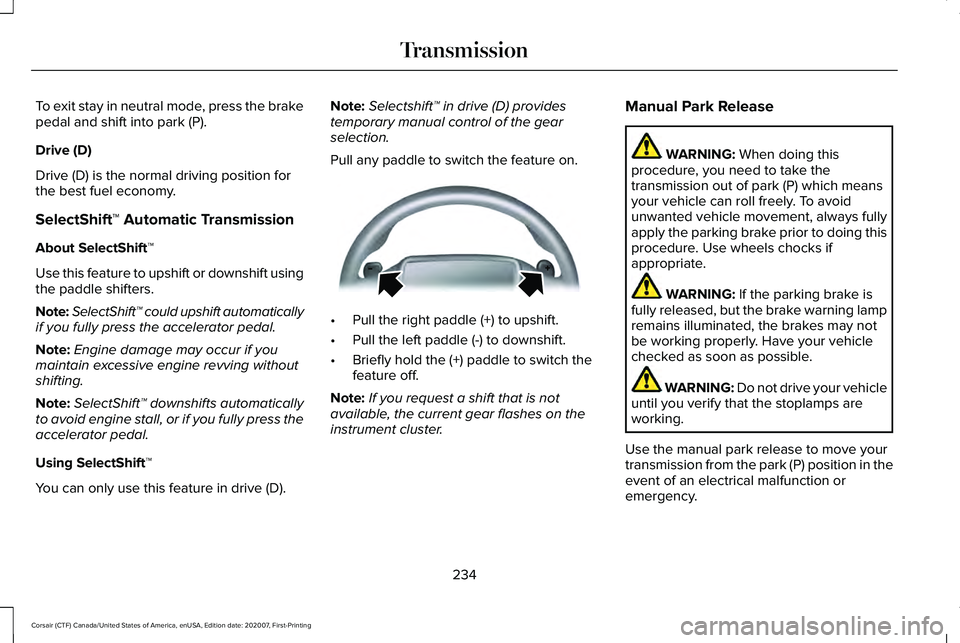
Pull any paddle to switch the feature on. •
Pull the right paddle (+) to upshift.
• Pull the left paddle (-) to downshift.
• Briefly hold the (+) paddle to switch the
feature off.
Note: If you request a shift that is not
available, the current gear flashes on the
instrument cluster. Manual Park Release WARNING: When doing this
procedure, you need to take the
transmission out of park (P) which means
your vehicle can roll freely. To avoid
unwanted vehicle movement, always fully
apply the parking brake prior to doing this
procedure. Use wheels chocks if
appropriate. WARNING:
If the parking brake is
fully released, but the brake warning lamp
remains illuminated, the brakes may not
be working properly. Have your vehicle
checked as soon as possible. WARNING: Do not drive your vehicle
until you verify that the stoplamps are
working.
Use the manual park release to move your
transmission from the park (P) position in the
event of an electrical malfunction or
emergency.
234
Corsair (CTF) Canada/United States of America, enUSA, Edition date: 202007, First-Printing TransmissionE144821
Page 238 of 638
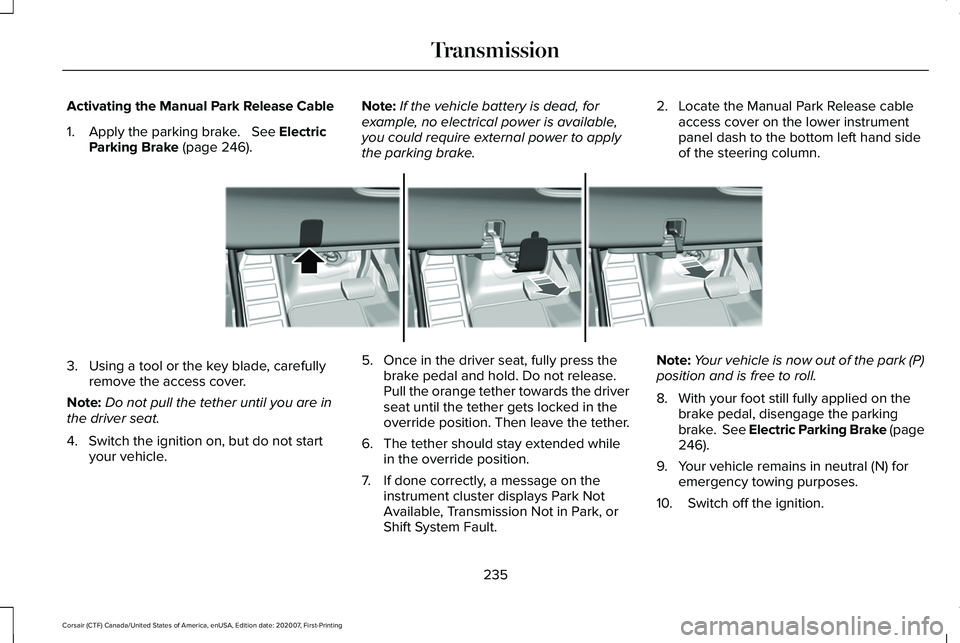
Activating the Manual Park Release Cable
1. Apply the parking brake. See Electric
Parking Brake (page 246). Note:
If the vehicle battery is dead, for
example, no electrical power is available,
you could require external power to apply
the parking brake. 2. Locate the Manual Park Release cable
access cover on the lower instrument
panel dash to the bottom left hand side
of the steering column. 3. Using a tool or the key blade, carefully
remove the access cover.
Note: Do not pull the tether until you are in
the driver seat.
4. Switch the ignition on, but do not start your vehicle. 5. Once in the driver seat, fully press the
brake pedal and hold. Do not release.
Pull the orange tether towards the driver
seat until the tether gets locked in the
override position. Then leave the tether.
6. The tether should stay extended while in the override position.
7. If done correctly, a message on the instrument cluster displays Park Not
Available, Transmission Not in Park, or
Shift System Fault. Note:
Your vehicle is now out of the park (P)
position and is free to roll.
8. With your foot still fully applied on the brake pedal, disengage the parking
brake. See Electric Parking Brake (page
246
).
9. Your vehicle remains in neutral (N) for emergency towing purposes.
10. Switch off the ignition.
235
Corsair (CTF) Canada/United States of America, enUSA, Edition date: 202007, First-Printing TransmissionE307867
Page 239 of 638
11.
Once it is safe to do so, and there is no
risk that your vehicle will roll,
disconnect the negative, black, battery
cable from the battery. If the vehicle
rolls before the battery is disconnected,
the electric parking brake may
automatically apply. The operator may
need to release the parking brake
again. See Electric Parking Brake
(page 246).
Returning Your Vehicle to Normal Mode
1. Once it is safe to do so, reconnect the negative, black, battery cable to the
battery.
2. Apply the parking brake.
See Electric
Parking Brake (page 246).
Note: If the vehicle battery is dead, for
example, no electrical power is available,
you could require external power to apply
the parking brake.
3. Fully apply the brake pedal and hold, do
not release. Pull the orange tether
outward toward the driver seat to remove
it from the override position. 4. The cable releases and retracts back to
its original rest position.
5. Stow the manual park release cable tether back inside the instrument panel
dash hole, and install the access cover
by pressing it back in position.
6. With your foot fully applied on the brake
pedal, start your vehicle. Confirm that
your vehicle is in the park (P) position and
that the instrument cluster indicates park
(P).
7. If the instrument cluster is not displaying
the park (P) position or there is a
message stating Park Not Available,
Transmission Not In Park, or Shift System
Fault, apply the parking brake before
exiting your vehicle. Contact an
authorized dealer for service. Automatic Transmission Adaptive
Learning
This feature may increase durability and
provide consistent shift feel over the life of
your vehicle. A new vehicle or transmission
may have firm shifts, soft shifts or both. This
is normal and does not affect the operation
or durability of the transmission. Over time,
the adaptive learning process fully updates
transmission operation.
If Your Vehicle Gets Stuck in Mud or
Snow
If your vehicle gets stuck in mud or snow,
you can rock it out by shifting between
forward and reverse gears, stopping
between shifts in a steady pattern. Press
lightly on the accelerator in each gear.
Note:
Do not rock your vehicle if the engine
is not at normal operating temperature or
damage to the transmission could occur.
Note: Do not rock your vehicle for more than
a minute or damage to the transmission and
tires could occur, or the engine may
overheat.
236
Corsair (CTF) Canada/United States of America, enUSA, Edition date: 202007, First-Printing Transmission
Page 240 of 638
Note:
If your vehicle has SelectShift™, you
can pull away in second gear.
1. Shift into drive (D).
2. Pull the (+) paddle until 2 shows on the instrument cluster.
AUTOMATIC TRANSMISSION -
PLUG-IN HYBRID ELECTRIC
VEHICLE (PHEV) WARNING: Always fully apply the
parking brake and make sure you shift into
park (P). Failure to follow this instruction
could result in personal injury or death. WARNING:
Do not apply the brake
pedal and accelerator pedal
simultaneously. Applying both pedals
simultaneously for more than a few
seconds will limit engine performance,
which may result in difficulty maintaining
speed in traffic and could lead to serious
injury. WARNING:
When your vehicle is
stationary, keep the brake pedal fully
pressed when shifting gears. Failure to
follow this instruction could result in
personal injury, death or property damage.
Note: The ready to drive indicator may be
off and you may not be able to shift out of
park (P) unless the remote control is inside
your vehicle.
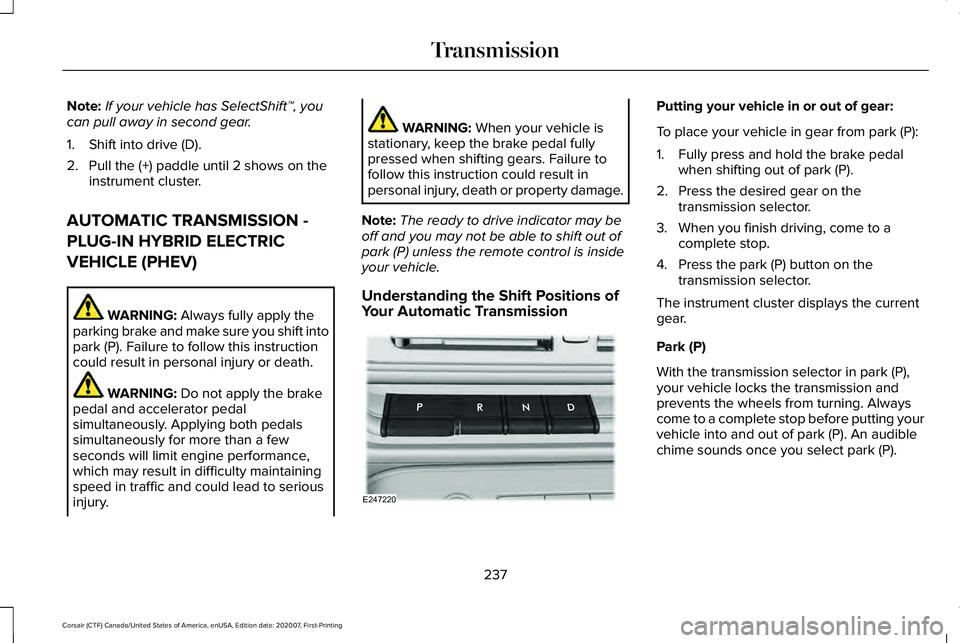
Understanding the Shift Positions of
Your Automatic Transmission Putting your vehicle in or out of gear:
To place your vehicle in gear from park (P):
1. Fully press and hold the brake pedal
when shifting out of park (P).
2. Press the desired gear on the transmission selector.
3. When you finish driving, come to a complete stop.
4. Press the park (P) button on the transmission selector.
The instrument cluster displays the current
gear.
Park (P)
With the transmission selector in park (P),
your vehicle locks the transmission and
prevents the wheels from turning. Always
come to a complete stop before putting your
vehicle into and out of park (P). An audible
chime sounds once you select park (P).
237
Corsair (CTF) Canada/United States of America, enUSA, Edition date: 202007, First-Printing TransmissionE247220