hood open LINCOLN CORSAIR 2021 Owners Manual
[x] Cancel search | Manufacturer: LINCOLN, Model Year: 2021, Model line: CORSAIR, Model: LINCOLN CORSAIR 2021Pages: 638, PDF Size: 5.7 MB
Page 10 of 638
Drive Mode Control
What Is Drive Mode Control
......................312
Selecting a Drive Mode ..............................
312
Drive Modes ..................................................
312
Speed Sign Recognition
What Is Speed Sign Recognition ..............
315
How Does Speed Sign Recognition Work .......................................................................
315
Speed Sign Recognition Precautions ......
315
Speed Sign Recognition Limitations .......
315
Speed Sign Recognition Indicators .........
316
Setting the Speed Sign Recognition Speed Warning ......................................................
316
Setting the Speed Sign Recognition Speed Tolerance ...................................................
316
Speed Sign Recognition – Troubleshooting .......................................................................
316
Load Carrying
Rear Under Floor Storage ..........................
318
Luggage Covers ...........................................
318
Roof Racks and Load Carriers ..................
318
Load Limit ......................................................
320Towing
Towing a Trailer
............................................
325
Trailer Sway Control ...................................
326
Recommended Towing Weights .............
326
Essential Towing Checks ..........................
328
Towing the Vehicle on Four Wheels - Gasoline, 8-Speed Automatic
Transmission – 8F35/8F40 ..................
330
Towing the Vehicle on Four Wheels - Plug-In Hybrid Electric Vehicle (PHEV),
Automatic Transmission – HF45 ..........
331
Driving Hints
Economical Driving .....................................
333
Breaking-In ....................................................
333
Driving Through Water ...............................
333
Floor Mats ......................................................
334
Roadside Emergencies
Roadside Assistance ..................................
336
Hazard Flashers ...........................................
337
Fuel Shutoff ...................................................
337
Jump Starting the Vehicle .........................
338
Post-Crash Alert System .............................
341Transporting the Vehicle
............................
341
Customer Assistance
Getting the Services You Need ...............
343
In California (U.S. Only) ..............................
344
The Better Business Bureau (BBB) Auto Line Program (U.S. Only) .......................
345
Utilizing the Mediation/Arbitration Program (Canada Only) ..........................................
346
Getting Assistance Outside the U.S. and Canada .......................................................
347
Ordering Additional Owner's Literature ......................................................................
349
Reporting Safety Defects (U.S. Only) ......
350
Reporting Safety Defects (Canada Only) ......................................................................
350
Fuses
Fuse Specification Chart ...........................
352
Changing a Fuse .........................................
363
Maintenance
General Information ...................................
365
Opening and Closing the Hood ..............
365
7
Corsair (CTF) Canada/United States of America, enUSA, Edition date: 202007, First-Printing Table of Contents
Page 62 of 638
The system consists of the following:
•
Safety Canopy curtain airbags above the
trim panels over the front and rear side
windows identified by a label or wording
on the headliner or roof-pillar trim.
• A flexible headliner which opens above
the side doors to allow air curtain
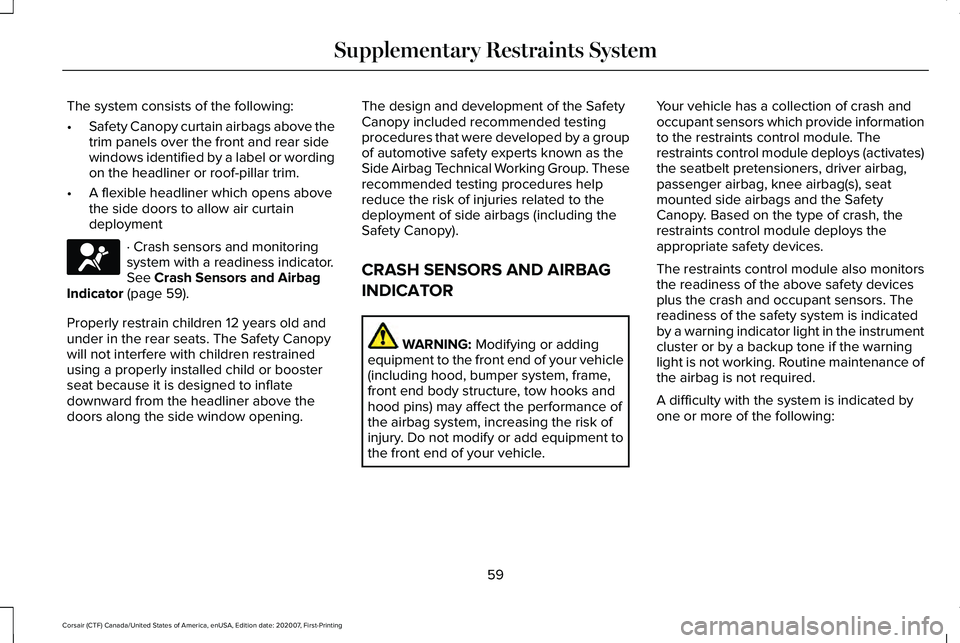
deployment · Crash sensors and monitoring
system with a readiness indicator.
See Crash Sensors and Airbag
Indicator (page 59).
Properly restrain children 12 years old and
under in the rear seats. The Safety Canopy
will not interfere with children restrained
using a properly installed child or booster
seat because it is designed to inflate
downward from the headliner above the
doors along the side window opening. The design and development of the Safety
Canopy included recommended testing
procedures that were developed by a group
of automotive safety experts known as the
Side Airbag Technical Working Group. These
recommended testing procedures help
reduce the risk of injuries related to the
deployment of side airbags (including the
Safety Canopy).
CRASH SENSORS AND AIRBAG
INDICATOR
WARNING:
Modifying or adding
equipment to the front end of your vehicle
(including hood, bumper system, frame,
front end body structure, tow hooks and
hood pins) may affect the performance of
the airbag system, increasing the risk of
injury. Do not modify or add equipment to
the front end of your vehicle. Your vehicle has a collection of crash and
occupant sensors which provide information
to the restraints control module. The
restraints control module deploys (activates)
the seatbelt pretensioners, driver airbag,
passenger airbag, knee airbag(s), seat
mounted side airbags and the Safety
Canopy. Based on the type of crash, the
restraints control module deploys the
appropriate safety devices.
The restraints control module also monitors
the readiness of the above safety devices
plus the crash and occupant sensors. The
readiness of the safety system is indicated
by a warning indicator light in the instrument
cluster or by a backup tone if the warning
light is not working. Routine maintenance of
the airbag is not required.
A difficulty with the system is indicated by
one or more of the following:
59
Corsair (CTF) Canada/United States of America, enUSA, Edition date: 202007, First-Printing Supplementary Restraints SystemE67017
Page 80 of 638
Press the button again within three seconds
to confirm that all the doors are closed. The
doors lock again, a tone sounds and the
direction indicators flash if all the doors and
the luggage compartment are closed.
Mislock
If any door or the luggage compartment is
open, or if the hood is open on vehicles with
an anti-theft alarm or remote start, a tone
sounds and the direction indicators will not
flash. You can switch this feature on or off
from the touchscreen. See Settings (page
526).
Audible and Visual Locking Confirmation
If audible and visual locking confirmation is
configurable, you can turn it on or off from
the touchscreen.
See Settings (page 526).
Mechanical Key
The intelligent access key also contains a
removable key blade that you can use to lock
and unlock your vehicle.
See Remote
Control (page 64). Turn the top of the key toward the front of
your vehicle once to lock all doors.
Turn the top of the key toward the rear of
your vehicle once to unlock the driver door
only.
Locking and Unlocking the Doors with the
Key Blade
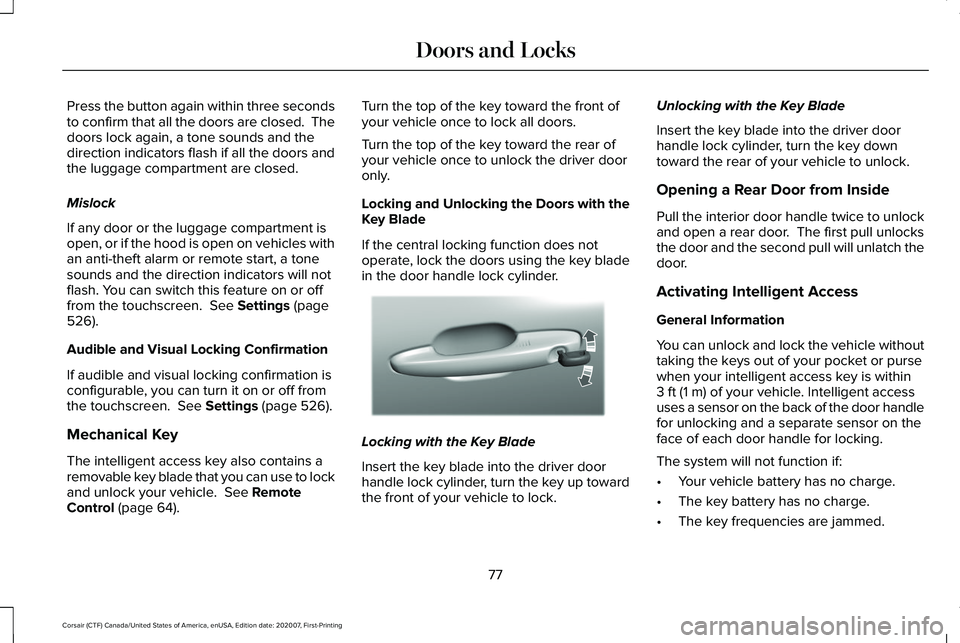
If the central locking function does not
operate, lock the doors using the key blade
in the door handle lock cylinder.
Locking with the Key Blade
Insert the key blade into the driver door
handle lock cylinder, turn the key up toward
the front of your vehicle to lock.Unlocking with the Key Blade
Insert the key blade into the driver door
handle lock cylinder, turn the key down
toward the rear of your vehicle to unlock.
Opening a Rear Door from Inside
Pull the interior door handle twice to unlock
and open a rear door. The first pull unlocks
the door and the second pull will unlatch the
door.
Activating Intelligent Access
General Information
You can unlock and lock the vehicle without
taking the keys out of your pocket or purse
when your intelligent access key is within
3 ft (1 m)
of your vehicle. Intelligent access
uses a sensor on the back of the door handle
for unlocking and a separate sensor on the
face of each door handle for locking.
The system will not function if:
• Your vehicle battery has no charge.
• The key battery has no charge.
• The key frequencies are jammed.
77
Corsair (CTF) Canada/United States of America, enUSA, Edition date: 202007, First-Printing Doors and LocksE310901
Page 96 of 638
PASSIVE ANTI-THEFT SYSTEM
What Is the Passive Anti-Theft System
The passive anti-theft system prevents
someone from starting the vehicle with an
incorrectly coded key.
Arming the Passive Anti-Theft System
The Passive Anti-Theft System arms
automatically after a short period of time
when you switch the ignition off.
Disarming the Passive Anti-Theft
System
The engine immobilizer disarms when you
switch the ignition on with a correctly coded
key.
Note:
You could have difficulty starting the
vehicle if you have metallic objects,
electronic devices or a second coded key
on the same key chain. ANTI-THEFT ALARM SYSTEM
What Is the Anti-Theft Alarm System
The Anti-Theft Alarm System warns you of
an unauthorized entry to your vehicle.
How Does the Anti-Theft Alarm System
Work
When armed, the anti-theft alarm is triggered
in any of the following ways:
•
If someone opens a door, the liftgate or
the hood without a correctly coded key
or remote control.
• If you turn the power on without a
correctly coded key.
• If the interior sensors detect movement
inside your vehicle.
• If the inclination sensors detect an
attempt to raise your vehicle.
• If someone disconnects the vehicle
battery or the battery backup alarm. If the anti-theft alarm is triggered, the alarm
horn sounds for 30 seconds and the
direction indicators flash for 5 minutes.
Any further attempts to carry out one of the
above sounds the alarm again.
What Is the Perimeter Alarm
The perimeter alarm is designed to detect
unauthorized access to your vehicle.
What Are the Interior Sensors
The interior sensors are designed to detect
any movement inside your vehicle.
The interior sensors are in the overhead
console.
Note:
Do not cover the interior sensors.
What Are the Inclination Sensors
The inclination sensor is designed to detect
an attempt to raise your vehicle, for example
to remove a wheel or to tow it away.
93
Corsair (CTF) Canada/United States of America, enUSA, Edition date: 202007, First-Printing Security
Page 148 of 638
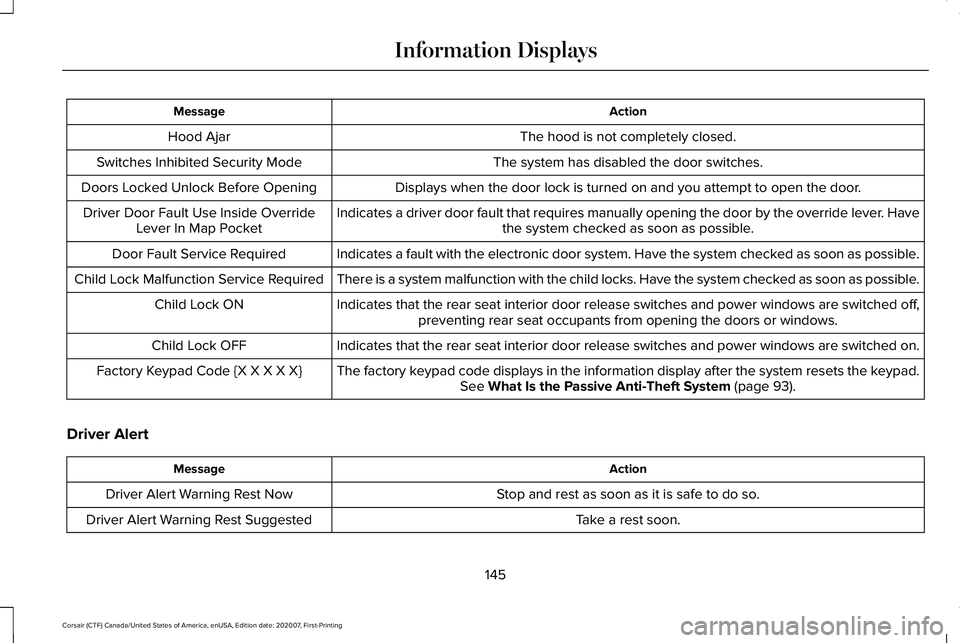
Action
Message
The hood is not completely closed.
Hood Ajar
The system has disabled the door switches.
Switches Inhibited Security Mode
Displays when the door lock is turned on and you attempt to open the doo\
r.
Doors Locked Unlock Before Opening
Indicates a driver door fault that requires manually opening the door by\
the override lever. Havethe system checked as soon as possible.
Driver Door Fault Use Inside Override
Lever In Map Pocket
Indicates a fault with the electronic door system. Have the system check\
ed as soon as possible.
Door Fault Service Required
There is a system malfunction with the child locks. Have the system chec\
ked as soon as possible.
Child Lock Malfunction Service Required
Indicates that the rear seat interior door release switches and power wi\
ndows are switched off,preventing rear seat occupants from opening the doors or windows.
Child Lock ON
Indicates that the rear seat interior door release switches and power wi\
ndows are switched on.
Child Lock OFF
The factory keypad code displays in the information display after the system resets t\
he keypad.See What Is the Passive Anti-Theft System (page 93).
Factory Keypad Code {X X X X X}
Driver Alert Action
Message
Stop and rest as soon as it is safe to do so.
Driver Alert Warning Rest Now
Take a rest soon.
Driver Alert Warning Rest Suggested
145
Corsair (CTF) Canada/United States of America, enUSA, Edition date: 202007, First-Printing Information Displays
Page 164 of 638
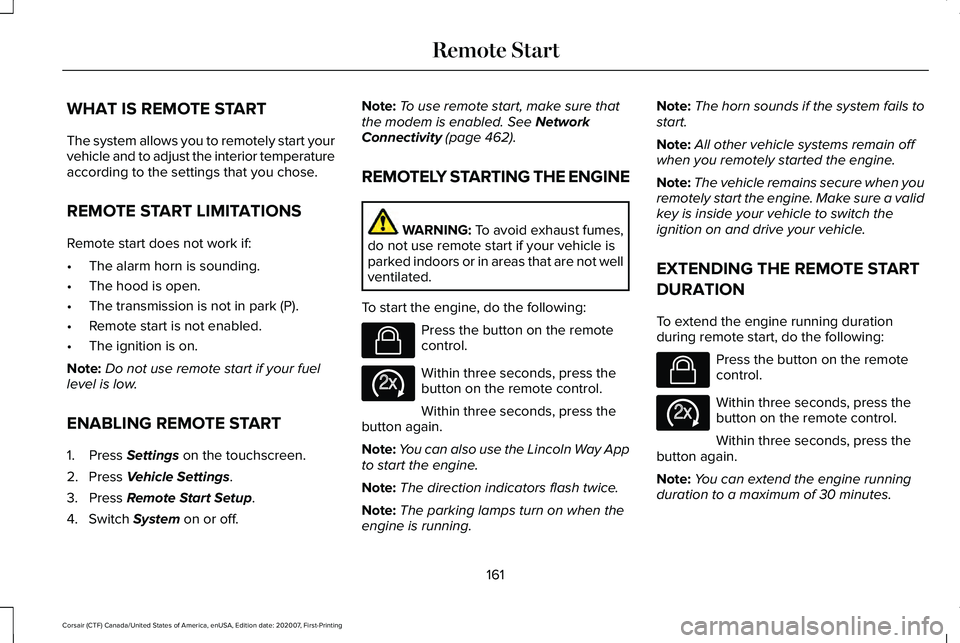
WHAT IS REMOTE START
The system allows you to remotely start your
vehicle and to adjust the interior temperature
according to the settings that you chose.
REMOTE START LIMITATIONS
Remote start does not work if:
•
The alarm horn is sounding.
• The hood is open.
• The transmission is not in park (P).
• Remote start is not enabled.
• The ignition is on.
Note: Do not use remote start if your fuel
level is low.
ENABLING REMOTE START
1. Press Settings on the touchscreen.
2. Press
Vehicle Settings.
3. Press
Remote Start Setup.
4. Switch
System on or off. Note:
To use remote start, make sure that
the modem is enabled.
See Network
Connectivity (page 462).
REMOTELY STARTING THE ENGINE WARNING:
To avoid exhaust fumes,
do not use remote start if your vehicle is
parked indoors or in areas that are not well
ventilated.
To start the engine, do the following: Press the button on the remote
control.
Within three seconds, press the
button on the remote control.
Within three seconds, press the
button again.
Note: You can also use the Lincoln Way App
to start the engine.
Note: The direction indicators flash twice.
Note: The parking lamps turn on when the
engine is running. Note:
The horn sounds if the system fails to
start.
Note: All other vehicle systems remain off
when you remotely started the engine.
Note: The vehicle remains secure when you
remotely start the engine. Make sure a valid
key is inside your vehicle to switch the
ignition on and drive your vehicle.
EXTENDING THE REMOTE START
DURATION
To extend the engine running duration
during remote start, do the following: Press the button on the remote
control.
Within three seconds, press the
button on the remote control.
Within three seconds, press the
button again.
Note: You can extend the engine running
duration to a maximum of 30 minutes.
161
Corsair (CTF) Canada/United States of America, enUSA, Edition date: 202007, First-Printing Remote StartE138623 E138625 E138623 E138625
Page 207 of 638
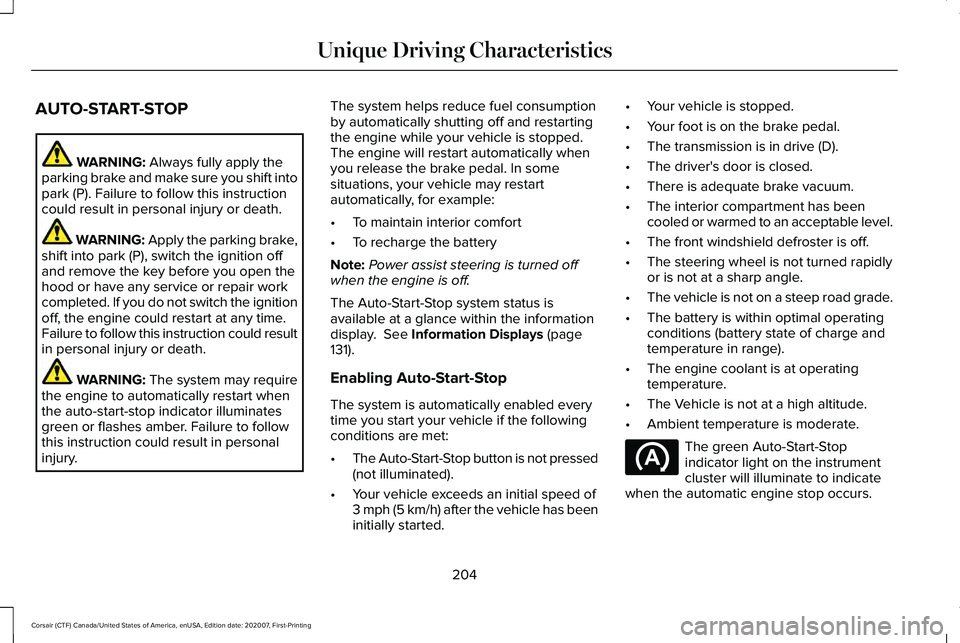
AUTO-START-STOP
WARNING: Always fully apply the
parking brake and make sure you shift into
park (P). Failure to follow this instruction
could result in personal injury or death. WARNING: Apply the parking brake,
shift into park (P), switch the ignition off
and remove the key before you open the
hood or have any service or repair work
completed. If you do not switch the ignition
off, the engine could restart at any time.
Failure to follow this instruction could result
in personal injury or death. WARNING:
The system may require
the engine to automatically restart when
the auto-start-stop indicator illuminates
green or flashes amber. Failure to follow
this instruction could result in personal
injury. The system helps reduce fuel consumption
by automatically shutting off and restarting
the engine while your vehicle is stopped.
The engine will restart automatically when
you release the brake pedal. In some
situations, your vehicle may restart
automatically, for example:
•
To maintain interior comfort
• To recharge the battery
Note: Power assist steering is turned off
when the engine is off.
The Auto-Start-Stop system status is
available at a glance within the information
display.
See Information Displays (page
131).
Enabling Auto-Start-Stop
The system is automatically enabled every
time you start your vehicle if the following
conditions are met:
• The Auto-Start-Stop button is not pressed
(not illuminated).
• Your vehicle exceeds an initial speed of
3 mph (5 km/h) after the vehicle has been
initially started. •
Your vehicle is stopped.
• Your foot is on the brake pedal.
• The transmission is in drive (D).
• The driver's door is closed.
• There is adequate brake vacuum.
• The interior compartment has been
cooled or warmed to an acceptable level.
• The front windshield defroster is off.
• The steering wheel is not turned rapidly
or is not at a sharp angle.
• The vehicle is not on a steep road grade.
• The battery is within optimal operating
conditions (battery state of charge and
temperature in range).
• The engine coolant is at operating
temperature.
• The Vehicle is not at a high altitude.
• Ambient temperature is moderate. The green Auto-Start-Stop
indicator light on the instrument
cluster will illuminate to indicate
when the automatic engine stop occurs.
204
Corsair (CTF) Canada/United States of America, enUSA, Edition date: 202007, First-Printing Unique Driving Characteristics
Page 228 of 638
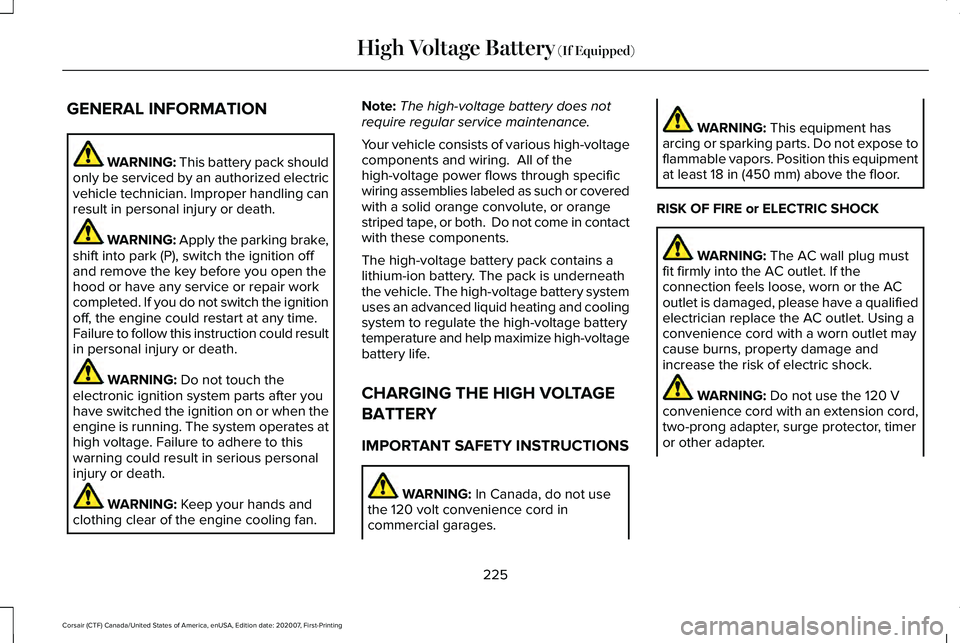
GENERAL INFORMATION
WARNING: This battery pack should
only be serviced by an authorized electric
vehicle technician. Improper handling can
result in personal injury or death. WARNING: Apply the parking brake,
shift into park (P), switch the ignition off
and remove the key before you open the
hood or have any service or repair work
completed. If you do not switch the ignition
off, the engine could restart at any time.
Failure to follow this instruction could result
in personal injury or death. WARNING:
Do not touch the
electronic ignition system parts after you
have switched the ignition on or when the
engine is running. The system operates at
high voltage. Failure to adhere to this
warning could result in serious personal
injury or death. WARNING:
Keep your hands and
clothing clear of the engine cooling fan. Note:
The high-voltage battery does not
require regular service maintenance.
Your vehicle consists of various high-voltage
components and wiring. All of the
high-voltage power flows through specific
wiring assemblies labeled as such or covered
with a solid orange convolute, or orange
striped tape, or both. Do not come in contact
with these components.
The high-voltage battery pack contains a
lithium-ion battery. The pack is underneath
the vehicle. The high-voltage battery system
uses an advanced liquid heating and cooling
system to regulate the high-voltage battery
temperature and help maximize high-voltage
battery life.
CHARGING THE HIGH VOLTAGE
BATTERY
IMPORTANT SAFETY INSTRUCTIONS WARNING: In Canada, do not use
the 120 volt convenience cord in
commercial garages. WARNING:
This equipment has
arcing or sparking parts. Do not expose to
flammable vapors. Position this equipment
at least
18 in (450 mm) above the floor.
RISK OF FIRE or ELECTRIC SHOCK WARNING:
The AC wall plug must
fit firmly into the AC outlet. If the
connection feels loose, worn or the AC
outlet is damaged, please have a qualified
electrician replace the AC outlet. Using a
convenience cord with a worn outlet may
cause burns, property damage and
increase the risk of electric shock. WARNING:
Do not use the 120 V
convenience cord with an extension cord,
two-prong adapter, surge protector, timer
or other adapter.
225
Corsair (CTF) Canada/United States of America, enUSA, Edition date: 202007, First-Printing High Voltage Battery
(If Equipped)
Page 368 of 638
GENERAL INFORMATION
Have your vehicle serviced regularly to help
maintain its roadworthiness and resale value.
There is a large network of authorized
dealers that are there to help you with their
professional servicing expertise. We believe
that their specially trained technicians are
best qualified to service your vehicle properly
and expertly. They are supported by a wide
range of highly specialized tools developed
specifically for servicing your vehicle.
If your vehicle requires professional service,
an authorized dealer can provide the
necessary parts and service. Check your
warranty information to find out which parts
and services are covered.
Use only recommended fuels, lubricants,
fluids and service parts conforming to
specifications. Motorcraft® parts are
designed and built to provide the best
performance in your vehicle.
Precautions
•
Do not work on a hot engine.
• Make sure that nothing gets caught in
moving parts.
• Do not work on a vehicle with the engine
running in an enclosed space, unless you
are sure you have enough ventilation.
• Keep all open flames and other burning
material (such as cigarettes) away from
the battery and all fuel related parts.
Working with the Engine Off
1. Set the parking brake and shift the transmission to park (P).
2. Switch off the engine.
3. Block the wheels.
Working with the Engine On WARNING: To reduce the risk of
vehicle damage and personal burn injuries,
do not start your engine with the air
cleaner removed and do not remove it
while the engine is running. 1. Set the parking brake and shift the
transmission to park (P).
2. Block the wheels.
OPENING AND CLOSING THE
HOOD
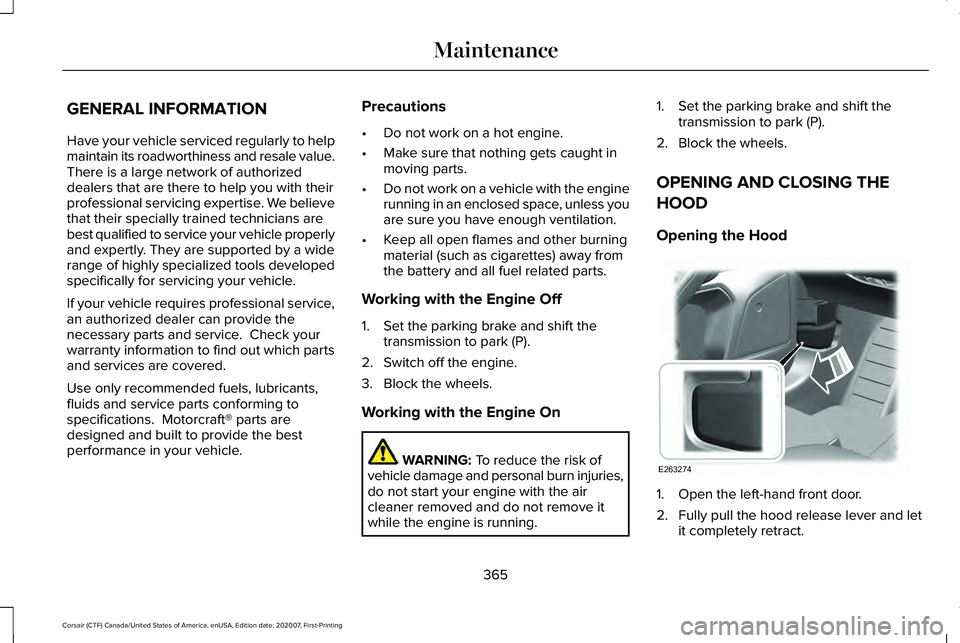
Opening the Hood 1. Open the left-hand front door.
2. Fully pull the hood release lever and let
it completely retract.
365
Corsair (CTF) Canada/United States of America, enUSA, Edition date: 202007, First-Printing MaintenanceE263274
Page 369 of 638
Note:
This action releases the hood latch.
3. Fully pull the hood release lever for a second time.
Note: This action fully releases the hood.
4. Open the hood.
Note: There is no secondary lever under the
hood. Closing the Hood WARNING: Make sure that you fully
latch the hood before driving. Failure to
follow this instruction could result in
personal injury or death. 1. For vehicles with a prop rod, fully stow
the prop rod prior to lowering the hood.
2. Lower the hood and make sure it fully latches.
366
Corsair (CTF) Canada/United States of America, enUSA, Edition date: 202007, First-Printing Maintenance