LINCOLN LS 2000 Owners Manual
Manufacturer: LINCOLN, Model Year: 2000, Model line: LS, Model: LINCOLN LS 2000Pages: 272, PDF Size: 2.36 MB
Page 211 of 272
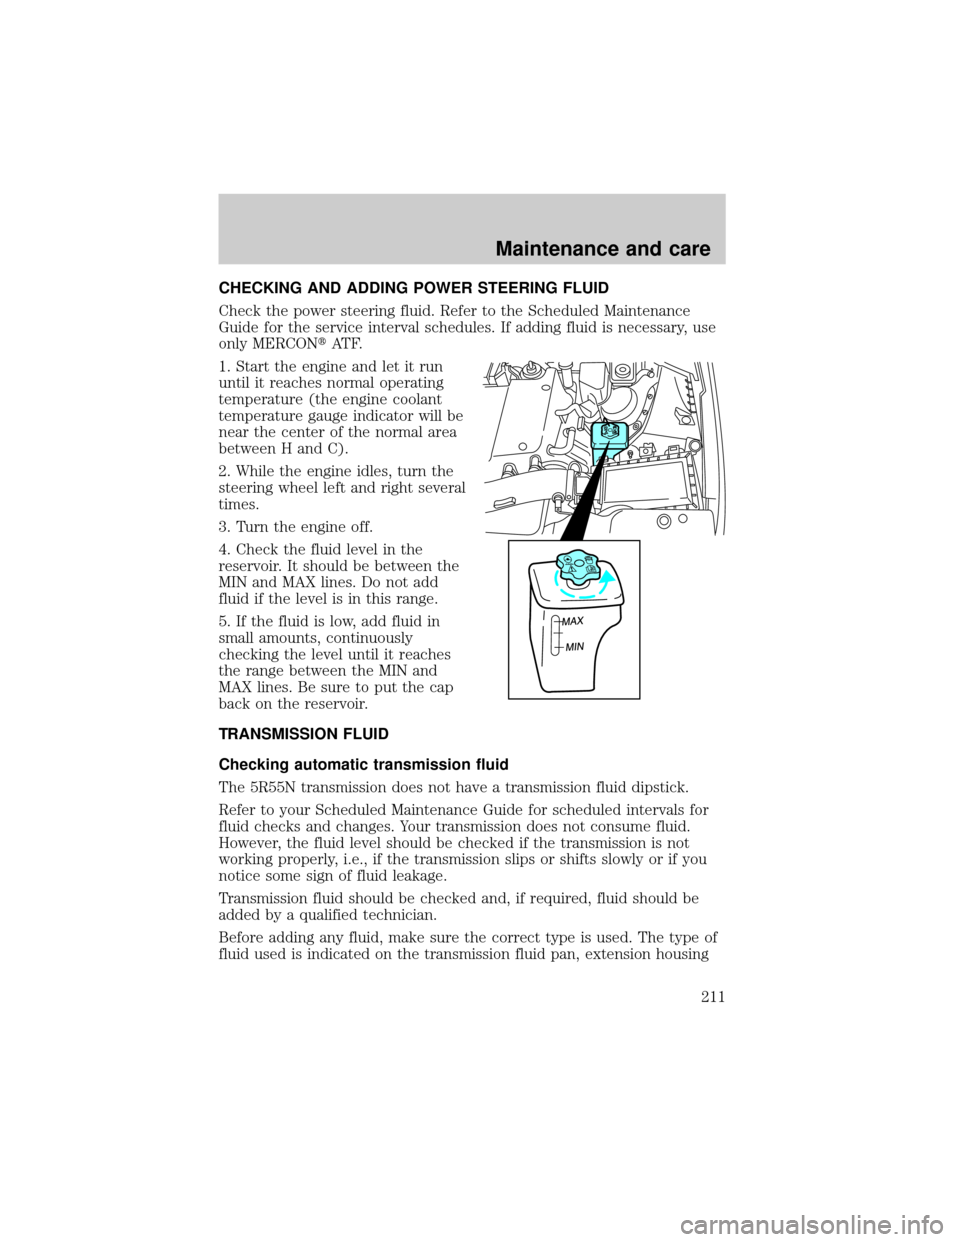
CHECKING AND ADDING POWER STEERING FLUID
Check the power steering fluid. Refer to the Scheduled Maintenance
Guide for the service interval schedules. If adding fluid is necessary, use
only MERCONtAT F.
1. Start the engine and let it run
until it reaches normal operating
temperature (the engine coolant
temperature gauge indicator will be
near the center of the normal area
between H and C).
2. While the engine idles, turn the
steering wheel left and right several
times.
3. Turn the engine off.
4. Check the fluid level in the
reservoir. It should be between the
MIN and MAX lines. Do not add
fluid if the level is in this range.
5. If the fluid is low, add fluid in
small amounts, continuously
checking the level until it reaches
the range between the MIN and
MAX lines. Be sure to put the cap
back on the reservoir.
TRANSMISSION FLUID
Checking automatic transmission fluid
The 5R55N transmission does not have a transmission fluid dipstick.
Refer to your Scheduled Maintenance Guide for scheduled intervals for
fluid checks and changes. Your transmission does not consume fluid.
However, the fluid level should be checked if the transmission is not
working properly, i.e., if the transmission slips or shifts slowly or if you
notice some sign of fluid leakage.
Transmission fluid should be checked and, if required, fluid should be
added by a qualified technician.
Before adding any fluid, make sure the correct type is used. The type of
fluid used is indicated on the transmission fluid pan, extension housing
MAX
MIN
MAX
MIN
Maintenance and care
211
Page 212 of 272
and also in theLubricant specificationssection in theCapacities and
specificationschapter.
Use of a non-approved automatic transmission fluid may cause
internal transmission component damage and void the warranty.
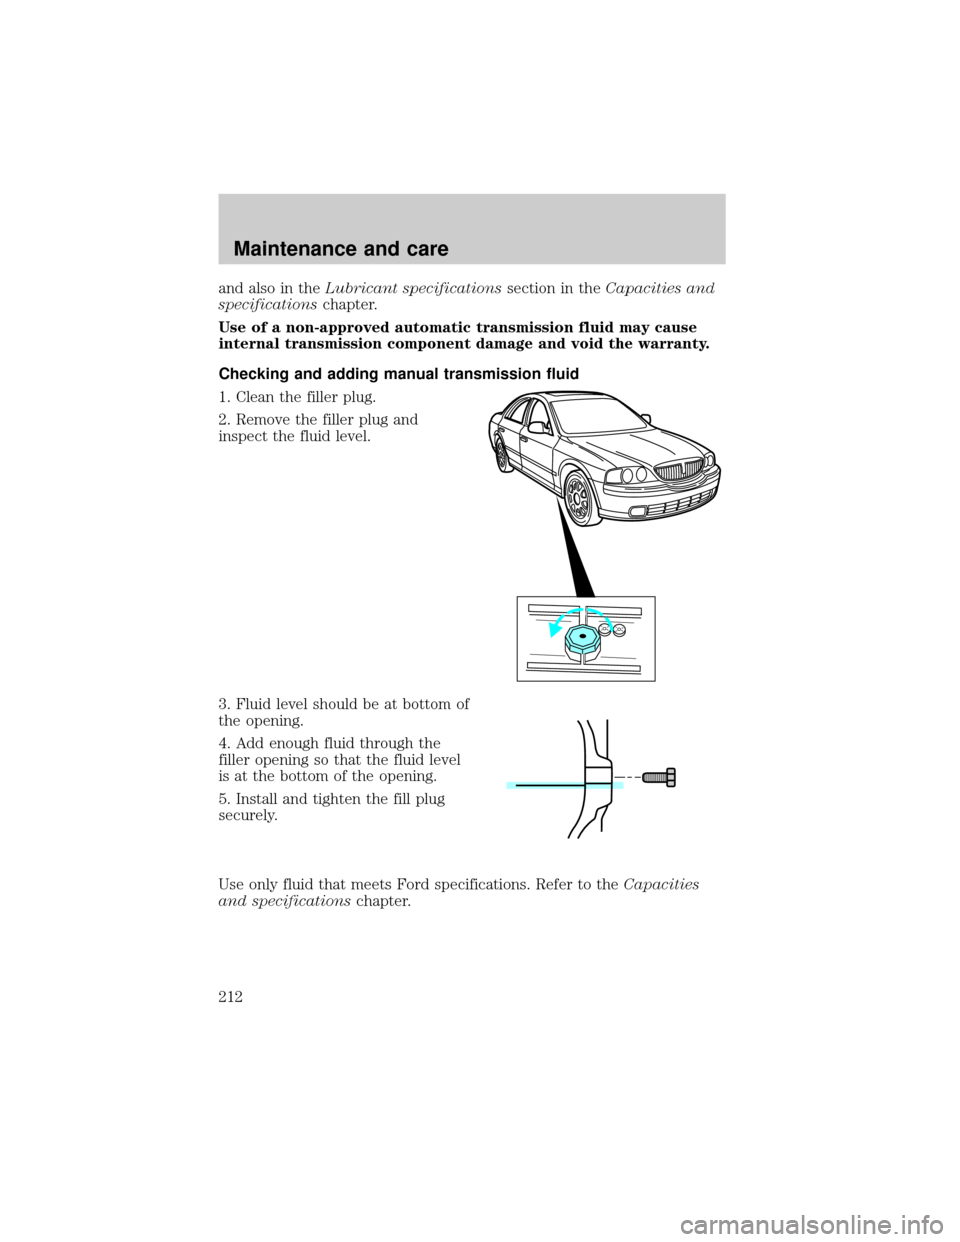
Checking and adding manual transmission fluid
1. Clean the filler plug.
2. Remove the filler plug and
inspect the fluid level.
3. Fluid level should be at bottom of
the opening.
4. Add enough fluid through the
filler opening so that the fluid level
is at the bottom of the opening.
5. Install and tighten the fill plug
securely.
Use only fluid that meets Ford specifications. Refer to theCapacities
and specificationschapter.
Maintenance and care
212
Page 213 of 272
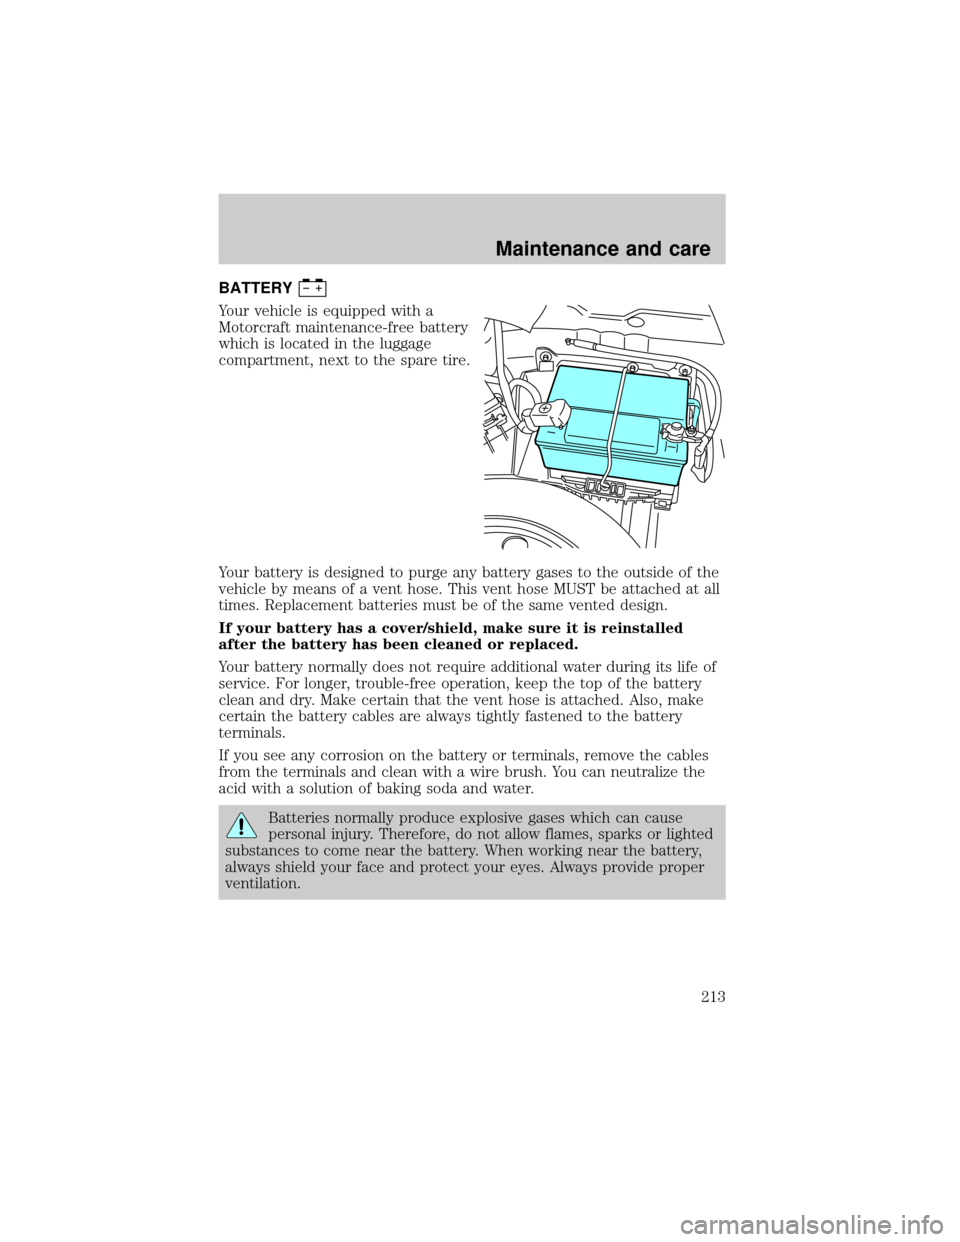
BATTERY
Your vehicle is equipped with a
Motorcraft maintenance-free battery
which is located in the luggage
compartment, next to the spare tire.
Your battery is designed to purge any battery gases to the outside of the
vehicle by means of a vent hose. This vent hose MUST be attached at all
times. Replacement batteries must be of the same vented design.
If your battery has a cover/shield, make sure it is reinstalled
after the battery has been cleaned or replaced.
Your battery normally does not require additional water during its life of
service. For longer, trouble-free operation, keep the top of the battery
clean and dry. Make certain that the vent hose is attached. Also, make
certain the battery cables are always tightly fastened to the battery
terminals.
If you see any corrosion on the battery or terminals, remove the cables
from the terminals and clean with a wire brush. You can neutralize the
acid with a solution of baking soda and water.
Batteries normally produce explosive gases which can cause
personal injury. Therefore, do not allow flames, sparks or lighted
substances to come near the battery. When working near the battery,
always shield your face and protect your eyes. Always provide proper
ventilation.
Maintenance and care
213
Page 214 of 272
When lifting a plastic-cased battery, excessive pressure on the
end walls could cause acid to flow through the vent caps,
resulting in personal injury and/or damage to the vehicle or battery.
Lift the battery with a battery carrier or with your hands on opposite
corners.
Keep batteries out of reach of children. Batteries contain sulfuric
acid. Avoid contact with skin, eyes or clothing. Shield your eyes
when working near the battery to protect against possible splashing of
acid solution. In case of acid contact with skin or eyes, flush
immediately with water for a minimum of 15 minutes and get prompt
medical attention. If acid is swallowed, call a physician immediately.
Because your vehicle's engine is electronically controlled by a computer,
some control conditions are maintained by power from the battery. When
the battery is disconnected or a new battery is installed, the engine must
relearn its idle and fuel trim strategy for optimum driveability and
performance. To begin this process:
1. With the vehicle at a complete stop, set the parking brake.
2. Put the gearshift in P (Park) (automatic transmission) or the neutral
position (manual transmission), turn off all accessories and start the
engine.
3. Run the engine until it reaches normal operating temperature.
4. Allow the engine to idle for at least one minute.
5. Turn the A/C on and allow the engine to idle for at least one minute.
6. Drive the vehicle to complete the relearning process.
²The vehicle may need to be driven 16 km (10 miles) or more to
relearn the idle and fuel trim strategy.
²If you do not allow the engine to relearn its idle trim, the idle
quality of your vehicle may be adversely affected until the idle
trim is eventually relearned.
If the battery has been disconnected or a new battery has been installed,
the clock and the preset radio stations must be reset once the battery is
reconnected.
Maintenance and care
214
Page 215 of 272
²Always dispose of automotive
batteries in a responsible manner.
Follow your local authorized
standards for disposal. Call your
local authorized recycling center
to find out more about recycling
automotive batteries.
AIR FILTER MAINTENANCE
Refer to the Scheduled Maintenance Guide for the appropriate intervals
for changing the air filter element.
When changing the air filter element, use only the Motorcraft air filter
element listed. Refer toMotorcraft Part Numbersin theCapacities and
specificationschapter.
Do not start your engine with the air cleaner removed and do
not remove it while the engine is running.
Changing the air filter element
1. Loosen the hose clamp on the
outlet tube at the air filter housing.
LEAD
RETURN
RECYCLE
Maintenance and care
215
Page 216 of 272
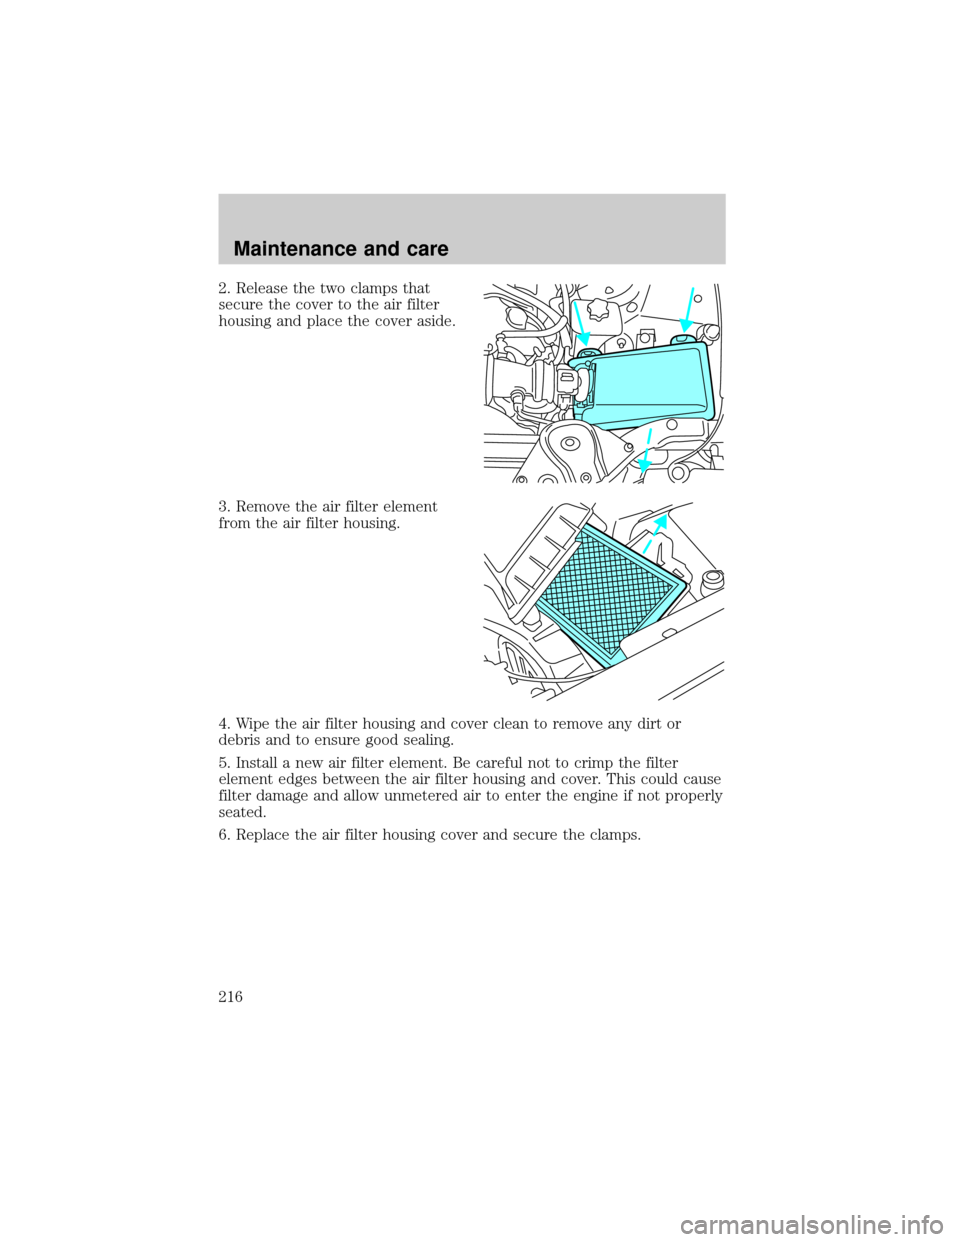
2. Release the two clamps that
secure the cover to the air filter
housing and place the cover aside.
3. Remove the air filter element
from the air filter housing.
4. Wipe the air filter housing and cover clean to remove any dirt or
debris and to ensure good sealing.
5. Install a new air filter element. Be careful not to crimp the filter
element edges between the air filter housing and cover. This could cause
filter damage and allow unmetered air to enter the engine if not properly
seated.
6. Replace the air filter housing cover and secure the clamps.
Maintenance and care
216
Page 217 of 272
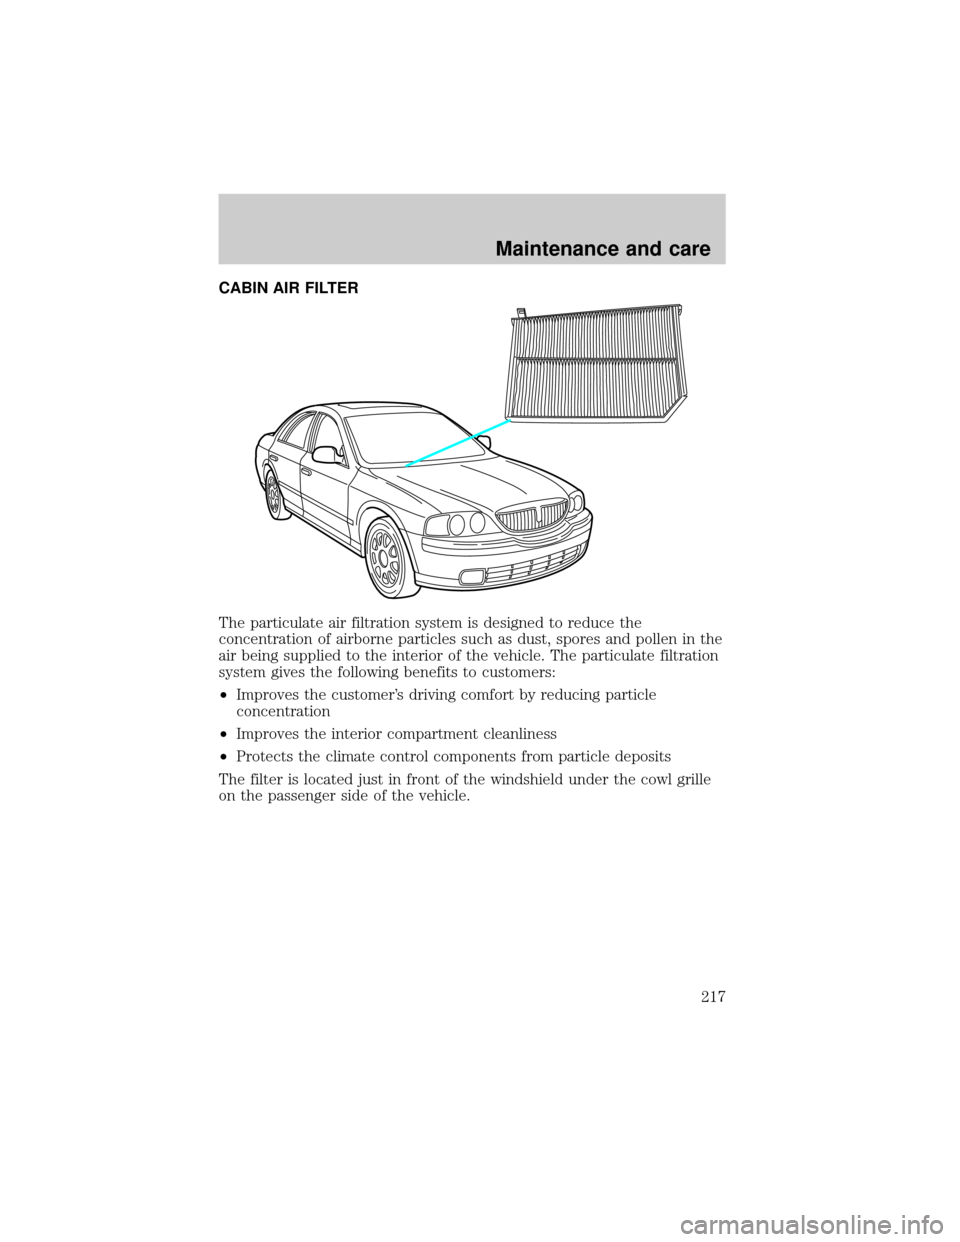
CABIN AIR FILTER
The particulate air filtration system is designed to reduce the
concentration of airborne particles such as dust, spores and pollen in the
air being supplied to the interior of the vehicle. The particulate filtration
system gives the following benefits to customers:
²Improves the customer's driving comfort by reducing particle
concentration
²Improves the interior compartment cleanliness
²Protects the climate control components from particle deposits
The filter is located just in front of the windshield under the cowl grille
on the passenger side of the vehicle.
Maintenance and care
217
Page 218 of 272
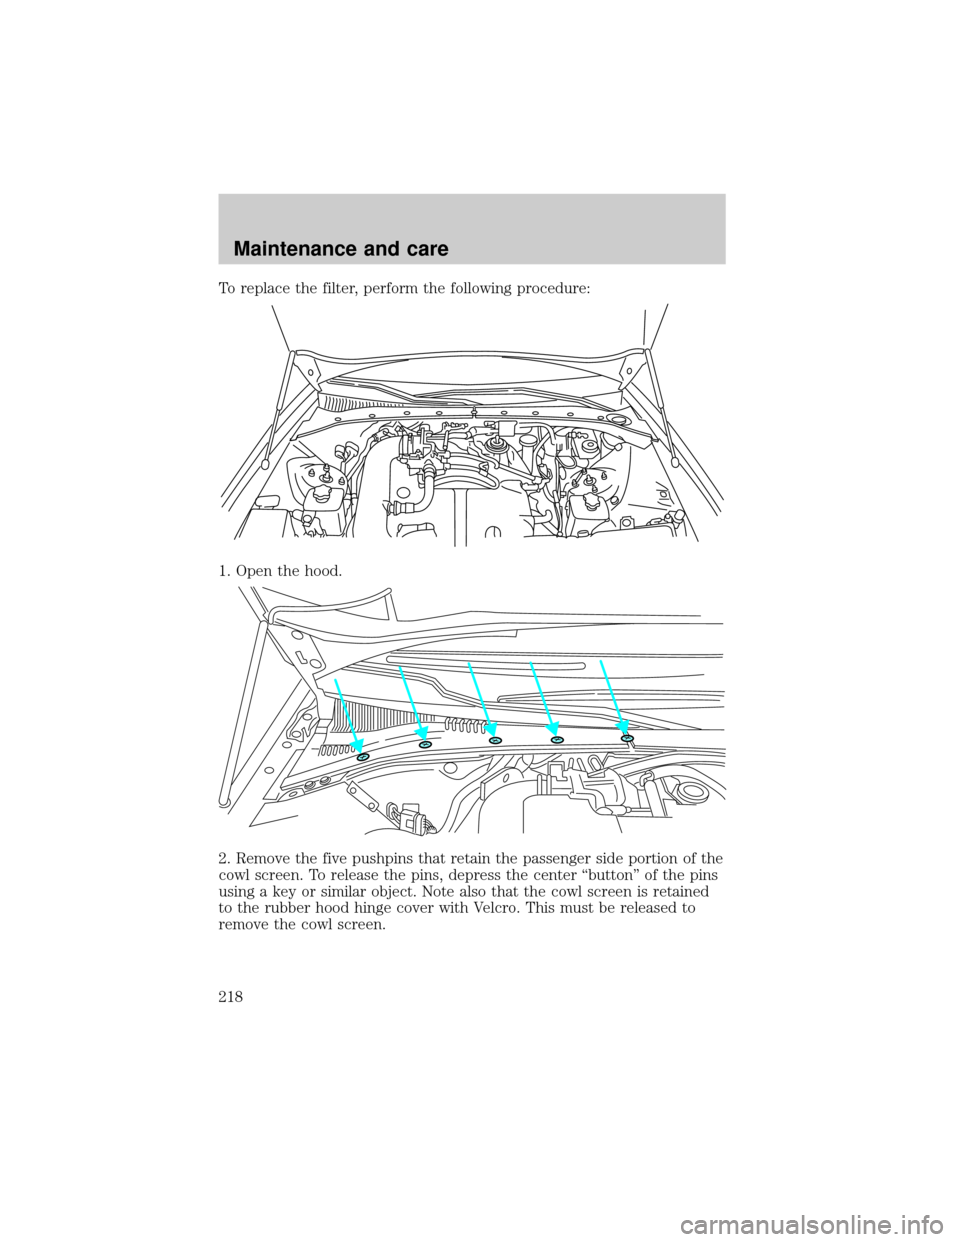
To replace the filter, perform the following procedure:
1. Open the hood.
2. Remove the five pushpins that retain the passenger side portion of the
cowl screen. To release the pins, depress the center ªbuttonº of the pins
using a key or similar object. Note also that the cowl screen is retained
to the rubber hood hinge cover with Velcro. This must be released to
remove the cowl screen.
Maintenance and care
218
Page 219 of 272
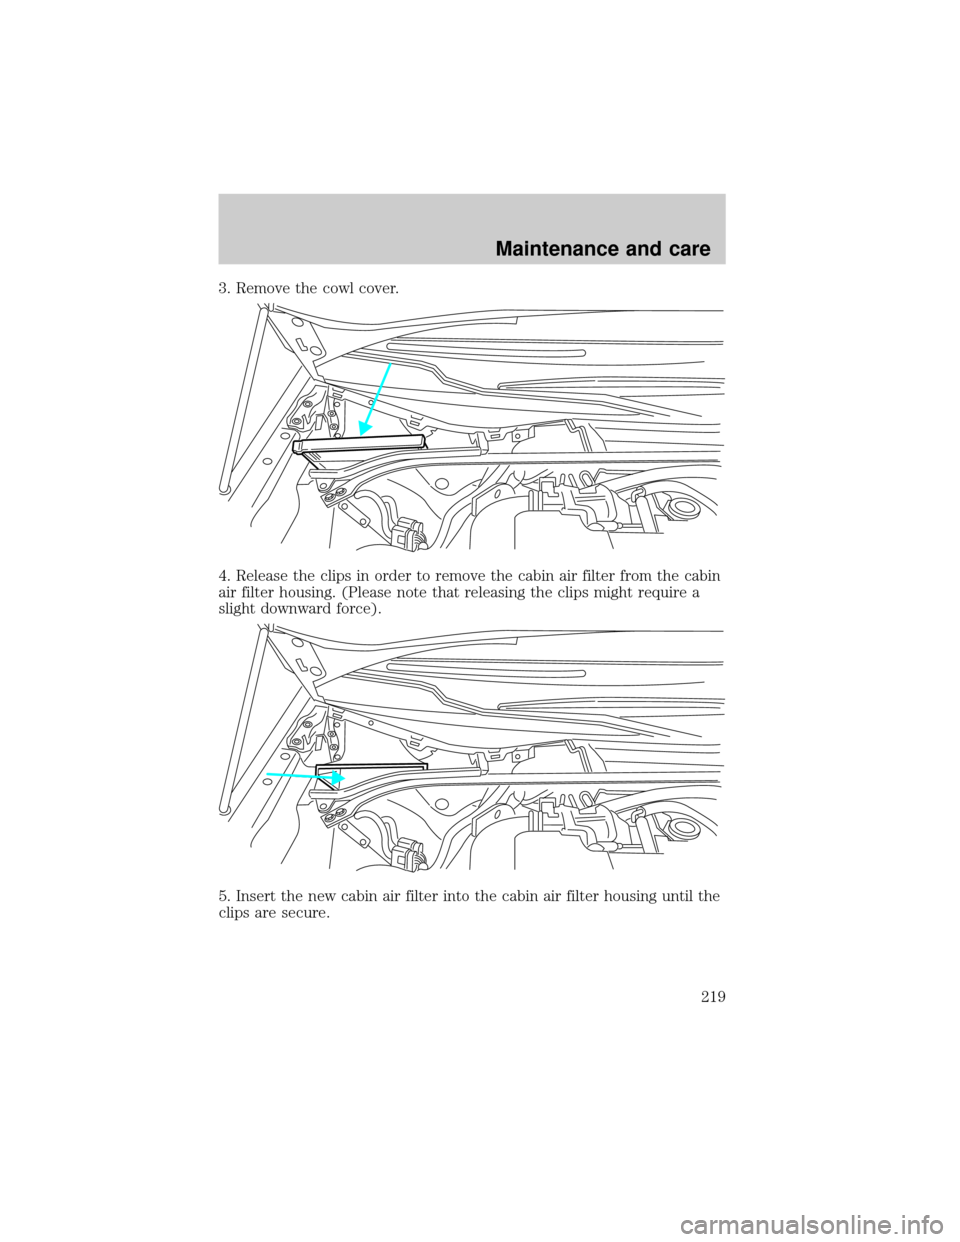
3. Remove the cowl cover.
4. Release the clips in order to remove the cabin air filter from the cabin
air filter housing. (Please note that releasing the clips might require a
slight downward force).
5. Insert the new cabin air filter into the cabin air filter housing until the
clips are secure.
Maintenance and care
219
Page 220 of 272
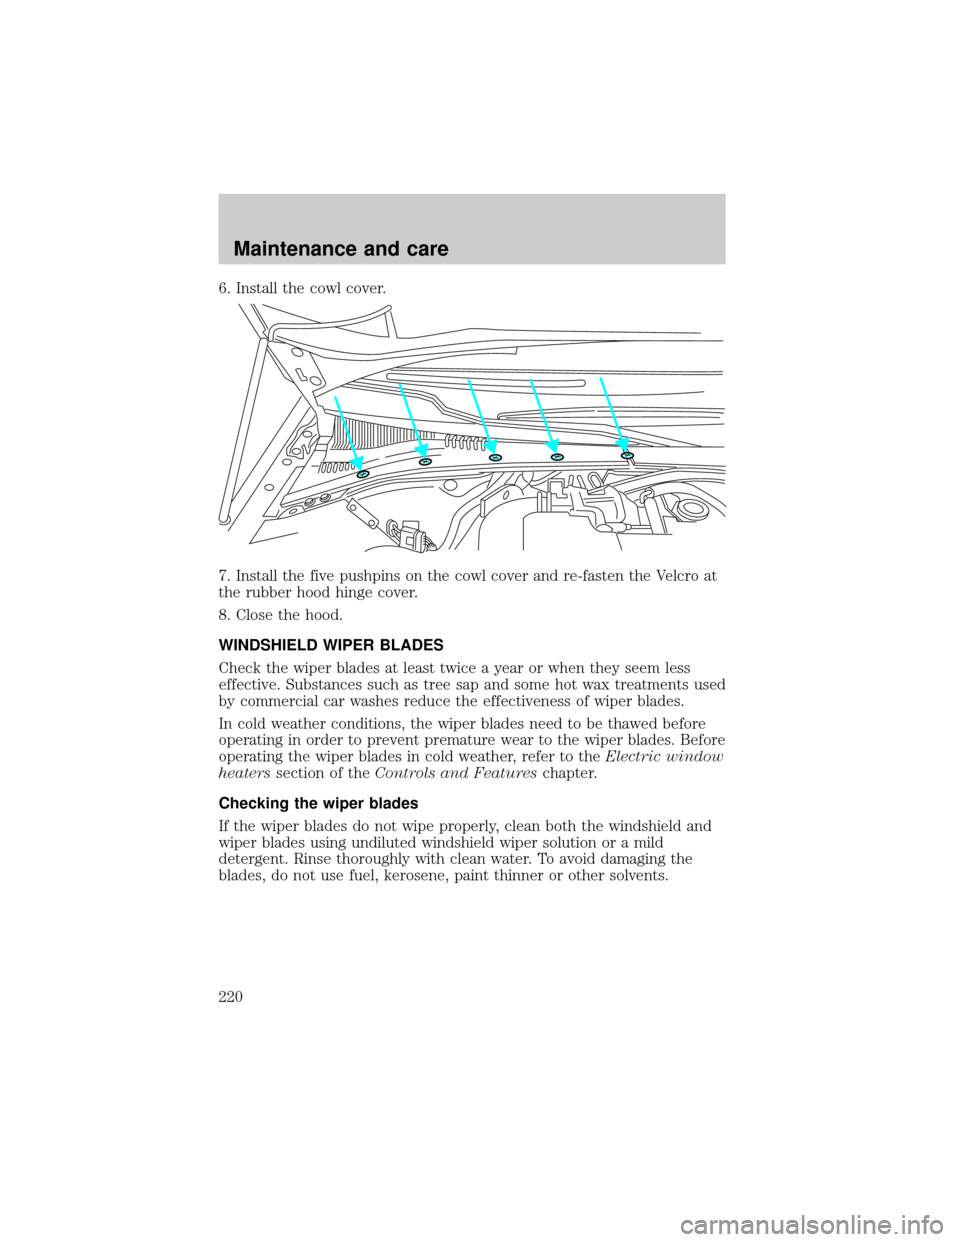
6. Install the cowl cover.
7. Install the five pushpins on the cowl cover and re-fasten the Velcro at
the rubber hood hinge cover.
8. Close the hood.
WINDSHIELD WIPER BLADES
Check the wiper blades at least twice a year or when they seem less
effective. Substances such as tree sap and some hot wax treatments used
by commercial car washes reduce the effectiveness of wiper blades.
In cold weather conditions, the wiper blades need to be thawed before
operating in order to prevent premature wear to the wiper blades. Before
operating the wiper blades in cold weather, refer to theElectric window
heaterssection of theControls and Featureschapter.
Checking the wiper blades
If the wiper blades do not wipe properly, clean both the windshield and
wiper blades using undiluted windshield wiper solution or a mild
detergent. Rinse thoroughly with clean water. To avoid damaging the
blades, do not use fuel, kerosene, paint thinner or other solvents.
Maintenance and care
220