display LINCOLN MARK VIII 1997 Owner's Manual
[x] Cancel search | Manufacturer: LINCOLN, Model Year: 1997, Model line: MARK VIII, Model: LINCOLN MARK VIII 1997Pages: 315, PDF Size: 2.18 MB
Page 44 of 315

39
Function/Status Error MessagesFor some functions displayed by the Message
Center, there will be error messages displayed,
instead of the requested information, if that
information is not currently available because of
improper operation of sensor systems, or the vehicle
network communication between electronic
modules. In this case instead of displaying a
warning message which takes control of the display,
a function/status error message will be displayed
when the affected function is requested. These
messages will have 2 formats:
1. Data error messages in the form ªDATA
ERRORº or ªDATA ERRº. These messages
indicate improper operation of the vehicle
network communication between electronics
modules. If these messages occur on a regular
basis contact your dealer for service as soon as
safely possible.2. Invalid sensor operation messages with the form
ªSENSOR OPENº or ªSENSOR SHORTº. These
messages indicate improper operation of vehicle
sensor systems, or vehicle wiring/connectors
between the sensors and Message Center. If
these messages occur on a regular basis contact
your dealer for service as soon as safely
possible.
Electronic CompassThe electronic compass will be displayed when the
COMPASS switch is pressed. The display shows the
direction your car is traveling as one of the
following directions: North, Northeast, East,
Southeast, South, Southwest, West, or Northwest.
If a warning becomes active, the warning message
will override the compass display.
File:03fnis8.ex
Update:Thu Jun 27 10:00:37 1996
Page 45 of 315

40Factors Affecting Compass AccuracyMagnetic mounted devices (antennas, racks, etc.)
should not be located on the front third of the
vehicle roof. Placement of these devices near the
compass will cause the compass to be inaccurate. If
these devices are used, for improved accuracy,
recalibrate the compass with the device(s) installed.
Driving near power lines or large iron or steel
structures can temporarily change the compass
heading. Demagnetize the vehicle and recalibrate
the compass if it remains inaccurate after driving
near such objects.Compass AdjustmentsPress and hold the COMPASS control, then press
the RESET control. Next, release both controls. The
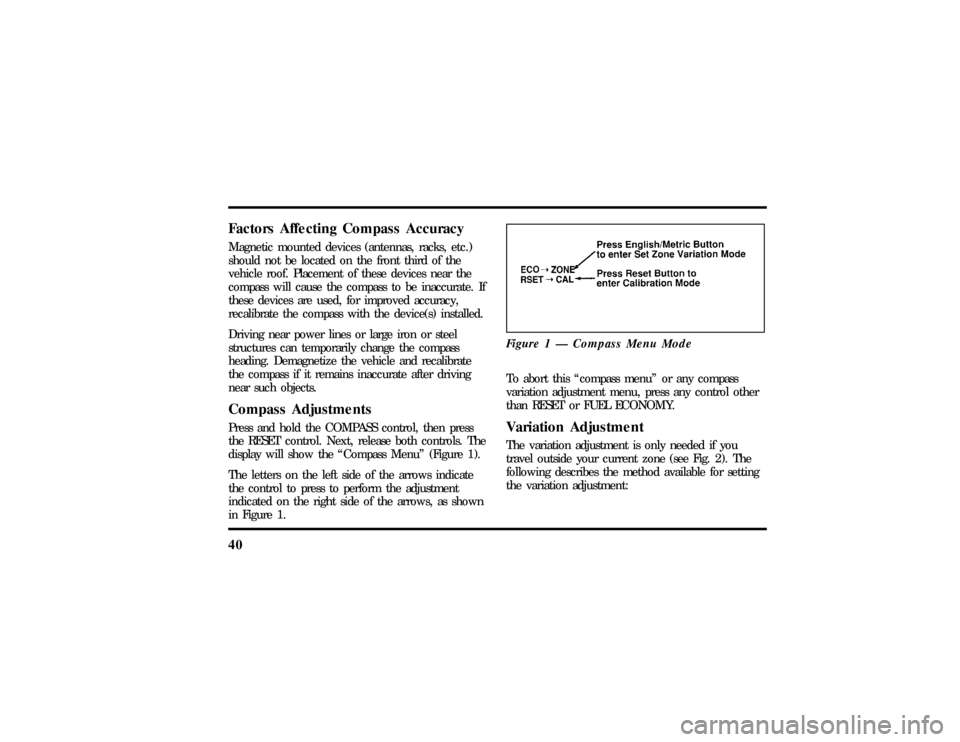
display will show the ªCompass Menuº (Figure 1).
The letters on the left side of the arrows indicate
the control to press to perform the adjustment
indicated on the right side of the arrows, as shown
in Figure 1.Figure 1 Ð Compass Menu Mode
To abort this ªcompass menuº or any compass
variation adjustment menu, press any control other
than RESET or FUEL ECONOMY.Variation AdjustmentThe variation adjustment is only needed if you
travel outside your current zone (see Fig. 2). The
following describes the method available for setting
the variation adjustment:
File:03fnis8.ex
Update:Thu Jun 27 10:00:37 1996
Page 46 of 315

41
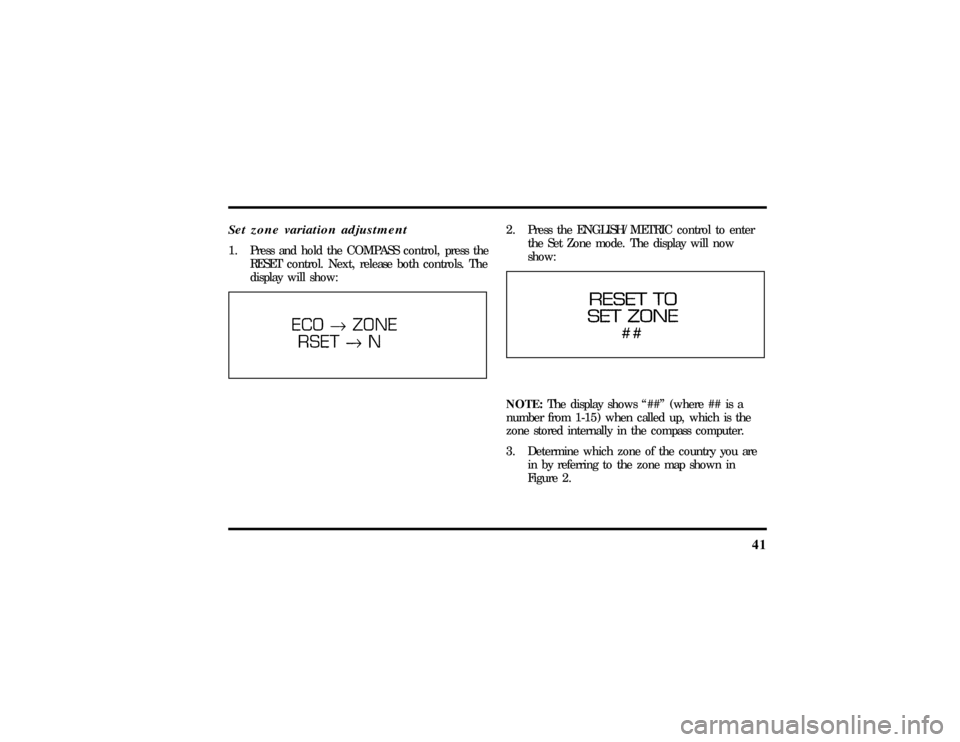
Set zone variation adjustment1. Press and hold the COMPASS control, press the
RESET control. Next, release both controls. The
display will show:
2. Press the ENGLISH/METRIC control to enter
the Set Zone mode. The display will now
show:NOTE:The display shows ª##º (where ## is a
number from 1-15) when called up, which is the
zone stored internally in the compass computer.
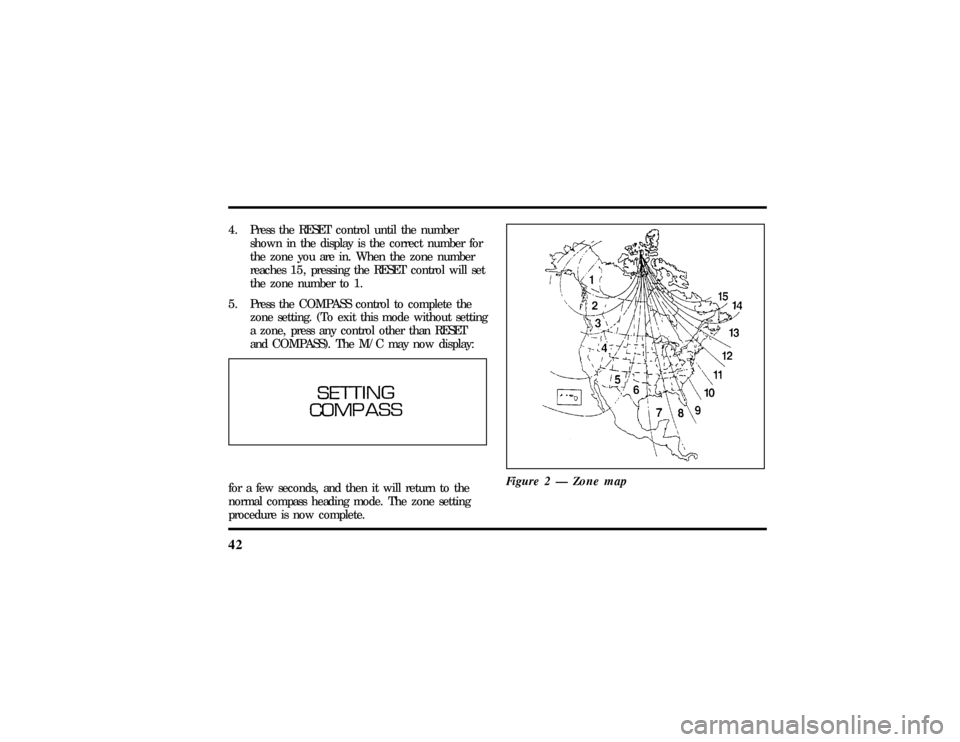
3. Determine which zone of the country you are
in by referring to the zone map shown in
Figure 2.
File:03fnis8.ex
Update:Thu Jun 27 10:00:37 1996
Page 47 of 315

424. Press the RESET control until the number
shown in the display is the correct number for
the zone you are in. When the zone number
reaches 15, pressing the RESET control will set
the zone number to 1.
5. Press the COMPASS control to complete the
zone setting. (To exit this mode without setting
a zone, press any control other than RESET
and COMPASS). The M/C may now display:for a few seconds, and then it will return to the
normal compass heading mode. The zone setting
procedure is now complete.Figure 2 Ð Zone map
File:03fnis8.ex
Update:Thu Jun 27 10:00:37 1996
Page 48 of 315

43
Calibration Procedure1. Find an open, level area free from steel
structures and high voltage lines. An empty,
level parking lot is recommended.
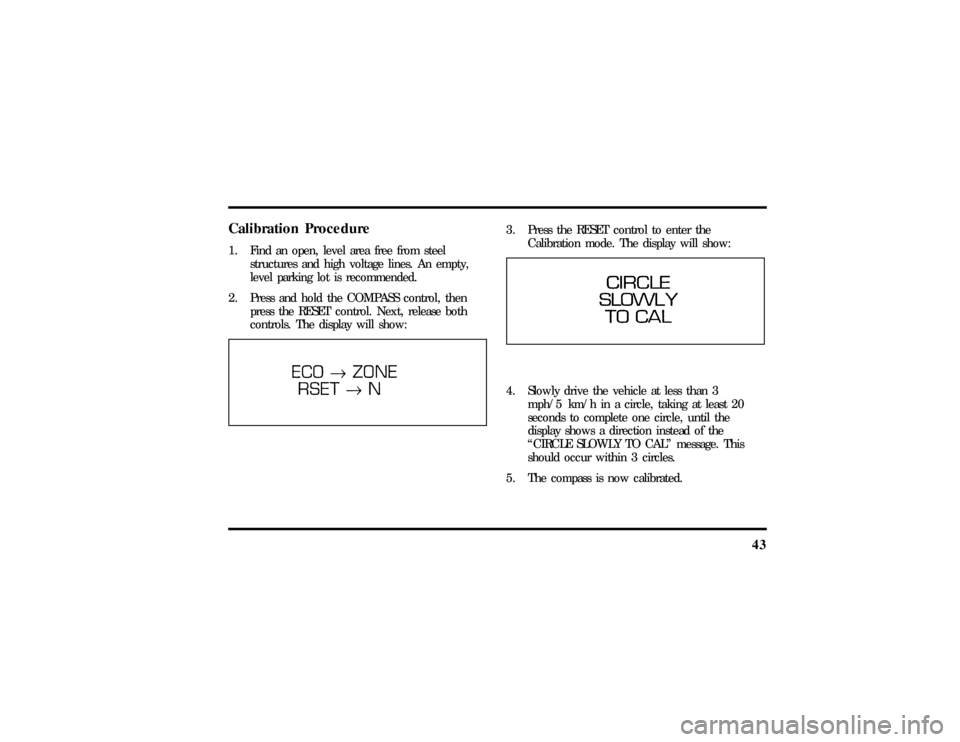
2. Press and hold the COMPASS control, then
press the RESET control. Next, release both
controls. The display will show:
3. Press the RESET control to enter the
Calibration mode. The display will show:4. Slowly drive the vehicle at less than 3
mph/5 km/h in a circle, taking at least 20
seconds to complete one circle, until the
display shows a direction instead of the
ªCIRCLE SLOWLY TO CALº message. This
should occur within 3 circles.
5. The compass is now calibrated.
File:03fnis8.ex
Update:Thu Jun 27 10:00:37 1996
Page 49 of 315

44TroubleshootingIf the display shows the following message during
any of the compass adjustment procedures, contact
your dealer:If the compass always displays one direction while
turning a full 360-degree circle, perform the
Calibration Procedure.
A system of warning lights are located below the
Message Center. Warning lights are used to monitor
the operation of your vehicle.
Safety Belt Warning Light and ChimeThis warning light and chime remind you to fasten
your safety belt. The following conditions will take
place:q
If the driver's safety belt is not buckled when
the ignition is turned to the ON position, the
light will turn on for 1 to 2 minutes and the
chime will sound for 4 to 8 seconds.
q
If the driver's safety belt is buckled while the
light is on and the chime is sounding, the light
and the chime will turn off.
q
If the driver's safety belt is buckled before the
ignition is turned to the ON position, neither
the light nor the chime will turn on.
File:03fnis8.ex
Update:Thu Jun 27 10:00:37 1996
Page 56 of 315

51
Premium Stereo Cassette, Stereo
Cassette with CD DJ and
Premium Compact Disc RadioYour vehicle is equipped with either a premium
stereo cassette radio or a premium compact disc
radio. Both systems are available with a JBLH
upgrade system, which includes a Ford 10-CD
changer.
Individual functions of these systems follow:Using the Controls on Your New RadioHow to turn the radio on and offPress the ªVOL/PUSHº knob to turn the radio on.
Press again to turn it off.How to adjust the volumeTurn the ªVOL/PUSHº knob to the right to
increase the volume and to the left to decrease the
volume. Bars illuminate in the display to show
relative volume level.NOTE:If the volume level is set above a certain
listening level when the ignition switch is turned
off, when the ignition switch is turned back on, the
volume will come back to a ªnominalº listening
level. However, if the radio power is turned off, the
volume will remain in the position it was set at
when radio power was switched off.
Selecting the AM or FM frequency bandPush the ªAM/FMº button to select the desired
frequency band or to stop/store cassette tape (when
in cassette mode) or compact disc (when in CD
mode). Pushing the button more than once will
alternate between AM, FM1 and FM2. These
functions are used with the station memory buttons
described underHow to tune radio stations.How to tune radio stationsThere are four ways for you to tune in a particular
station. You can manually locate the station using
the ªTUNEº, ªSEEKº, ªSCANº or selecting the
station by using the memory buttons, which you
File:04fnas8.ex
Update:Wed Jun 19 10:43:44 1996
Page 58 of 315

53
Follow the easy steps below to set these buttons to
the desired frequencies:
1. Select a band, then select a frequency.
2. Press one of the memory preset buttons and
hold the button until the sound returns. That
station is now held in memory on that button.
3. Follow the two steps above for each station
memory preset button you want to set.q
Using the AUTOSET feature
With AUTOSET, you can continually set strong
stations into your memory buttons without
losing your originally set stations.
Press the ªAUTOSETº button once. Your radio
will set the first six strong stations of the band
you are in (AM, FM1, or FM2) into the
memory buttons. The display will show
ªAUTOº, then run through the frequencies
setting the memory buttons.NOTE:If there are fewer than five strong
stations in the frequency band, the remaining
unfilled buttons will store the last strong station
detected on the band.
When all stations are filled, the radio will begin
playing the station stored in memory button 1.
To deactivate the Auto Memory Store mode and
return to manually-set memory button stations,
press the ªAUTOSETº button. Display will show
ªAUTOº then ªOFFº.
Adjusting the tone balance of your radioq
Increasing or decreasing bass response
Press the top
cof the ªBASSº button to increase
bass; press the bottom
dof the ªBASSº button to
decrease bass.
File:04fnas8.ex
Update:Wed Jun 19 10:43:44 1996
Page 59 of 315

54q
Increasing or decreasing treble response
Press the top
cof the ªTREBLEº button to
increase treble; press the bottom
dof the treble
button to decrease treble.
q
Adjusting speaker balance
Balance control allows you to adjust the sound
distribution between the right and left speakers.
Press the top
cof the ªBALº button to shift the
sound to the right speakers, and press the bottom
dof the ªBALº button to shift the sound to the
left speakers.
q
Adjusting speaker fader
Fade control allows you to adjust the sound
distribution between the front and rear speakers.
Press the top
cof the ªFADEº button to shift the
sound to the front speakers, and press the bottom
dof the ªFADEº button to shift the sound to the
back speakers.NOTE:Illuminated bars in the display show relative
levels of bass and treble, and positions of speaker
balance and fader functions (left to right, front to
rear).
Using the Controls of Your
Cassette Tape Player
(If Equipped)NOTE:Radio power must be on to use the cassette
tape player.How to insert a tapeYour cassette tape player is equipped with power
loading. Once you insert a tape and push slightly
(with theopen edge to the right), the loading
mechanism draws the tape the rest of the way in
and play will begin after a momentary tape
tightening process. Display indicates ªTAPEº while
tape is playing.
File:04fnas8.ex
Update:Wed Jun 19 10:43:44 1996
Page 60 of 315

55
NOTE:A cassette tape can be loaded with the
ignition on whether or not the radio power is on.
However, with radio power off, the cassette tape is
loaded and stored.
NOTE:Noise reduction system manufactured under
license from Dolby Labs Licensing Corporation.
ªDolbyº and double-D symbol are trademarks of
Dolby Laboratories Licensing Corporation.How to locate a desired track on the tapeThere are four ways to quickly locate a desired
selection on the tape. You can use the fast forward,
rewind, ªSEEKº or ªSCANº function. Following are
brief descriptions of each.q
Fast forwarding the tape
To fast forward the tape, press the ªFFº button.
The radio will begin playing until fast forward is
manually stopped (by pushing the ªTAPEº button)
or the end of the tape is reached.At the end of the tape, the direction automatically
reverses and plays the other side of the tape.
q
Rewinding the tape
To rewind the tape, press the ªREWº button. The
radio will begin playing until rewind is manually
stopped (by pushing the ªTAPEº button) or the
beginning of the tape is reached.
q
Using the ªSEEKº function with your cassette
tape player
While in the tape mode, push the right
aside of
the ªSEEKº button to seek forward to the next
selection on the tape. Push the left
bside to seek
the previous tape selection.
q
Using the ªSCANº function with your cassette
tape player
Press the ªSCANº button to begin the forward scan
mode on the tape currently playing, stopping on
each tape selection for approximately an
eight-second sampling (display indicates ªSCº).
File:04fnas8.ex
Update:Wed Jun 19 10:43:44 1996