engine overheat LINCOLN MKS 2015 Owners Manual
[x] Cancel search | Manufacturer: LINCOLN, Model Year: 2015, Model line: MKS, Model: LINCOLN MKS 2015Pages: 424, PDF Size: 3.96 MB
Page 99 of 424
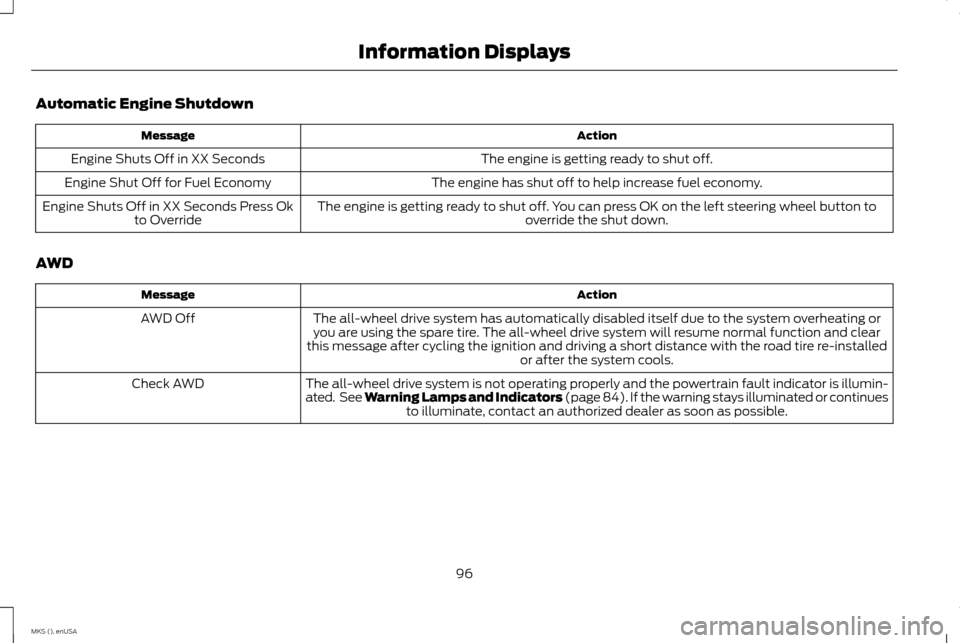
Automatic Engine Shutdown
Action
Message
The engine is getting ready to shut off.
Engine Shuts Off in XX Seconds
The engine has shut off to help increase fuel economy.
Engine Shut Off for Fuel Economy
The engine is getting ready to shut off. You can press OK on the left steering wheel button tooverride the shut down.
Engine Shuts Off in XX Seconds Press Ok
to Override
AWD Action
Message
The all-wheel drive system has automatically disabled itself due to the system overheating oryou are using the spare tire. The all-wheel drive system will resume normal function and clear
this message after cycling the ignition and driving a short distance with the road tire re-installed or after the system cools.
AWD Off
The all-wheel drive system is not operating properly and the powertrain fault indicator is illumin-
ated. See Warning Lamps and Indicators (page 84). If the warning stays illuminated or continuesto illuminate, contact an authorized dealer as soon as possible.
Check AWD
96
MKS (), enUSA Information Displays
Page 118 of 424
2.
Press and hold the desired preset button
for a few seconds. A tone will sound.
Continue holding until a second tone is
heard.
3. Within three seconds, press the lock button on the remote control you are
linking.
To unlink a remote control, follow the same
procedure – except in Step 3, press the
unlock button on the remote control.
Easy Entry and Exit Feature
If you enable the easy entry and exit feature,
it automatically moves the driver seat
position rearward up to two inches (five
centimeters) and the steering column up and
forward when you switch the ignition off.
When you switch the ignition on, the driver
seat will return to the previous position.
You can enable or disable this feature in the
information display. See Information
Displays (page 88). CLIMATE CONTROLLED SEATS
(If Equipped) WARNING
Persons who are unable to feel pain to
the skin because of advanced age,
chronic illness, diabetes, spinal cord
injury, medication, alcohol use, exhaustion,
or other physical conditions, must exercise
care when using the seat heater. The seat
heater may cause burns even at low
temperatures, especially if used for long
periods of time. Do not place anything on the
seat that insulates against heat, such as a
blanket or cushion, because this may cause
the seat heater to overheat. Do not puncture
the seat with pins, needles, or other pointed
objects because this may damage the
heating element which may cause the seat
heater to overheat. An overheated seat may
cause serious personal injury. Note:
Do not do the following:
• Place heavy objects on the seat.
• Operate the seat heater if water or any
other liquid is spilled on the seat. Allow
the seat to dry thoroughly. The heated seats will only function when the
engine is running.
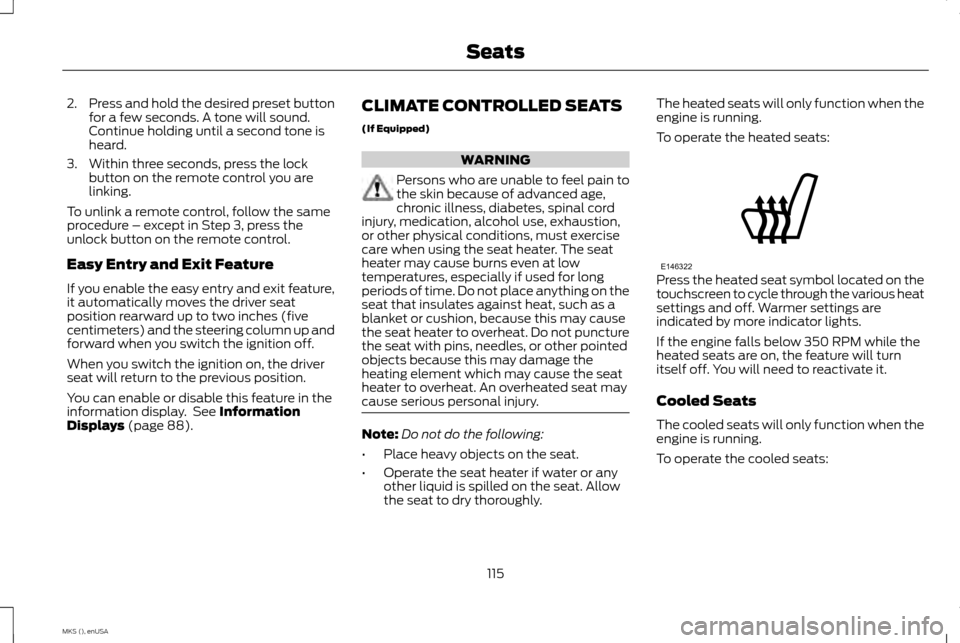
To operate the heated seats:
Press the heated seat symbol located on the
touchscreen to cycle through the various heat
settings and off. Warmer settings are
indicated by more indicator lights.
If the engine falls below 350 RPM while the
heated seats are on, the feature will turn
itself off. You will need to reactivate it.
Cooled Seats
The cooled seats will only function when the
engine is running.
To operate the cooled seats:
115
MKS (), enUSA SeatsE146322
Page 119 of 424
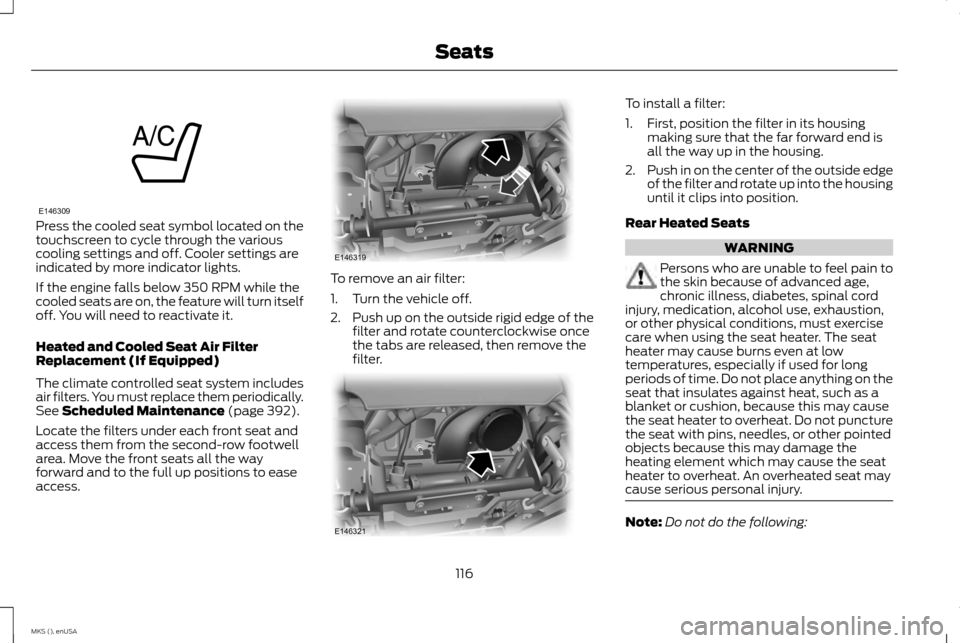
Press the cooled seat symbol located on the
touchscreen to cycle through the various
cooling settings and off. Cooler settings are
indicated by more indicator lights.
If the engine falls below 350 RPM while the
cooled seats are on, the feature will turn itself
off. You will need to reactivate it.
Heated and Cooled Seat Air Filter
Replacement (If Equipped)
The climate controlled seat system includes
air filters. You must replace them periodically.
See Scheduled Maintenance (page 392).
Locate the filters under each front seat and
access them from the second-row footwell
area. Move the front seats all the way
forward and to the full up positions to ease
access. To remove an air filter:
1. Turn the vehicle off.
2. Push up on the outside rigid edge of the
filter and rotate counterclockwise once
the tabs are released, then remove the
filter. To install a filter:
1. First, position the filter in its housing
making sure that the far forward end is
all the way up in the housing.
2. Push in on the center of the outside edge
of the filter and rotate up into the housing
until it clips into position.
Rear Heated Seats WARNING
Persons who are unable to feel pain to
the skin because of advanced age,
chronic illness, diabetes, spinal cord
injury, medication, alcohol use, exhaustion,
or other physical conditions, must exercise
care when using the seat heater. The seat
heater may cause burns even at low
temperatures, especially if used for long
periods of time. Do not place anything on the
seat that insulates against heat, such as a
blanket or cushion, because this may cause
the seat heater to overheat. Do not puncture
the seat with pins, needles, or other pointed
objects because this may damage the
heating element which may cause the seat
heater to overheat. An overheated seat may
cause serious personal injury. Note:
Do not do the following:
116
MKS (), enUSA SeatsE146309 E146319 E146321
Page 144 of 424
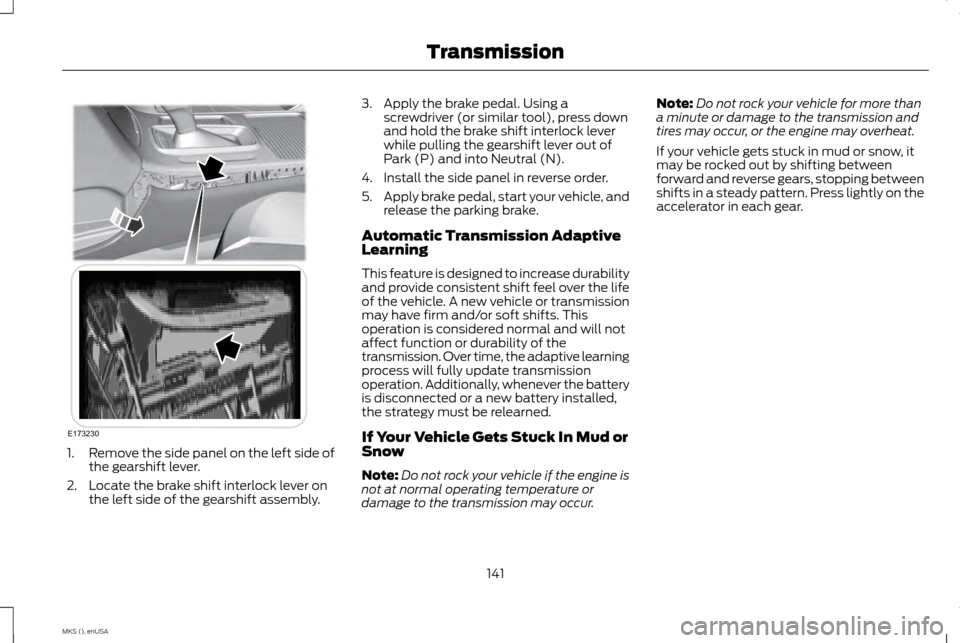
1.
Remove the side panel on the left side of
the gearshift lever.
2. Locate the brake shift interlock lever on the left side of the gearshift assembly. 3. Apply the brake pedal. Using a
screwdriver (or similar tool), press down
and hold the brake shift interlock lever
while pulling the gearshift lever out of
Park (P) and into Neutral (N).
4. Install the side panel in reverse order.
5. Apply brake pedal, start your vehicle, and
release the parking brake.
Automatic Transmission Adaptive
Learning
This feature is designed to increase durability
and provide consistent shift feel over the life
of the vehicle. A new vehicle or transmission
may have firm and/or soft shifts. This
operation is considered normal and will not
affect function or durability of the
transmission. Over time, the adaptive learning
process will fully update transmission
operation. Additionally, whenever the battery
is disconnected or a new battery installed,
the strategy must be relearned.
If Your Vehicle Gets Stuck In Mud or
Snow
Note: Do not rock your vehicle if the engine is
not at normal operating temperature or
damage to the transmission may occur. Note:
Do not rock your vehicle for more than
a minute or damage to the transmission and
tires may occur, or the engine may overheat.
If your vehicle gets stuck in mud or snow, it
may be rocked out by shifting between
forward and reverse gears, stopping between
shifts in a steady pattern. Press lightly on the
accelerator in each gear.
141
MKS (), enUSA TransmissionE173230
Page 145 of 424
USING ALL-WHEEL DRIVE
All-wheel drive uses all four wheels to power
the vehicle. This increases traction, enabling
you to drive over terrain and road conditions
that a conventional two-wheel drive vehicle
cannot. The AWD system is active all the time
and requires no input from the operator.
Note:
Your AWD vehicle is not for off-road
use. The AWD feature gives your vehicle some
limited off-road capabilities in which driving
surfaces are relatively level, obstruction-free
and otherwise similar to normal on-road
driving conditions. Operating your vehicle
under other than those conditions could
subject the vehicle to excessive stress which
might result in damage not covered under your
warranty.
Note: When an AWD system fault is present,
the warning Check AWD displays in the
information display. See Information
Messages (page 94). An AWD system fault
causes the AWD system to default to
front-wheel drive only mode. If this warning
displays, have your vehicle serviced at an
authorized dealer. Note:
The AWD Off message displays in the
information display if the AWD system has
overheated
See Information Messages
(page 94). This condition may occur if the
vehicle operates in extreme conditions with
excessive wheel slip, such as deep sand. To
resume normal AWD function as soon as
possible, stop the vehicle in a safe location
and stop the engine for at least 10 minutes.
After the engine restarts and the AWD system
has adequately cooled, the AWD Off message
turns off and normal AWD function returns. In
the event you do not stop the engine, the AWD
Off message turns off when the system cools
and normal AWD function returns.
Do not use a spare tire of a different size
other than the tire provided. The AWD system
may disable automatically and enter
front-wheel drive only mode to protect
driveline components if you install the
mini-spare tire. A warning in the information
display indicates this condition.
See
Information Messages (page 94). If there
is an AWD Off message in the information
display from using the spare tire, this
indicator should turn off after reinstalling the
repaired or replaced normal road tire and
cycling the ignition off and on. Reinstall the repaired or replaced road tire as soon as
possible. Major dissimilar tire sizes between
the front and rear axles could cause the AWD
system to stop functioning and default to
front-wheel drive or damage the AWD
system.
Driving In Special Conditions With
All-Wheel Drive (AWD)
AWD vehicles are equipped for driving on
sand, snow, mud and rough roads and have
operating characteristics that are somewhat
different from conventional vehicles, both on
and off the highway.
When driving at slow speeds in deep sand
under high outside temperatures, use a low
gear when possible. Lower gear operation
maximizes the engine and transmission
cooling capability. Under severe operating
conditions, the A/C may cycle on and off to
protect overheating of the engine.
Basic operating principles in special
conditions
•
Drive slower in strong crosswinds which
can affect the normal steering
characteristics of your vehicle.
• Use extreme care when driving on
pavement made slippery by loose sand,
water, gravel, snow or ice.
142
MKS (), enUSA All-Wheel Drive
(If Equipped)
Page 146 of 424
If Your Vehicle Goes Off the Edge of the
Pavement
•
If your vehicle goes off the edge of the
pavement, slow down, but avoid severe
brake application. Ease the vehicle back
onto the pavement only after reducing
your speed. Do not turn the steering
wheel too sharply while returning to the
road surface.
• It may be safer to stay on the apron or
shoulder of the road and slow down
gradually before returning to the
pavement. You may lose control if you do
not slow down or if you turn the steering
wheel too sharply or abruptly.
• It often may be less risky to strike small
objects, such as highway reflectors, with
minor damage to your vehicle rather than
attempt a sudden return to the pavement
which could cause the vehicle to slide
sideways out of control or rollover.
Remember, your safety and the safety of
others should be your primary concern. If Your Vehicle Gets Stuck WARNINGS
Always set the parking brake fully and
make sure the transmission is in park
(P). Turn the ignition to the lock
position or turn the vehicle off using the
start/stop button and remove the key
whenever you leave your vehicle. If you release the parking brake and the
brake warning lamp remains
illuminated, the brakes may not be
working properly. See your authorized dealer. Do not spin the wheels at over 35 mph
(56 km/h). The tires may fail and injure
a passenger or bystander. Note:
Do not rock the vehicle if the engine is
not at normal operating temperature or
damage to the transmission may occur.
Note: Do not rock the vehicle for more than a
few minutes or damage to the transmission
and tires may occur or the engine may
overheat.
If your vehicle gets stuck in mud or snow you
can rock it out by shifting between forward
and reverse gears, stopping between shifts,
in a steady pattern. Press lightly on the
accelerator in each gear. If your vehicle is equipped with
AdvanceTrac® with Roll Stability Control
™,
it may be beneficial to disengage the
AdvanceTrac® with Roll Stability Control ™
system while attempting to rock the vehicle.
Emergency Maneuvers
• In an unavoidable emergency situation
where a sudden sharp turn must be
made, remember to avoid "over-driving"
your vehicle (i.e., turn the steering wheel
only as rapidly and as far as required to
avoid the emergency). Excessive steering
results in less vehicle control, not more.
Additionally, if changes in vehicle speed
are necessary, use smooth variations of
accelerator and/or brake pedal pressure
to adjust vehicle speed. Avoid abrupt
143
MKS (), enUSA All-Wheel Drive
(If Equipped)
Page 147 of 424
steering, acceleration or braking which
could result in an increased risk of loss of
vehicle control, vehicle rollover and/or
personal injury. Use all available road
surface to return the vehicle to a safe
direction of travel.
• In the event of an emergency stop, avoid
skidding the tires and do not attempt any
sharp steering wheel movements.
• If the vehicle goes from one type of
surface to another (i.e., from concrete to
gravel) the way the vehicle responds to
a maneuver changes (steering,
acceleration or braking). Again, avoid
these abrupt inputs.
Sand
When driving over sand, try to keep all four
wheels on the most solid area of the trail.
Avoid reducing the tire pressures but shift to
a lower gear and drive steadily through the
terrain. Apply the accelerator slowly and
avoid excessive wheel slip.
Do not drive your vehicle in deep sand for an
extended period of time. This could cause
the AWD system to overheat and default to
front-wheel drive. If this occurs AWD Off
displays in the Information Display. To
resume normal AWD function as soon as
possible, stop the vehicle in a safe location and stop the engine for at least 10 minutes.
After the engine restarts and the AWD
system has adequately cooled, the AWD Off
message turns off and normal AWD function
returns. In the event you do not stop the
engine, the AWD Off message turns off when
the system cools and normal AWD function
returns.
When driving at slow speeds in deep sand
under high outside temperatures, use a low
gear when possible. Low gear operation
maximizes the engine and transmission
cooling capability. Under severe operating
conditions, the A/C may cycle on and off to
protect overheating of the engine.
Avoid excessive speed because vehicle
momentum can work against you and cause
the vehicle to become stuck to the point that
assistance may be required from another
vehicle. Remember, you may be able to back
out the way you came if you proceed with
caution.
Mud and Water
If you must drive through high water, drive
slowly. Traction or brake capability may be
limited.
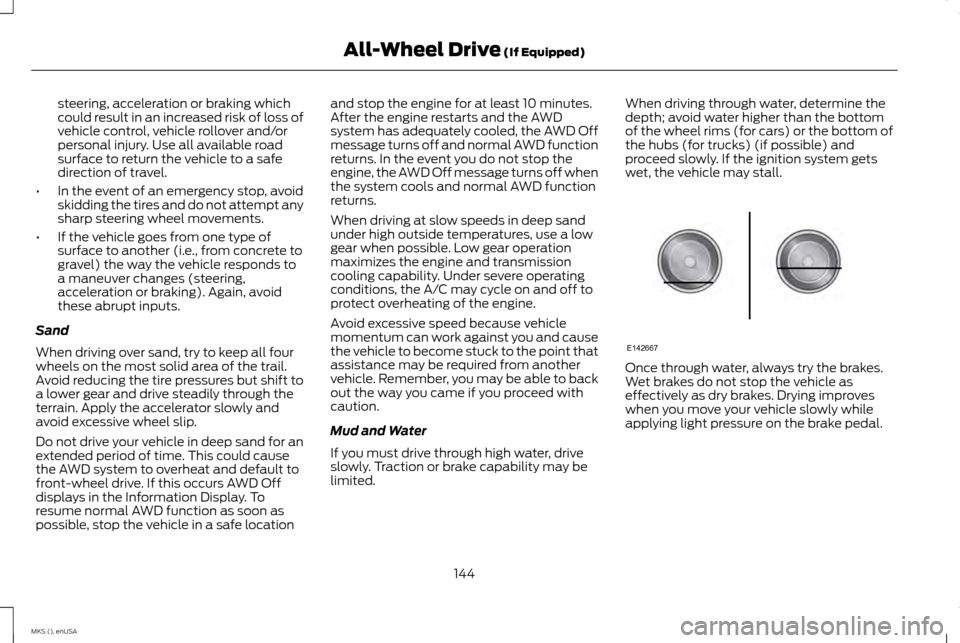
When driving through water, determine the
depth; avoid water higher than the bottom
of the wheel rims (for cars) or the bottom of
the hubs (for trucks) (if possible) and
proceed slowly. If the ignition system gets
wet, the vehicle may stall.
Once through water, always try the brakes.
Wet brakes do not stop the vehicle as
effectively as dry brakes. Drying improves
when you move your vehicle slowly while
applying light pressure on the brake pedal.
144
MKS (), enUSA All-Wheel Drive (If Equipped)E142667
Page 148 of 424
Be cautious of sudden changes in vehicle
speed or direction when you are driving in
mud. Even AWD vehicles can lose traction in
slick mud. As when you are driving over sand,
apply the accelerator slowly and avoid
spinning your wheels. If the vehicle does slide,
steer in the direction of the slide until you
regain control of the vehicle.
After driving through mud, clean off residue
stuck to rotating driveshafts and tires. Excess
mud stuck on tires and rotating driveshafts
causes an imbalance that could damage
drive components.
Note:
Driving through deep water may
damage the transmission.
If the front or rear axle is submerged in water,
the axle lubricant and AWD PTU (Power
Transfer Unit) lubricant should be checked
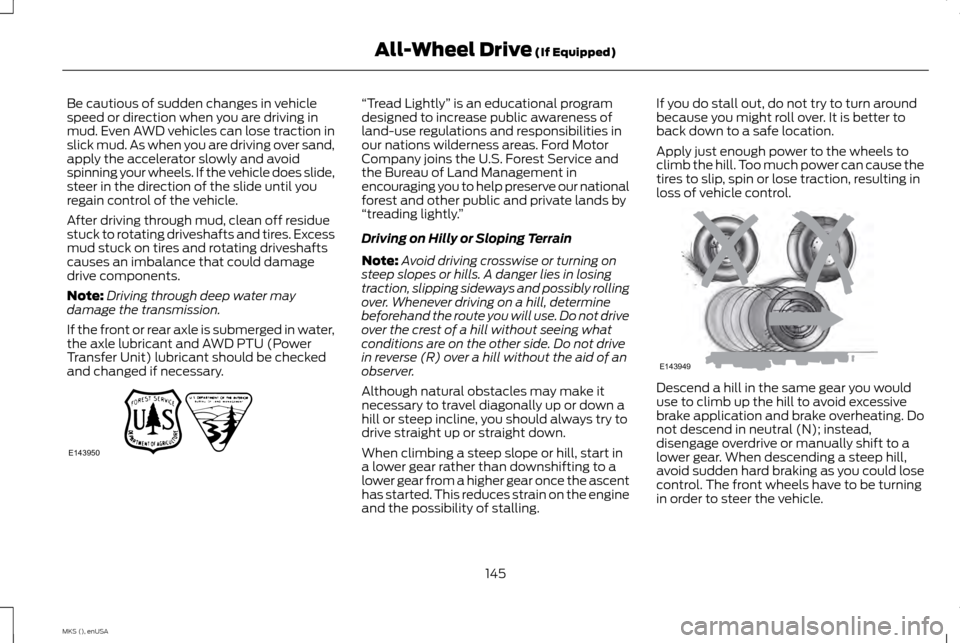
and changed if necessary. “Tread Lightly
” is an educational program
designed to increase public awareness of
land-use regulations and responsibilities in
our nations wilderness areas. Ford Motor
Company joins the U.S. Forest Service and
the Bureau of Land Management in
encouraging you to help preserve our national
forest and other public and private lands by
“treading lightly. ”
Driving on Hilly or Sloping Terrain
Note: Avoid driving crosswise or turning on
steep slopes or hills. A danger lies in losing
traction, slipping sideways and possibly rolling
over. Whenever driving on a hill, determine
beforehand the route you will use. Do not drive
over the crest of a hill without seeing what
conditions are on the other side. Do not drive
in reverse (R) over a hill without the aid of an
observer.
Although natural obstacles may make it
necessary to travel diagonally up or down a
hill or steep incline, you should always try to
drive straight up or straight down.
When climbing a steep slope or hill, start in
a lower gear rather than downshifting to a
lower gear from a higher gear once the ascent
has started. This reduces strain on the engine
and the possibility of stalling. If you do stall out, do not try to turn around
because you might roll over. It is better to
back down to a safe location.
Apply just enough power to the wheels to
climb the hill. Too much power can cause the
tires to slip, spin or lose traction, resulting in
loss of vehicle control.
Descend a hill in the same gear you would
use to climb up the hill to avoid excessive
brake application and brake overheating. Do
not descend in neutral (N); instead,
disengage overdrive or manually shift to a
lower gear. When descending a steep hill,
avoid sudden hard braking as you could lose
control. The front wheels have to be turning
in order to steer the vehicle.
145
MKS (), enUSA All-Wheel Drive (If Equipped)E143950 E143949
Page 170 of 424
Overriding Adaptive Cruise Control
WARNING
Whenever the driver is overriding the
system by pressing the accelerator
pedal, the system will not
automatically apply the brakes to maintain
separation from any vehicle ahead. You can override the set speed and gap
distance by pressing the accelerator pedal.
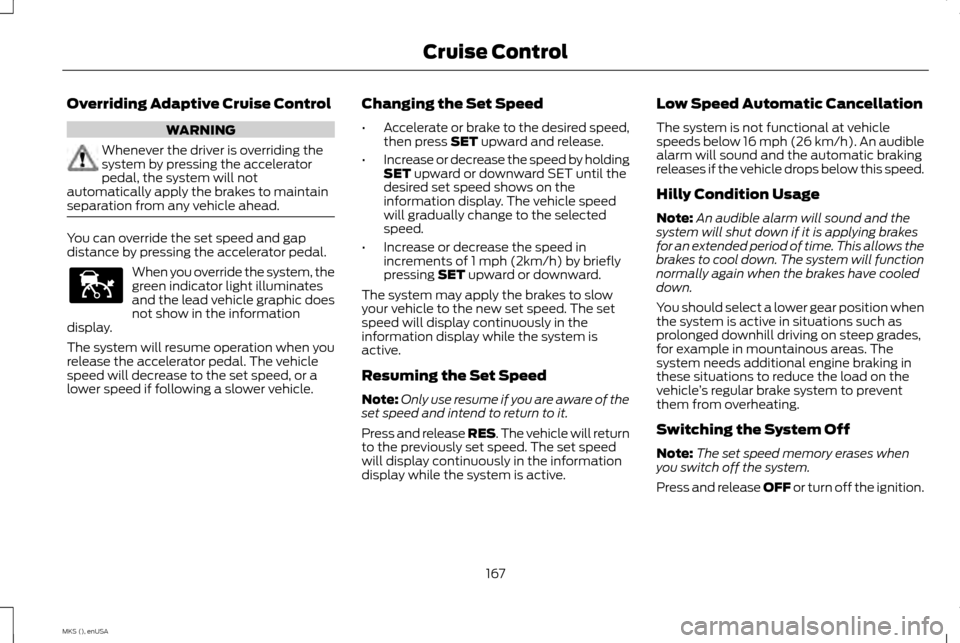
When you override the system, the
green indicator light illuminates
and the lead vehicle graphic does
not show in the information
display.
The system will resume operation when you
release the accelerator pedal. The vehicle
speed will decrease to the set speed, or a
lower speed if following a slower vehicle. Changing the Set Speed
•
Accelerate or brake to the desired speed,
then press SET upward and release.
• Increase or decrease the speed by holding
SET
upward or downward SET until the
desired set speed shows on the
information display. The vehicle speed
will gradually change to the selected
speed.
• Increase or decrease the speed in
increments of 1 mph (2km/h) by briefly
pressing
SET upward or downward.
The system may apply the brakes to slow
your vehicle to the new set speed. The set
speed will display continuously in the
information display while the system is
active.
Resuming the Set Speed
Note: Only use resume if you are aware of the
set speed and intend to return to it.
Press and release RES. The vehicle will return
to the previously set speed. The set speed
will display continuously in the information
display while the system is active. Low Speed Automatic Cancellation
The system is not functional at vehicle
speeds below 16 mph (26 km/h). An audible
alarm will sound and the automatic braking
releases if the vehicle drops below this speed.
Hilly Condition Usage
Note:
An audible alarm will sound and the
system will shut down if it is applying brakes
for an extended period of time. This allows the
brakes to cool down. The system will function
normally again when the brakes have cooled
down.
You should select a lower gear position when
the system is active in situations such as
prolonged downhill driving on steep grades,
for example in mountainous areas. The
system needs additional engine braking in
these situations to reduce the load on the
vehicle ’s regular brake system to prevent
them from overheating.
Switching the System Off
Note: The set speed memory erases when
you switch off the system.
Press and release OFF or turn off the ignition.
167
MKS (), enUSA Cruise ControlE144529
Page 204 of 424
Before Towing a Trailer
Practice turning, stopping and backing up to
get the feel of your vehicle-trailer
combination before starting on a trip. When
turning, make wider turns so the trailer
wheels clear curbs and other obstacles.
When Towing a Trailer
•
Do not drive faster than 70 mph (113
km/h) during the first 500 miles (800
kilometers).
• Do not make full-throttle starts.
• Check your hitch, electrical connections
and trailer wheel lug nuts thoroughly after
you have traveled 50 miles (80
kilometers).
• When stopped in congested or heavy
traffic during hot weather, place the
gearshift in position P to aid engine and
transmission cooling and to help A/C
performance.
• Turn off the speed control with heavy
loads or in hilly terrain. The speed control
may turn off automatically when you are
towing on long, steep grades.
• Shift to a lower gear when driving down
a long or steep hill. Do not apply the
brakes continuously, as they may
overheat and become less effective. •
If your transmission is equipped with a
Grade Assist or Tow/Haul feature, use
this feature when towing. This provides
engine braking and helps eliminate
excessive transmission shifting for
optimum fuel economy and transmission
cooling.
• Allow more distance for stopping with a
trailer attached. Anticipate stops and
brake gradually.
• Avoid parking on a grade. However, if you
must park on a grade:
1. Turn the steering wheel to point your vehicle tires away from traffic flow.
2. Set your vehicle parking brake.
3. Place the automatic transmission in position
P.
4. Place wheel chocks in front and back of the trailer wheels. (Chocks not included
with vehicle.)
Launching or Retrieving a Boat or
Personal Watercraft (PWC)
Note: Disconnect the wiring to the trailer
before
backing the trailer into the water.
Note: Reconnect the wiring to the trailer after
removing the trailer from the water. When backing down a ramp during boat
launching or retrieval:
•
Do not allow the static water level to rise
above the bottom edge of the rear
bumper.
• Do not allow waves to break higher than
6 inches (15 centimeters) above the
bottom edge of the rear bumper.
Exceeding these limits may allow water to
enter vehicle components:
• Causing internal damage to the
components.
• Affecting driveability, emissions, and
reliability.
Any time the rear axle submerges in water,
replace the rear axle lubricant. Water may
contaminate the rear axle lubricant, which is
not a normal maintenance inspection item
unless there is a possibility of a leak or other
axle repair is required.
201
MKS (), enUSA Towing