trunk LINCOLN MKS 2015 Owners Manual
[x] Cancel search | Manufacturer: LINCOLN, Model Year: 2015, Model line: MKS, Model: LINCOLN MKS 2015Pages: 424, PDF Size: 3.96 MB
Page 17 of 424
GENERAL INFORMATION
See the following sections for directions on
how to properly use safety restraints for
children.
WARNINGS
Always make sure your child is secured
properly in a device that is appropriate
for their height, age and weight. Child
safety restraints must be bought separately
from your vehicle. Failure to follow these
instructions and guidelines may result in an
increased risk of serious injury or death to
your child. WARNINGS
All children are shaped differently. The
recommendations for safety restraints
are based on probable child height, age
and weight thresholds from National
Highway Traffic Safety Administration and
other safety organizations, or are the
minimum requirements of law. Ford
recommends checking with a NHTSA
Certified Child Passenger Safety Technician
(CPST) and consult your pediatrician to
make sure your child seat is appropriate for
your child, and is compatible with and
properly installed in your vehicle. To locate
a child seat fitting station and CPST, contact
the NHTSA toll free at 1-888-327-4236 or go
to http://www.nhtsa.dot.gov. In Canada,
check with your local St. John Ambulance
office for referral to a CPST or for further
information, contact your provincial ministry WARNINGS
of transportation, locate your local St. John
Ambulance office by searching for St. John
Ambulance on the internet, or Transport
Canada at 1-800-333-0371
(http://www.tc.gc.ca). Failure to properly
restrain children in safety seats made
especially for their height, age, and weight
may result in an increased risk of serious
injury or death to your child. Do not leave children or animals
unattended in the vehicle. On hot days,
the temperature in the trunk or vehicle
interior can rise very quickly. Exposure of
people or animals to these high temperatures
for even a short time can cause death or
serious heat-related injuries, including brain
damage. Small children are particularly at
risk. 14
MKS (), enUSA Child Safety
Page 61 of 424
Note:
The doors will not autounlock if you
electronically lock your vehicle after you switch
the ignition off and before you open the driver
door.
Enabling or Disabling
Note: You can enable or disable the autolock
and autounlock features independently of
each other.
You can enable or disable these features in
the information display or your authorized
dealer can do it for you. See General
Information (page 88).
Illuminated Entry
The interior lamps and select exterior lamps
will illuminate when you unlock the doors
with the remote entry system.
The illuminated entry system will turn off the
lights if:
• The ignition is on.
• You press the remote control lock button.
• After 25 seconds of illumination.
The lights will not turn off if:
• You turn them on with the lamp control.
• Any door is open. Illuminated Exit
The interior dome lamps, parking lamps and
puddle lamps illuminate when all doors are
closed and the ignition is turned off.
The lights will turn off if all the doors remain
closed and:
•
25 seconds elapse.
• You press the START/STOP button.
Battery Saver
If you leave the courtesy lamps, dome lamps
or headlamps on, the battery saver will shut
them off 10 minutes after you switch the
ignition off.
Accessory Mode Battery Saver for
Intelligent Access Keys
If you leave your vehicle in the run ignition
state, it will shut off once it detects a certain
amount of battery drain or after 45 minutes.
Luggage Compartment Release
From Inside Your Vehicle
Press the button located on the instrument
panel. From Outside Your Vehicle
•
Unlock the trunk with the remote control
or power door lock control. The trunk
unlocks when you press the release
button if the intelligent access transmitter
is within 3 feet (1 meter) of the trunk.
• Press the release button located near the
license plate.
58
MKS (), enUSA LocksE173604
Page 64 of 424
3. Press the START/STOP button again
and remove the key.
4. Insert the second programmed key into the backup slot, then press the
START/STOP
button.
The factory-set code will appear in the
information display for a few seconds.
Note: The code may not display until after
any other warning messages first display.
INTERIOR LUGGAGE
COMPARTMENT RELEASE WARNINGS
Keep vehicle doors and luggage
compartment locked and keep keys
and remote transmitters out of a child
’s
reach. Unsupervised children could lock
themselves in the trunk and risk injury.
Children should be taught not to play in
vehicles. WARNINGS
Do not leave children or animals
unattended in the vehicle. On hot days,
the temperature in the luggage
compartment or vehicle interior can rise very
quickly. Exposure of people or animals to
these high temperatures for even a short time
can cause death or serious heat-related
injuries, including brain damage. Small
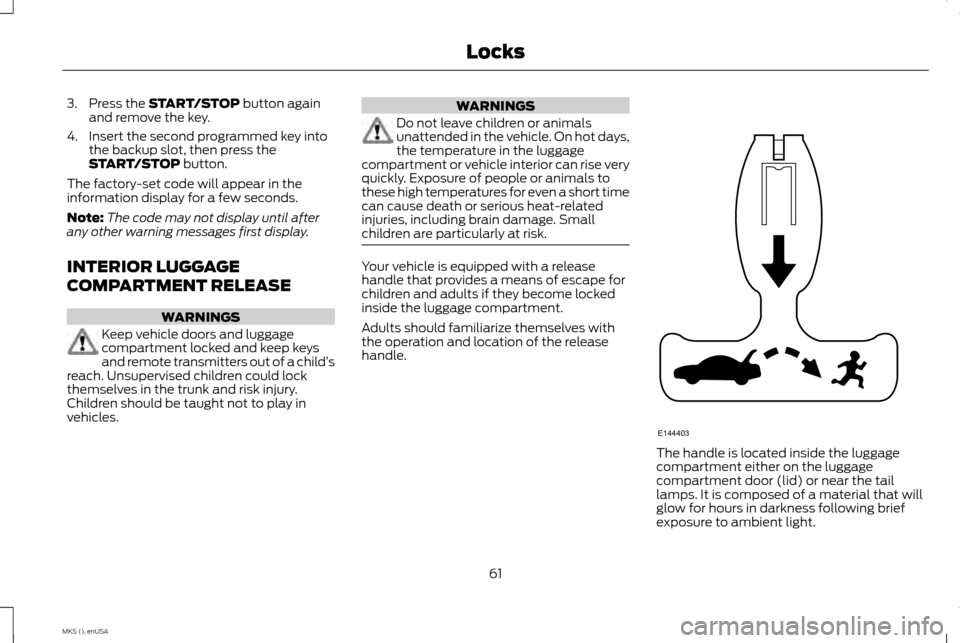
children are particularly at risk. Your vehicle is equipped with a release
handle that provides a means of escape for
children and adults if they become locked
inside the luggage compartment.
Adults should familiarize themselves with
the operation and location of the release
handle.
The handle is located inside the luggage
compartment either on the luggage
compartment door (lid) or near the tail
lamps. It is composed of a material that will
glow for hours in darkness following brief
exposure to ambient light.
61
MKS (), enUSA LocksE144403
Page 102 of 424
Doors and Locks
Action
Message
The door listed is not completely closed.
X Door Ajar
The luggage compartment is not completely closed.
Trunk Ajar
The driver’s door is opened, your vehicle is in park and the engine is on.
Engine On
Fuel Action
Message
An early reminder of a low fuel condition.
Fuel Level LOW
The fuel fill inlet may not be properly closed.
Check Fuel Fill Inlet
Keys and Intelligent Access Action
Message
A reminder to press the brake while starting your vehicle.
Press Brake to START
The key is not detected by the system. See Keyless Starting (page 126).
No Key Detected
The Start Stop button is pressed to shut off the engine and an Intelligent Access key is not detected inside your vehicle.
Restart Now or Key is Needed
Your vehicle is in the accessory ignition state.
Accessory Power is Active
99
MKS (), enUSA Information Displays
Page 163 of 424
REAR VIEW CAMERA (If Equipped)
WARNINGS
The rear view camera system is a
reverse aid supplement device that still
requires the driver to use it in
conjunction with the interior and exterior
mirrors for maximum coverage. Objects that are close to either corner
of the bumper or under the bumper,
might not be seen on the screen due to
the limited coverage of the camera system. Back up as slow as possible since
higher speeds might limit your reaction
time to stop the vehicle.
Use caution when using the rear video
camera and the trunk is ajar. If the trunk
is ajar, the camera will be out of
position and the video image may be
incorrect. All guidelines (if enabled) have
been removed when the trunk is ajar. Use caution when turning camera
features on or off while in R (Reverse).
Make sure the vehicle is not moving. The rear view camera system provides a
video image of the area behind your vehicle.
The image will display in either the rear view
mirror or the display in the center of the
instrument panel.
During operation, lines will appear in the
display that represent your vehicle
’s path and
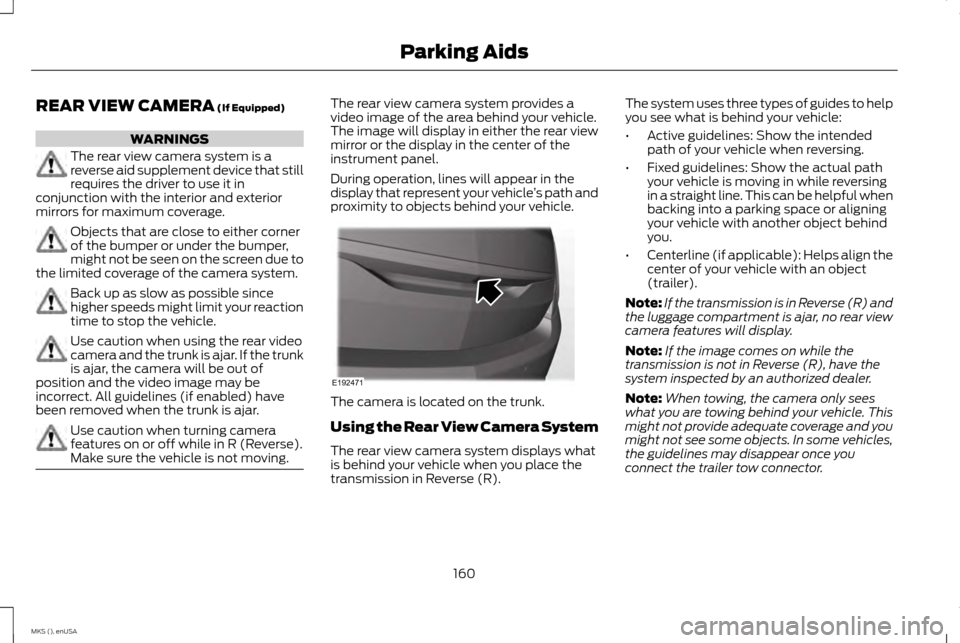
proximity to objects behind your vehicle. The camera is located on the trunk.
Using the Rear View Camera System
The rear view camera system displays what
is behind your vehicle when you place the
transmission in Reverse (R).The system uses three types of guides to help
you see what is behind your vehicle:
•
Active guidelines: Show the intended
path of your vehicle when reversing.
• Fixed guidelines: Show the actual path
your vehicle is moving in while reversing
in a straight line. This can be helpful when
backing into a parking space or aligning
your vehicle with another object behind
you.
• Centerline (if applicable): Helps align the
center of your vehicle with an object
(trailer).
Note: If the transmission is in Reverse (R) and
the luggage compartment is ajar, no rear view
camera features will display.
Note: If the image comes on while the
transmission is not in Reverse (R), have the
system inspected by an authorized dealer.
Note: When towing, the camera only sees
what you are towing behind your vehicle. This
might not provide adequate coverage and you
might not see some objects. In some vehicles,
the guidelines may disappear once you
connect the trailer tow connector.
160
MKS (), enUSA Parking AidsE192471
Page 288 of 424
Tire Change Procedure
WARNINGS
When one of the front wheels is off the
ground, the transmission alone will not
prevent the vehicle from moving or
slipping off the jack, even if the transmission
is in park (P). To help prevent the vehicle from
moving when you change a tire, be sure
to place the transmission in park
(P),
set the parking brake and block (in both
directions) the wheel that is diagonally
opposite (other side and end of the vehicle)
to the tire being changed. Never get underneath a vehicle that is
supported only by a jack. If the vehicle
slips off the jack, you or someone else
could be seriously injured. Do not attempt to change a tire on the
side of the vehicle close to moving
traffic. Pull far enough off the road to
avoid the danger of being hit when operating
the jack or changing the wheel. WARNINGS
Always use the jack provided as original
equipment with your vehicle. If using a
jack other than the one provided as
original equipment with your vehicle, make
sure the jack capacity is adequate for the
vehicle weight, including any vehicle cargo
or modifications. 1. Park on a level surface, set the parking
brake and activate the hazard flashers.
2. Place the transmission in park
(P) and
turn the engine off. 3.
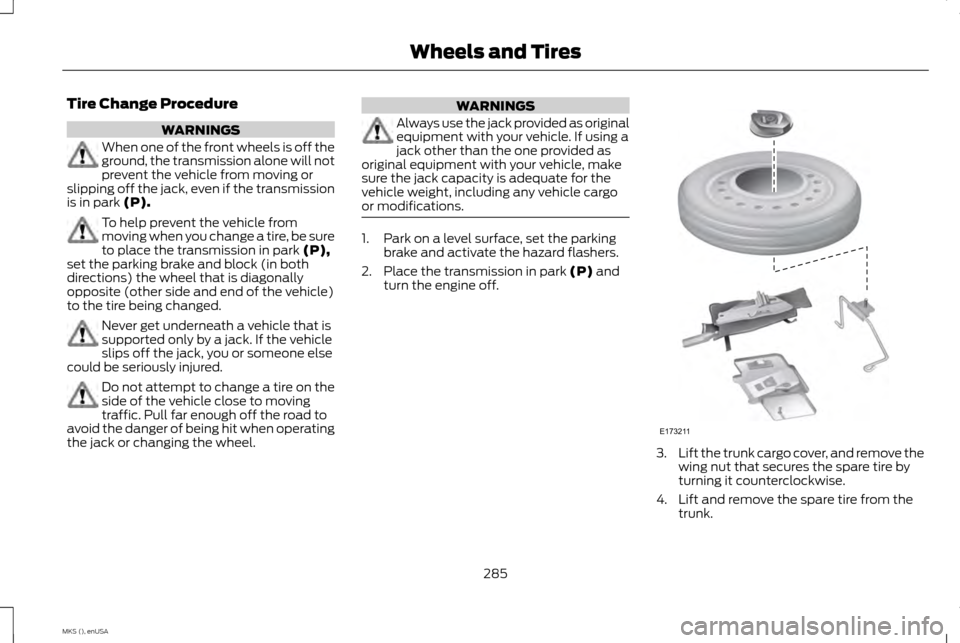
Lift the trunk cargo cover, and remove the
wing nut that secures the spare tire by
turning it counterclockwise.
4. Lift and remove the spare tire from the trunk.
285
MKS (), enUSA Wheels and TiresE173211
Page 290 of 424
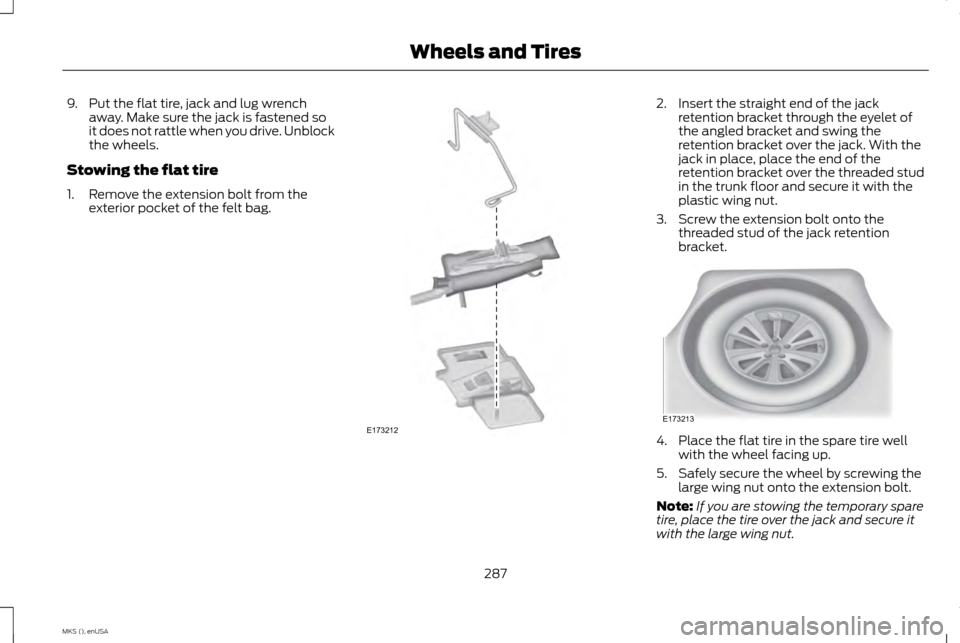
9. Put the flat tire, jack and lug wrench
away. Make sure the jack is fastened so
it does not rattle when you drive. Unblock
the wheels.
Stowing the flat tire
1. Remove the extension bolt from the exterior pocket of the felt bag. 2. Insert the straight end of the jack
retention bracket through the eyelet of
the angled bracket and swing the
retention bracket over the jack. With the
jack in place, place the end of the
retention bracket over the threaded stud
in the trunk floor and secure it with the
plastic wing nut.
3. Screw the extension bolt onto the threaded stud of the jack retention
bracket. 4. Place the flat tire in the spare tire well
with the wheel facing up.
5. Safely secure the wheel by screwing the large wing nut onto the extension bolt.
Note: If you are stowing the temporary spare
tire, place the tire over the jack and secure it
with the large wing nut.
287
MKS (), enUSA Wheels and TiresE173212 E173213