LINCOLN MKT 2010 Owners Manual
Manufacturer: LINCOLN, Model Year: 2010, Model line: MKT, Model: LINCOLN MKT 2010Pages: 430, PDF Size: 3.32 MB
Page 181 of 430
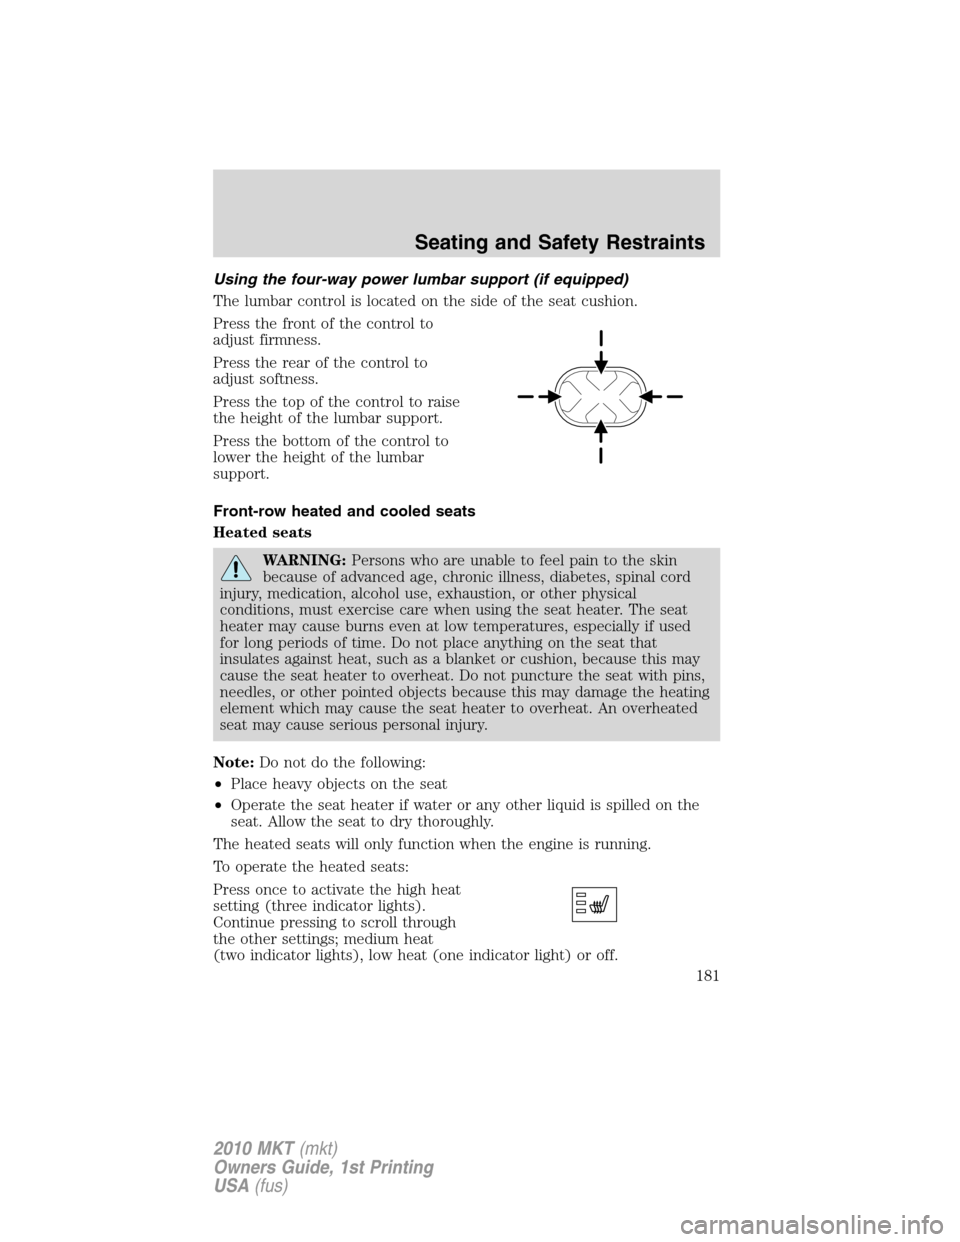
Using the four-way power lumbar support (if equipped)
The lumbar control is located on the side of the seat cushion.
Press the front of the control to
adjust firmness.
Press the rear of the control to
adjust softness.
Press the top of the control to raise
the height of the lumbar support.
Press the bottom of the control to
lower the height of the lumbar
support.
Front-row heated and cooled seats
Heated seats
WARNING:Persons who are unable to feel pain to the skin
because of advanced age, chronic illness, diabetes, spinal cord
injury, medication, alcohol use, exhaustion, or other physical
conditions, must exercise care when using the seat heater. The seat
heater may cause burns even at low temperatures, especially if used
for long periods of time. Do not place anything on the seat that
insulates against heat, such as a blanket or cushion, because this may
cause the seat heater to overheat. Do not puncture the seat with pins,
needles, or other pointed objects because this may damage the heating
element which may cause the seat heater to overheat. An overheated
seat may cause serious personal injury.
Note:Do not do the following:
•Place heavy objects on the seat
•Operate the seat heater if water or any other liquid is spilled on the
seat. Allow the seat to dry thoroughly.
The heated seats will only function when the engine is running.
To operate the heated seats:
Press once to activate the high heat
setting (three indicator lights).
Continue pressing to scroll through
the other settings; medium heat
(two indicator lights), low heat (one indicator light) or off.
Seating and Safety Restraints
181
2010 MKT(mkt)
Owners Guide, 1st Printing
USA(fus)
Page 182 of 430
The heated seats will turn off after 15 minutes.
If the engine falls below 350 RPMs while the heated seats are on, the
feature will turn itself off and will need to be reactivated.
Cooled seats
The cooled seats will only function when the engine is running.
To operate the cooled seats:
Press once to activate the high cool
setting (three indicator lights).
Continue pressing to scroll through
the other settings; medium cool
(two indicator lights), low cool (one indicator light) or off.
The cooled seats will turn off after 30 minutes.
If the engine falls below 350 RPMs while the cooled seats are on, the
feature will turn itself off and will need to be reactivated.
Climate controlled seats air filter replacement
The climate controlled seat system includes air filters that must be
replaced periodically. Refer to thescheduled maintenance information
for more information.
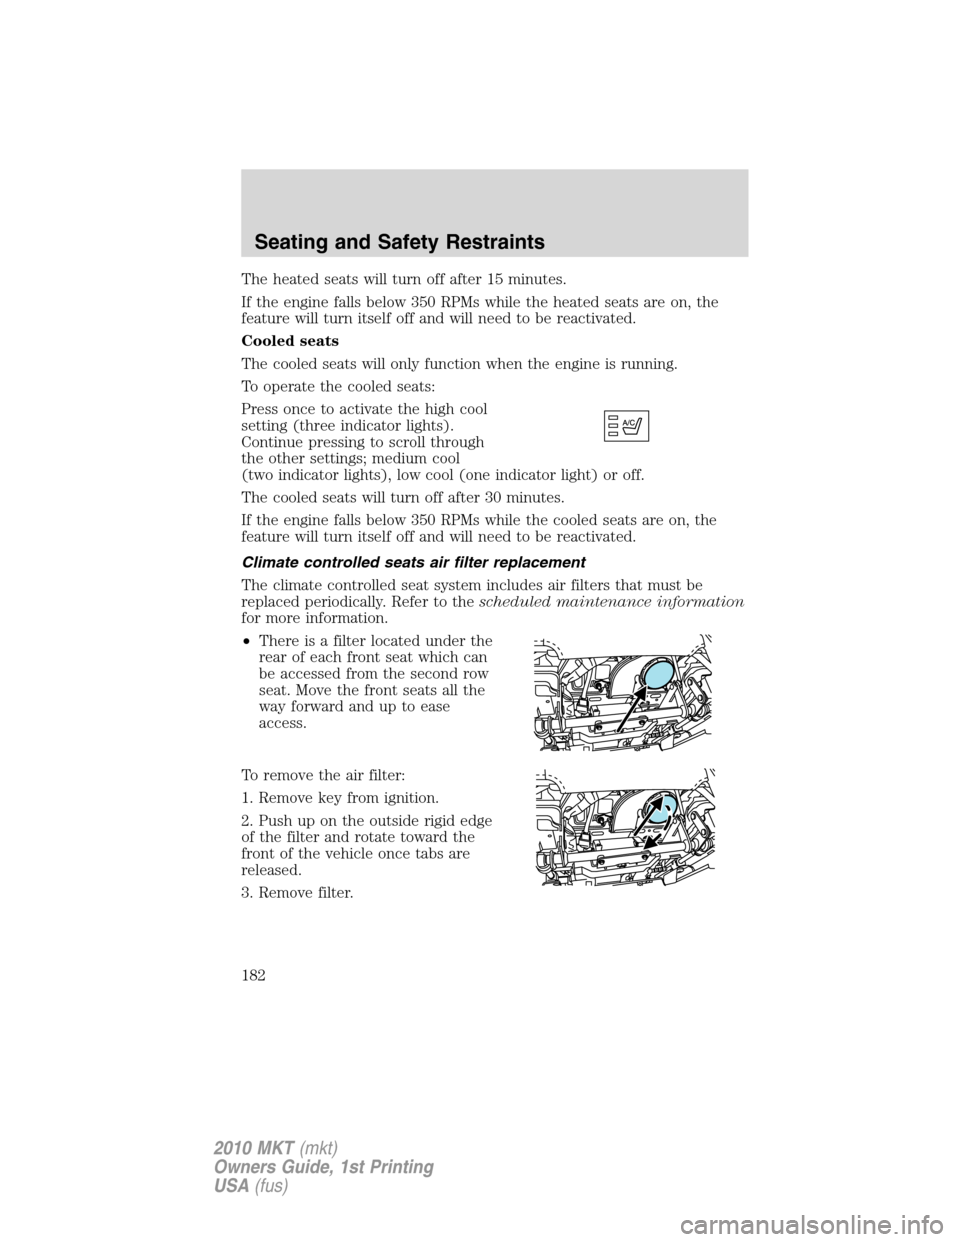
•There is a filter located under the
rear of each front seat which can
be accessed from the second row
seat. Move the front seats all the
way forward and up to ease
access.
To remove the air filter:
1. Remove key from ignition.
2. Push up on the outside rigid edge
of the filter and rotate toward the
front of the vehicle once tabs are
released.
3. Remove filter.
Seating and Safety Restraints
182
2010 MKT(mkt)
Owners Guide, 1st Printing
USA(fus)
Page 183 of 430
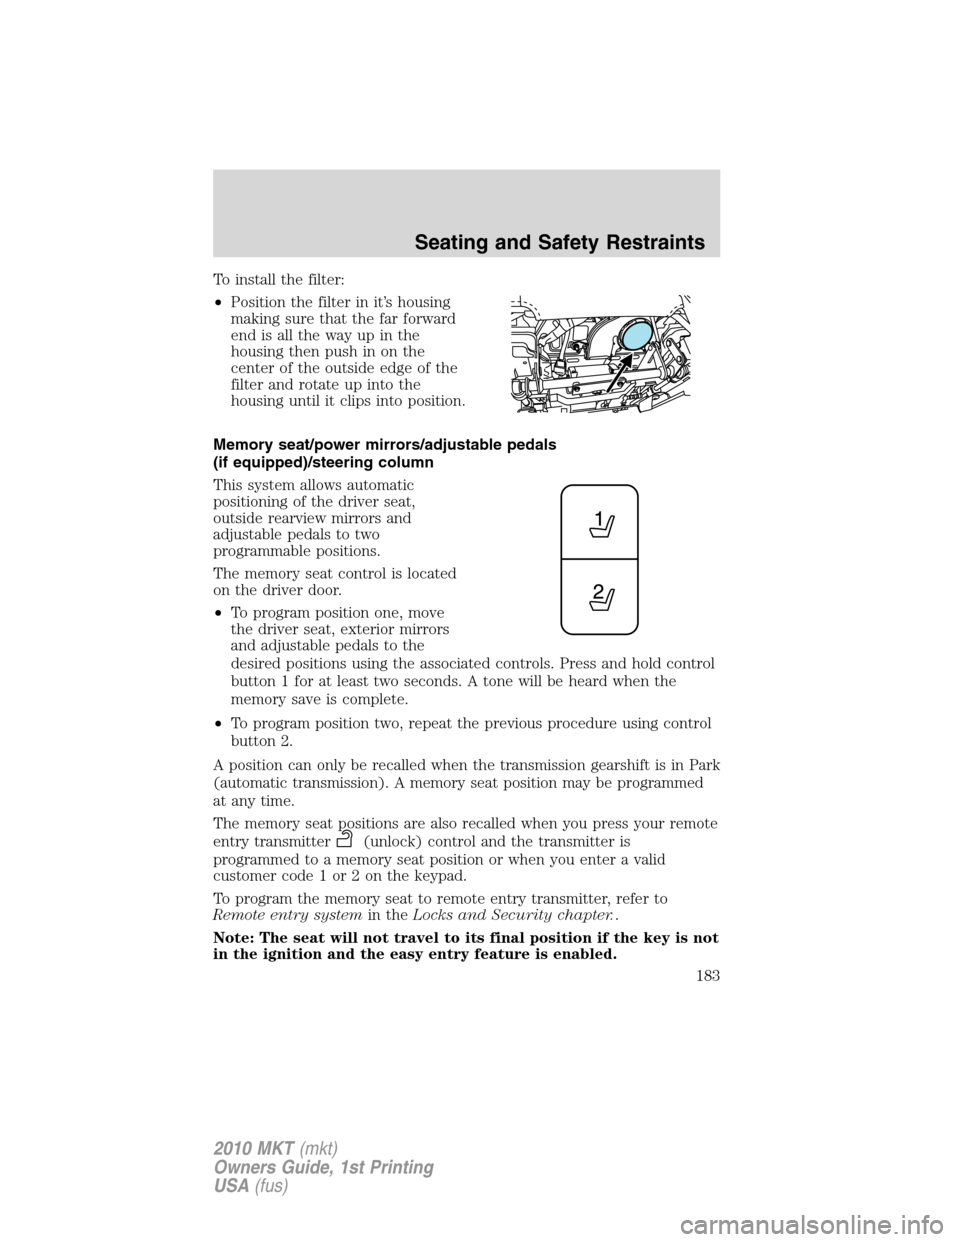
To install the filter:
•Position the filter in it’s housing
making sure that the far forward
end is all the way up in the
housing then push in on the
center of the outside edge of the
filter and rotate up into the
housing until it clips into position.
Memory seat/power mirrors/adjustable pedals
(if equipped)/steering column
This system allows automatic
positioning of the driver seat,
outside rearview mirrors and
adjustable pedals to two
programmable positions.
The memory seat control is located
on the driver door.
•To program position one, move
the driver seat, exterior mirrors
and adjustable pedals to the
desired positions using the associated controls. Press and hold control
button 1 for at least two seconds. A tone will be heard when the
memory save is complete.
•To program position two, repeat the previous procedure using control
button 2.
A position can only be recalled when the transmission gearshift is in Park
(automatic transmission). A memory seat position may be programmed
at any time.
The memory seat positions are also recalled when you press your remote
entry transmitter
(unlock) control and the transmitter is
programmed to a memory seat position or when you enter a valid
customer code 1 or 2 on the keypad.
To program the memory seat to remote entry transmitter, refer to
Remote entry systemin theLocks and Security chapter..
Note: The seat will not travel to its final position if the key is not
in the ignition and the easy entry feature is enabled.
Seating and Safety Restraints
183
2010 MKT(mkt)
Owners Guide, 1st Printing
USA(fus)
Page 184 of 430
Easy access/easy out feature
This feature automatically moves the driver’s seat rearward 2 in (5 cm)
when:
•the transmission is in N (Neutral) or P (Park)
•the ignition is turned off
The seat will move to the original position when:
•the transmission is in N (Neutral) or P (Park)
•the ignition is put in accessory mode
The easy entry feature can be turned off or on through the vehicle
message center. Refer toMessage centerin theDriver controlschapter.
REAR SEATS
Non-adjustable second-row outboard head restraints
Your vehicle is equipped with second row outboard head restraints that
are non-adjustable.
Note:Please read the warnings listed at the beginning of this chapter.
Six-passenger second row outboard head restraints
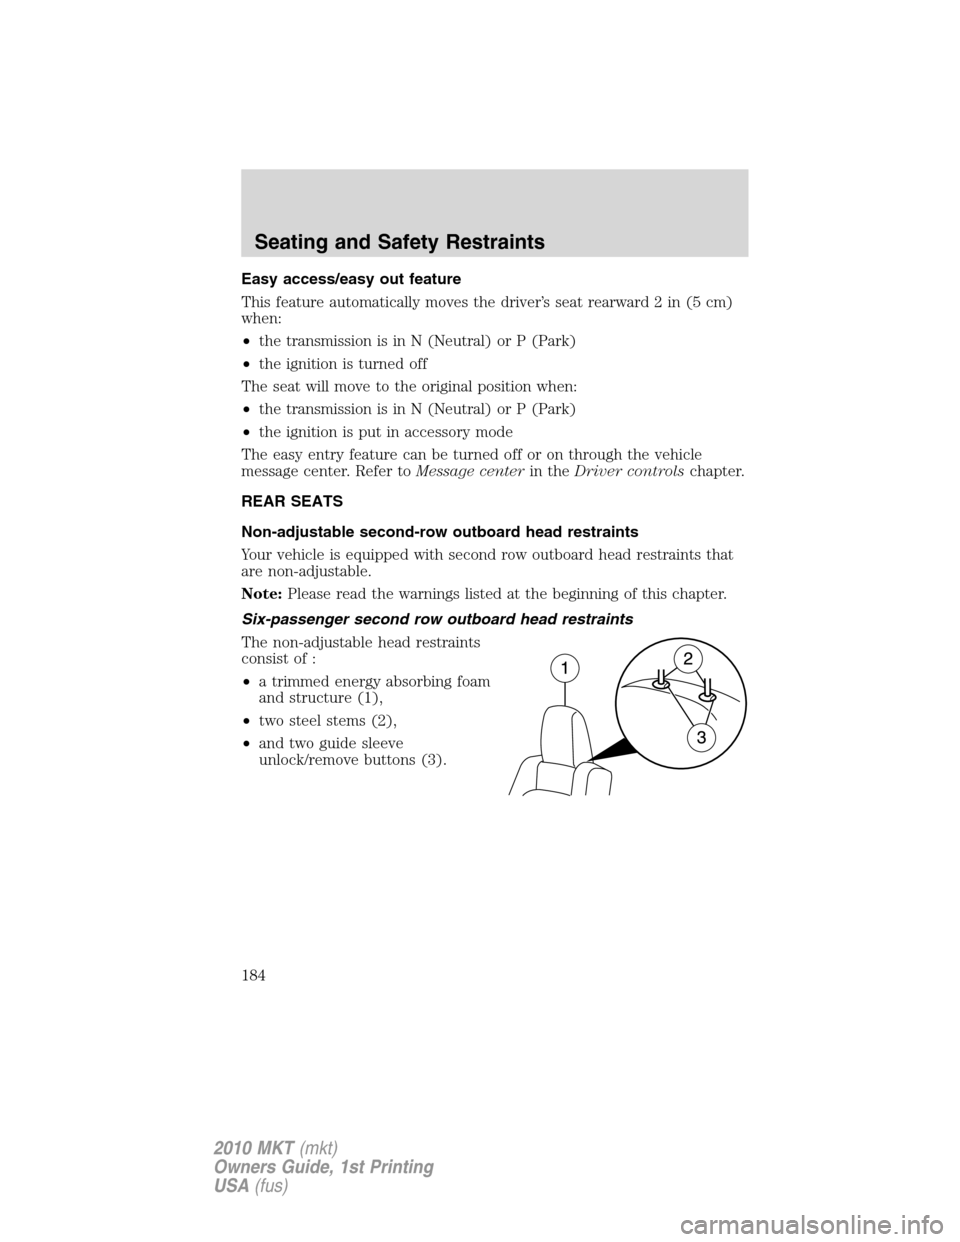
The non-adjustable head restraints
consist of :
•a trimmed energy absorbing foam
and structure (1),
•two steel stems (2),
•and two guide sleeve
unlock/remove buttons (3).
Seating and Safety Restraints
184
2010 MKT(mkt)
Owners Guide, 1st Printing
USA(fus)
Page 185 of 430
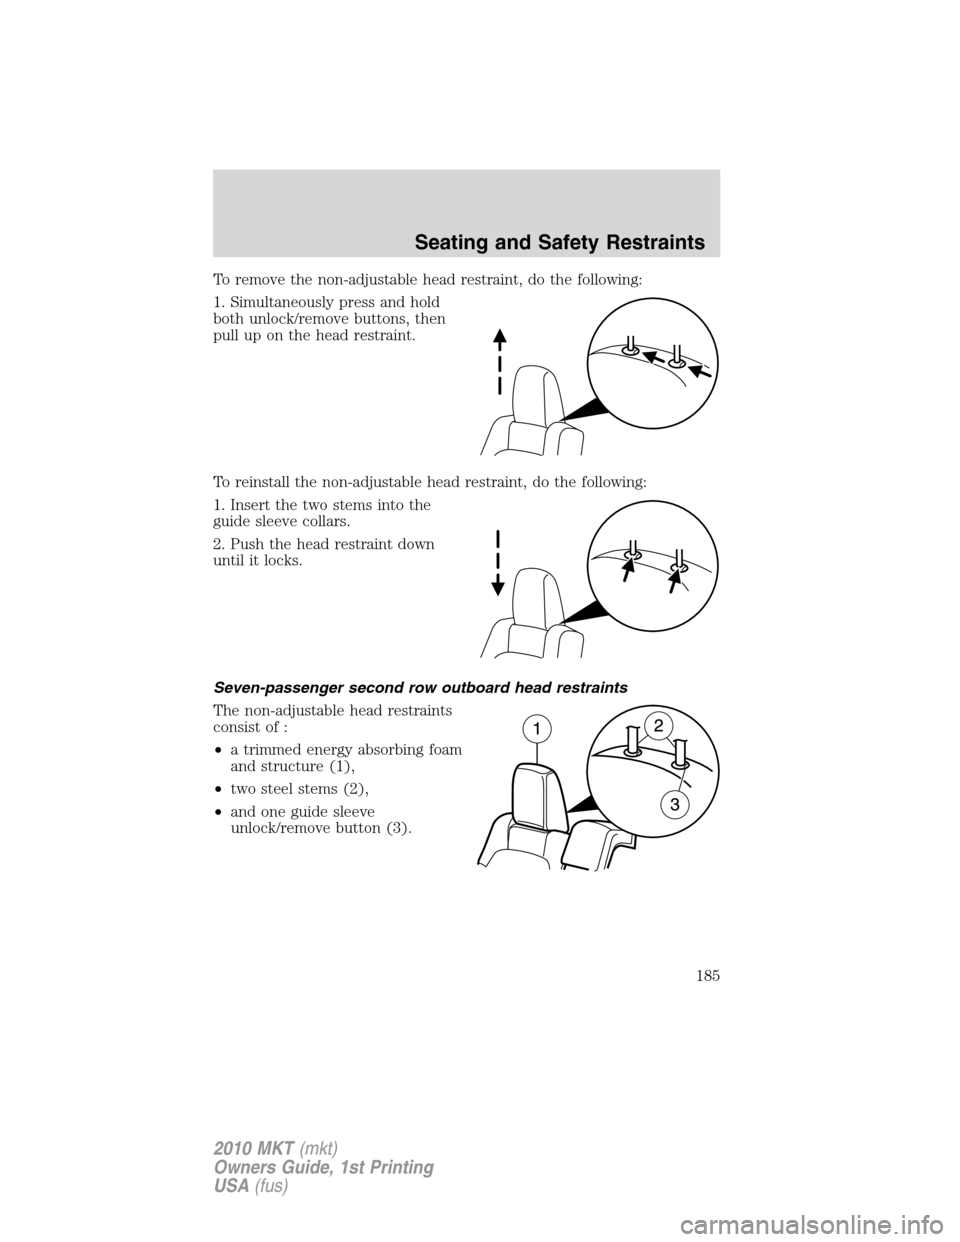
To remove the non-adjustable head restraint, do the following:
1. Simultaneously press and hold
both unlock/remove buttons, then
pull up on the head restraint.
To reinstall the non-adjustable head restraint, do the following:
1. Insert the two stems into the
guide sleeve collars.
2. Push the head restraint down
until it locks.
Seven-passenger second row outboard head restraints
The non-adjustable head restraints
consist of :
•a trimmed energy absorbing foam
and structure (1),
•two steel stems (2),
•and one guide sleeve
unlock/remove button (3).
Seating and Safety Restraints
185
2010 MKT(mkt)
Owners Guide, 1st Printing
USA(fus)
Page 186 of 430
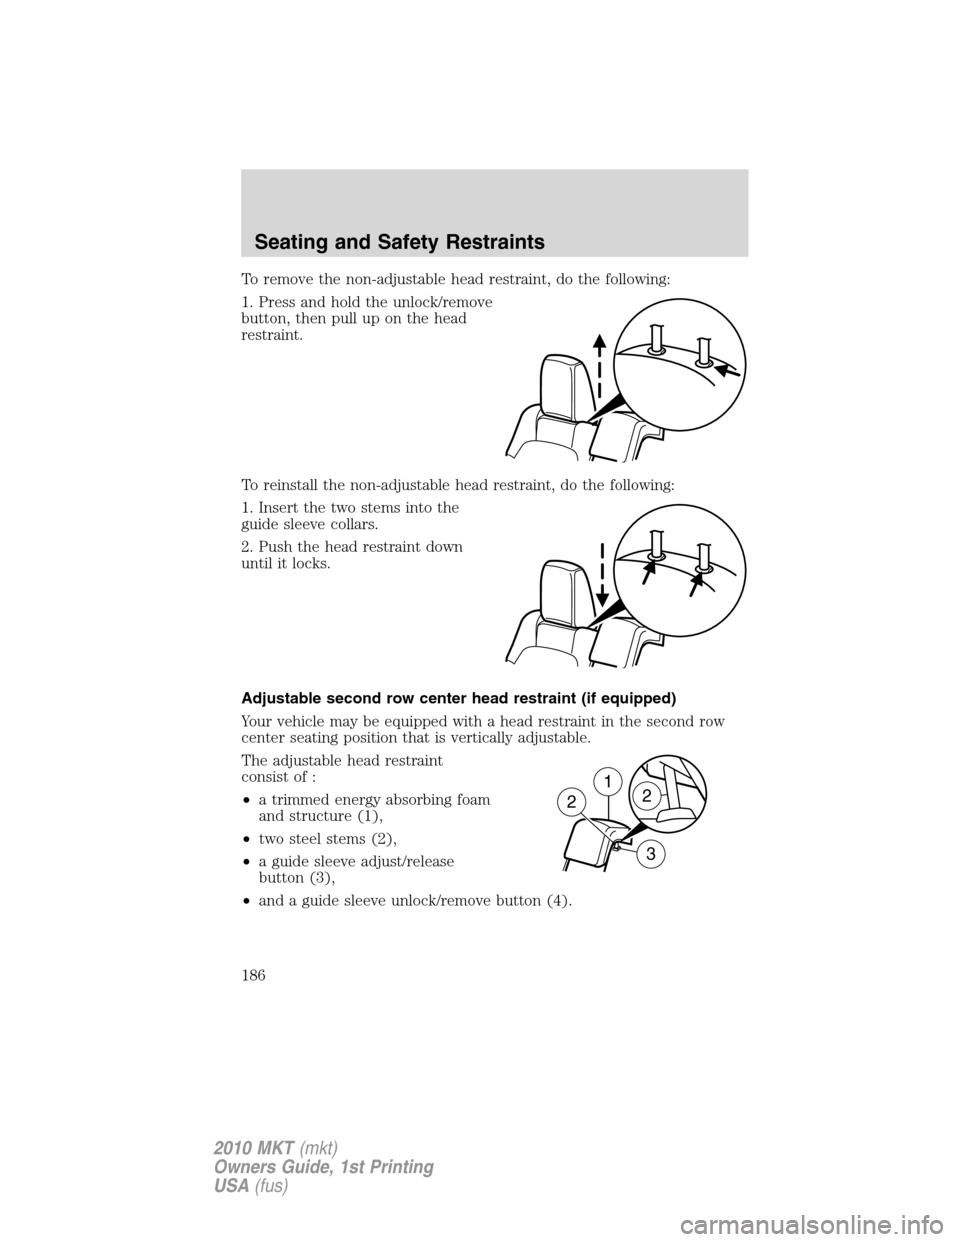
To remove the non-adjustable head restraint, do the following:
1. Press and hold the unlock/remove
button, then pull up on the head
restraint.
To reinstall the non-adjustable head restraint, do the following:
1. Insert the two stems into the
guide sleeve collars.
2. Push the head restraint down
until it locks.
Adjustable second row center head restraint (if equipped)
Your vehicle may be equipped with a head restraint in the second row
center seating position that is vertically adjustable.
The adjustable head restraint
consist of :
•a trimmed energy absorbing foam
and structure (1),
•two steel stems (2),
•a guide sleeve adjust/release
button (3),
•and a guide sleeve unlock/remove button (4).
1
2
3
2
Seating and Safety Restraints
186
2010 MKT(mkt)
Owners Guide, 1st Printing
USA(fus)
Page 187 of 430
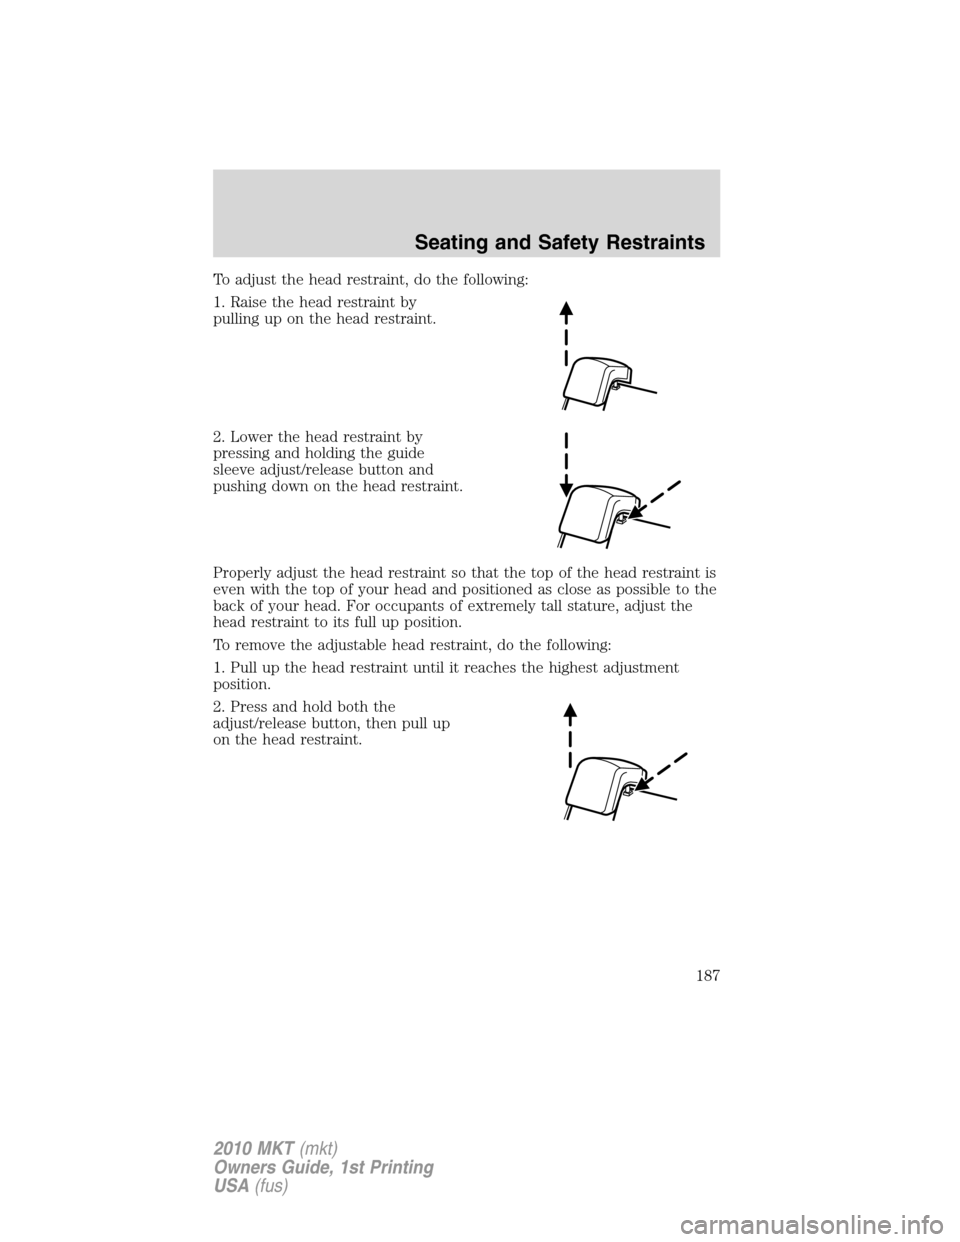
To adjust the head restraint, do the following:
1. Raise the head restraint by
pulling up on the head restraint.
2. Lower the head restraint by
pressing and holding the guide
sleeve adjust/release button and
pushing down on the head restraint.
Properly adjust the head restraint so that the top of the head restraint is
even with the top of your head and positioned as close as possible to the
back of your head. For occupants of extremely tall stature, adjust the
head restraint to its full up position.
To remove the adjustable head restraint, do the following:
1. Pull up the head restraint until it reaches the highest adjustment
position.
2. Press and hold both the
adjust/release button, then pull up
on the head restraint.
Seating and Safety Restraints
187
2010 MKT(mkt)
Owners Guide, 1st Printing
USA(fus)
Page 188 of 430
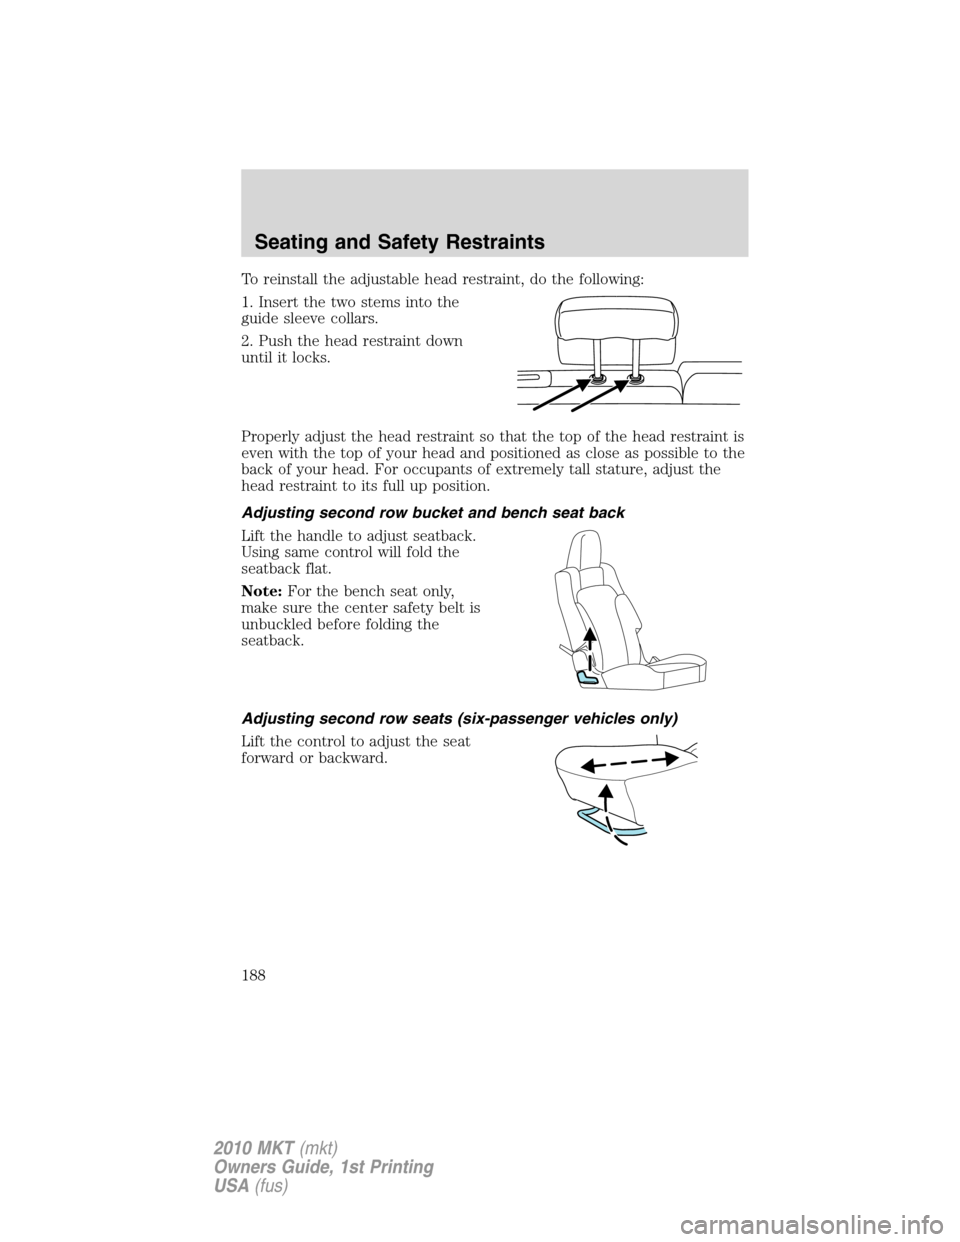
To reinstall the adjustable head restraint, do the following:
1. Insert the two stems into the
guide sleeve collars.
2. Push the head restraint down
until it locks.
Properly adjust the head restraint so that the top of the head restraint is
even with the top of your head and positioned as close as possible to the
back of your head. For occupants of extremely tall stature, adjust the
head restraint to its full up position.
Adjusting second row bucket and bench seat back
Lift the handle to adjust seatback.
Using same control will fold the
seatback flat.
Note:For the bench seat only,
make sure the center safety belt is
unbuckled before folding the
seatback.
Adjusting second row seats (six-passenger vehicles only)
Lift the control to adjust the seat
forward or backward.
Seating and Safety Restraints
188
2010 MKT(mkt)
Owners Guide, 1st Printing
USA(fus)
Page 189 of 430
Using the second-row power lumbar support
(six-passenger vehicles only)
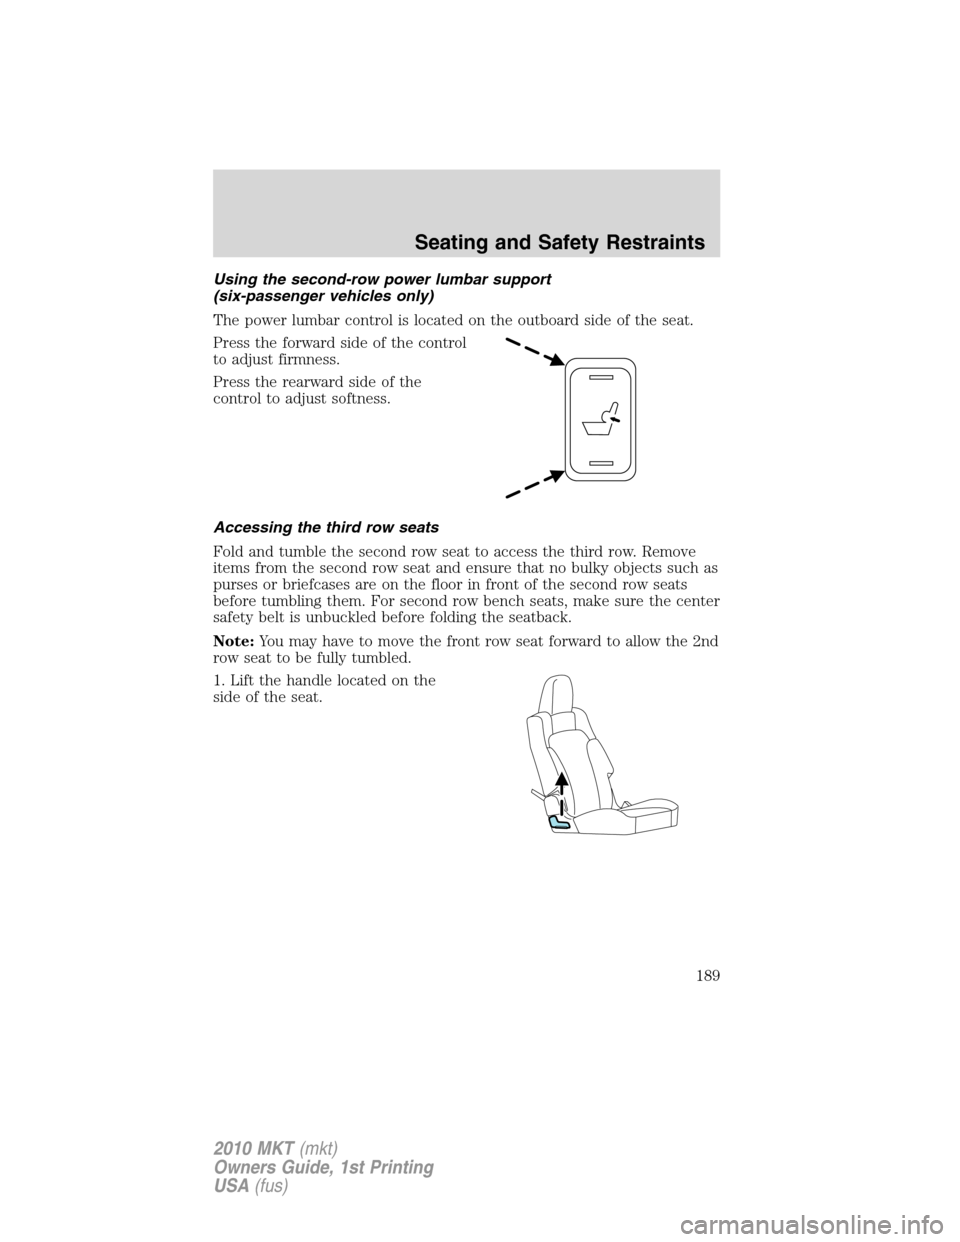
The power lumbar control is located on the outboard side of the seat.
Press the forward side of the control
to adjust firmness.
Press the rearward side of the
control to adjust softness.
Accessing the third row seats
Fold and tumble the second row seat to access the third row. Remove
items from the second row seat and ensure that no bulky objects such as
purses or briefcases are on the floor in front of the second row seats
before tumbling them. For second row bench seats, make sure the center
safety belt is unbuckled before folding the seatback.
Note:You may have to move the front row seat forward to allow the 2nd
row seat to be fully tumbled.
1. Lift the handle located on the
side of the seat.
Seating and Safety Restraints
189
2010 MKT(mkt)
Owners Guide, 1st Printing
USA(fus)
Page 190 of 430
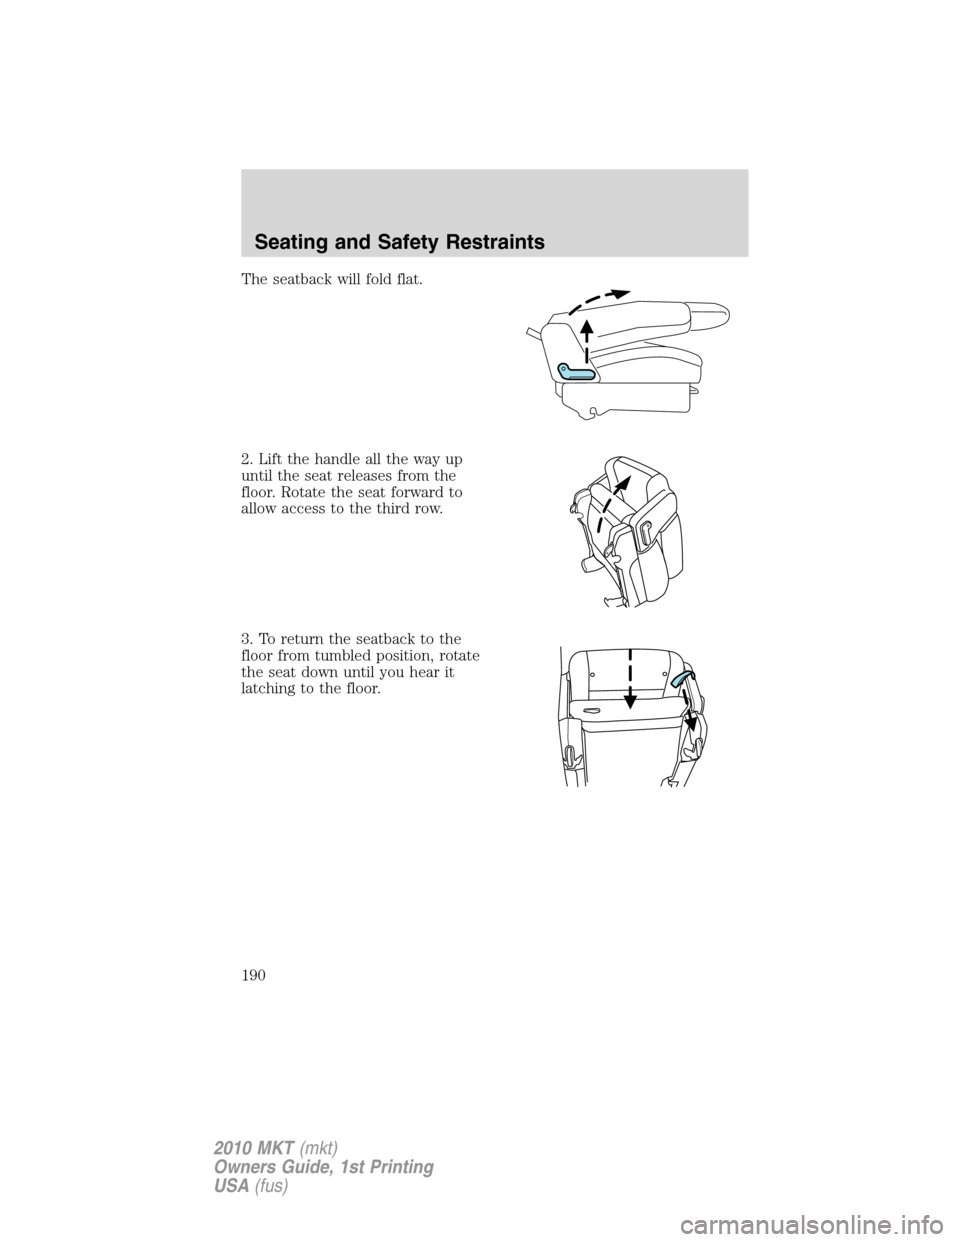
The seatback will fold flat.
2. Lift the handle all the way up
until the seat releases from the
floor. Rotate the seat forward to
allow access to the third row.
3. To return the seatback to the
floor from tumbled position, rotate
the seat down until you hear it
latching to the floor.
Seating and Safety Restraints
190
2010 MKT(mkt)
Owners Guide, 1st Printing
USA(fus)