display LINCOLN MKT 2010 Workshop Manual
[x] Cancel search | Manufacturer: LINCOLN, Model Year: 2010, Model line: MKT, Model: LINCOLN MKT 2010Pages: 430, PDF Size: 3.32 MB
Page 89 of 430
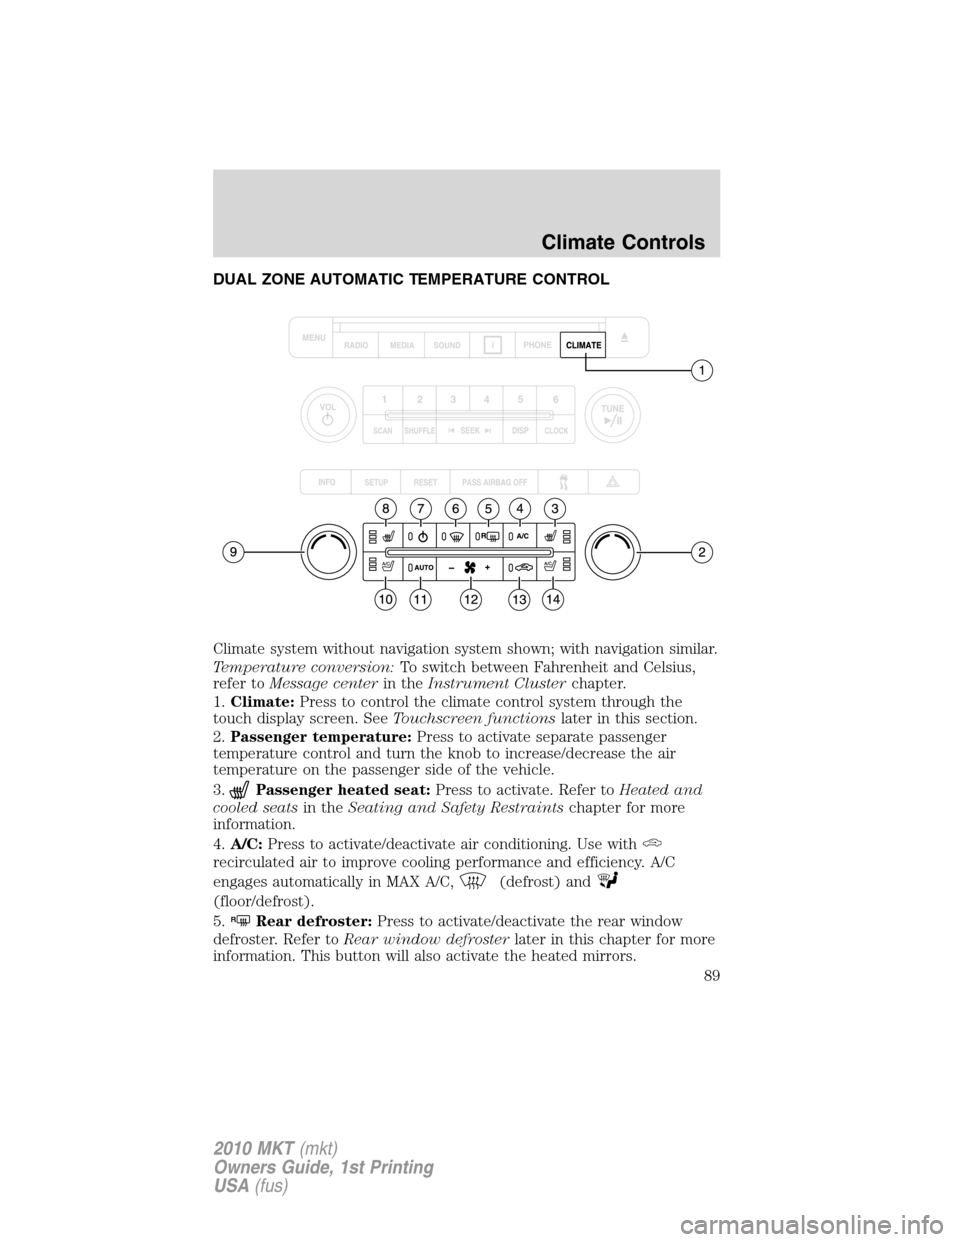
DUAL ZONE AUTOMATIC TEMPERATURE CONTROL
Climate system without navigation system shown; with navigation similar.
Temperature conversion:To switch between Fahrenheit and Celsius,
refer toMessage centerin theInstrument Clusterchapter.
1.Climate:Press to control the climate control system through the
touch display screen. SeeTouchscreen functionslater in this section.
2.Passenger temperature:Press to activate separate passenger
temperature control and turn the knob to increase/decrease the air
temperature on the passenger side of the vehicle.
3.
Passenger heated seat:Press to activate. Refer toHeated and
cooled seatsin theSeating and Safety Restraintschapter for more
information.
4.A/C:Press to activate/deactivate air conditioning. Use with
recirculated air to improve cooling performance and efficiency. A/C
engages automatically in MAX A/C,
(defrost) and
(floor/defrost).
5.
RRear defroster:Press to activate/deactivate the rear window
defroster. Refer toRear window defrosterlater in this chapter for more
information. This button will also activate the heated mirrors.
Climate Controls
89
2010 MKT(mkt)
Owners Guide, 1st Printing
USA(fus)
Page 99 of 430
Scenario 2:
Conditions -The automatic high beam system is set to ON in the
message center. The headlamp switch is in
(auto lamps). The
automatic high beam system has not turned the high beams on.
Operation -The high beam switch can be used to turn the high beams
on. They will then remain on until the switch has been returned to the
neutral position and the auto high beam system has turned the high
beams off.
Scenario 3:
Conditions -The automatic high beam system is set to ON in the
message center. The headlamp switch is in
(off),(park lamps),
or
(on).
Operation -The high beam switch can be used to turn the high beams
on and off.
Scenario 4:
Conditions -The automatic high beam system is set to OFF in the
message center. The headlamp switch is in
(auto
lamps),
(off),(park lamps), or(on).
Operation -The high beam switch can be used to turn the high beams
on and off.
Enabling/disabling auto high beams
Enabling/disabling and/or checking the status of the automatic high beam
system can be performed using the message center. SeeMessage center
in theInstrument clusterchapter.
Activating high beams
If there is no traffic in front of the vehicle, the high beams will come on
automatically and the
light will display in the instrument panel if
the following are true:
•The headlamp control is in auto lamp
mode.
•Fog lamps are turned off.
•The ambient light level is low enough that high beams are needed.
•Vehicle speed must be greater than 32 mph (51 km/h).
•Severe weather is not detected.
Lights
99
2010 MKT(mkt)
Owners Guide, 1st Printing
USA(fus)
Page 102 of 430
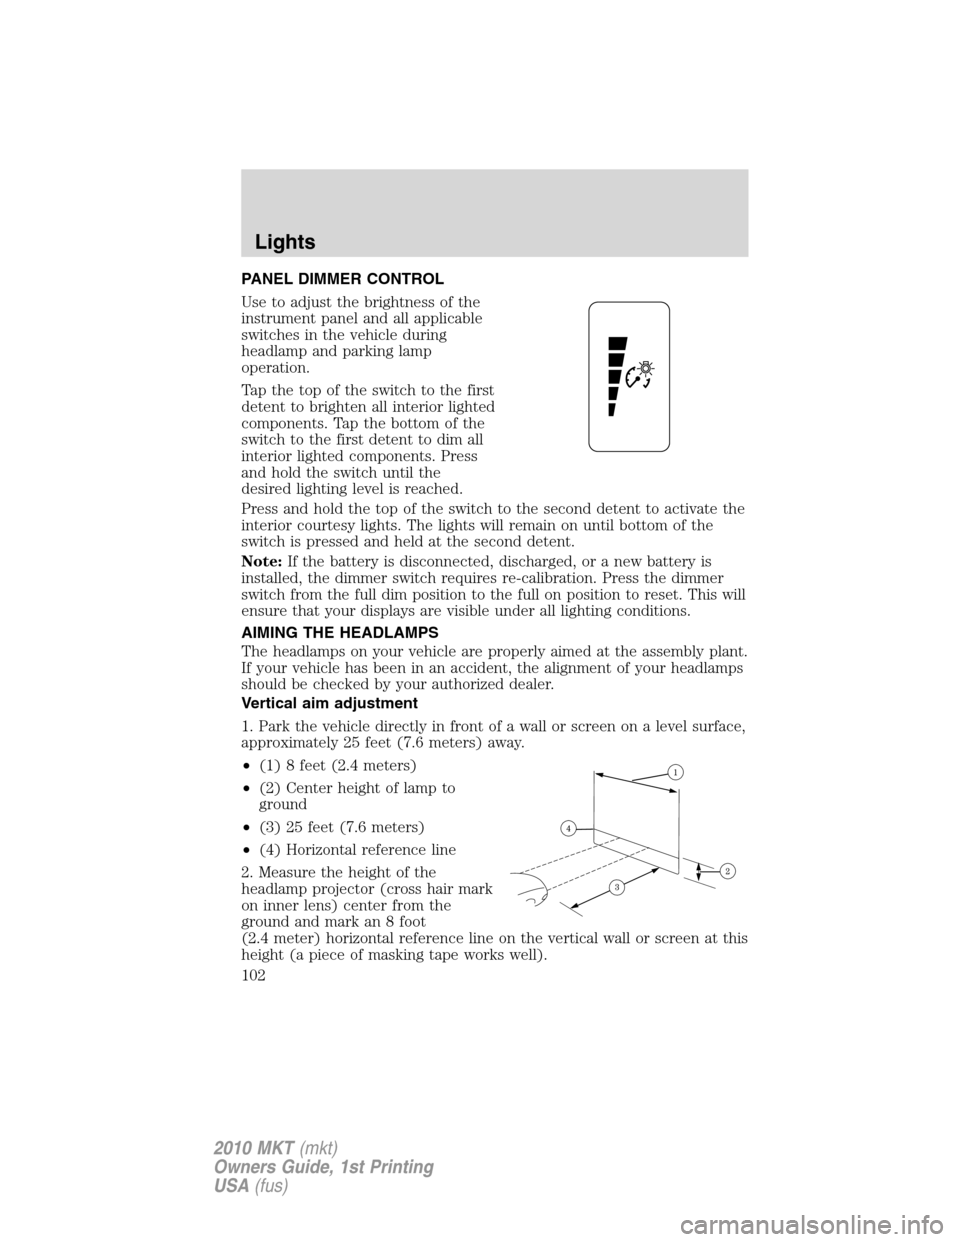
PANEL DIMMER CONTROL
Use to adjust the brightness of the
instrument panel and all applicable
switches in the vehicle during
headlamp and parking lamp
operation.
Tap the top of the switch to the first
detent to brighten all interior lighted
components. Tap the bottom of the
switch to the first detent to dim all
interior lighted components. Press
and hold the switch until the
desired lighting level is reached.
Press and hold the top of the switch to the second detent to activate the
interior courtesy lights. The lights will remain on until bottom of the
switch is pressed and held at the second detent.
Note:If the battery is disconnected, discharged, or a new battery is
installed, the dimmer switch requires re-calibration. Press the dimmer
switch from the full dim position to the full on position to reset. This will
ensure that your displays are visible under all lighting conditions.
AIMING THE HEADLAMPS
The headlamps on your vehicle are properly aimed at the assembly plant.
If your vehicle has been in an accident, the alignment of your headlamps
should be checked by your authorized dealer.
Vertical aim adjustment
1. Park the vehicle directly in front of a wall or screen on a level surface,
approximately 25 feet (7.6 meters) away.
•(1) 8 feet (2.4 meters)
•(2) Center height of lamp to
ground
•(3) 25 feet (7.6 meters)
•(4) Horizontal reference line
2. Measure the height of the
headlamp projector (cross hair mark
on inner lens) center from the
ground and mark an 8 foot
(2.4 meter) horizontal reference line on the vertical wall or screen at this
height (a piece of masking tape works well).
Lights
102
2010 MKT(mkt)
Owners Guide, 1st Printing
USA(fus)
Page 112 of 430
OVERHEAD CONSOLE
The appearance of your vehicle’s overhead console will vary according to
your option package.
Storage compartment
The storage compartment may be
used to store a pair of sunglasses.
Press the release area on the rear
edge of the bin door to open the
storage compartment. The door will
open to the full open position.
ELECTRONIC COMPASS
The compass heading is displayed in the touch screen.
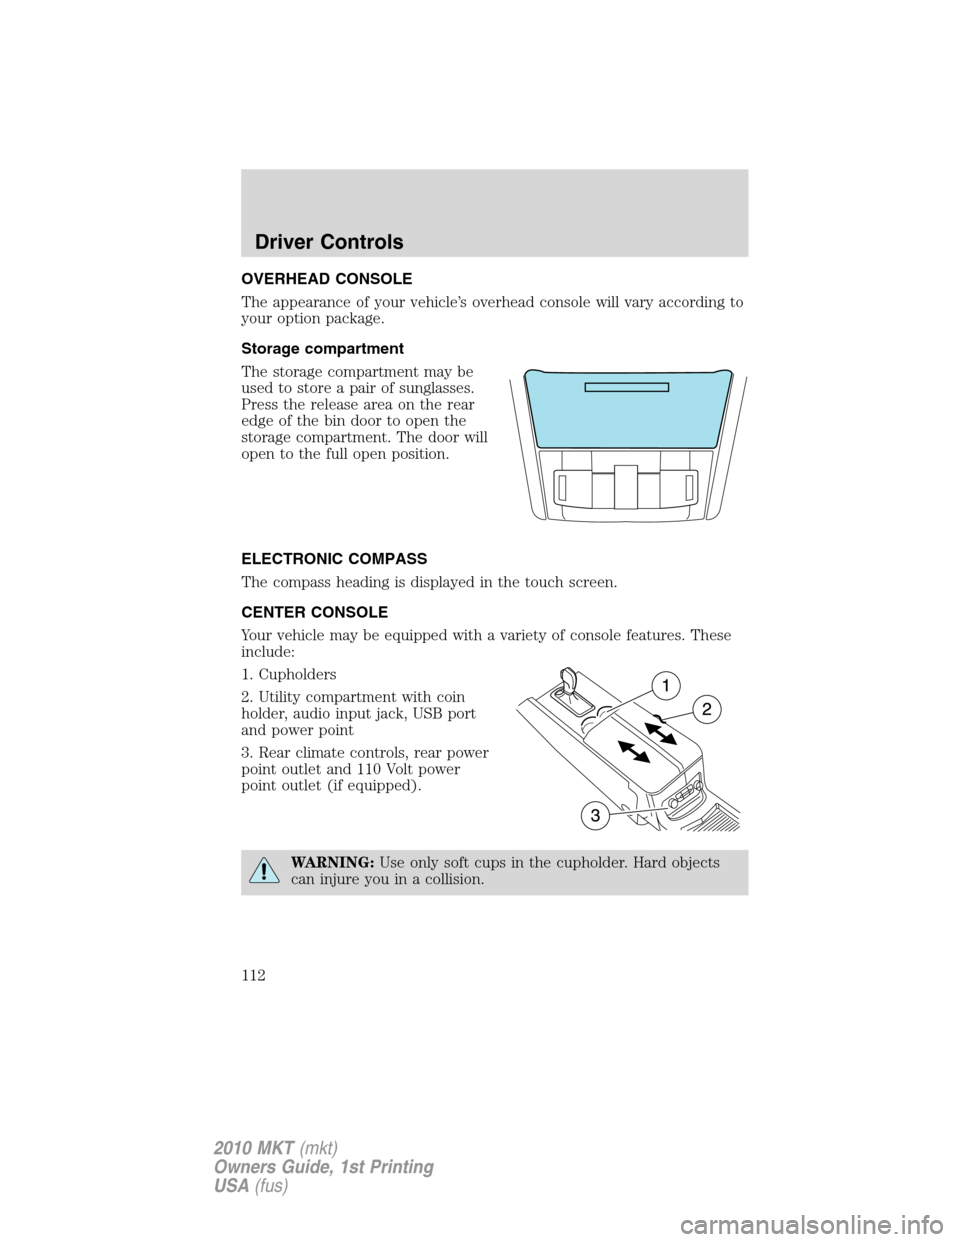
CENTER CONSOLE
Your vehicle may be equipped with a variety of console features. These
include:
1. Cupholders
2. Utility compartment with coin
holder, audio input jack, USB port
and power point
3. Rear climate controls, rear power
point outlet and 110 Volt power
point outlet (if equipped).
WARNING:Use only soft cups in the cupholder. Hard objects
can injure you in a collision.
Driver Controls
112
2010 MKT(mkt)
Owners Guide, 1st Printing
USA(fus)
Page 125 of 430
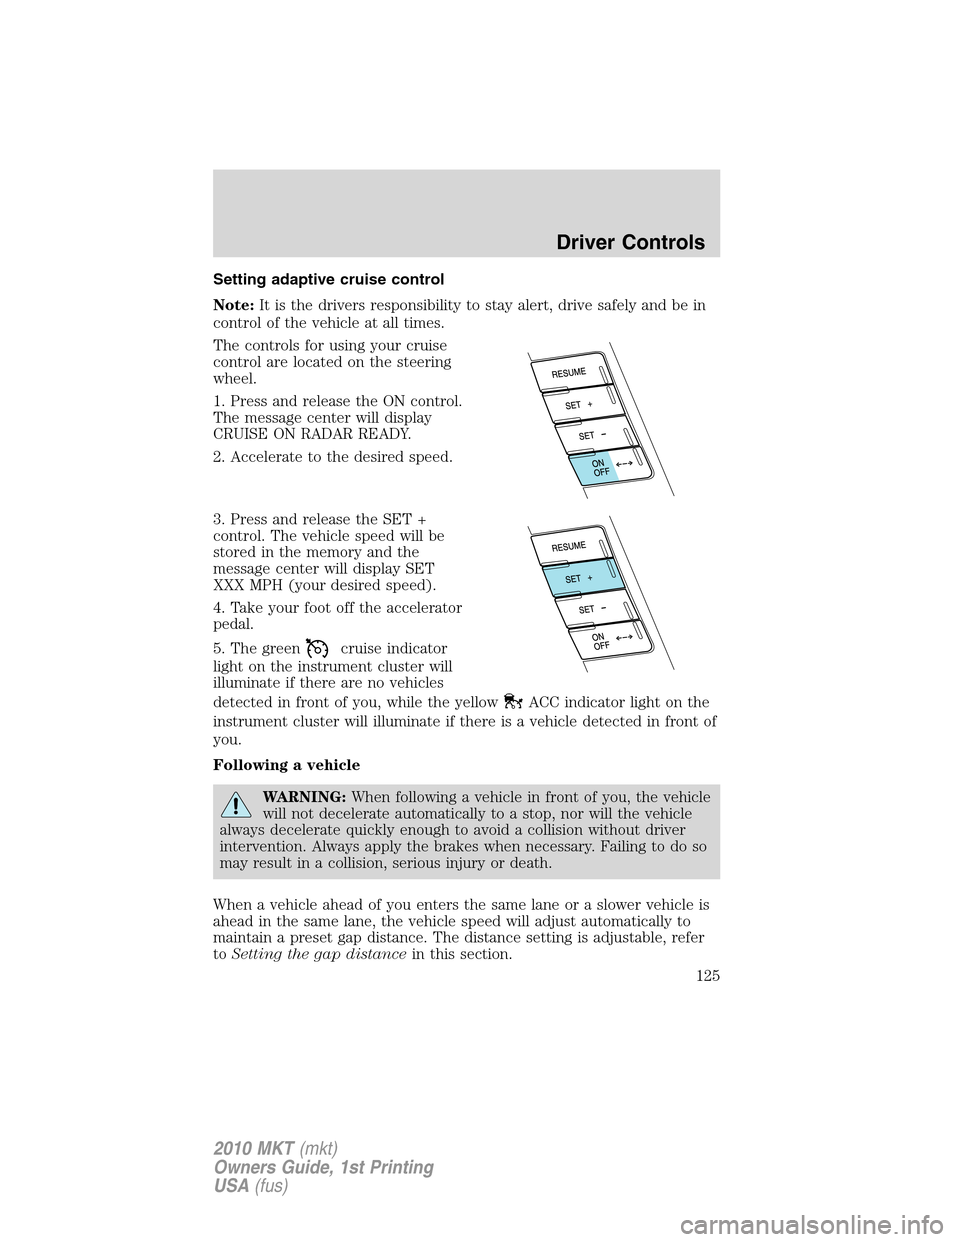
Setting adaptive cruise control
Note:It is the drivers responsibility to stay alert, drive safely and be in
control of the vehicle at all times.
The controls for using your cruise
control are located on the steering
wheel.
1. Press and release the ON control.
The message center will display
CRUISE ON RADAR READY.
2. Accelerate to the desired speed.
3. Press and release the SET +
control. The vehicle speed will be
stored in the memory and the
message center will display SET
XXX MPH (your desired speed).
4. Take your foot off the accelerator
pedal.
5. The green
cruise indicator
light on the instrument cluster will
illuminate if there are no vehicles
detected in front of you, while the yellow
ACC indicator light on the
instrument cluster will illuminate if there is a vehicle detected in front of
you.
Following a vehicle
WARNING:When following a vehicle in front of you, the vehicle
will not decelerate automatically to a stop, nor will the vehicle
always decelerate quickly enough to avoid a collision without driver
intervention. Always apply the brakes when necessary. Failing to do so
may result in a collision, serious injury or death.
When a vehicle ahead of you enters the same lane or a slower vehicle is
ahead in the same lane, the vehicle speed will adjust automatically to
maintain a preset gap distance. The distance setting is adjustable, refer
toSetting the gap distancein this section.
Driver Controls
125
2010 MKT(mkt)
Owners Guide, 1st Printing
USA(fus)
Page 126 of 430
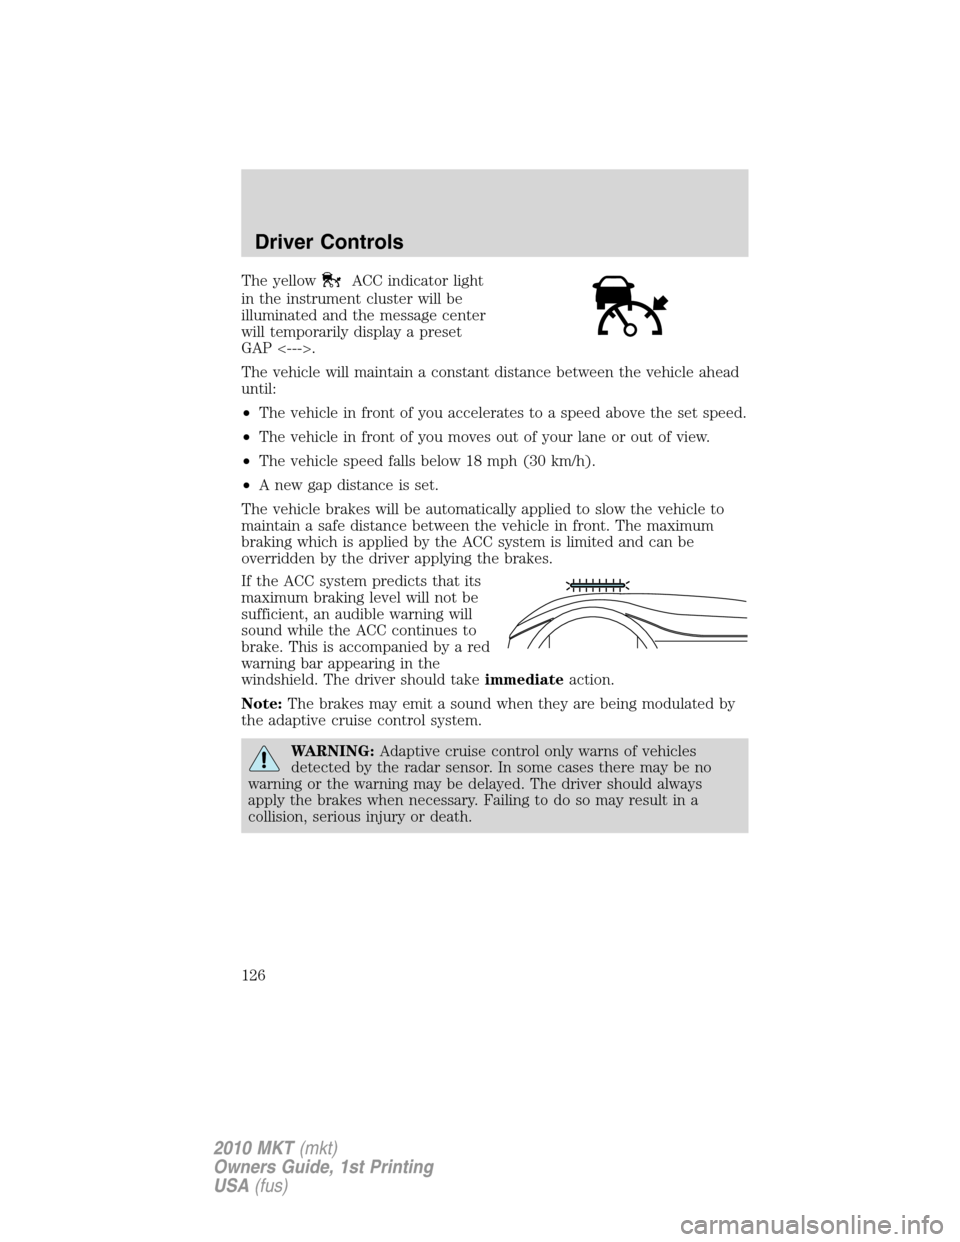
The yellowACC indicator light
in the instrument cluster will be
illuminated and the message center
will temporarily display a preset
GAP <--->.
The vehicle will maintain a constant distance between the vehicle ahead
until:
•The vehicle in front of you accelerates to a speed above the set speed.
•The vehicle in front of you moves out of your lane or out of view.
•The vehicle speed falls below 18 mph (30 km/h).
•A new gap distance is set.
The vehicle brakes will be automatically applied to slow the vehicle to
maintain a safe distance between the vehicle in front. The maximum
braking which is applied by the ACC system is limited and can be
overridden by the driver applying the brakes.
If the ACC system predicts that its
maximum braking level will not be
sufficient, an audible warning will
sound while the ACC continues to
brake. This is accompanied by a red
warning bar appearing in the
windshield. The driver should takeimmediateaction.
Note:The brakes may emit a sound when they are being modulated by
the adaptive cruise control system.
WARNING:Adaptive cruise control only warns of vehicles
detected by the radar sensor. In some cases there may be no
warning or the warning may be delayed. The driver should always
apply the brakes when necessary. Failing to do so may result in a
collision, serious injury or death.
Driver Controls
126
2010 MKT(mkt)
Owners Guide, 1st Printing
USA(fus)
Page 127 of 430
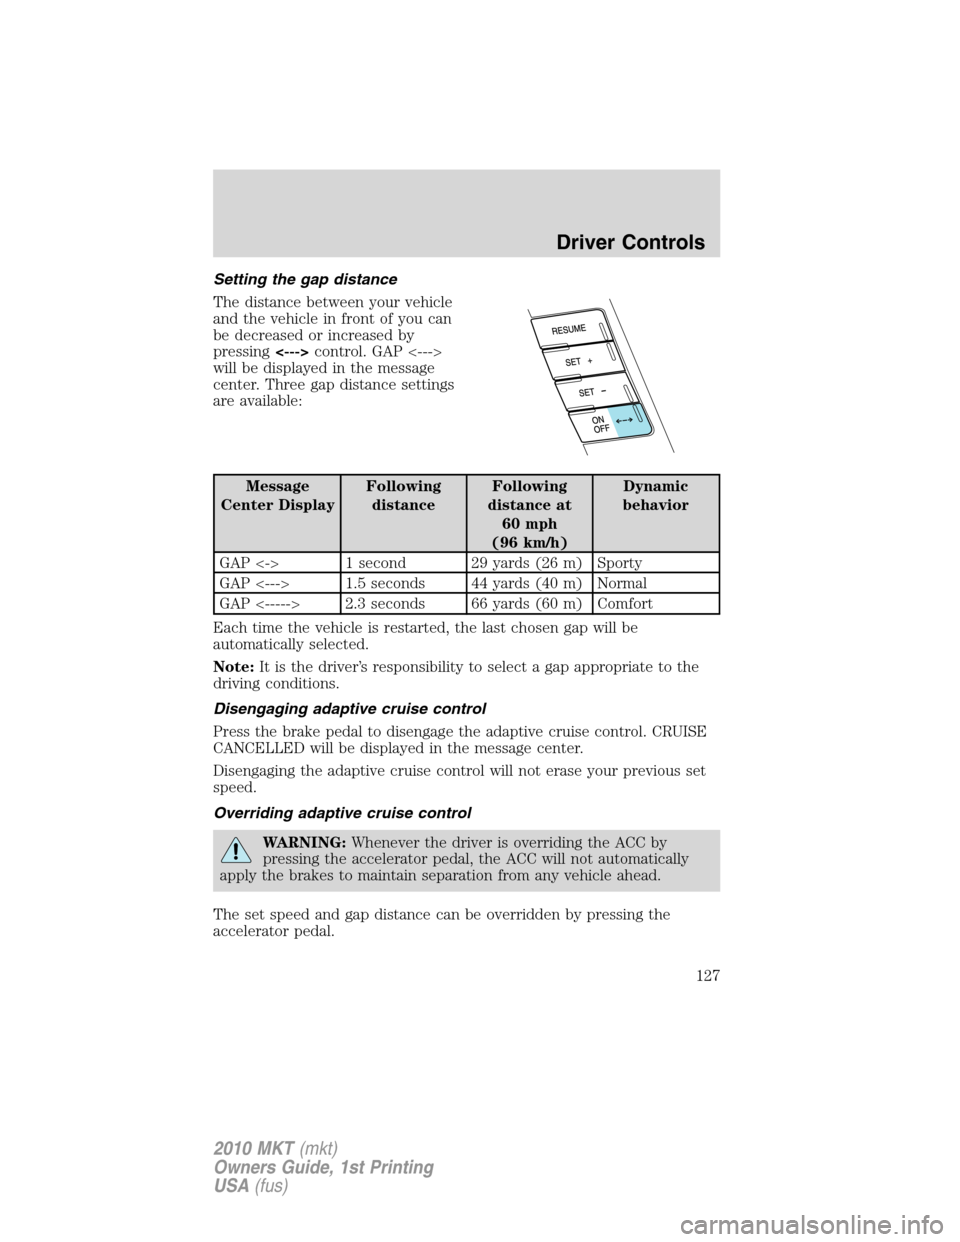
Setting the gap distance
The distance between your vehicle
and the vehicle in front of you can
be decreased or increased by
pressing<--->control. GAP <--->
will be displayed in the message
center. Three gap distance settings
are available:
Message
Center DisplayFollowing
distanceFollowing
distance at
60 mph
(96 km/h)Dynamic
behavior
GAP <-> 1 second 29 yards (26 m) Sporty
GAP <---> 1.5 seconds 44 yards (40 m) Normal
GAP <-----> 2.3 seconds 66 yards (60 m) Comfort
Each time the vehicle is restarted, the last chosen gap will be
automatically selected.
Note:It is the driver’s responsibility to select a gap appropriate to the
driving conditions.
Disengaging adaptive cruise control
Press the brake pedal to disengage the adaptive cruise control. CRUISE
CANCELLED will be displayed in the message center.
Disengaging the adaptive cruise control will not erase your previous set
speed.
Overriding adaptive cruise control
WARNING:Whenever the driver is overriding the ACC by
pressing the accelerator pedal, the ACC will not automatically
apply the brakes to maintain separation from any vehicle ahead.
The set speed and gap distance can be overridden by pressing the
accelerator pedal.
Driver Controls
127
2010 MKT(mkt)
Owners Guide, 1st Printing
USA(fus)
Page 128 of 430
When the driver is overriding ACC, the greencruise indicator light
is illuminated, and CRUISE OVERRIDE is displayed in the message
center. When the accelerator is released, the ACC function will operate
again and vehicle speed will decrease to the set speed, or a lower speed
if following a slower vehicle.
Changing the set speed
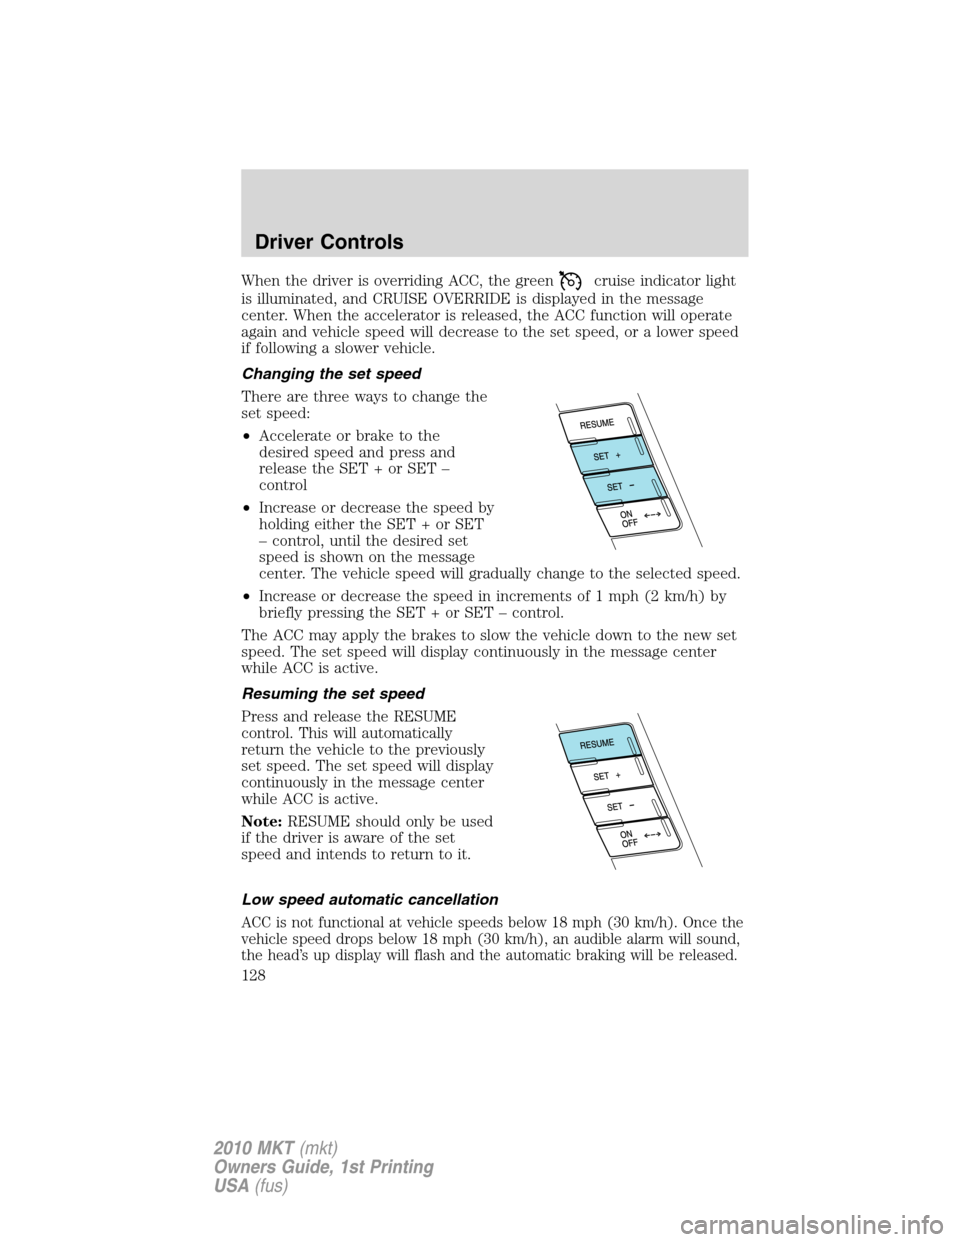
There are three ways to change the
set speed:
•Accelerate or brake to the
desired speed and press and
release the SET + or SET –
control
•Increase or decrease the speed by
holding either the SET + or SET
– control, until the desired set
speed is shown on the message
center. The vehicle speed will gradually change to the selected speed.
•Increase or decrease the speed in increments of 1 mph (2 km/h) by
briefly pressing the SET + or SET – control.
The ACC may apply the brakes to slow the vehicle down to the new set
speed. The set speed will display continuously in the message center
while ACC is active.
Resuming the set speed
Press and release the RESUME
control. This will automatically
return the vehicle to the previously
set speed. The set speed will display
continuously in the message center
while ACC is active.
Note:RESUME should only be used
if the driver is aware of the set
speed and intends to return to it.
Low speed automatic cancellation
ACC is not functional at vehicle speeds below 18 mph (30 km/h). Once the
vehicle speed drops below 18 mph (30 km/h), an audible alarm will sound,
the head’s up display will flash and the automatic braking will be released.
Driver Controls
128
2010 MKT(mkt)
Owners Guide, 1st Printing
USA(fus)
Page 129 of 430
Hilly condition usage
It is recommended that the driver select a lower gear position when ACC
is active in situations such as prolonged downhill driving on steep grades
(i.e., driving in mountainous areas). In these situations, additional engine
braking is needed to reduce the load on the vehicle’s regular brake
system to prevent them from overheating. For more information,
referenceAutomatic transmission operationin theDrivingchapter.
Note:If ACC is applying brakes for an extended period of time, an
audible alarm will sound, the head’s up display will flash and ACC will
shut down. This is to allow the brakes to cool down. When the brakes
have cooled down, the ACC will again function normally.
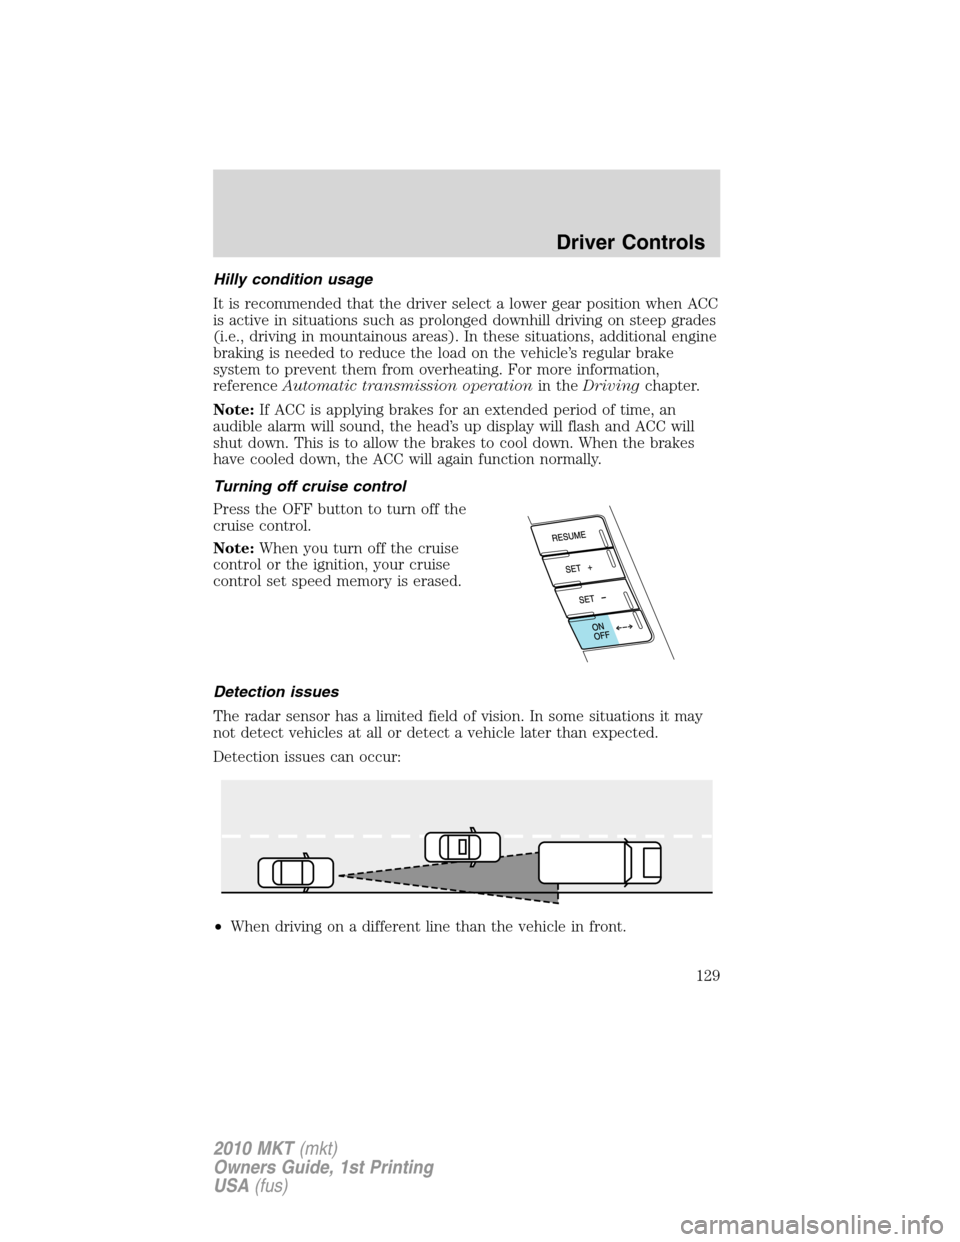
Turning off cruise control
Press the OFF button to turn off the
cruise control.
Note:When you turn off the cruise
control or the ignition, your cruise
control set speed memory is erased.
Detection issues
The radar sensor has a limited field of vision. In some situations it may
not detect vehicles at all or detect a vehicle later than expected.
Detection issues can occur:
•When driving on a different line than the vehicle in front.
Driver Controls
129
2010 MKT(mkt)
Owners Guide, 1st Printing
USA(fus)
Page 131 of 430
Blocked sensor
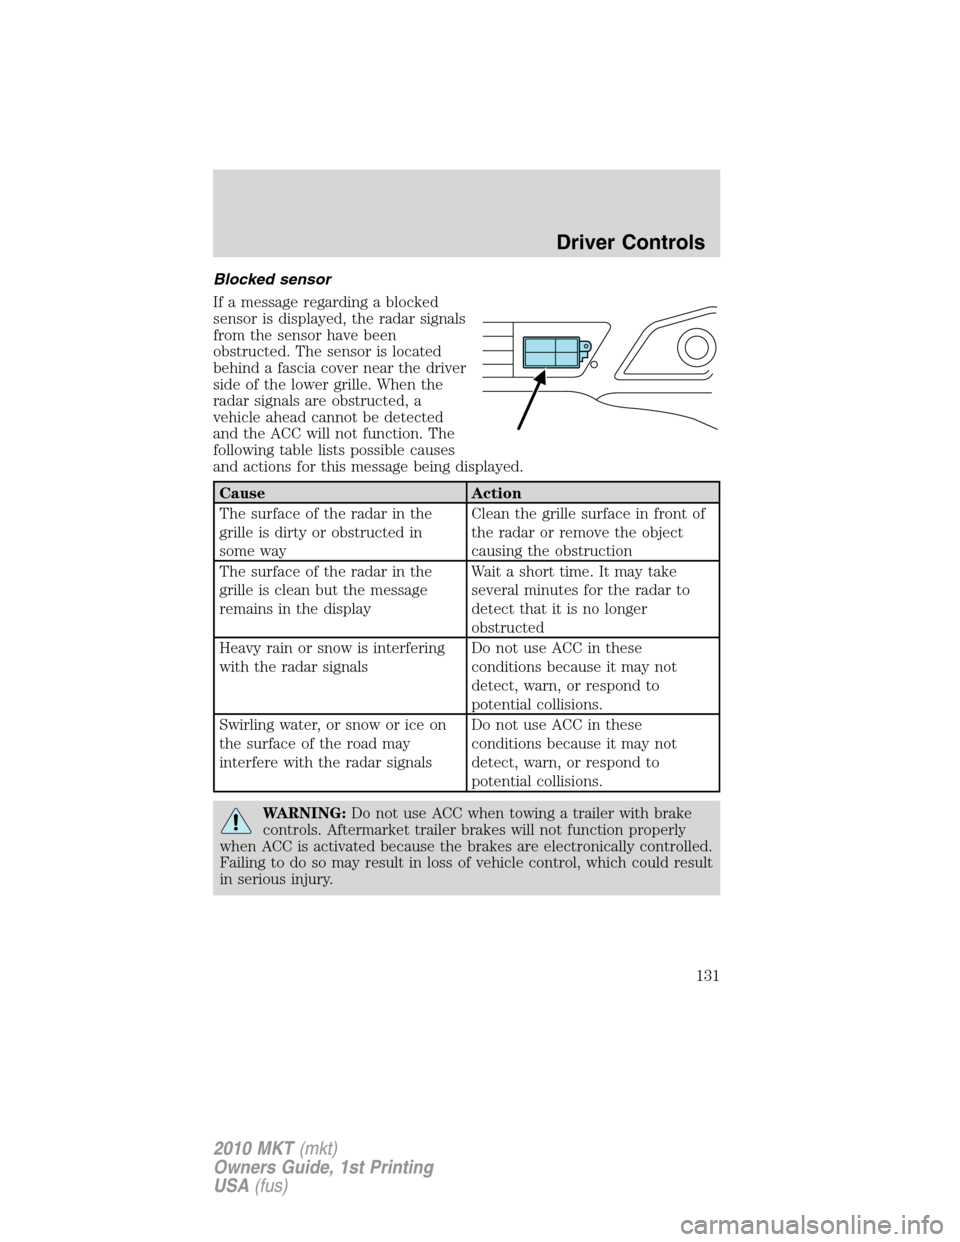
If a message regarding a blocked
sensor is displayed, the radar signals
from the sensor have been
obstructed. The sensor is located
behind a fascia cover near the driver
side of the lower grille. When the
radar signals are obstructed, a
vehicle ahead cannot be detected
and the ACC will not function. The
following table lists possible causes
and actions for this message being displayed.
Cause Action
The surface of the radar in the
grille is dirty or obstructed in
some wayClean the grille surface in front of
the radar or remove the object
causing the obstruction
The surface of the radar in the
grille is clean but the message
remains in the displayWait a short time. It may take
several minutes for the radar to
detect that it is no longer
obstructed
Heavy rain or snow is interfering
with the radar signalsDo not use ACC in these
conditions because it may not
detect, warn, or respond to
potential collisions.
Swirling water, or snow or ice on
the surface of the road may
interfere with the radar signalsDo not use ACC in these
conditions because it may not
detect, warn, or respond to
potential collisions.
WARNING:Do not use ACC when towing a trailer with brake
controls. Aftermarket trailer brakes will not function properly
when ACC is activated because the brakes are electronically controlled.
Failing to do so may result in loss of vehicle control, which could result
in serious injury.
Driver Controls
131
2010 MKT(mkt)
Owners Guide, 1st Printing
USA(fus)