LINCOLN MKT 2014 Manual Online
Manufacturer: LINCOLN, Model Year: 2014, Model line: MKT, Model: LINCOLN MKT 2014Pages: 498, PDF Size: 7.3 MB
Page 81 of 498
WARNING:Keep keys out of reach of children. Do not allow
children to play near an open or moving power liftgate.
Note:Cycling the ignition while the liftgate is power closing and is
6–10 inches (15–24 cm) from being latched may cause the liftgate to
reverse to full open position. Make sure that the liftgate is closed before
operating or moving the vehicle, especially in an enclosure, like a garage
or a parking structure. The liftgate or its components could be damaged.
Note:Do not drive with the liftgate open without first disabling the
power function and securing the liftgate to the vehicle.
Note:In case of operation in extreme cold -40°F (-40°C), or on extreme
inclines, manual operation of the liftgate is suggested.
The power liftgate can be enabled or disabled using the information
display. The remote control and instrument panel button will still operate
the liftgate regardless of the setting.
Opening and Closing the Power Liftgate
Note:The liftgate movement direction can be reversed with a second
press of the instrument panel, or the control button on the liftgate, or a
second double press of the transmitter button.
The liftgate will only operate with the vehicle in P (Park).
A chime will sound three times as the liftgate begins to power close.
A single chime indicates a problem with the close request, caused by:
•the ignition is on and the transmission is not in P (Park);
•or the battery voltage is below the minimum operating voltage;
•or the vehicle speed is at or above 3 mph (5 km/h).
If the liftgate reverses and starts to close after an open request, a fast
continuous chime indicates excessive load on the gate or a possible strut
failure. See your authorized dealer if you still have a fast chime after the
load is removed.
To open or close from the instrument panel:Press the
instrument panel button.
To open or close with the remote control:Press the remote
control button twice within three seconds.
80Locks
2014 MKT(mkt)
Owners Guide gf, 1st Printing, April 2013
USA(fus)
Page 82 of 498
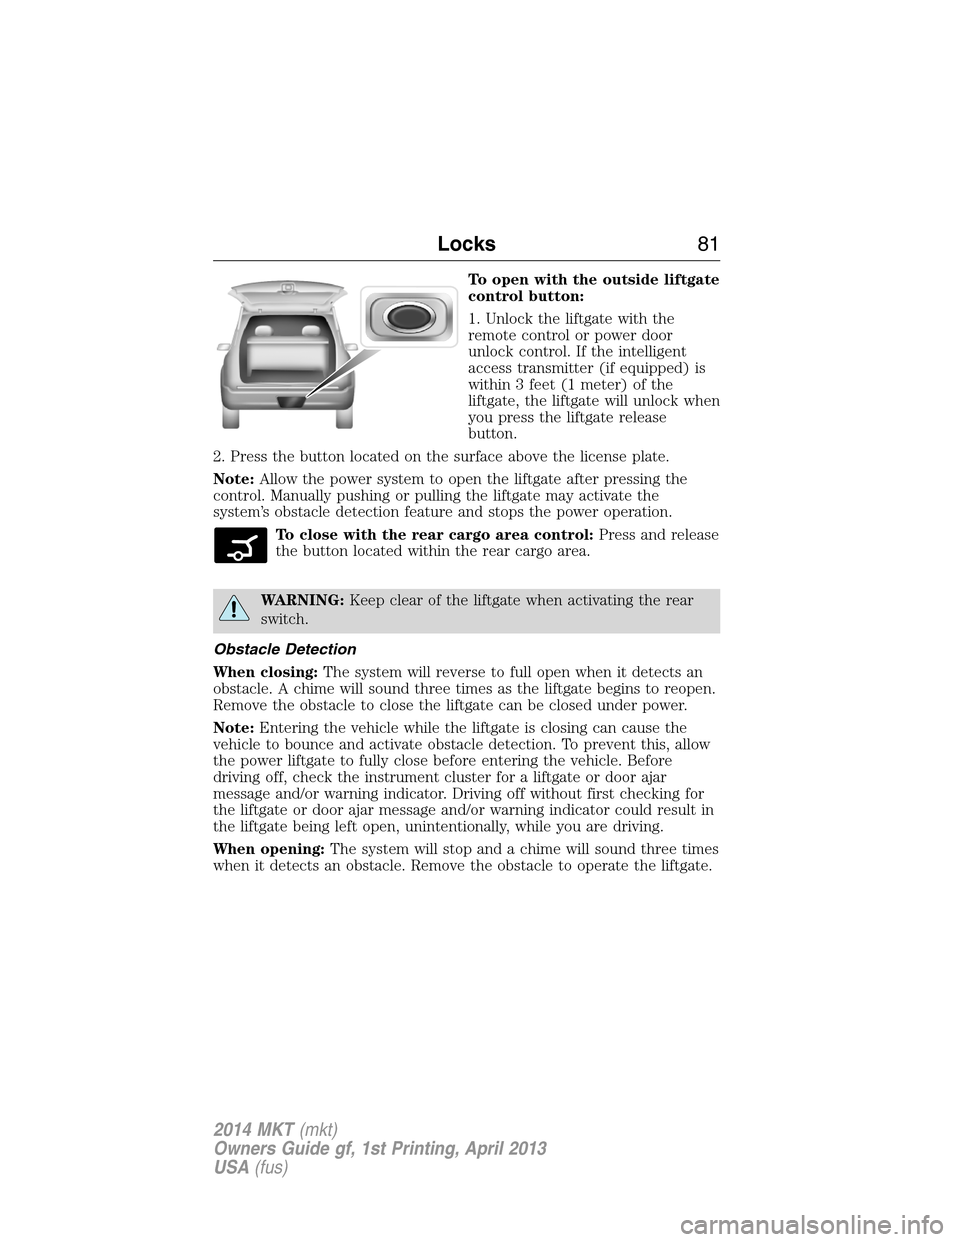
To open with the outside liftgate
control button:
1. Unlock the liftgate with the
remote control or power door
unlock control. If the intelligent
access transmitter (if equipped) is
within 3 feet (1 meter) of the
liftgate, the liftgate will unlock when
you press the liftgate release
button.
2. Press the button located on the surface above the license plate.
Note:Allow the power system to open the liftgate after pressing the
control. Manually pushing or pulling the liftgate may activate the
system’s obstacle detection feature and stops the power operation.
To close with the rear cargo area control:Press and release
the button located within the rear cargo area.
WARNING:Keep clear of the liftgate when activating the rear
switch.
Obstacle Detection
When closing:The system will reverse to full open when it detects an
obstacle. A chime will sound three times as the liftgate begins to reopen.
Remove the obstacle to close the liftgate can be closed under power.
Note:Entering the vehicle while the liftgate is closing can cause the
vehicle to bounce and activate obstacle detection. To prevent this, allow
the power liftgate to fully close before entering the vehicle. Before
driving off, check the instrument cluster for a liftgate or door ajar
message and/or warning indicator. Driving off without first checking for
the liftgate or door ajar message and/or warning indicator could result in
the liftgate being left open, unintentionally, while you are driving.
When opening:The system will stop and a chime will sound three times
when it detects an obstacle. Remove the obstacle to operate the liftgate.
Locks81
2014 MKT(mkt)
Owners Guide gf, 1st Printing, April 2013
USA(fus)
Page 83 of 498
Resetting the Power Liftgate
The liftgate may not operate properly and may need to be reset if any of
these conditions occur:
•a low voltage or dead battery
•disconnected battery
•the liftgate is manually closed and left ajar (unlatched)
To reset the power liftgate:
1. Disconnect the battery for 20 seconds then, reconnect the battery.
2. Manually close and fully latch the liftgate.
3. Power open the liftgate by using the transmitter, or the instrument
panel control button.
Manual Operation
WARNING:Make sure to close and latch the liftgate to prevent
drawing exhaust fumes into your vehicle. This will also prevent
passengers and cargo from falling out. If you must drive with the
liftgate open, keep the vents or windows open so outside air comes into
your vehicle. Failure to follow this warning could result in serious
personal injury.
Note:Be careful when opening or closing the liftgate in a garage or
other enclosed area to avoid damaging the liftgate.
Note:Do not hang anything (bike rack, etc.) from the spoiler, glass or
liftgate. This could damage the liftgate and its components.
Note:Do not leave the liftgate open while driving. This could damage
the liftgate and its components.
The liftgate area is only intended for cargo, not passengers.
82Locks
2014 MKT(mkt)
Owners Guide gf, 1st Printing, April 2013
USA(fus)
Page 84 of 498
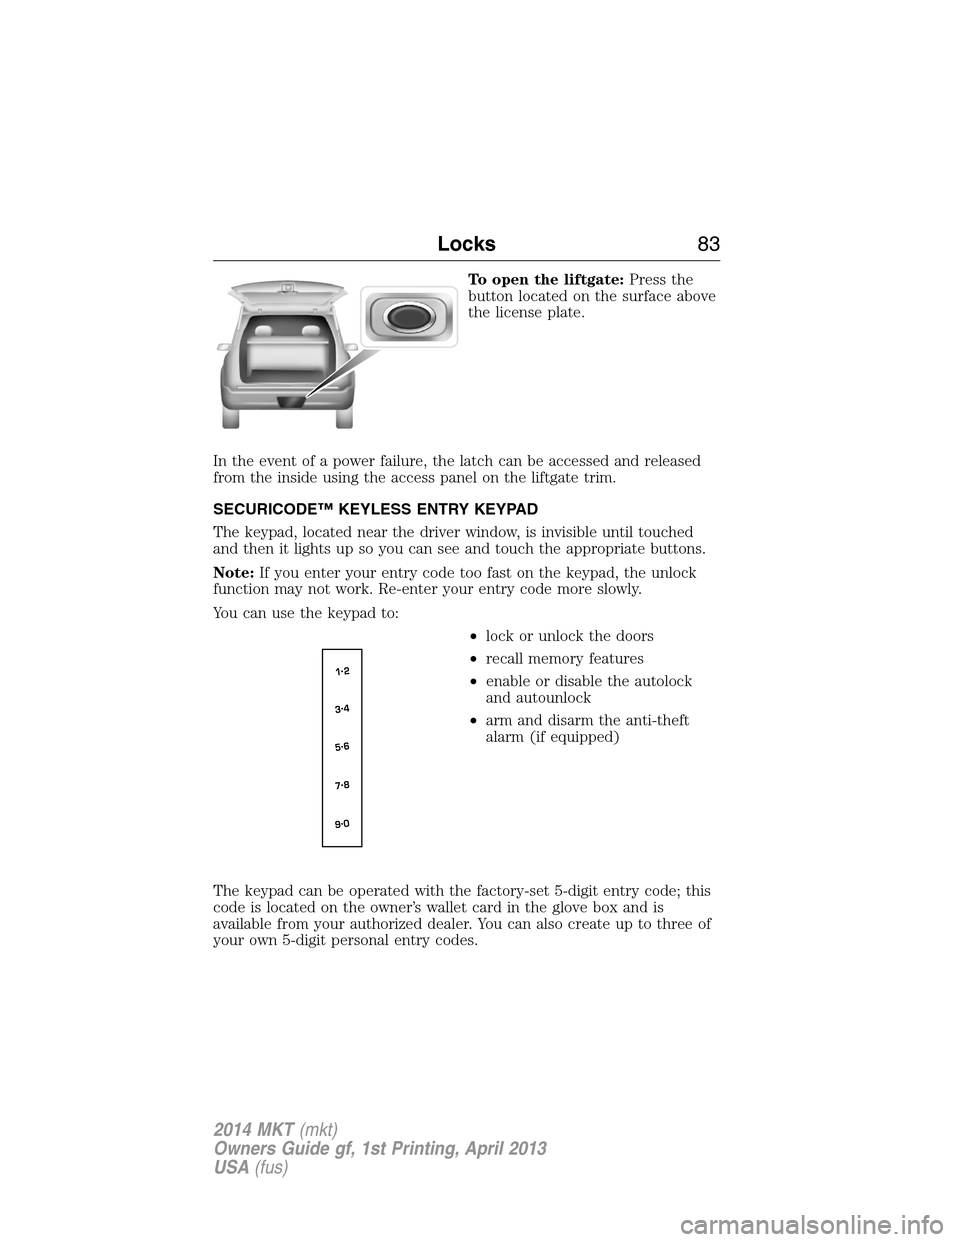
To open the liftgate:Press the
button located on the surface above
the license plate.
In the event of a power failure, the latch can be accessed and released
from the inside using the access panel on the liftgate trim.
SECURICODE™ KEYLESS ENTRY KEYPAD
The keypad, located near the driver window, is invisible until touched
and then it lights up so you can see and touch the appropriate buttons.
Note:If you enter your entry code too fast on the keypad, the unlock
function may not work. Re-enter your entry code more slowly.
You can use the keypad to:
•lock or unlock the doors
•recall memory features
•enable or disable the autolock
and autounlock
•arm and disarm the anti-theft
alarm (if equipped)
The keypad can be operated with the factory-set 5-digit entry code; this
code is located on the owner’s wallet card in the glove box and is
available from your authorized dealer. You can also create up to three of
your own 5-digit personal entry codes.
Locks83
2014 MKT(mkt)
Owners Guide gf, 1st Printing, April 2013
USA(fus)
Page 85 of 498
Programming a Personal Entry Code
To create your own personal entry code:
1. Enter the factory-set code.
2. Press the1•2on the keypad within five seconds.
3. Enter your personal 5-digit code. You must enter each number within
five seconds of each other.
4. For memory recall feature, enter the sixth digit1•2to store driver 1
settings or3•4to store driver 2 settings.
Note:Pressing5•6,7•8,or9•0keypad numbers as a sixth digit will
not recall a driver memory setting.
Note:The factory-set code cannot be associated with a memory setting.
5. The doors will lock and then unlock to confirm that programming is
complete.
You may also program a personal entry code through the MyFord Touch
or MyLincoln Touch system. Refer to theMyFord TouchorMyLincoln
Touchchapter.
Tips:
•Do not set a code that uses five of the same number.
•Do not use five numbers in sequential order.
•The factory-set code will work even if you have set your own personal
code.
Erasing a Personal Code
1. Enter the factory-set 5-digit code.
2. Press and release the1•2on the keypad within five seconds.
3. Press and hold the1•2for two seconds. This must be done within
five seconds of completing Step 2.
All personal codes are now erased and only the factory-set 5-digit code
will work.
Anti-Scan Feature
The keypad will go into an anti-scan mode if you enter the wrong code
seven times (35 consecutive button presses). This mode disables the
keypad for one minute and the keypad lamp will flash.
84Locks
2014 MKT(mkt)
Owners Guide gf, 1st Printing, April 2013
USA(fus)
Page 86 of 498
The anti-scan feature will turn off after:
•one minute of keypad inactivity
•pressing the unlock button on the remote control
•the ignition is turned on
•unlocking the vehicle using intelligent access.
Unlocking and Locking the Doors
To unlock the driver door:Enter the factory-set 5-digit code or your
personal code. You must press each number within five seconds of each
other. The interior lamps will illuminate.Note:All doors will unlock if
the two-stage unlocking feature is disabled. Refer toLocking and
Unlockingearlier in this chapter.
To unlock all doors:Enter the factory-set code or your personal code,
then press the3•4control within five seconds.
To lock all doors:Press and hold7•8and9•0at the same time with
the driver door closed. You do not need to enter the keypad code first.
Displaying the Factory Set Code
Note:You will need to have two programmed intelligent access keys for
this procedure.
To display the factory-set code in the information display:
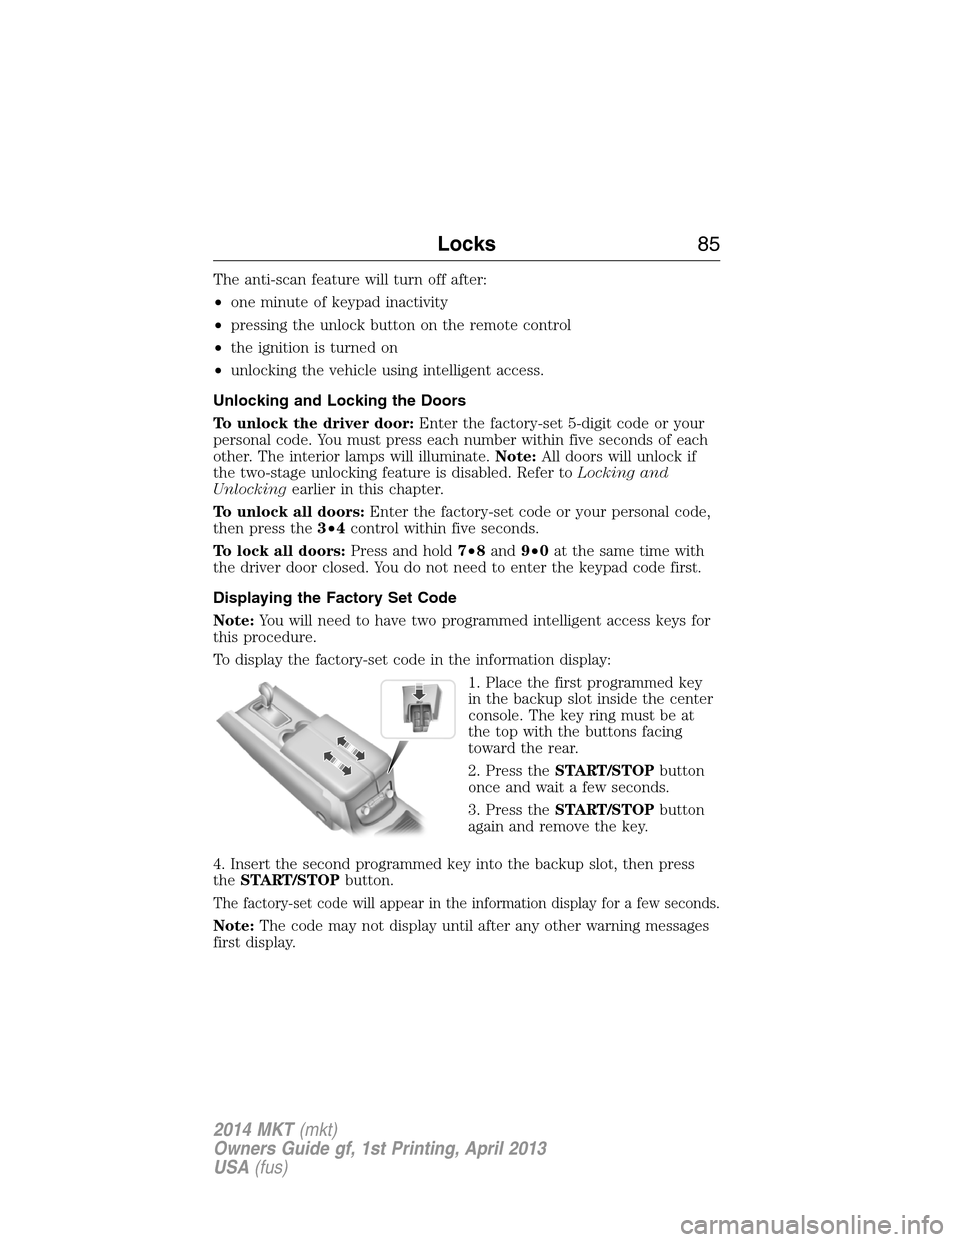
1. Place the first programmed key
in the backup slot inside the center
console. The key ring must be at
the top with the buttons facing
toward the rear.
2. Press theSTART/STOPbutton
once and wait a few seconds.
3. Press theSTART/STOPbutton
again and remove the key.
4. Insert the second programmed key into the backup slot, then press
theSTART/STOPbutton.
The factory-set code will appear in the information display for a few seconds.
Note:The code may not display until after any other warning messages
first display.
Locks85
2014 MKT(mkt)
Owners Guide gf, 1st Printing, April 2013
USA(fus)
Page 87 of 498
SECURILOCK® PASSIVE ANTI-THEFT SYSTEM
Note:The system is not compatible with non-Ford aftermarket remote
start systems. Use of these systems may result in vehicle starting
problems and a loss of security protection.
Note:Metallic objects, electronic devices or a second coded key on the
same key chain may cause vehicle starting issues if they are too close to
the key when starting the engine. Prevent these objects from touching
the coded key while starting the engine. Switch the ignition off, move all
objects on the key chain away from the coded key and restart the engine
if a problem occurs.
Note:Do not leave a duplicate coded key in the vehicle. Always take
your keys and lock all doors when leaving the vehicle.
The system is an engine immobilization system. It helps prevent the
engine from starting unless a coded key programmed to your vehicle
is used. Using the wrong key may prevent the engine from starting.
A message may appear in the information display.
If you are unable to start the engine with a correctly coded key, a
malfunction has happened and a message may appear in the information
display.
Automatic Arming
Your vehicle arms immediately after you switch the ignition off.
Automatic Disarming
Your vehicle disarms when you switch the ignition on with a coded key.
Replacement Keys
Note:Your vehicle comes with two intelligent access keys.
The intelligent access key functions as a programmed key that operates
the driver door lock and activates the intelligent access with push button
start systems, as well as a remote control.
If your intelligent access key is lost or stolen and you do not have an
extra coded key, you will need to have your vehicle towed to an
authorized dealer. The key codes need to be erased from your vehicle
and new coded keys will need to be programmed.
Store an extra programmed key away from the vehicle in a safe place to
help prevent any inconveniences. See an authorized dealer to purchase
additional spare or replacement keys.
86Security
2014 MKT(mkt)
Owners Guide gf, 1st Printing, April 2013
USA(fus)
Page 88 of 498
Programming a Spare Intelligent Access Key
Note:A maximum of four intelligent access keys can be programmed to
your vehicle. You must take your vehicle and all access keys to your
authorized dealer to be erased and reprogrammed if you would like to
replace a previously programmed access key with a new access key, or if
you already have four access keys programmed to your vehicle.
You must have two previously programmed intelligent access keys
inside your vehicle and the new unprogrammed intelligent access keys
readily accessible. See your authorized dealer to have the spare key
programmed if two previously programmed keys are not available.
Make sure that your vehicle is off before beginning this procedure. Make
sure that all doors are closed before beginning and that they remain
closed throughout the procedure. Perform all steps within 30 seconds of
starting the sequence. Stop and wait for at least one minute before
starting again if any steps are performed out of sequence.
Read and understand the entire procedure before you begin.
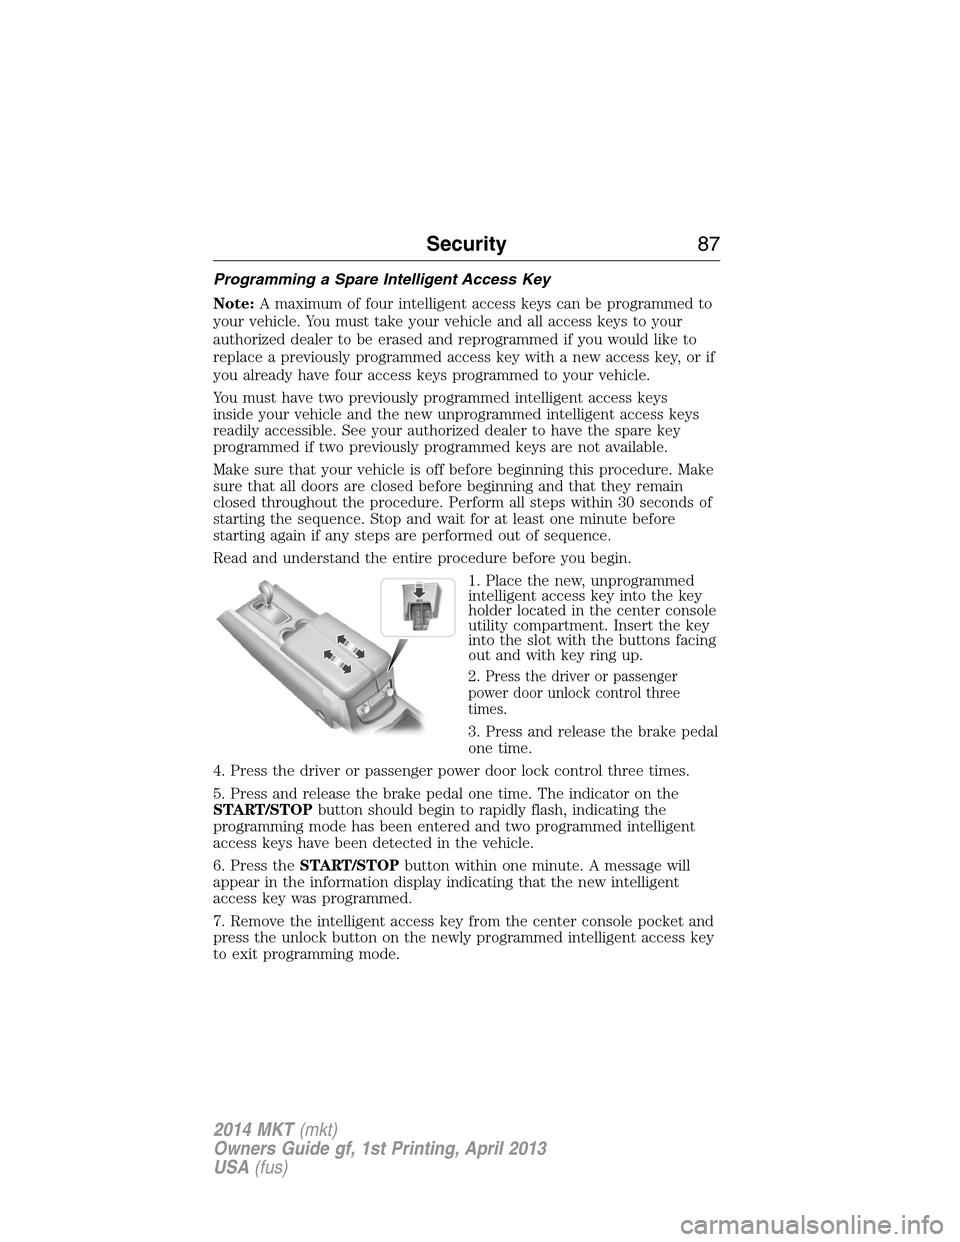
1. Place the new, unprogrammed
intelligent access key into the key
holder located in the center console
utility compartment. Insert the key
into the slot with the buttons facing
out and with key ring up.
2.
Press the driver or passenger
power door unlock control three
times.
3. Press and release the brake pedal
one time.
4. Press the driver or passenger power door lock control three times.
5. Press and release the brake pedal one time. The indicator on the
START/STOPbutton should begin to rapidly flash, indicating the
programming mode has been entered and two programmed intelligent
access keys have been detected in the vehicle.
6. Press theSTART/STOPbutton within one minute. A message will
appear in the information display indicating that the new intelligent
access key was programmed.
7. Remove the intelligent access key from the center console pocket and
press the unlock button on the newly programmed intelligent access key
to exit programming mode.
Security87
2014 MKT(mkt)
Owners Guide gf, 1st Printing, April 2013
USA(fus)
Page 89 of 498
8. Verify that the remote entry functions operate (press lock then
unlock, making sure you end in unlock) and that your vehicle starts with
new intelligent access key.
ANTI-THEFT ALARM
The system will warn you of unauthorized entry to your vehicle.
The turn signal lamps will flash and sound the horn up to a total of 10
times when:
•any door, the hood or the luggage compartment is opened without
using the keypad, the remote control or the intelligent access
transmitter
•the ignition is turned on with an invalid key.
Take all keys and remote controls to an authorized dealer if there is any
potential alarm problem with your vehicle.
Arming the Alarm
The system is ready to arm whenever the ignition is off. Lock the vehicle
to arm the alarm.
The turn signal lamps will flash once after locking the vehicle to indicate
the alarm is in the pre-armed mode. It will become fully armed in
20 seconds.
Disarming the Alarm
To disarm the alarm, do any of the following:
•Press the power door unlock button within the 20-second pre-armed
mode will.
•Press the unlock button on the remote control.
•Unlock the doors with the keyless entry pad.
•Enter the vehicle using intelligent access.
•Press the panic button on the remote control. The alarm system will
still be armed, but this shuts off the horn and turn lamps when the
alarm is sounding.
Note:If the driver door is unlocked with a key, a tone will sound when
you open the door and a message will appear in the information display.
You will have 12 seconds to disarm the alarm using any of the actions
above, otherwise the alarm will trigger.
88Security
2014 MKT(mkt)
Owners Guide gf, 1st Printing, April 2013
USA(fus)
Page 90 of 498
ADJUSTING THE STEERING WHEEL
WARNING:Do not adjust the steering wheel when your vehicle
is moving.
Note:Make sure that you are sitting in the correct position. Refer to
Sitting in the Correct Positionin theSeatschapter.
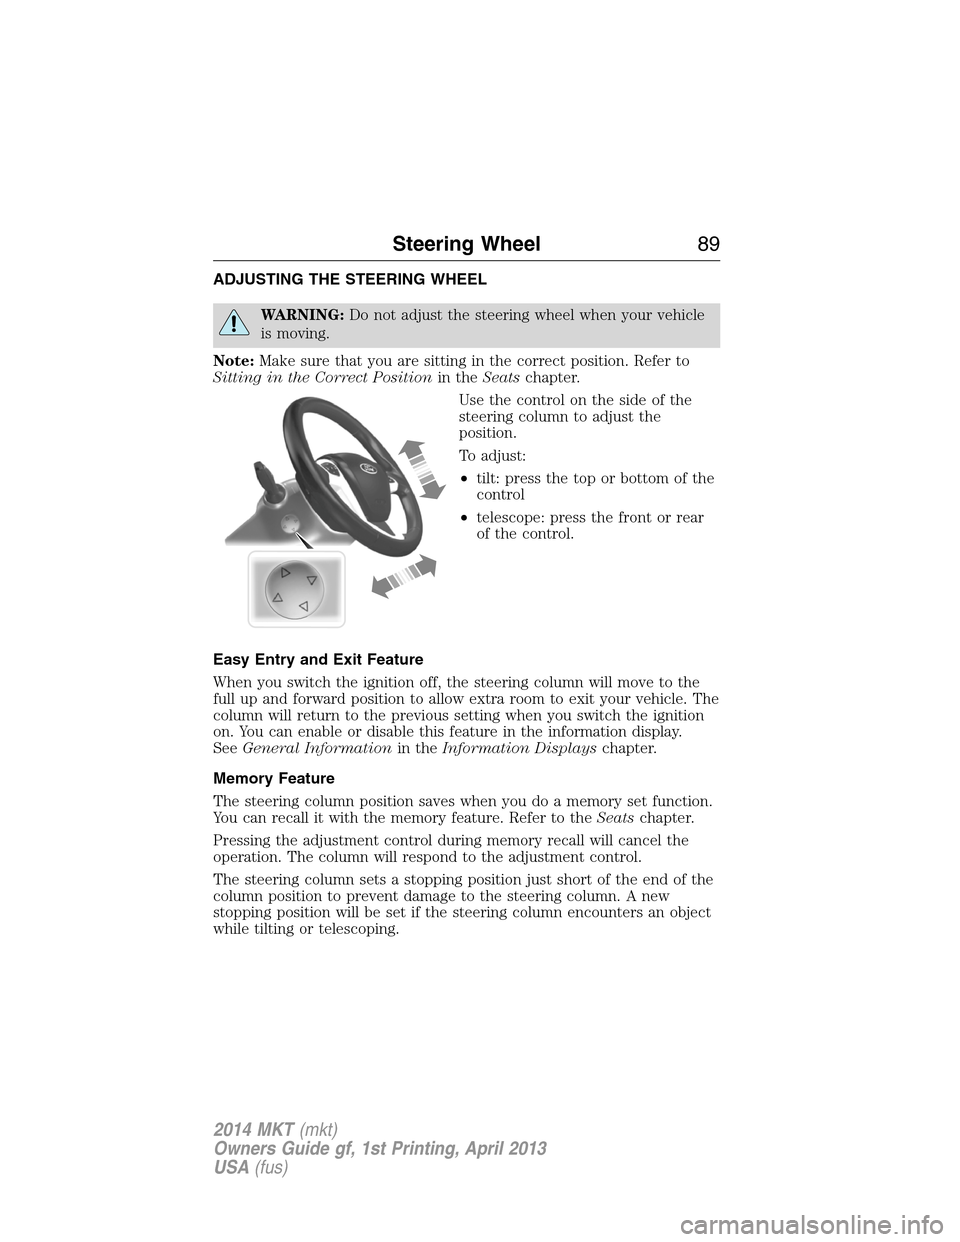
Use the control on the side of the
steering column to adjust the
position.
To adjust:
•tilt: press the top or bottom of the
control
•telescope: press the front or rear
of the control.
Easy Entry and Exit Feature
When you switch the ignition off, the steering column will move to the
full up and forward position to allow extra room to exit your vehicle. The
column will return to the previous setting when you switch the ignition
on. You can enable or disable this feature in the information display.
SeeGeneral Informationin theInformation Displayschapter.
Memory Feature
The steering column position saves when you do a memory set function.
You can recall it with the memory feature. Refer to theSeatschapter.
Pressing the adjustment control during memory recall will cancel the
operation. The column will respond to the adjustment control.
The steering column sets a stopping position just short of the end of the
column position to prevent damage to the steering column. A new
stopping position will be set if the steering column encounters an object
while tilting or telescoping.
Steering Wheel89
2014 MKT(mkt)
Owners Guide gf, 1st Printing, April 2013
USA(fus)