lock LINCOLN MKT 2018 Workshop Manual
[x] Cancel search | Manufacturer: LINCOLN, Model Year: 2018, Model line: MKT, Model: LINCOLN MKT 2018Pages: 564, PDF Size: 4.66 MB
Page 152 of 564
Note:
The power fold seats work only when
the transmission is in park (P) and the
tailgate is open. If the ignition is off and the
feature is still running, the battery saver turns
it off after 10 minutes. You can reactivate the
power seats by pressing the unlock button
on the remote entry key fob or by using the
unlock procedure on the keyless entry
keypad. See Keyless Entry (page 75). Keep
the key in the accessory or run position to
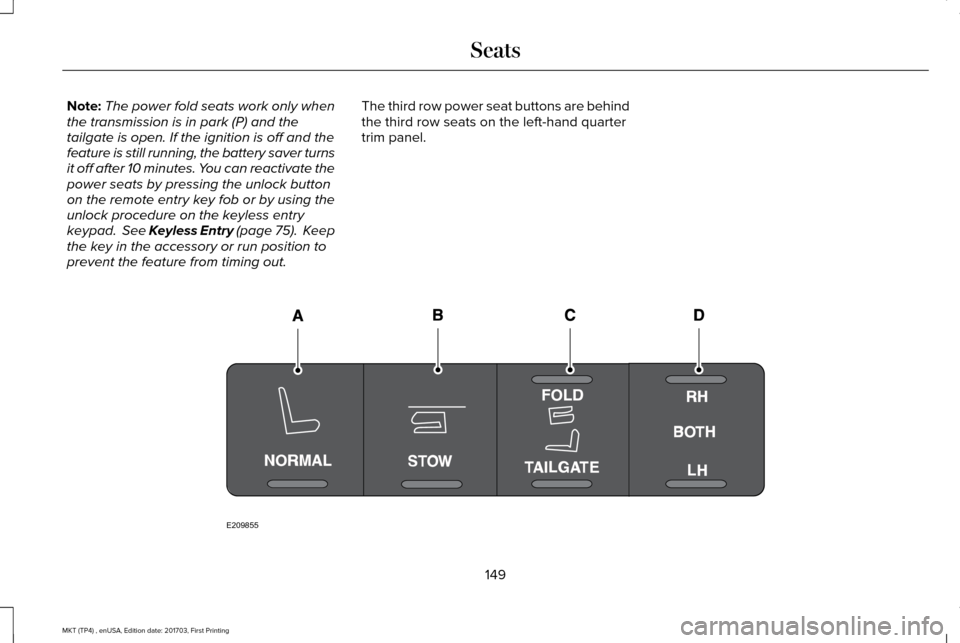
prevent the feature from timing out. The third row power seat buttons are behind
the third row seats on the left-hand quarter
trim panel.
149
MKT (TP4) , enUSA, Edition date: 201703, First Printing SeatsE209855
Page 155 of 564
Note:
You must switch the ignition on to use
this feature. Press the heated seat symbol to cycle
through the various heat settings and off.
More indicator lights indicate warmer
settings.
CLIMATE CONTROLLED SEATS (If
Equipped)
Heated Seats WARNING
People who are unable to feel pain to
their skin because of advanced age,
chronic illness, diabetes, spinal cord injury,
medication, alcohol use, exhaustion or other
physical conditions, must use caution when
using the heated seat. The heated seat may
cause burns even at low temperatures,
especially if used for long periods of time.
Do not place anything on the seat that may
block the heat, such as a blanket or cushion.
This can cause the heated seat to overheat.
Do not puncture the seat with pins, needles
or other pointed objects. This damages the
heating element and can cause the heated
seat to overheat. An overheated seat may
cause serious personal injury. Do not do the following:
•
Place heavy objects on the seat.
• Operate the heated seat if water or any
other liquid spills on the seat. Allow the
seat to dry thoroughly.
Note: You must switch the ignition on to use
this feature. Press the heated seat symbol to cycle
through the various heat settings and off.
More indicator lights indicate warmer
settings.
Cooled Seats
Note:
You must switch the ignition on to use
this feature.
152
MKT (TP4) , enUSA, Edition date: 201703, First Printing SeatsE146322 E146322
Page 157 of 564
HomeLink Wireless Control System
WARNINGS
Make sure that the garage door and
security device are free from
obstruction when you are programming. Do
not program the system with the vehicle in
the garage. Do not use the system with any garage
door opener that does not have the
safety stop and reverse feature as required
by U.S. Federal Safety Standards (this
includes any garage door opener
manufactured before April 1, 1982). A garage
door opener which cannot detect an object,
signaling the door to stop and reverse, does
not meet current federal safety standards.
Using a garage door opener without these
features increases the risk of serious injury
or death. Note:
Make sure you keep the original
remote control transmitter for use in other
vehicles as well as for future system
programming. Note:
We recommend that upon the sale or
lease termination of your vehicle, you erase
the programmed function buttons for security
reasons. See Erasing the Function Button
Codes later in this section.
Note: You can program a maximum of three
devices. To change or replace any of the
three devices after it has been initially
programmed, you must first erase the current
settings. See
Erasing the Function Button
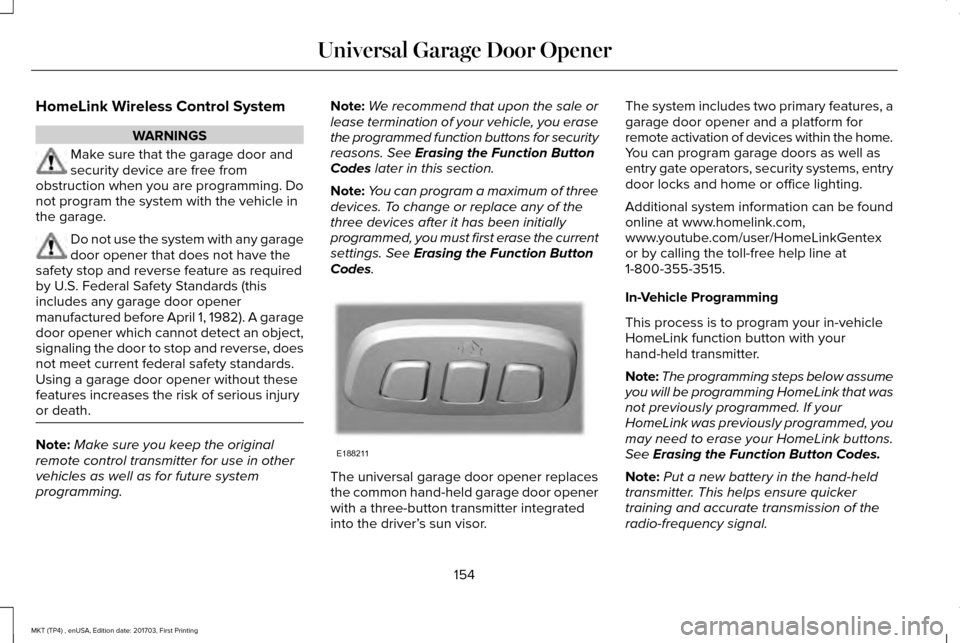
Codes. The universal garage door opener replaces
the common hand-held garage door opener
with a three-button transmitter integrated
into the driver’
s sun visor. The system includes two primary features, a
garage door opener and a platform for
remote activation of devices within the home.
You can program garage doors as well as
entry gate operators, security systems, entry
door locks and home or office lighting.
Additional system information can be found
online at www.homelink.com,
www.youtube.com/user/HomeLinkGentex
or by calling the toll-free help line at
1-800-355-3515.
In-Vehicle Programming
This process is to program your in-vehicle
HomeLink function button with your
hand-held transmitter.
Note:
The programming steps below assume
you will be programming HomeLink that was
not previously programmed. If your
HomeLink was previously programmed, you
may need to erase your HomeLink buttons.
See
Erasing the Function Button Codes.
Note: Put a new battery in the hand-held
transmitter. This helps ensure quicker
training and accurate transmission of the
radio-frequency signal.
154
MKT (TP4) , enUSA, Edition date: 201703, First Printing Universal Garage Door OpenerE188211
Page 168 of 564
Automatic Engine Shutdown
For vehicles with a keyless ignition, this
feature automatically shuts down the engine
if it has been idling for an extended period.
The ignition also turns off to save battery
power. Before your vehicle shuts down, a
message appears in the information display
showing a timer counting down. If you do
not intervene within 30 seconds, your vehicle
shuts down. Another message appears in
the information display to inform you that
your vehicle has shut down to save fuel.
Start your vehicle as normal.
Automatic Engine Shutdown Override
Note:
You cannot permanently switch off
the automatic shutdown. When you switch
it off temporarily, it turns on at the next
ignition cycle. You can stop the shutdown, or reset the
timer, at any point before the 30-second
countdown has expired by doing any of the
following:
•
Interacting with your vehicle, for example
pressing the brake or accelerator pedal.
• You can temporarily switch off the
shutdown feature any time the ignition is
on using the information display. See
Information Displays (page 109). The
feature only remains off for the current
ignition cycle.
• During the 30-second countdown, the
system prompts you to press OK or
RESET to temporarily switch the feature
off for the current ignition cycle only.
Stopping the Engine When Your
Vehicle is Stationary
1. Shift into park (P).
2. Press the push button ignition switch.
3. Apply the parking brake.
Note: The ignition, all electrical circuits and
all warning lamps and indicators will be
turned off. Note:
If the engine is idling for 30 minutes,
the ignition and engine automatically shuts
down.
Stopping the Engine When Your
Vehicle is Moving WARNING
Switching off the engine when the
vehicle is still moving will result in a
loss of brake and steering assistance. The
steering will not lock, but higher effort will
be required. When the ignition is switched
off, some electrical circuits, including air
bags, warning lamps and indicators may also
be off. If the ignition was turned off
accidentally, you can shift into neutral (N) and
re-start the engine. 1. Shift into neutral and use the brakes to
bring your vehicle to a safe stop.
2. When your vehicle has stopped, shift into
park (P).
3. Press and hold the push button ignition switch, or press it three times within two
seconds.
165
MKT (TP4) , enUSA, Edition date: 201703, First Printing Starting and Stopping the Engine
Page 169 of 564
4. Apply the parking brake.
Guarding Against Exhaust Fumes
WARNING
If you smell exhaust fumes inside your
vehicle, have your vehicle checked by
your authorized dealer immediately. Do not
drive your vehicle if you smell exhaust fumes.
Carbon monoxide is present in exhaust
fumes. Take precautions to avoid its
dangerous effects. Important Ventilating Information
If you stop your vehicle and then leave the
engine idling for long periods, we
recommend that you do one of the following:
•
Open the windows at least 1 in (3 cm).
• Set your climate control to outside air. ENGINE BLOCK HEATER
(If Equipped) WARNINGS
Failure to follow engine block heater
instructions could result in property
damage or serious personal injury. Do not use your heater with
ungrounded electrical systems or
two-pronged adapters. There is a risk of
electrical shock. Do not fully close the hood, or allow it
to drop under its own weight when
using the engine block heater. This could
damage the power cable and may cause an
electrical short resulting in fire, injury and
property damage. Note:
The heater is most effective when
outdoor temperatures are below 0°F (-18°C).
The heater acts as a starting aid by warming
the engine coolant. This allows the climate
control system to respond quickly. The
equipment includes a heater element
(installed in the engine block) and a wire
harness. You can connect the system to a
grounded 120-volt AC electrical source. We recommend that you do the following for
a safe and correct operation:
•
Use a 16-gauge outdoor extension cord
that is product certified by Underwriter’ s
Laboratory (UL) or Canadian Standards
Association (CSA). This extension cord
must be suitable for use outdoors, in cold
temperatures, and be clearly marked
Suitable for Use with Outdoor
Appliances. Do not use an indoor
extension cord outdoors. This could
result in an electric shock or become a
fire hazard.
• Use as short an extension cord as
possible.
• Do not use multiple extension cords.
• Make sure that when in operation, the
extension cord plug and heater cord plug
connections are free and clear of water.
This could cause an electric shock or fire.
• Make sure your vehicle is parked in a
clean area, clear of combustibles.
• Make sure the heater, heater cord and
extension cord are firmly connected.
166
MKT (TP4) , enUSA, Edition date: 201703, First Printing Starting and Stopping the Engine
Page 170 of 564
•
Check for heat anywhere in the electrical
hookup once the system has been
operating for approximately 30 minutes.
• Make sure the system is unplugged and
properly stowed before starting and
driving your vehicle. Make sure the
protective cover seals the prongs of the
block heater cord plug when not in use.
• Make sure the heater system is checked
for proper operation before winter.
Using the Engine Block Heater
Make sure the receptacle terminals are clean
and dry prior to use. Clean them with a dry
cloth if necessary.
The heater uses 0.4 to 1.0 kilowatt-hours of
energy per hour of use. The system does not
have a thermostat. It achieves maximum
temperature after approximately three hours
of operation. Using the heater longer than
three hours does not improve system
performance and unnecessarily uses
electricity.
167
MKT (TP4) , enUSA, Edition date: 201703, First Printing Starting and Stopping the Engine
Page 182 of 564
AUTOMATIC TRANSMISSION
WARNINGS
Always apply the parking brake fully
and make sure you shift into park (P).
Switch the ignition off and remove the key
whenever you leave your vehicle. Do not apply the brake pedal and
accelerator pedal simultaneously.
Applying both pedals simultaneously for
more than a few seconds will limit engine
performance, which may result in difficulty
maintaining speed in traffic and could lead
to serious injury. Understanding the Positions of Your
Automatic Transmission
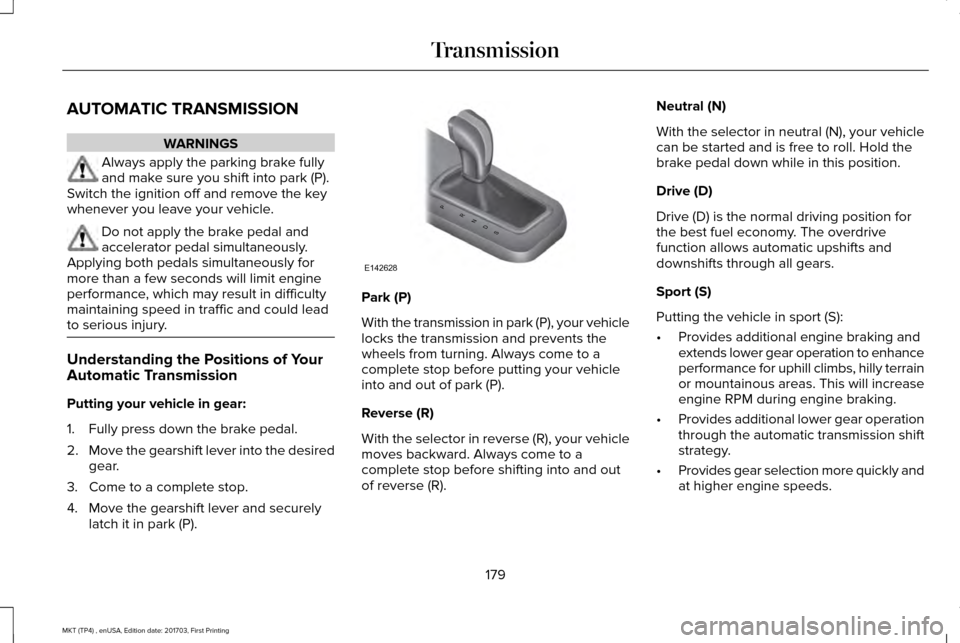
Putting your vehicle in gear:
1. Fully press down the brake pedal.
2.
Move the gearshift lever into the desired
gear.
3. Come to a complete stop.
4. Move the gearshift lever and securely latch it in park (P). Park (P)
With the transmission in park (P), your vehicle
locks the transmission and prevents the
wheels from turning. Always come to a
complete stop before putting your vehicle
into and out of park (P).
Reverse (R)
With the selector in reverse (R), your vehicle
moves backward. Always come to a
complete stop before shifting into and out
of reverse (R).Neutral (N)
With the selector in neutral (N), your vehicle
can be started and is free to roll. Hold the
brake pedal down while in this position.
Drive (D)
Drive (D) is the normal driving position for
the best fuel economy. The overdrive
function allows automatic upshifts and
downshifts through all gears.
Sport (S)
Putting the vehicle in sport (S):
•
Provides additional engine braking and
extends lower gear operation to enhance
performance for uphill climbs, hilly terrain
or mountainous areas. This will increase
engine RPM during engine braking.
• Provides additional lower gear operation
through the automatic transmission shift
strategy.
• Provides gear selection more quickly and
at higher engine speeds.
179
MKT (TP4) , enUSA, Edition date: 201703, First Printing TransmissionPRNDS
E142628
Page 184 of 564

SelectShift in sport (S):
•
Provides a permanent manual gear
selection where full control of gear
selection is required.
To exit SelectShift mode shift the
transmission into another gear (for example,
drive [D]).
Upshift to the recommended shift speeds
according to the following chart: Upshifts when accelerating (recommended for
best fuel economy)
Shift from: 15 mph (24 km/h)
1 - 2
25 mph (40 km/h)
2 - 3
40 mph (64 km/h)
3 - 4
45 mph (72 km/h)
4 - 5
50 mph (80 km/h)
5 - 6 The instrument cluster displays your currently
selected gear. If a gear is requested but not
available due to vehicle conditions (low
speed, too high engine speed for requested
gear selection), the current gear will flash
three times.
Note:
At full accelerator pedal travel, the
transmission automatically downshifts for
maximum performance.
Note: In low traction conditions, you can pull
away in second gear using SelectShift. To
perform this operation, select drive (D) or
sport (S) mode and press the + toggle (if
equipped) or pull the + paddle (if equipped)
until 2 is displayed on the cluster. Your
vehicle is now ready to move in 2nd gear.
Brake-Shift Interlock WARNINGS
Do not drive your vehicle until you
verify that the brake lamps are working. WARNINGS
When doing this procedure, you need
to take the transmission out of park (P)
which means your vehicle can roll freely. To
avoid unwanted vehicle movement, always
fully apply the parking brake prior to doing
this procedure. Use wheels chocks if
appropriate. If the parking brake is fully released,
but the brake warning lamp remains
illuminated, the brakes may not be working
properly. Have your vehicle checked as soon
as possible. Note:
For some markets this feature will be
disabled.
Your vehicle is equipped with a brake-shift
interlock feature that prevents moving the
gearshift lever from park (P) when the ignition
is in the on position and the brake pedal is
not pressed.
181
MKT (TP4) , enUSA, Edition date: 201703, First Printing Transmission
Page 185 of 564
If you cannot move the gearshift lever out of
park (P) position with the ignition in the on
position and the brake pedal pressed, a
malfunction may have occurred. It is possible
that a fuse has blown or your vehicle
’s brake
lamps are not operating properly. See Fuse
Specification Chart (page 267).
If the fuse is not blown and the brake lamps
are working properly, the following
procedure will allow you to move the
gearshift lever from park (P):
1. Apply the parking brake, turn the ignition
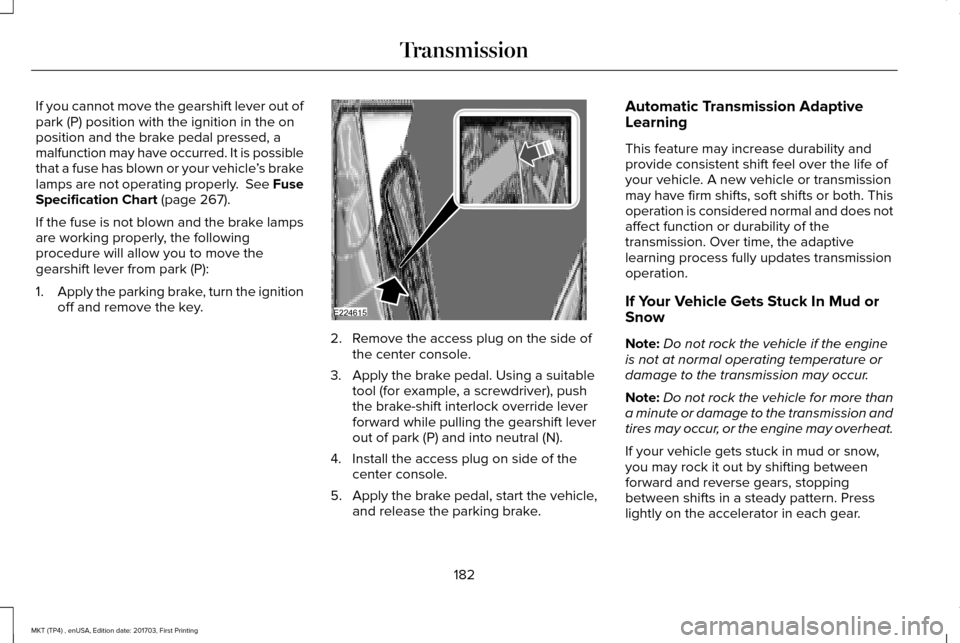
off and remove the key. 2. Remove the access plug on the side of
the center console.
3. Apply the brake pedal. Using a suitable tool (for example, a screwdriver), push
the brake-shift interlock override lever
forward while pulling the gearshift lever
out of park (P) and into neutral (N).
4. Install the access plug on side of the center console.
5. Apply the brake pedal, start the vehicle, and release the parking brake. Automatic Transmission Adaptive
Learning
This feature may increase durability and
provide consistent shift feel over the life of
your vehicle. A new vehicle or transmission
may have firm shifts, soft shifts or both. This
operation is considered normal and does not
affect function or durability of the
transmission. Over time, the adaptive
learning process fully updates transmission
operation.
If Your Vehicle Gets Stuck In Mud or
Snow
Note:
Do not rock the vehicle if the engine
is not at normal operating temperature or
damage to the transmission may occur.
Note: Do not rock the vehicle for more than
a minute or damage to the transmission and
tires may occur, or the engine may overheat.
If your vehicle gets stuck in mud or snow,
you may rock it out by shifting between
forward and reverse gears, stopping
between shifts in a steady pattern. Press
lightly on the accelerator in each gear.
182
MKT (TP4) , enUSA, Edition date: 201703, First Printing TransmissionE224615
Page 192 of 564
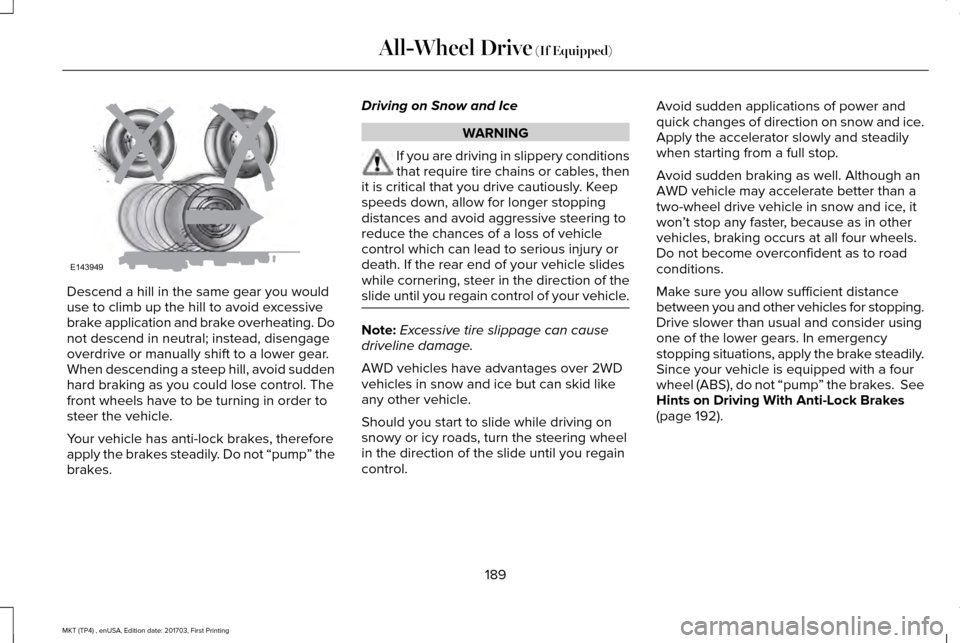
Descend a hill in the same gear you would
use to climb up the hill to avoid excessive
brake application and brake overheating. Do
not descend in neutral; instead, disengage
overdrive or manually shift to a lower gear.
When descending a steep hill, avoid sudden
hard braking as you could lose control. The
front wheels have to be turning in order to
steer the vehicle.
Your vehicle has anti-lock brakes, therefore
apply the brakes steadily. Do not “pump
” the
brakes. Driving on Snow and Ice WARNING
If you are driving in slippery conditions
that require tire chains or cables, then
it is critical that you drive cautiously. Keep
speeds down, allow for longer stopping
distances and avoid aggressive steering to
reduce the chances of a loss of vehicle
control which can lead to serious injury or
death. If the rear end of your vehicle slides
while cornering, steer in the direction of the
slide until you regain control of your vehicle. Note:
Excessive tire slippage can cause
driveline damage.
AWD vehicles have advantages over 2WD
vehicles in snow and ice but can skid like
any other vehicle.
Should you start to slide while driving on
snowy or icy roads, turn the steering wheel
in the direction of the slide until you regain
control. Avoid sudden applications of power and
quick changes of direction on snow and ice.
Apply the accelerator slowly and steadily
when starting from a full stop.
Avoid sudden braking as well. Although an
AWD vehicle may accelerate better than a
two-wheel drive vehicle in snow and ice, it
won
’t stop any faster, because as in other
vehicles, braking occurs at all four wheels.
Do not become overconfident as to road
conditions.
Make sure you allow sufficient distance
between you and other vehicles for stopping.
Drive slower than usual and consider using
one of the lower gears. In emergency
stopping situations, apply the brake steadily.
Since your vehicle is equipped with a four
wheel (ABS), do not “pump ” the brakes. See
Hints on Driving With Anti-Lock Brakes
(page 192).
189
MKT (TP4) , enUSA, Edition date: 201703, First Printing All-Wheel Drive
(If Equipped)E143949