warning lights LINCOLN MKZ 2014 Owners Manual
[x] Cancel search | Manufacturer: LINCOLN, Model Year: 2014, Model line: MKZ, Model: LINCOLN MKZ 2014Pages: 468, PDF Size: 4.49 MB
Page 44 of 468
The Personal Safety System provides
an improved overall level of frontal
crash protection to front seat
occupants and is designed to help
further reduce the risk of
airbag-related injuries. The system is
able to analyze different occupant
conditions and crash severity before
activating the appropriate safety
devices to help better protect a range
of occupants in a variety of frontal
crash situations.
Your vehicle's Personal Safety System
consists of:
• Driver and passenger dual-stageairbag supplemental restraints.
• Front outboard safety belts with pretensioners, energy
management retractors (first row
only), and safety belt usage
sensors.
• Driver’s seat position sensor.
• Front passenger sensing system.
• Passenger airbag off and on indicator lamp.
• Front crash severity sensors.
• Restraints control module with impact and safing sensors.
• Restraint system warning light and backup tone.
• The electrical wiring for the airbags, crash sensor(s), safety
belt pretensioners, front safety belt
usage sensors, driver seat position
sensor, front passenger sensing
system, and indicator lights.How Does the Personal Safety
System Work?
The Personal Safety System can
adapt the deployment strategy of
your vehicle’s safety devices
according to crash severity and
occupant conditions. A collection of
crash and occupant sensors provides
information to the restraints control
module. During a crash, the restraints
control module may activate the
safety belt pretensioners and may
activate either one or both stages of
the dual-stage airbag supplemental
restraints based on crash severity and
occupant conditions.
41
Personal Safety System™
Page 70 of 468
From Inside Your Vehicle
E138633
Press the button on the
instrument panel.
With the Remote Control
E138630
Press twice within three
seconds.
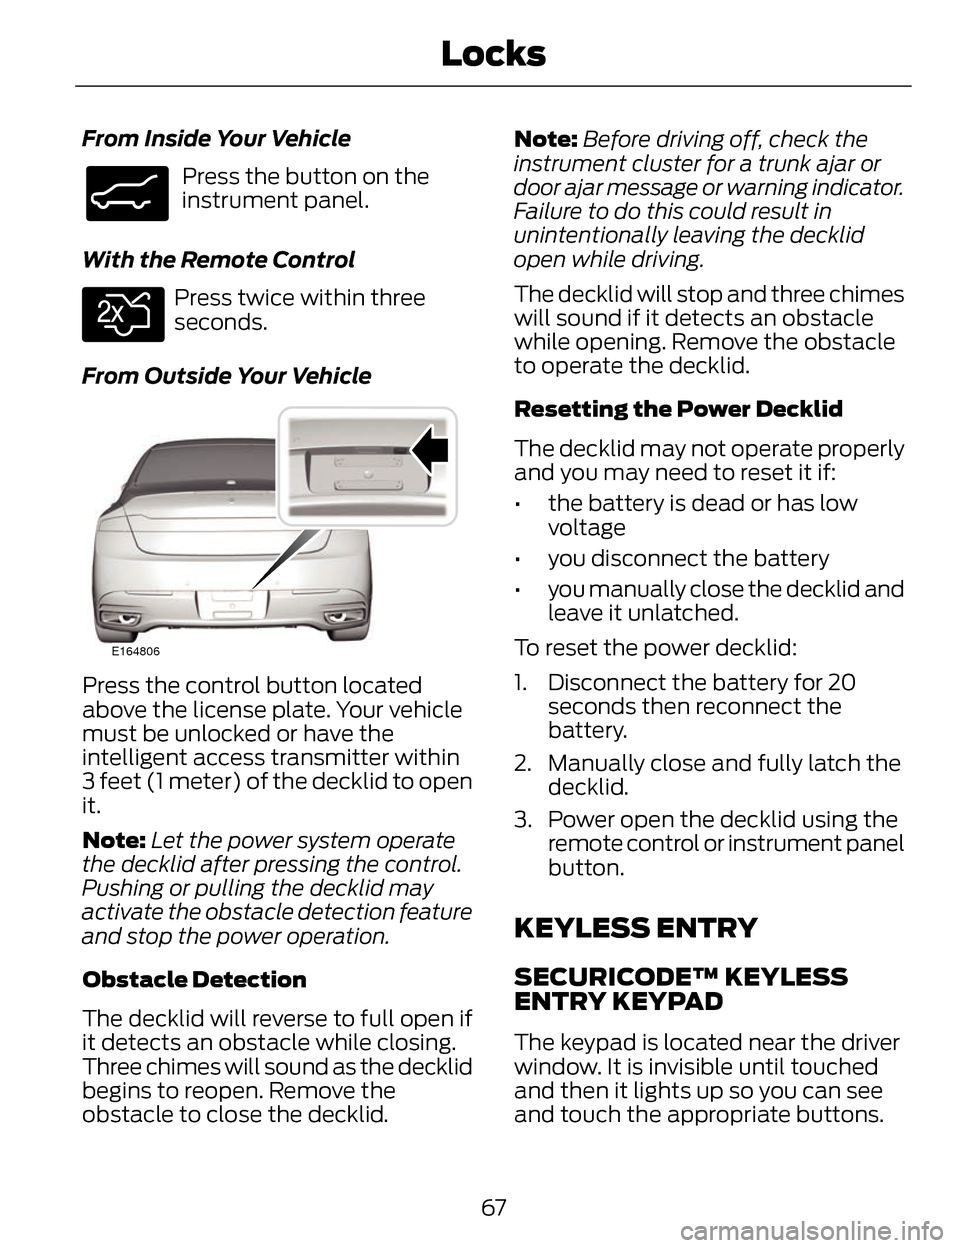
From Outside Your Vehicle
E164806
Press the control button located
above the license plate. Your vehicle
must be unlocked or have the
intelligent access transmitter within
3 feet (1 meter) of the decklid to open
it.
Note: Let the power system operate
the decklid after pressing the control.
Pushing or pulling the decklid may
activate the obstacle detection feature
and stop the power operation.
Obstacle Detection
The decklid will reverse to full open if
it detects an obstacle while closing.
Three chimes will sound as the decklid
begins to reopen. Remove the
obstacle to close the decklid. Note:
Before driving off, check the
instrument cluster for a trunk ajar or
door ajar message or warning indicator.
Failure to do this could result in
unintentionally leaving the decklid
open while driving.
The decklid will stop and three chimes
will sound if it detects an obstacle
while opening. Remove the obstacle
to operate the decklid.
Resetting the Power Decklid
The decklid may not operate properly
and you may need to reset it if:
• the battery is dead or has low voltage
• you disconnect the battery
• you manually close the decklid and leave it unlatched.
To reset the power decklid:
1. Disconnect the battery for 20 seconds then reconnect the
battery.
2. Manually close and fully latch the decklid.
3. Power open the decklid using the remote control or instrument panel
button.
KEYLESS ENTRY
SECURICODE™ KEYLESS
ENTRY KEYPAD
The keypad is located near the driver
window. It is invisible until touched
and then it lights up so you can see
and touch the appropriate buttons.
67
Locks
Page 94 of 468
A
B
C
E138665
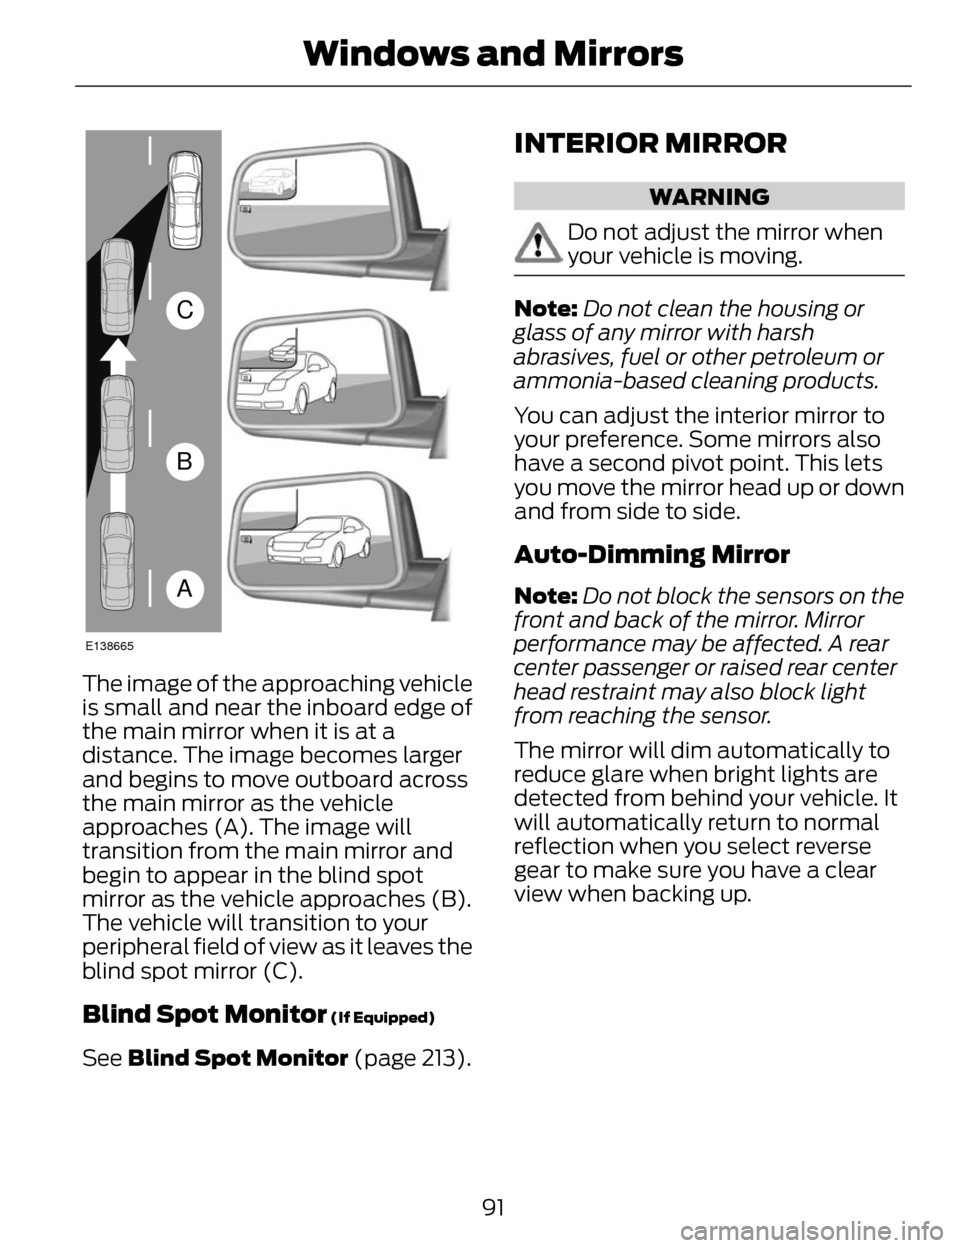
The image of the approaching vehicle
is small and near the inboard edge of
the main mirror when it is at a
distance. The image becomes larger
and begins to move outboard across
the main mirror as the vehicle
approaches (A). The image will
transition from the main mirror and
begin to appear in the blind spot
mirror as the vehicle approaches (B).
The vehicle will transition to your
peripheral field of view as it leaves the
blind spot mirror (C).
Blind Spot Monitor (If Equipped)
See Blind Spot Monitor (page 213).
INTERIOR MIRROR
WARNING
Do not adjust the mirror when
your vehicle is moving.
Note:Do not clean the housing or
glass of any mirror with harsh
abrasives, fuel or other petroleum or
ammonia-based cleaning products.
You can adjust the interior mirror to
your preference. Some mirrors also
have a second pivot point. This lets
you move the mirror head up or down
and from side to side.
Auto-Dimming Mirror
Note: Do not block the sensors on the
front and back of the mirror. Mirror
performance may be affected. A rear
center passenger or raised rear center
head restraint may also block light
from reaching the sensor.
The mirror will dim automatically to
reduce glare when bright lights are
detected from behind your vehicle. It
will automatically return to normal
reflection when you select reverse
gear to make sure you have a clear
view when backing up.
91
Windows and Mirrors
Page 101 of 468
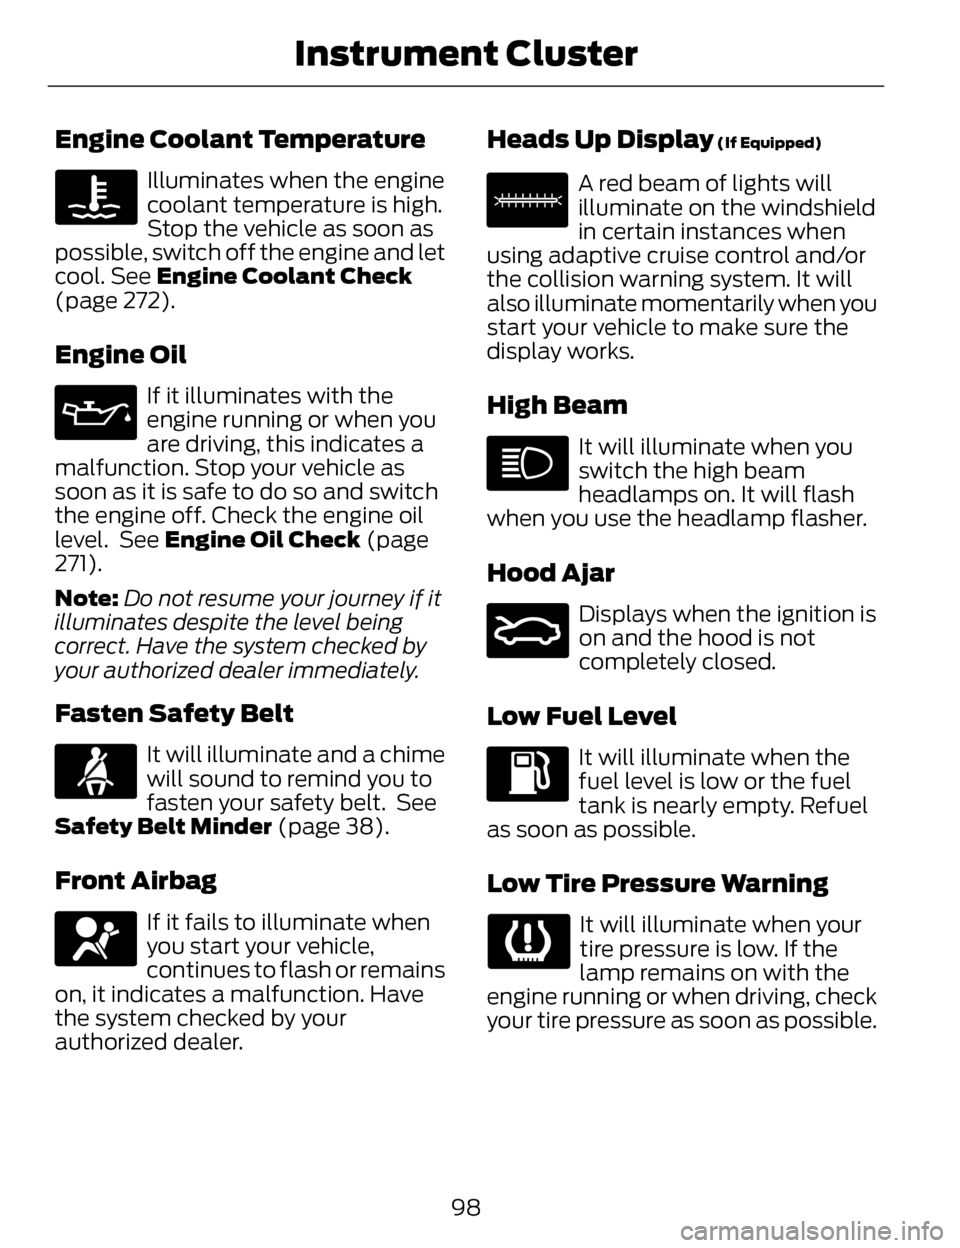
Engine Coolant Temperature
Illuminates when the engine
coolant temperature is high.
Stop the vehicle as soon as
possible, switch off the engine and let
cool. See Engine Coolant Check
(page 272).
Engine Oil
If it illuminates with the
engine running or when you
are driving, this indicates a
malfunction. Stop your vehicle as
soon as it is safe to do so and switch
the engine off. Check the engine oil
level. See Engine Oil Check (page
271).
Note: Do not resume your journey if it
illuminates despite the level being
correct. Have the system checked by
your authorized dealer immediately.
Fasten Safety Belt
It will illuminate and a chime
will sound to remind you to
fasten your safety belt. See
Safety Belt Minder (page 38).
Front Airbag
If it fails to illuminate when
you start your vehicle,
continues to flash or remains
on, it indicates a malfunction. Have
the system checked by your
authorized dealer.
Heads Up Display (If Equipped)
E156133
A red beam of lights will
illuminate on the windshield
in certain instances when
using adaptive cruise control and/or
the collision warning system. It will
also illuminate momentarily when you
start your vehicle to make sure the
display works.
High Beam
It will illuminate when you
switch the high beam
headlamps on. It will flash
when you use the headlamp flasher.
Hood Ajar
E159324
Displays when the ignition is
on and the hood is not
completely closed.
Low Fuel Level
It will illuminate when the
fuel level is low or the fuel
tank is nearly empty. Refuel
as soon as possible.
Low Tire Pressure Warning
It will illuminate when your
tire pressure is low. If the
lamp remains on with the
engine running or when driving, check
your tire pressure as soon as possible.
98
Instrument Cluster
Page 144 of 468
Touch the heated seat symbol on the
touchscreen to cycle through the
various heat settings and off. Warmer
settings are indicated by more
indicator lights.
Rear Heated Seats (If Equipped)
WARNING
Persons who are unable to feel
pain to the skin because of
advanced age, chronic illness,
diabetes, spinal cord injury,
medication, alcohol use, exhaustion,
or other physical conditions, must
exercise care when using the seat
heater. The seat heater may cause
burns even at low temperatures,
especially if used for long periods of
time. Do not place anything on the
seat that insulates against heat, such
as a blanket or cushion, because this
may cause the seat heater to
overheat. Do not puncture the seat
with pins, needles, or other pointed
objects because this may damage the
heating element which may cause the
seat heater to overheat. An
overheated seat may cause serious
personal injury.
Note: Do not do the following:
• Place heavy objects on the seat.
• Operate the seat heater if water or any other liquid is spilled on the
seat. Allow the seat to dry
thoroughly.
The rear seat heat controls are
located on the rear of the center
console. The heated seats only operate when
the ignition is on.
E146322
• Press the heated seat symbol to
cycle through the various heat
settings and off. Warmer settings
are indicated by more indicator
lights.
• Press again to deactivate.
The heated seat module resets at
every ignition run cycle. While the
ignition is on, press the high or low
heated seat switch to enable heating
mode. When activated, they will turn
off automatically when you turn the
engine off.
VENTILATED SEATS (IF
EQUIPPED)
The ventilated seats will only function
when the engine is running.
E146309
To operate the ventilated seats:
141
Seats
Page 187 of 468
PRINCIPLE OF OPERATION
The traction control system helps
avoid drive wheel spin and loss of
traction.
If your vehicle begins to slide, the
system applies the brakes to
individual wheels and, when needed,
reduces engine power at the same
time. If the wheels spin when
accelerating on slippery or loose
surfaces, the system reduces engine
power in order to increase traction.
USING TRACTION
CONTROL
In certain situations (for example,
stuck in snow or mud), turning the
traction control off may be beneficial
as this allows the wheels to spin with
full engine power. Turn off the traction
control system through the
information display. See General
Information (page 101).
System Indicator Lights and
Messages
WARNING
If a failure has been detected
within the AdvanceTrac system,
the stability control light will
illuminate steadily. Verify that the
AdvanceTrac system was not
manually disabled through the
information display. If the stability
control light still illuminates steadily,
have the system serviced by an
authorized dealer immediately.
Operating your vehicle with
AdvanceTrac disabled could lead to
an increased risk of loss of vehicle
control, vehicle rollover, personal
injury and death.
E138639
The stability control light
temporarily illuminates on
engine start-up and flashes
when a driving condition activates the
stability system.
The stability control off light
temporarily illuminates on
engine start-up and stays on
when you turn the traction control
system off.
When you turn the traction control
system off or on, a message appears
in the information display showing
system status.
184
Traction Control
Page 199 of 468
Active guidelines are only shown with
fixed guidelines. To use active
guidelines, turn the steering wheel to
point the guidelines toward an
intended path. If the steering wheel
position is changed while reversing,
the vehicle might deviate from the
original intended path.
The fixed and active guidelines fade
in and out depending on the steering
wheel position. The active guidelines
are not shown when the steering
wheel position is straight.
Always use caution while reversing.
Objects in the red zone are closest to
your vehicle and objects in the green
zone are farther away. Objects are
getting closer to your vehicle as they
move from the green zone to the
yellow or red zones. Use the side view
mirrors and rear view mirror to get
better coverage on both sides and rear
of the vehicle.
Selectable settings for this feature are
ACTIVE + FIXED, FIXED and OFF.
Visual Park Aid Alert
Note: Visual park alert is only available
when the transmission is in R
(Reverse).
Note: The reverse sensing system is
not effective at speeds above 3 mph
(5 km/h) and may not detect certain
angular or moving objects. The system uses red, yellow and green
highlights which appear on top of the
video image when an object is
detected by the reverse sensing
system. The alert highlights the
closest object detected. The reverse
sensing alert can be disabled and if
visual park aid alert is enabled,
highlighted areas are still displayed.
Selectable settings for this feature are
ON and OFF.
Manual Zoom
WARNING
When manual zoom is on, the
full area behind the vehicle is not
shown. Be aware of your surroundings
when using the manual zoom feature.
Note: Manual zoom is only available
when the transmission is in R
(Reverse).
Note: When manual zoom is enabled,
only the centerline is shown.
This allows you to get a closer view of
an object behind the vehicle. The
zoomed image keeps the bumper in
the image to provide a reference. The
zoom is only active while the
transmission is in R (Reverse). When
the transmission is shifted out of R
(Reverse), the feature automatically
turns off and must be reset when it is
used again.
Selectable settings for this feature are
ON and OFF.
196
Parking Aids
Page 218 of 468
E142441
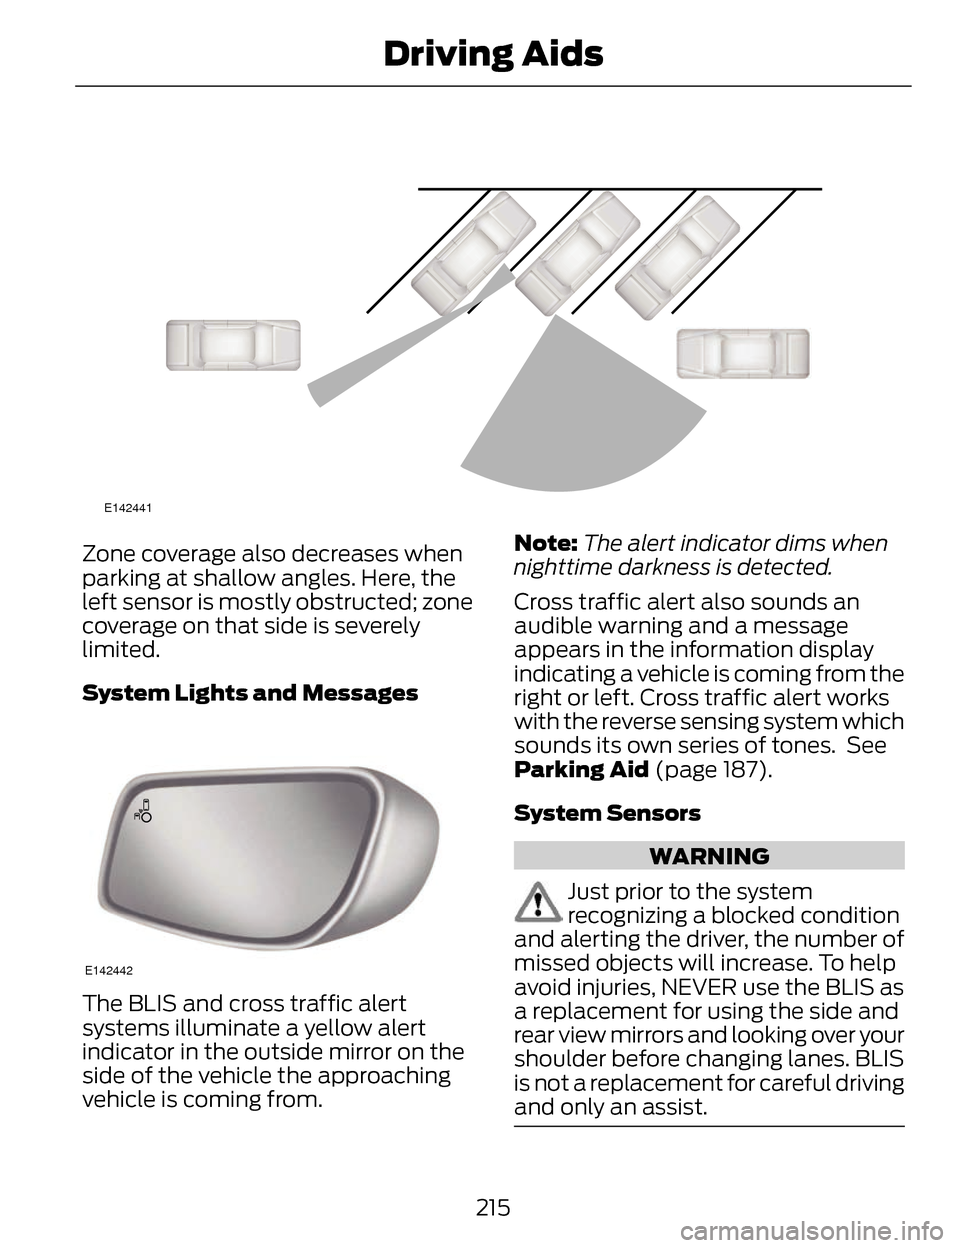
Zone coverage also decreases when
parking at shallow angles. Here, the
left sensor is mostly obstructed; zone
coverage on that side is severely
limited.
System Lights and Messages
E142442
The BLIS and cross traffic alert
systems illuminate a yellow alert
indicator in the outside mirror on the
side of the vehicle the approaching
vehicle is coming from. Note:
The alert indicator dims when
nighttime darkness is detected.
Cross traffic alert also sounds an
audible warning and a message
appears in the information display
indicating a vehicle is coming from the
right or left. Cross traffic alert works
with the reverse sensing system which
sounds its own series of tones. See
Parking Aid (page 187).
System Sensors
WARNING
Just prior to the system
recognizing a blocked condition
and alerting the driver, the number of
missed objects will increase. To help
avoid injuries, NEVER use the BLIS as
a replacement for using the side and
rear view mirrors and looking over your
shoulder before changing lanes. BLIS
is not a replacement for careful driving
and only an assist.
215
Driving Aids
Page 238 of 468
Trailer Lamps
WARNING
Never connect any trailer lamp
wiring to the vehicle's tail lamp
wiring; this may damage the electrical
system resulting in fire. Contact your
authorized dealer as soon as possible
for assistance in proper trailer tow
wiring installation. Additional
electrical equipment may be required.
Trailer lamps are required on most
towed vehicles. Make sure all running
lights, brake lights, turn signals and
hazard lights are working.
Before Towing a Trailer
Practice turning, stopping and backing
up to get the feel of your
vehicle-trailer combination before
starting on a trip. When turning, make
wider turns so the trailer wheels clear
curbs and other obstacles.
When Towing a Trailer
• Do not drive faster than 70 mph (113 km/h) during the first 500
miles (800 kilometers).
• Do not make full-throttle starts.
• Check your hitch, electrical connections and trailer wheel lug
nuts thoroughly after you have
traveled 50 miles (80 kilometers).
• When stopped in congested or heavy traffic during hot weather,
place the gearshift in position P to
aid engine and transmission
cooling and to help A/C
performance. • Turn off the speed control with
heavy loads or in hilly terrain. The
speed control may turn off
automatically when you are towing
on long, steep grades.
• Shift to a lower gear when driving down a long or steep hill. Do not
apply the brakes continuously, as
they may overheat and become
less effective.
• If your transmission is equipped with a Grade Assist or Tow/Haul
feature, use this feature when
towing. This provides engine
braking and helps eliminate
excessive transmission shifting for
optimum fuel economy and
transmission cooling.
• Allow more distance for stopping with a trailer attached. Anticipate
stops and brake gradually.
• Avoid parking on a grade. However, if you must park on a grade:
• Turn the steering wheel to pointyour vehicle tires away from
traffic flow.
• Set your vehicle parking brake.
• Place the automatic transmission in position P.
• Place wheel chocks in front and back of the trailer wheels.
(Chocks not included with
vehicle.)
Launching or Retrieving a Boat
or Personal Watercraft (PWC)
Note: Disconnect the wiring to the
trailer before backing the trailer into
the water.
235
Towing
Page 301 of 468
General Information
WARNING
Failure to follow these guidelines
could result in an increased risk
of loss of vehicle control, injury or
death.
Note: Do not use the kit if a tire has
become severely damaged by driving
the vehicle with a tire that has
insufficient air pressure. Only punctured
areas located within the tire tread can
be sealed with the kit.
Do not attempt to repair punctures
larger than 1.4 inch (6.4 millimeters)
or damage to the tire's sidewall. The
tire may not completely seal.
Loss of air pressure may adversely
affect tire performance. For this
reason:
Note: Do not drive the vehicle above
50 mph (80 km/h).
Note: Do not drive further than 120
miles (200 kilometers). Drive only to
the closest Ford Motor Company
authorized dealer or tire repair shop to
have your tire inspected.
• Drive carefully and avoid abrupt steering maneuvers.
• Periodically monitor tire inflation pressure in the affected tire; if the
tire is losing pressure, have the
vehicle towed.
• Read the information in the Tips for Use of the Kit section to make
sure safe operation of the kit and
your vehicle.
Tips for Use of the Kit
Read the following list of tips to
ensure safe operation of the kit:
• Before operating the kit, make sureyour vehicle is safely off the road
and away from moving traffic. Turn
on the hazard lights.
• Always set the parking brake to ensure the vehicle doesn't move
unexpectedly.
• Do not remove any foreign objects, such as nails or screws, from the
tire.
• When using the kit, leave the engine running (only if the vehicle
is outdoors or in a well-ventilated
area) so the compressor doesn't
drain the vehicle's battery.
• Do not allow the compressor to operate continuously for more
than 15 minutes; this will help
prevent the compressor from
overheating.
• Never leave the kit unattended when it is operating.
• Sealant compound contains latex. Make sure that you use the
non-latex gloves provided to avoid
an allergic reaction.
• Keep the kit away from children.
• Only use the kit when the ambient temperature is between -22°F
(–30°C) and 158°F (70°C).
298
Wheels and Tires