Key code LINCOLN MKZ 2016 Owners Manual
[x] Cancel search | Manufacturer: LINCOLN, Model Year: 2016, Model line: MKZ, Model: LINCOLN MKZ 2016Pages: 544, PDF Size: 5.77 MB
Page 75 of 544
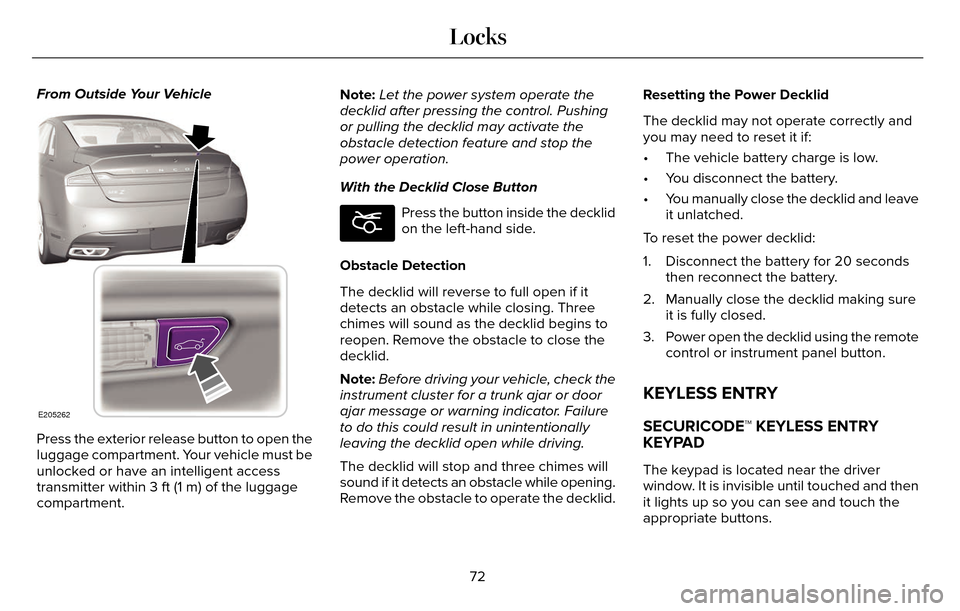
From Outside Your Vehicle
E205262
Press the exterior release button to open the
luggage compartment. Your vehicle must be
unlocked or have an intelligent access
transmitter within 3 ft (1 m) of the luggage
compartment.Note:
Let the power system operate the
decklid after pressing the control. Pushing
or pulling the decklid may activate the
obstacle detection feature and stop the
power operation.
With the Decklid Close Button
E194407
Press the button inside the decklid
on the left-hand side.
Obstacle Detection
The decklid will reverse to full open if it
detects an obstacle while closing. Three
chimes will sound as the decklid begins to
reopen. Remove the obstacle to close the
decklid.
Note: Before driving your vehicle, check the
instrument cluster for a trunk ajar or door
ajar message or warning indicator. Failure
to do this could result in unintentionally
leaving the decklid open while driving.
The decklid will stop and three chimes will
sound if it detects an obstacle while opening.
Remove the obstacle to operate the decklid. Resetting the Power Decklid
The decklid may not operate correctly and
you may need to reset it if:
• The vehicle battery charge is low.
• You disconnect the battery.
• You manually close the decklid and leave
it unlatched.
To reset the power decklid:
1. Disconnect the battery for 20 seconds then reconnect the battery.
2. Manually close the decklid making sure it is fully closed.
3. Power open the decklid using the remote control or instrument panel button.
KEYLESS ENTRY
SECURICODE™ KEYLESS ENTRY
KEYPAD
The keypad is located near the driver
window. It is invisible until touched and then
it lights up so you can see and touch the
appropriate buttons.
72
Locks
Page 76 of 544
Note:If you enter your entry code too fast
on the keypad, the unlock function may not
work. Re-enter your entry code more slowly.
E138637
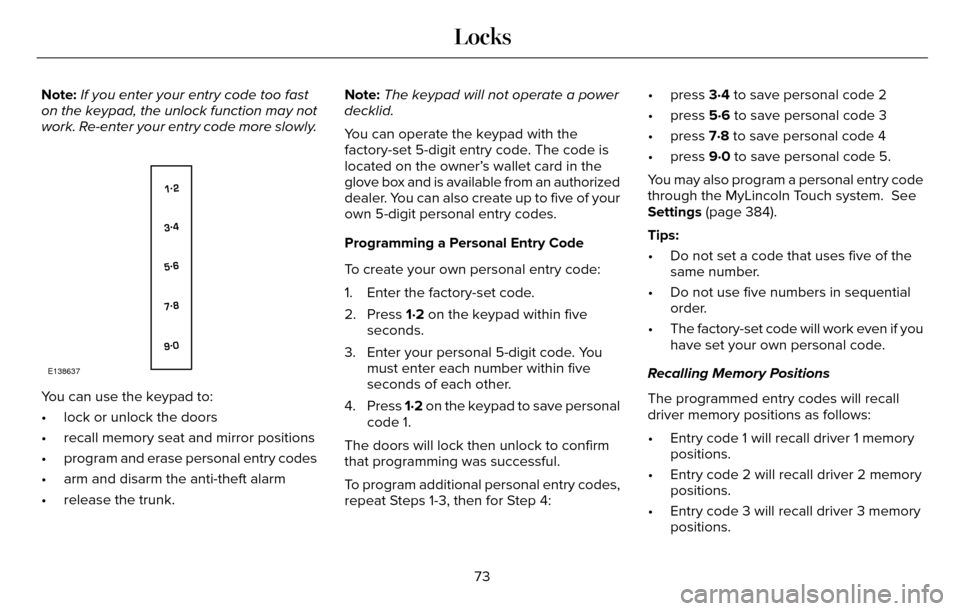
You can use the keypad to:
• lock or unlock the doors
• recall memory seat and mirror positions
• program and erase personal entry codes
• arm and disarm the anti-theft alarm
• release the trunk. Note:
The keypad will not operate a power
decklid.
You can operate the keypad with the
factory-set 5-digit entry code. The code is
located on the owner’s wallet card in the
glove box and is available from an authorized
dealer. You can also create up to five of your
own 5-digit personal entry codes.
Programming a Personal Entry Code
To create your own personal entry code:
1. Enter the factory-set code.
2. Press 1·2 on the keypad within five seconds.
3. Enter your personal 5-digit code. You must enter each number within five
seconds of each other.
4. Press 1·2 on the keypad to save personal
code 1.
The doors will lock then unlock to confirm
that programming was successful.
To program additional personal entry codes,
repeat Steps 1-3, then for Step 4: • press 3·4 to save personal code 2
• press 5·6 to save personal code 3
• press 7·8 to save personal code 4
• press 9·0 to save personal code 5.
You may also program a personal entry code
through the MyLincoln Touch system. See
Settings (page 384).
Tips:
• Do not set a code that uses five of the
same number.
• Do not use five numbers in sequential order.
• The factory-set code will work even if you have set your own personal code.
Recalling Memory Positions
The programmed entry codes will recall
driver memory positions as follows:
• Entry code 1 will recall driver 1 memory positions.
• Entry code 2 will recall driver 2 memory positions.
• Entry code 3 will recall driver 3 memory positions.
73
Locks
Page 77 of 544
Note:Personal entry codes 4 and 5 will not
recall memory positions.
Erasing a Personal Code
1. Enter the factory-set 5-digit code.
2. Press and release 1·2 on the keypad within five seconds.
3. Press and hold 1·2 for two seconds. You must do this within five seconds of
completing Step 2.
All personal codes are now erased and only
the factory-set 5–digit code will work.
Anti-Scan Feature
The keypad will go into an anti-scan mode
if you enter the wrong code seven times (35
consecutive button presses). This mode
disables the keypad for one minute and the
keypad lamp will flash.
The anti-scan feature will turn off after:
• one minute of keypad inactivity
• pressing the unlock button on the remote control • switching the ignition on
• unlocking your vehicle using intelligent
access.
Unlocking and Locking the Doors
To Unlock the Driver Door
Enter the factory-set 5-digit code or your
personal code. You must press each number
within five seconds of each other. The
interior lamps will illuminate.
Note: All doors will unlock if you enable the
all-door unlocking mode. See Locking and
Unlocking (page 67).
To Unlock All Doors
Enter the factory-set code or your personal
code, then press 3·4 within five seconds.
To Lock All Doors
Press and hold 7·8 and 9·0 at the same time
(with the driver door closed). You do not
need to enter the keypad code first. To Release the Trunk
Enter the factory-set code or your personal
code, then press 5·6 within five seconds.
Displaying the Factory Set Code
Note:
You will need to have two
programmed intelligent access keys for this
procedure.
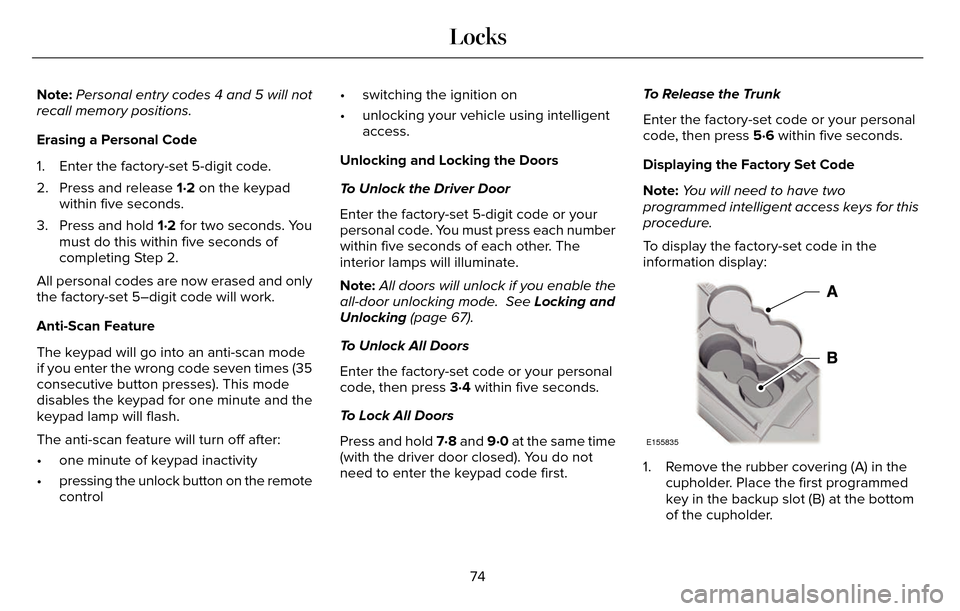
To display the factory-set code in the
information display:
E155835
1. Remove the rubber covering (A) in the cupholder. Place the first programmed
key in the backup slot (B) at the bottom
of the cupholder.
74
Locks
Page 78 of 544
2. Press the START/STOP button once andwait a few seconds.
3. Press the START/STOP button again and
remove the key.
4. Insert the second programmed key into the backup slot, then press the
START/STOP button.
The factory-set code will appear in the
information display for a few seconds.
Note: The code may not display until after
any other warning messages first display.
INTERIOR LUGGAGE
COMPARTMENT RELEASE
WARNINGS
Keep vehicle doors and luggage
compartment locked and keep keys
and remote transmitters out of a child’s
reach. Unsupervised children could lock
themselves in the trunk and risk injury.
Children should be taught not to play in
vehicles.
WARNINGS
Do not leave children or animals
unattended in the vehicle. On hot days,
the temperature in the trunk or vehicle
interior can rise very quickly. Exposure of
people or animals to these high
temperatures for even a short time can cause
death or serious heat-related injuries,
including brain damage. Small children are
particularly at risk.
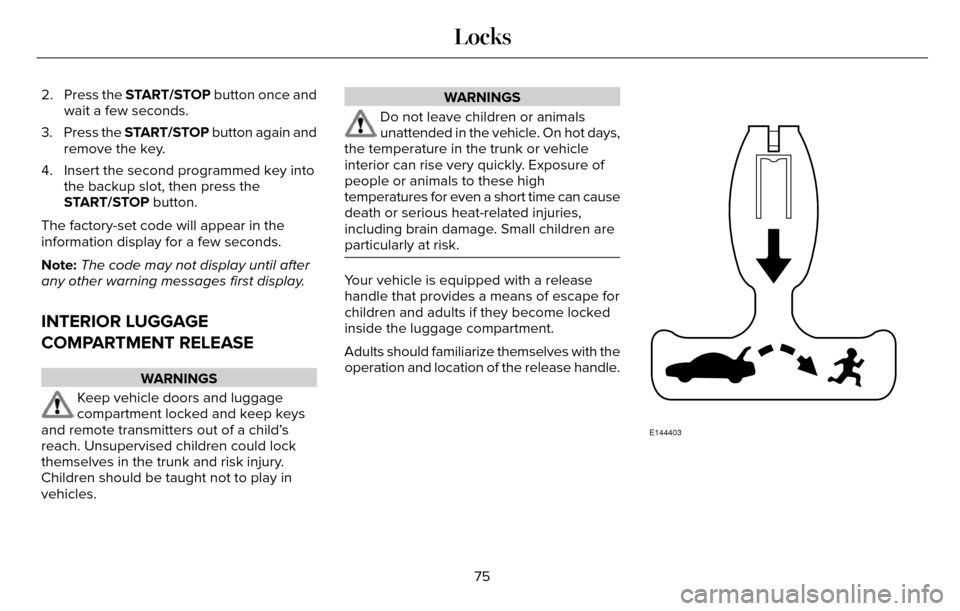
Your vehicle is equipped with a release
handle that provides a means of escape for
children and adults if they become locked
inside the luggage compartment.
Adults should familiarize themselves with the
operation and location of the release handle.
E144403
75
Locks
Page 80 of 544
PASSIVE ANTI-THEFT SYSTEM
Note:The system is not compatible with
non-Ford aftermarket remote start systems.
Use of these systems may result in vehicle
starting problems and a loss of security
protection.
Note: Metallic objects, electronic devices or
a second coded key on the same key chain
may cause vehicle starting problems if they
are too close to the key when starting your
vehicle. Prevent these objects from touching
the coded key while starting your vehicle.
Switch the ignition off, move all objects on
the key chain away from the coded key and
restart your vehicle if a problem occurs.
Note: Do not leave a duplicate coded key
in your vehicle. Always take your keys and
lock all doors when leaving your vehicle.
SecuriLock
The system helps prevent your vehicle from
starting unless you use a coded key
programmed to your vehicle. Using the
wrong key may prevent your vehicle from
starting. A message may appear in the
information display.
If you are unable to start your vehicle with a
correctly coded key, it is not operating
properly. A message may appear in the
information display.
Automatic Arming
Your vehicle arms immediately after
switching the ignition off.
Automatic Disarming
Switching the ignition on with a coded key
disarms your vehicle.
Replacement Keys
Note: Your vehicle comes equipped with two
intelligent access keys. The intelligent access key functions as a
programmed key that operates the driver
door lock and activates the intelligent access
with push button start system, as well as a
remote control.
If your programmed transmitters are lost or
stolen and you do not have an extra coded
key, have your vehicle towed to an
authorized dealer. You need to erase the
key codes from your vehicle and program
new coded keys.
Store an extra programmed key away from
your vehicle in a safe place to help prevent
any inconveniences. See your authorized
dealer to purchase additional spare or
replacement keys.
Programming a Spare Intelligent Access
Key
Note:
You can program a maximum of four
intelligent access keys to your vehicle.
77
Security
Page 125 of 544
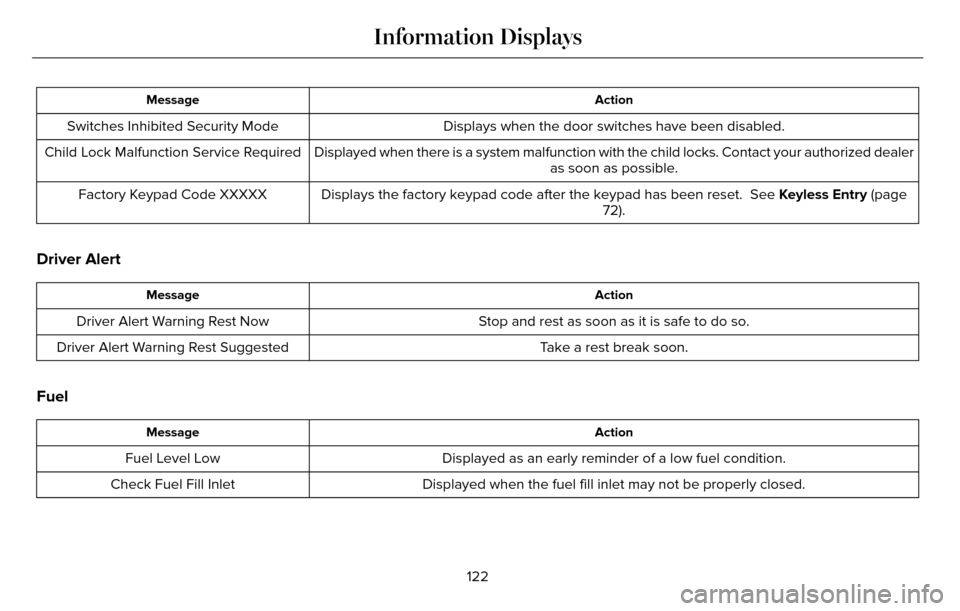
Action
Message
Displays when the door switches have been disabled.
Switches Inhibited Security Mode
Displayed when there is a system malfunction with the child locks. Conta\
ct your authorized dealeras soon as possible.
Child Lock Malfunction Service Required
Displays the factory keypad code after the keypad has been reset. See Keyless Entry (page 72).
Factory Keypad Code XXXXX
Driver Alert
Action
Message
Stop and rest as soon as it is safe to do so.
Driver Alert Warning Rest Now
Take a rest break soon.
Driver Alert Warning Rest Suggested
Fuel
Action
Message
Displayed as an early reminder of a low fuel condition.
Fuel Level Low
Displayed when the fuel fill inlet may not be properly closed.
Check Fuel Fill Inlet
122
Information Displays
Page 149 of 544
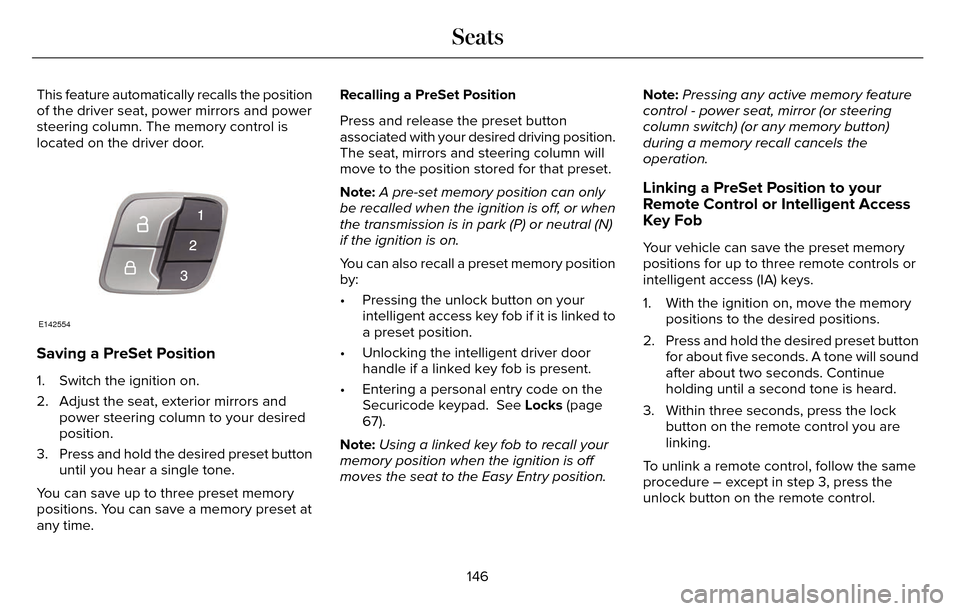
This feature automatically recalls the position
of the driver seat, power mirrors and power
steering column. The memory control is
located on the driver door.
E142554
Saving a PreSet Position
1. Switch the ignition on.
2. Adjust the seat, exterior mirrors andpower steering column to your desired
position.
3. Press and hold the desired preset button until you hear a single tone.
You can save up to three preset memory
positions. You can save a memory preset at
any time. Recalling a PreSet Position
Press and release the preset button
associated with your desired driving position.
The seat, mirrors and steering column will
move to the position stored for that preset.
Note:
A pre-set memory position can only
be recalled when the ignition is off, or when
the transmission is in park (P) or neutral (N)
if the ignition is on.
You can also recall a preset memory position
by:
• Pressing the unlock button on your intelligent access key fob if it is linked to
a preset position.
• Unlocking the intelligent driver door handle if a linked key fob is present.
• Entering a personal entry code on the Securicode keypad. See Locks (page
67).
Note: Using a linked key fob to recall your
memory position when the ignition is off
moves the seat to the Easy Entry position. Note:
Pressing any active memory feature
control - power seat, mirror (or steering
column switch) (or any memory button)
during a memory recall cancels the
operation.
Linking a PreSet Position to your
Remote Control or Intelligent Access
Key Fob
Your vehicle can save the preset memory
positions for up to three remote controls or
intelligent access (IA) keys.
1. With the ignition on, move the memory positions to the desired positions.
2. Press and hold the desired preset button for about five seconds. A tone will sound
after about two seconds. Continue
holding until a second tone is heard.
3. Within three seconds, press the lock button on the remote control you are
linking.
To unlink a remote control, follow the same
procedure – except in step 3, press the
unlock button on the remote control.
146
Seats
Page 539 of 544
Information Messages..................................115Active Park.............................................................115
Adaptive Cruise Control.....................................116
Adaptive Headlamps...........................................117
AdvanceTrac™.........................................................117
Airbag......................................................................117
Alarm.......................................................................1\
18
Automatic Engine Shutdown.............................118
AWD........................................................................\
.119
Battery and Charging System..........................120
Blind Spot Information and Cross Traffic AlertSystem................................................................121
Doors and Locks...................................................121
Driver Alert............................................................\
122
Fuel........................................................................\
.122
Hill Start Assist.....................................................123
Keys and Intelligent Access..............................123
Lane Keeping System........................................124
Maintenance.........................................................125
MyKey.....................................................................126
Park Aid.................................................................\
.127
Park Brake.............................................................12\
7
Power Steering....................................................129
Pre-Collision Assist.............................................129
Remote Start.........................................................130
Seats.......................................................................1\
30
Starting System ...................................................130
Tire Pressure Monitoring System.....................131 Traction Control................................................131
Transmission.........................................................132
Installing Child Seats......................................18Child Seats.............................................................\
..18
Using Lap and Shoulder Belts............................18
Using Lower Anchors and Tethers for CHildren (LATCH).............................................24
Using Tether Straps..............................................25
Instrument Cluster........................................102
Instrument Lighting Dimmer........................88
Interior Lamps..................................................93
Front Interior Lamp...............................................93
Rear Interior Lamp................................................94
Rear Interior Lamp (If Equipped).......................94
Interior Luggage Compartment Release...........................................................75
Interior Mirror...................................................98
Auto-Dimming Mirror...........................................99
Introduction.........................................................7
J
Jump Starting the Vehicle..........................253Connecting the Jumper Cables......................254
Jump Starting......................................................254
Preparing Your Vehicle.....................................253
Removing the Jumper Cables........................255
K
Keyless Entry....................................................72SECURICODE™ KEYLESS ENTRY
KEYPAD...............................................................72
Keyless Starting..............................................161Ignition Modes......................................................161
Keys and Remote Controls...........................54
L
Lane Keeping System..................................215Switching the System On and Off...................216
Lighting Control...............................................87Headlamp Flasher.................................................87
High Beams............................................................87\
Lighting..............................................................87
Lincoln Automotive Financial Services......12
Load Carrying.................................................231
Load Limit........................................................231
Vehicle Loading - with and without aTrailer.................................................................231
536
Index
Page 543 of 544
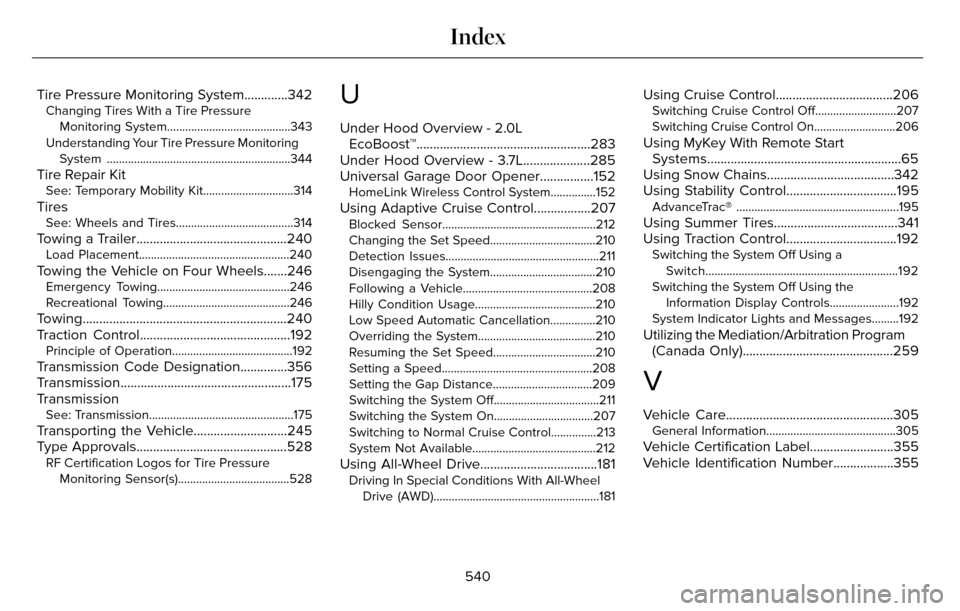
Tire Pressure Monitoring System.............342Changing Tires With a Tire PressureMonitoring System.........................................343
Understanding Your Tire Pressure Monitoring System .............................................................344
Tire Repair KitSee: Temporary Mobility Kit..............................314
TiresSee: Wheels and Tires.......................................314
Towing a Trailer.............................................240Load Placement..................................................240
Towing the Vehicle on Four Wheels.......246Emergency Towing............................................246
Recreational Towing..........................................246
Towing.............................................................240
Traction Control.............................................192
Principle of Operation........................................192
Transmission Code Designation..............356
Transmission...................................................175
Transmission
See: Transmission................................................175
Transporting the Vehicle............................245
Type Approvals.............................................528
RF Certification Logos for Tire PressureMonitoring Sensor(s).....................................528
U
Under Hood Overview - 2.0LEcoBoost™....................................................283
Under Hood Overview - 3.7L....................285
Universal Garage Door Opener................152
HomeLink Wireless Control System...............152
Using Adaptive Cruise Control.................207Blocked Sensor...................................................212
Changing the Set Speed...................................210
Detection Issues...................................................211
Disengaging the System...................................210
Following a Vehicle...........................................208
Hilly Condition Usage........................................210
Low Speed Automatic Cancellation...............210
Overriding the System.......................................210
Resuming the Set Speed..................................210
Setting a Speed..................................................208
Setting the Gap Distance.................................209
Switching the System Off...................................211
Switching the System On.................................207
Switching to Normal Cruise Control...............213
System Not Available.........................................212
Using All-Wheel Drive...................................181Driving In Special Conditions With All-Wheel
Drive (AWD).......................................................181
Using Cruise Control...................................206Switching Cruise Control Off...........................207
Switching Cruise Control On...........................206
Using MyKey With Remote StartSystems..........................................................65
Using Snow Chains......................................342
Using Stability Control.................................195
AdvanceTrac® ......................................................195
Using Summer Tires.....................................341
Using Traction Control.................................192
Switching the System Off Using a
Switch................................................................192
Switching the System Off Using the Information Display Controls.......................192
System Indicator Lights and Messages.........192
Utilizing the Mediation/Arbitration Program (Canada Only).............................................259
V
Vehicle Care..................................................305General Information...........................................305
Vehicle Certification Label.........................355
Vehicle Identification Number..................355
540
Index