change time LINCOLN MKZ 2020 User Guide
[x] Cancel search | Manufacturer: LINCOLN, Model Year: 2020, Model line: MKZ, Model: LINCOLN MKZ 2020Pages: 561, PDF Size: 5.7 MB
Page 191 of 561
acceleration or braking which could result
in an increased risk of loss of vehicle
control, vehicle rollover and/or personal
injury. Use all available road surface to
return the vehicle to a safe direction of
travel.
• In the event of an emergency stop, avoid
skidding the tires and do not attempt any
sharp steering wheel movements.
• If the vehicle goes from one type of
surface to another (that is, from concrete
to gravel) there will be a change in the
way the vehicle responds to a maneuver
(steering, acceleration or braking). Again,
avoid these abrupt inputs.
Sand
Most of the time traction control improves
tire traction by managing wheel slip through
Brake, Engine, and AWD calibrations.
However, during low speed driving, disabling
traction control in deep sand can help keep
the wheels moving to maintain vehicle
momentum. When driving over sand, try to keep all four
wheels on the most solid area of the trail.
Avoid reducing the tire pressures but shift
to a lower gear and drive steadily through
the terrain. Apply the accelerator slowly and
avoid spinning the wheels.
Do not drive your vehicle in deep sand for
an extended period of time. This could cause
the AWD system to overheat and default to
front-wheel drive. If this occurs, an AWD OFF
message displays in the information display.
To resume normal AWD function as soon as
possible, stop the vehicle in a safe location
and stop the engine for at least 10 minutes.
After the engine has been restarted and the
AWD system has adequately cooled, the
AWD OFF message turns off and normal
AWD function returns. In the event the
engine is not stopped, the
AWD OFF
message turns off when the system cools
and normal AWD function returns.
When driving at slow speeds in deep sand
under high outside temperatures, use L (Low)
gear when possible. L (Low) gear operation
will maximize the engine and transmission
cooling capability. Under severe operating conditions, the A/C
may cycle on and off to protect overheating
of the engine.
Avoid excessive speed because vehicle
momentum can work against you and cause
the vehicle to become stuck to the point that
assistance may be required from another
vehicle. Remember, you may be able to back
out the way you came if you proceed with
caution.
Mud and Water
If you must drive through high water, drive
slowly. Traction or brake capability may be
limited.
When driving through water, determine the
depth; avoid water higher than the bottom
of the wheel rims (for cars) or the bottom of
the hubs (for trucks) (if possible) and proceed
slowly. If the ignition system gets wet, the
vehicle may stall.
188
MKZ (CC9) Canada/United States of America, enUSA, Edition date: 201905, Second-Printing All-Wheel Drive
(If Equipped)
Page 203 of 561
PRINCIPLE OF OPERATION
WARNING: Vehicle modifications
involving braking system, aftermarket roof
racks, suspension, steering system, tire
construction and wheel and tire size may
change the handling characteristics of your
vehicle and may adversely affect the
performance of the electronic stability
control system. In addition, installing any
stereo loudspeakers may interfere with
and adversely affect the electronic stability
control system. Install any aftermarket
stereo loudspeaker as far as possible from
the front center console, the tunnel, and
the front seats in order to minimize the risk
of interfering with the electronic stability
control sensors. Reducing the
effectiveness of the electronic stability
control system could lead to an increased
risk of loss of vehicle control, vehicle
rollover, personal injury and death. WARNING:
Remember that even
advanced technology cannot defy the laws
of physics. It’ s always possible to lose
control of a vehicle due to inappropriate
driver input for the conditions. Aggressive
driving on any road condition can cause
you to lose control of your vehicle
increasing the risk of personal injury or
property damage. Activation of the
electronic stability control system is an
indication that at least some of the tires
have exceeded their ability to grip the
road; this could reduce the operator’ s
ability to control the vehicle potentially
resulting in a loss of vehicle control, vehicle
rollover, personal injury and death. If your
electronic stability control system activates,
SLOW DOWN.
The system automatically turns on each time
you switch the ignition on.
If a fault occurs in either the stability control
or the traction control system, you may
experience the following conditions: •
The stability and traction control light
illuminates steadily.
• The stability control and traction control
systems do not enhance your vehicle's
ability to maintain traction of the wheels.
If a driving condition activates either the
stability control or the traction control system
you may experience the following conditions:
• The stability and traction control light
flashes.
• Your vehicle slows down.
• Reduced engine power.
• A vibration in the brake pedal.
• The brake pedal is stiffer than usual.
• If the driving condition is severe and your
foot is not on the brake, the brake pedal
may move as the system applies higher
brake force.
The stability control system has several
features built into it to help you maintain
control of your vehicle:
200
MKZ (CC9) Canada/United States of America, enUSA, Edition date: 201905, Second-Printing Stability Control
Page 213 of 561
Note:
If you change any tires, the system
must recalibrate and may not correctly
operate for a short time.
Active park assist is a multi-step process and
may require you to shift the transmission
multiple times. Follow the onscreen
instructions until the parking maneuver is
complete.
If you are uncomfortable with the proximity
to any vehicle or object, you may choose to
override the system by grabbing the steering
wheel, or by taking full control of your vehicle
after pressing the active park assist button.
Keep your hands, hair, clothing and any
loose items clear of the steering wheel when
using active park assist.
The sensors are on the front and rear
bumpers.
The system may not correctly operate in any
of the following conditions:
• You use a spare tire or a tire that is
significantly worn more than the other
tires.
• One or more tires are incorrectly inflated.
• You try to park on a tight curve. •
Something passes between the front
bumper and the parking space. For
example, a pedestrian or cyclist.
• The edge of the neighboring parked
vehicle is high off the ground. For
example, a bus, tow truck or flatbed
truck.
• The weather conditions are poor. For
example, during heavy rain, snow, fog,
high humidity and high temperatures.
Do not use the system if:
• You have attached an add-on accessory
close to the sensors on the front or rear
of your vehicle. For example, a bike rack
or trailer.
• You have attached an overhanging
object to the roof. For example, a
surfboard.
• The front bumper, rear bumper or the
side sensors are damaged.
• The correct tire size is not in use on your
vehicle. For example, a mini-spare tire. Using Active Park Assist
Selecting an Active Park Assist Mode Press the button once to activate
parallel parking. Press the button
a second time to activate
perpendicular parking. If you press the
button again the system switches off.
If your vehicle is parked and after you switch
the ignition on, you can use the information
display to toggle through the modes. Press
the button to switch the system on and open
the system menu in the information display.
Note: If your vehicle is parked, the default
mode is parallel park out assist. However, if
you did not use active park assist to parallel
park your vehicle, use the information
display to select park out assist.
Note: You can repeatedly press the active
park assist button to toggle through the
modes only after moving your vehicle
approximately 33 ft (10 m).
210
MKZ (CC9) Canada/United States of America, enUSA, Edition date: 201905, Second-Printing Parking AidsE146186
Page 219 of 561
Possible Cause
Symptom
The parking space is more than 5 ft (1.5 m) or less than 2 ft (0.5 m) away.
The vehicle speed is greater than 22 mph (35 km/h) for parallel parkin\
g or greater than
19 mph (30 km/h)
for perpendicular parking.
You recently disconnected or replaced the battery. After you reconnect the battery you
must drive your vehicle on a straight road for a short period of time.
Your vehicle is rolling in the opposite direction of the current transmis\
sion position. For
example, rolling forward when in reverse (R).
The system does not correctly position your vehicle
in a parking space.
An irregular curb along the parking space prevents the system from corre\
ctly aligning
your vehicle.
Vehicles or objects bordering the space may not be correctly parked.
Your vehicle stopped too far past the parking space.
The tires may not be correctly installed or maintained. For example, not inflated correctly,
improper size, or of different sizes.
A repair or alteration changes the detection capabilities.
216
MKZ (CC9) Canada/United States of America, enUSA, Edition date: 201905, Second-Printing Parking Aids
Page 220 of 561
Possible Cause
Symptom
A parked vehicle has a high attachment. For example, a salt sprayer, snowplow or moving
truck bed.
The parking space length or position of parked objects changes after your vehicle passes
the space.
The temperature around your vehicle quickly changes. For example, driving from a
heated garage into the cold, or after leaving a car wash.
REAR VIEW CAMERA WARNING: The rear view camera
system is a reverse aid supplement device
that still requires the driver to use it in
conjunction with the interior and exterior
mirrors for maximum coverage. WARNING:
Objects that are close to
either corner of the bumper or under the
bumper, might not be seen on the screen
due to the limited coverage of the camera
system. WARNING:
Back up as slow as
possible since higher speeds might limit
your reaction time to stop your vehicle. WARNING:
Use caution when using
the rear video camera and the trunk is ajar.
If the trunk is ajar, the camera will be out
of position and the video image may be
incorrect. All guidelines (if enabled) have
been removed when the trunk is ajar. WARNING:
Use caution when turning
camera features on or off while in reverse
(R). Make sure your vehicle is not moving. The rear view camera system provides a
video image of the area behind your vehicle.
The image will display in either the rear view
mirror or the display in the center of the
instrument panel.
During operation, lines will appear in the
display that represent your vehicle
’s path
and proximity to objects behind your vehicle.
217
MKZ (CC9) Canada/United States of America, enUSA, Edition date: 201905, Second-Printing Parking Aids
Page 228 of 561
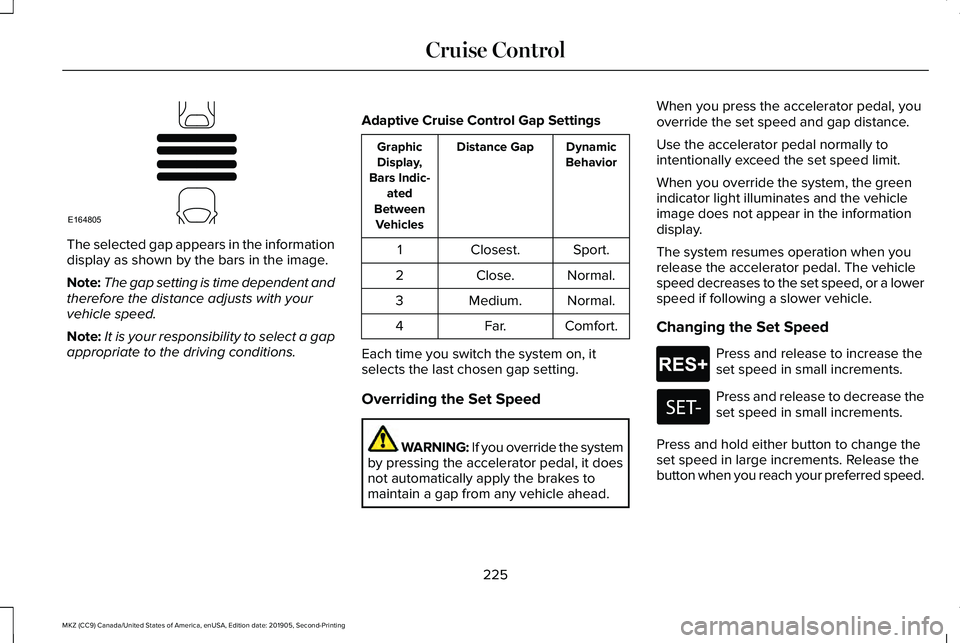
The selected gap appears in the information
display as shown by the bars in the image.
Note:
The gap setting is time dependent and
therefore the distance adjusts with your
vehicle speed.
Note: It is your responsibility to select a gap
appropriate to the driving conditions. Adaptive Cruise Control Gap Settings Dynamic
Behavior
Distance Gap
Graphic
Display,
Bars Indic- ated
Between Vehicles
Sport.
Closest.
1
Normal.
Close.
2
Normal.
Medium.
3
Comfort.
Far.
4
Each time you switch the system on, it
selects the last chosen gap setting.
Overriding the Set Speed WARNING: If you override the system
by pressing the accelerator pedal, it does
not automatically apply the brakes to
maintain a gap from any vehicle ahead. When you press the accelerator pedal, you
override the set speed and gap distance.
Use the accelerator pedal normally to
intentionally exceed the set speed limit.
When you override the system, the green
indicator light illuminates and the vehicle
image does not appear in the information
display.
The system resumes operation when you
release the accelerator pedal. The vehicle
speed decreases to the set speed, or a lower
speed if following a slower vehicle.
Changing the Set Speed
Press and release to increase the
set speed in small increments.
Press and release to decrease the
set speed in small increments.
Press and hold either button to change the
set speed in large increments. Release the
button when you reach your preferred speed.
225
MKZ (CC9) Canada/United States of America, enUSA, Edition date: 201905, Second-Printing Cruise ControlE164805 E265299
Page 236 of 561
Note:
When aid mode is on and the system
detects no steering activity for a short period,
the system alerts you to put your hands on
the steering wheel. The system may detect
a light grip or touch on the steering wheel
as hands off driving.
Note: The system may not function if the
camera is blocked, or if the windshield is
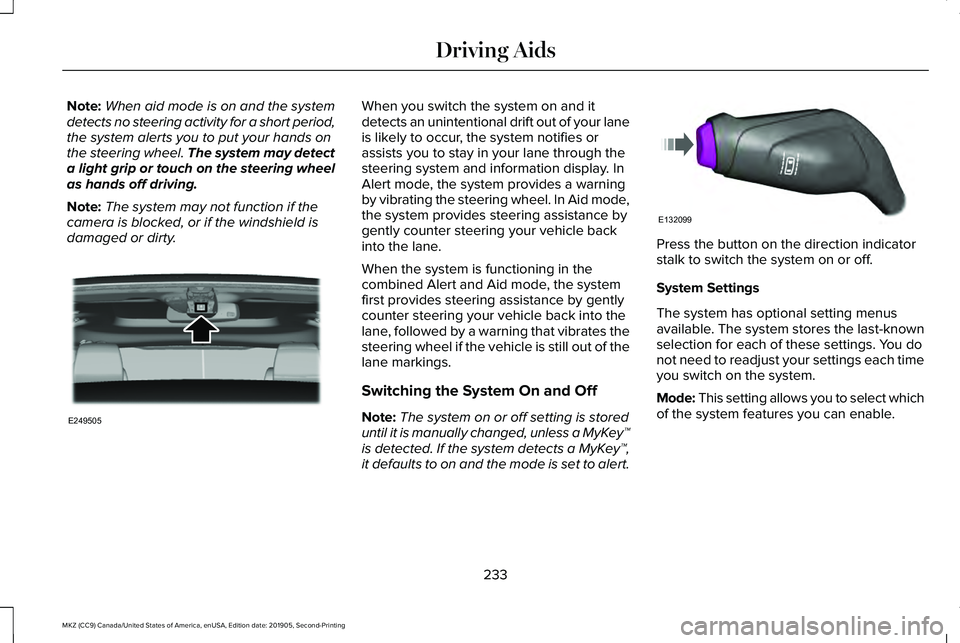
damaged or dirty. When you switch the system on and it
detects an unintentional drift out of your lane
is likely to occur, the system notifies or
assists you to stay in your lane through the
steering system and information display. In
Alert mode, the system provides a warning
by vibrating the steering wheel. In Aid mode,
the system provides steering assistance by
gently counter steering your vehicle back
into the lane.
When the system is functioning in the
combined Alert and Aid mode, the system
first provides steering assistance by gently
counter steering your vehicle back into the
lane, followed by a warning that vibrates the
steering wheel if the vehicle is still out of the
lane markings.
Switching the System On and Off
Note:
The system on or off setting is stored
until it is manually changed, unless a MyKey™
is detected. If the system detects a MyKey™,
it defaults to on and the mode is set to alert. Press the button on the direction indicator
stalk to switch the system on or off.
System Settings
The system has optional setting menus
available. The system stores the last-known
selection for each of these settings. You do
not need to readjust your settings each time
you switch on the system.
Mode: This setting allows you to select which
of the system features you can enable.
233
MKZ (CC9) Canada/United States of America, enUSA, Edition date: 201905, Second-Printing Driving AidsE249505 E132099
Page 238 of 561
If you switch the system on in alert mode, an
overhead graphic of a vehicle with lane
markings appears in the information display.
If you switch the system on in aid or alert and
aid mode, a separate white icon also
appears, or in some vehicles, arrows display
with the lane markings.
When you switch the system off, the lane
marking graphics do not display.
While the system is on, the color of the lane
markings change to indicate the system
status.
Gray: Indicates that the system is temporarily
unable to provide a warning or intervention
on the indicated side. This may be because:
•
Your vehicle is under the activation
speed.
• The direction indicator is active.
• Your vehicle is in a dynamic maneuver.
• The road has no or poor lane markings
in the camera field of view.
• The camera is obscured or unable to
detect the lane markings due to
environmental, traffic or vehicle
conditions. For example, significant sun
angles, shadows, snow, heavy rain or fog,
following a large vehicle that is blocking
or shadowing the lane, poor headlamp
illumination.
See Troubleshooting for additional
information. Green: Indicates that the system is available
or ready to provide a warning or intervention,
on the indicated side.
Yellow: Indicates that the system is providing
or has just provided a lane keeping aid
intervention.
Red: Indicates that the system is providing
or has just provided a lane keeping alert
warning.
The system can be temporarily suppressed
at any time by the following:
•
Quick braking.
• Fast acceleration.
• Using the direction indicator.
• Evasive steering maneuver.
• Driving too close to the lane markings.
Troubleshooting Why is the feature not available (line markings are gray) when I can s\
ee the lane markings on the road?
Your vehicle speed is outside the operational range of the feature.
The sun is shining directly into the camera lens.
A quick intentional lane change has occurred.
235
MKZ (CC9) Canada/United States of America, enUSA, Edition date: 201905, Second-Printing Driving Aids
Page 250 of 561
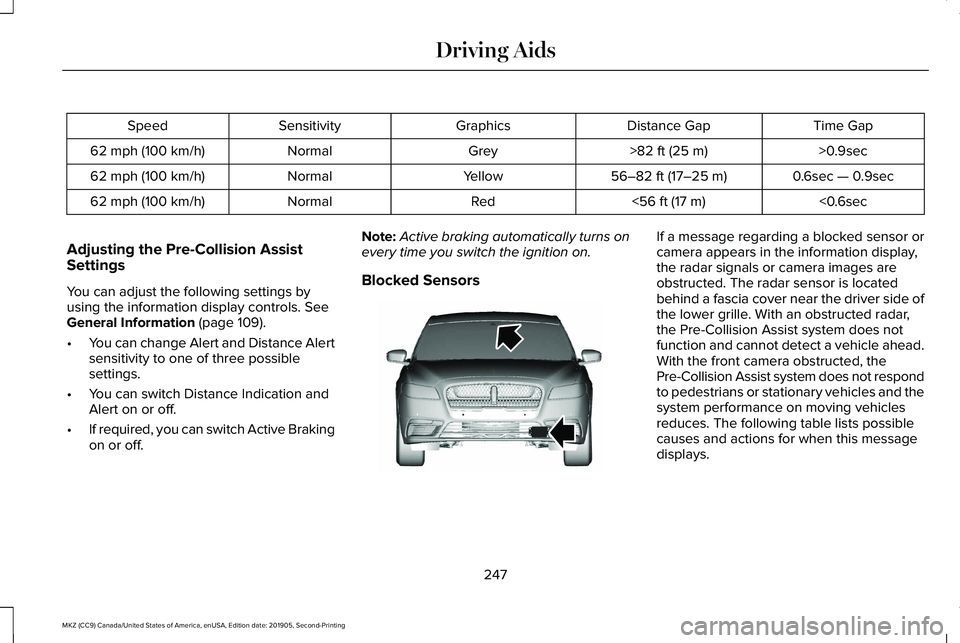
Time Gap
Distance Gap
Graphics
Sensitivity
Speed
>0.9sec
>82 ft (25 m)
Grey
Normal
62 mph (100 km/h)
0.6sec — 0.9sec
56–82 ft (17–25 m)
Yellow
Normal
62 mph (100 km/h)
<0.6sec
<
56 ft (17 m)
Red
Normal
62 mph (100 km/h)
Adjusting the Pre-Collision Assist
Settings
You can adjust the following settings by
using the information display controls.
See
General Information (page 109).
• You can change Alert and Distance Alert
sensitivity to one of three possible
settings.
• You can switch Distance Indication and
Alert on or off.
• If required, you can switch Active Braking
on or off. Note:
Active braking automatically turns on
every time you switch the ignition on.
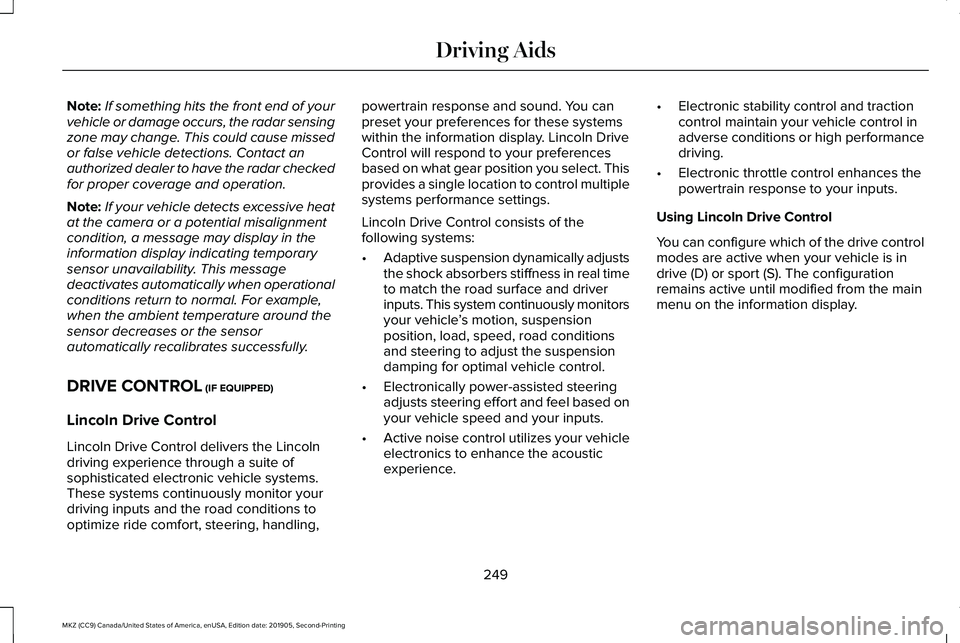
Blocked Sensors If a message regarding a blocked sensor or
camera appears in the information display,
the radar signals or camera images are
obstructed. The radar sensor is located
behind a fascia cover near the driver side of
the lower grille. With an obstructed radar,
the Pre-Collision Assist system does not
function and cannot detect a vehicle ahead.
With the front camera obstructed, the
Pre-Collision Assist system does not respond
to pedestrians or stationary vehicles and the
system performance on moving vehicles
reduces. The following table lists possible
causes and actions for when this message
displays.
247
MKZ (CC9) Canada/United States of America, enUSA, Edition date: 201905, Second-Printing Driving AidsE310641
Page 252 of 561
Note:
If something hits the front end of your
vehicle or damage occurs, the radar sensing
zone may change. This could cause missed
or false vehicle detections. Contact an
authorized dealer to have the radar checked
for proper coverage and operation.
Note: If your vehicle detects excessive heat
at the camera or a potential misalignment
condition, a message may display in the
information display indicating temporary
sensor unavailability. This message
deactivates automatically when operational
conditions return to normal. For example,
when the ambient temperature around the
sensor decreases or the sensor
automatically recalibrates successfully.
DRIVE CONTROL (IF EQUIPPED)
Lincoln Drive Control
Lincoln Drive Control delivers the Lincoln
driving experience through a suite of
sophisticated electronic vehicle systems.
These systems continuously monitor your
driving inputs and the road conditions to
optimize ride comfort, steering, handling, powertrain response and sound. You can
preset your preferences for these systems
within the information display. Lincoln Drive
Control will respond to your preferences
based on what gear position you select. This
provides a single location to control multiple
systems performance settings.
Lincoln Drive Control consists of the
following systems:
•
Adaptive suspension dynamically adjusts
the shock absorbers stiffness in real time
to match the road surface and driver
inputs. This system continuously monitors
your vehicle ’s motion, suspension
position, load, speed, road conditions
and steering to adjust the suspension
damping for optimal vehicle control.
• Electronically power-assisted steering
adjusts steering effort and feel based on
your vehicle speed and your inputs.
• Active noise control utilizes your vehicle
electronics to enhance the acoustic
experience. •
Electronic stability control and traction
control maintain your vehicle control in
adverse conditions or high performance
driving.
• Electronic throttle control enhances the
powertrain response to your inputs.
Using Lincoln Drive Control
You can configure which of the drive control
modes are active when your vehicle is in
drive (D) or sport (S). The configuration
remains active until modified from the main
menu on the information display.
249
MKZ (CC9) Canada/United States of America, enUSA, Edition date: 201905, Second-Printing Driving Aids