instrument panel LINCOLN MKZ HYBRID 2014 Owner's Manual
[x] Cancel search | Manufacturer: LINCOLN, Model Year: 2014, Model line: MKZ HYBRID, Model: LINCOLN MKZ HYBRID 2014Pages: 445, PDF Size: 3.8 MB
Page 273 of 445
•
If grease or tar is present on the
material, spot-clean the area first with
Motorcraft Spot and Stain Remover. In
Canada, use Motorcraft Multi-Purpose
Cleaner.
• If a ring forms on the fabric after spot
cleaning, clean the entire area
immediately (but do not oversaturate)
or the ring will set.
• Do not use household cleaning
products or glass cleaners, which can
stain and discolor the fabric and affect
the flame retardant abilities of the seat
materials.
CLEANING THE INSTRUMENT
PANEL AND INSTRUMENT
CLUSTER LENS WARNING
Do not use chemical solvents or
strong detergents when cleaning the
steering wheel or instrument panel to
avoid contamination of the airbag system. Clean the instrument panel and cluster
lens with a clean, damp, white cotton cloth,
then use a clean and dry white cotton cloth
to dry these areas. •
Avoid cleaners or polishes that
increase the gloss of the upper portion
of the instrument panel. The dull finish
in this area helps protect you from
undesirable windshield reflection.
• Be certain to wash or wipe your hands
clean if you have been in contact with
certain products such as insect
repellent and suntan lotion in order to
avoid possible damage to the interior
painted surfaces.
• Do not use household or glass
cleaners as these may damage the
finish of the instrument panel, interior
trim and cluster lens.
• Do not allow air fresheners and hand
sanitizers to spill onto interior surfaces.
If a spill occurs, wipe off immediately.
Damage may not be covered by your
warranty.
If a staining liquid like coffee or juice has
been spilled on the instrument panel or
on interior trim surfaces, clean as follows:
1. Wipe up spilled liquid using a clean, white, cotton cloth.
2. Wipe the surface with a damp, clean, white cotton cloth. For more thorough
cleaning, use a mild soap and water
solution. If the spot cannot be
completely cleaned by this method,
the area may be cleaned using a
commercially available cleaning
product designed for automotive
interiors.
3. If necessary, apply more soap and water solution or cleaning product to
a clean, white, cotton cloth and press
the cloth onto the soiled area. Allow
this to set at room temperature for 30
minutes.
271
MKZ (CC9) Vehicle Care
Page 281 of 445
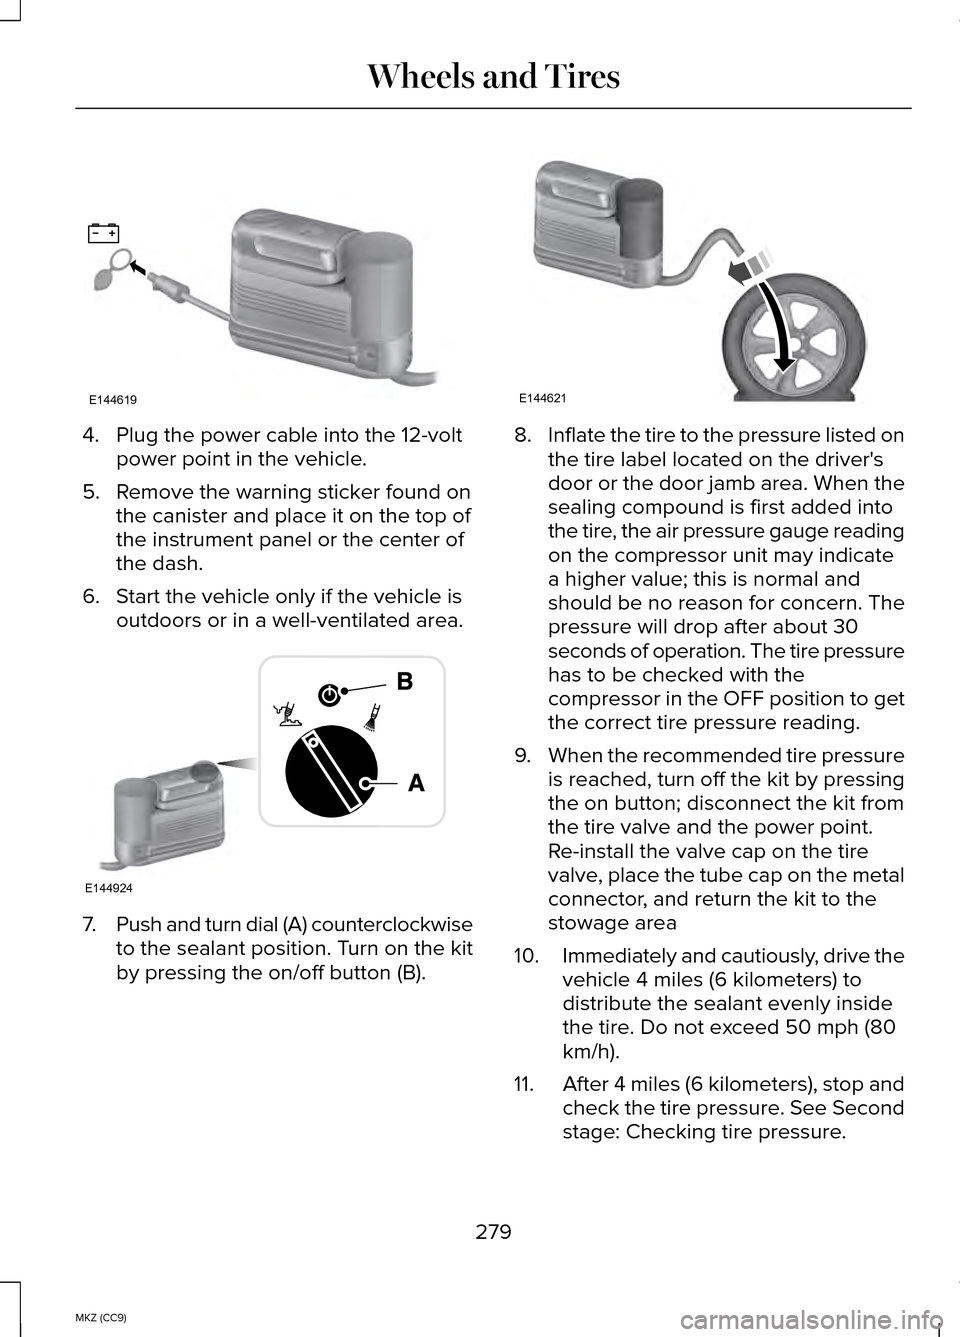
4. Plug the power cable into the 12-volt
power point in the vehicle.
5. Remove the warning sticker found on the canister and place it on the top of
the instrument panel or the center of
the dash.
6. Start the vehicle only if the vehicle is outdoors or in a well-ventilated area. 7.
Push and turn dial (A) counterclockwise
to the sealant position. Turn on the kit
by pressing the on/off button (B). 8.
Inflate the tire to the pressure listed on
the tire label located on the driver's
door or the door jamb area. When the
sealing compound is first added into
the tire, the air pressure gauge reading
on the compressor unit may indicate
a higher value; this is normal and
should be no reason for concern. The
pressure will drop after about 30
seconds of operation. The tire pressure
has to be checked with the
compressor in the OFF position to get
the correct tire pressure reading.
9. When the recommended tire pressure
is reached, turn off the kit by pressing
the on button; disconnect the kit from
the tire valve and the power point.
Re-install the valve cap on the tire
valve, place the tube cap on the metal
connector, and return the kit to the
stowage area
10. Immediately and cautiously, drive the
vehicle 4 miles (6 kilometers) to
distribute the sealant evenly inside
the tire. Do not exceed 50 mph (80
km/h).
11. After 4 miles (6 kilometers), stop and
check the tire pressure. See Second
stage: Checking tire pressure.
279
MKZ (CC9) Wheels and TiresE144619 E144924 E144621
Page 306 of 445
VEHICLE IDENTIFICATION
NUMBER
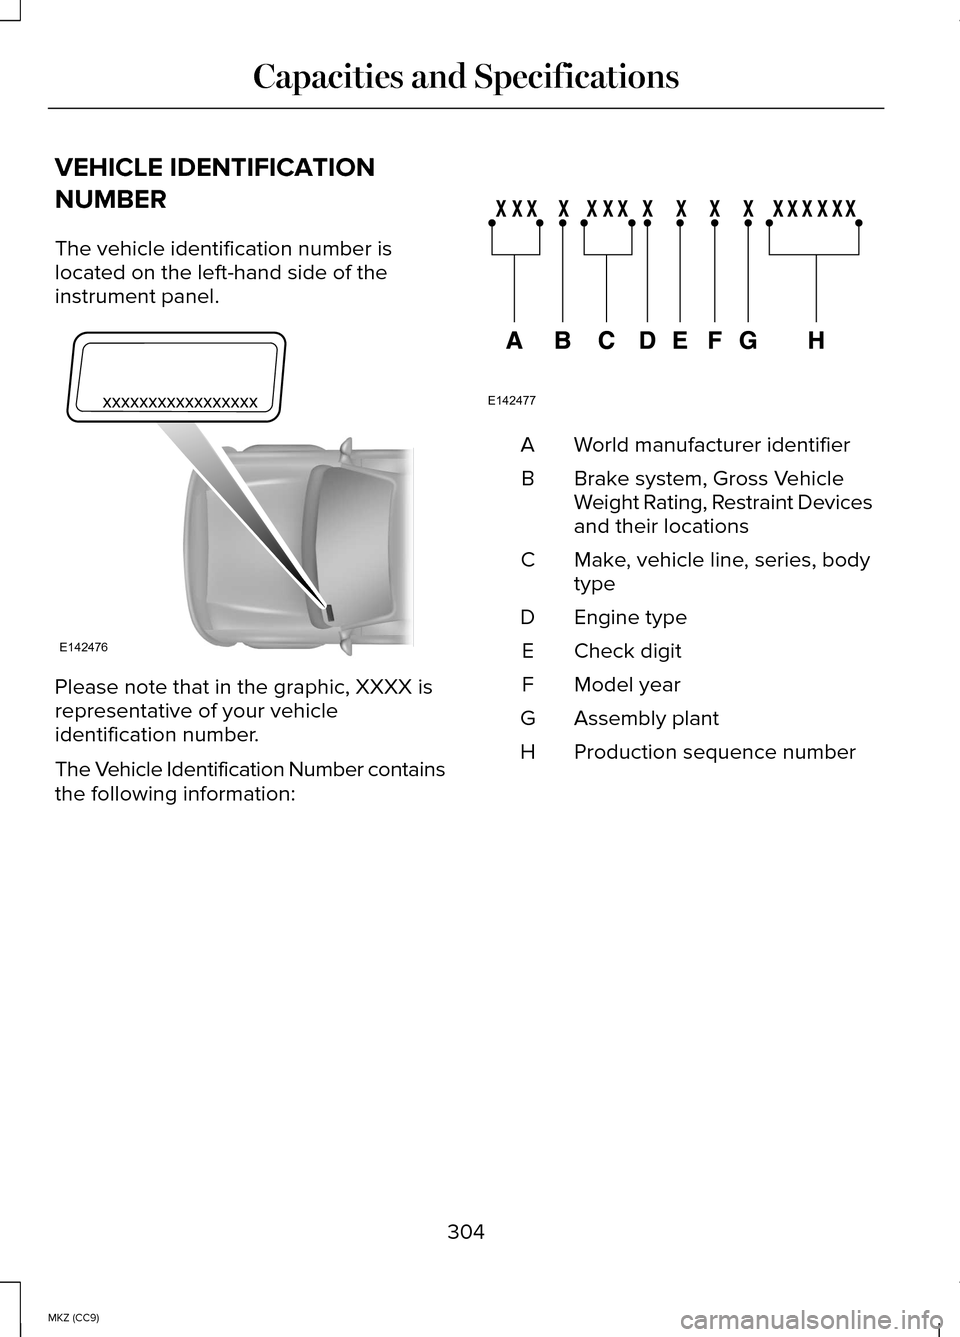
The vehicle identification number is
located on the left-hand side of the
instrument panel.
Please note that in the graphic, XXXX is
representative of your vehicle
identification number.
The Vehicle Identification Number contains
the following information: World manufacturer identifier
A
Brake system, Gross Vehicle
Weight Rating, Restraint Devices
and their locations
B
Make, vehicle line, series, body
type
C
Engine type
D
Check digit
E
Model year
F
Assembly plant
G
Production sequence number
H
304
MKZ (CC9) Capacities and SpecificationsE142476 E142477
Page 326 of 445
From this screen, you can also make other
adjustments such as 12-hour or 24-hour
mode, activate GPS time synchronization
and have the system automatically update
new time zones.
You can also turn the outside air
temperature display off and on. It appears
at the top center of the touchscreen, next
to the time and date.
The system automatically saves any
updates you make to the settings.
Display
You can adjust the touchscreen display
through the touchscreen or by pressing
the voice button on your steering wheel
controls and when prompted, say, "Display
settings".
Press the Settings icon >
Display, to access and make
adjustments using the
touchscreen.
• Brightness
allows you to make the
screen display brighter or dimmer.
• Auto DIM
, when set to On, lets you
use the Auto Dim Manual Offset
feature. When set to
Off, screen
brightness does not change.
• Mode
allows you to set the screen to
a certain brightness or have the system
automatically change based on the
outside light level, or turn the display
off.
• If you select
AUTO or NIGHT, you
have the options of turning the
display's Auto Dim feature on or off
and changing the Auto Dim Manual
Offset feature. •
Auto Dim Manual Offset
allows you
to adjust screen dimming as the
outside lighting conditions change
from day to night. This feature also
allows you to adjust screen brightness
using the instrument panel dimming
control.
• Edit Wallpaper
•You can have your touchscreen
display the default photo or upload
your own.
Uploading Photos for Your Home Screen
Wallpaper
Note: You cannot load photos directly
from your camera. You must access the
photos either from your USB mass storage
device or from an SD card.
Note: Photographs with extremely large
dimensions (such as 2048 x 1536) may not
be compatible and appear as a blank
(black) image on the display.
Your system allows you to upload and
view up to 32 photos. To access, press the Settings
icon > Display > Edit Wallpaper,
and then follow the system
prompts to upload your photographs.
Only the photograph(s), which meets the
following conditions, display:
• Compatible file formats are as follows:
.jpg, .gif, .png, .bmp
• Each file must be 1.5 MB or less.
• Recommended dimensions: 800 x 384
324
MKZ (CC9) MyLincoln Touch™E142607 E142607
Page 351 of 445
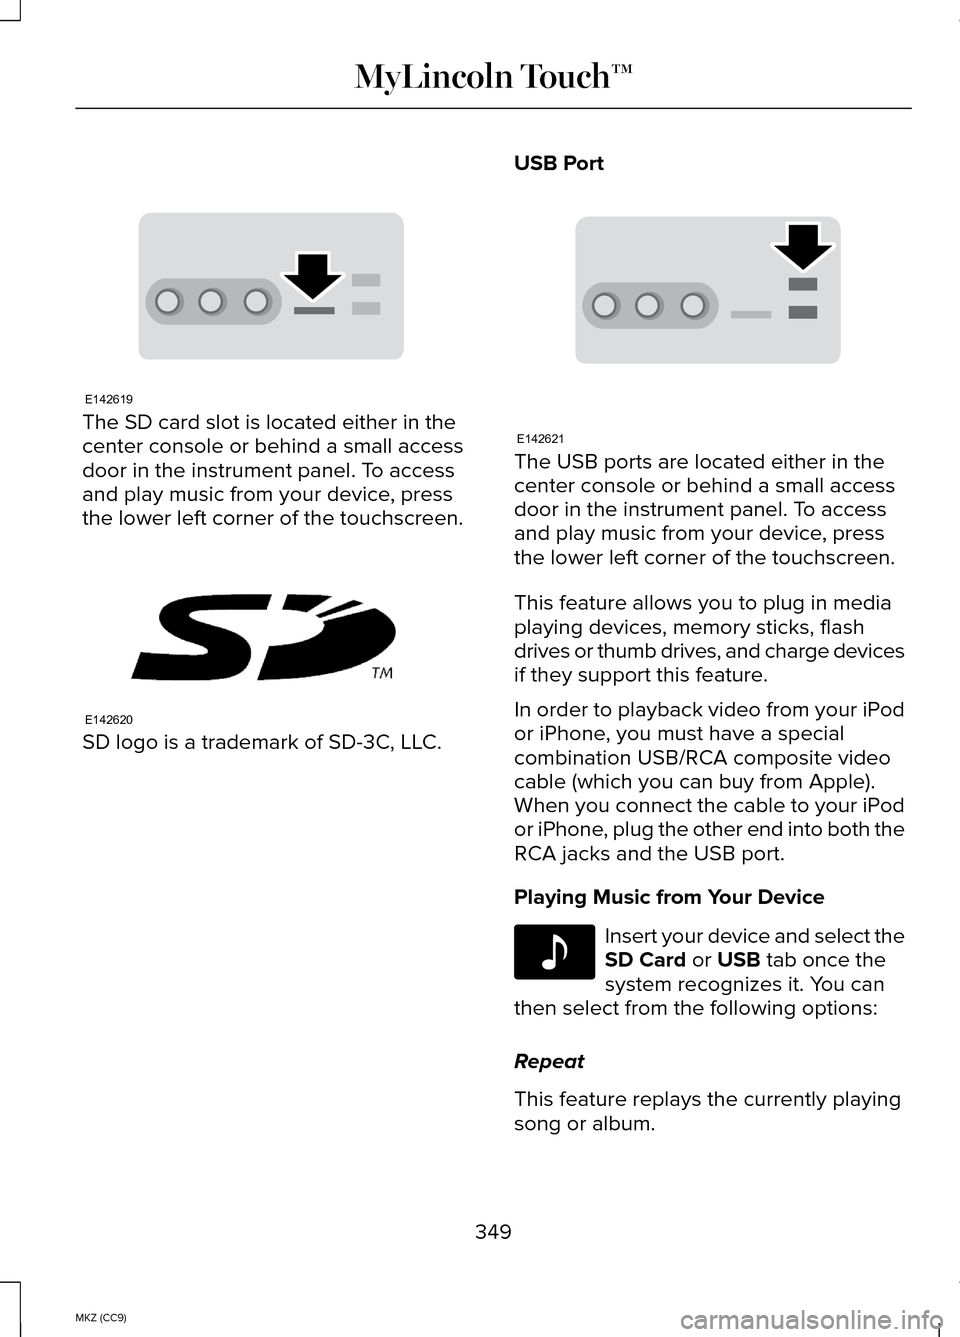
The SD card slot is located either in the
center console or behind a small access
door in the instrument panel. To access
and play music from your device, press
the lower left corner of the touchscreen.
SD logo is a trademark of SD-3C, LLC. USB Port The USB ports are located either in the
center console or behind a small access
door in the instrument panel. To access
and play music from your device, press
the lower left corner of the touchscreen.
This feature allows you to plug in media
playing devices, memory sticks, flash
drives or thumb drives, and charge devices
if they support this feature.
In order to playback video from your iPod
or iPhone, you must have a special
combination USB/RCA composite video
cable (which you can buy from Apple).
When you connect the cable to your iPod
or iPhone, plug the other end into both the
RCA jacks and the USB port.
Playing Music from Your Device
Insert your device and select the
SD Card or USB tab once the
system recognizes it. You can
then select from the following options:
Repeat
This feature replays the currently playing
song or album.
349
MKZ (CC9) MyLincoln Touch™E142619 E142620 E142621 E142611
Page 355 of 445
Bluetooth Audio
Your system allows you to stream audio
over your vehicle's speakers from your
connected, Bluetooth-enabled cellular
phone.
To access, press the lower left
corner on the touchscreen, then
select the BT Stereo tab.
Bluetooth Audio Voice Commands If you are listening to a Bluetooth
audio device, press the voice
button on the steering wheel
control. When prompted, say "Next song",
"Pause", "Play" or "Previous song".
If you are not listening to a Bluetooth audio
device, press the voice button and, after
the tone, say "Next song", "Pause", "Play"
or "Previous song".
A/V Inputs WARNINGS
Driving while distracted can result in
loss of vehicle control, crash and
injury. We strongly recommend that you
use extreme caution when using any
device that may take your focus off the
road. Your primary responsibility is the
safe operation of your vehicle. We
recommend against the use of any
handheld device while driving and
encourage the use of voice-operated
systems when possible. Make sure you
are aware of all applicable local laws that
may affect the use of electronic devices
while driving. WARNINGS
For safety reasons, do not connect
or adjust the settings on your
portable music player while your vehicle
is moving. Store the portable music player in a
secure location, such as the center
console or the glove box, when your
vehicle is moving. Hard objects may
become projectiles in a crash or sudden
stop, which may increase the risk of
serious injury. The audio extension cable
must be long enough to allow the portable
music player to be safely stored while your
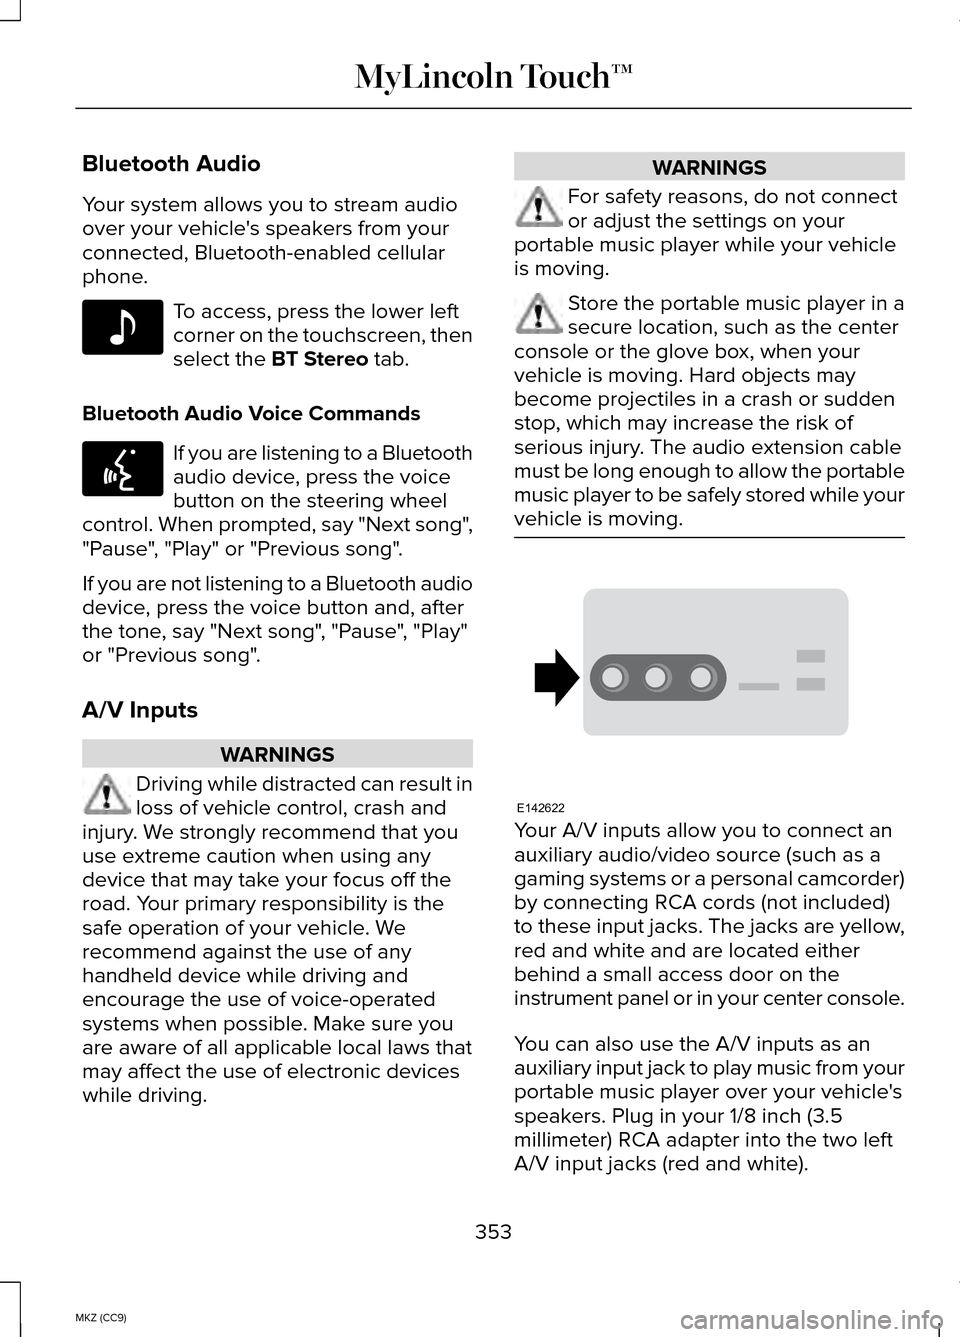
vehicle is moving. Your A/V inputs allow you to connect an
auxiliary audio/video source (such as a
gaming systems or a personal camcorder)
by connecting RCA cords (not included)
to these input jacks. The jacks are yellow,
red and white and are located either
behind a small access door on the
instrument panel or in your center console.
You can also use the A/V inputs as an
auxiliary input jack to play music from your
portable music player over your vehicle's
speakers. Plug in your 1/8 inch (3.5
millimeter) RCA adapter into the two left
A/V input jacks (red and white).
353
MKZ (CC9) MyLincoln Touch™E142611 E142599 E142622
Page 379 of 445
Power: Touch to switch the system off and on. Outside air cannot enter your
vehicle when you switch off the system.
A
Passenger settings:
Touch DUAL to switch on the passenger temperature
control. Touch the + and - to adjust the temperature. Touch the heated seat
icon to control the heated seat (if equipped). Touch the cooled seat icon to
control the cooled seat (if equipped).
See Seats (page 129).
B
Fan speed:
Touch + or - to increase or decrease the volume of air circulated
in your vehicle.
C
Recirculated air:
Touch the button to switch between outside air and
recirculated air. When you select recirculated air, the button illuminates and
the air currently in the passenger compartment recirculates. This may re\
duce
the time needed to cool the interior (when used with A/C) and may redu\
ce
unwanted odors from entering your vehicle. Recirculated air may turn off
automatically in all airflow modes except MAX A/C to reduce the possibility of
fogging.
D
MAX A/C:
Touch to switch on. The system distributes recirculated air through
the instrument panel air vents, air conditioning automatically turns on \
and fan
speed adjusts to the highest speed. This re-cooling of the interior is m\
ore
economical and efficient than normal A/C.
E
A/C:
Touch to turn air conditioning on or off. To improve air conditioning when
starting your vehicle, drive with the windows slightly open for two to three
minutes. Use A/C with recirculated air to improve cooling performance an\
d
efficiency.
F
AUTO:
Touch to turn on fully automatic operation. Select the desired
temperature using the temperature control. The system automatically adju\
sts
fan speed, air distribution, A/C operation, and outside or recirculated \
air, to
heat or cool the vehicle to maintain the selected temperature.
G
Rear defroster:
Touch to turn the rear window defroster and heated mirrors
(if equipped).
H
377
MKZ (CC9) MyLincoln Touch™
Page 380 of 445
Manual airflow distribution controls:Floor/Defrost: Distributes air through the
windshield defroster vents, demister vents, floor vents and rear seat fl\
oor vents,
and provides outside air to reduce window fogging. Panel: Distributes air
through the instrument panel vents. Panel/Floor: Distributes air through the
instrument panel vents, demister vents, floor vents and rear seat floor \
vents.
Floor:
Distributes air through the demister vents, floor vents and rear seat f\
loor
vents. Defrost: Touch to clear the windshield of fog and thin ice. Touch again
to return to the previous airflow selection. When switched on, defrost d\
istributes
outside air through the windshield defroster vents and demister vents to\
reduce
window fogging.
I
Driver settings: Depending on your vehicle and option package, you may have
the following features: Touch the + and - to adjust the temperature. Touch the
heated seat icon to control the heated seat (if equipped). Touch the cooled
seat icon to control the cooled seat (if equipped). See Seats (page 129). Touch
MyTemp
to select your previously pre-set temperature setpoint. Touch and
hold MyTemp to store a new pre-set for temperature setpoint. Touch the heated
steering wheel icon (if equipped) to warm the steering wheel.
J
Note: If your vehicle is equipped with a
wood-trimmed steering wheel, it does not
heat between the 10 o'clock and 2 o'clock
positions.
Climate Control Voice Commands Press the voice button on the
steering wheel controls. When
prompted, say any of the
following commands: Climate control commands
"Climate automatic"
"Climate my temperature" "Climate off ""Climate on" Climate control commands
"Climate temperature <15.5-29.5> degrees"
"Climate temperature <60-85> degrees" "Help"
There are additional climate control
commands but in order to access them,
you have to say "Climate" first. When the
system is ready to listen, you may say any
of the following commands: "CLIMATE"
"A/C off ""A/C on"
"Automatic"
"Defrost off "
378
MKZ (CC9) MyLincoln Touch™E142599
Page 434 of 445
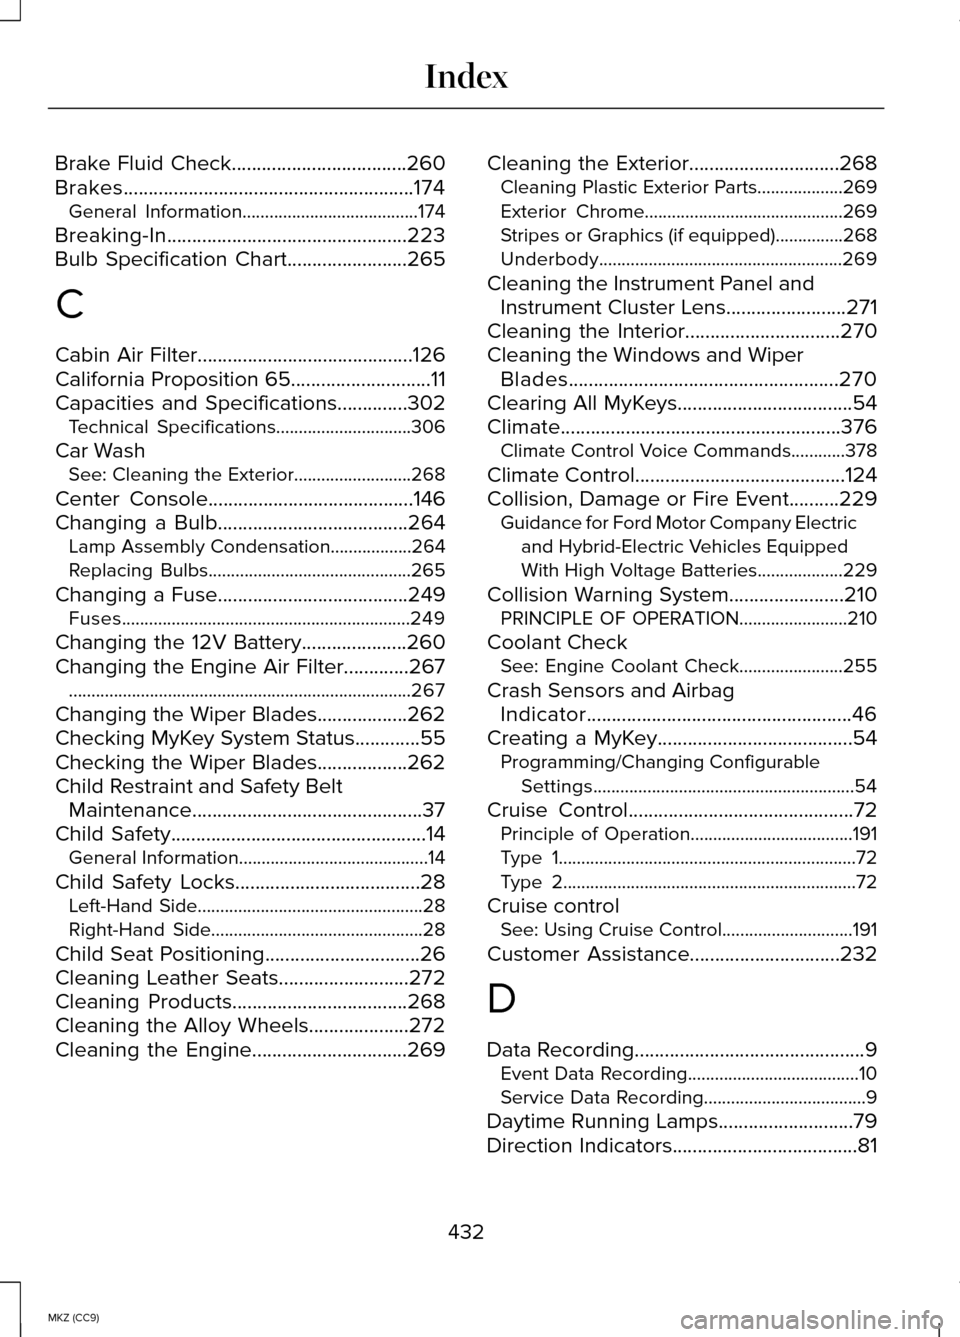
Brake Fluid Check...................................260
Brakes..........................................................174
General Information.......................................174
Breaking-In................................................223
Bulb Specification Chart........................265
C
Cabin Air Filter...........................................126
California Proposition 65............................11
Capacities and Specifications..............302
Technical Specifications..............................306
Car Wash See: Cleaning the Exterior..........................268
Center Console.........................................146
Changing a Bulb
......................................264
Lamp Assembly Condensation..................264
Replacing Bulbs.............................................265
Changing a Fuse......................................249 Fuses................................................................249
Changing the 12V Battery.....................260
Changing the Engine Air Filter.............267 ........................................................................\
....267
Changing the Wiper Blades..................262
Checking MyKey System Status.............55
Checking the Wiper Blades..................262
Child Restraint and Safety Belt Maintenance ..............................................
37
Child Safety...................................................14
General Information..........................................14
Child Safety Locks.....................................28 Left-Hand Side..................................................28
Right-Hand Side...............................................28
Child Seat Positioning
...............................26
Cleaning Leather Seats..........................272
Cleaning Products...................................268
Cleaning the Alloy Wheels....................272
Cleaning the Engine...............................269 Cleaning the Exterior..............................268
Cleaning Plastic Exterior Parts...................269
Exterior Chrome............................................269
Stripes or Graphics (if equipped)...............268
Underbody......................................................269
Cleaning the Instrument Panel and Instrument Cluster Lens........................271
Cleaning the Interior...............................270
Cleaning the Windows and Wiper Blades......................................................270
Clearing All MyKeys...................................54
Climate........................................................376 Climate Control Voice Commands............378
Climate Control
..........................................124
Collision, Damage or Fire Event..........229 Guidance for Ford Motor Company Electric
and Hybrid-Electric Vehicles Equipped
With High Voltage Batteries...................229
Collision Warning System.......................210 PRINCIPLE OF OPERATION........................
210
Coolant Check See: Engine Coolant Check.......................
255
Crash Sensors and Airbag Indicator.....................................................46
Creating a MyKey
.......................................54
Programming/Changing Configurable
Settings..........................................................54
Cruise Control
.............................................72
Principle of Operation....................................191
Type 1..................................................................72
Type 2.................................................................72
Cruise control See: Using Cruise Control.............................191
Customer Assistance..............................232
D
Data Recording
..............................................9
Event Data Recording......................................10
Service Data Recording....................................9
Daytime Running Lamps...........................79
Direction Indicators
.....................................81
432
MKZ (CC9) Index