maintenance reset LINCOLN MKZ HYBRID 2014 Owners Manual
[x] Cancel search | Manufacturer: LINCOLN, Model Year: 2014, Model line: MKZ HYBRID, Model: LINCOLN MKZ HYBRID 2014Pages: 445, PDF Size: 3.8 MB
Page 6 of 445
Towing the Vehicle on Four
Wheels...................................................222
Driving Hints
Breaking-In................................................223
Economical Driving
..................................223
Driving Through Water...........................223
Floor Mats
..................................................224
Roadside Emergencies
Roadside Assistance...............................225
Hazard Warning Flashers
......................226
Fuel Shutoff...............................................226
Jump-Starting the Vehicle.....................226
Collision, Damage or Fire Event..........229
Post-Crash Alert System.........................231
Customer Assistance
Getting the Services You Need
............232
In California (U.S. Only)
...........................233
The Better Business Bureau (BBB) Auto Line Program (U.S. Only)....................234
Utilizing the Mediation/Arbitration Program (Canada Only)......................235
Getting Assistance Outside the U.S. and Canada...................................................235
Ordering Additional Owner's Literature................................................237
Reporting Safety Defects (U.S. Only)........................................................237
Reporting Safety Defects (Canada Only)........................................................238
Fuses
Fuse Specification Chart........................239
Changing a Fuse......................................249 Maintenance
General Information.................................251
Opening and Closing the Hood...........252
Under Hood Overview - 2.0L
Hybrid.....................................................252
Engine Oil Dipstick
..................................254
Engine Oil Check
.....................................254
Oil Change Indicator Reset
...................254
Engine Coolant Check...........................255
Automatic Transmission Fluid Check.....................................................259
Brake Fluid Check...................................260
Power Steering Fluid Check.................260
Washer Fluid Check
................................260
Fuel Filter
...................................................260
Changing the 12V Battery.....................260
Checking the Wiper Blades..................262
Changing the Wiper Blades..................262
Adjusting the Headlamps......................263
Changing a Bulb
......................................264
Bulb Specification Chart........................265
Changing the Engine Air Filter.............267
Vehicle Care
General Information
................................268
Cleaning Products...................................268
Cleaning the Exterior..............................268
Waxing........................................................269
Cleaning the Engine...............................269
Cleaning the Windows and Wiper Blades.....................................................270
Cleaning the Interior...............................270
Cleaning the Instrument Panel and Instrument Cluster Lens......................271
Cleaning Leather Seats
..........................272
4
MKZ (CC9) Table of Contents
Page 139 of 445
•
Press the heated seat symbol to cycle
through the various heat settings and
off. Warmer settings are indicated by
more indicator lights.
• Press again to deactivate.
The heated seat module resets at every
ignition run cycle. While the ignition is on,
press the high or low heated seat switch
to enable heating mode. When activated,
they will turn off automatically when you
turn the engine off.
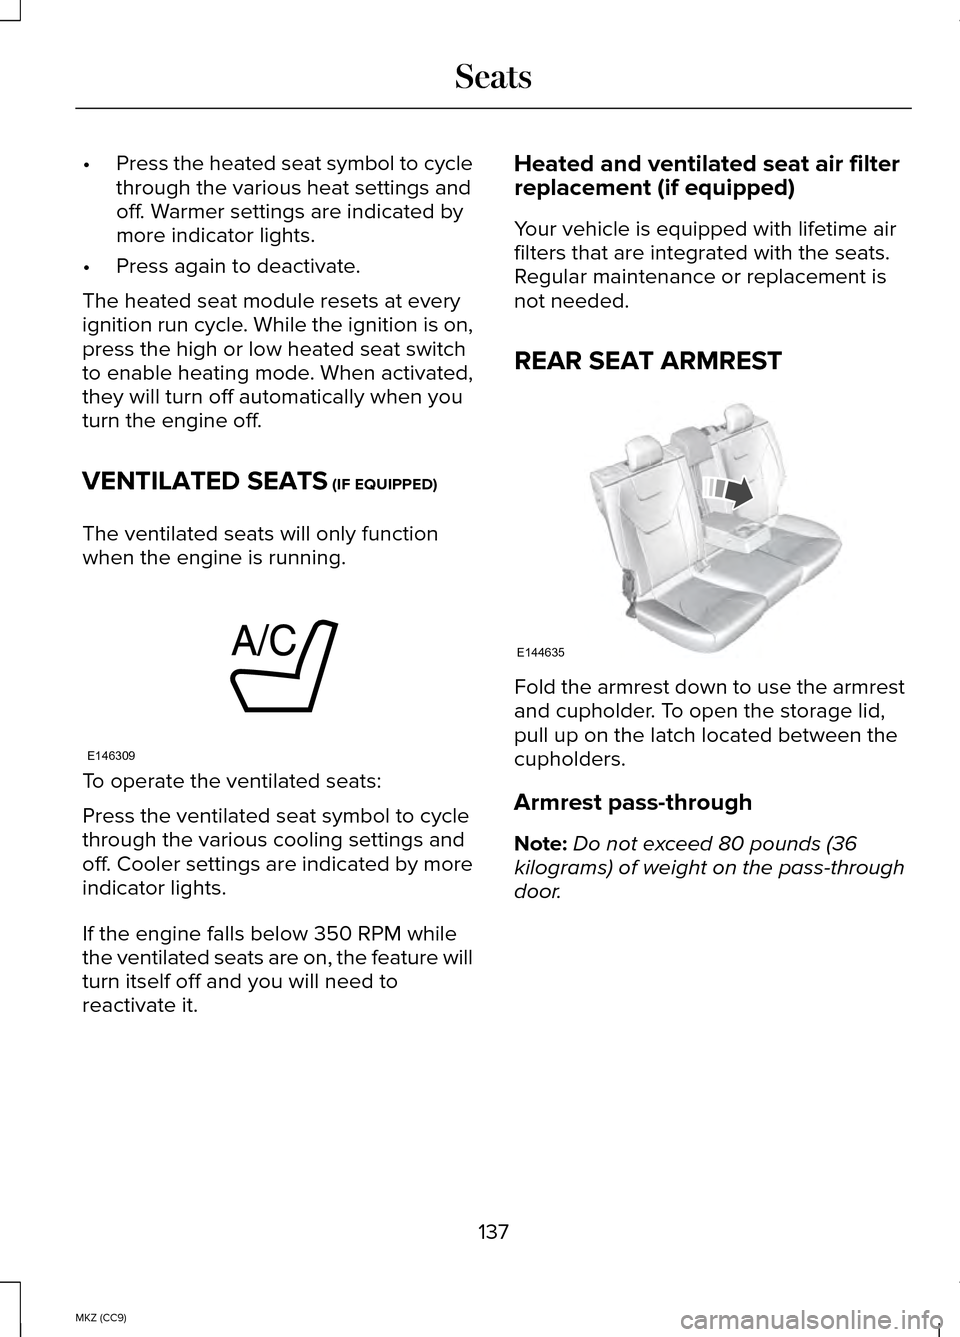
VENTILATED SEATS (IF EQUIPPED)
The ventilated seats will only function
when the engine is running. To operate the ventilated seats:
Press the ventilated seat symbol to cycle
through the various cooling settings and
off. Cooler settings are indicated by more
indicator lights.
If the engine falls below 350 RPM while
the ventilated seats are on, the feature will
turn itself off and you will need to
reactivate it. Heated and ventilated seat air filter
replacement (if equipped)
Your vehicle is equipped with lifetime air
filters that are integrated with the seats.
Regular maintenance or replacement is
not needed.
REAR SEAT ARMREST
Fold the armrest down to use the armrest
and cupholder. To open the storage lid,
pull up on the latch located between the
cupholders.
Armrest pass-through
Note:
Do not exceed 80 pounds (36
kilograms) of weight on the pass-through
door.
137
MKZ (CC9) SeatsE146309 E144635
Page 156 of 445
•
Keep the tires properly inflated and
only use the recommended size.
• Aggressive driving increases the
amount of energy required to move
your vehicle. In general, you can
achieve better fuel economy with mild
to moderate acceleration and
deceleration. Moderate braking is
particularly important since it allows
you to maximize the energy captured
by the regenerative braking system.
Additional Tips:
• Do not carry extra loads.
• Be mindful of adding external
accessories that may increase
aerodynamic drag.
• Observe posted speed limits.
• Perform all scheduled maintenance.
• There is no need to wait for your
engine to warm up. The vehicle is
ready to drive immediately after
starting. EV+ Mode
Your vehicle will recognize your frequent
destinations and allow for more EV driving
as you approach them. For example, when
nearing your home it should be easier to
stay in electric mode. The EV indicator will
display EV+ when this mode is active. You
should see this about 1/8 mile (200 meters)
from a frequent destination. See
Information Displays (page 97).
Note: Frequent destinations are learned
by your vehicle after two to four weeks of
use. You can clear these destinations with
a Driving History reset through the
Settings menu.
Note: The EV+ feature can be turned on
or off through the Driver Assist section of
the Settings menu.
154
MKZ (CC9) Unique Driving Characteristics
Page 256 of 445
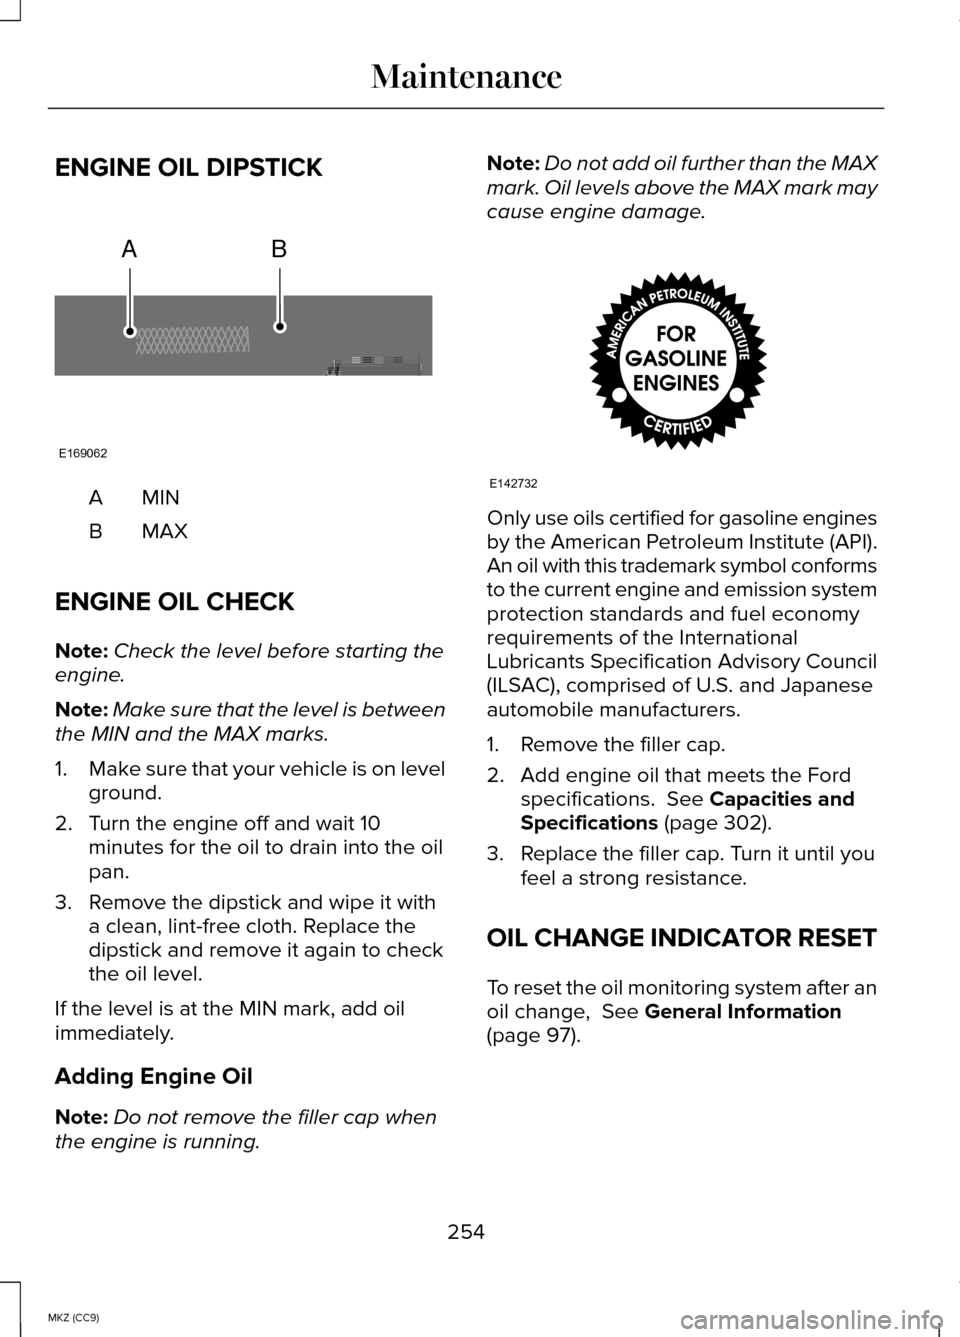
ENGINE OIL DIPSTICK
MINA
MAXB
ENGINE OIL CHECK
Note: Check the level before starting the
engine.
Note: Make sure that the level is between
the MIN and the MAX marks.
1. Make sure that your vehicle is on level
ground.
2. Turn the engine off and wait 10 minutes for the oil to drain into the oil
pan.
3. Remove the dipstick and wipe it with a clean, lint-free cloth. Replace the
dipstick and remove it again to check
the oil level.
If the level is at the MIN mark, add oil
immediately.
Adding Engine Oil
Note: Do not remove the filler cap when
the engine is running. Note:
Do not add oil further than the MAX
mark. Oil levels above the MAX mark may
cause engine damage. Only use oils certified for gasoline engines
by the American Petroleum Institute (API).
An oil with this trademark symbol conforms
to the current engine and emission system
protection standards and fuel economy
requirements of the International
Lubricants Specification Advisory Council
(ILSAC), comprised of U.S. and Japanese
automobile manufacturers.
1. Remove the filler cap.
2. Add engine oil that meets the Ford
specifications. See Capacities and
Specifications (page 302).
3. Replace the filler cap. Turn it until you feel a strong resistance.
OIL CHANGE INDICATOR RESET
To reset the oil monitoring system after an
oil change,
See General Information
(page 97).
254
MKZ (CC9) MaintenanceAB
E169062 E142732
Page 260 of 445
Whenever you add coolant, check the
coolant level in the inverter system
controller coolant reservoir the next few
times you drive the vehicle. If necessary,
add enough prediluted coolant to bring
the inverter system controller coolant level
to the proper level.
Recycled Engine Coolant
Ford Motor Company does not
recommend the use of recycled engine
coolant since a Ford-approved recycling
process is not yet available.
Used engine coolant should be disposed
of in an appropriate manner. Follow your
community’
s regulations and standards for
recycling and disposing of automotive
fluids.
Severe Climates
If you drive in extremely cold climates:
• It may be necessary to have an
authorized Ford dealer increase the
coolant concentration above 50%.
• A coolant concentration of 60% will
provide improved freeze point
protection. Engine coolant
concentrations above 60% will
decrease the overheat protection
characteristics of the engine coolant
and may cause engine damage. If you drive in extremely hot climates:
•
It may be necessary to have an
authorized Ford dealer decrease the
coolant concentration to 40%.
• A coolant concentration of 40% will
provide improved overheat protection.
Engine coolant concentrations below
40% will decrease the corrosion/freeze
protection characteristics of the engine
coolant and may cause engine
damage.
Vehicles driven year-round in non-extreme
climates should use prediluted coolant
meeting the Ford specification for optimum
cooling system and engine protection.
What You Should Know About Fail-
Safe Cooling
If the engine coolant supply is depleted,
this feature allows the vehicle to be driven
temporarily before incremental component
damage is incurred. The “fail-safe ”
distance depends on ambient
temperatures, vehicle load and terrain.
How Fail-Safe Cooling Works
If the engine begins to overheat, the
engine coolant temperature gauge will
move to the red (hot) area and: The coolant temperature
warning light will illuminate.
The service engine soon
indicator will illuminate.
If the engine reaches a preset
over-temperature condition, the engine
will automatically switch to alternating
cylinder operation. Each disabled cylinder
acts as an air pump and cools the engine.
258
MKZ (CC9) Maintenance
Page 263 of 445
WARNINGS
Keep batteries out of reach of
children. Batteries contain sulfuric
acid. Avoid contact with skin, eyes or
clothing. Shield your eyes when working
near the battery to protect against possible
splashing of acid solution. In case of acid
contact with skin or eyes, flush
immediately with water for a minimum of
15 minutes and get prompt medical
attention. If acid is swallowed, call a
physician immediately. Your vehicle is equipped with a
Motorcraft® maintenance-free battery
which normally does not require additional
water during its life of service.
Note:
If your battery has a cover/shield,
make sure it is reinstalled after the battery
has been cleaned or replaced.
Note: See an authorized dealer for low
voltage battery access, testing, or
replacement.
When a low voltage battery replacement
is necessary, see an authorized dealer to
replace the low voltage battery with a Ford
recommended replacement low voltage
battery that matches the electrical
requirements of the vehicle
To ensure proper operation of the battery
management system (BMS), do not allow
a technician to connect any electrical
device ground connection directly to the
low voltage battery negative post. A
connection at the low voltage battery
negative post can cause inaccurate
measurements of the battery condition
and potential incorrect system operation. Note:
If a person adds electrical or
electronic accessories or components to
the vehicle, the accessories or
components may adversely affect the low
voltage battery performance and
durability and may also affect the
performance of other electrical systems
in the vehicle.
For longer, trouble-free operation, keep
the top of the battery clean and dry. Also,
make certain the battery cables are always
tightly fastened to the battery terminals.
If you see any corrosion on the battery or
terminals, remove the cables from the
terminals and clean with a wire brush. You
can neutralize the acid with a solution of
baking soda and water.
When a battery replacement is required,
the battery should only be replaced with
a Ford recommended replacement battery
that matches the electrical requirements
of the vehicle.
Because your vehicle ’s engine is
electronically-controlled by a computer,
some engine control settings are
maintained by power from the low voltage
battery. Some engine computer settings,
like the idle trim and fuel trim strategy,
optimize the driveability and performance
of the engine. Some other computer
settings, like the clock and radio station
presets, are also maintained in memory
by power from the low voltage battery.
When a technician disconnects and
connects the low voltage battery, these
settings are erased. Complete the
following procedure in order to restore the
settings:
1. With the vehicle at a complete stop, set the parking brake.
261
MKZ (CC9) Maintenance
Page 264 of 445
2. Shift the transmission into P.
3. Turn off all accessories.
4. Step on the brake pedal and start the
vehicle.
5. Run the engine until it reaches normal
operating temperature. While the
engine is warming up, complete the
following: Reset the clock. See Audio
System (page 309). Reset the power
windows bounce-back feature. See
Windows and Mirrors (page 83). Reset
the radio station presets.
See Audio
System (page 309).
6. Allow the engine to idle for at least one
minute. If the engine turns off, step on
the accelerator to start the engine.
7. While the engine is running, step on the brake pedal and shift the
transmission to N.
8. Allow the engine to run for at least one
minute by pressing on the accelerator
pedal.
9. Drive the vehicle at least 10 miles (16 kilometers) to completely relearn the
idle and fuel trim strategy.
Note: If you do not allow the engine to
relearn the idle and fuel trim strategy, the
idle quality of your vehicle may be
adversely affected until the engine
computer eventually relearns the idle trim
and fuel trim strategy.
Note: Always dispose of automotive
batteries in a responsible manner. Follow
your local authorized standards for
disposal. Call your local authorized
recycling center to find out more about
recycling automotive batteries. Note:
It is recommended that the negative
battery cable terminal be disconnected
from the battery if you plan to store your
vehicle for an extended period of time.
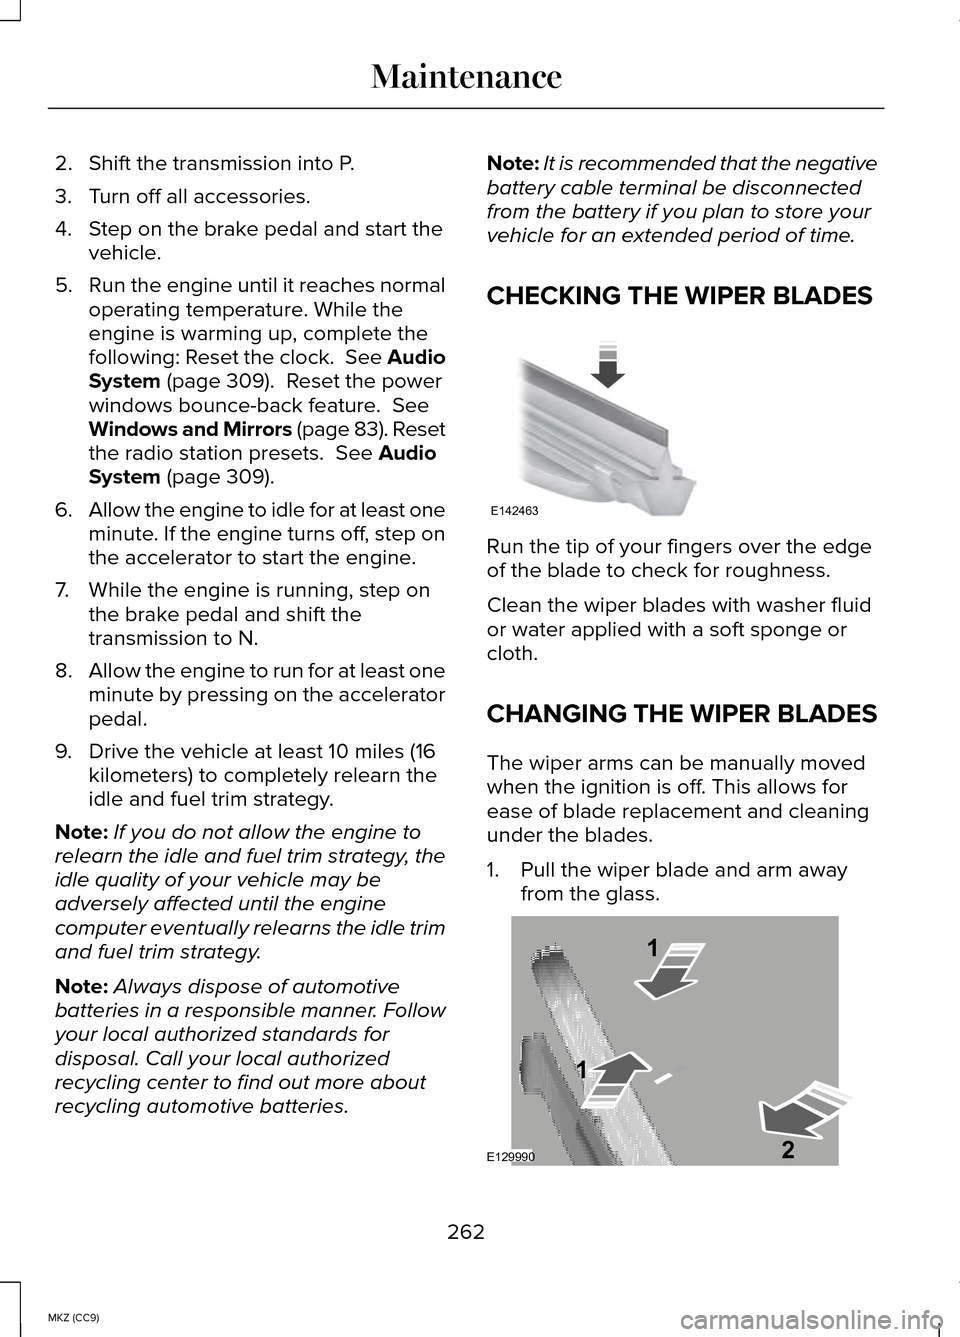
CHECKING THE WIPER BLADES Run the tip of your fingers over the edge
of the blade to check for roughness.
Clean the wiper blades with washer fluid
or water applied with a soft sponge or
cloth.
CHANGING THE WIPER BLADES
The wiper arms can be manually moved
when the ignition is off. This allows for
ease of blade replacement and cleaning
under the blades.
1. Pull the wiper blade and arm away
from the glass. 262
MKZ (CC9) MaintenanceE142463 E129990
1
1 2
Page 415 of 445
Protecting Your Investment
Maintenance is an investment that pays
dividends in the form of improved
reliability, durability and resale value. To
maintain the proper performance of your
vehicle and its emission control systems,
make sure you have scheduled
maintenance performed at the designated
intervals.
Your vehicle is equipped with an
information display, which indicates the
proper oil change interval. This interval
may be up to one year or 10000 miles
(16000 kilometers).
When ENGINE OIL CHANGE DUE or OIL
CHANGE REQUIRED appears in the
information display, it is time for an oil
change. Make sure you perform the oil
change within two weeks or 500 miles
(800 kilometers) of the
ENGINE OIL
CHANGE DUE or OIL CHANGE
REQUIRED message appearing. Make
sure you reset the oil monitoring system
after each oil change.
See Engine Oil
Check (page 254).
If your information display resets
prematurely, becomes inoperative or the
vehicle battery becomes discharged or
disconnected, the oil monitoring system
resets to 100% oil life. You should change
your engine oil one year or 10000 miles
(16000 kilometers) from the previous oil
change. Never exceed one year or 10000
miles (16000 kilometers) between oil
change intervals. Your vehicle is very sophisticated and built
with multiple, complex, performance
systems. Every manufacturer develops
these systems using different
specifications and performance features.
That is why it is important to rely upon your
dealership to properly diagnose and repair
your vehicle.
Ford Motor Company has recommended
maintenance intervals for various parts
and component systems based upon
engineering testing. Ford Motor Company
relies upon this testing to determine the
most appropriate mileage for replacement
of oils and fluids to protect your vehicle at
the lowest overall cost to you and
recommends against maintenance
schedules that deviate from the scheduled
maintenance information.
We strongly recommend the use of only
genuine Ford, Motorcraft or
Ford-authorized re-manufactured
replacement parts engineered for your
vehicle.
Additives and Chemicals
This owner's manual and the Ford
Workshop Manual list the recommended
additives and chemicals for your vehicle.
We do not recommend using chemicals
or additives not approved by us as part of
your vehicle
’s normal maintenance. Please
consult your warranty information.
413
MKZ (CC9) Scheduled Maintenance
Page 420 of 445
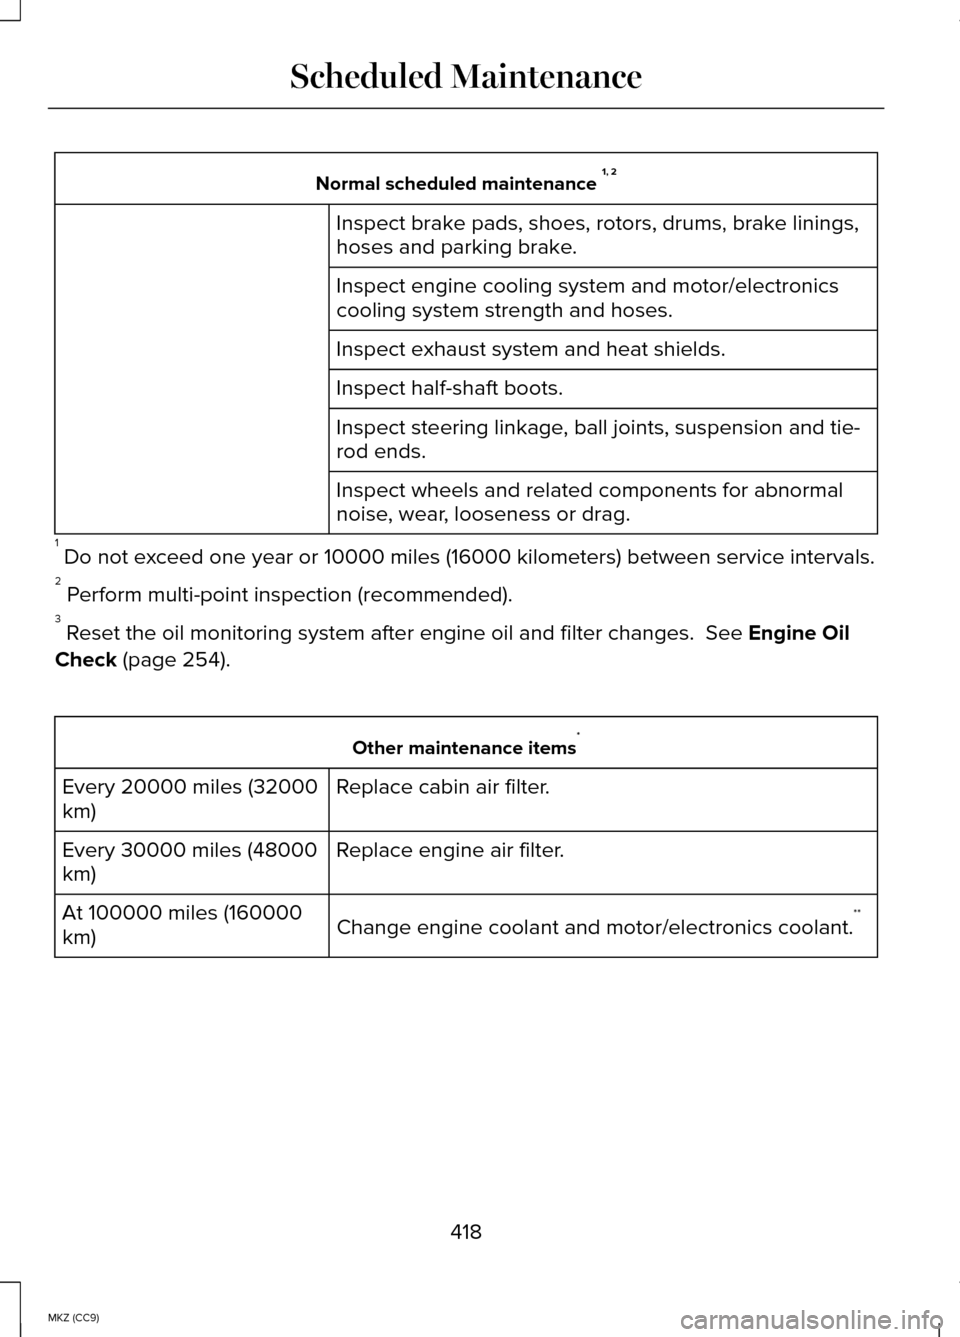
Normal scheduled maintenance
1, 2
Inspect brake pads, shoes, rotors, drums, brake linings,
hoses and parking brake.
Inspect engine cooling system and motor/electronics
cooling system strength and hoses.
Inspect exhaust system and heat shields.
Inspect half-shaft boots.
Inspect steering linkage, ball joints, suspension and tie-
rod ends.
Inspect wheels and related components for abnormal
noise, wear, looseness or drag.
1 Do not exceed one year or 10000 miles (16000 kilometers) between service interv\
als.
2 Perform multi-point inspection (recommended).
3 Reset the oil monitoring system after engine oil and filter changes. See Engine Oil
Check
(page 254). Other maintenance items
*
Replace cabin air filter.
Every 20000 miles (32000
km)
Replace engine air filter.
Every 30000 miles (48000
km)
Change engine coolant and motor/electronics coolant. **
At 100000 miles (160000
km)
418
MKZ (CC9) Scheduled Maintenance
Page 439 of 445
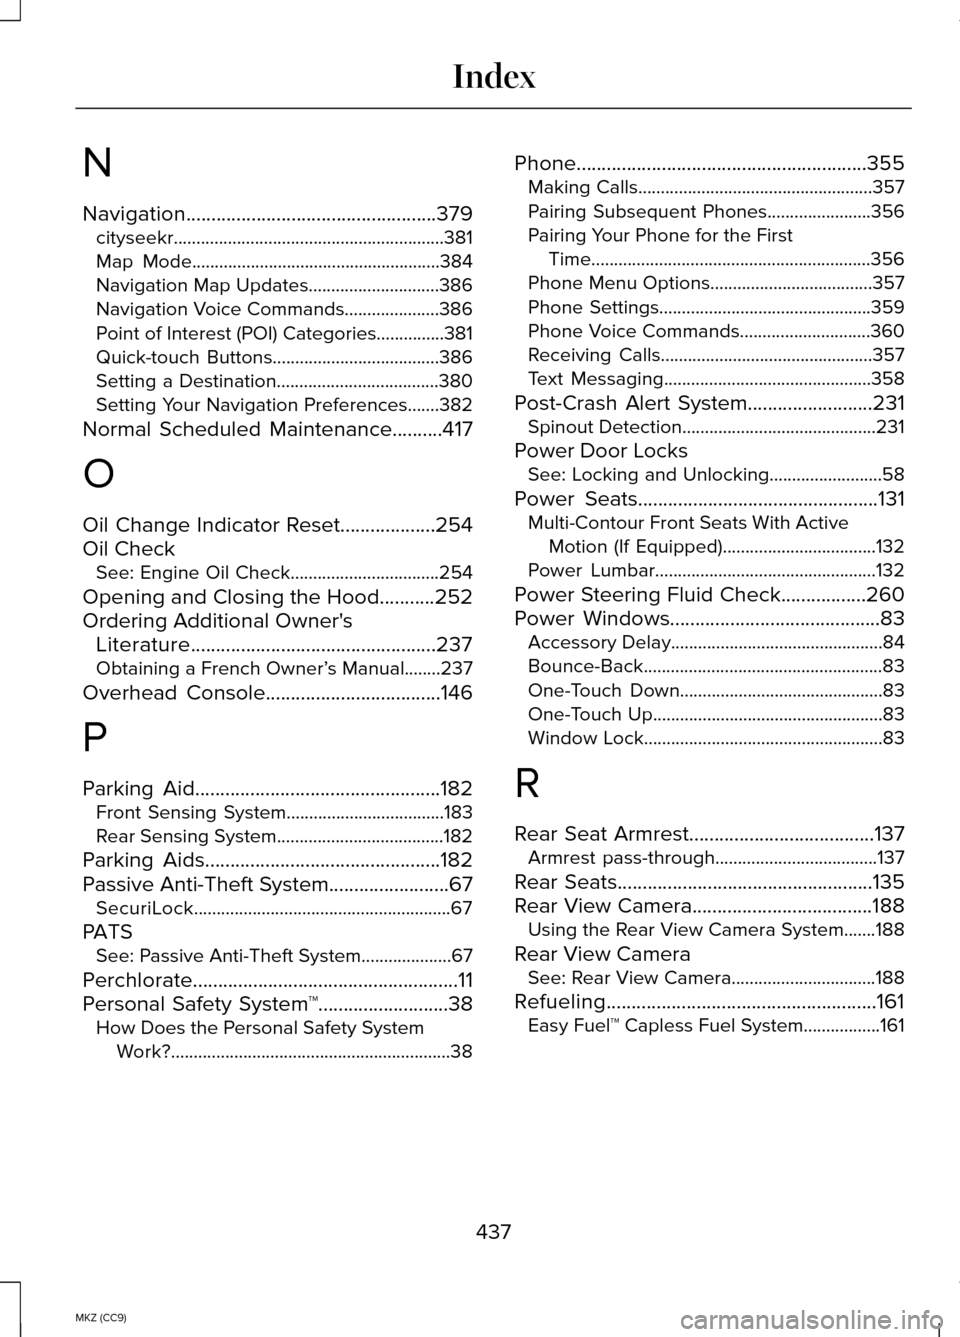
N
Navigation..................................................379
cityseekr............................................................381
Map Mode.......................................................384
Navigation Map Updates.............................386
Navigation Voice Commands.....................386
Point of Interest (POI) Categories...............381
Quick-touch Buttons.....................................386
Setting a Destination....................................380
Setting Your Navigation Preferences.......382
Normal Scheduled Maintenance
..........417
O
Oil Change Indicator Reset
...................254
Oil Check See: Engine Oil Check.................................254
Opening and Closing the Hood...........252
Ordering Additional Owner's Literature.................................................237
Obtaining a French Owner’ s Manual........237
Overhead Console
...................................146
P
Parking Aid
.................................................182
Front Sensing System...................................183
Rear Sensing System.....................................182
Parking Aids
...............................................182
Passive Anti-Theft System........................67
SecuriLock.........................................................67
PATS See: Passive Anti-Theft System....................
67
Perchlorate
.....................................................11
Personal Safety System ™..........................38
How Does the Personal Safety System
Work?..............................................................38 Phone..........................................................355
Making Calls....................................................357
Pairing Subsequent Phones.......................356
Pairing Your Phone for the First
Time..............................................................356
Phone Menu Options....................................357
Phone Settings...............................................359
Phone Voice Commands.............................360
Receiving Calls...............................................357
Text Messaging..............................................358
Post-Crash Alert System.........................231 Spinout Detection...........................................231
Power Door Locks See: Locking and Unlocking.........................58
Power Seats
................................................131
Multi-Contour Front Seats With Active
Motion (If Equipped)..................................132
Power Lumbar.................................................132
Power Steering Fluid Check.................260
Power Windows..........................................83 Accessory Delay...............................................84
Bounce-Back.....................................................83
One-Touch Down.............................................83
One-Touch Up...................................................83
Window Lock.....................................................83
R
Rear Seat Armrest
.....................................137
Armrest pass-through....................................137
Rear Seats
...................................................135
Rear View Camera....................................188 Using the Rear View Camera System.......
188
Rear View Camera See: Rear View Camera................................188
Refueling......................................................161 Easy Fuel™ Capless Fuel System.................161
437
MKZ (CC9) Index