instrument panel LINCOLN MKZ HYBRID 2014 Owners Manual
[x] Cancel search | Manufacturer: LINCOLN, Model Year: 2014, Model line: MKZ HYBRID, Model: LINCOLN MKZ HYBRID 2014Pages: 445, PDF Size: 3.8 MB
Page 6 of 445
Towing the Vehicle on Four
Wheels...................................................222
Driving Hints
Breaking-In................................................223
Economical Driving
..................................223
Driving Through Water...........................223
Floor Mats
..................................................224
Roadside Emergencies
Roadside Assistance...............................225
Hazard Warning Flashers
......................226
Fuel Shutoff...............................................226
Jump-Starting the Vehicle.....................226
Collision, Damage or Fire Event..........229
Post-Crash Alert System.........................231
Customer Assistance
Getting the Services You Need
............232
In California (U.S. Only)
...........................233
The Better Business Bureau (BBB) Auto Line Program (U.S. Only)....................234
Utilizing the Mediation/Arbitration Program (Canada Only)......................235
Getting Assistance Outside the U.S. and Canada...................................................235
Ordering Additional Owner's Literature................................................237
Reporting Safety Defects (U.S. Only)........................................................237
Reporting Safety Defects (Canada Only)........................................................238
Fuses
Fuse Specification Chart........................239
Changing a Fuse......................................249 Maintenance
General Information.................................251
Opening and Closing the Hood...........252
Under Hood Overview - 2.0L
Hybrid.....................................................252
Engine Oil Dipstick
..................................254
Engine Oil Check
.....................................254
Oil Change Indicator Reset
...................254
Engine Coolant Check...........................255
Automatic Transmission Fluid Check.....................................................259
Brake Fluid Check...................................260
Power Steering Fluid Check.................260
Washer Fluid Check
................................260
Fuel Filter
...................................................260
Changing the 12V Battery.....................260
Checking the Wiper Blades..................262
Changing the Wiper Blades..................262
Adjusting the Headlamps......................263
Changing a Bulb
......................................264
Bulb Specification Chart........................265
Changing the Engine Air Filter.............267
Vehicle Care
General Information
................................268
Cleaning Products...................................268
Cleaning the Exterior..............................268
Waxing........................................................269
Cleaning the Engine...............................269
Cleaning the Windows and Wiper Blades.....................................................270
Cleaning the Interior...............................270
Cleaning the Instrument Panel and Instrument Cluster Lens......................271
Cleaning Leather Seats
..........................272
4
MKZ (CC9) Table of Contents
Page 44 of 445
The front passenger sensing system uses
a passenger airbag status indicator that
will illuminate indicating that the front
passenger frontal airbag is either ON
(enabled) or OFF (disabled).
The indicator lamp is located in the center
stack of the instrument panel.
Note:
The passenger airbag status
indicator OFF and ON indicator lamps will
illuminate for a short period of time when
the ignition is first turned on to confirm it
is functional.
The front passenger sensing system is
designed to disable (will not inflate) the
front passenger's frontal airbag when the
front passenger seat is unoccupied, or a
rear facing infant seat, a forward-facing
child restraint, or a booster seat is
detected. Even with this technology,
parents are strongly encouraged to always
properly restrain children in the rear seat.
The sensor also turns off the passenger
front airbag and seat-mounted side airbag
when the passenger seat is empty.
• When the front passenger sensing
system disables (will not inflate) the
front passenger frontal airbag, the
passenger airbag status indicator will
illuminate the OFF lamp and stay lit to
remind you that the front passenger
frontal airbag is disabled.
• If the child restraint has been installed
and the passenger airbag status
indicator illuminates the ON lamp, then
turn the vehicle off, remove the child
restraint from the vehicle and reinstall
the restraint following the child
restraint manufacturer's instructions. The front passenger sensing system is
designed to enable (may inflate) the front
passenger's frontal airbag anytime the
system senses that a person of adult size
is sitting properly in the front passenger
seat.
•
When the front passenger sensing
system enables the front passenger
frontal airbag (may inflate), the
passenger airbag status indicator will
illuminate the ON lamp and remain
illuminated.
If a person of adult size is sitting in the
front passenger’ s seat, but the airbag off
indicator lamp is lit, it is possible that the
person isn ’t sitting properly in the seat. If
this happens:
• Turn the vehicle off and ask the person
to place the seat back in the full
upright position.
• Have the person sit upright in the seat,
centered on the seat cushion, with the
person ’s legs comfortably extended.
• Restart the vehicle and have the
person remain in this position for about
two minutes. This will allow the system
to detect that person and enable the
passenger’ s frontal airbag.
• If the indicator OFF lamp remains lit
even after this, the person should be
advised to ride in the rear seat.
42
MKZ (CC9) Supplementary Restraints System
Page 47 of 445
DRIVER KNEE AIRBAG
A driver’
s and passenger’ s knee airbag is
located under or within the instrument
panel. During a crash, the restraints control
module may activate the driver’ s and
passenger’ s knee airbag (individually or
both) based on crash severity and
respective occupant conditions. Under
certain crash and occupant conditions, the
driver’ s and passenger’ s knee airbag may
deploy (individually or both) but the
corresponding front airbag may not
activate. As with front and side airbags, it
is important to be properly seated and
restrained to reduce the risk of death or
serious injury. Make sure the knee airbags are
operating properly. See Crash
Sensors and Airbag Indicator
(page
46).
SIDE CURTAIN AIRBAGS WARNINGS
Do not place objects or mount
equipment on or near the headliner
at the siderail that may come into contact
with a deploying side curtain airbag.
Failure to follow these instructions may
increase the risk of personal injury in the
event of a crash. Do not lean your head on the door.
The side curtain airbag could injure
you as it deploys from the headliner. WARNINGS
Do not attempt to service, repair, or
modify the side curtain airbags, its
fuses, the A, B, or C pillar trim, or the
headliner on a vehicle containing side
curtain airbags. Contact your authorized
dealer as soon as possible. All occupants of the vehicle
including the driver should always
wear their safety belts even when an
airbag supplemental restraint system and
side curtain airbag is provided. To reduce risk of injury, do not
obstruct or place objects in the
deployment path of the side curtain airbag. If the side curtain airbags have
deployed, the side curtain airbags
will not function again. The side curtain
airbags (including the A, B and C pillar trim
and headliner) must be inspected and
serviced by an authorized dealer. If the
side curtain airbag is not replaced, the
unrepaired area will increase the risk of
injury in a crash. The side curtain airbags will deploy during
significant side crashes. The side curtain
airbags are mounted to the roof side-rail
sheet metal, behind the headliner, above
each row of seats. In certain sideways
crashes, the side curtain airbag on the
impacted side of the vehicle will be
activated. The side curtain airbags are
designed to inflate between the side
window area and occupants to further
enhance protection provided in side
impact crashes.
The system consists of the following:
45
MKZ (CC9) Supplementary Restraints System
Page 48 of 445
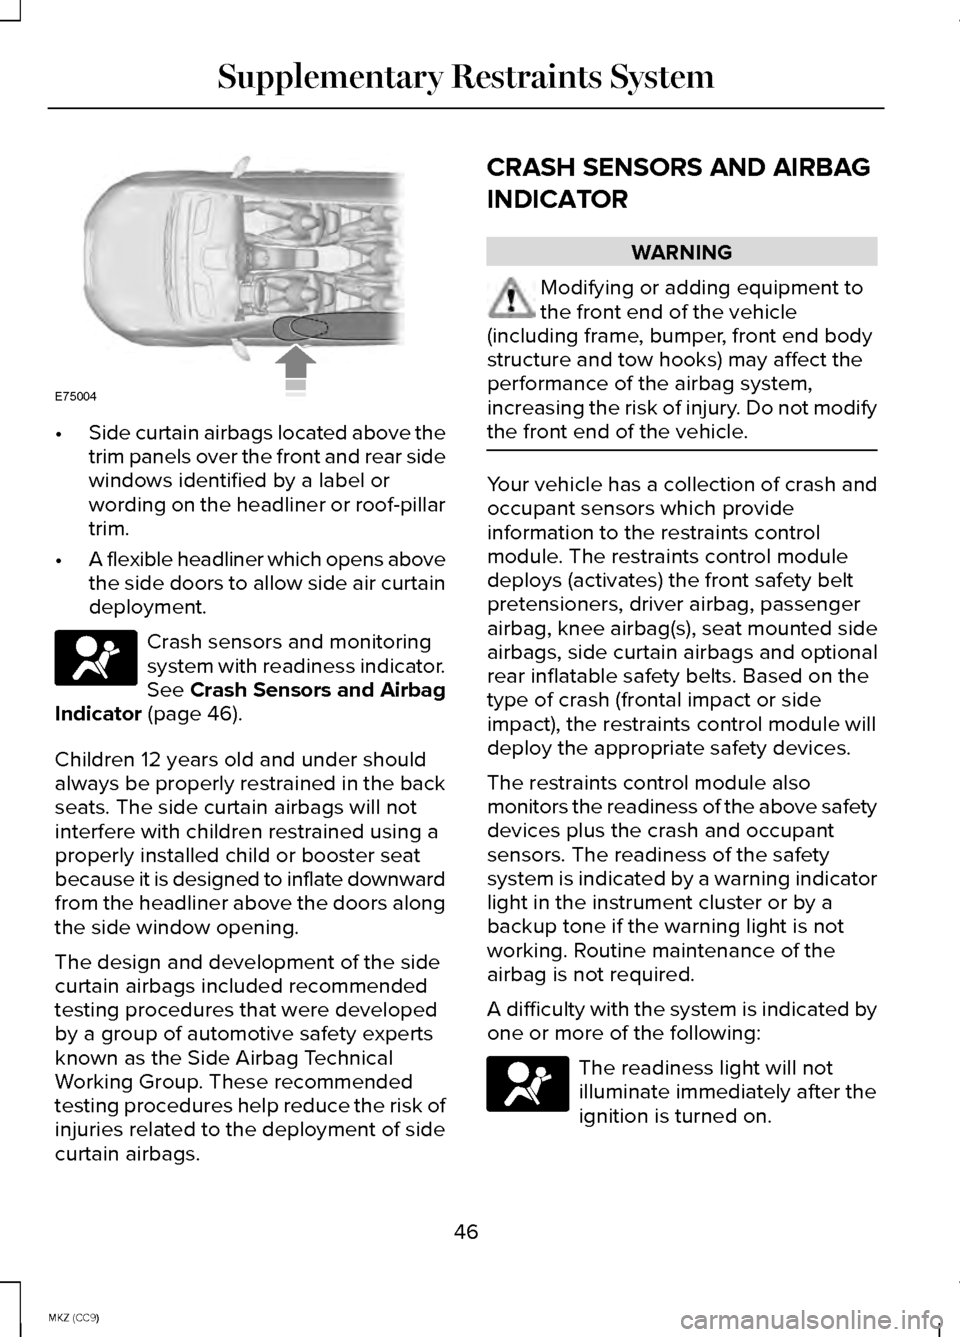
•
Side curtain airbags located above the
trim panels over the front and rear side
windows identified by a label or
wording on the headliner or roof-pillar
trim.
• A flexible headliner which opens above
the side doors to allow side air curtain
deployment. Crash sensors and monitoring
system with readiness indicator.
See Crash Sensors and Airbag
Indicator (page 46).
Children 12 years old and under should
always be properly restrained in the back
seats. The side curtain airbags will not
interfere with children restrained using a
properly installed child or booster seat
because it is designed to inflate downward
from the headliner above the doors along
the side window opening.
The design and development of the side
curtain airbags included recommended
testing procedures that were developed
by a group of automotive safety experts
known as the Side Airbag Technical
Working Group. These recommended
testing procedures help reduce the risk of
injuries related to the deployment of side
curtain airbags. CRASH SENSORS AND AIRBAG
INDICATOR WARNING
Modifying or adding equipment to
the front end of the vehicle
(including frame, bumper, front end body
structure and tow hooks) may affect the
performance of the airbag system,
increasing the risk of injury. Do not modify
the front end of the vehicle. Your vehicle has a collection of crash and
occupant sensors which provide
information to the restraints control
module. The restraints control module
deploys (activates) the front safety belt
pretensioners, driver airbag, passenger
airbag, knee airbag(s), seat mounted side
airbags, side curtain airbags and optional
rear inflatable safety belts. Based on the
type of crash (frontal impact or side
impact), the restraints control module will
deploy the appropriate safety devices.
The restraints control module also
monitors the readiness of the above safety
devices plus the crash and occupant
sensors. The readiness of the safety
system is indicated by a warning indicator
light in the instrument cluster or by a
backup tone if the warning light is not
working. Routine maintenance of the
airbag is not required.
A difficulty with the system is indicated by
one or more of the following:
The readiness light will not
illuminate immediately after the
ignition is turned on.
46
MKZ (CC9) Supplementary Restraints SystemE75004
Page 53 of 445
Remote Control Feedback
An LED on the remote control provides
status feedback of remote start or stop
commands.
Status
LED
Remote start orextension
successful
Solid green
Remote stop
successful; engine off
Solid red
Remote start orstop failed
Blinking red
Waiting for statusupdate
Blinking green
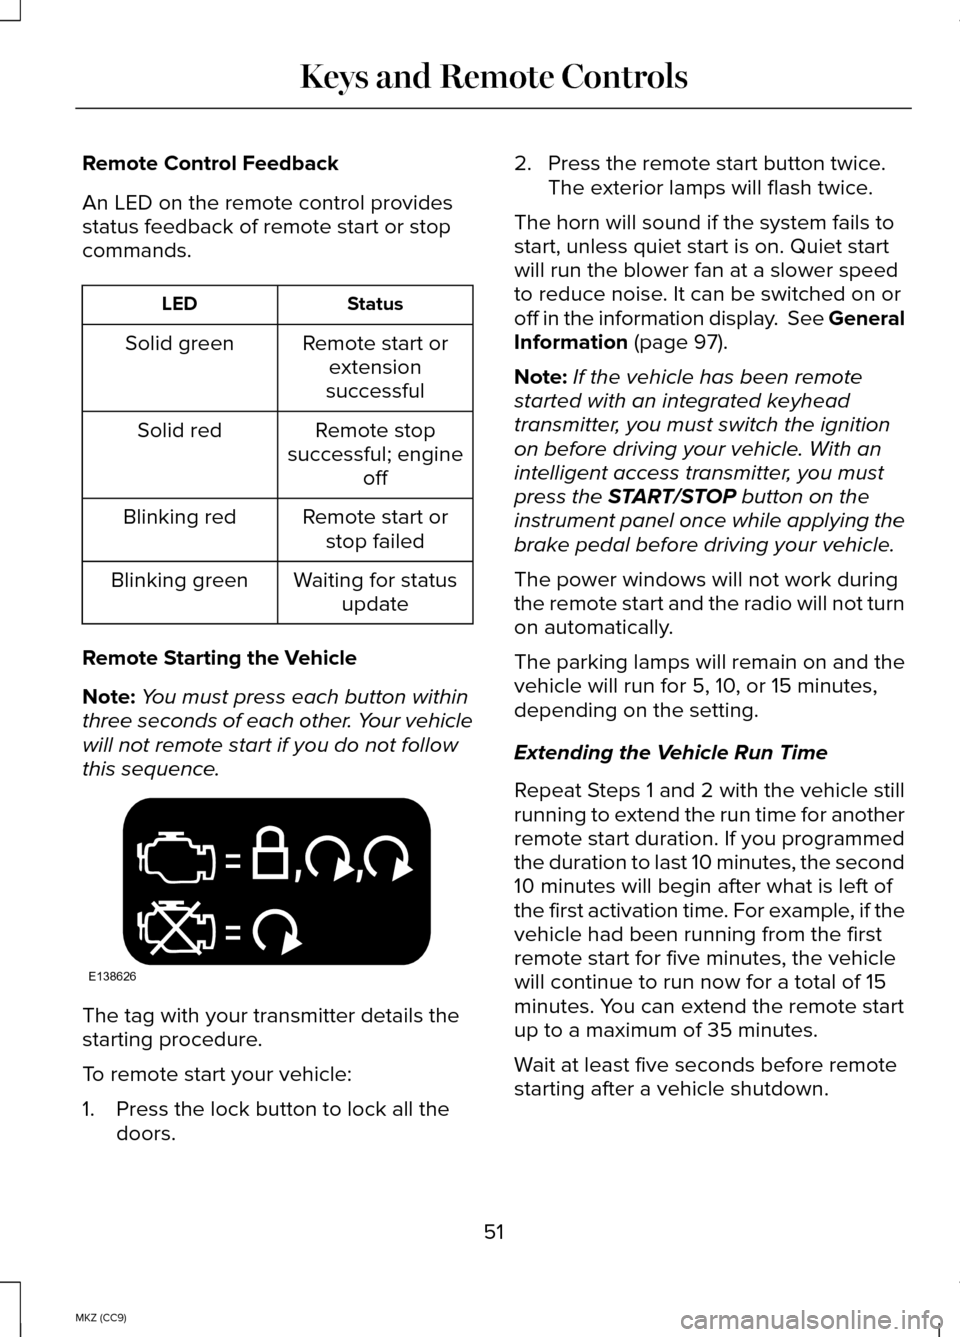
Remote Starting the Vehicle
Note: You must press each button within
three seconds of each other. Your vehicle
will not remote start if you do not follow
this sequence. The tag with your transmitter details the
starting procedure.
To remote start your vehicle:
1. Press the lock button to lock all the
doors. 2. Press the remote start button twice.
The exterior lamps will flash twice.
The horn will sound if the system fails to
start, unless quiet start is on. Quiet start
will run the blower fan at a slower speed
to reduce noise. It can be switched on or
off in the information display. See General
Information (page 97).
Note: If the vehicle has been remote
started with an integrated keyhead
transmitter, you must switch the ignition
on before driving your vehicle. With an
intelligent access transmitter, you must
press the
START/STOP button on the
instrument panel once while applying the
brake pedal before driving your vehicle.
The power windows will not work during
the remote start and the radio will not turn
on automatically.
The parking lamps will remain on and the
vehicle will run for 5, 10, or 15 minutes,
depending on the setting.
Extending the Vehicle Run Time
Repeat Steps 1 and 2 with the vehicle still
running to extend the run time for another
remote start duration. If you programmed
the duration to last 10 minutes, the second
10 minutes will begin after what is left of
the first activation time. For example, if the
vehicle had been running from the first
remote start for five minutes, the vehicle
will continue to run now for a total of 15
minutes. You can extend the remote start
up to a maximum of 35 minutes.
Wait at least five seconds before remote
starting after a vehicle shutdown.
51
MKZ (CC9) Keys and Remote ControlsE138626
Page 63 of 445
Enabling or Disabling
Note:
You can enable or disable the
autolock and autounlock features
independently of each other.
You can enable or disable these features
in the information display or your
authorized dealer can do it for you. See
General Information (page 97).
Illuminated Entry
The interior lamps and select exterior
lamps will illuminate when you unlock the
doors with the remote entry system.
The illuminated entry system will turn off
the lights if:
• the ignition is on,
• you press the remote control lock
button, or
• after 25 seconds of illumination.
The lights will not turn off if:
• you turn them on with the lamp control,
or
• any door is open.
Illuminated Exit
The interior lamps and select exterior
lamps will illuminate when all doors are
closed and you switch the ignition off.
The lamps will turn off if all the doors
remain closed and:
• 25 seconds elapse
• you press the
START/STOP button. Battery Saver
If you leave the courtesy lamps, dome
lamps or headlamps on, the battery saver
will shut them off 10 minutes after you
switch the ignition off.
Accessory Mode Battery Saver for
Intelligent Access Keys
If you leave your vehicle in the run ignition
state, it will shut off once it detects a
certain amount of battery drain or after 45
minutes.
Luggage Compartment
From Inside Your Vehicle
Press the button on the
instrument panel to unlatch the
trunk.
With the Remote Control Press twice within three seconds
to unlatch the trunk.
From Outside Your Vehicle 61
MKZ (CC9) LocksE138633 E138630 E164806
Page 64 of 445
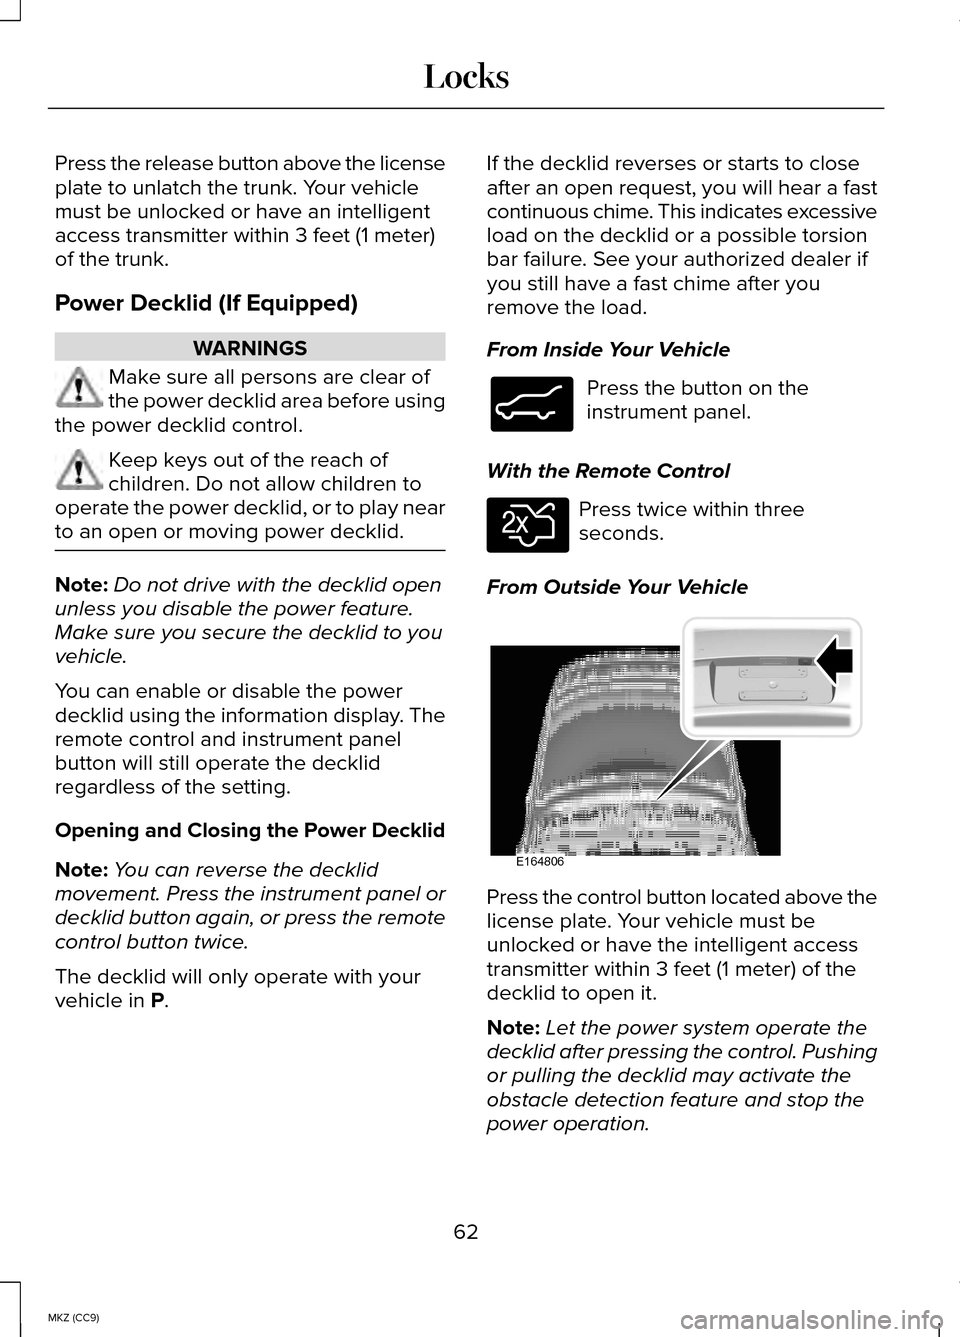
Press the release button above the license
plate to unlatch the trunk. Your vehicle
must be unlocked or have an intelligent
access transmitter within 3 feet (1 meter)
of the trunk.
Power Decklid (If Equipped)
WARNINGS
Make sure all persons are clear of
the power decklid area before using
the power decklid control. Keep keys out of the reach of
children. Do not allow children to
operate the power decklid, or to play near
to an open or moving power decklid. Note:
Do not drive with the decklid open
unless you disable the power feature.
Make sure you secure the decklid to you
vehicle.
You can enable or disable the power
decklid using the information display. The
remote control and instrument panel
button will still operate the decklid
regardless of the setting.
Opening and Closing the Power Decklid
Note: You can reverse the decklid
movement. Press the instrument panel or
decklid button again, or press the remote
control button twice.
The decklid will only operate with your
vehicle in P. If the decklid reverses or starts to close
after an open request, you will hear a fast
continuous chime. This indicates excessive
load on the decklid or a possible torsion
bar failure. See your authorized dealer if
you still have a fast chime after you
remove the load.
From Inside Your Vehicle Press the button on the
instrument panel.
With the Remote Control Press twice within three
seconds.
From Outside Your Vehicle Press the control button located above the
license plate. Your vehicle must be
unlocked or have the intelligent access
transmitter within 3 feet (1 meter) of the
decklid to open it.
Note:
Let the power system operate the
decklid after pressing the control. Pushing
or pulling the decklid may activate the
obstacle detection feature and stop the
power operation.
62
MKZ (CC9) LocksE138633 E138630 E164806
Page 65 of 445
With the Decklid Close Button
Press the button inside the
decklid on the left side.
Obstacle Detection
The decklid will reverse to full open if it
detects an obstacle while closing. Three
chimes will sound as the decklid begins
to reopen. Remove the obstacle to close
the decklid.
Note: Before driving off, check the
instrument cluster for a trunk ajar or door
ajar message or warning indicator. Failure
to do this could result in unintentionally
leaving the decklid open while driving.
The decklid will stop and three chimes will
sound if it detects an obstacle while
opening. Remove the obstacle to operate
the decklid.
Resetting the Power Decklid
The decklid may not operate properly and
you may need to reset it if:
• the battery is dead or has low voltage
• you disconnect the battery
• you manually close the decklid and
leave it unlatched.
To reset the power decklid:
1. Disconnect the battery for 20 seconds
then reconnect the battery.
2. Manually close and fully latch the decklid.
3. Power open the decklid using the remote control or instrument panel
button. KEYLESS ENTRY
SECURICODE™ KEYLESS ENTRY
KEYPAD
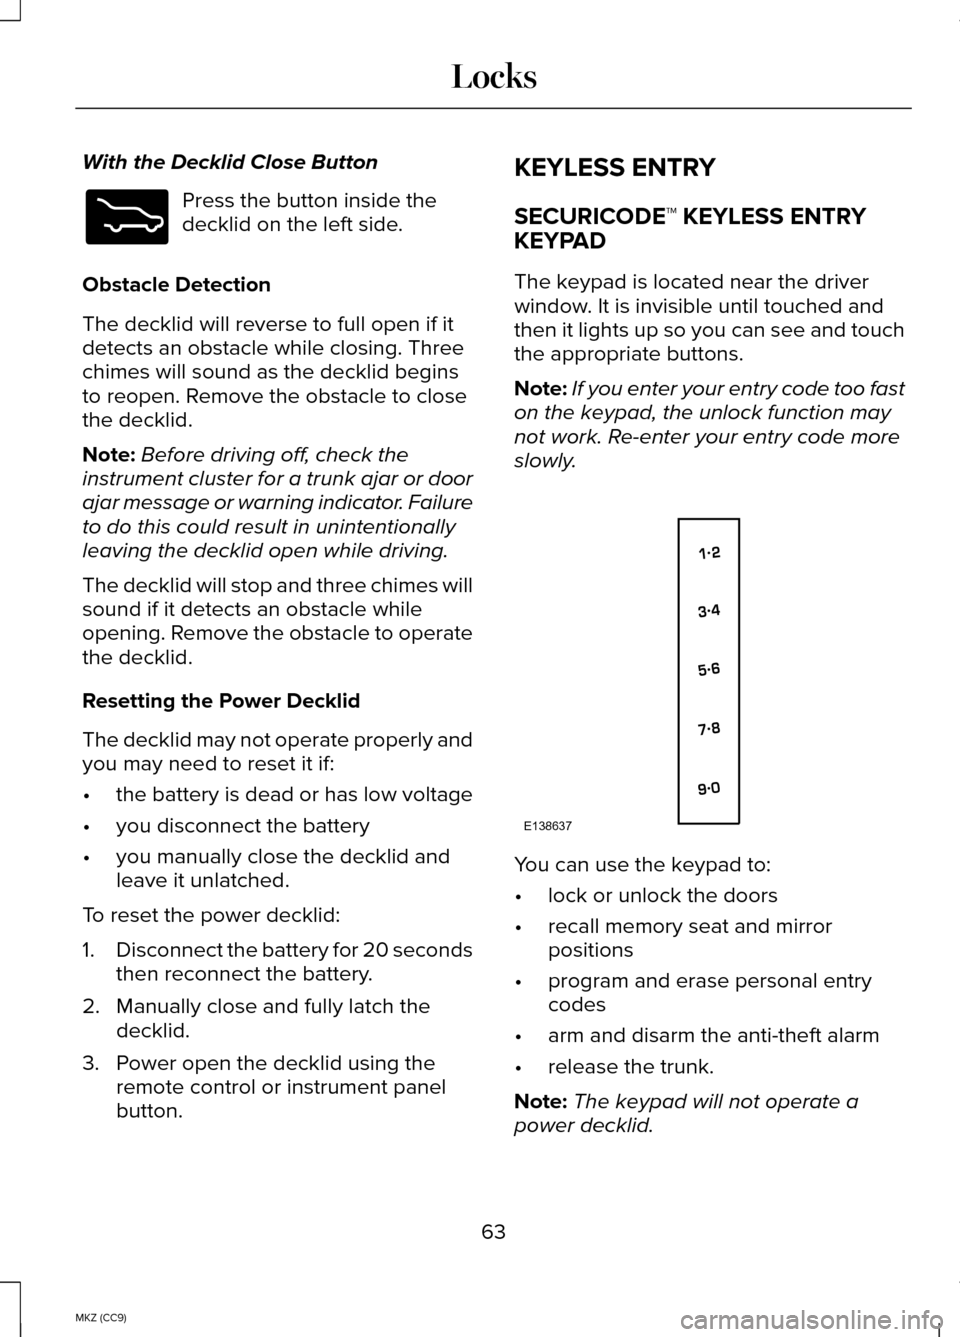
The keypad is located near the driver
window. It is invisible until touched and
then it lights up so you can see and touch
the appropriate buttons.
Note:
If you enter your entry code too fast
on the keypad, the unlock function may
not work. Re-enter your entry code more
slowly. You can use the keypad to:
•
lock or unlock the doors
• recall memory seat and mirror
positions
• program and erase personal entry
codes
• arm and disarm the anti-theft alarm
• release the trunk.
Note: The keypad will not operate a
power decklid.
63
MKZ (CC9) LocksE173217 E138637
Page 79 of 445
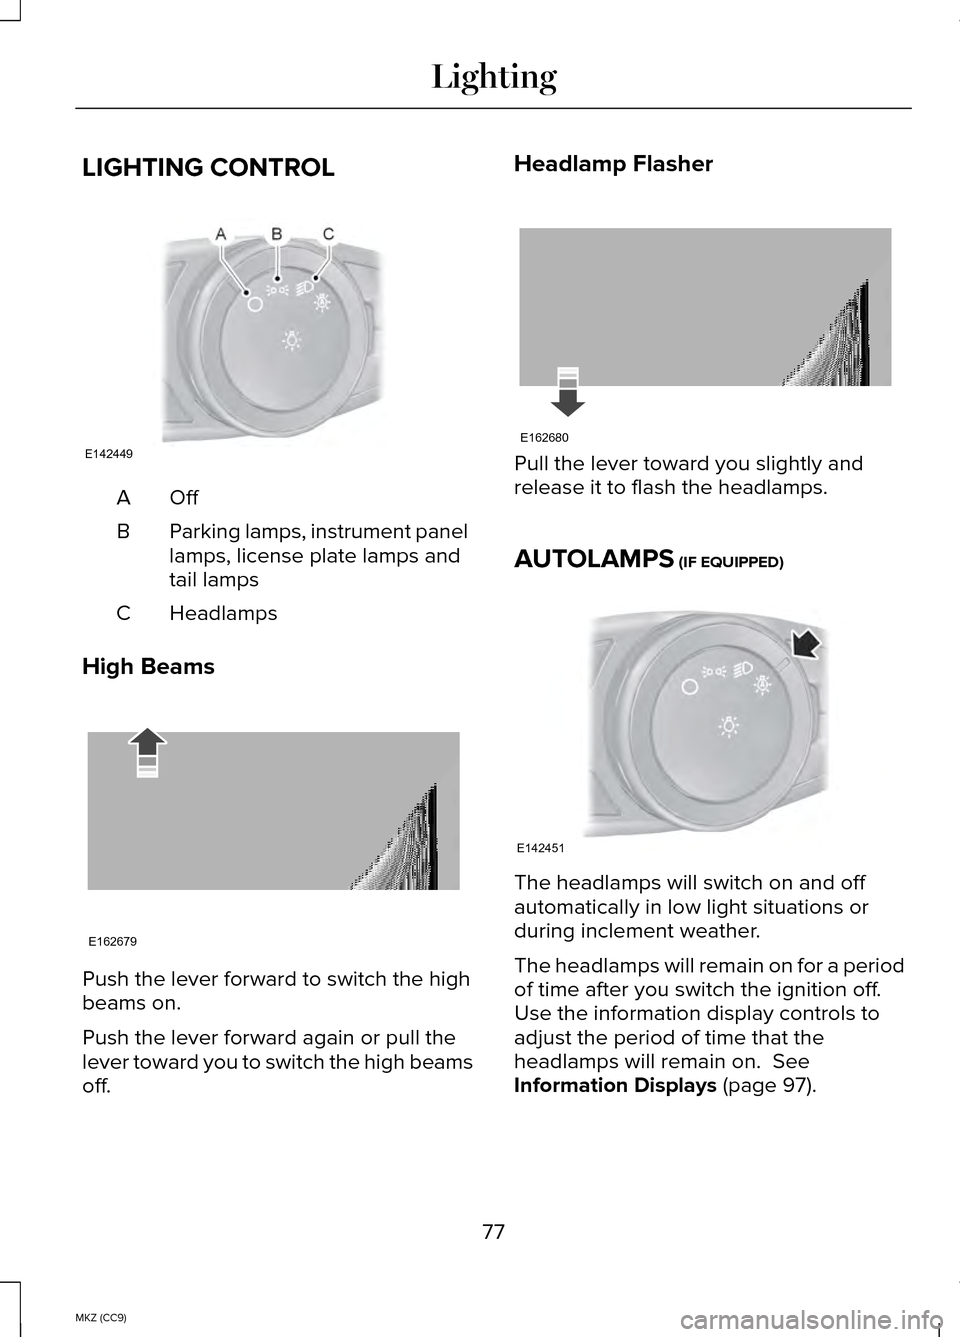
LIGHTING CONTROL
OffA
Parking lamps, instrument panel
lamps, license plate lamps and
tail lamps
B
Headlamps
C
High Beams Push the lever forward to switch the high
beams on.
Push the lever forward again or pull the
lever toward you to switch the high beams
off. Headlamp Flasher
Pull the lever toward you slightly and
release it to flash the headlamps.
AUTOLAMPS (IF EQUIPPED)
The headlamps will switch on and off
automatically in low light situations or
during inclement weather.
The headlamps will remain on for a period
of time after you switch the ignition off.
Use the information display controls to
adjust the period of time that the
headlamps will remain on.
See
Information Displays (page 97).
77
MKZ (CC9) LightingE142449 E162679 E162680 E142451
Page 127 of 445
MAX A/C: Press the button to switch on. Recirculated air flows through the
instrument panel air vents, air conditioning automatically adjusts to th\
e highest
speed and the temperature dial returns to the full cool position. This r\
e-cooling
of the interior is more economical and efficient.
G
AUTO:
Press the button to switch on. Recirculated air flows through the
instrument panel air vents, air conditioning automatically adjusts to th\
e highest
speed and the temperature dial returns to the full cool position. This r\
e-cooling
of the interior is more economical and efficient.
H
Heated rear window:
Turns the heated rear window on and off. See Heated
Windows and Mirrors (page 126).
I
Defrost:
Distributes air through the windshield defroster vents and de-mister
vents. You can also use this setting to defog and clear the windshield of a thin\
covering of ice.
J
HINTS ON CONTROLLING THE
INTERIOR CLIMATE
General Hints
Note: Prolonged use of recirculated air
may cause the windows to fog up.
Note: You may feel a small amount of air
from the footwell air vents regardless of
the air distribution setting.
Note: To reduce humidity build-up inside
your vehicle, do not drive with the system
switched off or with recirculated air always
switched on.
Note: Do not place objects under the front
seats as this may interfere with the airflow
to the rear seats.
Note: Remove any snow, ice or leaves
from the air intake area at the base of the
windshield. Automatic Climate Control
Note:
Do not adjust the settings when your
vehicle interior is extremely hot or cold.
The system automatically adjusts to the
previously stored settings. For the system
to function efficiently, the instrument panel
and side air vents should be fully open.
Note: At low ambient temperatures with
AUTO selected, the system directs air
toward the windshield and side windows
for as long as the engine remains cold.
Note: When you switch the system off,
outside air cannot enter your vehicle.
Note: When the system is in AUTO mode,
and the interior and exterior temperatures
are high, the system automatically selects
recirculated air to maximize cooling of the
interior. When the system reaches the
selected air temperature, it automatically
switches to outside air.
125
MKZ (CC9) Climate Control