stop start LINCOLN NAUTILUS 2020 Owners Manual
[x] Cancel search | Manufacturer: LINCOLN, Model Year: 2020, Model line: NAUTILUS, Model: LINCOLN NAUTILUS 2020Pages: 596, PDF Size: 5.88 MB
Page 6 of 596
Instrument Cluster
Gauges
...........................................................109
Warning Lamps and Indicators ...................
111
Audible Warnings and Indicators ..............
115
Information Displays
General Information ......................................
116
Information Messages ................................
122
Climate Control
Automatic Climate Control ........................
142
Hints on Controlling the Interior Climate .......................................................................
143
Heated Windshield ......................................
144
Heated Rear Window ..................................
144
Heated Exterior Mirrors ..............................
144
Cabin Air Filter ..............................................
145
Remote Start ..................................................
145
Seats
Sitting in the Correct Position ...................
147
Head Restraints ............................................
148
Power Seats ....................................................
151Memory Function
.........................................
154
Rear Seats ......................................................
158
Heated Seats ................................................
159
Climate Controlled Seats ...........................
160
Garage Door Opener
Universal Garage Door Opener ...............
162
Auxiliary Power Points
Auxiliary Power Points ................................
166
Wireless Accessory Charging ...................
167
Storage Compartments
Glove Compartment ....................................
170
Center Console .............................................
170
Overhead Console ........................................
171
Rear Seat Armrest .........................................
171
Starting and Stopping the Engine
General Information .....................................
172
Keyless Starting ............................................
172
Starting a Gasoline Engine ........................
173Engine Block Heater
...................................
176
Unique Driving Characteristics
Auto-Start-Stop .............................................
178
Fuel and Refueling
Safety Precautions ........................................
181
Fuel Quality ....................................................
182
Fuel Filler Funnel Location ........................
182
Running Out of Fuel ....................................
183
Refueling ........................................................
184
Fuel Consumption ........................................
187
Engine Emission Control
Emission Law .................................................
188
Catalytic Converter ......................................
189
Transmission
Automatic Transmission .............................
192
All-Wheel Drive
Using All-Wheel Drive .................................
199
3
Nautilus (CD9) Canada/United States of America, enUSA, Edition date: 201907, First-Printing Table of Contents
Page 65 of 596
The remote start system does not work if:
•
The ignition is on.
• The alarm system is triggered.
• You switch off the feature in the
information display. See General
Information (page 116).
• The hood is open.
• The transmission is not in park (P).
• The vehicle battery voltage is too low.
• The service engine soon light is on.
Remote Starting Your Vehicle
Note: You must press each button within
three seconds of each other. If you do not
follow this sequence, your vehicle does not
start remotely, the direction indicators do
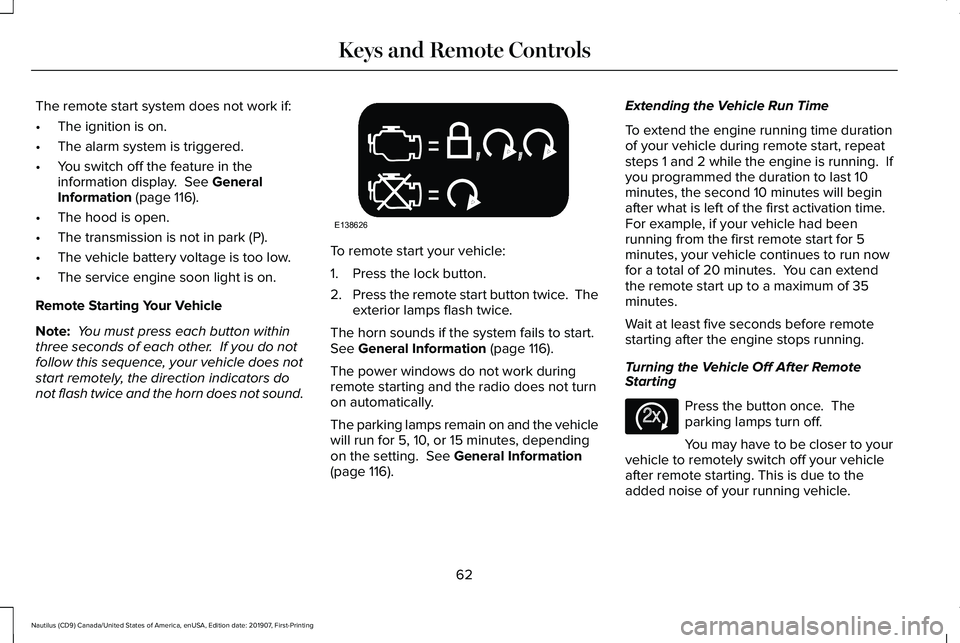
not flash twice and the horn does not sound. To remote start your vehicle:
1. Press the lock button.
2.
Press the remote start button twice. The
exterior lamps flash twice.
The horn sounds if the system fails to start.
See
General Information (page 116).
The power windows do not work during
remote starting and the radio does not turn
on automatically.
The parking lamps remain on and the vehicle
will run for 5, 10, or 15 minutes, depending
on the setting.
See General Information
(page 116). Extending the Vehicle Run Time
To extend the engine running time duration
of your vehicle during remote start, repeat
steps 1 and 2 while the engine is running. If
you programmed the duration to last 10
minutes, the second 10 minutes will begin
after what is left of the first activation time.
For example, if your vehicle had been
running from the first remote start for 5
minutes, your vehicle continues to run now
for a total of 20 minutes. You can extend
the remote start up to a maximum of 35
minutes.
Wait at least five seconds before remote
starting after the engine stops running.
Turning the Vehicle Off After Remote
Starting
Press the button once. The
parking lamps turn off.
You may have to be closer to your
vehicle to remotely switch off your vehicle
after remote starting. This is due to the
added noise of your running vehicle.
62
Nautilus (CD9) Canada/United States of America, enUSA, Edition date: 201907, First-Printing Keys and Remote ControlsE138626 E138625
Page 66 of 596
You can disable or enable the remote start
system through the information display. See
General Information (page 116).
Remote Control Feedback (If Equipped)
An LED on the remote control provides status
feedback of remote start or stop commands. Status
LED
Remote startsuccessful
Solid green
Remote stopsuccessful
Solid red
Request failed or
status not received
Blinking red
Status incomplete
Blinking green Memory Feature
You can program your remote control to
recall memory positions. See Memory
Function (page 154).
Remote Control Information Messages Action
Message
Displays when the remote control battery requires replacing.
Key Battery Low Replace Soon
63
Nautilus (CD9) Canada/United States of America, enUSA, Edition date: 201907, First-Printing Keys and Remote Controls
Page 86 of 596
Make sure that the ignition is switched off
before beginning this procedure. Make sure
that you close all the doors before beginning
and that they remain closed throughout the
procedure. Carry out all steps within 30
seconds of starting the sequence. Stop and
wait for at least one minute before starting
again if you carry out any steps out of
sequence.
Read and understand the entire procedure
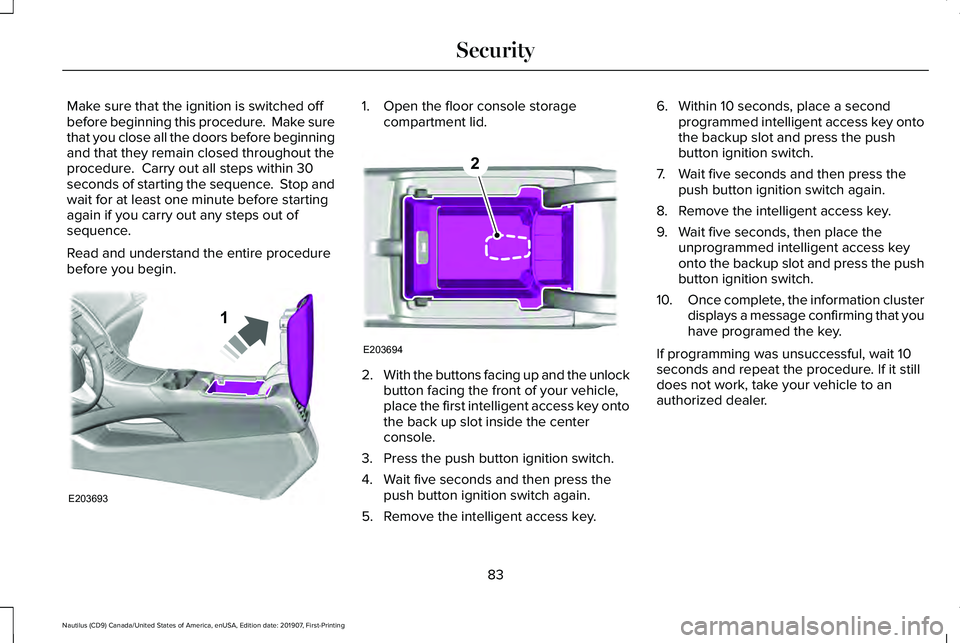
before you begin. 1. Open the floor console storage
compartment lid. 2.
With the buttons facing up and the unlock
button facing the front of your vehicle,
place the first intelligent access key onto
the back up slot inside the center
console.
3. Press the push button ignition switch.
4. Wait five seconds and then press the push button ignition switch again.
5. Remove the intelligent access key. 6. Within 10 seconds, place a second
programmed intelligent access key onto
the backup slot and press the push
button ignition switch.
7. Wait five seconds and then press the push button ignition switch again.
8. Remove the intelligent access key.
9. Wait five seconds, then place the unprogrammed intelligent access key
onto the backup slot and press the push
button ignition switch.
10. Once complete, the information cluster
displays a message confirming that you
have programed the key.
If programming was unsuccessful, wait 10
seconds and repeat the procedure. If it still
does not work, take your vehicle to an
authorized dealer.
83
Nautilus (CD9) Canada/United States of America, enUSA, Edition date: 201907, First-Printing SecurityE203693
1 E203694
2
Page 87 of 596
ANTI-THEFT ALARM
The system will warn you of an unauthorized
entry to your vehicle. It will be triggered if
any door, the luggage compartment or the
hood is opened without using the key,
remote control or keyless entry keypad.
The direction indicators will flash and the
horn will sound if unauthorized entry is
attempted while the alarm is armed.
Take all remote controls to an authorized
dealer if there is any potential alarm problem
with your vehicle.
Arming the Alarm
The alarm is ready to arm when there is not
a key in your vehicle. Electronically lock your
vehicle to arm the alarm.
Disarming the Alarm
Disarm the alarm by any of the following
actions:
•
Unlock the doors or luggage
compartment with the remote control or
keyless entry keypad.
• Switch your vehicle on or start your
vehicle.
• Use a key in the driver door to unlock
your vehicle, then switch your vehicle on
within 12 seconds.
Note: Pressing the panic button on the
remote control will stop the horn and signal
indicators, but will not disarm the system.
84
Nautilus (CD9) Canada/United States of America, enUSA, Edition date: 201907, First-Printing Security
Page 106 of 596
POWER WINDOWS
WARNING: Do not leave children
unattended in your vehicle and do not let
them play with the power windows. Failure
to follow this instruction could result in
personal injury. WARNING: When closing the power
windows, verify they are free of obstruction
and make sure that children and pets are
not in the proximity of the window
openings. Note:
You may hear a pulsing noise when
just one of the windows is open. Lower the
opposite window slightly to reduce this
noise.
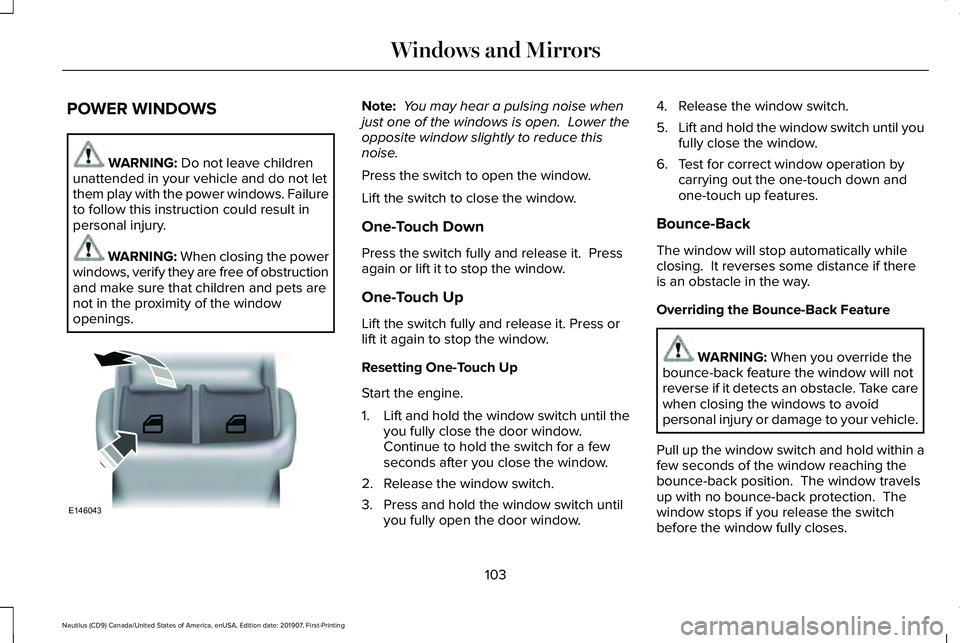
Press the switch to open the window.
Lift the switch to close the window.
One-Touch Down
Press the switch fully and release it. Press
again or lift it to stop the window.
One-Touch Up
Lift the switch fully and release it. Press or
lift it again to stop the window.
Resetting One-Touch Up
Start the engine.
1. Lift and hold the window switch until the
you fully close the door window.
Continue to hold the switch for a few
seconds after you close the window.
2. Release the window switch.
3. Press and hold the window switch until you fully open the door window. 4. Release the window switch.
5.
Lift and hold the window switch until you
fully close the window.
6. Test for correct window operation by carrying out the one-touch down and
one-touch up features.
Bounce-Back
The window will stop automatically while
closing. It reverses some distance if there
is an obstacle in the way.
Overriding the Bounce-Back Feature WARNING:
When you override the
bounce-back feature the window will not
reverse if it detects an obstacle. Take care
when closing the windows to avoid
personal injury or damage to your vehicle.
Pull up the window switch and hold within a
few seconds of the window reaching the
bounce-back position. The window travels
up with no bounce-back protection. The
window stops if you release the switch
before the window fully closes.
103
Nautilus (CD9) Canada/United States of America, enUSA, Edition date: 201907, First-Printing Windows and MirrorsE146043
Page 107 of 596
Window Lock
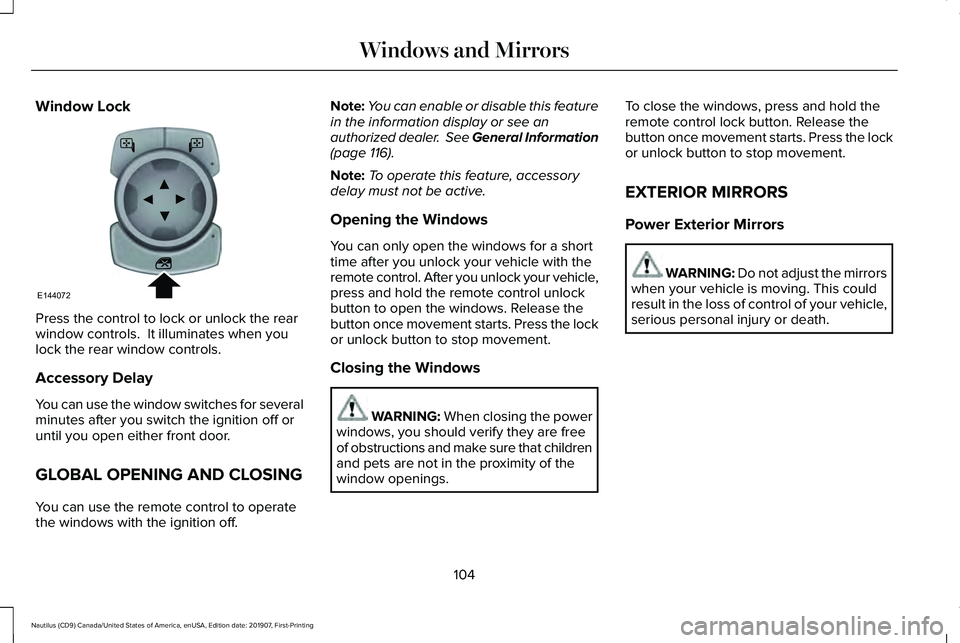
Press the control to lock or unlock the rear
window controls. It illuminates when you
lock the rear window controls.
Accessory Delay
You can use the window switches for several
minutes after you switch the ignition off or
until you open either front door.
GLOBAL OPENING AND CLOSING
You can use the remote control to operate
the windows with the ignition off. Note:
You can enable or disable this feature
in the information display or see an
authorized dealer. See General Information
(page 116).
Note: To operate this feature, accessory
delay must not be active.
Opening the Windows
You can only open the windows for a short
time after you unlock your vehicle with the
remote control. After you unlock your vehicle,
press and hold the remote control unlock
button to open the windows. Release the
button once movement starts. Press the lock
or unlock button to stop movement.
Closing the Windows WARNING: When closing the power
windows, you should verify they are free
of obstructions and make sure that children
and pets are not in the proximity of the
window openings. To close the windows, press and hold the
remote control lock button. Release the
button once movement starts. Press the lock
or unlock button to stop movement.
EXTERIOR MIRRORS
Power Exterior Mirrors
WARNING: Do not adjust the mirrors
when your vehicle is moving. This could
result in the loss of control of your vehicle,
serious personal injury or death.
104
Nautilus (CD9) Canada/United States of America, enUSA, Edition date: 201907, First-Printing Windows and MirrorsE144072
Page 114 of 596
Indicates engine coolant temperature. At
normal operating temperature, the level
indicator will be in the normal range. If the
engine coolant temperature exceeds the
normal range, stop your vehicle as soon as
safely possible, switch off the engine and let
the engine cool.
WARNING LAMPS AND
INDICATORS
The following warning lamps and indicators
alert you to a vehicle condition that may
become serious. Some lamps illuminate
when you start your vehicle to make sure
they work. If any lamps remain on after
starting your vehicle, refer to the respective
system warning lamp for further information.
Note:
Some warning indicators appear in
the information display and operate the
same as a warning lamp but do not
illuminate when you start your vehicle. Adaptive Cruise Control Indicator (If
Equipped) It illuminates when you switch the
system on.
It illuminates white when the
system is in standby mode. It illuminates
green when you set the adaptive cruise
speed.
See
Using Adaptive Cruise Control (page
235).
Adaptive Steering
(If Equipped) The adaptive steering system
indicator illuminates if the system
detects a fault during the
continuous diagnostic checks.
Adaptive Steering Initialization (yellow,
flashing): The adaptive steering system has
detected a difference between steering
wheel angle and the desired road wheel
angle. The steering wheel adjusts itself to
correct this difference. This adjustment is
part of normal system operation. Adaptive Steering Off (yellow, solid): The
adaptive steering system is off. It is possible
that the steering wheel may not be straight
when the vehicle is driving straight ahead. If
this message persists, see an authorized
dealer.
Adaptive Steering Loss (red, solid): The
adaptive steering system integrity cannot be
verified. Do not drive the vehicle and contact
an authorized dealer immediately.
See
Steering (page 260).
Airbag Warning Lamp If it does not illuminate when you
switch the ignition on, continues
to flash or remains on when the
engine is running, this indicates a
malfunction. Have your vehicle checked as
soon as possible.
111
Nautilus (CD9) Canada/United States of America, enUSA, Edition date: 201907, First-Printing Instrument ClusterE144524 E223375 E67017
Page 115 of 596
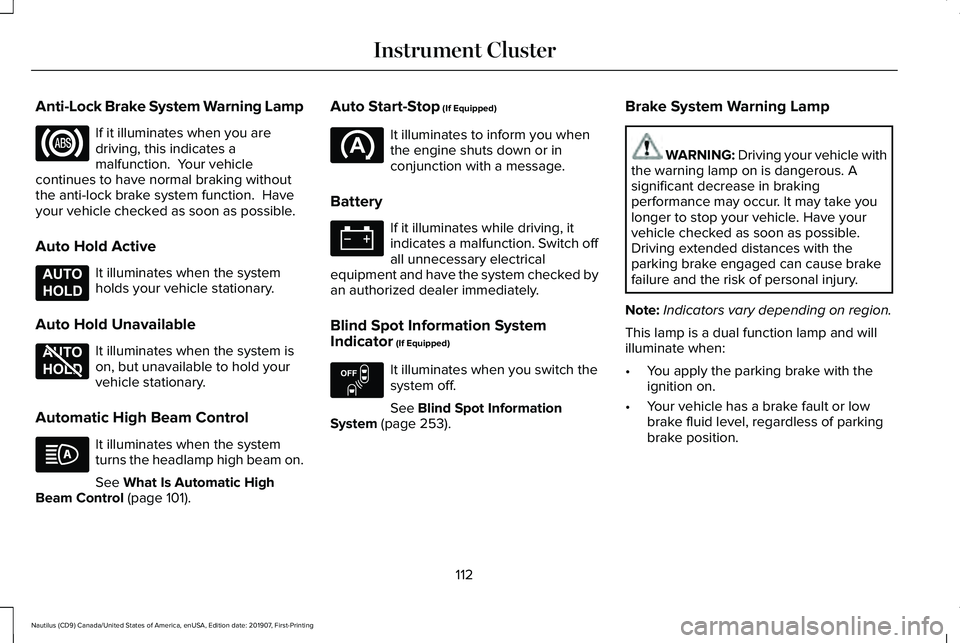
Anti-Lock Brake System Warning Lamp
If it illuminates when you are
driving, this indicates a
malfunction. Your vehicle
continues to have normal braking without
the anti-lock brake system function. Have
your vehicle checked as soon as possible.
Auto Hold Active It illuminates when the system
holds your vehicle stationary.
Auto Hold Unavailable It illuminates when the system is
on, but unavailable to hold your
vehicle stationary.
Automatic High Beam Control It illuminates when the system
turns the headlamp high beam on.
See What Is Automatic High
Beam Control (page 101). Auto Start-Stop
(If Equipped) It illuminates to inform you when
the engine shuts down or in
conjunction with a message.
Battery If it illuminates while driving, it
indicates a malfunction. Switch off
all unnecessary electrical
equipment and have the system checked by
an authorized dealer immediately.
Blind Spot Information System
Indicator
(If Equipped) It illuminates when you switch the
system off.
See
Blind Spot Information
System (page 253). Brake System Warning Lamp WARNING: Driving your vehicle with
the warning lamp on is dangerous. A
significant decrease in braking
performance may occur. It may take you
longer to stop your vehicle. Have your
vehicle checked as soon as possible.
Driving extended distances with the
parking brake engaged can cause brake
failure and the risk of personal injury.
Note: Indicators vary depending on region.
This lamp is a dual function lamp and will
illuminate when:
• You apply the parking brake with the
ignition on.
• Your vehicle has a brake fault or low
brake fluid level, regardless of parking
brake position.
112
Nautilus (CD9) Canada/United States of America, enUSA, Edition date: 201907, First-Printing Instrument Cluster E197933 E197934 E151262
Page 116 of 596
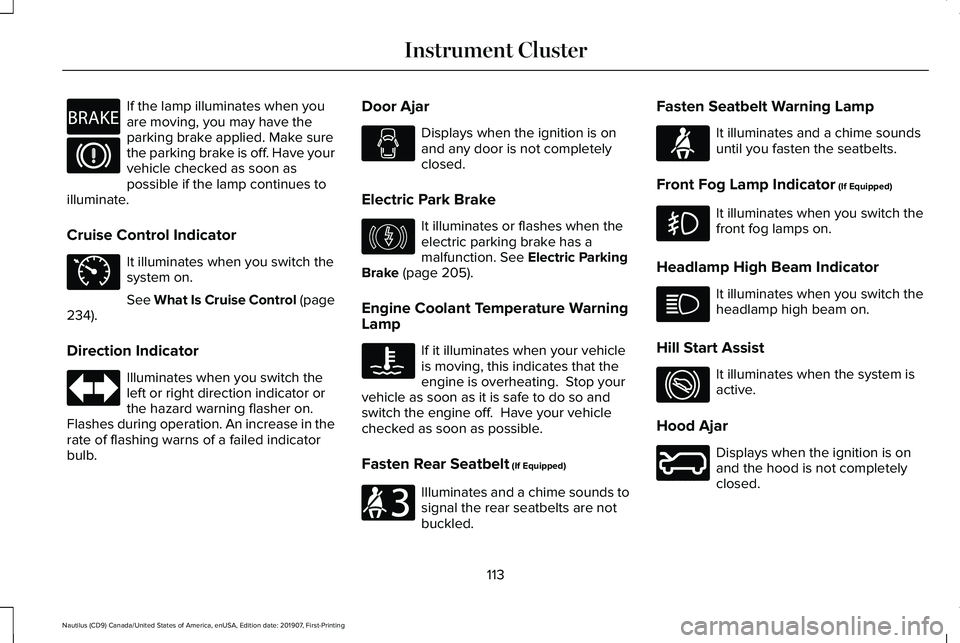
If the lamp illuminates when you
are moving, you may have the
parking brake applied. Make sure
the parking brake is off. Have your
vehicle checked as soon as
possible if the lamp continues to
illuminate.
Cruise Control Indicator It illuminates when you switch the
system on.
See What Is Cruise Control (page
234).
Direction Indicator Illuminates when you switch the
left or right direction indicator or
the hazard warning flasher on.
Flashes during operation. An increase in the
rate of flashing warns of a failed indicator
bulb. Door Ajar Displays when the ignition is on
and any door is not completely
closed.
Electric Park Brake It illuminates or flashes when the
electric parking brake has a
malfunction.
See Electric Parking
Brake (page 205).
Engine Coolant Temperature Warning
Lamp If it illuminates when your vehicle
is moving, this indicates that the
engine is overheating. Stop your
vehicle as soon as it is safe to do so and
switch the engine off. Have your vehicle
checked as soon as possible.
Fasten Rear Seatbelt
(If Equipped) Illuminates and a chime sounds to
signal the rear seatbelts are not
buckled.Fasten Seatbelt Warning Lamp It illuminates and a chime sounds
until you fasten the seatbelts.
Front Fog Lamp Indicator
(If Equipped) It illuminates when you switch the
front fog lamps on.
Headlamp High Beam Indicator It illuminates when you switch the
headlamp high beam on.
Hill Start Assist It illuminates when the system is
active.
Hood Ajar Displays when the ignition is on
and the hood is not completely
closed.
113
Nautilus (CD9) Canada/United States of America, enUSA, Edition date: 201907, First-Printing Instrument ClusterE270480 E71340 E146190 E206718 E71880 E274708 E246598