warning light LINCOLN NAUTILUS 2020 Owners Manual
[x] Cancel search | Manufacturer: LINCOLN, Model Year: 2020, Model line: NAUTILUS, Model: LINCOLN NAUTILUS 2020Pages: 596, PDF Size: 5.88 MB
Page 12 of 596

Windshield defrosting system
Interior luggage compartment
release
Jack
Keep out of reach of children
Lighting control
Low tire pressure warning
Maintain correct fluid level
Note operating instructions
Horn control Panic alarm
Parking aid
Parking brake
Power steering fluid
Power windows front/rear
Power window lockout
Requires registered technician
Safety alert
See Owner's Manual See Service Manual
Service engine soon
Passenger airbag activated
Passenger airbag deactivated
Side airbag
Shield the eyes
Stability control
Hill descent control
Trail control
Windshield wiping system
9
Nautilus (CD9) Canada/United States of America, enUSA, Edition date: 201907, First-Printing Introduction E161353 E270945 E139213 E231159 E231158 E270849 E270850 E167012 E138639 E163957 E272858 E270969
Page 18 of 596
P.O. Box 542000
Omaha, NE 68154-8000
REPLACEMENT PARTS
RECOMMENDATION
We have built your vehicle to the highest
standards using quality parts. We
recommend that you demand the use of
genuine Ford and Motorcraft parts whenever
your vehicle requires scheduled
maintenance or repair. You can clearly
identify genuine Ford and Motorcraft parts
by looking for the Ford, FoMoCo or
Motorcraft branding on the parts or their
packaging.
Scheduled Maintenance and
Mechanical Repairs
One of the best ways for you to make sure
that your vehicle provides years of service
is to have it maintained in line with our
recommendations using parts that conform
to the specifications detailed in this Owner’
s
Manual. Genuine Ford and Motorcraft parts
meet or exceed these specifications. Collision Repairs
We hope that you never experience a
collision, but accidents do happen. Genuine
Ford replacement collision parts meet our
stringent requirements for fit, finish, structural
integrity, corrosion protection and dent
resistance. During vehicle development we
validate that these parts deliver the intended
level of protection as a whole system. A
great way to know for sure you are getting
this level of protection is to use genuine Ford
replacement collision parts.
Warranty on Replacement Parts
Genuine Ford and Motorcraft replacement
parts are the only replacement parts that
benefit from a Lincoln Warranty. Damage
caused to your vehicle as a result of the
failure of non-Ford parts may not be covered
by the Lincoln Warranty. For additional
information, refer to the terms and conditions
of the Lincoln Warranty.
SPECIAL NOTICES
New Vehicle Limited Warranty
For a detailed description of what is covered
by your New Vehicle Limited Warranty, see
your warranty guide that is available online.
For more information, refer to our website
and download your copy of the warranty
guide.
Special Instructions
For your added safety, your vehicle is fitted
with sophisticated electronic controls.
WARNING: You risk death or serious
injury to yourself and others if you do not
follow the instruction highlighted by the
warning symbol. Failure to follow the
specific warnings and instructions could
result in personal injury.
15
Nautilus (CD9) Canada/United States of America, enUSA, Edition date: 201907, First-Printing Introduction
Page 23 of 596
Direction indicators. See Direction Indicators (page 98).
A
Audio control.
See Audio Control (page 86). Voice control. See Voice Control (page 87).
B
Instrument cluster.
See Gauges (page 109). See Warning Lamps and Indicators (page 111).
C
Information display control.
See Information Display Control (page 88).
D
Wiper lever.
See Wipers and Washers (page 90).
E
Automatic transmission.
See Automatic Transmission (page 192).
F
Information and entertainment display.
See General Information (page 429).
G
Hazard flashers.
See Hazard Flashers (page 289).
H
Climate control.
See Climate Control (page 142).
I
Audio unit.
See Audio Unit (page 419).
J
Start button.
See Keyless Starting (page 172).
K
Information display control.
See Information Display Control (page 88).
L
Horn.M
Cruise control.
See What Is Cruise Control (page 234).
N
Steering wheel adjustment.
See Adjusting the Steering Wheel (page 85).
O
Liftgate control.
See Power Liftgate (page 78).
P
Parking brake.
See Electric Parking Brake (page 205).
Q
Lighting control.
See Lighting Control (page 94). Instrument lighting dimmer. See Instrument Lighting Dimmer (page 96).
R
20
Nautilus (CD9) Canada/United States of America, enUSA, Edition date: 201907, First-Printing At a Glance
Page 29 of 596
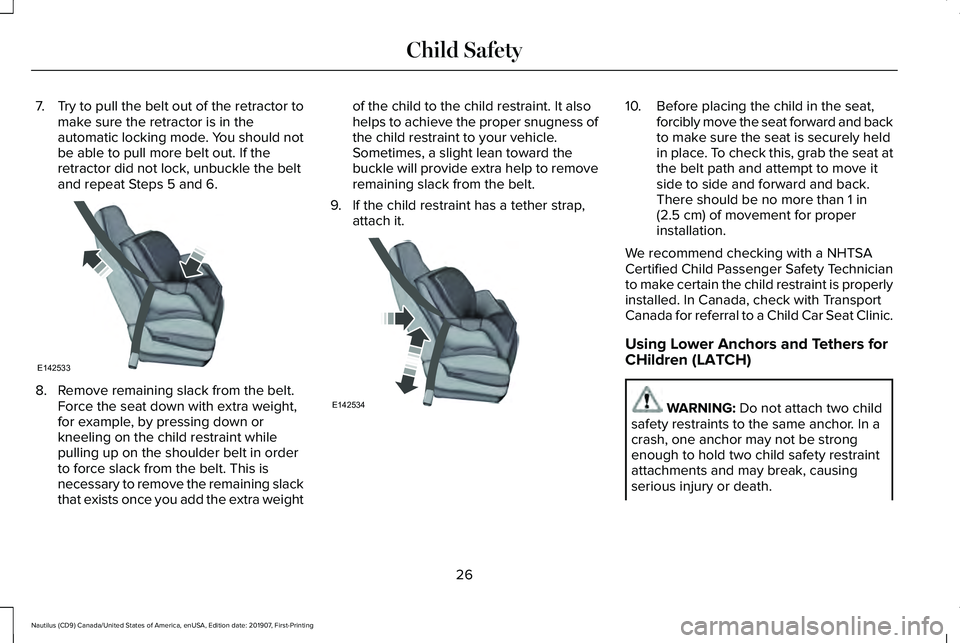
7.
Try to pull the belt out of the retractor to
make sure the retractor is in the
automatic locking mode. You should not
be able to pull more belt out. If the
retractor did not lock, unbuckle the belt
and repeat Steps 5 and 6. 8. Remove remaining slack from the belt.
Force the seat down with extra weight,
for example, by pressing down or
kneeling on the child restraint while
pulling up on the shoulder belt in order
to force slack from the belt. This is
necessary to remove the remaining slack
that exists once you add the extra weight of the child to the child restraint. It also
helps to achieve the proper snugness of
the child restraint to your vehicle.
Sometimes, a slight lean toward the
buckle will provide extra help to remove
remaining slack from the belt.
9. If the child restraint has a tether strap, attach it. 10. Before placing the child in the seat,
forcibly move the seat forward and back
to make sure the seat is securely held
in place. To check this, grab the seat at
the belt path and attempt to move it
side to side and forward and back.
There should be no more than 1 in
(2.5 cm) of movement for proper
installation.
We recommend checking with a NHTSA
Certified Child Passenger Safety Technician
to make certain the child restraint is properly
installed. In Canada, check with Transport
Canada for referral to a Child Car Seat Clinic.
Using Lower Anchors and Tethers for
CHildren (LATCH) WARNING:
Do not attach two child
safety restraints to the same anchor. In a
crash, one anchor may not be strong
enough to hold two child safety restraint
attachments and may break, causing
serious injury or death.
26
Nautilus (CD9) Canada/United States of America, enUSA, Edition date: 201907, First-Printing Child SafetyE142533 E142534
Page 40 of 596
•
Seatbelt pretensioners at the front
outermost and second row outermost
seating positions.
• Belt tension sensor at the front outermost
passenger seating position. •
Seatbelt warning light and chime. •
Crash sensors and monitoring system
with readiness indicator.
The seatbelt pretensioners are designed to
tighten the seatbelts when activated. In
frontal and near-frontal crashes, the seatbelt
pretensioners may be activated alone or, if
the crash is of sufficient severity, together
with the front airbags. The pretensioners may
also activate when a Safety Canopy airbag
deploys. FASTENING THE SEATBELTS
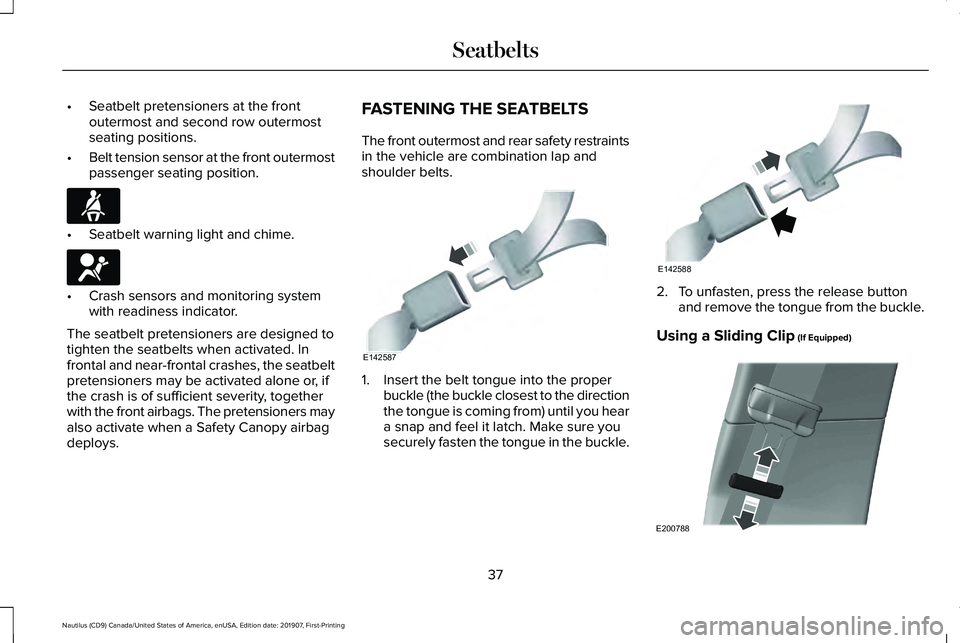
The front outermost and rear safety restraints
in the vehicle are combination lap and
shoulder belts.
1. Insert the belt tongue into the proper
buckle (the buckle closest to the direction
the tongue is coming from) until you hear
a snap and feel it latch. Make sure you
securely fasten the tongue in the buckle. 2. To unfasten, press the release button
and remove the tongue from the buckle.
Using a Sliding Clip (If Equipped) 37
Nautilus (CD9) Canada/United States of America, enUSA, Edition date: 201907, First-Printing SeatbeltsE71880 E67017 E142587 E142588 E200788
Page 50 of 596
The driver and passenger front airbag system
consists of:
•
Driver and passenger airbag modules.
• Front passenger sensing system. · Crash sensors and monitoring
system with readiness indicator.
See Crash Sensors and Airbag
Indicator (page 54).
Proper Driver and Front Passenger
Seating Adjustment WARNING:
National Highway Traffic
Safety Administration (NHTSA)
recommends a minimum distance of at
least
10 in (25 cm) between an occupant's
chest and the driver airbag module.
To properly position yourself away from the
airbag:
• Move your seat to the rear as far as you
can while still reaching the pedals
comfortably.
• Recline the seat slightly (one or two
degrees) from the upright position. After all occupants have adjusted their seats
and put on seatbelts, it is very important that
they continue to sit properly. A properly
seated occupant sits upright, leaning against
the seatback, and centered on the seat
cushion, with their feet comfortably extended
on the floor. Sitting improperly can increase
the chance of injury in a crash event. For
example, if an occupant slouches, lies down,
turns sideways, sits forward, leans forward
or sideways, or puts one or both feet up, the
chance of injury during a crash is greatly
increased.
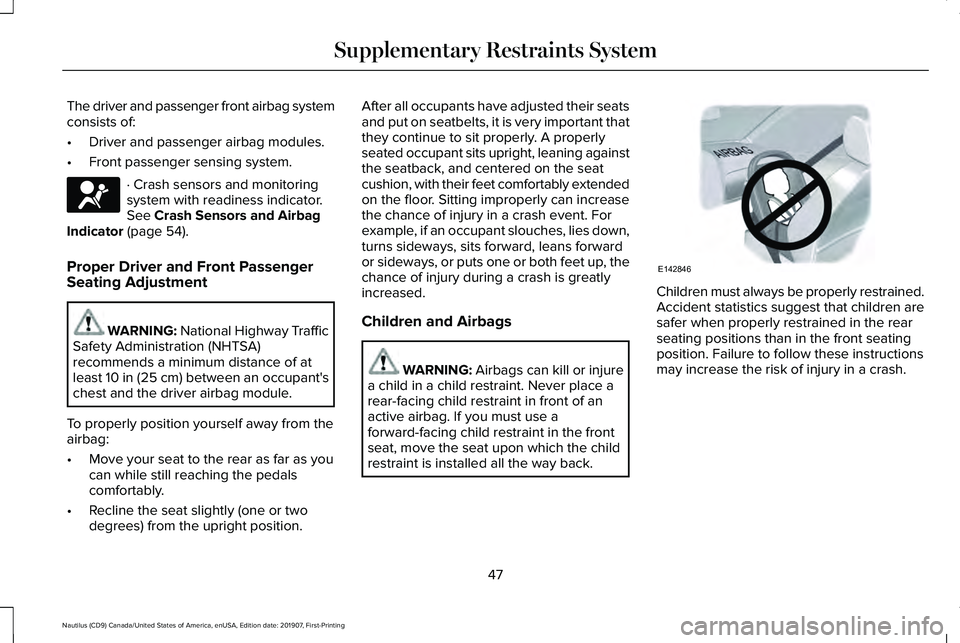
Children and Airbags
WARNING: Airbags can kill or injure
a child in a child restraint. Never place a
rear-facing child restraint in front of an
active airbag. If you must use a
forward-facing child restraint in the front
seat, move the seat upon which the child
restraint is installed all the way back. Children must always be properly restrained.
Accident statistics suggest that children are
safer when properly restrained in the rear
seating positions than in the front seating
position. Failure to follow these instructions
may increase the risk of injury in a crash.
47
Nautilus (CD9) Canada/United States of America, enUSA, Edition date: 201907, First-Printing Supplementary Restraints SystemE67017 E142846
Page 57 of 596
The design and development of the Safety
Canopy included recommended testing
procedures that were developed by a group
of automotive safety experts known as the
Side Airbag Technical Working Group. These
recommended testing procedures help
reduce the risk of injuries related to the
deployment of side airbags (including the
Safety Canopy).
CRASH SENSORS AND AIRBAG
INDICATOR
WARNING: Modifying or adding
equipment to the front end of your vehicle
(including hood, bumper system, frame,
front end body structure, tow hooks and
hood pins) may affect the performance of
the airbag system, increasing the risk of
injury. Do not modify or add equipment to
the front end of your vehicle. Your vehicle has a collection of crash and
occupant sensors which provide information
to the restraints control module. The
restraints control module deploys (activates)
the seatbelt pretensioners, driver airbag,
passenger airbag, knee airbag(s), seat
mounted side airbags and the Safety
Canopy. Based on the type of crash, the
restraints control module deploys the
appropriate safety devices.
The restraints control module also monitors
the readiness of the above safety devices
plus the crash and occupant sensors. The
readiness of the safety system is indicated
by a warning indicator light in the instrument
cluster or by a backup tone if the warning
light is not working. Routine maintenance of
the airbag is not required.
A difficulty with the system is indicated by
one or more of the following: •
The readiness light will not illuminate
immediately after you switch the ignition
on.
• The readiness light either flashes or stays
lit.
• A series of five beeps is heard. The tone
pattern repeats periodically until the
problem, the light or both are repaired.
If any of these things happen, even
intermittently, have the supplemental
restraint system serviced at an authorized
dealer immediately. Unless serviced, the
system may not function properly in the
event of a crash.
The restraint system is designed to activate
when the vehicle sustains conditions
sufficient to cause the restraint control
module to deploy a safety device.
54
Nautilus (CD9) Canada/United States of America, enUSA, Edition date: 201907, First-Printing Supplementary Restraints SystemE67017
Page 98 of 596
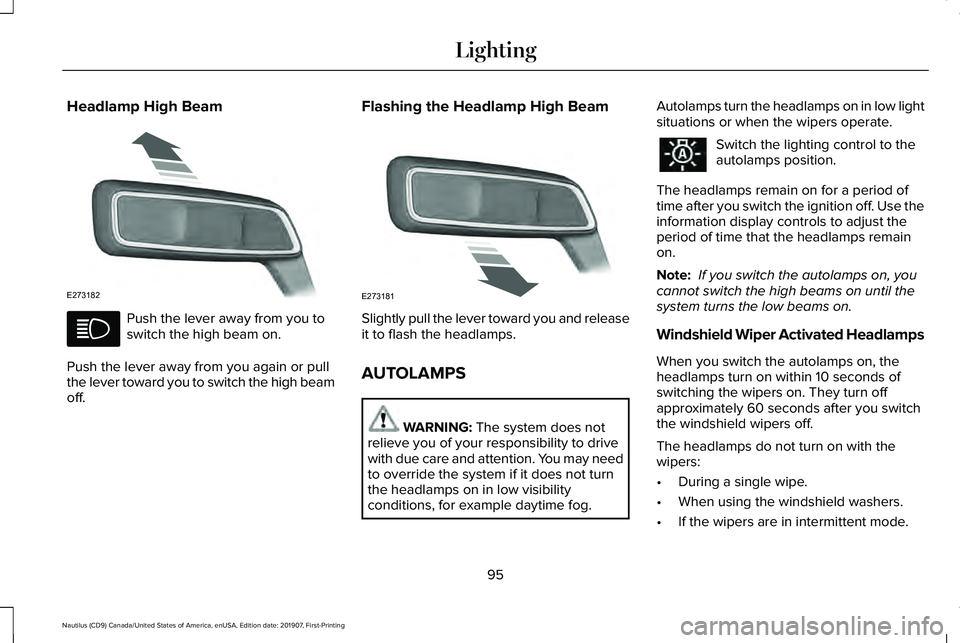
Headlamp High Beam
Push the lever away from you to
switch the high beam on.
Push the lever away from you again or pull
the lever toward you to switch the high beam
off. Flashing the Headlamp High Beam
Slightly pull the lever toward you and release
it to flash the headlamps.
AUTOLAMPS
WARNING: The system does not
relieve you of your responsibility to drive
with due care and attention. You may need
to override the system if it does not turn
the headlamps on in low visibility
conditions, for example daytime fog. Autolamps turn the headlamps on in low light
situations or when the wipers operate. Switch the lighting control to the
autolamps position.
The headlamps remain on for a period of
time after you switch the ignition off. Use the
information display controls to adjust the
period of time that the headlamps remain
on.
Note: If you switch the autolamps on, you
cannot switch the high beams on until the
system turns the low beams on.
Windshield Wiper Activated Headlamps
When you switch the autolamps on, the
headlamps turn on within 10 seconds of
switching the wipers on. They turn off
approximately 60 seconds after you switch
the windshield wipers off.
The headlamps do not turn on with the
wipers:
• During a single wipe.
• When using the windshield washers.
• If the wipers are in intermittent mode.
95
Nautilus (CD9) Canada/United States of America, enUSA, Edition date: 201907, First-Printing LightingE273182 E273181
Page 99 of 596
Note:
If you switch the autolamps and the
autowipers on, the headlamps turn on when
the windshield wipers continuously operate.
INSTRUMENT LIGHTING DIMMER
The instrument lighting dimmer buttons are
on the lighting control. Repeatedly press one of the
buttons to adjust the brightness.
HEADLAMP EXIT DELAY
After you switch the ignition off, you can
switch the headlamps on by pulling the
direction indicator lever toward you. You will
hear a short tone. The headlamps will switch
off automatically after three minutes with any
door open or 30 seconds after the last door
has been closed. You can cancel this feature
by pulling the direction indicator toward you
again or switching the ignition on. DAYTIME RUNNING LAMPS -
VEHICLES WITH: DAYTIME
RUNNING LAMPS (DRL) WARNING: The daytime running
lamps system does not activate the rear
lamps and may not provide adequate
lighting during low visibility driving
conditions. Make sure you switch the
headlamps on, as appropriate, during all
low visibility conditions. Failure to do so
may result in a crash.
The system turns the lamps on in daylight
conditions.
To switch the system on, switch the lighting
control to any position except headlamps. DAYTIME RUNNING LAMPS -
VEHICLES WITH: CONFIGURABLE
DAYTIME RUNNING LAMPS WARNING: The daytime running
lamps system does not activate the rear
lamps and may not provide adequate
lighting during low visibility driving
conditions. Make sure you switch the
headlamps on, as appropriate, during all
low visibility conditions. Failure to do so
may result in a crash.
Switch the daytime running lamps on or off
using the information display.
See General
Information (page 116).
The daytime running lamps turn on when:
1. The lamps are on in the information display.
2. You switch the ignition on.
3. The transmission is not in park (P) for vehicles with automatic transmissions or
you release the parking brake for
vehicles with manual transmissions.
96
Nautilus (CD9) Canada/United States of America, enUSA, Edition date: 201907, First-Printing LightingE291299 E291298
Page 106 of 596
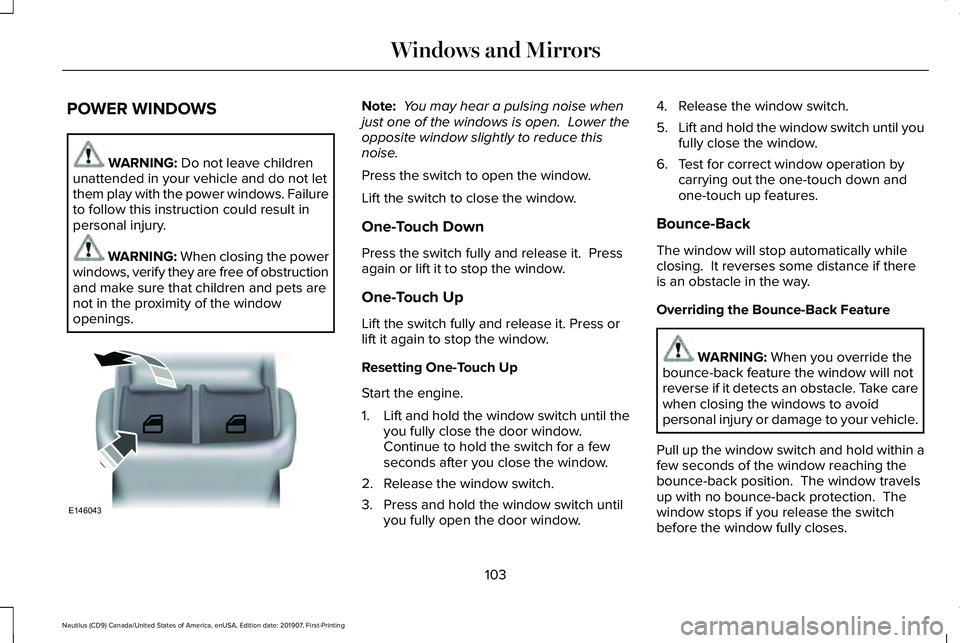
POWER WINDOWS
WARNING: Do not leave children
unattended in your vehicle and do not let
them play with the power windows. Failure
to follow this instruction could result in
personal injury. WARNING: When closing the power
windows, verify they are free of obstruction
and make sure that children and pets are
not in the proximity of the window
openings. Note:
You may hear a pulsing noise when
just one of the windows is open. Lower the
opposite window slightly to reduce this
noise.
Press the switch to open the window.
Lift the switch to close the window.
One-Touch Down
Press the switch fully and release it. Press
again or lift it to stop the window.
One-Touch Up
Lift the switch fully and release it. Press or
lift it again to stop the window.
Resetting One-Touch Up
Start the engine.
1. Lift and hold the window switch until the
you fully close the door window.
Continue to hold the switch for a few
seconds after you close the window.
2. Release the window switch.
3. Press and hold the window switch until you fully open the door window. 4. Release the window switch.
5.
Lift and hold the window switch until you
fully close the window.
6. Test for correct window operation by carrying out the one-touch down and
one-touch up features.
Bounce-Back
The window will stop automatically while
closing. It reverses some distance if there
is an obstacle in the way.
Overriding the Bounce-Back Feature WARNING:
When you override the
bounce-back feature the window will not
reverse if it detects an obstacle. Take care
when closing the windows to avoid
personal injury or damage to your vehicle.
Pull up the window switch and hold within a
few seconds of the window reaching the
bounce-back position. The window travels
up with no bounce-back protection. The
window stops if you release the switch
before the window fully closes.
103
Nautilus (CD9) Canada/United States of America, enUSA, Edition date: 201907, First-Printing Windows and MirrorsE146043