remote control LINCOLN NAUTILUS 2022 Owner's Guide
[x] Cancel search | Manufacturer: LINCOLN, Model Year: 2022, Model line: NAUTILUS, Model: LINCOLN NAUTILUS 2022Pages: 586, PDF Size: 13.97 MB
Page 190 of 586

WHAT IS THE WIRELESS
ACCESSORY CHARGER
The wireless accessory charger allows youto charge one compatible Qi wirelesscharging device on the charging area.
WIRELESS ACCESSORY CHARGER
PRECAUTIONS
WARNING: Wireless chargingdevices can affect the operation ofimplanted medical devices, includingcardiac pacemakers. If you have anyimplanted medical devices, we recommendthat you consult with your physician.
Keep the charging area clean and removeforeign objects prior to charging a device.
Do not place items with a magnetic strip orradio-frequency identification chip, forexample passports, parking tickets,transportation passes or credit cards, nearthe charging area when charging a device.Damage could occur to the magnetic stripor radio-frequency identification chip.
Do not place metal objects, for exampleremote controls, coins and candy wrappers,on or near the charging area when charginga device. Metal objects may heat up anddegrade the charging performance, inaddition to causing interruptions in charging.
Charging could be interrupted, degraded, orcould stop if any of the following occur:
•The system detects a foreign object.
•The device is misaligned on the chargingarea.
•The device moves on the active chargingarea when the vehicle is in motion.
•The vehicle ambient temperature is toohigh.
•You attempt to charge a non-Qicompatible device on the wirelesscharger.
Note:During charging, the device and thecharger could heat up, this is normal. If thebattery gets hotter than usual, the devicemay stop charging.
LOCATING THE WIRELESS
ACCESSORY CHARGER
The charging area is on the centerconsole or in the media bin belowthe instrument panel.
CHARGING A WIRELESS DEVICE
Place the device on the center of thecharging surface with the charging sidedown. The charging stops after your devicereaches a full charge.
You can use the charger when the vehicleis in accessory mode, when the vehicle isrunning, or when SYNC is on.
Displays on the status bar whenwireless charging is in progress.
186
2022 Nautilus (CD9) Canada/United States of America, enUSA, Edition date: 202108, First-PrintingWireless Accessory Charger (If Equipped)E297549
Page 214 of 586
AUTOMATIC TRANSMISSION
PRECAUTIONS
WARNING: Always fully apply theparking brake and make sure you shift intopark (P). Failure to follow this instructioncould result in personal injury or death.
WARNING: Do not apply the brakepedal and accelerator pedalsimultaneously. Applying both pedalssimultaneously for more than a fewseconds will limit engine performance,which may result in difficulty maintainingspeed in traffic and could lead to seriousinjury.
WARNING: When your vehicle isstationary, keep the brake pedal fullypressed when shifting gears. Failure tofollow this instruction could result inpersonal injury, death or property damage.
Note:Do not use supplemental transmissionfluid additives, treatments, or cleaningagents. Failure to follow this instruction couldresult in vehicle damage not covered by thevehicle warranty.
AUTOMATIC TRANSMISSION
POSITIONS
PARK (P)
WARNING: Move the transmissionselector lever to park (P) only when yourvehicle is stationary.
This position locks the driveline. Come to acomplete stop before shifting into and outof park (P).
The electric parking brake could apply whenyou shift to park (P) without the brake pedalfully pressed. The electric parking brakeapplies when you shift to park (P) on largeslopes. The electric parking brake releaseswith the drive away release function. SeeElectric Parking Brake (page 223).
Note:A tone sounds if you attempt to exityour vehicle without the transmission in park(P).
Note:Your vehicle may not shift out of park(P) if the vehicle battery has run out ofcharge. See Jump Starting the Vehicle(page 316).
Note:Your vehicle may not shift out of park(P) if a fuse is blown. See Fuses (page 323).
Note:Your vehicle may not shift out of park(P) unless the key or remote control is insideyour vehicle.
Note:Your vehicle shifts into park (P) if youattempt to exit your vehicle without thetransmission in park (P). See How DoesAutomatic Return to Park (P) Work (page213).
Note:If you shift into park (P) without fullypressing the brake, the parking brake couldapply. If you shift into park (P) on a slope, theparking brake could apply. SeeAutomatically Releasing the ElectricParking Brake (page 224).
Note:You can start your vehicle in thisposition.
210
2022 Nautilus (CD9) Canada/United States of America, enUSA, Edition date: 202108, First-PrintingAutomatic Transmission
Page 323 of 586
POST-CRASH ALERT SYSTEMLIMITATIONS
Depending on applicable laws in the countryyour vehicle was built for, the horn does notsound in the event of a serious impact.
SWITCHING THE POST-CRASH ALERTSYSTEM OFF
Press the hazard flasher switch or the unlockbutton on the remote control to switch thesystem off.
Note:The alert turns off when the vehiclebattery runs out of charge.
AUTOMATIC CRASH SHUTOFF
WHAT IS AUTOMATIC CRASHSHUTOFF
The automatic crash shutoff is designed tostop the fuel going to the engine in the eventof a moderate or severe crash.
Note:Not every impact causes a shutoff.
AUTOMATIC CRASH SHUTOFFPRECAUTIONS
WARNING: If your vehicle has beeninvolved in a crash, have the fuel systemchecked. Failure to follow this instructioncould result in fire, personal injury or death.
RE-ENABLING YOUR VEHICLE
1.Switch the ignition off.
2.Attempt to start your vehicle.
3.Switch the ignition off.
4.Attempt to start your vehicle.
Note:If your vehicle does not start after thethird attempt, have your vehicle checked assoon as possible.
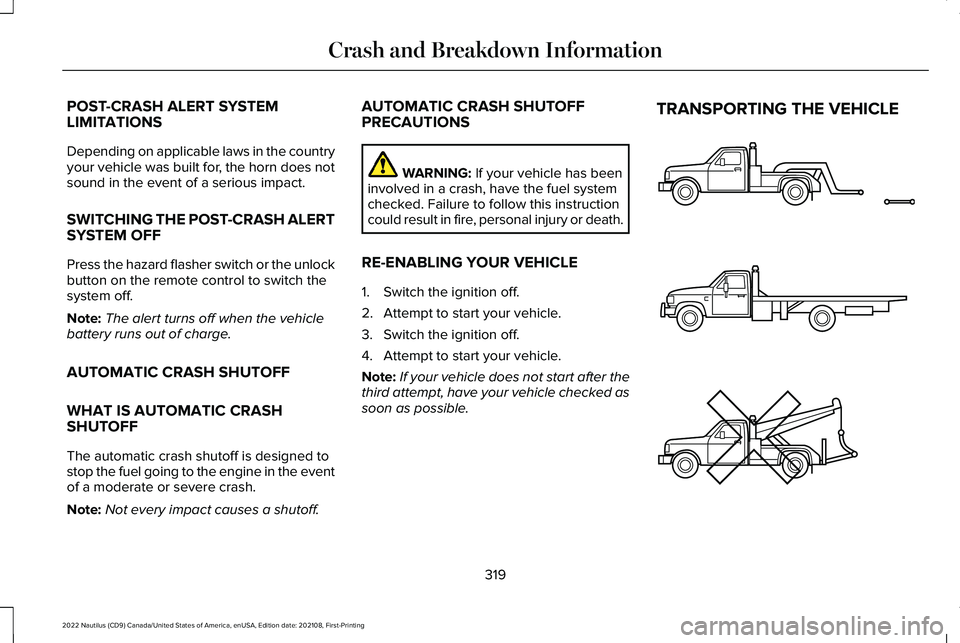
TRANSPORTING THE VEHICLE
319
2022 Nautilus (CD9) Canada/United States of America, enUSA, Edition date: 202108, First-PrintingCrash and Breakdown InformationE143886
Page 382 of 586
WARNING: Only usereplacement tires and wheels that arethe same size, load index, speed ratingand type (such as P-metric versusLT-metric or all-season versusall-terrain) as those originally providedby Ford. The recommended tire andwheel size may be found on either theSafety Compliance Certification Label(affixed to either the door hinge pillar,door-latch post, or the door edge thatmeets the door-latch post, next to thedriver's seating position), or the TireLabel which is located on the B-Pillaror edge of the driver's door. If thisinformation is not found on theselabels, then you should contact yourauthorized dealer as soon as possible.
Use of any tire or wheel notrecommended by Ford can affect thesafety and performance of yourvehicle, which could result in anincreased risk of loss of vehiclecontrol, vehicle rollover, personalinjury and death.
WARNING: To reduce the risk ofserious injury, when mountingreplacement tires and wheels, youshould not exceed the maximumpressure indicated on the sidewall ofthe tire to set the beads withoutadditional precautions listed below. Ifthe beads do not seat at the maximumpressure indicated, re-lubricate andtry again.
WARNING: For a mountingpressure more than 20 psi (1.38 bar)greater than the maximum pressure,a Ford dealer or other tire serviceprofessional should do the mounting.
WARNING: Always inflate steelcarcass tires with a remote air fill withthe person inflating standing at aminimum of 12 ft (3.66 m) away fromthe wheel and tire assembly.
WARNING: When inflating thetire for mounting pressures up to20 psi (1.38 bar) greater than themaximum pressure on the tire sidewall,the following precautions must betaken to protect the person mountingthe tire:
WARNING: Use only thespecified jacking points. If you useother locations, you could damage thebody, steering, suspension, engine,braking system or the fuel lines.
•Make sure that you have the correcttire and wheel size.
•Lubricate the tire bead and wheelbead seat area again.
•Stand at a minimum of 12 ft (3.66 m)away from the wheel and tireassembly.
•Use both eye and ear protection.
Important: Remember to replace thewheel valve stems when the road tiresare replaced on your vehicle.
378
2022 Nautilus (CD9) Canada/United States of America, enUSA, Edition date: 202108, First-PrintingWheel and Tire Information
Page 427 of 586
WHAT IS A CONNECTED VEHICLE
A connected vehicle has technology thatallows your vehicle to connect to a mobilenetwork and for you to access a range offeatures. When used in conjunction with theLincoln Way app, it could allow you tomonitor and control your vehicle further, forexample checking the tire pressures, andthe vehicle location. For additionalinformation, refer to the local Lincoln website.
CONNECTED VEHICLE
REQUIREMENTS
Connected service and related featurefunctionality requires a compatible vehiclenetwork.
Some remote features require a subscription.For additional information, see the LincolnWay app. Some restrictions, third party termsand message or data rates may apply.
CONNECTED VEHICLE
LIMITATIONS
Evolving technology, cellular networks, orregulations could affect functionality andavailability, or continued provision of somefeatures. These changes could even stopsome features from functioning.
CONNECTING THE VEHICLE TO A
MOBILE NETWORK
WHAT IS THE MODEM
The modem allows access to arange of features built into yourvehicle.
ENABLING AND DISABLING THEMODEM
1.Press Settings.
2.Press Lincoln Connect.
3.Press Connectivity Settings.
4.Switch connectivity features on or off.
CONNECTING LINCOLN WAY TO THEMODEM
1.Make sure that the modem is enabledusing the vehicle settings menu.
2.Open the Lincoln Way app on yourdevice and log in.
3.Add your vehicle or select your vehicleif already added.
4.Select the option for vehicle details.
5.Select the option to activate your vehicle.
6.Make sure that the name on the screenmatches the name shown in your LincolnWay account.
7.Confirm that your Lincoln Way accountis connected to the modem.
CONNECTING THE VEHICLE TO A
WI-FI NETWORK
1.Press Settings.
2.Press Wi-Fi.
423
2022 Nautilus (CD9) Canada/United States of America, enUSA, Edition date: 202108, First-PrintingConnected Vehicle
Page 456 of 586
HOW DO PERSONAL PROFILES
WORK
This feature allows you to create multiplepersonal profiles enabling users topersonalize vehicle’s settings such as seatsand mirrors, as well as non-positional settingslike radio, navigation, driver assist systemsettings. Positional settings are saved byholding a memory seat button.Non-positional settings are saved youchange a setting while a profile is active. Youcan create one profile for each presetmemory seat button along with a guestprofile.
Recalling and Changing a Profile
You can recall a profile using thetouchscreen or the preset button youselected when you created your profile. Youcan also link a remote control and a mobiledevice to your profile, which are used torecall it.
ENABLING OR DISABLING
PERSONAL PROFILES
When you switch on the Personal Profilesfeature:
•Unlocking a door with a remote controlor mobile device that is not linked to adriver profile does not change the activeprofile, but remains in the last knownprofile. It does not change the positionalsettings.
•Pressing a memory seat button that isnot linked to a driver profile or saved toa preset setting does not change theactive profile, but remains in the lastknown profile. It does not change thepositional settings.
•Pressing a memory seat button that isnot linked to a driver profile but is savedto a preset setting does not change theactive profile, but remains in the lastknown profile. It recalls the positionalsettings that you saved to that memoryseat button.
When you switch off a Personal Profilesfeature:
•Unlocking a door with a remote controlor mobile device does not recall anynon-positional settings but still recallspositional settings from the driver profilewhich the remote control or mobiledevice is linked to.
•Pressing a memory seat button that isnot linked to a driver profile or saved toa preset setting does not change thepositional or non-positional settings.
•Pressing a memory seat button that islinked to a driver profile or has saved toa preset setting recalls the positionalsettings that you saved to that memoryseat button.
CREATING A PERSONAL PROFILE
Use the touchscreen to create a personalprofile.
1.Switch the vehicle on and leave thevehicle in park (P).
2.Select the Personal Profiles button underSettings.
452
2022 Nautilus (CD9) Canada/United States of America, enUSA, Edition date: 202108, First-PrintingPersonal Profiles
Page 457 of 586
3.Follow the instructions on the display.
LINKING OR UNLINKING A
PERSONAL PROFILE TO A REMOTE
CONTROL
You can save preset memory positions forup to three remote controls by assigning aremote control to a personal profile usingthe touchscreen.
Use the touchscreen to link a remote controlto a personal profile.
1.Switch the vehicle on and leave thevehicle in park (P).
2.Select the Personal Profiles button underSettings.
3.Touch the arrow for the profile you wishto link to a remote control.
4.Select remote control.
5.Follow the instructions on the display.
Note:If more than one linked remote controlis in range, the memory function moves tothe settings of the first key to initiate amemory recall.
Note:The guest profile consists of existingsettings when there is no driver profilecreated. After you create a driver profile, theguest profile serves as an additional driverprofile.
Note:You cannot link a remote control to aguest profile.
LINKING OR UNLINKING A
PERSONAL PROFILE TO A DEVICE
Use the touchscreen to link a mobile deviceto a personal profile.
1.Switch the vehicle on and leave thevehicle in park (P).
2.Select the Personal Profiles button underSettings.
3.Touch the arrow for the profile you wishto link to a mobile device.
4.Select mobile device.
5.Follow the instructions on the display.
Note:To successfully link a mobile device,the mobile device must be in your vehicle,and must have previously been setup as aremote control for your vehicle.
Note:The guest profile consists of existingsettings when there is no driver profilecreated. After you create a driver profile, theguest profile serves as an additional driverprofile.
Note:You cannot link a personalized nameto a guest profile.
453
2022 Nautilus (CD9) Canada/United States of America, enUSA, Edition date: 202108, First-PrintingPersonal Profiles
Page 460 of 586
UPDATING THE VEHICLE SYSTEMS
WIRELESSLY
System software updates allow youto update your vehicle systemsoftware wirelessly. To make sureyou receive all updates, set a recurringschedule and connect to Wi-Fi. Updates maytake longer if not connected to Wi-Fi, or maynot download at all.
System Update Requirements
Before updating, reference this list to makesure your vehicle is ready be updated. Ifthese requirements are not met during ascheduled update, the update will becanceled and you can reschedule.
•Your vehicle is not running.
•Your vehicle is stopped.
•Your vehicle is parked.
•The hazard indicators are switched off.
•The alarm is not sounding.
•The doors are closed.
•The parking lights are switched off.
•You are not pressing the brake pedal.
•An emergency call is not in progress.
•Your vehicle is not in limp mode.
Scheduling an Update
Make sure Vehicle Connectivity andAutomatic Updates are switched on.
Using the Settings Menu
Press the settings option on thefeature bar.
1.Press the System Update tile.
2.Press Schedule Update.
3.Use the controls to set the time and dayof the update.
4.Save the schedule.
Note:You can set the updates to occurevery seven days.
Using the Status Bar Icon
When an update is available, tapthe notification icon and follow theprompts on the screen.
Applying a Vehicle System SoftwareUpdate
You can schedule a convenient time for theupdate to complete. During scheduledupdates you may not be able to use yourvehicle.
Note:Updates may take up to 30 minutesto complete.
You can see the progress of the update onthe touchscreen. An update cannot becanceled once it has been started.
During an update you will not be able todrive your vehicle, start the vehicle, useremote controls to lock and unlock thevehicle. The alarm, central locks, and doortones are disabled. The electronic door lockwill not function during an update. You canopen the doors using the mechanical latchif child locks are not on. Pull the handle untilit stops to use the mechanical latch.
Note:Double locking is switched off andcentral locking is switched on during andafter an update.
456
2022 Nautilus (CD9) Canada/United States of America, enUSA, Edition date: 202108, First-PrintingVehicle System UpdatesE327789 E280315 E327785
Page 493 of 586
REMOTE FUNCTION ACTUATOR
China
CMIIT ID: 2018DJ4563
United States and Canada
WARNING: Changes or modificationsnot expressively approved by the partyresponsible for compliance could void theuser's authority to operate the equipment.The term "IC:" before the radio certificationnumber only signifies that Industry Canadatechnical specifications were met.
FCC ID: HYQS2NA0
IC: 1551A-S2NA0
This device complies with Part 15 of the FCCRules and with Innovation, Science andEconomic Development Canada’slicence-exempt RSS(s). Operation is subjectto the following two conditions:
1.This device may not cause harmfulinterference, and
2.This device must accept any interferencereceived, including interference that maycause undesired operation.
BODY CONTROL MODULE
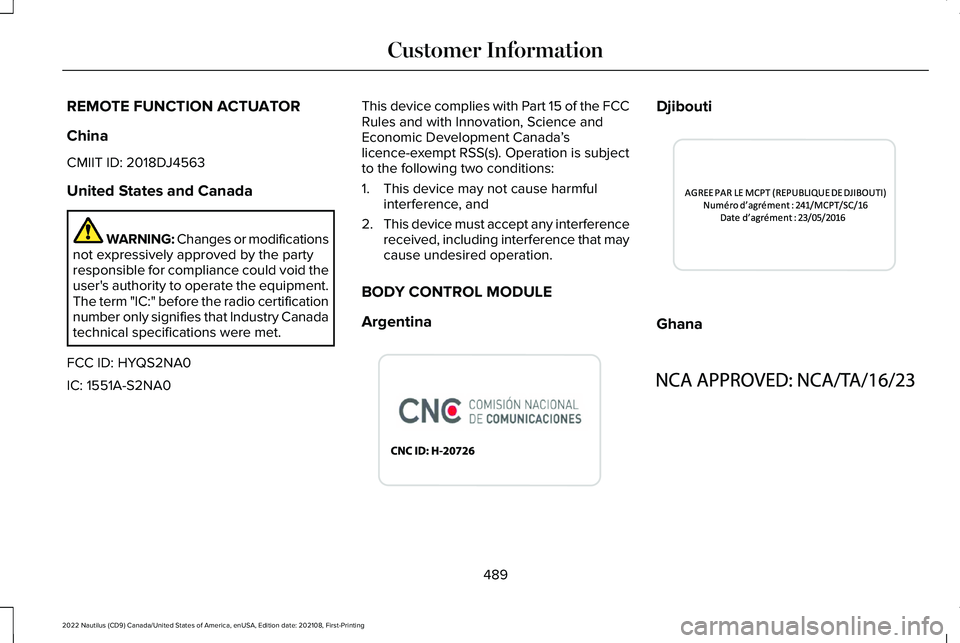
Argentina
Djibouti
Ghana
489
2022 Nautilus (CD9) Canada/United States of America, enUSA, Edition date: 202108, First-PrintingCustomer InformationE340512 E344539 E340513
Page 501 of 586

KEYS AND REMOTE CONTROLS
Argentina
Brazil
Djibouti
Ghana
Jamaica
497
2022 Nautilus (CD9) Canada/United States of America, enUSA, Edition date: 202108, First-PrintingCustomer InformationE339844 E340316 E340121 E343017 E340317 E340219 E340318