program LINCOLN NAUTILUS 2023 User Guide
[x] Cancel search | Manufacturer: LINCOLN, Model Year: 2023, Model line: NAUTILUS, Model: LINCOLN NAUTILUS 2023Pages: 606, PDF Size: 13.57 MB
Page 89 of 606
PRINCIPLE OF OPERATION
MyKey allows you to program keys withrestricted driving modes to promote gooddriving habits. All but one of the keys can beactivated with these restricted modes.
Any keys that remain unprogrammed arereferred to as administrator keys or adminkeys. They can be used to:
•Create a MyKey.
•Program configurable MyKey settings.
•Clear all MyKey features.
When you have created a MyKey, you canaccess the following information by usingthe information display to determine:
•How many admin keys and MyKeys areprogrammed to your vehicle.
•The total distance your vehicle traveledwith a MyKey.
Note:Switch the vehicle on to use thesystem.
Note:All MyKeys are programmed to thesame settings. You cannot program themindividually.
Note:For vehicles with push-button start,when both a MyKey and an admin key arepresent, the vehicle will recognize the adminkey when you switch the vehicle on.
Non-Configurable Settings
The following settings cannot be changedby an admin key user:
•Seatbelt reminder. You cannot disablethis feature. The audio system will mutewhen the driver and front-seat passengerseatbelts are not fastened.
•Early low fuel or charge. The low-fuel orlow charge warning activates earlier,giving the MyKey user more time to refuelor recharge.
•Restricted touchscreen operation in somemarkets. For example, MyKey mayprevent manual navigation destinationinput when the vehicle is in any gearother than park (P), or when the vehiclereaches a certain rate of speed.
•Satellite radio adult content restrictions,if available on your vehicle.
Note:If a phone is connected using AppleCarPlay or Android Auto when driving witha MyKey, the driver can receive phone callsand text messages even if the do not disturbrestriction is on. If the vehicle comes withsatellite radio, the adult content is notrestricted.
Note:The audio system may not mute witha basic AM/FM radio.
Note:You may be able to turn the lanedeparture warning feature off, but thefeature will automatically re-activate withevery new key cycle.
Configurable Settings
With an admin key, you can configure certainMyKey settings when you first create aMyKey and before you restart the vehicle.You can also change the settings afterwardwith an admin key.
Note:Available vehicle features will appearin your information display, providing youwith choices to switch them on or off, or toselect a more specific setting.
85
2023 Nautilus (CD9) Canada/United States of America, enUSA, Edition date: 202207, DOMMyKey™
Page 91 of 606
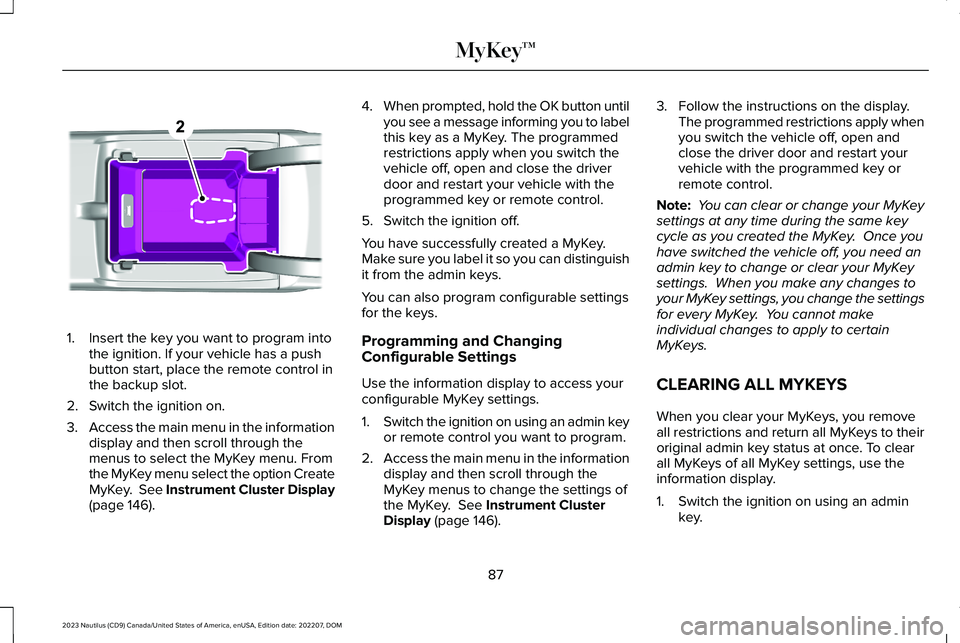
1.Insert the key you want to program intothe ignition. If your vehicle has a pushbutton start, place the remote control inthe backup slot.
2.Switch the ignition on.
3.Access the main menu in the informationdisplay and then scroll through themenus to select the MyKey menu. Fromthe MyKey menu select the option CreateMyKey. See Instrument Cluster Display(page 146).
4.When prompted, hold the OK button untilyou see a message informing you to labelthis key as a MyKey. The programmedrestrictions apply when you switch thevehicle off, open and close the driverdoor and restart your vehicle with theprogrammed key or remote control.
5.Switch the ignition off.
You have successfully created a MyKey.Make sure you label it so you can distinguishit from the admin keys.
You can also program configurable settingsfor the keys.
Programming and ChangingConfigurable Settings
Use the information display to access yourconfigurable MyKey settings.
1.Switch the ignition on using an admin keyor remote control you want to program.
2.Access the main menu in the informationdisplay and then scroll through theMyKey menus to change the settings ofthe MyKey. See Instrument ClusterDisplay (page 146).
3.Follow the instructions on the display.The programmed restrictions apply whenyou switch the vehicle off, open andclose the driver door and restart yourvehicle with the programmed key orremote control.
Note: You can clear or change your MyKeysettings at any time during the same keycycle as you created the MyKey. Once youhave switched the vehicle off, you need anadmin key to change or clear your MyKeysettings. When you make any changes toyour MyKey settings, you change the settingsfor every MyKey. You cannot makeindividual changes to apply to certainMyKeys.
CLEARING ALL MYKEYS
When you clear your MyKeys, you removeall restrictions and return all MyKeys to theiroriginal admin key status at once. To clearall MyKeys of all MyKey settings, use theinformation display.
1.Switch the ignition on using an adminkey.
87
2023 Nautilus (CD9) Canada/United States of America, enUSA, Edition date: 202207, DOMMyKey™E203694
Page 92 of 606
2.Access the main menu in the informationdisplay and then scroll through themenus to select the MyKey menu. Fromthe MyKey menu select the option ClearAll MyKeys. See Instrument ClusterDisplay (page 146).
3.Follow the instructions on the display.
4.A confirmation message appears on thedisplay after you finish clearing yourMyKeys.
Note:When you clear your MyKeys, youremove all restrictions and return all MyKeysto their original admin key status. You cannotremove the MyKey restrictions individually.
CHECKING MYKEY SYSTEM
STATUS
You can find information about yourprogrammed MyKeys by using theinformation display.
MyKey Distance
Tracks the distance when drivers use aMyKey. The only way to delete theaccumulated distance is by using an adminkey to clear all MyKeys. If the distance doesnot accumulate as expected, then theintended user is not using the MyKey, or anadmin key user recently cleared and thenrecreated a MyKey.
Number of MyKeys
Indicates the number of MyKeysprogrammed to your vehicle. Use this featureto detect how many MyKeys you have foryour vehicle and determine when all MyKeyshave been deleted.
Number of Admin Keys
Indicates how many admin keys areprogrammed to your vehicle. Use this featureto determine how many admin keys you havefor your vehicle, and detect if an additionalMyKey has been programmed.
USING MYKEY WITH REMOTE
START SYSTEMS
MyKey is not compatible with nonLincoln-approved, aftermarket remote startsystems. If you choose to install a remotestart system, see an authorized dealer for aLincoln-approved remote start system.
88
2023 Nautilus (CD9) Canada/United States of America, enUSA, Edition date: 202207, DOMMyKey™
Page 93 of 606
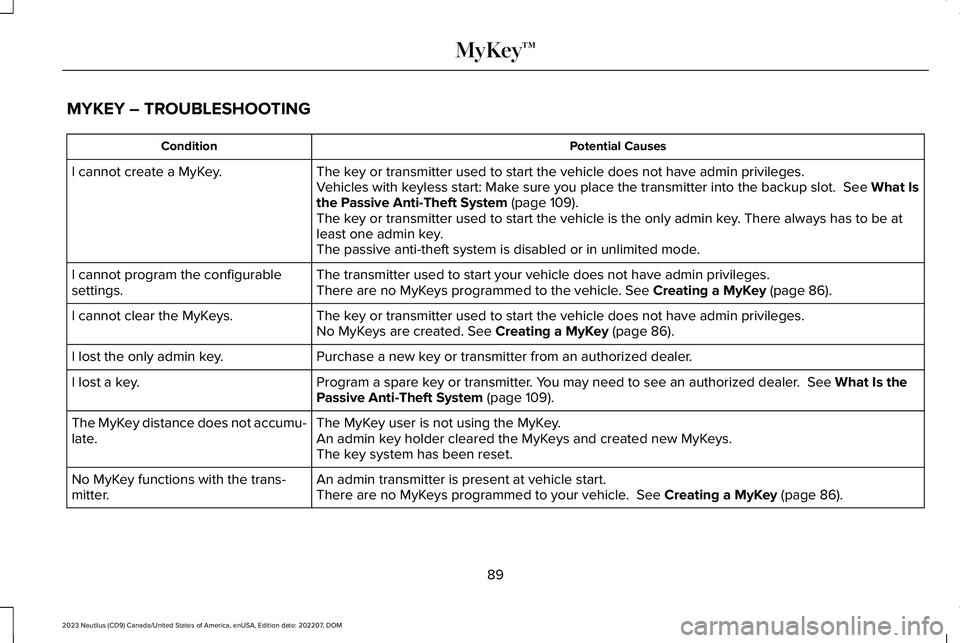
MYKEY – TROUBLESHOOTING
Potential CausesCondition
The key or transmitter used to start the vehicle does not have admin privileges.I cannot create a MyKey.Vehicles with keyless start: Make sure you place the transmitter into the backup slot. See What Isthe Passive Anti-Theft System (page 109).The key or transmitter used to start the vehicle is the only admin key. There always has to be atleast one admin key.The passive anti-theft system is disabled or in unlimited mode.
The transmitter used to start your vehicle does not have admin privileges.I cannot program the configurablesettings.There are no MyKeys programmed to the vehicle. See Creating a MyKey (page 86).
The key or transmitter used to start the vehicle does not have admin privileges.I cannot clear the MyKeys.No MyKeys are created. See Creating a MyKey (page 86).
Purchase a new key or transmitter from an authorized dealer.I lost the only admin key.
Program a spare key or transmitter. You may need to see an authorized dealer. See What Is thePassive Anti-Theft System (page 109).I lost a key.
The MyKey user is not using the MyKey.The MyKey distance does not accumu-late.An admin key holder cleared the MyKeys and created new MyKeys.The key system has been reset.
An admin transmitter is present at vehicle start.No MyKey functions with the trans-mitter.There are no MyKeys programmed to your vehicle. See Creating a MyKey (page 86).
89
2023 Nautilus (CD9) Canada/United States of America, enUSA, Edition date: 202207, DOMMyKey™
Page 98 of 606
WHAT IS KEYLESS ENTRY
The system allows you to lock and unlockyour vehicle without taking the passive keyout of your pocket or purse.
KEYLESS ENTRY LIMITATIONS
Make sure your remote control is within 3 ft(1 m) from the front door handles and thetailgate.
The system could not function if:
•The remote control remains stationaryfor about a minute.
•The vehicle battery has no charge.
•The remote control battery has nocharge.
•There is interference causing issues withthe remote control frequencies.
•The remote control is too close to metalobjects or electronic devices, for examplekeys or a cell phone.
KEYLESS ENTRY SETTINGS
Switching Keyless Entry On and Off
1.Switch the ignition on using an originalkey that has not been created as aMyKey.
2.Press Settings on the touchscreen.
3.Press Vehicle Settings.
4.Press Locks.
Reprogramming the UnlockingFunction
You can enable two-stage unlocking functionallowing you to unlock only the driver doorwhen you touch the unlock sensor.
Press and hold both the lock and unlockbuttons on the remote control for fourseconds to disable or enable two-stageunlocking.
If you program the unlocking function so thatonly the driver door unlocks, you can unlockall of the other doors from inside your vehicleusing the power door lock control. You canunlock individual doors by pulling the interiordoor handles on those doors.
USING KEYLESS ENTRY
Unlocking the Doors
With the remote control within 3 ft (1 m) ofyour vehicle, touch the unlock sensor on theback of the door handle for a brief periodand then pull on the door handle to unlock,being careful not to touch the lock sensor atthe same time or pull on the door handle tooquickly. The system requires a brief delay toauthenticate the remote control.
94
2023 Nautilus (CD9) Canada/United States of America, enUSA, Edition date: 202207, DOMKeyless EntryE248553
Page 101 of 606
Locking the Doors
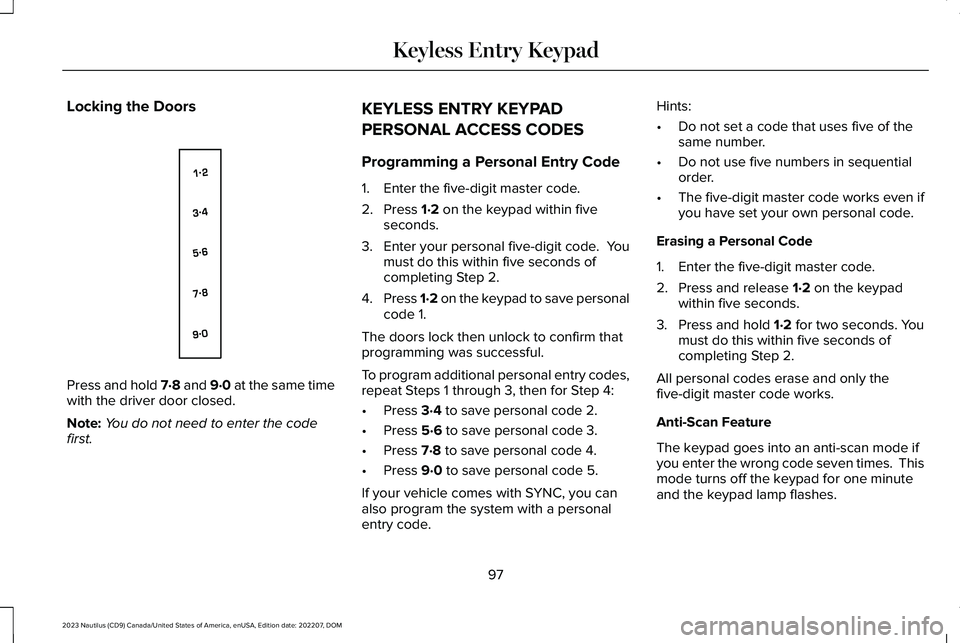
Press and hold 7·8 and 9·0 at the same timewith the driver door closed.
Note:You do not need to enter the codefirst.
KEYLESS ENTRY KEYPAD
PERSONAL ACCESS CODES
Programming a Personal Entry Code
1.Enter the five-digit master code.
2.Press 1·2 on the keypad within fiveseconds.
3.Enter your personal five-digit code. Youmust do this within five seconds ofcompleting Step 2.
4.Press 1·2 on the keypad to save personalcode 1.
The doors lock then unlock to confirm thatprogramming was successful.
To program additional personal entry codes,repeat Steps 1 through 3, then for Step 4:
•Press 3·4 to save personal code 2.
•Press 5·6 to save personal code 3.
•Press 7·8 to save personal code 4.
•Press 9·0 to save personal code 5.
If your vehicle comes with SYNC, you canalso program the system with a personalentry code.
Hints:
•Do not set a code that uses five of thesame number.
•Do not use five numbers in sequentialorder.
•The five-digit master code works even ifyou have set your own personal code.
Erasing a Personal Code
1.Enter the five-digit master code.
2.Press and release 1·2 on the keypadwithin five seconds.
3.Press and hold 1·2 for two seconds. Youmust do this within five seconds ofcompleting Step 2.
All personal codes erase and only thefive-digit master code works.
Anti-Scan Feature
The keypad goes into an anti-scan mode ifyou enter the wrong code seven times. Thismode turns off the keypad for one minuteand the keypad lamp flashes.
97
2023 Nautilus (CD9) Canada/United States of America, enUSA, Edition date: 202207, DOMKeyless Entry KeypadE138637
Page 107 of 606
Detection Zones
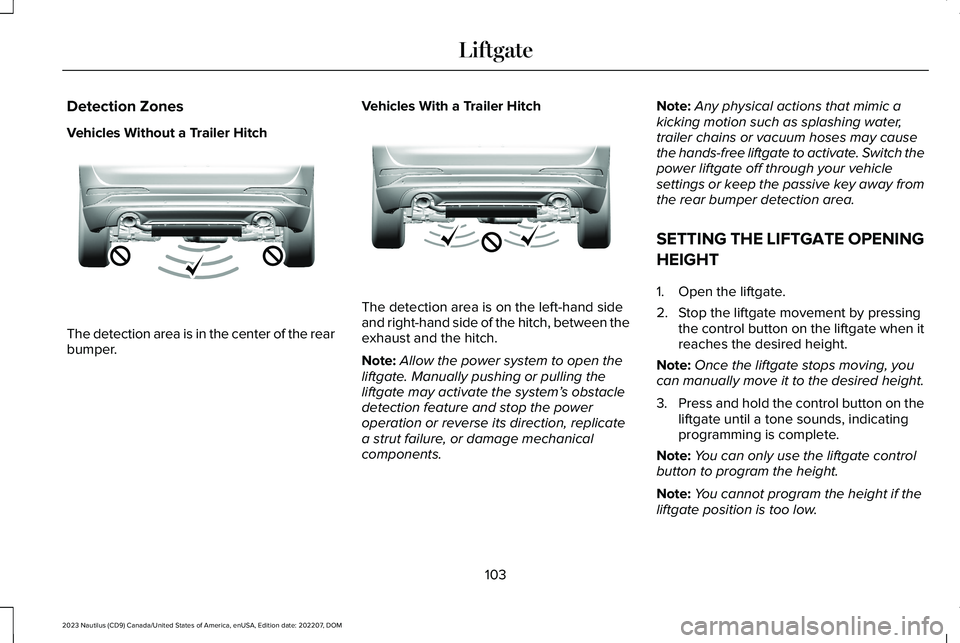
Vehicles Without a Trailer Hitch
The detection area is in the center of the rearbumper.
Vehicles With a Trailer Hitch
The detection area is on the left-hand sideand right-hand side of the hitch, between theexhaust and the hitch.
Note:Allow the power system to open theliftgate. Manually pushing or pulling theliftgate may activate the system’s obstacledetection feature and stop the poweroperation or reverse its direction, replicatea strut failure, or damage mechanicalcomponents.
Note:Any physical actions that mimic akicking motion such as splashing water,trailer chains or vacuum hoses may causethe hands-free liftgate to activate. Switch thepower liftgate off through your vehiclesettings or keep the passive key away fromthe rear bumper detection area.
SETTING THE LIFTGATE OPENING
HEIGHT
1.Open the liftgate.
2.Stop the liftgate movement by pressingthe control button on the liftgate when itreaches the desired height.
Note:Once the liftgate stops moving, youcan manually move it to the desired height.
3.Press and hold the control button on theliftgate until a tone sounds, indicatingprogramming is complete.
Note:You can only use the liftgate controlbutton to program the height.
Note:You cannot program the height if theliftgate position is too low.
103
2023 Nautilus (CD9) Canada/United States of America, enUSA, Edition date: 202207, DOMLiftgateE310717 E310718
Page 108 of 606
4.The power liftgate now opens at theprogrammed height. To change theprogrammed height, repeat the steps.
Note:You can fully open the liftgate bymanually pushing it upward to the maximumopen position if it opens in a lower position.
Note:The system recalls the newprogrammed height until you reprogram it,even if you disconnect the battery.
CLOSING THE LIFTGATE
CLOSING THE LIFTGATE FROM INSIDEYOUR VEHICLE
WARNING: Make sure all personsare clear of the power liftgate area beforeusing the power liftgate control.
With the transmission in park (P),press the button on the instrumentpanel.
Note: Make sure that you close the liftgatebefore operating or moving your vehicle,especially in an enclosure, like a garage ora parking structure. This could damage theliftgate and its components.
Note: Make sure the area behind yourvehicle is free from obstruction and thatthere is enough room for you to operate theliftgate. Objects too close to your vehicle,for example a wall, garage door or anothervehicle may come into contact with themoving liftgate. This could damage theliftgate and its components.
Note:Make sure that you fully close theliftgate to prevent cargo from falling out.
CLOSING THE LIFTGATE FROMOUTSIDE YOUR VEHICLE
WARNING: Make sure all personsare clear of the power liftgate area beforeusing the power liftgate control.
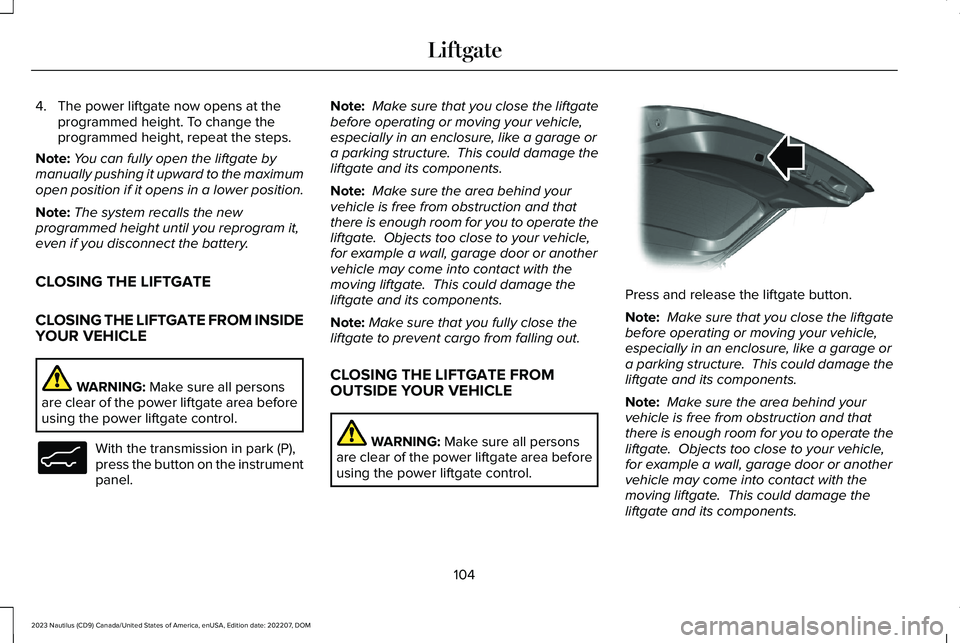
Press and release the liftgate button.
Note: Make sure that you close the liftgatebefore operating or moving your vehicle,especially in an enclosure, like a garage ora parking structure. This could damage theliftgate and its components.
Note: Make sure the area behind yourvehicle is free from obstruction and thatthere is enough room for you to operate theliftgate. Objects too close to your vehicle,for example a wall, garage door or anothervehicle may come into contact with themoving liftgate. This could damage theliftgate and its components.
104
2023 Nautilus (CD9) Canada/United States of America, enUSA, Edition date: 202207, DOMLiftgateE138633 E138636
Page 182 of 606
GARAGE DOOR OPENER
INTRODUCTION
HomeLink Wireless Control System
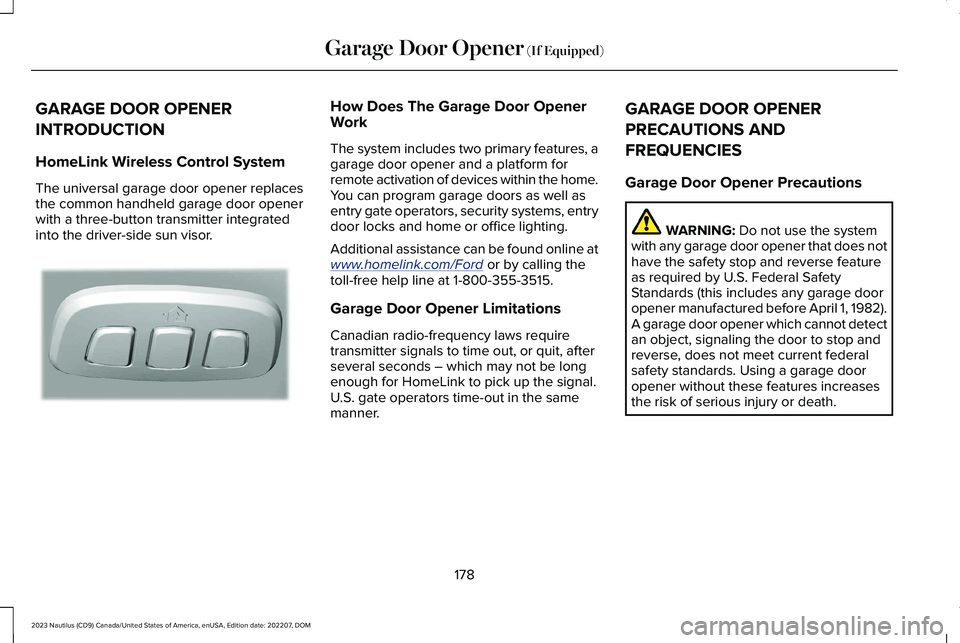
The universal garage door opener replacesthe common handheld garage door openerwith a three-button transmitter integratedinto the driver-side sun visor.
How Does The Garage Door OpenerWork
The system includes two primary features, agarage door opener and a platform forremote activation of devices within the home.You can program garage doors as well asentry gate operators, security systems, entrydoor locks and home or office lighting.
Additional assistance can be found online atwww.homelink.com/Ford or by calling thetoll-free help line at 1-800-355-3515.
Garage Door Opener Limitations
Canadian radio-frequency laws requiretransmitter signals to time out, or quit, afterseveral seconds – which may not be longenough for HomeLink to pick up the signal.U.S. gate operators time-out in the samemanner.
GARAGE DOOR OPENER
PRECAUTIONS AND
FREQUENCIES
Garage Door Opener Precautions
WARNING: Do not use the systemwith any garage door opener that does nothave the safety stop and reverse featureas required by U.S. Federal SafetyStandards (this includes any garage dooropener manufactured before April 1, 1982).A garage door opener which cannot detectan object, signaling the door to stop andreverse, does not meet current federalsafety standards. Using a garage dooropener without these features increasesthe risk of serious injury or death.
178
2023 Nautilus (CD9) Canada/United States of America, enUSA, Edition date: 202207, DOMGarage Door Opener (If Equipped)E188211
Page 183 of 606
FCC and RSS-210 Industry CanadaCompliance
WARNING: Changes or modificationsnot expressively approved by the partyresponsible for compliance could void theuser's authority to operate the equipment.The term "IC:" before the radio certificationnumber only signifies that Industry Canadatechnical specifications were met.
This device complies with Part 15 of the FCCRules and with RSS-210 of Industry Canada.Operation is subject to the following twoconditions: (1) this device may not causeharmful interference, and (2) this device mustaccept any interference received, includinginterference that may cause undesiredoperation.
This equipment complies with FCC radiationexposure limits set forth for an uncontrolledenvironment. End Users must follow thespecific operating instructions for satisfyingRF exposure compliance. This transmittermust be at least 8 in (20 cm) from the userand must not be co-located or operating inconjunction with any other antenna ortransmitter.
PROGRAMMING THE GARAGE
DOOR OPENER
To clear all stored codes in the garage dooropener in your vehicle, use the clearfunction. To override one button, use thereprogram function.
Note:Make sure that the garage door andsecurity device are free from obstructionwhen you are programming. Do not programthe system with the vehicle in the garage.
Clearing the Garage Door Opener
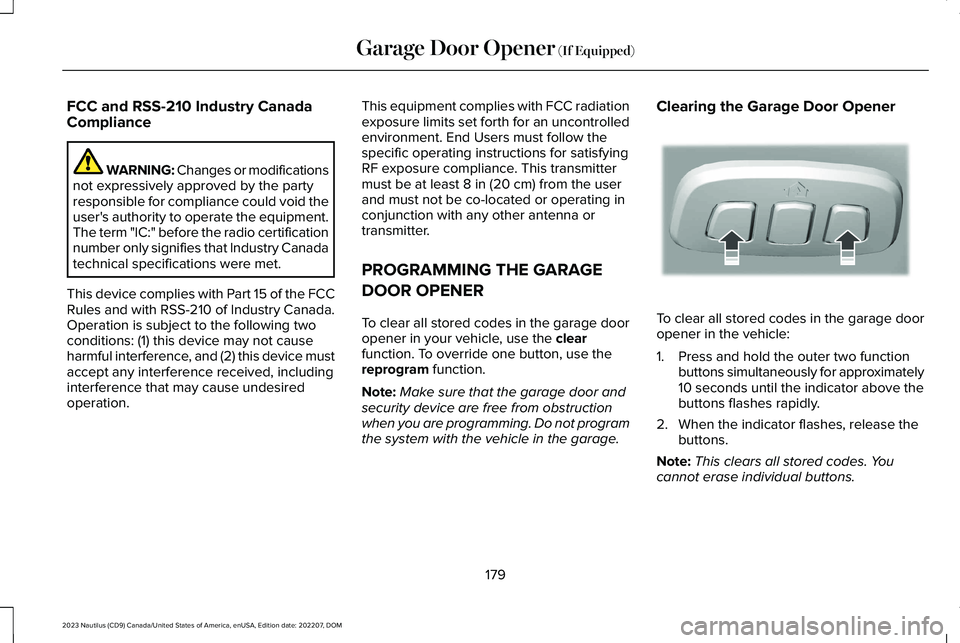
To clear all stored codes in the garage dooropener in the vehicle:
1.Press and hold the outer two functionbuttons simultaneously for approximately10 seconds until the indicator above thebuttons flashes rapidly.
2.When the indicator flashes, release thebuttons.
Note:This clears all stored codes. Youcannot erase individual buttons.
179
2023 Nautilus (CD9) Canada/United States of America, enUSA, Edition date: 202207, DOMGarage Door Opener (If Equipped)E188213