headlamp LINCOLN NAVIGATOR 2007 Owners Manual
[x] Cancel search | Manufacturer: LINCOLN, Model Year: 2007, Model line: NAVIGATOR, Model: LINCOLN NAVIGATOR 2007Pages: 312, PDF Size: 2.74 MB
Page 1 of 312
Introduction 4
Instrument Cluster 10
Warning lights and chimes 10
Gauges 15
Entertainment Systems 18
AM/FM stereo with CDX6/MP3 18
Auxiliary input jack 24
Rear seat controls 25
Satellite radio information 29
Climate Controls 33
Rear window defroster 38
Lights 39
Headlamps 39
Turn signal control 42
Bulb replacement 44
Driver Controls 49
Windshield wiper/washer control 49
Steering wheel adjustment 50
Power windows 55
Mirrors 58
Speed control 61
Moon roof 66
Message center 71
Locks and Security 89
Keys 89
Locks 89
Table of Contents
1
2007 Navigator(nav)
Owners Guide (post-2002-fmt)
USA(fus)
Page 14 of 312
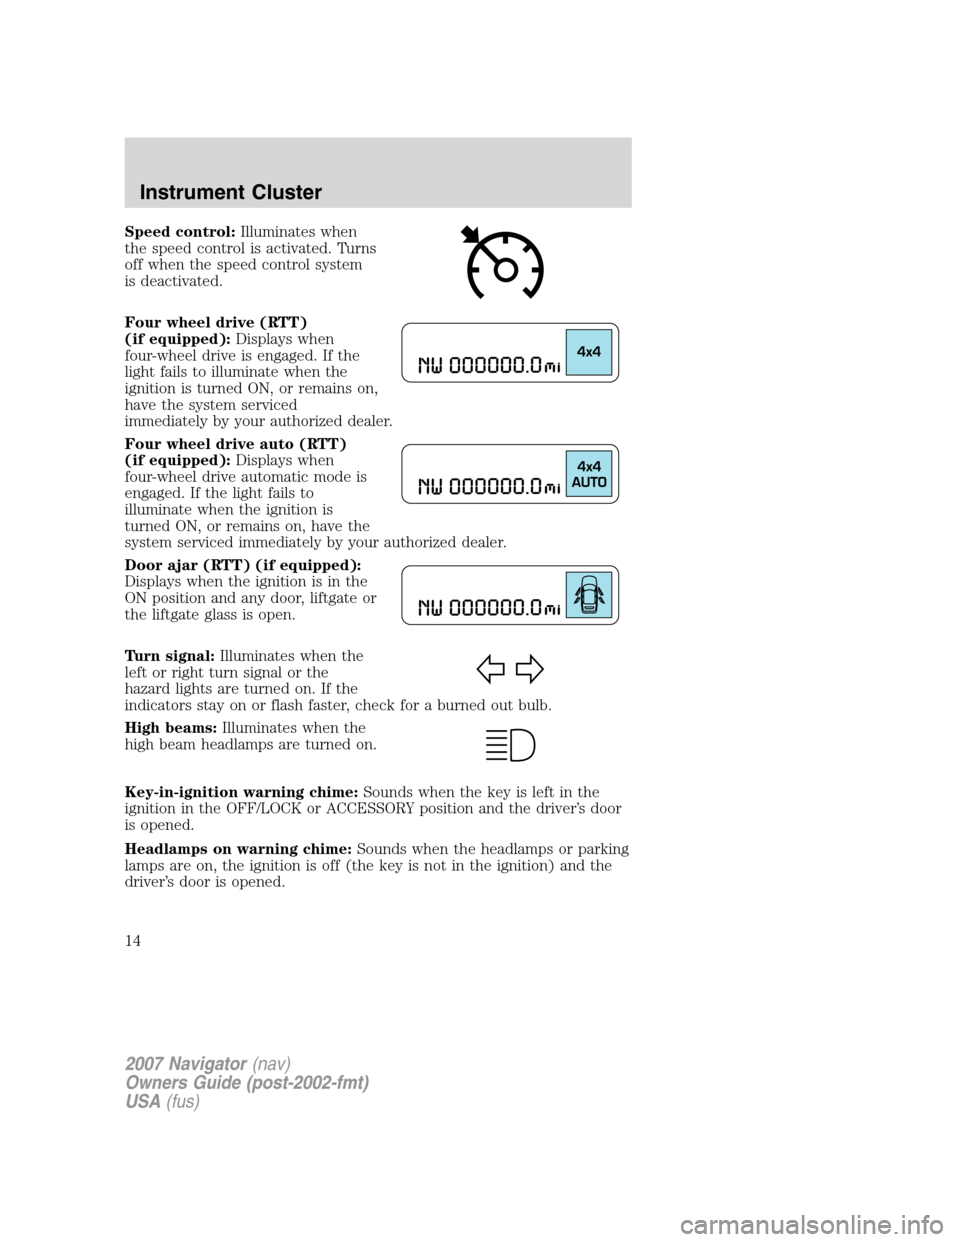
Speed control:Illuminates when
the speed control is activated. Turns
off when the speed control system
is deactivated.
Four wheel drive (RTT)
(if equipped):Displays when
four-wheel drive is engaged. If the
light fails to illuminate when the
ignition is turned ON, or remains on,
have the system serviced
immediately by your authorized dealer.
Four wheel drive auto (RTT)
(if equipped):Displays when
four-wheel drive automatic mode is
engaged. If the light fails to
illuminate when the ignition is
turned ON, or remains on, have the
system serviced immediately by your authorized dealer.
Door ajar (RTT) (if equipped):
Displays when the ignition is in the
ON position and any door, liftgate or
the liftgate glass is open.
Turn signal:Illuminates when the
left or right turn signal or the
hazard lights are turned on. If the
indicators stay on or flash faster, check for a burned out bulb.
High beams:Illuminates when the
high beam headlamps are turned on.
Key-in-ignition warning chime:Sounds when the key is left in the
ignition in the OFF/LOCK or ACCESSORY position and the driver’s door
is opened.
Headlamps on warning chime:Sounds when the headlamps or parking
lamps are on, the ignition is off (the key is not in the ignition) and the
driver’s door is opened.
2007 Navigator(nav)
Owners Guide (post-2002-fmt)
USA(fus)
Instrument Cluster
14
Page 39 of 312
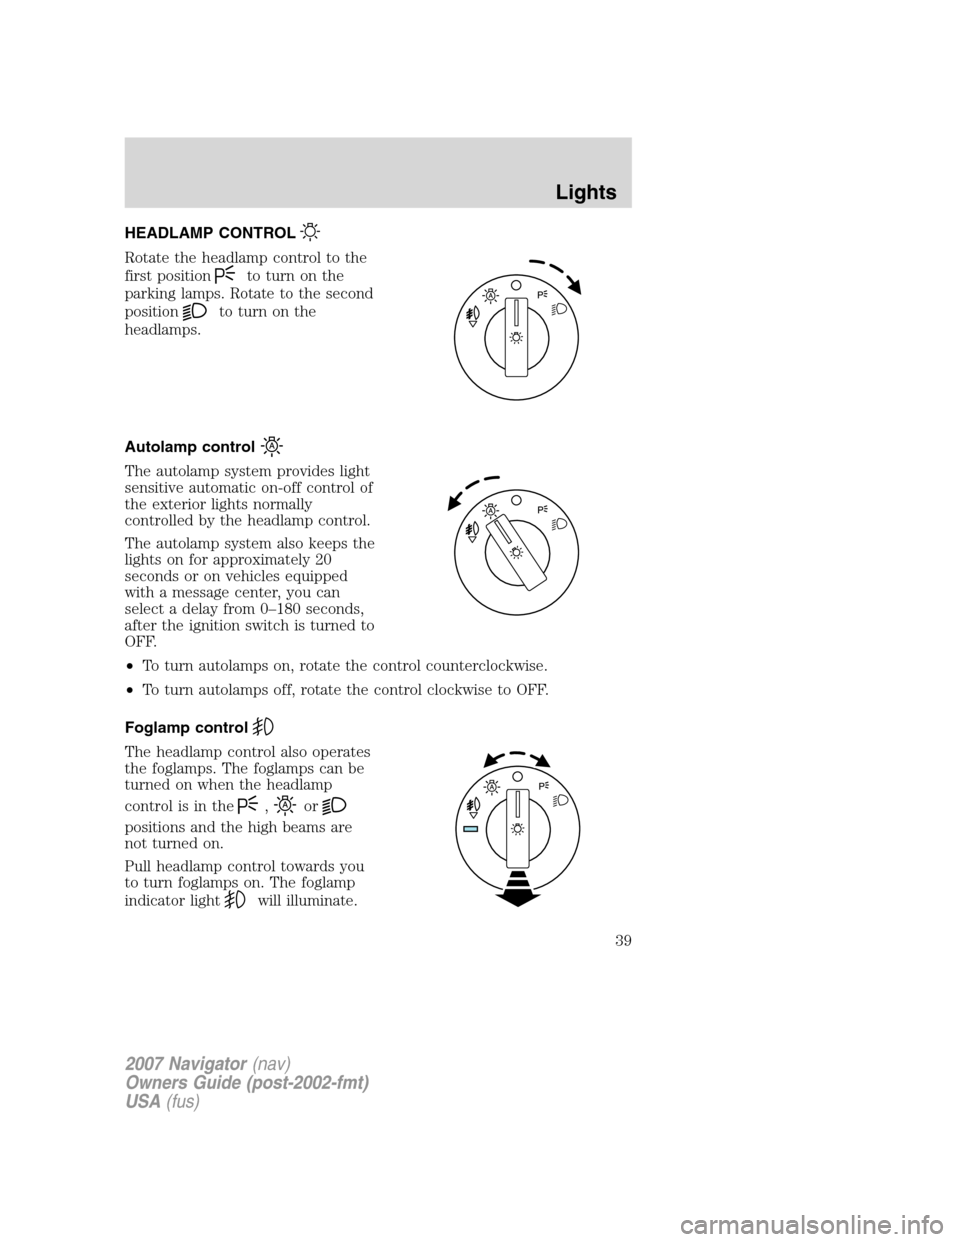
HEADLAMP CONTROL
Rotate the headlamp control to the
first position
to turn on the
parking lamps. Rotate to the second
position
to turn on the
headlamps.
Autolamp control
The autolamp system provides light
sensitive automatic on-off control of
the exterior lights normally
controlled by the headlamp control.
The autolamp system also keeps the
lights on for approximately 20
seconds or on vehicles equipped
with a message center, you can
select a delay from 0–180 seconds,
after the ignition switch is turned to
OFF.
•To turn autolamps on, rotate the control counterclockwise.
•To turn autolamps off, rotate the control clockwise to OFF.
Foglamp control
The headlamp control also operates
the foglamps. The foglamps can be
turned on when the headlamp
control is in the
,or
positions and the high beams are
not turned on.
Pull headlamp control towards you
to turn foglamps on. The foglamp
indicator light
will illuminate.
2007 Navigator(nav)
Owners Guide (post-2002-fmt)
USA(fus)
Lights
39
Page 40 of 312
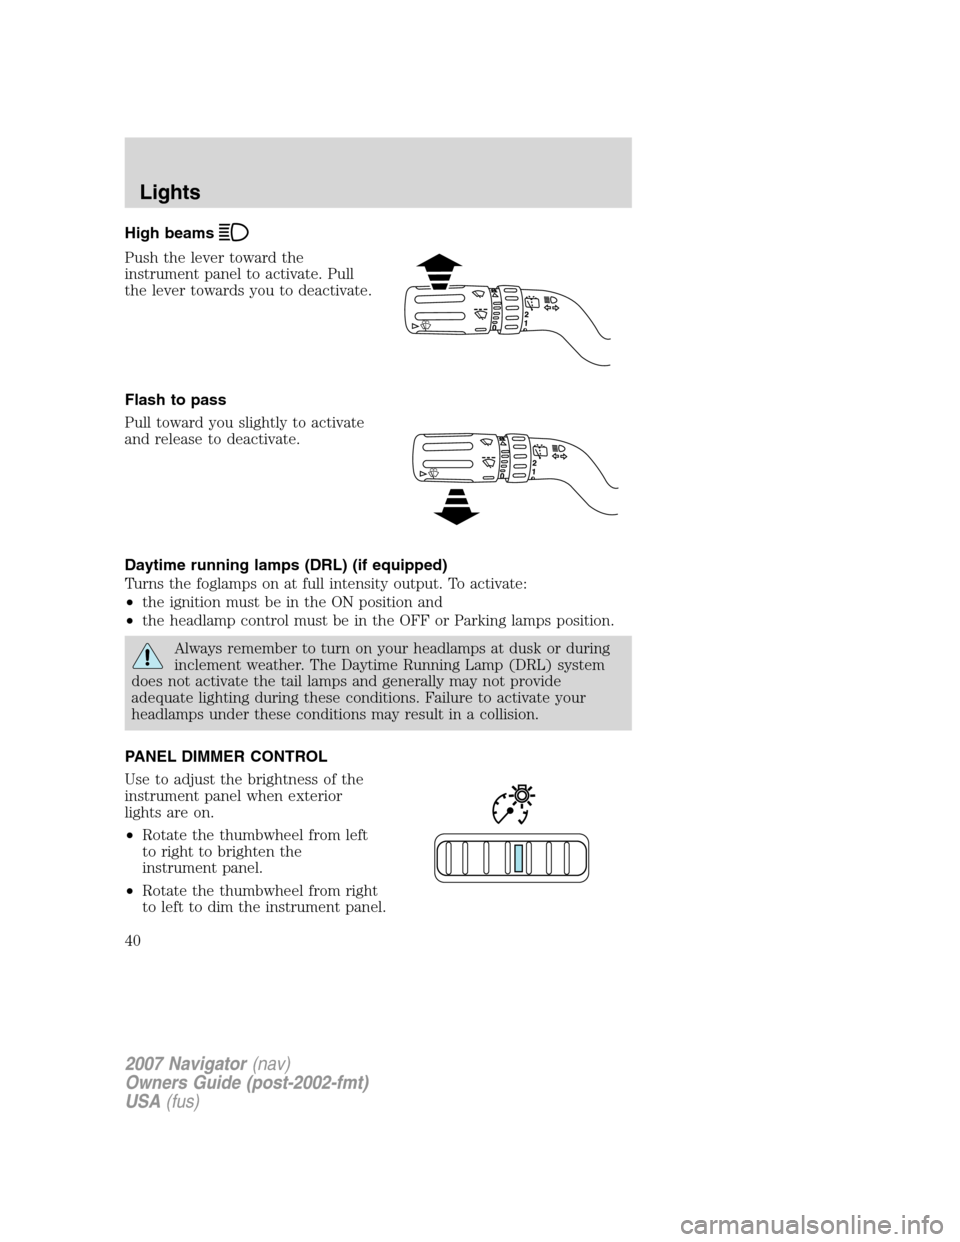
High beams
Push the lever toward the
instrument panel to activate. Pull
the lever towards you to deactivate.
Flash to pass
Pull toward you slightly to activate
and release to deactivate.
Daytime running lamps (DRL) (if equipped)
Turns the foglamps on at full intensity output. To activate:
•the ignition must be in the ON position and
•the headlamp control must be in the OFF or Parking lamps position.
Always remember to turn on your headlamps at dusk or during
inclement weather. The Daytime Running Lamp (DRL) system
does not activate the tail lamps and generally may not provide
adequate lighting during these conditions. Failure to activate your
headlamps under these conditions may result in a collision.
PANEL DIMMER CONTROL
Use to adjust the brightness of the
instrument panel when exterior
lights are on.
•Rotate the thumbwheel from left
to right to brighten the
instrument panel.
•Rotate the thumbwheel from right
to left to dim the instrument panel.
2007 Navigator(nav)
Owners Guide (post-2002-fmt)
USA(fus)
Lights
40
Page 41 of 312
•Rotate fully to the right (past detent) to turn on interior lamps.
•Rotate to the left position (past detent) to turn off the interior lamps
and will also disable the illuminated entry feature.
At dusk and dawn, the LEDs are illuminated at six times the normal
intensity to enhance contrast and visibility. The system automatically
“dims down” as ambient light reaches the dash-mounted sensor.
The interior control lights dim progressively in four steps until they
reach nighttime operating levels. At all illumination levels, the lights can
be dimmed using the thumbwheel on the instrument panel.
AIMING THE HEADLAMPS
The headlamps on your vehicle are properly aimed at the assembly plant.
If your vehicle has been in an accident the alignment of your headlamps
should be checked by your authorized dealer.
Vertical aim adjustment
Before aim adjustment, disable the air suspension system. Refer to
Messagecenter in theDriver Controlschapter.
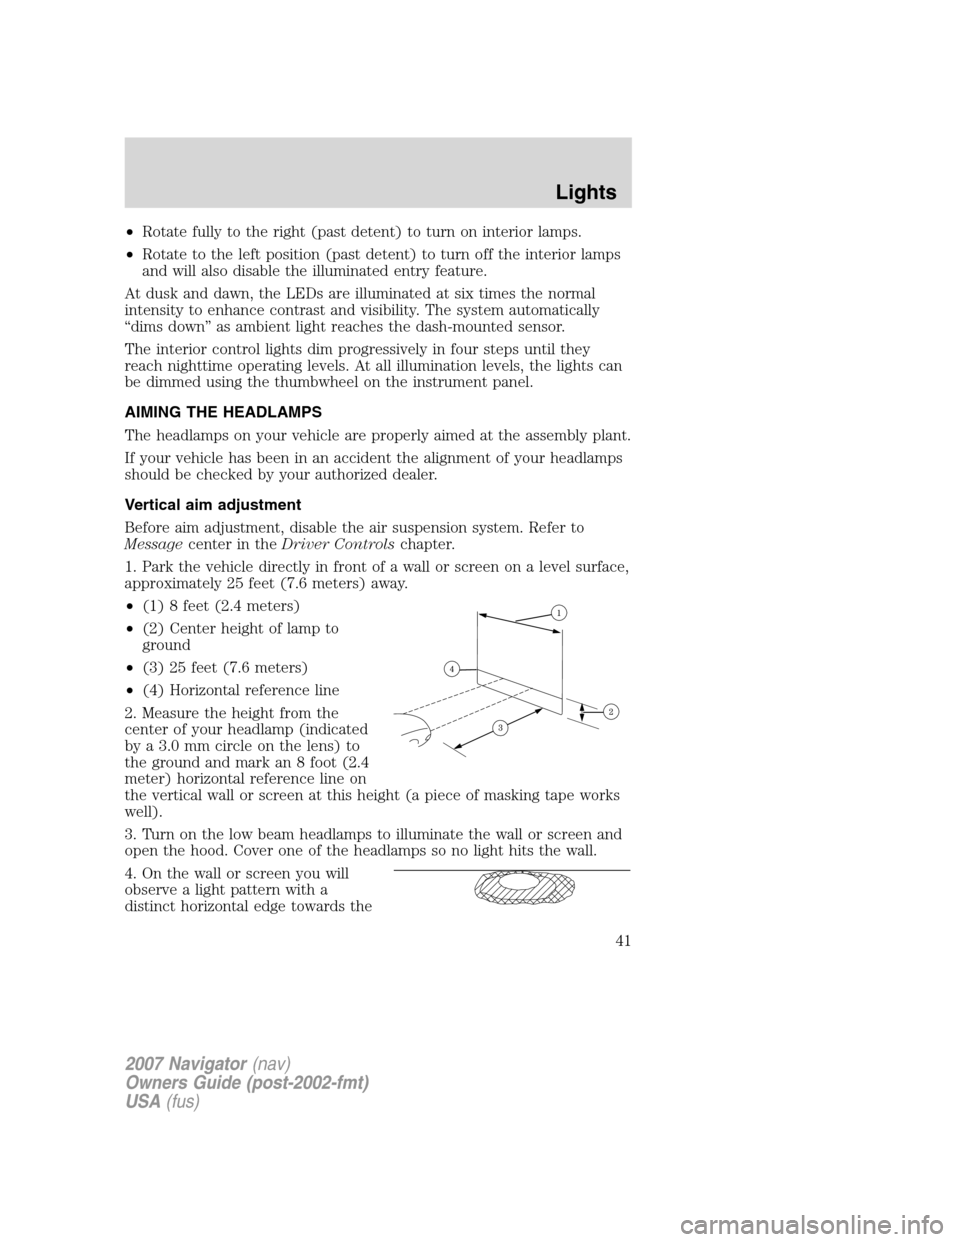
1. Park the vehicle directly in front of a wall or screen on a level surface,
approximately 25 feet (7.6 meters) away.
•(1) 8 feet (2.4 meters)
•(2) Center height of lamp to
ground
•(3) 25 feet (7.6 meters)
•(4) Horizontal reference line
2. Measure the height from the
center of your headlamp (indicated
by a 3.0 mm circle on the lens) to
the ground and mark an 8 foot (2.4
meter) horizontal reference line on
the vertical wall or screen at this height (a piece of masking tape works
well).
3. Turn on the low beam headlamps to illuminate the wall or screen and
open the hood. Cover one of the headlamps so no light hits the wall.
4. On the wall or screen you will
observe a light pattern with a
distinct horizontal edge towards the
2007 Navigator(nav)
Owners Guide (post-2002-fmt)
USA(fus)
Lights
41
Page 42 of 312
right. If this edge is not at the horizontal reference line, the beam will
need to be adjusted so the edge is at the same height as the horizontal
reference line.
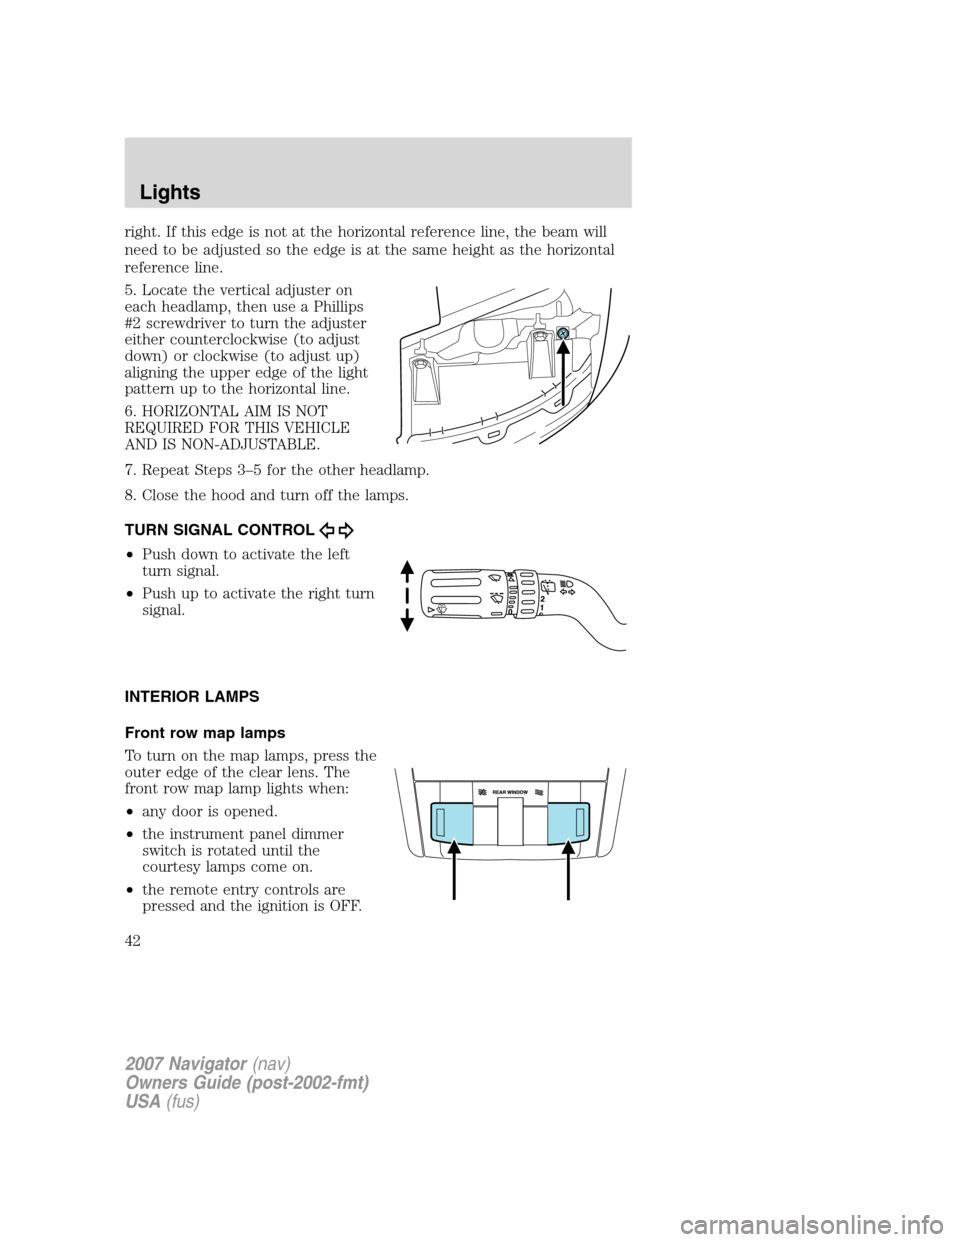
5. Locate the vertical adjuster on
each headlamp, then use a Phillips
#2 screwdriver to turn the adjuster
either counterclockwise (to adjust
down) or clockwise (to adjust up)
aligning the upper edge of the light
pattern up to the horizontal line.
6. HORIZONTAL AIM IS NOT
REQUIRED FOR THIS VEHICLE
AND IS NON-ADJUSTABLE.
7. Repeat Steps 3–5 for the other headlamp.
8. Close the hood and turn off the lamps.
TURN SIGNAL CONTROL
•Push down to activate the left
turn signal.
•Push up to activate the right turn
signal.
INTERIOR LAMPS
Front row map lamps
To turn on the map lamps, press the
outer edge of the clear lens. The
front row map lamp lights when:
•any door is opened.
•the instrument panel dimmer
switch is rotated until the
courtesy lamps come on.
•the remote entry controls are
pressed and the ignition is OFF.
2007 Navigator(nav)
Owners Guide (post-2002-fmt)
USA(fus)
Lights
42
Page 44 of 312
BULB REPLACEMENT
Headlamp Condensation
The headlamps are vented to equalize pressure. When moist air enters
the headlamp(s) through the vents, there is a possibility that
condensation can occur. This condensation is normal and will clear
within 45 minutes of headlamp operation.
Using the right bulbs
Replacement bulbs are specified in the chart below. Headlamp bulbs
must be marked with an authorized “D.O.T.” for North America to ensure
lamp performance, light brightness and pattern and safe visibility. The
correct bulbs will not damage the lamp assembly or void the lamp
assembly warranty and will provide quality bulb burn time.
Function Number of bulbs Trade number
Headlamps (low and
high-beam)2 *See your dealer
Front park lamps 2 3157 A (amber)
Front turn lamps 2 3157 K
Front sidemarker 2 168 (amber)
Foglamps 2 800
Front row map lamps 2 1600XB
2nd row reading lamp 1 1600XB
Rear cargo lamp 1 211–2XB
Rear turn/tail/brake lamps 4 4057K
Backup lamps 2 921
Supplemental tail lamps 4 906
Approach lamps 2 906
Mirror turn signal lamps 2 906 (amber)
License lamp 2 168
High-mount brake lamp 5 W5W
All replacement bulbs are clear in color except where noted.
To replace all instrument panel lights - see your authorized dealer
* For vehicles with HID (high intensity discharge) lamps, see your
authorized dealer for service.
2007 Navigator(nav)
Owners Guide (post-2002-fmt)
USA(fus)
Lights
44
Page 45 of 312
Replacing the interior bulbs
Check the operation of all bulbs frequently.
Replacing exterior bulbs
Check the operation of all the bulbs frequently.
Replacing HID headlamp bulbs
The low/high beam headlamps on your vehicle may use a “high intensity
discharge” source. These lamps operate at a high voltage. The bulb is
NOT replaceable. When the bulb is burned out, the lamp assembly must
be replaced by your authorized dealer.
Replacing front parking lamp/turn signal/sidemarker bulbs
The front parking lamp/turn signal/sidemarker bulbs are located in the
headlamp assembly. Follow the same steps to replace either bulb:
1. Make sure the headlamp control is in the OFF position.
2. Open the hood.
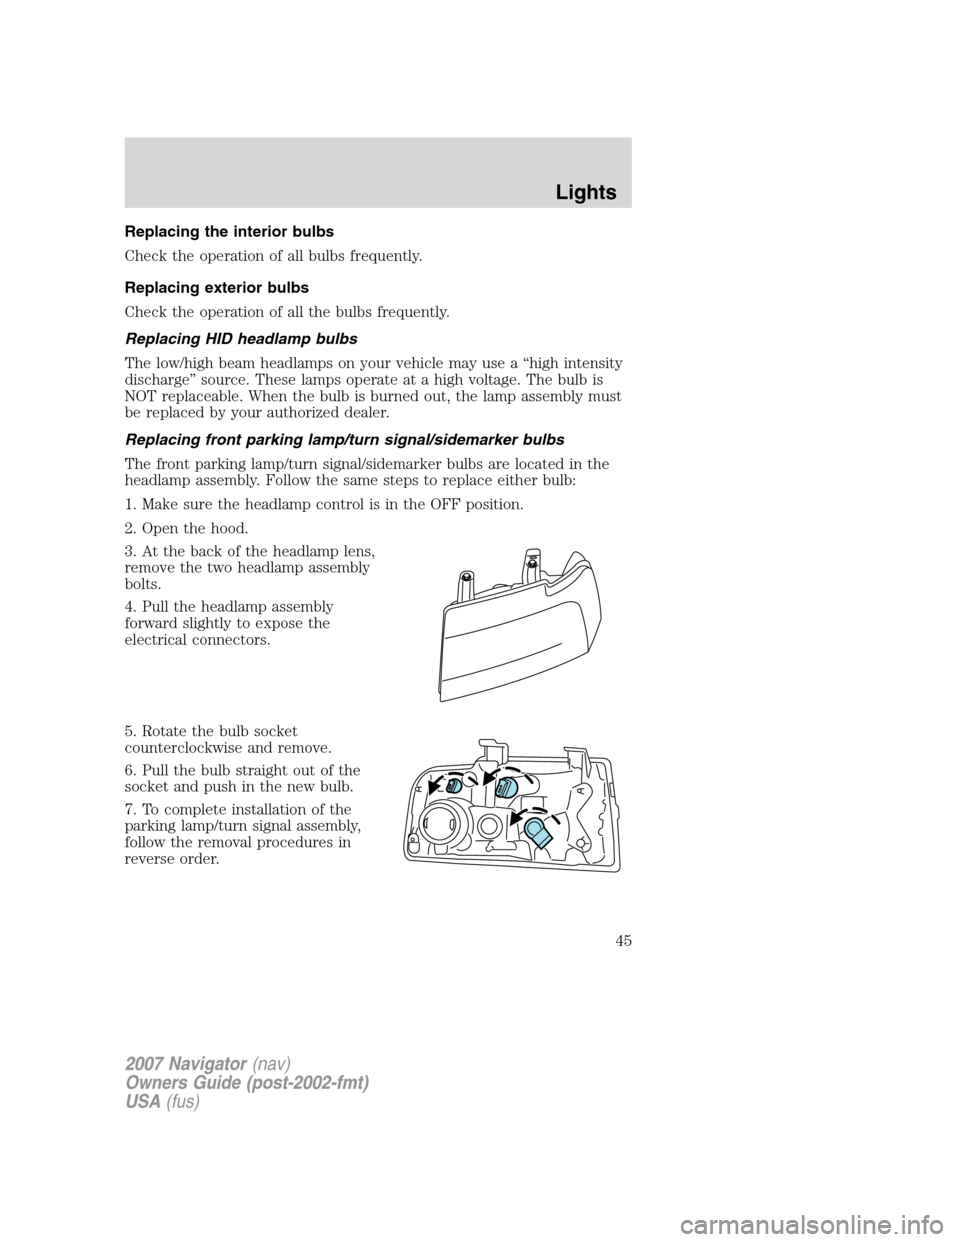
3. At the back of the headlamp lens,
remove the two headlamp assembly
bolts.
4. Pull the headlamp assembly
forward slightly to expose the
electrical connectors.
5. Rotate the bulb socket
counterclockwise and remove.
6. Pull the bulb straight out of the
socket and push in the new bulb.
7. To complete installation of the
parking lamp/turn signal assembly,
follow the removal procedures in
reverse order.
2007 Navigator(nav)
Owners Guide (post-2002-fmt)
USA(fus)
Lights
45
Page 46 of 312
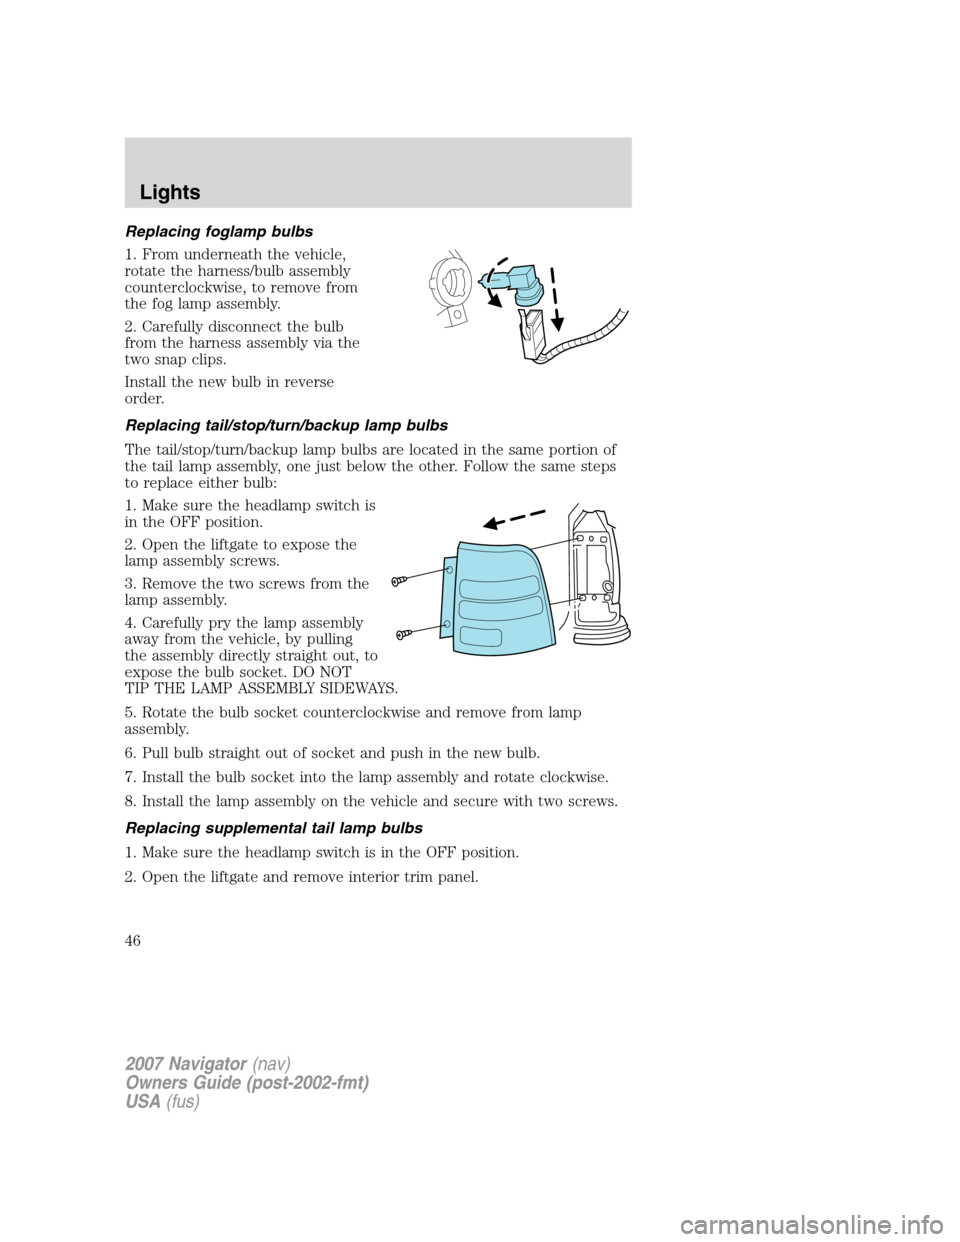
Replacing foglamp bulbs
1. From underneath the vehicle,
rotate the harness/bulb assembly
counterclockwise, to remove from
the fog lamp assembly.
2. Carefully disconnect the bulb
from the harness assembly via the
two snap clips.
Install the new bulb in reverse
order.
Replacing tail/stop/turn/backup lamp bulbs
The tail/stop/turn/backup lamp bulbs are located in the same portion of
the tail lamp assembly, one just below the other. Follow the same steps
to replace either bulb:
1. Make sure the headlamp switch is
in the OFF position.
2. Open the liftgate to expose the
lamp assembly screws.
3. Remove the two screws from the
lamp assembly.
4. Carefully pry the lamp assembly
away from the vehicle, by pulling
the assembly directly straight out, to
expose the bulb socket. DO NOT
TIP THE LAMP ASSEMBLY SIDEWAYS.
5. Rotate the bulb socket counterclockwise and remove from lamp
assembly.
6. Pull bulb straight out of socket and push in the new bulb.
7. Install the bulb socket into the lamp assembly and rotate clockwise.
8. Install the lamp assembly on the vehicle and secure with two screws.
Replacing supplemental tail lamp bulbs
1. Make sure the headlamp switch is in the OFF position.
2. Open the liftgate and remove interior trim panel.
2007 Navigator(nav)
Owners Guide (post-2002-fmt)
USA(fus)
Lights
46
Page 48 of 312
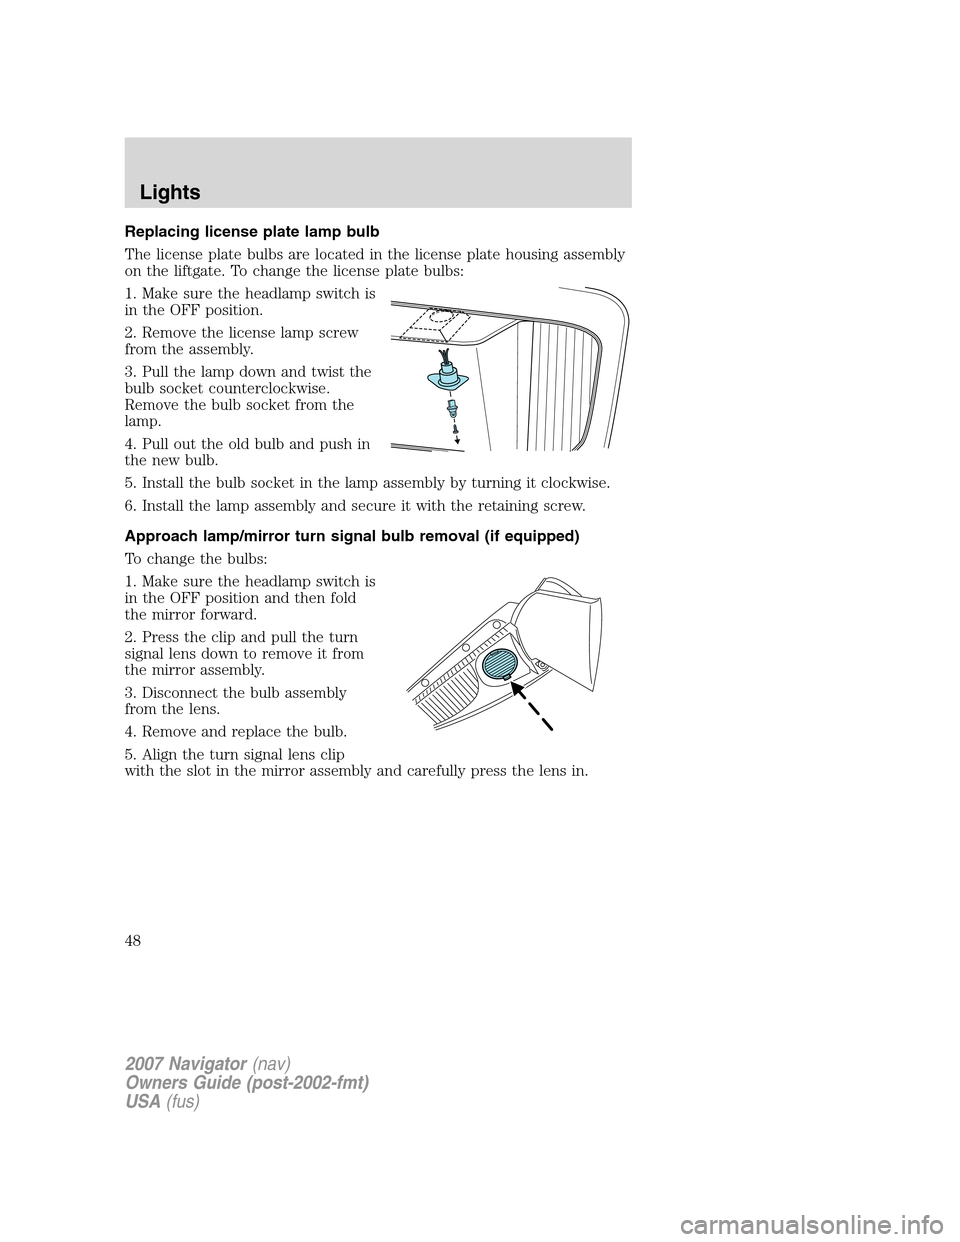
Replacing license plate lamp bulb
The license plate bulbs are located in the license plate housing assembly
on the liftgate. To change the license plate bulbs:
1. Make sure the headlamp switch is
in the OFF position.
2. Remove the license lamp screw
from the assembly.
3. Pull the lamp down and twist the
bulb socket counterclockwise.
Remove the bulb socket from the
lamp.
4. Pull out the old bulb and push in
the new bulb.
5. Install the bulb socket in the lamp assembly by turning it clockwise.
6. Install the lamp assembly and secure it with the retaining screw.
Approach lamp/mirror turn signal bulb removal (if equipped)
To change the bulbs:
1. Make sure the headlamp switch is
in the OFF position and then fold
the mirror forward.
2. Press the clip and pull the turn
signal lens down to remove it from
the mirror assembly.
3. Disconnect the bulb assembly
from the lens.
4. Remove and replace the bulb.
5. Align the turn signal lens clip
with the slot in the mirror assembly and carefully press the lens in.
2007 Navigator(nav)
Owners Guide (post-2002-fmt)
USA(fus)
Lights
48