LINCOLN NAVIGATOR 2010 Owners Manual
Manufacturer: LINCOLN, Model Year: 2010, Model line: NAVIGATOR, Model: LINCOLN NAVIGATOR 2010Pages: 385, PDF Size: 2.96 MB
Page 91 of 385
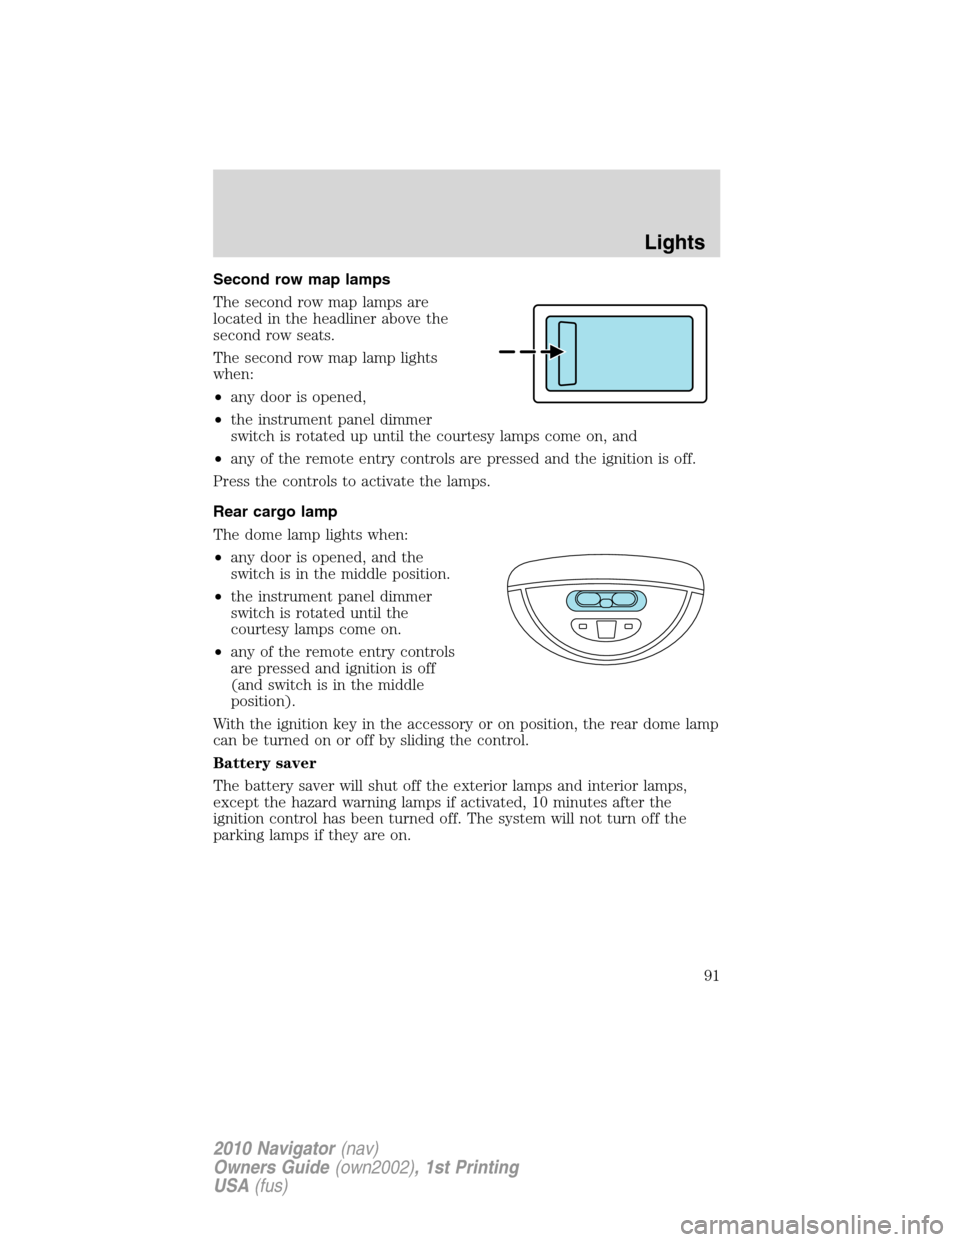
Second row map lamps
The second row map lamps are
located in the headliner above the
second row seats.
The second row map lamp lights
when:
•any door is opened,
•the instrument panel dimmer
switch is rotated up until the courtesy lamps come on, and
•any of the remote entry controls are pressed and the ignition is off.
Press the controls to activate the lamps.
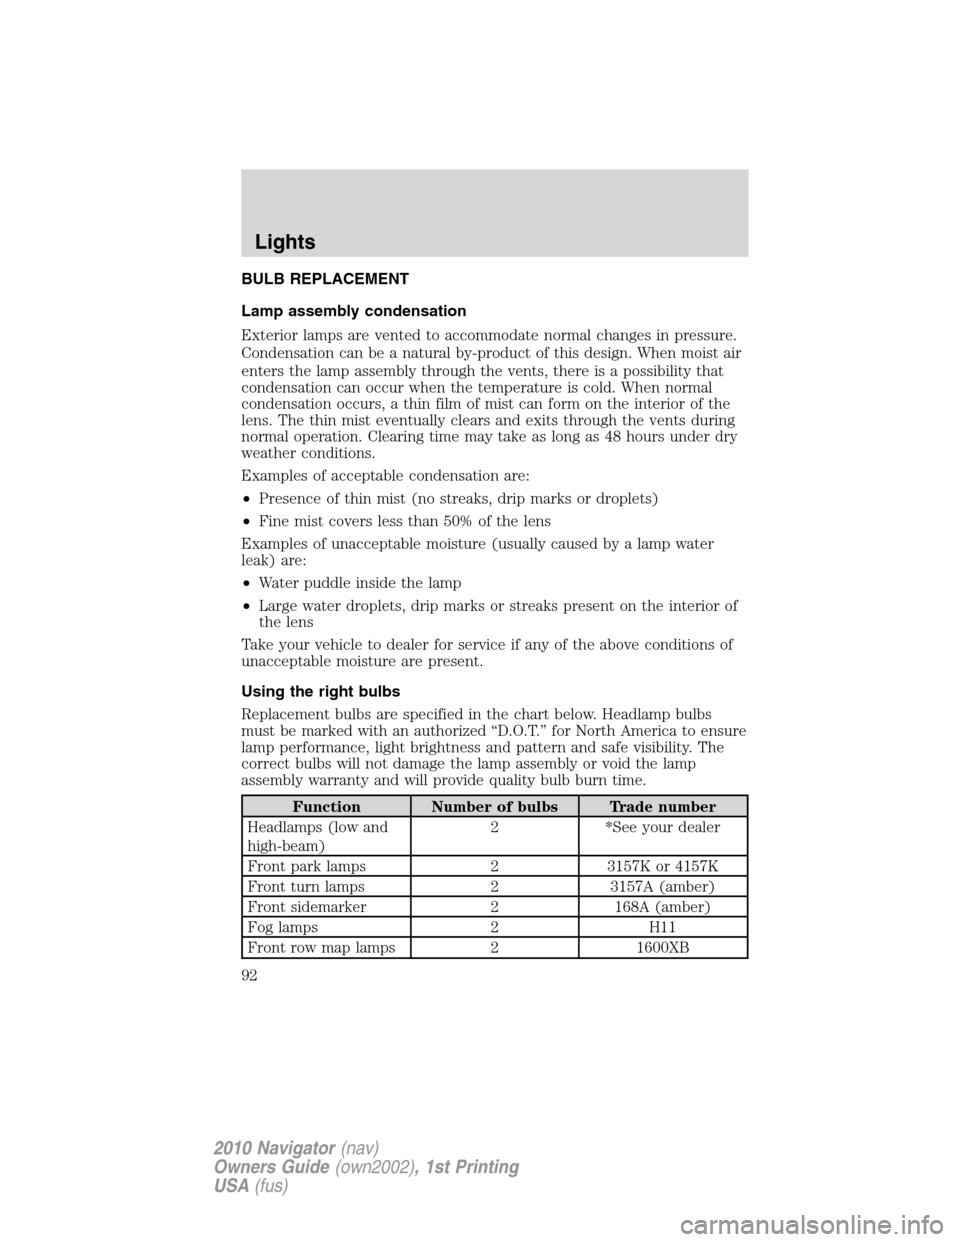
Rear cargo lamp
The dome lamp lights when:
•any door is opened, and the
switch is in the middle position.
•the instrument panel dimmer
switch is rotated until the
courtesy lamps come on.
•any of the remote entry controls
are pressed and ignition is off
(and switch is in the middle
position).
With the ignition key in the accessory or on position, the rear dome lamp
can be turned on or off by sliding the control.
Battery saver
The battery saver will shut off the exterior lamps and interior lamps,
except the hazard warning lamps if activated, 10 minutes after the
ignition control has been turned off. The system will not turn off the
parking lamps if they are on.
Lights
91
2010 Navigator(nav)
Owners Guide(own2002), 1st Printing
USA(fus)
Page 92 of 385
BULB REPLACEMENT
Lamp assembly condensation
Exterior lamps are vented to accommodate normal changes in pressure.
Condensation can be a natural by-product of this design. When moist air
enters the lamp assembly through the vents, there is a possibility that
condensation can occur when the temperature is cold. When normal
condensation occurs, a thin film of mist can form on the interior of the
lens. The thin mist eventually clears and exits through the vents during
normal operation. Clearing time may take as long as 48 hours under dry
weather conditions.
Examples of acceptable condensation are:
•Presence of thin mist (no streaks, drip marks or droplets)
•Fine mist covers less than 50% of the lens
Examples of unacceptable moisture (usually caused by a lamp water
leak) are:
•Water puddle inside the lamp
•Large water droplets, drip marks or streaks present on the interior of
the lens
Take your vehicle to dealer for service if any of the above conditions of
unacceptable moisture are present.
Using the right bulbs
Replacement bulbs are specified in the chart below. Headlamp bulbs
must be marked with an authorized “D.O.T.” for North America to ensure
lamp performance, light brightness and pattern and safe visibility. The
correct bulbs will not damage the lamp assembly or void the lamp
assembly warranty and will provide quality bulb burn time.
Function Number of bulbs Trade number
Headlamps (low and
high-beam)2 *See your dealer
Front park lamps 2 3157K or 4157K
Front turn lamps 2 3157A (amber)
Front sidemarker 2 168A (amber)
Fog lamps 2 H11
Front row map lamps 2 1600XB
Lights
92
2010 Navigator(nav)
Owners Guide(own2002), 1st Printing
USA(fus)
Page 93 of 385
Function Number of bulbs Trade number
2nd row reading lamp 1 1600XB
Rear cargo lamp 1 211–2XB
Rear turn/tail/brake
lamps4 4057K
Backup lamps 2 921
Supplemental tail
lamps4 906
Approach lamps 2 906
Mirror turn signal
lamps2 906 (amber)
License lamp 2 168
High-mount brake
lamp5 W5W
Visor vanity lamp -
Slide on rail system
(SOR)2 A6224PF
All replacement bulbs are clear in color except where noted.
To replace all instrument panel lights - see your authorized dealer
* For vehicles with HID (high intensity discharge) lamps, see your
authorized dealer for service.
Replacing interior bulbs
Check the operation of all bulbs frequently.
Replacing HID headlamp bulbs
The low/high beam headlamps on your vehicle use a “high intensity
discharge” source. These lamps operate at a high voltage. The bulb is
NOT customer replaceable. When the bulb is burned out, the bulb must
be replaced by your authorized dealer.
Replacing front parking lamp/turn signal/sidemarker bulbs
The front parking lamp/turn signal/sidemarker bulbs are located in the
headlamp assembly. Follow the same steps to replace either bulb.
1. Make sure the headlamp control is in the off position.
2. Open the hood.
Lights
93
2010 Navigator(nav)
Owners Guide(own2002), 1st Printing
USA(fus)
Page 94 of 385
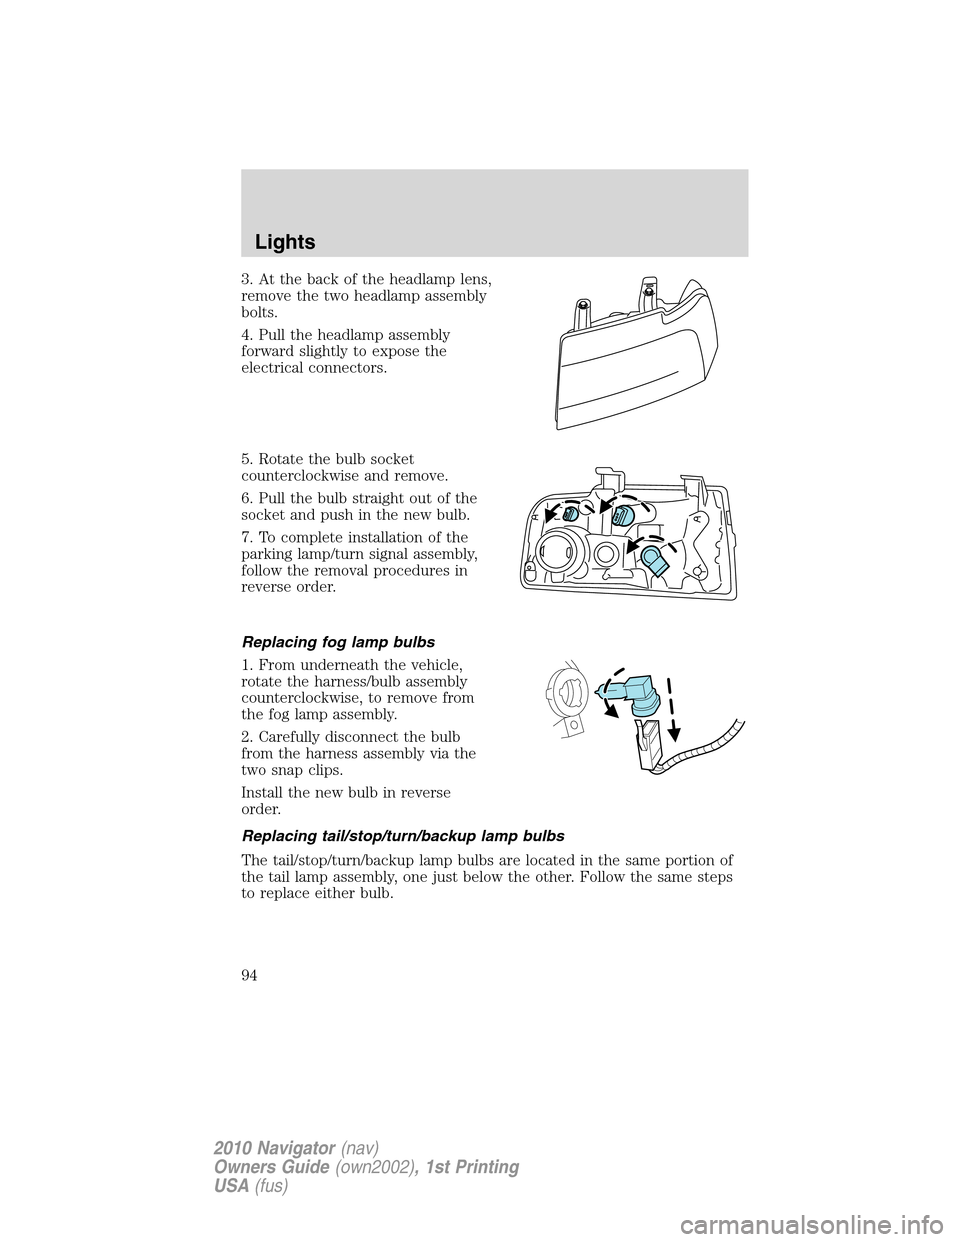
3. At the back of the headlamp lens,
remove the two headlamp assembly
bolts.
4. Pull the headlamp assembly
forward slightly to expose the
electrical connectors.
5. Rotate the bulb socket
counterclockwise and remove.
6. Pull the bulb straight out of the
socket and push in the new bulb.
7. To complete installation of the
parking lamp/turn signal assembly,
follow the removal procedures in
reverse order.
Replacing fog lamp bulbs
1. From underneath the vehicle,
rotate the harness/bulb assembly
counterclockwise, to remove from
the fog lamp assembly.
2. Carefully disconnect the bulb
from the harness assembly via the
two snap clips.
Install the new bulb in reverse
order.
Replacing tail/stop/turn/backup lamp bulbs
The tail/stop/turn/backup lamp bulbs are located in the same portion of
the tail lamp assembly, one just below the other. Follow the same steps
to replace either bulb.
Lights
94
2010 Navigator(nav)
Owners Guide(own2002), 1st Printing
USA(fus)
Page 95 of 385
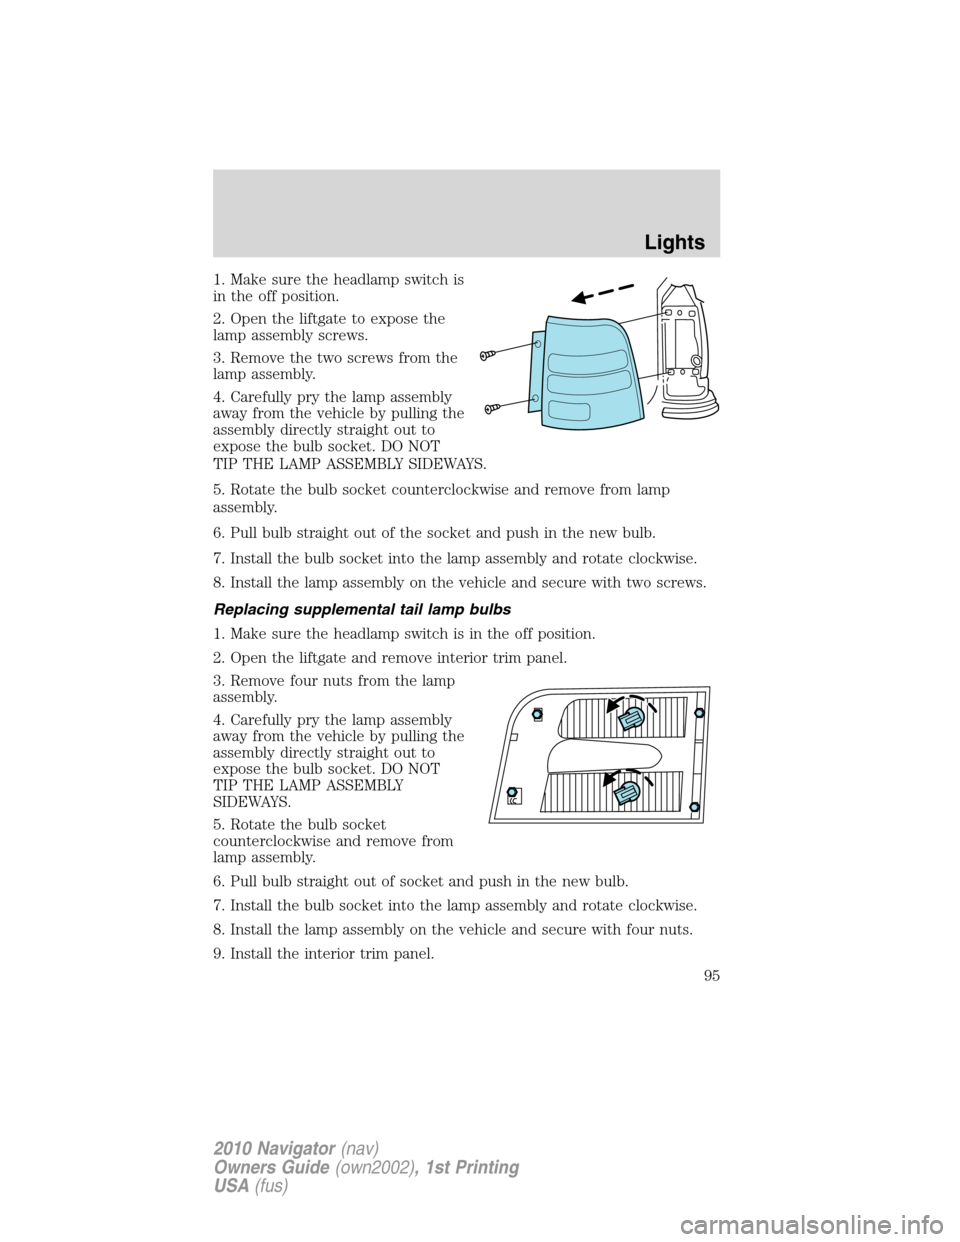
1. Make sure the headlamp switch is
in the off position.
2. Open the liftgate to expose the
lamp assembly screws.
3. Remove the two screws from the
lamp assembly.
4. Carefully pry the lamp assembly
away from the vehicle by pulling the
assembly directly straight out to
expose the bulb socket. DO NOT
TIP THE LAMP ASSEMBLY SIDEWAYS.
5. Rotate the bulb socket counterclockwise and remove from lamp
assembly.
6. Pull bulb straight out of the socket and push in the new bulb.
7. Install the bulb socket into the lamp assembly and rotate clockwise.
8. Install the lamp assembly on the vehicle and secure with two screws.
Replacing supplemental tail lamp bulbs
1. Make sure the headlamp switch is in the off position.
2. Open the liftgate and remove interior trim panel.
3. Remove four nuts from the lamp
assembly.
4. Carefully pry the lamp assembly
away from the vehicle by pulling the
assembly directly straight out to
expose the bulb socket. DO NOT
TIP THE LAMP ASSEMBLY
SIDEWAYS.
5. Rotate the bulb socket
counterclockwise and remove from
lamp assembly.
6. Pull bulb straight out of socket and push in the new bulb.
7. Install the bulb socket into the lamp assembly and rotate clockwise.
8. Install the lamp assembly on the vehicle and secure with four nuts.
9. Install the interior trim panel.
Lights
95
2010 Navigator(nav)
Owners Guide(own2002), 1st Printing
USA(fus)
Page 96 of 385
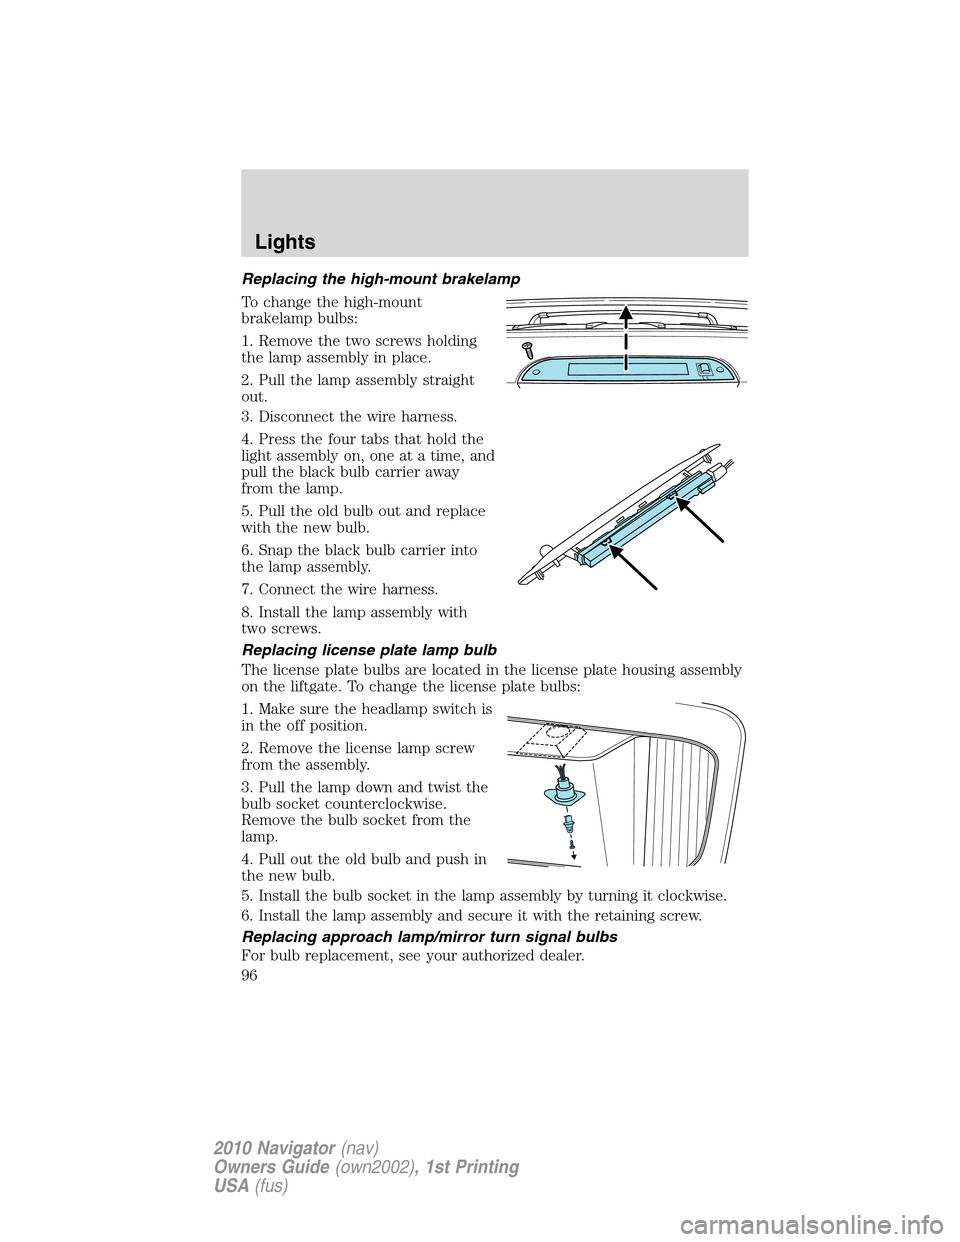
Replacing the high-mount brakelamp
To change the high-mount
brakelamp bulbs:
1. Remove the two screws holding
the lamp assembly in place.
2. Pull the lamp assembly straight
out.
3. Disconnect the wire harness.
4. Press the four tabs that hold the
light assembly on, one at a time, and
pull the black bulb carrier away
from the lamp.
5. Pull the old bulb out and replace
with the new bulb.
6. Snap the black bulb carrier into
the lamp assembly.
7. Connect the wire harness.
8. Install the lamp assembly with
two screws.
Replacing license plate lamp bulb
The license plate bulbs are located in the license plate housing assembly
on the liftgate. To change the license plate bulbs:
1. Make sure the headlamp switch is
in the off position.
2. Remove the license lamp screw
from the assembly.
3. Pull the lamp down and twist the
bulb socket counterclockwise.
Remove the bulb socket from the
lamp.
4. Pull out the old bulb and push in
the new bulb.
5. Install the bulb socket in the lamp assembly by turning it clockwise.
6. Install the lamp assembly and secure it with the retaining screw.
Replacing approach lamp/mirror turn signal bulbs
For bulb replacement, see your authorized dealer.
Lights
96
2010 Navigator(nav)
Owners Guide(own2002), 1st Printing
USA(fus)
Page 97 of 385
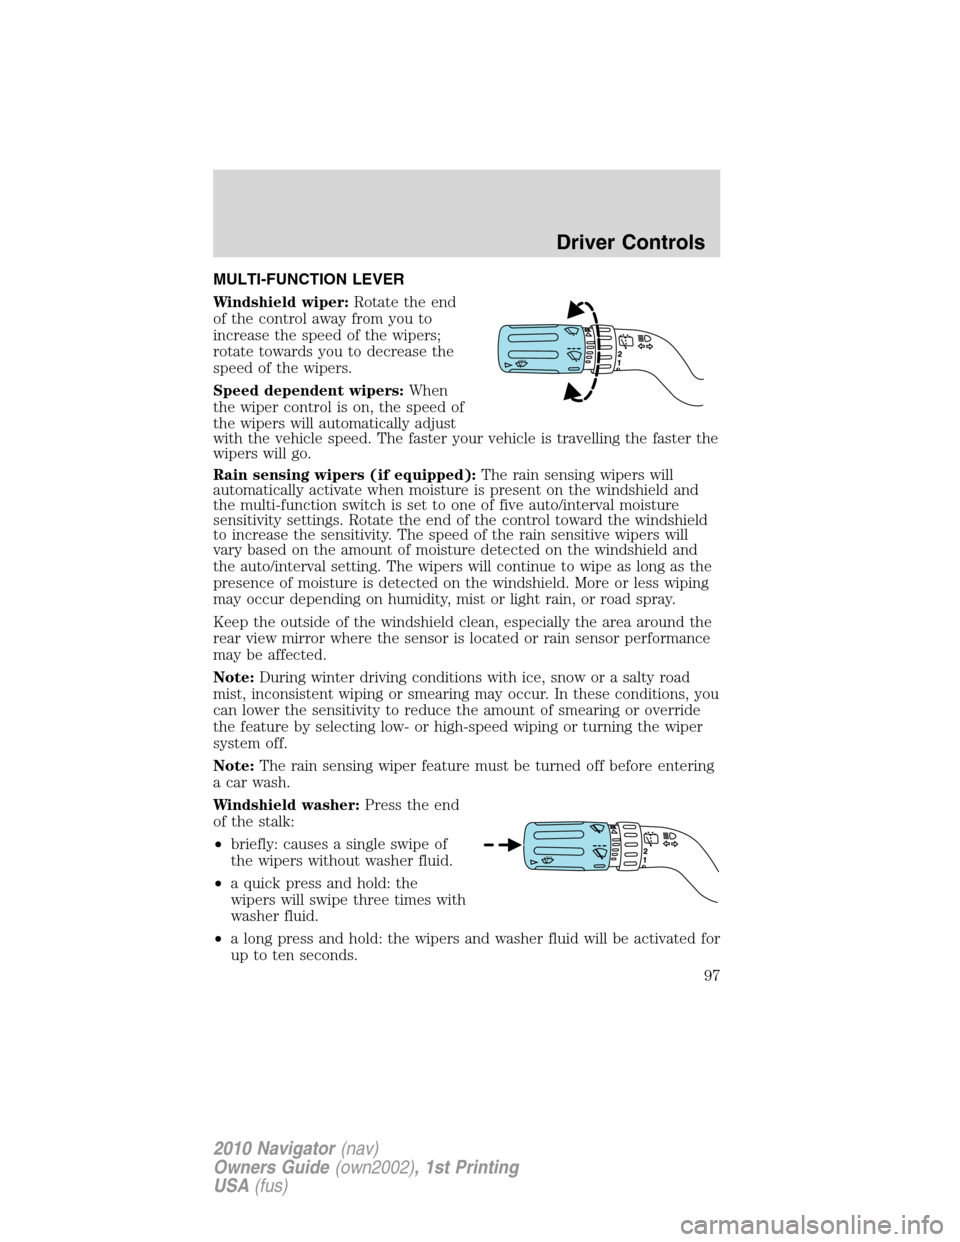
MULTI-FUNCTION LEVER
Windshield wiper:Rotate the end
of the control away from you to
increase the speed of the wipers;
rotate towards you to decrease the
speed of the wipers.
Speed dependent wipers:When
the wiper control is on, the speed of
the wipers will automatically adjust
with the vehicle speed. The faster your vehicle is travelling the faster the
wipers will go.
Rain sensing wipers (if equipped):The rain sensing wipers will
automatically activate when moisture is present on the windshield and
the multi-function switch is set to one of five auto/interval moisture
sensitivity settings. Rotate the end of the control toward the windshield
to increase the sensitivity. The speed of the rain sensitive wipers will
vary based on the amount of moisture detected on the windshield and
the auto/interval setting. The wipers will continue to wipe as long as the
presence of moisture is detected on the windshield. More or less wiping
may occur depending on humidity, mist or light rain, or road spray.
Keep the outside of the windshield clean, especially the area around the
rear view mirror where the sensor is located or rain sensor performance
may be affected.
Note:During winter driving conditions with ice, snow or a salty road
mist, inconsistent wiping or smearing may occur. In these conditions, you
can lower the sensitivity to reduce the amount of smearing or override
the feature by selecting low- or high-speed wiping or turning the wiper
system off.
Note:The rain sensing wiper feature must be turned off before entering
a car wash.
Windshield washer:Press the end
of the stalk:
•briefly: causes a single swipe of
the wipers without washer fluid.
•a quick press and hold: the
wipers will swipe three times with
washer fluid.
•a long press and hold: the wipers and washer fluid will be activated for
up to ten seconds.
Driver Controls
97
2010 Navigator(nav)
Owners Guide(own2002), 1st Printing
USA(fus)
Page 98 of 385
Courtesy wipe feature:One extra wipe will occur a few seconds after
washing the front window to clear any excess washer fluid remaining on
the windshield.
Note:Do not operate the washer when the washer reservoir is empty.
This may cause the washer pump to overheat. Check the washer fluid
level frequently. Do not operate the wipers when the windshield is dry.
This may scratch the glass, damage the wiper blades and cause the wiper
motor to burn out. Before operating the wiper on a dry windshield,
always use the windshield washer. In freezing weather, be sure the wiper
blades are not frozen to the windshield before operating the wipers.
Windshield wiper rainlamp feature (if equipped with Autolamp)
When the windshield wipers are turned on during daylight, and the
headlamp control is in the autolamp position, the exterior lamps will turn
on after a brief delay and will remain on until the wipers are turned off.
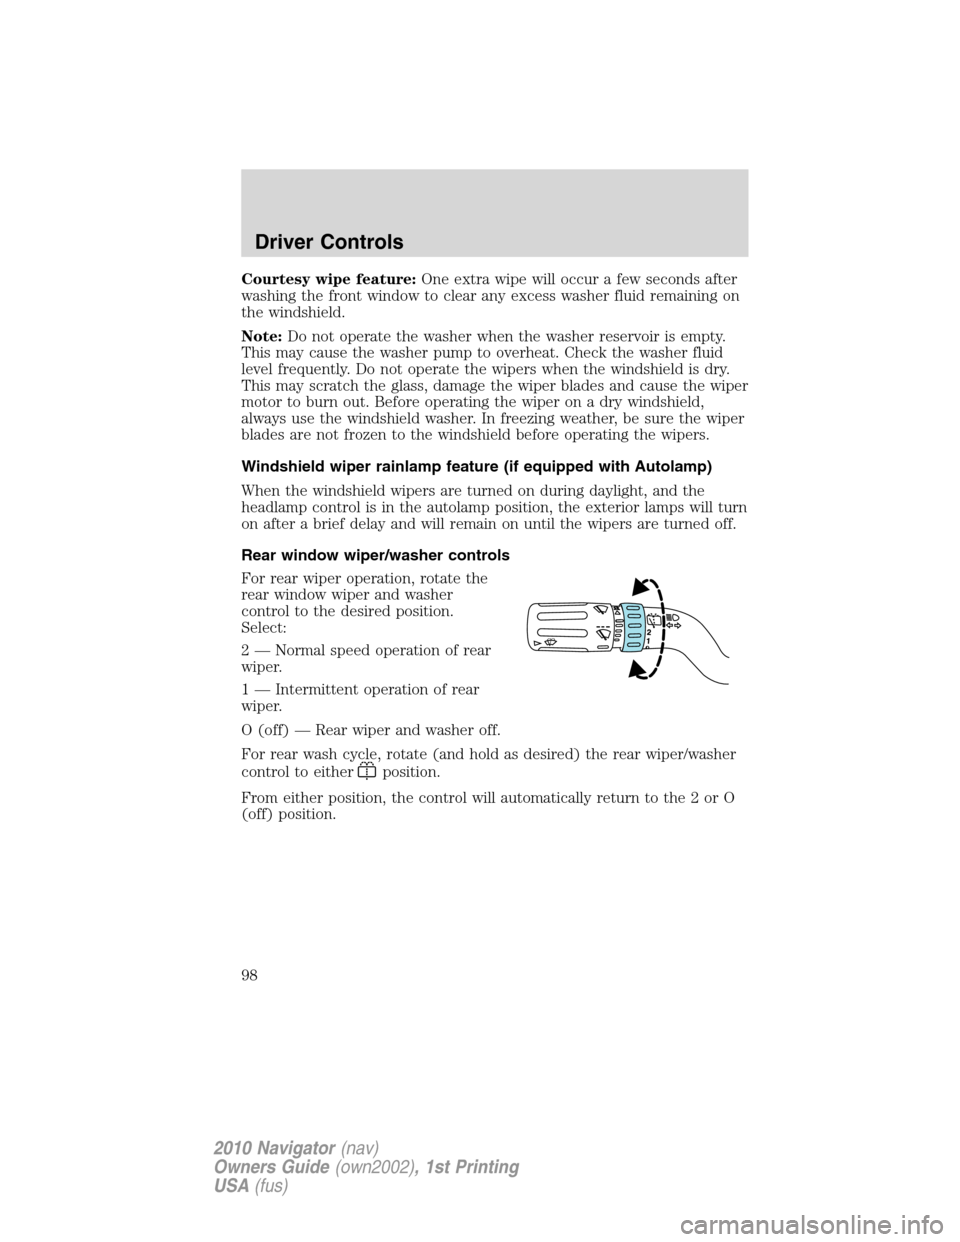
Rear window wiper/washer controls
For rear wiper operation, rotate the
rear window wiper and washer
control to the desired position.
Select:
2 — Normal speed operation of rear
wiper.
1 — Intermittent operation of rear
wiper.
O (off) — Rear wiper and washer off.
For rear wash cycle, rotate (and hold as desired) the rear wiper/washer
control to either
position.
From either position, the control will automatically return to the 2 or O
(off) position.
Driver Controls
98
2010 Navigator(nav)
Owners Guide(own2002), 1st Printing
USA(fus)
Page 99 of 385
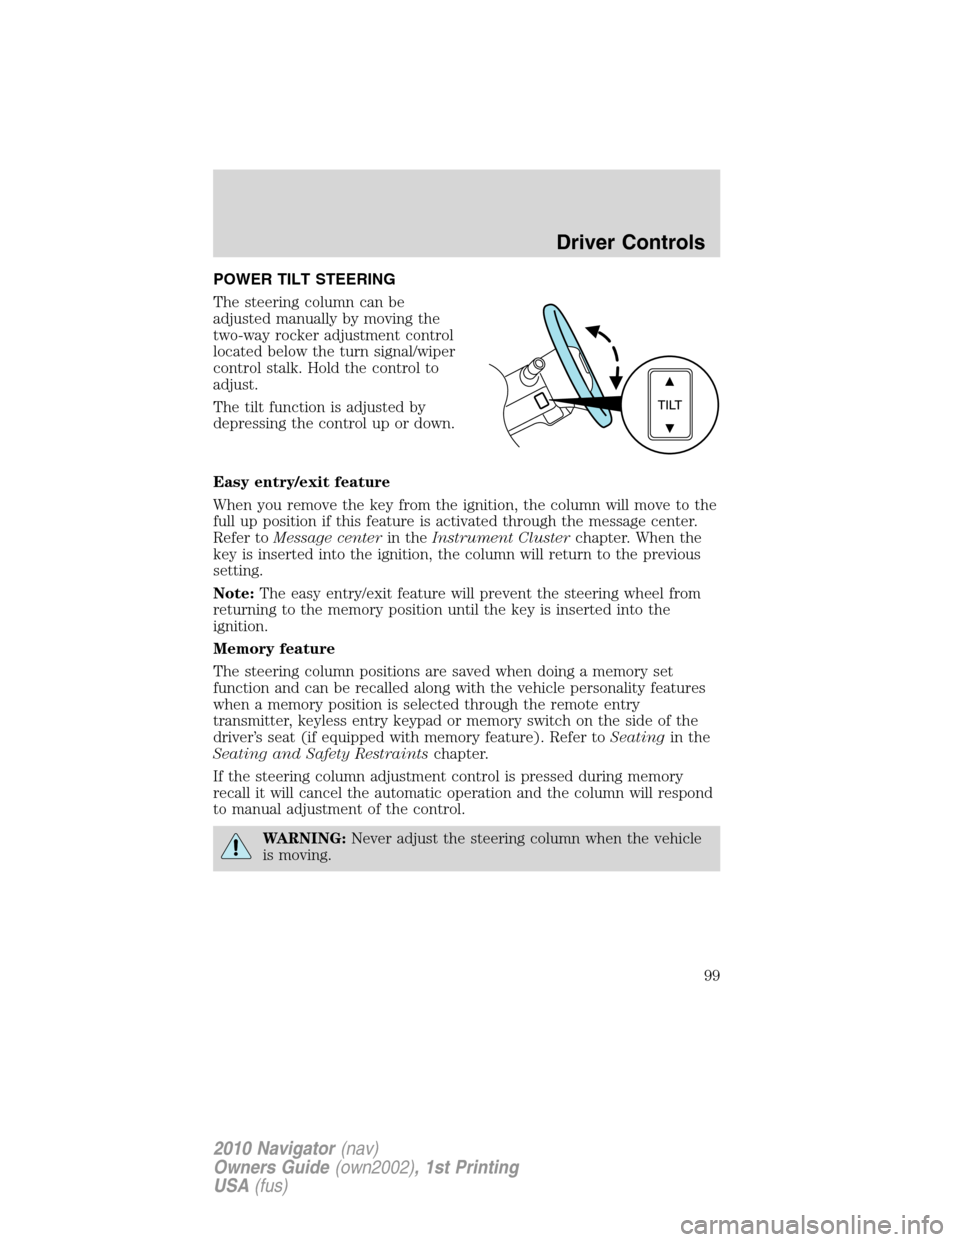
POWER TILT STEERING
The steering column can be
adjusted manually by moving the
two-way rocker adjustment control
located below the turn signal/wiper
control stalk. Hold the control to
adjust.
The tilt function is adjusted by
depressing the control up or down.
Easy entry/exit feature
When you remove the key from the ignition, the column will move to the
full up position if this feature is activated through the message center.
Refer toMessage centerin theInstrument Clusterchapter. When the
key is inserted into the ignition, the column will return to the previous
setting.
Note:The easy entry/exit feature will prevent the steering wheel from
returning to the memory position until the key is inserted into the
ignition.
Memory feature
The steering column positions are saved when doing a memory set
function and can be recalled along with the vehicle personality features
when a memory position is selected through the remote entry
transmitter, keyless entry keypad or memory switch on the side of the
driver’s seat (if equipped with memory feature). Refer toSeatingin the
Seating and Safety Restraintschapter.
If the steering column adjustment control is pressed during memory
recall it will cancel the automatic operation and the column will respond
to manual adjustment of the control.
WARNING:Never adjust the steering column when the vehicle
is moving.
Driver Controls
99
2010 Navigator(nav)
Owners Guide(own2002), 1st Printing
USA(fus)
Page 100 of 385
On vehicles with memory feature, to prevent damage to the steering
column, the steering column is designed to set a stopping position just
short of the end of the column position. If the steering column
encounters an object while moving up or down, a new stopping position
will be set. To reset the steering column to its normal stopping position:
•After encountering the new stopping position, press the steering
column control again to override.
•Continue pressing the control until it reaches the end of the column
position.
•A new soft stop will be automatically set. The next time the steering
column is tilted it will stop just short of the end of the column
position.
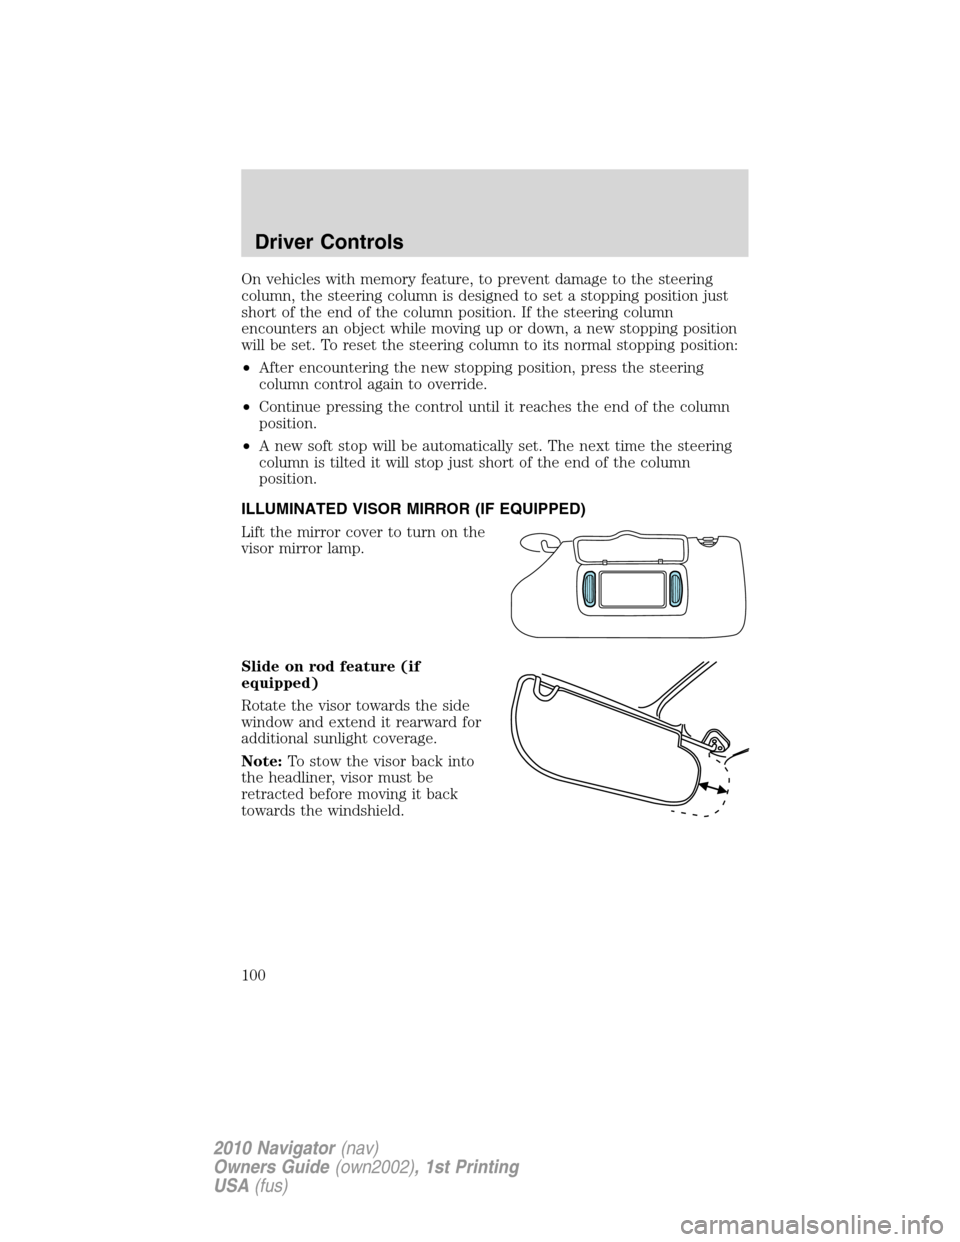
ILLUMINATED VISOR MIRROR (IF EQUIPPED)
Lift the mirror cover to turn on the
visor mirror lamp.
Slide on rod feature (if
equipped)
Rotate the visor towards the side
window and extend it rearward for
additional sunlight coverage.
Note:To stow the visor back into
the headliner, visor must be
retracted before moving it back
towards the windshield.
Driver Controls
100
2010 Navigator(nav)
Owners Guide(own2002), 1st Printing
USA(fus)