LINCOLN NAVIGATOR 2014 Owners Manual
Manufacturer: LINCOLN, Model Year: 2014, Model line: NAVIGATOR, Model: LINCOLN NAVIGATOR 2014Pages: 506, PDF Size: 5.72 MB
Page 141 of 506
WARNING:Before returning the seatback to its original position,
make sure that cargo or any objects are not trapped underneath
the seatback. After returning the seatback to its original position, pull
on the seatback to make sure that it has fully latched. An unlatched
seat may become dangerous in the event of a sudden stop or crash.
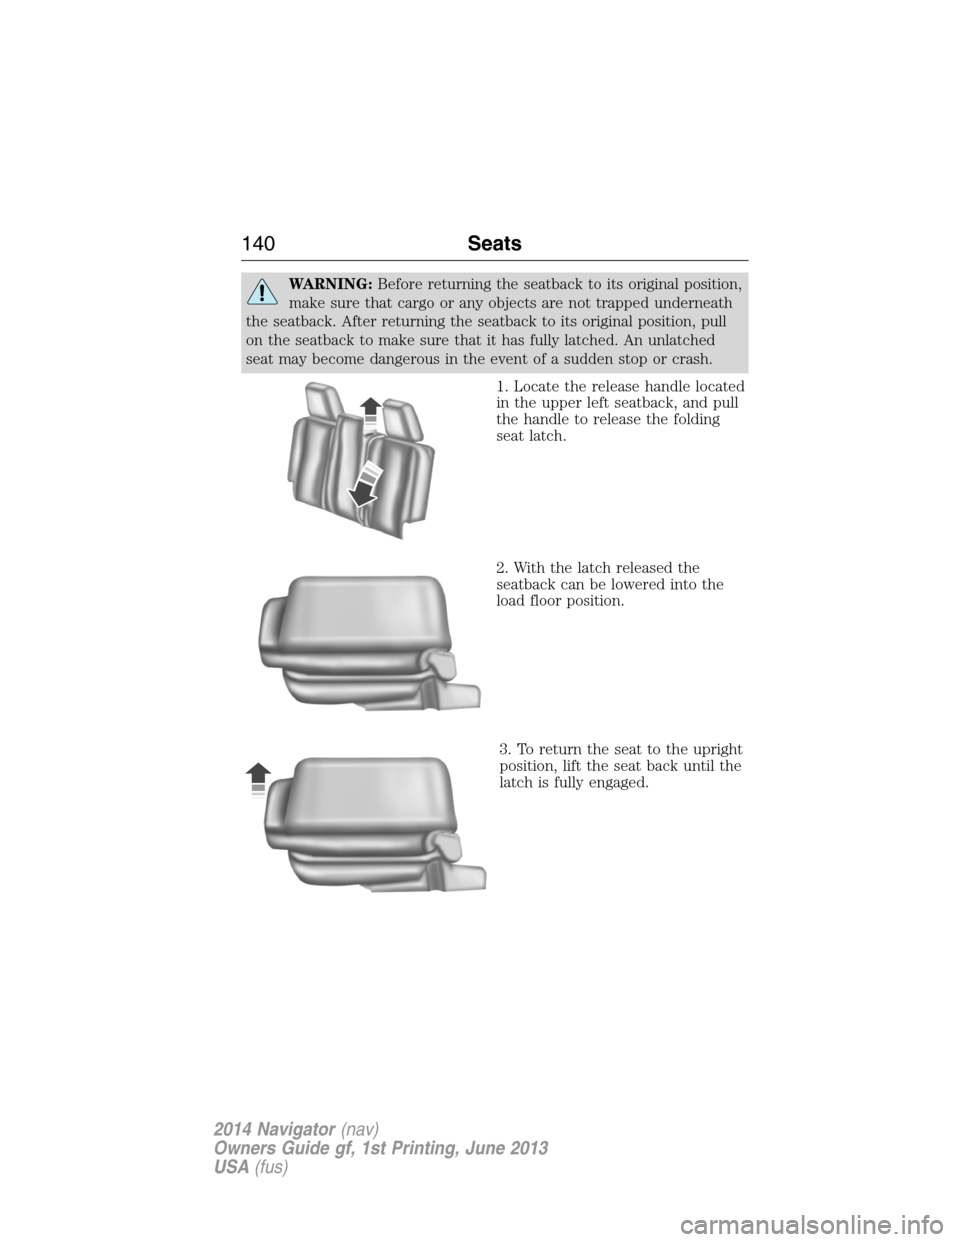
1. Locate the release handle located
in the upper left seatback, and pull
the handle to release the folding
seat latch.
2. With the latch released the
seatback can be lowered into the
load floor position.
3. To return the seat to the upright
position, lift the seat back until the
latch is fully engaged.
140Seats
2014 Navigator(nav)
Owners Guide gf, 1st Printing, June 2013
USA(fus)
Page 142 of 506
Adjusting the Second-Row Center 20% Seat (If Equipped)
Note:Move this seat forward to keep a child in a child restraint close to
the front seat occupants. Move the seat to the full rearward position
when it is occupied by older children or adults, including children in
booster seats.
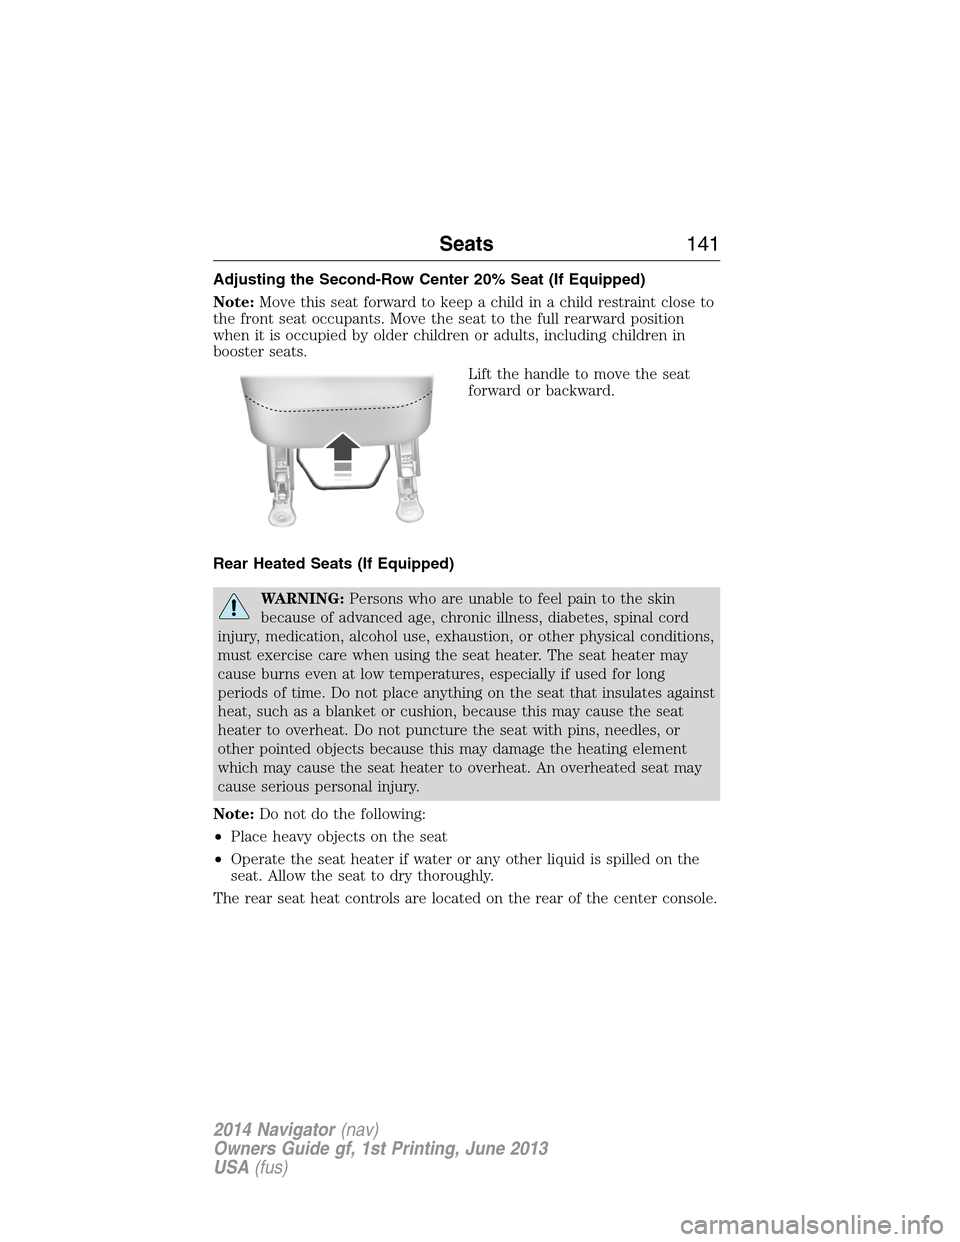
Lift the handle to move the seat
forward or backward.
Rear Heated Seats (If Equipped)
WARNING:Persons who are unable to feel pain to the skin
because of advanced age, chronic illness, diabetes, spinal cord
injury, medication, alcohol use, exhaustion, or other physical conditions,
must exercise care when using the seat heater. The seat heater may
cause burns even at low temperatures, especially if used for long
periods of time. Do not place anything on the seat that insulates against
heat, such as a blanket or cushion, because this may cause the seat
heater to overheat. Do not puncture the seat with pins, needles, or
other pointed objects because this may damage the heating element
which may cause the seat heater to overheat. An overheated seat may
cause serious personal injury.
Note:Do not do the following:
•Place heavy objects on the seat
•Operate the seat heater if water or any other liquid is spilled on the
seat. Allow the seat to dry thoroughly.
The rear seat heat controls are located on the rear of the center console.
Seats141
2014 Navigator(nav)
Owners Guide gf, 1st Printing, June 2013
USA(fus)
Page 143 of 506
The heated seats only operate when the ignition is on. To operate the
heated seats:
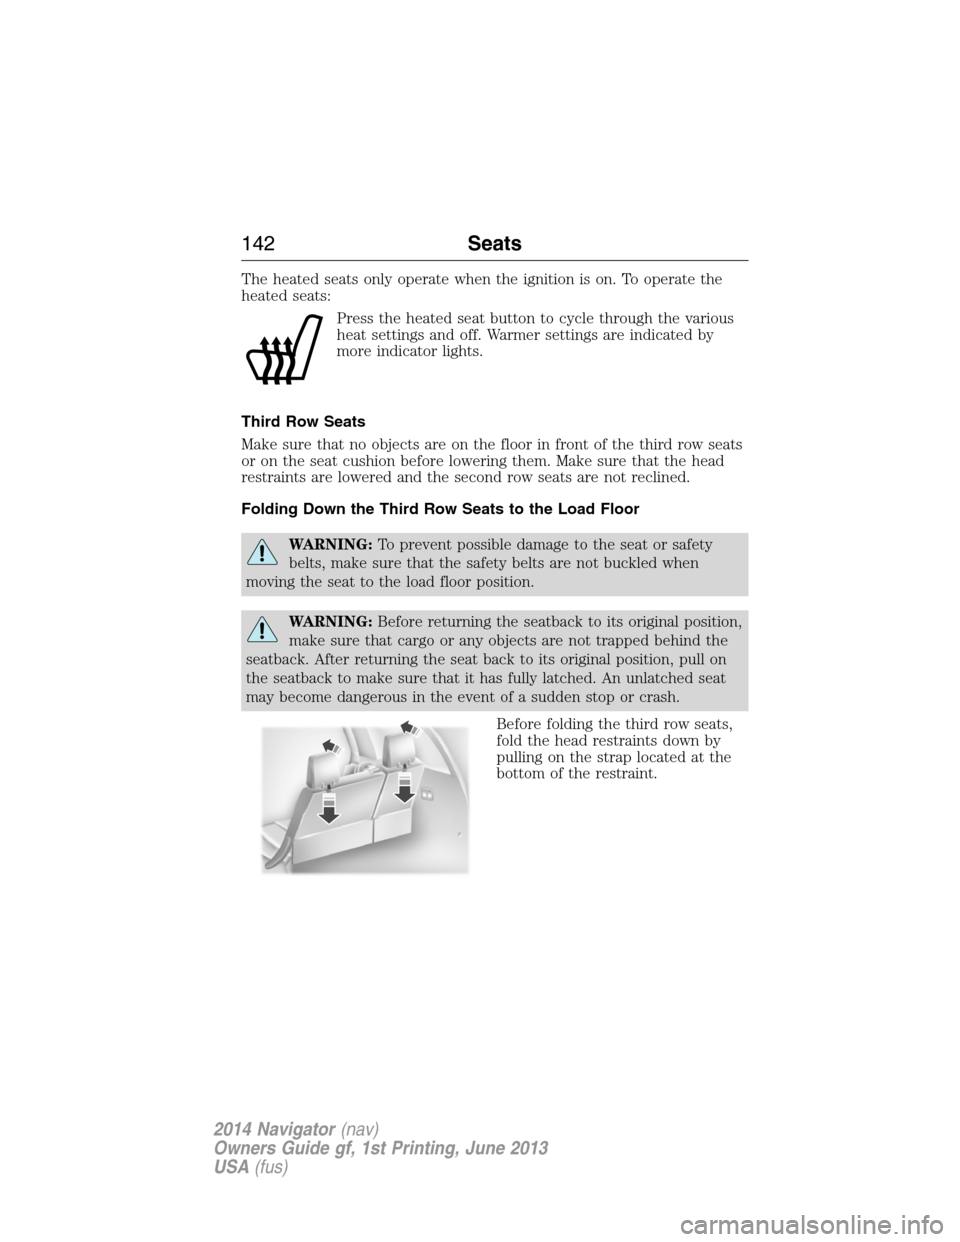
Press the heated seat button to cycle through the various
heat settings and off. Warmer settings are indicated by
more indicator lights.
Third Row Seats
Make sure that no objects are on the floor in front of the third row seats
or on the seat cushion before lowering them. Make sure that the head
restraints are lowered and the second row seats are not reclined.
Folding Down the Third Row Seats to the Load Floor
WARNING:To prevent possible damage to the seat or safety
belts, make sure that the safety belts are not buckled when
moving the seat to the load floor position.
WARNING:Before returning the seatback to its original position,
make sure that cargo or any objects are not trapped behind the
seatback. After returning the seat back to its original position, pull on
the seatback to make sure that it has fully latched. An unlatched seat
may become dangerous in the event of a sudden stop or crash.
Before folding the third row seats,
fold the head restraints down by
pulling on the strap located at the
bottom of the restraint.
142Seats
2014 Navigator(nav)
Owners Guide gf, 1st Printing, June 2013
USA(fus)
Page 144 of 506
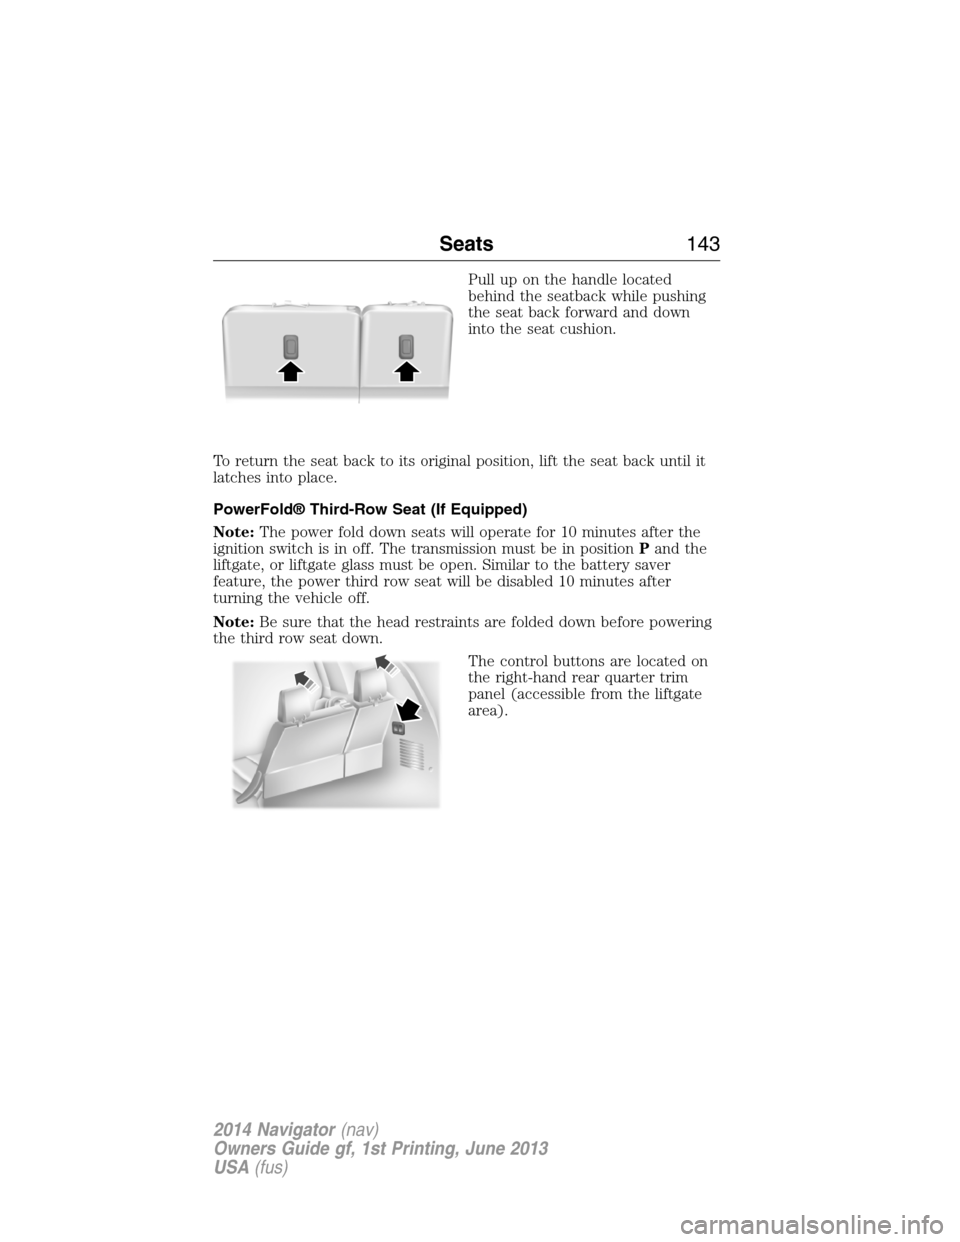
Pull up on the handle located
behind the seatback while pushing
the seat back forward and down
into the seat cushion.
To return the seat back to its original position, lift the seat back until it
latches into place.
PowerFold® Third-Row Seat (If Equipped)
Note:The power fold down seats will operate for 10 minutes after the
ignition switch is in off. The transmission must be in positionPand the
liftgate, or liftgate glass must be open. Similar to the battery saver
feature, the power third row seat will be disabled 10 minutes after
turning the vehicle off.
Note:Be sure that the head restraints are folded down before powering
the third row seat down.
The control buttons are located on
the right-hand rear quarter trim
panel (accessible from the liftgate
area).
Seats143
2014 Navigator(nav)
Owners Guide gf, 1st Printing, June 2013
USA(fus)
Page 145 of 506
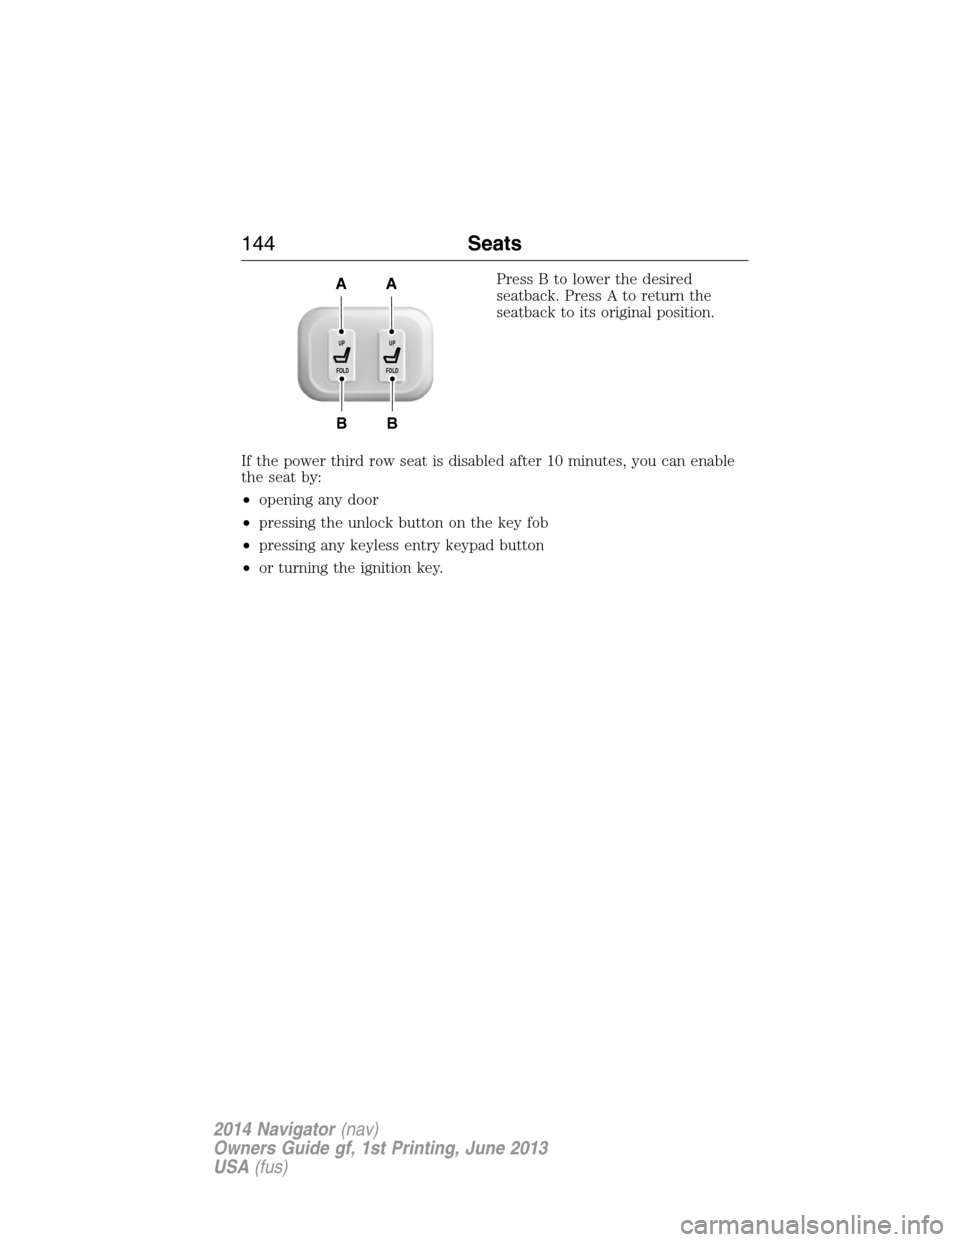
Press B to lower the desired
seatback. Press A to return the
seatback to its original position.
If the power third row seat is disabled after 10 minutes, you can enable
the seat by:
•opening any door
•pressing the unlock button on the key fob
•pressing any keyless entry keypad button
•or turning the ignition key.
B
AA
B
UP
FOLDUP
FOLD
144Seats
2014 Navigator(nav)
Owners Guide gf, 1st Printing, June 2013
USA(fus)
Page 146 of 506
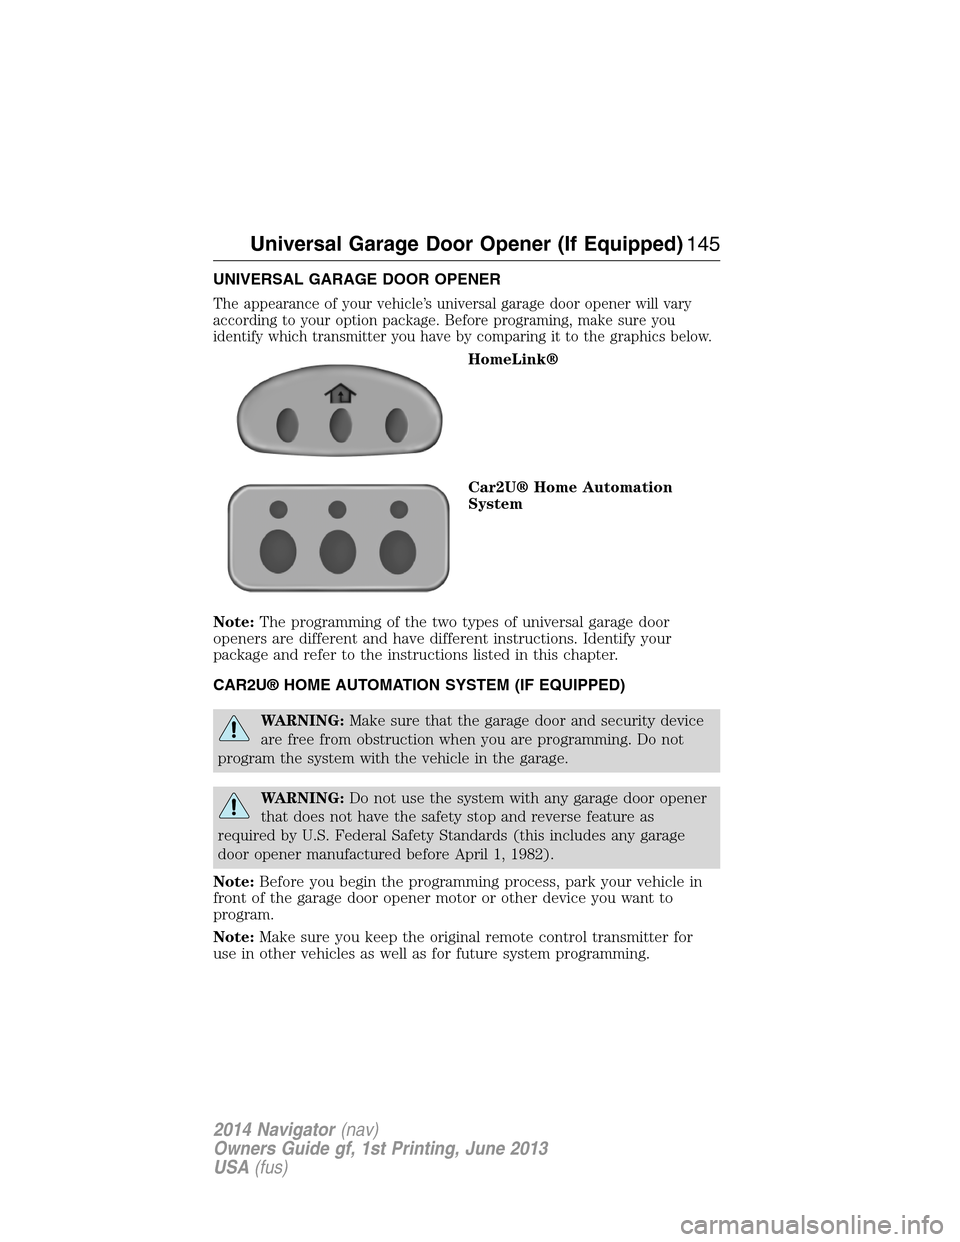
UNIVERSAL GARAGE DOOR OPENER
The appearance of your vehicle’s universal garage door opener will vary
according to your option package. Before programing, make sure you
identify which transmitter you have by comparing it to the graphics below.
HomeLink®
Car2U® Home Automation
System
Note:The programming of the two types of universal garage door
openers are different and have different instructions. Identify your
package and refer to the instructions listed in this chapter.
CAR2U® HOME AUTOMATION SYSTEM (IF EQUIPPED)
WARNING:Make sure that the garage door and security device
are free from obstruction when you are programming. Do not
program the system with the vehicle in the garage.
WARNING:Do not use the system with any garage door opener
that does not have the safety stop and reverse feature as
required by U.S. Federal Safety Standards (this includes any garage
door opener manufactured before April 1, 1982).
Note:Before you begin the programming process, park your vehicle in
front of the garage door opener motor or other device you want to
program.
Note:Make sure you keep the original remote control transmitter for
use in other vehicles as well as for future system programming.
Universal Garage Door Opener (If Equipped)145
2014 Navigator(nav)
Owners Guide gf, 1st Printing, June 2013
USA(fus)
Page 147 of 506
Note:We recommend that upon the sale or lease termination of your
vehicle, you erase the programmed function buttons for security reasons.
SeeErasing the Function Button Codeslater in this section.
Note:You can program a maximum of three devices. To change or
replace any of the three devices after it has been initially programmed,
you must first erase the current settings. SeeErasing the Function
Button Codeslater in this section.
Note:Programming the system to a community gate will require a
unique set of instructions depending on the gate system model. Contact
the help line at 1-866-572-2728 for further information.
Note:If you accidently enter the program mode by pressing and
releasing the outer two buttons or all three buttons simultaneously, do
not press any button until the module times out after a few seconds and
resets to normal mode. When the module has timed out, all three LED
lamps will flash rapidly for a few seconds then turn off. Any settings
should remain as previously set.
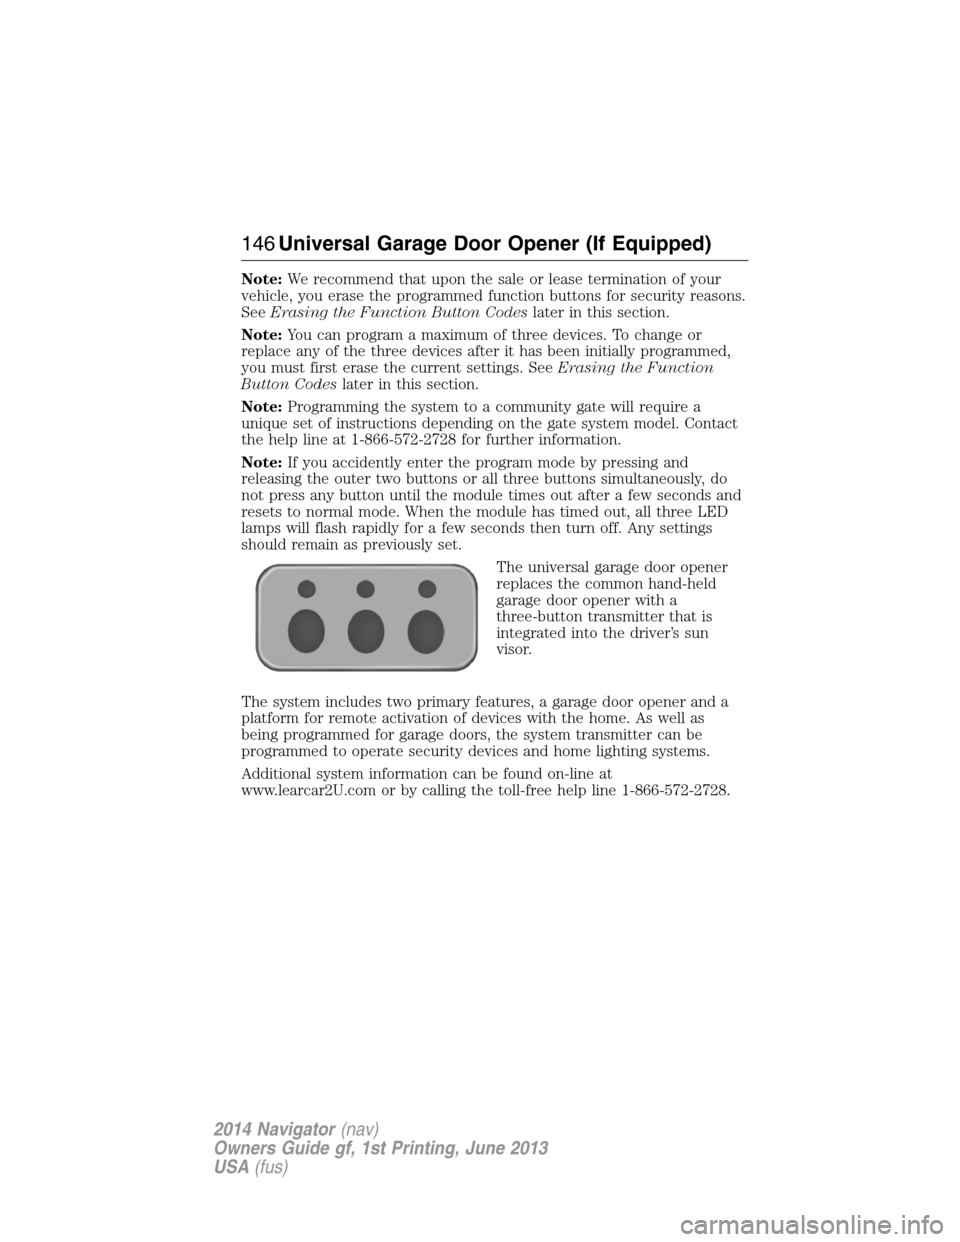
The universal garage door opener
replaces the common hand-held
garage door opener with a
three-button transmitter that is
integrated into the driver’s sun
visor.
The system includes two primary features, a garage door opener and a
platform for remote activation of devices with the home. As well as
being programmed for garage doors, the system transmitter can be
programmed to operate security devices and home lighting systems.
Additional system information can be found on-line at
www.learcar2U.com or by calling the toll-free help line 1-866-572-2728.
146Universal Garage Door Opener (If Equipped)
2014 Navigator(nav)
Owners Guide gf, 1st Printing, June 2013
USA(fus)
Page 148 of 506
Rolling Code Programming
Note:If you do not follow the time-sensitive instructions, the device will
time out and you will have to repeat the complete procedure.
Note:It may be helpful to have another person assist you in
programming the transmitter.
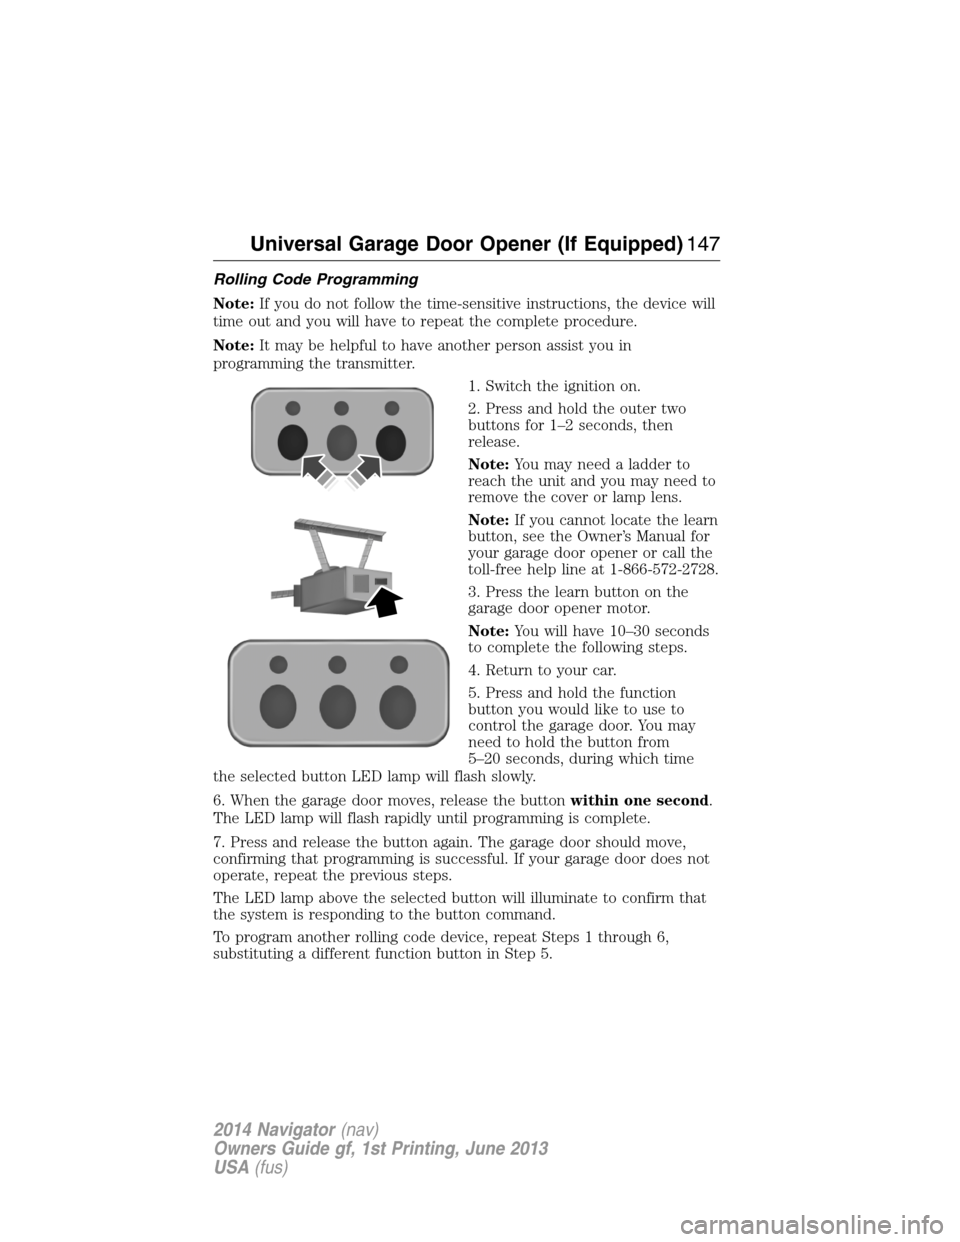
1. Switch the ignition on.
2. Press and hold the outer two
buttons for 1–2 seconds, then
release.
Note:You may need a ladder to
reach the unit and you may need to
remove the cover or lamp lens.
Note:If you cannot locate the learn
button, see the Owner’s Manual for
your garage door opener or call the
toll-free help line at 1-866-572-2728.
3. Press the learn button on the
garage door opener motor.
Note:You will have 10–30 seconds
to complete the following steps.
4. Return to your car.
5. Press and hold the function
button you would like to use to
control the garage door. You may
need to hold the button from
5–20 seconds, during which time
the selected button LED lamp will flash slowly.
6. When the garage door moves, release the buttonwithin one second.
The LED lamp will flash rapidly until programming is complete.
7. Press and release the button again. The garage door should move,
confirming that programming is successful. If your garage door does not
operate, repeat the previous steps.
The LED lamp above the selected button will illuminate to confirm that
the system is responding to the button command.
To program another rolling code device, repeat Steps 1 through 6,
substituting a different function button in Step 5.
Universal Garage Door Opener (If Equipped)147
2014 Navigator(nav)
Owners Guide gf, 1st Printing, June 2013
USA(fus)
Page 149 of 506

Fixed Code Programming
Note:It may be helpful to have another person assist you in
programming the transmitter.
To program units with fixed code
DIP switches, you will need the
garage door hand-held transmitter,
paper and a pen or pencil.
1. Switch the ignition on.
2. Open the battery cover and note
all the switch settings from left to
right.
When the switch is in the up, on, or + position, mark down “left button”.
When the switch is in the middle, neutral, or 0 position, mark down
“middle button”.
When the switch is in the down, off, or – position, mark down “right
button”.
3. Press all three function buttons
simultaneously for a few seconds
and then release. The LED lamps
will flash slowly.
Note:The following step must be
completed within 2.5 minutes.
4. Enter the corresponding DIP switch settings from left to right into
the system by pressing and releasing the buttons corresponding to the
settings you noted.
5. Simultaneously press and release all three function buttons. The LED
lamps will illuminate.
6. Press and hold the function
button you would like to use to
control the garage door.
Note:You may need to hold the
button from 5–55 seconds before
observing movement of the garage
door.
7. When the garage door moves, release the button within one second.
When the button is released, the LED lamp will flash slowly.
148Universal Garage Door Opener (If Equipped)
2014 Navigator(nav)
Owners Guide gf, 1st Printing, June 2013
USA(fus)
Page 150 of 506
8. The LED lamp will begin to flash rapidly until programming is
complete. If your garage door does not operate, repeat the previous
steps. Otherwise, call the toll-free help line at 1-866-572-2728.
The LED lamp above the selected button will illuminate to confirm that
the system is responding to the button command.
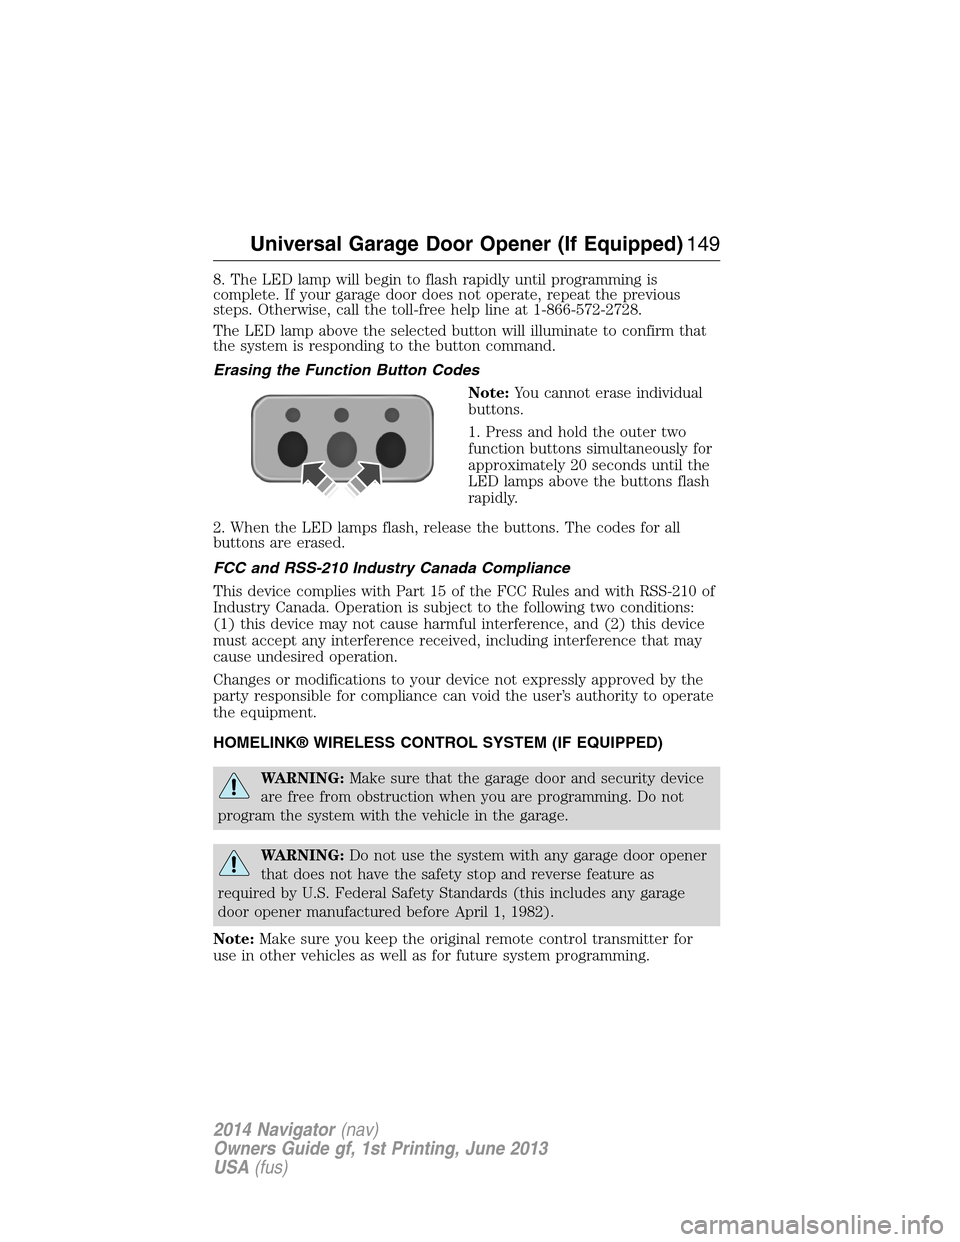
Erasing the Function Button Codes
Note:You cannot erase individual
buttons.
1. Press and hold the outer two
function buttons simultaneously for
approximately 20 seconds until the
LED lamps above the buttons flash
rapidly.
2. When the LED lamps flash, release the buttons. The codes for all
buttons are erased.
FCC and RSS-210 Industry Canada Compliance
This device complies with Part 15 of the FCC Rules and with RSS-210 of
Industry Canada. Operation is subject to the following two conditions:
(1) this device may not cause harmful interference, and (2) this device
must accept any interference received, including interference that may
cause undesired operation.
Changes or modifications to your device not expressly approved by the
party responsible for compliance can void the user’s authority to operate
the equipment.
HOMELINK® WIRELESS CONTROL SYSTEM (IF EQUIPPED)
WARNING:Make sure that the garage door and security device
are free from obstruction when you are programming. Do not
program the system with the vehicle in the garage.
WARNING:Do not use the system with any garage door opener
that does not have the safety stop and reverse feature as
required by U.S. Federal Safety Standards (this includes any garage
door opener manufactured before April 1, 1982).
Note:Make sure you keep the original remote control transmitter for
use in other vehicles as well as for future system programming.
Universal Garage Door Opener (If Equipped)149
2014 Navigator(nav)
Owners Guide gf, 1st Printing, June 2013
USA(fus)