steering LINCOLN NAVIGATOR 2018 Service Manual
[x] Cancel search | Manufacturer: LINCOLN, Model Year: 2018, Model line: NAVIGATOR, Model: LINCOLN NAVIGATOR 2018Pages: 649, PDF Size: 4.96 MB
Page 247 of 649
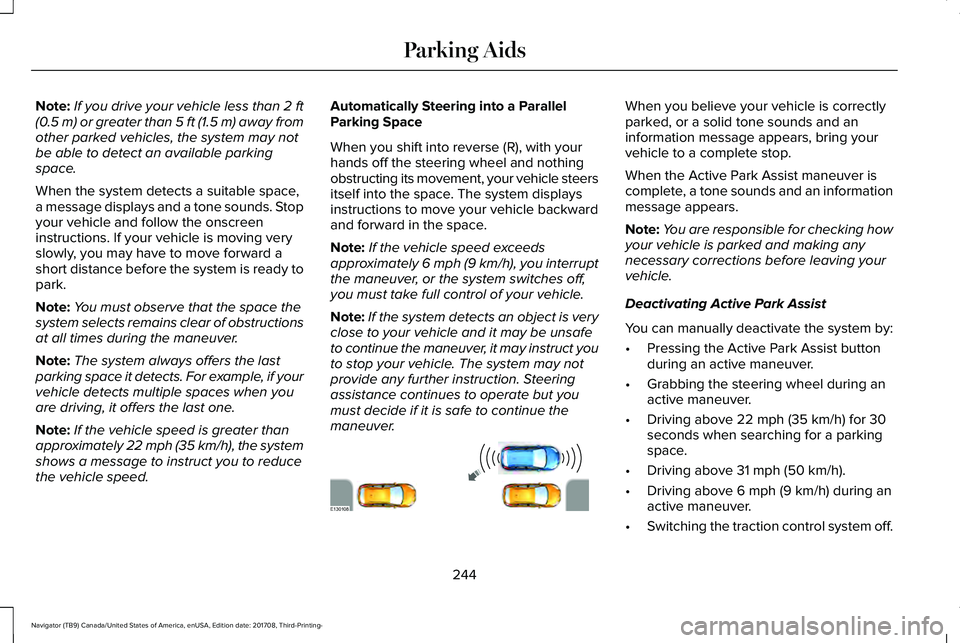
Note:If you drive your vehicle less than 2 ft(0.5 m) or greater than 5 ft (1.5 m) away fromother parked vehicles, the system may notbe able to detect an available parkingspace.
When the system detects a suitable space,a message displays and a tone sounds. Stopyour vehicle and follow the onscreeninstructions. If your vehicle is moving veryslowly, you may have to move forward ashort distance before the system is ready topark.
Note:You must observe that the space thesystem selects remains clear of obstructionsat all times during the maneuver.
Note:The system always offers the lastparking space it detects. For example, if yourvehicle detects multiple spaces when youare driving, it offers the last one.
Note:If the vehicle speed is greater thanapproximately 22 mph (35 km/h), the systemshows a message to instruct you to reducethe vehicle speed.
Automatically Steering into a ParallelParking Space
When you shift into reverse (R), with yourhands off the steering wheel and nothingobstructing its movement, your vehicle steersitself into the space. The system displaysinstructions to move your vehicle backwardand forward in the space.
Note:If the vehicle speed exceedsapproximately 6 mph (9 km/h), you interruptthe maneuver, or the system switches off,you must take full control of your vehicle.
Note:If the system detects an object is veryclose to your vehicle and it may be unsafeto continue the maneuver, it may instruct youto stop your vehicle. The system may notprovide any further instruction. Steeringassistance continues to operate but youmust decide if it is safe to continue themaneuver.
When you believe your vehicle is correctlyparked, or a solid tone sounds and aninformation message appears, bring yourvehicle to a complete stop.
When the Active Park Assist maneuver iscomplete, a tone sounds and an informationmessage appears.
Note:You are responsible for checking howyour vehicle is parked and making anynecessary corrections before leaving yourvehicle.
Deactivating Active Park Assist
You can manually deactivate the system by:
•Pressing the Active Park Assist buttonduring an active maneuver.
•Grabbing the steering wheel during anactive maneuver.
•Driving above 22 mph (35 km/h) for 30seconds when searching for a parkingspace.
•Driving above 31 mph (50 km/h).
•Driving above 6 mph (9 km/h) during anactive maneuver.
•Switching the traction control system off.
244
Navigator (TB9) Canada/United States of America, enUSA, Edition date: 201708, Third-Printing-
Parking AidsE130108
Page 249 of 649
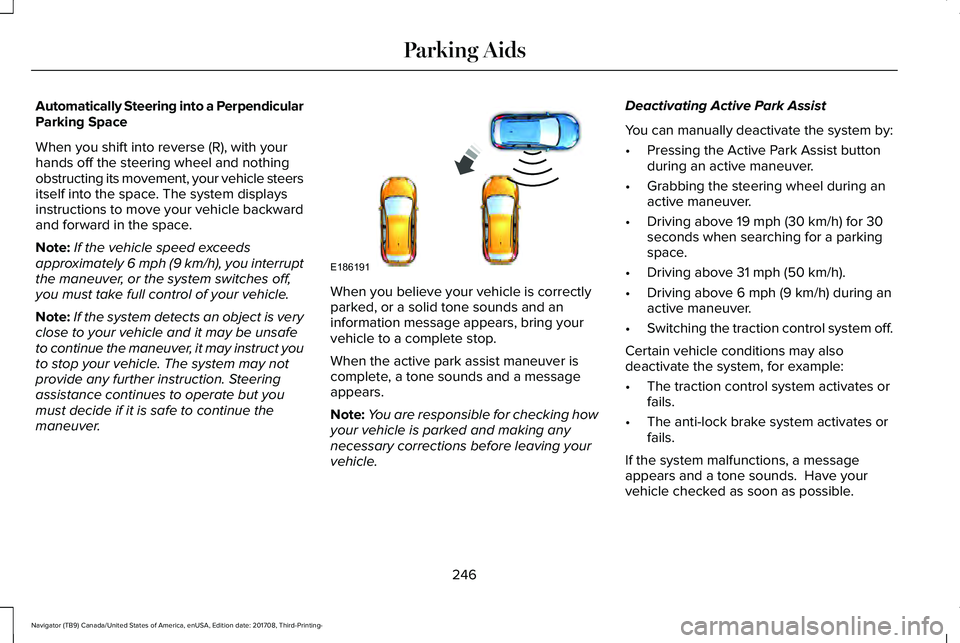
Automatically Steering into a PerpendicularParking Space
When you shift into reverse (R), with yourhands off the steering wheel and nothingobstructing its movement, your vehicle steersitself into the space. The system displaysinstructions to move your vehicle backwardand forward in the space.
Note:If the vehicle speed exceedsapproximately 6 mph (9 km/h), you interruptthe maneuver, or the system switches off,you must take full control of your vehicle.
Note:If the system detects an object is veryclose to your vehicle and it may be unsafeto continue the maneuver, it may instruct youto stop your vehicle. The system may notprovide any further instruction. Steeringassistance continues to operate but youmust decide if it is safe to continue themaneuver.
When you believe your vehicle is correctlyparked, or a solid tone sounds and aninformation message appears, bring yourvehicle to a complete stop.
When the active park assist maneuver iscomplete, a tone sounds and a messageappears.
Note:You are responsible for checking howyour vehicle is parked and making anynecessary corrections before leaving yourvehicle.
Deactivating Active Park Assist
You can manually deactivate the system by:
•Pressing the Active Park Assist buttonduring an active maneuver.
•Grabbing the steering wheel during anactive maneuver.
•Driving above 19 mph (30 km/h) for 30seconds when searching for a parkingspace.
•Driving above 31 mph (50 km/h).
•Driving above 6 mph (9 km/h) during anactive maneuver.
•Switching the traction control system off.
Certain vehicle conditions may alsodeactivate the system, for example:
•The traction control system activates orfails.
•The anti-lock brake system activates orfails.
If the system malfunctions, a messageappears and a tone sounds. Have yourvehicle checked as soon as possible.
246
Navigator (TB9) Canada/United States of America, enUSA, Edition date: 201708, Third-Printing-
Parking AidsE186191
Page 250 of 649
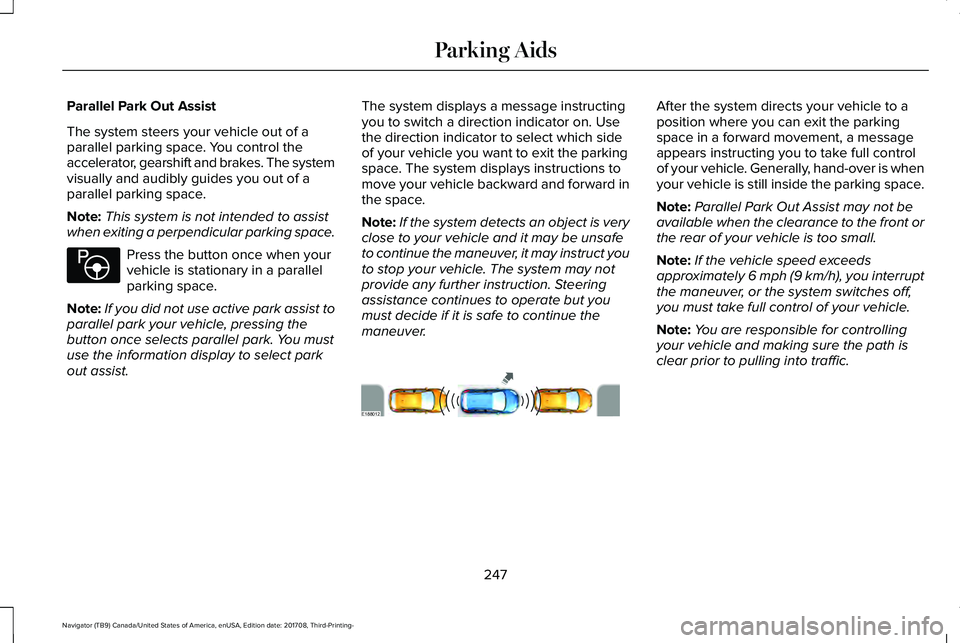
Parallel Park Out Assist
The system steers your vehicle out of aparallel parking space. You control theaccelerator, gearshift and brakes. The systemvisually and audibly guides you out of aparallel parking space.
Note:This system is not intended to assistwhen exiting a perpendicular parking space.
Press the button once when yourvehicle is stationary in a parallelparking space.
Note:If you did not use active park assist toparallel park your vehicle, pressing thebutton once selects parallel park. You mustuse the information display to select parkout assist.
The system displays a message instructingyou to switch a direction indicator on. Usethe direction indicator to select which sideof your vehicle you want to exit the parkingspace. The system displays instructions tomove your vehicle backward and forward inthe space.
Note:If the system detects an object is veryclose to your vehicle and it may be unsafeto continue the maneuver, it may instruct youto stop your vehicle. The system may notprovide any further instruction. Steeringassistance continues to operate but youmust decide if it is safe to continue themaneuver.
After the system directs your vehicle to aposition where you can exit the parkingspace in a forward movement, a messageappears instructing you to take full controlof your vehicle. Generally, hand-over is whenyour vehicle is still inside the parking space.
Note:Parallel Park Out Assist may not beavailable when the clearance to the front orthe rear of your vehicle is too small.
Note:If the vehicle speed exceedsapproximately 6 mph (9 km/h), you interruptthe maneuver, or the system switches off,you must take full control of your vehicle.
Note:You are responsible for controllingyour vehicle and making sure the path isclear prior to pulling into traffic.
247
Navigator (TB9) Canada/United States of America, enUSA, Edition date: 201708, Third-Printing-
Parking AidsE146186 E188012
Page 255 of 649
Fixed guideline: Yellow zoneD
Fixed guideline: Red zoneE
Rear bumperF
Active guidelines are only shown with fixedguidelines. To use active guidelines, turnthe steering wheel to point the guidelinestoward an intended path. If you change thesteering wheel position while reversing, yourvehicle might deviate from the originalintended path.
The fixed and active guidelines fade in andout depending on the steering wheelposition. The active guidelines do notdisplay when the steering wheel position isstraight.
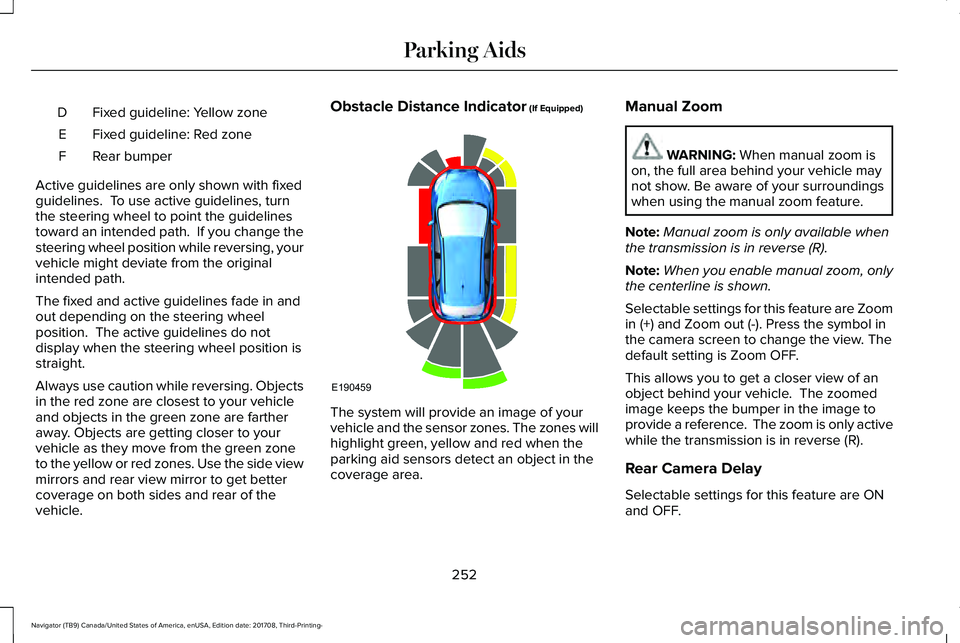
Always use caution while reversing. Objectsin the red zone are closest to your vehicleand objects in the green zone are fartheraway. Objects are getting closer to yourvehicle as they move from the green zoneto the yellow or red zones. Use the side viewmirrors and rear view mirror to get bettercoverage on both sides and rear of thevehicle.
Obstacle Distance Indicator (If Equipped)
The system will provide an image of yourvehicle and the sensor zones. The zones willhighlight green, yellow and red when theparking aid sensors detect an object in thecoverage area.
Manual Zoom
WARNING: When manual zoom ison, the full area behind your vehicle maynot show. Be aware of your surroundingswhen using the manual zoom feature.
Note:Manual zoom is only available whenthe transmission is in reverse (R).
Note:When you enable manual zoom, onlythe centerline is shown.
Selectable settings for this feature are Zoomin (+) and Zoom out (-). Press the symbol inthe camera screen to change the view. Thedefault setting is Zoom OFF.
This allows you to get a closer view of anobject behind your vehicle. The zoomedimage keeps the bumper in the image toprovide a reference. The zoom is only activewhile the transmission is in reverse (R).
Rear Camera Delay
Selectable settings for this feature are ONand OFF.
252
Navigator (TB9) Canada/United States of America, enUSA, Edition date: 201708, Third-Printing-
Parking AidsE190459
Page 259 of 649
PRINCIPLE OF OPERATION
Cruise control lets you maintain a set speedwithout keeping your foot on the acceleratorpedal. You can use cruise control when yourvehicle speed is greater than 20 mph(30 km/h).
USING CRUISE CONTROL (IF EQUIPPED)
WARNING: Do not use cruise controlon winding roads, in heavy traffic or whenthe road surface is slippery. This couldresult in loss of vehicle control, seriousinjury or death.
WARNING: When you are goingdownhill, your vehicle speed couldincrease above the set speed. The systemdoes not apply the brakes.
Note:Cruise control disengages if thevehicle speed decreases more than 10 mph(16 km/h) below the set speed when drivinguphill.
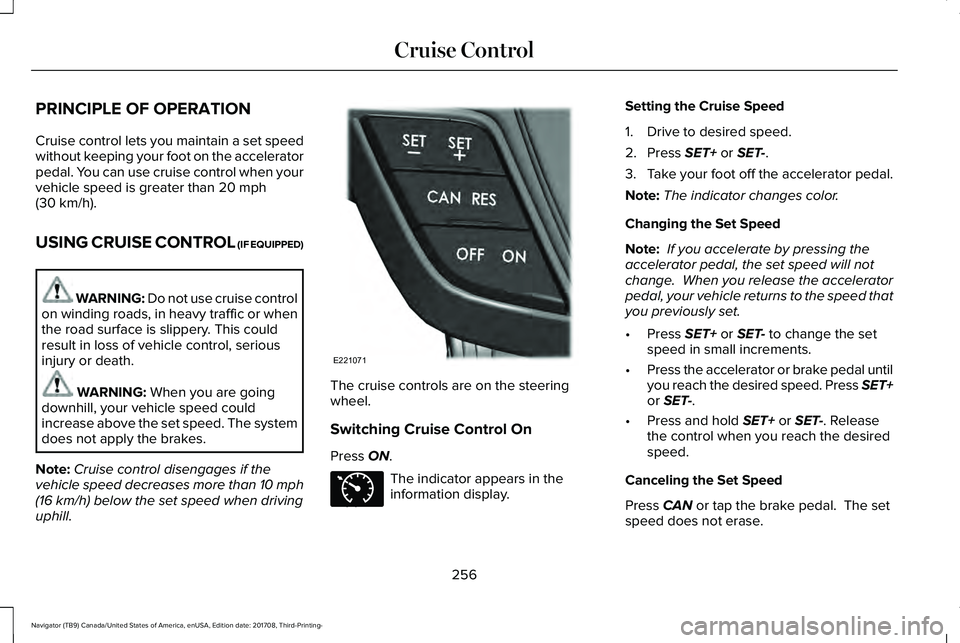
The cruise controls are on the steeringwheel.
Switching Cruise Control On
Press ON.
The indicator appears in theinformation display.
Setting the Cruise Speed
1. Drive to desired speed.
2. Press SET+ or SET-.
3.Take your foot off the accelerator pedal.
Note:The indicator changes color.
Changing the Set Speed
Note: If you accelerate by pressing theaccelerator pedal, the set speed will notchange. When you release the acceleratorpedal, your vehicle returns to the speed thatyou previously set.
•Press SET+ or SET- to change the setspeed in small increments.
•Press the accelerator or brake pedal untilyou reach the desired speed. Press SET+or SET-.
•Press and hold SET+ or SET-. Releasethe control when you reach the desiredspeed.
Canceling the Set Speed
Press CAN or tap the brake pedal. The setspeed does not erase.
256
Navigator (TB9) Canada/United States of America, enUSA, Edition date: 201708, Third-Printing-
Cruise ControlE221071 E71340
Page 261 of 649
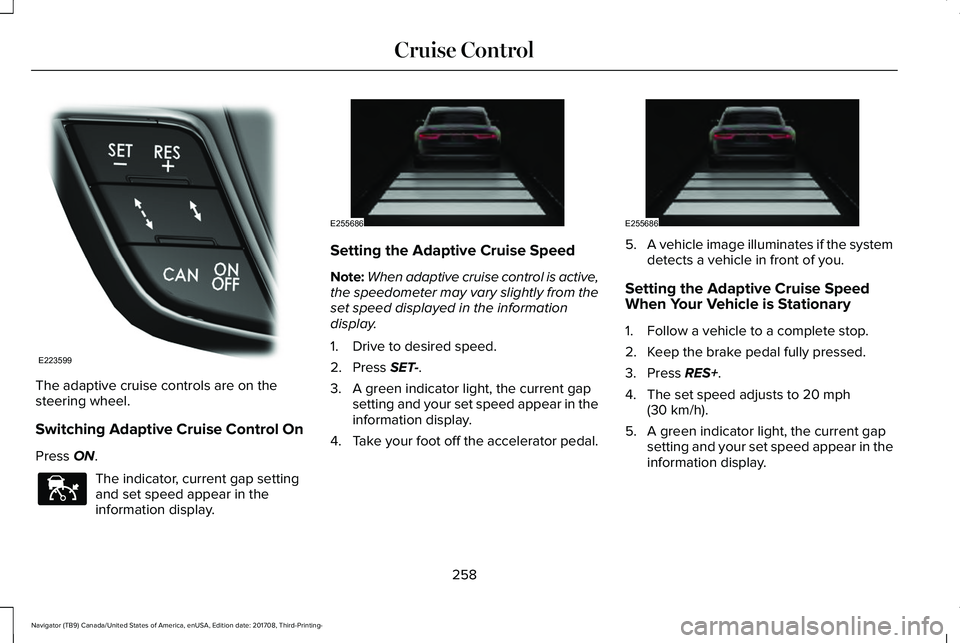
The adaptive cruise controls are on thesteering wheel.
Switching Adaptive Cruise Control On
Press ON.
The indicator, current gap settingand set speed appear in theinformation display.
Setting the Adaptive Cruise Speed
Note:When adaptive cruise control is active,the speedometer may vary slightly from theset speed displayed in the informationdisplay.
1. Drive to desired speed.
2. Press SET-.
3. A green indicator light, the current gapsetting and your set speed appear in theinformation display.
4.Take your foot off the accelerator pedal.
5.A vehicle image illuminates if the systemdetects a vehicle in front of you.
Setting the Adaptive Cruise SpeedWhen Your Vehicle is Stationary
1. Follow a vehicle to a complete stop.
2. Keep the brake pedal fully pressed.
3. Press RES+.
4. The set speed adjusts to 20 mph(30 km/h).
5. A green indicator light, the current gapsetting and your set speed appear in theinformation display.
258
Navigator (TB9) Canada/United States of America, enUSA, Edition date: 201708, Third-Printing-
Cruise ControlE223599 E144529 E255686 E255686
Page 269 of 649
Using Driver Alert
Switching the system on and off
You may switch the system on or off throughthe information display. See GeneralInformation (page 119). When activated, thesystem monitors your alertness level basedupon your driving behavior in relation to thelane markings, and other factors.
System Warnings
Note: The system does not issue warningsbelow approximately 40 mph (64 km/h).
The warning system is in two stages. At firstthe system issues a temporary warning thatyou need to take a rest. This message willonly appear for a short time. If the systemdetects further reduction in driving alertness,another warning may be issued which willremain in the information display for a longertime. Press OK on the steering wheel controlto clear the warning. When active the systemwill run automatically in the background andonly issue a warning if required.
Resetting the System
You can reset the system by either:
•Switching the ignition off and on.
•Stopping your vehicle and then openingand closing the driver’s door.
LANE KEEPING SYSTEM (IF EQUIPPED)
WARNING: You are responsible forcontrolling your vehicle at all times. Thesystem is designed to be an aid and doesnot relieve you of your responsibility todrive with due care and attention. Failureto follow this instruction could result in theloss of control of your vehicle, personalinjury or death.
WARNING: Always drive with duecare and attention when using andoperating the controls and features on yourvehicle.
WARNING: In cold and severeweather conditions the system may notfunction. Rain, snow and spray can all limitsensor performance.
WARNING: The system will notoperate if the sensor cannot track the roadlane markings.
WARNING: The sensor mayincorrectly track lane markings as otherstructures or objects. This can result in afalse or missed warning.
WARNING: Large contrasts in outsidelighting can limit sensor performance.
WARNING: The system may notoperate properly if the sensor is blocked.Keep the windshield free from obstruction.
WARNING: If damage occurs in theimmediate area surrounding the sensor,have your vehicle checked as soon aspossible.
266
Navigator (TB9) Canada/United States of America, enUSA, Edition date: 201708, Third-Printing-
Driving Aids
Page 270 of 649
WARNING: The system may notcorrectly operate if your vehicle is fittedwith a suspension kit not approved by us.
Note:The system works above 40 mph(64 km/h).
Note:The system works as long as thecamera can detect one lane marking.
Note:When you select aid or alert and aidmode and the system detects no steeringactivity for a short period, the system alertsyou to put your hands on the steering wheel.The system may detect a light grip or touchon the steering wheel as hands off driving.
Note:The system may not function if thecamera is blocked, or if the windshield isdamaged or dirty.
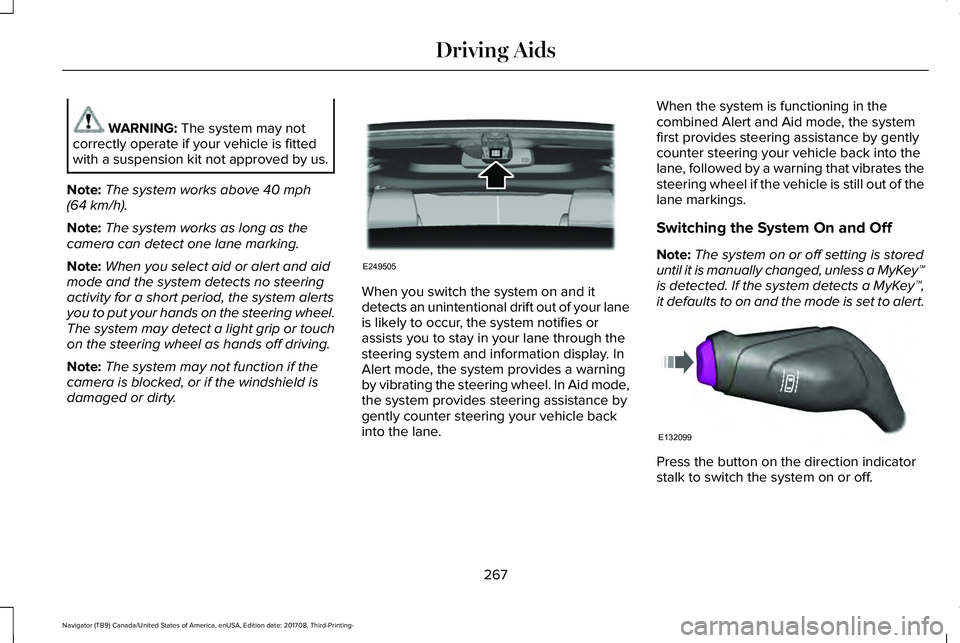
When you switch the system on and itdetects an unintentional drift out of your laneis likely to occur, the system notifies orassists you to stay in your lane through thesteering system and information display. InAlert mode, the system provides a warningby vibrating the steering wheel. In Aid mode,the system provides steering assistance bygently counter steering your vehicle backinto the lane.
When the system is functioning in thecombined Alert and Aid mode, the systemfirst provides steering assistance by gentlycounter steering your vehicle back into thelane, followed by a warning that vibrates thesteering wheel if the vehicle is still out of thelane markings.
Switching the System On and Off
Note:The system on or off setting is storeduntil it is manually changed, unless a MyKey™is detected. If the system detects a MyKey™,it defaults to on and the mode is set to alert.
Press the button on the direction indicatorstalk to switch the system on or off.
267
Navigator (TB9) Canada/United States of America, enUSA, Edition date: 201708, Third-Printing-
Driving AidsE249505 E132099
Page 271 of 649
System Settings
The system has optional menu settingsavailable. See General Information (page119). The system stores the last knownselection for each of these settings. You donot need to readjust your settings each timeyou switch the system on.
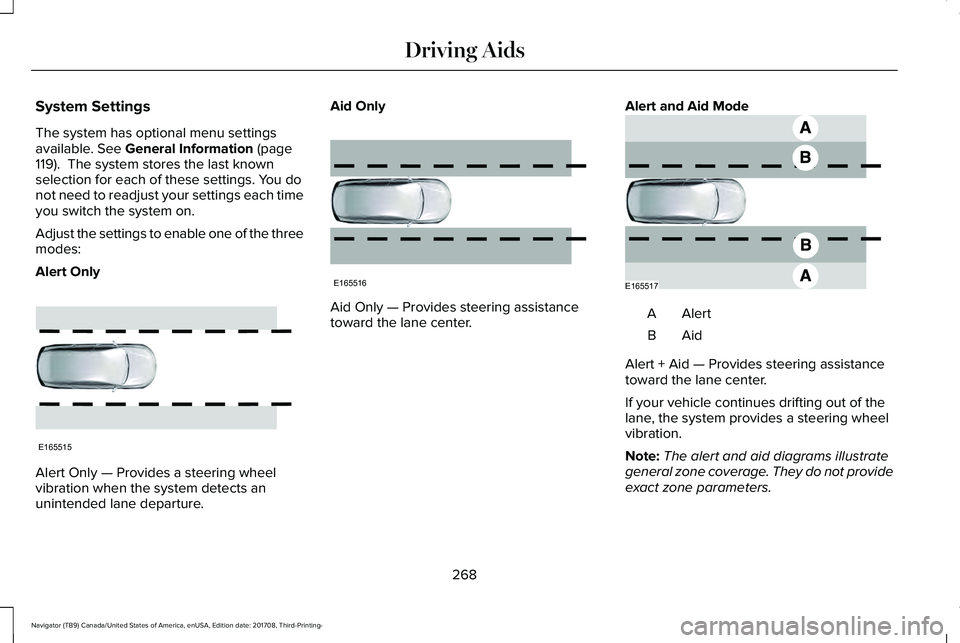
Adjust the settings to enable one of the threemodes:
Alert Only
Alert Only — Provides a steering wheelvibration when the system detects anunintended lane departure.
Aid Only
Aid Only — Provides steering assistancetoward the lane center.
Alert and Aid Mode
AlertA
AidB
Alert + Aid — Provides steering assistancetoward the lane center.
If your vehicle continues drifting out of thelane, the system provides a steering wheelvibration.
Note:The alert and aid diagrams illustrategeneral zone coverage. They do not provideexact zone parameters.
268
Navigator (TB9) Canada/United States of America, enUSA, Edition date: 201708, Third-Printing-
Driving AidsE165515 E165516 E165517
Page 272 of 649
Intensity: This setting affects the intensity ofthe steering wheel vibration used for the alertand alert and aid modes. This setting doesnot affect the aid mode.
•Low.
•Medium.
•High.
System Display
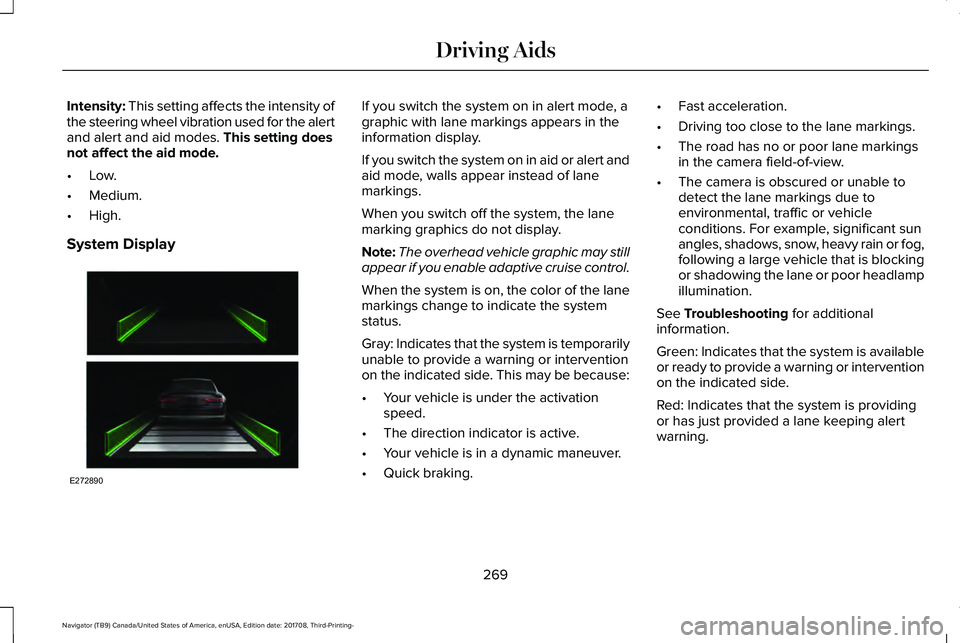
If you switch the system on in alert mode, agraphic with lane markings appears in theinformation display.
If you switch the system on in aid or alert andaid mode, walls appear instead of lanemarkings.
When you switch off the system, the lanemarking graphics do not display.
Note:The overhead vehicle graphic may stillappear if you enable adaptive cruise control.
When the system is on, the color of the lanemarkings change to indicate the systemstatus.
Gray: Indicates that the system is temporarilyunable to provide a warning or interventionon the indicated side. This may be because:
•Your vehicle is under the activationspeed.
•The direction indicator is active.
•Your vehicle is in a dynamic maneuver.
•Quick braking.
•Fast acceleration.
•Driving too close to the lane markings.
•The road has no or poor lane markingsin the camera field-of-view.
•The camera is obscured or unable todetect the lane markings due toenvironmental, traffic or vehicleconditions. For example, significant sunangles, shadows, snow, heavy rain or fog,following a large vehicle that is blockingor shadowing the lane or poor headlampillumination.
See Troubleshooting for additionalinformation.
Green: Indicates that the system is availableor ready to provide a warning or interventionon the indicated side.
Red: Indicates that the system is providingor has just provided a lane keeping alertwarning.
269
Navigator (TB9) Canada/United States of America, enUSA, Edition date: 201708, Third-Printing-
Driving AidsE272890