buttons LINCOLN NAVIGATOR 2019 User Guide
[x] Cancel search | Manufacturer: LINCOLN, Model Year: 2019, Model line: NAVIGATOR, Model: LINCOLN NAVIGATOR 2019Pages: 645, PDF Size: 5.02 MB
Page 164 of 645
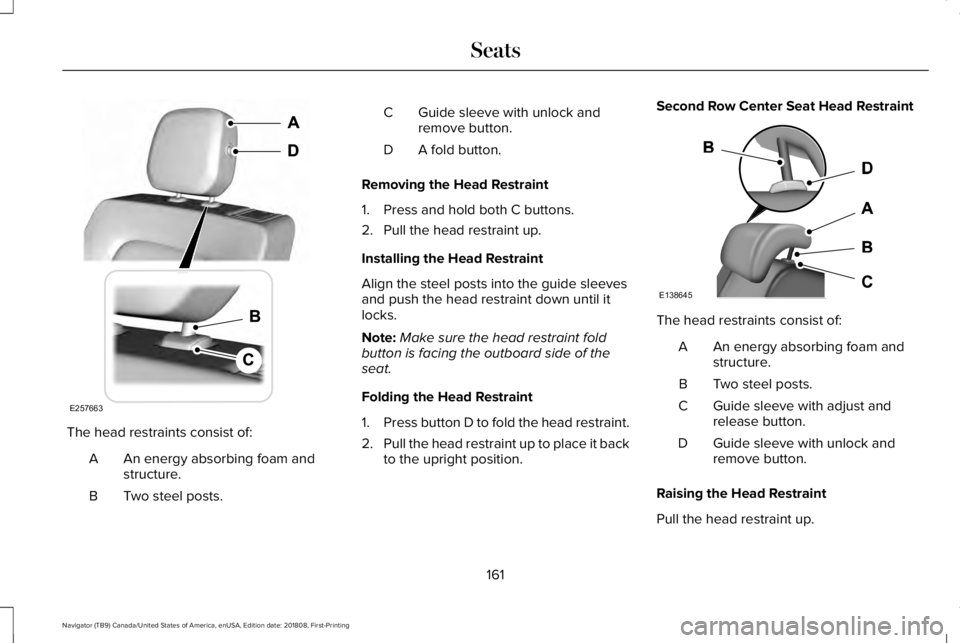
The head restraints consist of:
An energy absorbing foam andstructure.A
Two steel posts.B
Guide sleeve with unlock andremove button.C
A fold button.D
Removing the Head Restraint
1. Press and hold both C buttons.
2. Pull the head restraint up.
Installing the Head Restraint
Align the steel posts into the guide sleevesand push the head restraint down until itlocks.
Note:Make sure the head restraint foldbutton is facing the outboard side of theseat.
Folding the Head Restraint
1.Press button D to fold the head restraint.
2.Pull the head restraint up to place it backto the upright position.
Second Row Center Seat Head Restraint
The head restraints consist of:
An energy absorbing foam andstructure.A
Two steel posts.B
Guide sleeve with adjust andrelease button.C
Guide sleeve with unlock andremove button.D
Raising the Head Restraint
Pull the head restraint up.
161
Navigator (TB9) Canada/United States of America, enUSA, Edition date: 201808, First-Printing
SeatsE257663 E138645
Page 165 of 645
Lowering the Head Restraint
1. Press and hold button C.
2. Push the head restraint down.
Removing the Head Restraint
1.Pull the head restraint up until it reachesits highest position.
2. Press and hold buttons C and D.
3. Pull the head restraint up.
Installing the Head Restraint
Align the steel posts into the guide sleevesand push the head restraint down until itlocks.
Third Row Head Restraints
The third row head restraints arenon-adjustable, but you can fold them.
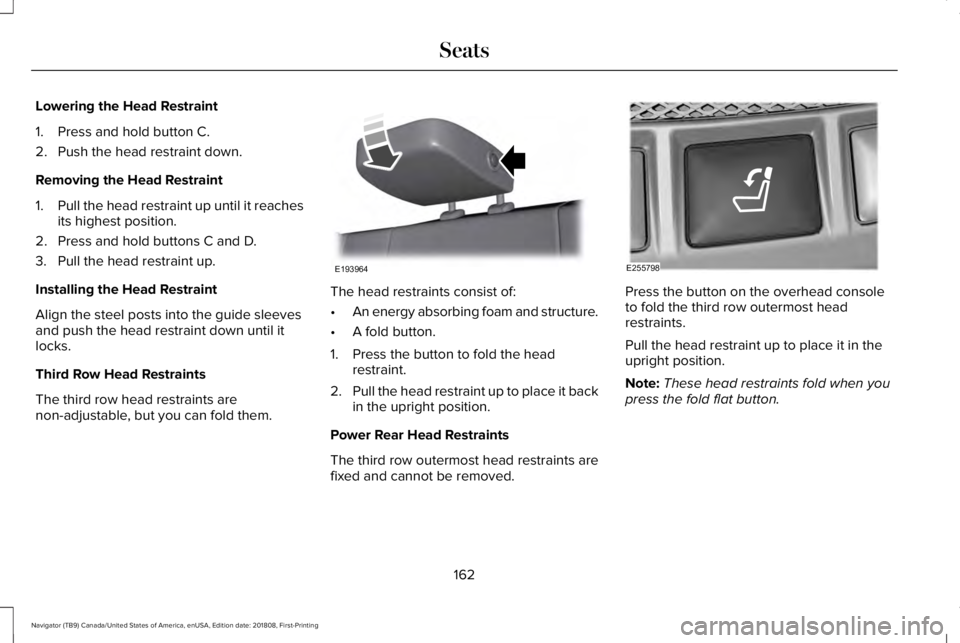
The head restraints consist of:
•An energy absorbing foam and structure.
•A fold button.
1. Press the button to fold the headrestraint.
2.Pull the head restraint up to place it backin the upright position.
Power Rear Head Restraints
The third row outermost head restraints arefixed and cannot be removed.
Press the button on the overhead consoleto fold the third row outermost headrestraints.
Pull the head restraint up to place it in theupright position.
Note:These head restraints fold when youpress the fold flat button.
162
Navigator (TB9) Canada/United States of America, enUSA, Edition date: 201808, First-Printing
SeatsE193964 E255798
Page 178 of 645
WARNING: Do not place cargo orany objects behind the seat backrestbefore returning it to the original position.Pull on the seat backrest to make sure thatit has fully latched after returning the seatbackrest to its original position. Anunlatched seat may become dangerous ifyou stop suddenly or have a crash.
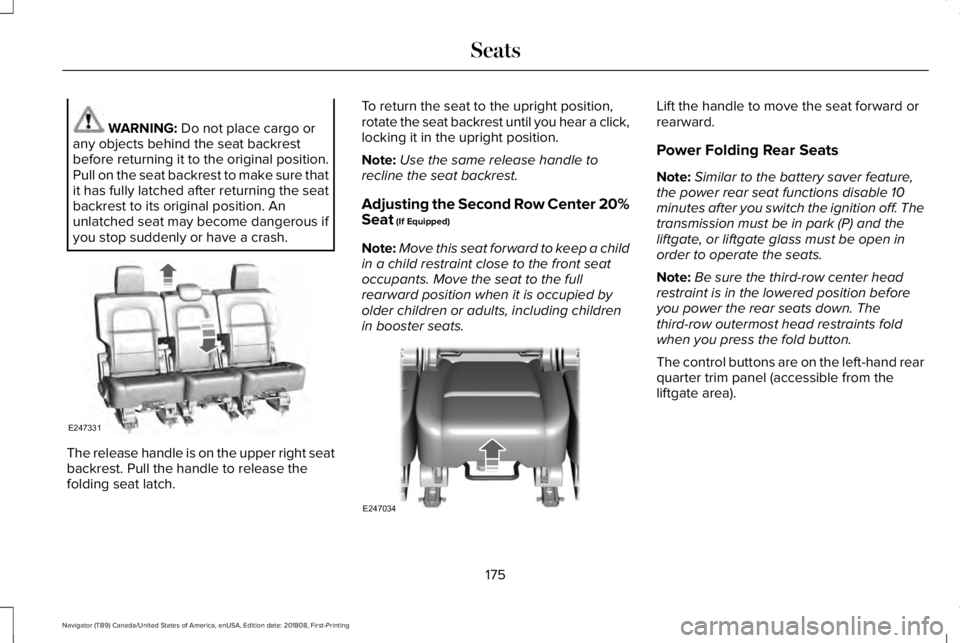
The release handle is on the upper right seatbackrest. Pull the handle to release thefolding seat latch.
To return the seat to the upright position,rotate the seat backrest until you hear a click,locking it in the upright position.
Note:Use the same release handle torecline the seat backrest.
Adjusting the Second Row Center 20%Seat (If Equipped)
Note:Move this seat forward to keep a childin a child restraint close to the front seatoccupants. Move the seat to the fullrearward position when it is occupied byolder children or adults, including childrenin booster seats.
Lift the handle to move the seat forward orrearward.
Power Folding Rear Seats
Note:Similar to the battery saver feature,the power rear seat functions disable 10minutes after you switch the ignition off. Thetransmission must be in park (P) and theliftgate, or liftgate glass must be open inorder to operate the seats.
Note:Be sure the third-row center headrestraint is in the lowered position beforeyou power the rear seats down. Thethird-row outermost head restraints foldwhen you press the fold button.
The control buttons are on the left-hand rearquarter trim panel (accessible from theliftgate area).
175
Navigator (TB9) Canada/United States of America, enUSA, Edition date: 201808, First-Printing
SeatsE247331 E247034
Page 180 of 645
Folding Down the Rear Seats to the LoadFloor
WARNING: To prevent possibledamage to the seat or seatbelts, make surethat the seatbelts are not fastened beforefolding the seatback.
WARNING: Do not place cargo orany objects behind the seatback beforereturning it to the original position.
The third-row seats have obstacle detectionthat prevents the seats from folding orreturning if they are obstructed.
Power Recline
WARNING: Do not recline a rear seaton which a child restraint is installed.Failure to follow this instruction couldreduce the effectiveness of the childrestraint.
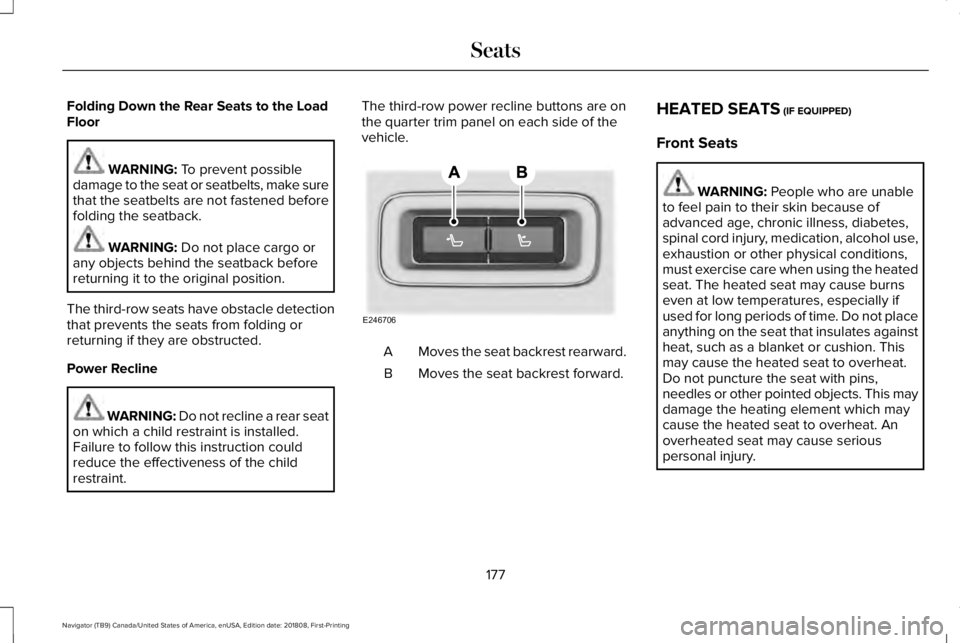
The third-row power recline buttons are onthe quarter trim panel on each side of thevehicle.
Moves the seat backrest rearward.A
Moves the seat backrest forward.B
HEATED SEATS (IF EQUIPPED)
Front Seats
WARNING: People who are unableto feel pain to their skin because ofadvanced age, chronic illness, diabetes,spinal cord injury, medication, alcohol use,exhaustion or other physical conditions,must exercise care when using the heatedseat. The heated seat may cause burnseven at low temperatures, especially ifused for long periods of time. Do not placeanything on the seat that insulates againstheat, such as a blanket or cushion. Thismay cause the heated seat to overheat.Do not puncture the seat with pins,needles or other pointed objects. This maydamage the heating element which maycause the heated seat to overheat. Anoverheated seat may cause seriouspersonal injury.
177
Navigator (TB9) Canada/United States of America, enUSA, Edition date: 201808, First-Printing
SeatsE246706
Page 184 of 645
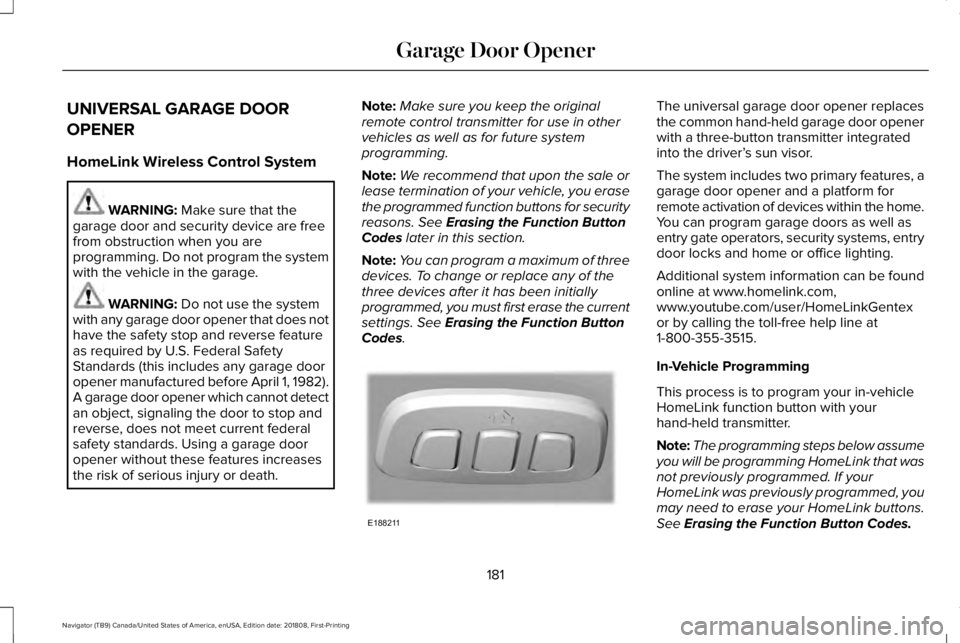
UNIVERSAL GARAGE DOOR
OPENER
HomeLink Wireless Control System
WARNING: Make sure that thegarage door and security device are freefrom obstruction when you areprogramming. Do not program the systemwith the vehicle in the garage.
WARNING: Do not use the systemwith any garage door opener that does nothave the safety stop and reverse featureas required by U.S. Federal SafetyStandards (this includes any garage dooropener manufactured before April 1, 1982).A garage door opener which cannot detectan object, signaling the door to stop andreverse, does not meet current federalsafety standards. Using a garage dooropener without these features increasesthe risk of serious injury or death.
Note:Make sure you keep the originalremote control transmitter for use in othervehicles as well as for future systemprogramming.
Note:We recommend that upon the sale orlease termination of your vehicle, you erasethe programmed function buttons for securityreasons. See Erasing the Function ButtonCodes later in this section.
Note:You can program a maximum of threedevices. To change or replace any of thethree devices after it has been initiallyprogrammed, you must first erase the currentsettings. See Erasing the Function ButtonCodes.
The universal garage door opener replacesthe common hand-held garage door openerwith a three-button transmitter integratedinto the driver’s sun visor.
The system includes two primary features, agarage door opener and a platform forremote activation of devices within the home.You can program garage doors as well asentry gate operators, security systems, entrydoor locks and home or office lighting.
Additional system information can be foundonline at www.homelink.com,www.youtube.com/user/HomeLinkGentexor by calling the toll-free help line at1-800-355-3515.
In-Vehicle Programming
This process is to program your in-vehicleHomeLink function button with yourhand-held transmitter.
Note:The programming steps below assumeyou will be programming HomeLink that wasnot previously programmed. If yourHomeLink was previously programmed, youmay need to erase your HomeLink buttons.See Erasing the Function Button Codes.
181
Navigator (TB9) Canada/United States of America, enUSA, Edition date: 201808, First-Printing
Garage Door OpenerE188211
Page 185 of 645
Note:Put a new battery in the hand-heldtransmitter. This helps ensure quickertraining and accurate transmission of theradio-frequency signal.
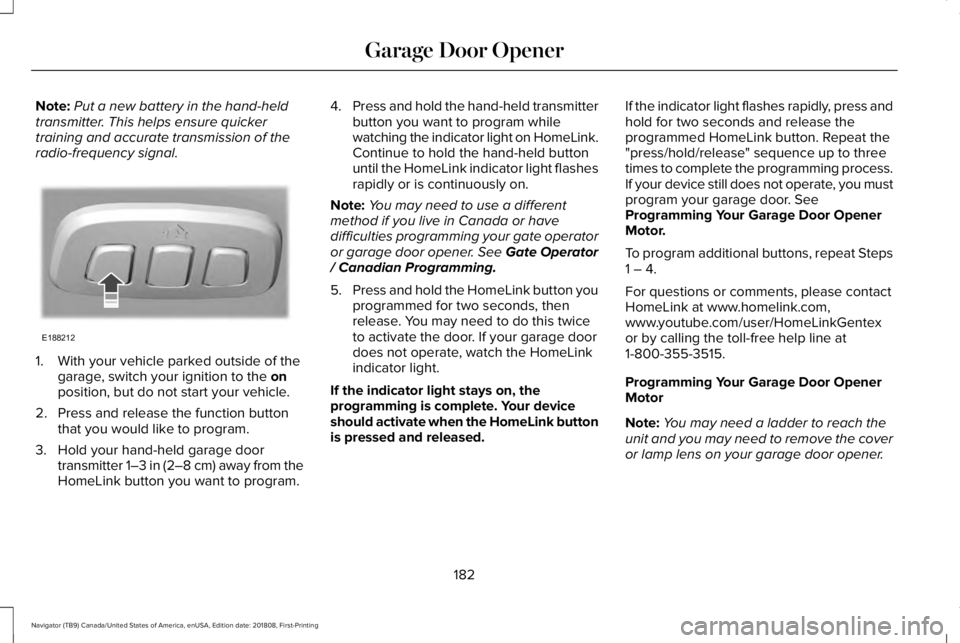
1. With your vehicle parked outside of thegarage, switch your ignition to the onposition, but do not start your vehicle.
2. Press and release the function buttonthat you would like to program.
3. Hold your hand-held garage doortransmitter 1–3 in (2–8 cm) away from theHomeLink button you want to program.
4.Press and hold the hand-held transmitterbutton you want to program whilewatching the indicator light on HomeLink.Continue to hold the hand-held buttonuntil the HomeLink indicator light flashesrapidly or is continuously on.
Note:You may need to use a differentmethod if you live in Canada or havedifficulties programming your gate operatoror garage door opener. See Gate Operator/ Canadian Programming.
5.Press and hold the HomeLink button youprogrammed for two seconds, thenrelease. You may need to do this twiceto activate the door. If your garage doordoes not operate, watch the HomeLinkindicator light.
If the indicator light stays on, theprogramming is complete. Your deviceshould activate when the HomeLink buttonis pressed and released.
If the indicator light flashes rapidly, press andhold for two seconds and release theprogrammed HomeLink button. Repeat the"press/hold/release" sequence up to threetimes to complete the programming process.If your device still does not operate, you mustprogram your garage door. SeeProgramming Your Garage Door OpenerMotor.
To program additional buttons, repeat Steps1 – 4.
For questions or comments, please contactHomeLink at www.homelink.com,www.youtube.com/user/HomeLinkGentexor by calling the toll-free help line at1-800-355-3515.
Programming Your Garage Door OpenerMotor
Note:You may need a ladder to reach theunit and you may need to remove the coveror lamp lens on your garage door opener.
182
Navigator (TB9) Canada/United States of America, enUSA, Edition date: 201808, First-Printing
Garage Door OpenerE188212
Page 186 of 645
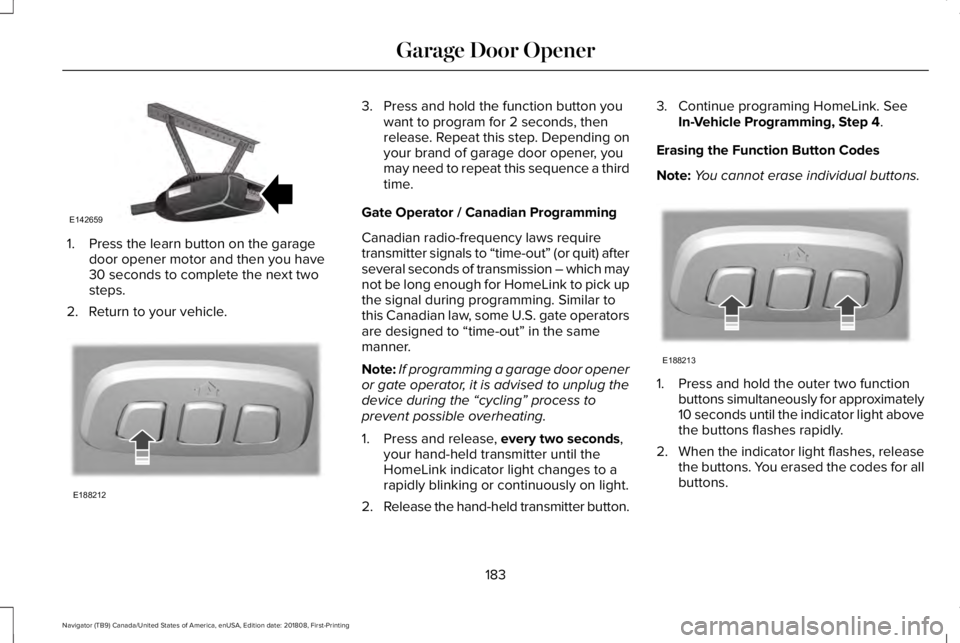
1. Press the learn button on the garagedoor opener motor and then you have30 seconds to complete the next twosteps.
2. Return to your vehicle.
3. Press and hold the function button youwant to program for 2 seconds, thenrelease. Repeat this step. Depending onyour brand of garage door opener, youmay need to repeat this sequence a thirdtime.
Gate Operator / Canadian Programming
Canadian radio-frequency laws requiretransmitter signals to “time-out” (or quit) afterseveral seconds of transmission – which maynot be long enough for HomeLink to pick upthe signal during programming. Similar tothis Canadian law, some U.S. gate operatorsare designed to “time-out” in the samemanner.
Note:If programming a garage door openeror gate operator, it is advised to unplug thedevice during the “cycling” process toprevent possible overheating.
1. Press and release, every two seconds,your hand-held transmitter until theHomeLink indicator light changes to arapidly blinking or continuously on light.
2.Release the hand-held transmitter button.
3. Continue programing HomeLink. SeeIn-Vehicle Programming, Step 4.
Erasing the Function Button Codes
Note:You cannot erase individual buttons.
1. Press and hold the outer two functionbuttons simultaneously for approximately10 seconds until the indicator light abovethe buttons flashes rapidly.
2.When the indicator light flashes, releasethe buttons. You erased the codes for allbuttons.
183
Navigator (TB9) Canada/United States of America, enUSA, Edition date: 201808, First-Printing
Garage Door OpenerE142659 E188212 E188213
Page 217 of 645
Brake-Shift Interlock Override
WARNING: When doing thisprocedure, you need to take thetransmission out of park (P) which meansyour vehicle can roll freely. To avoidunwanted vehicle movement, always fullyapply the parking brake prior to doing thisprocedure. Use wheels chocks ifappropriate.
WARNING: Do not drive your vehicleuntil you verify that the stoplamps areworking.
WARNING: If the parking brake isfully released, but the brake warning lampremains illuminated, the brakes may notbe working properly. Have your vehiclechecked as soon as possible.
Note:See your authorized dealer as soonas possible if this procedure is used.
Note:For some markets this feature isdisabled.
Note:This feature only functions if your12-volt battery has power.
Use the brake-shift interlock override tomove your transmission from the parkposition in the event of an electricalmalfunction.
1. Apply the parking brake and start theengine before performing this procedure.
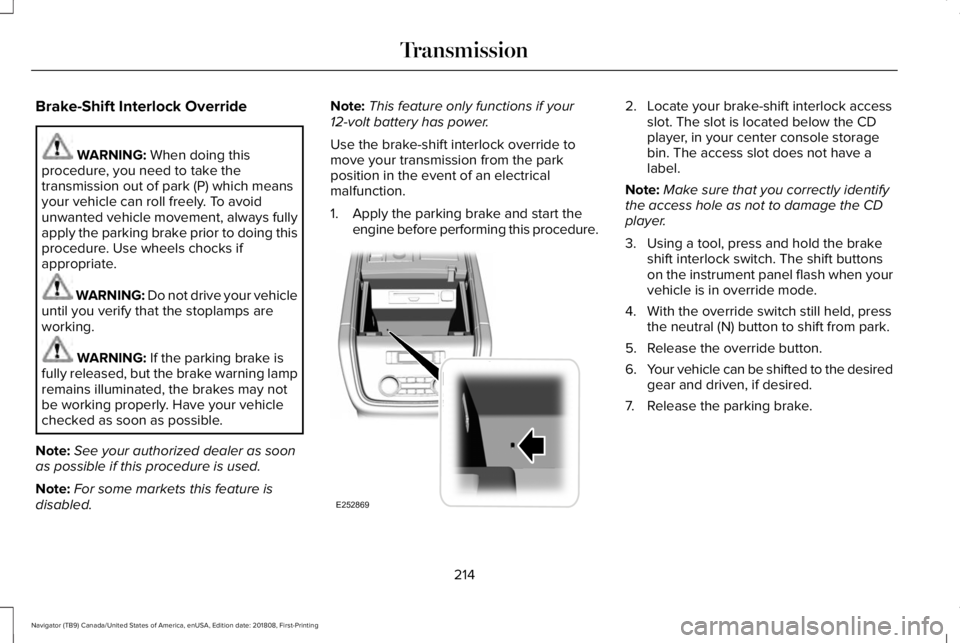
2. Locate your brake-shift interlock accessslot. The slot is located below the CDplayer, in your center console storagebin. The access slot does not have alabel.
Note:Make sure that you correctly identifythe access hole as not to damage the CDplayer.
3. Using a tool, press and hold the brakeshift interlock switch. The shift buttonson the instrument panel flash when yourvehicle is in override mode.
4. With the override switch still held, pressthe neutral (N) button to shift from park.
5. Release the override button.
6.Your vehicle can be shifted to the desiredgear and driven, if desired.
7. Release the parking brake.
214
Navigator (TB9) Canada/United States of America, enUSA, Edition date: 201808, First-Printing
TransmissionE252869
Page 245 of 645
Using Active Park Assist
Selecting an Active Park Assist Mode
Press the button once to activateparallel parking. Press the buttona second time to activateperpendicular parking. If you press thebutton again the system switches off.
If your vehicle is parked and after you switchthe ignition on, you can use the informationdisplay to toggle through the modes. Pressthe button to switch the system on and openthe system menu in the information display.
Note:If your vehicle is parked, the defaultmode is parallel park out assist. However, ifyou did not use active park assist to parallelpark your vehicle, use the informationdisplay to select park out assist.
Note:You can repeatedly press the activepark assist button to toggle through themodes only after moving your vehicleapproximately 33 ft (10 m).
To toggle through the modes, use thebuttons on the information display to selectthe following:
•Parallel parking.
•Perpendicular parking.
•Parallel park out assist.
•Switch the system off.
Note:There is no time limit for togglingthrough the modes.
Parallel Parking
The system detects available parallel parkingspaces and steers your vehicle into thespace. You control the accelerator, gearshiftand brakes. The system visually and audiblyguides you into a parallel parking space.
Press the button once to searchfor a parking space.
Note:You can also switch the system onafter you have already driven partially orcompletely past a parking space. Press theactive park assist button and the systeminforms you if you have recently passed asuitable parking space.
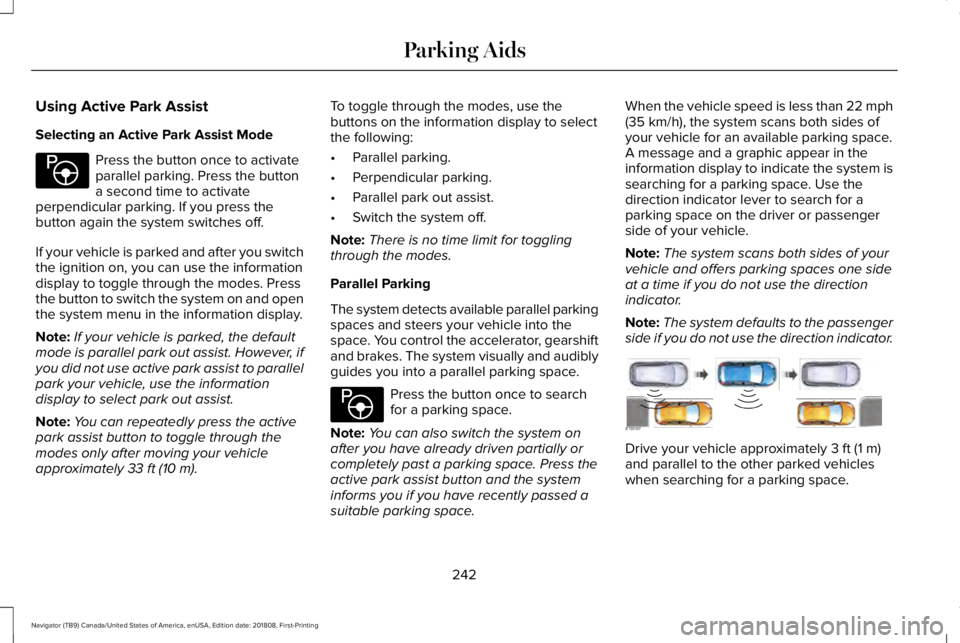
When the vehicle speed is less than 22 mph(35 km/h), the system scans both sides ofyour vehicle for an available parking space.A message and a graphic appear in theinformation display to indicate the system issearching for a parking space. Use thedirection indicator lever to search for aparking space on the driver or passengerside of your vehicle.
Note:The system scans both sides of yourvehicle and offers parking spaces one sideat a time if you do not use the directionindicator.
Note:The system defaults to the passengerside if you do not use the direction indicator.
Drive your vehicle approximately 3 ft (1 m)and parallel to the other parked vehicleswhen searching for a parking space.
242
Navigator (TB9) Canada/United States of America, enUSA, Edition date: 201808, First-Printing
Parking AidsE146186 E146186 E130107
Page 277 of 645
Note:You do not need to enter an exacttrailer width measurement. You only needto confirm that the width of the trailer is 8.5 ft(2.6 m) or less.
•Trailer length measurement:
The trailer length is the distance betweenthe trailer hitch ball and the rear of the trailer.The maximum length that the system cansupport is 33 ft (10.1 m).
•Enter length of trailer:
The default setting is 18 ft (5.5 m). Togglingup or down using the menu buttonsincreases or decreases the measurement by3 ft (1 m). Select a length that is equal to orwithin 3 ft (1 m) of the actual measuredlength. For example, if the actual measuredlength is 25 ft (7.6 m), toggle the length inthe menu to 27 ft (8.2 m). When you enterthe length of the trailer, the system setup issaved.
Note:If the trailer is actually a bike rack orcargo rack with electrical lighting, enter alength of 3 ft (1 m). Cross Traffic Alert remainson for trailers with a length of 3 ft (1 m) orless.
Note:Proper measurement andmeasurement entry is required for thesystem to function as designed.
System Operation
When you connect a trailer to your vehicle,the trailer set up menu appears in theinformation display. This menu allows you toset up a new trailer or choose from apreviously set up trailer. A warning messageappears and the system turns off if you donot choose or add a new trailer.
Note:The warning message may not appearuntil your vehicle speed reaches 22 mph(35 km/h).
If you select a trailer in the informationdisplay before connecting a trailer to yourvehicle, the system loads the configurationfor the selected trailer. When a trailer isconnected, a warning message appears.
Note:A second warning message mayappear stating that the Cross Traffic Alertsystem has turned off. The Blind SpotInformation System with Trailer Towcontinues to function normally in thissituation.
Note:The system remembers the lastselected trailer set up when you start yourvehicle.
Trailer Considerations
The system is designed to work with a trailerwith a front width of 8.5 ft (2.6 m) or less, anda total length from the trailer hitch ball to therear of the trailer of 33 ft (10.1 m) or less.
Some trailers may cause a slight change insystem performance:
•Large box trailers may cause false alertsto occur when driving next toinfrastructures or near parked cars. Afalse alert may also occur while makinga 90-degree turn.
•Trailers that have a width greater than8.5 ft (2.6 m) at the front and have a totallength greater than 20 ft (6 m) may causedelayed alerts when a vehicle is passingat high speed.
274
Navigator (TB9) Canada/United States of America, enUSA, Edition date: 201808, First-Printing
Driving Aids