change LINCOLN NAVIGATOR 2019 Owners Manual
[x] Cancel search | Manufacturer: LINCOLN, Model Year: 2019, Model line: NAVIGATOR, Model: LINCOLN NAVIGATOR 2019Pages: 645, PDF Size: 5.02 MB
Page 2 of 645

The information contained in this publication was correct at the time of going to print. In the interest of continuous development, we reserve the right to change specifications,design or equipment at any time without notice or obligation. No part of this publication may be reproduced, transmitted, stored in a retrieval system or translated into any languagein any form by any means without our written permission. Errors and omissions excepted.
© Ford Motor Company 2018
All rights reserved.
Part Number: 201808 20180807173941
California Proposition 65
WARNING: Operating, servicing and maintaining a passenger vehicle or off-highway motor
vehicle can expose you to chemicals including engine exhaust, carbon monoxide, phthalates,
and lead, which are known to the State of California to cause cancer and birth defects or other
reproductive harm. To minimize exposure, avoid breathing exhaust, do not idle the engine except
as necessary, service your vehicle in a well-ventilated area and wear gloves or wash your hands
frequently when servicing your vehicle. For more information go to
www.P65Warnings.ca.gov/passenger-vehicle.
WARNING: Battery posts, terminals and related accessories contain lead and lead compounds,
chemicals known to the State of California to cause cancer and reproductive harm. Wash your
hands after handling.
Page 8 of 645
Getting Assistance Outside the U.S. andCanada.......................................................337
Ordering Additional Owner's Literature......................................................................339
Reporting Safety Defects (U.S. Only)......339
Reporting Safety Defects (Canada Only)......................................................................340
Fuses
Fuse Specification Chart............................341
Changing a Fuse.........................................357
Maintenance
General Information...................................359
Opening and Closing the Hood..............359
Under Hood Overview..............................360
Engine Oil Dipstick.....................................362
Engine Oil Check........................................362
Oil Change Indicator Reset......................363
Engine Coolant Check...............................364
Automatic Transmission Fluid Check......369
Transfer Case Fluid Check.......................369
Brake Fluid Check.......................................370
Washer Fluid Check.....................................371
Fuel Filter........................................................371
Changing the 12V Battery..........................371
Checking the Wiper Blades......................373
Changing the Wiper Blades......................374
Adjusting the Headlamps..........................374
Changing a Bulb..........................................376
Changing the Engine Air Filter.................376
Vehicle Care
General Information....................................378
Cleaning Products.......................................378
Cleaning the Exterior..................................379
Waxing...........................................................380
Cleaning the Engine....................................381
Cleaning the Windows and Wiper Blades.......................................................................381
Cleaning the Interior...................................382
Cleaning the Instrument Panel andInstrument Cluster Lens........................384
Cleaning Leather Seats.............................384
Repairing Minor Paint Damage................385
Cleaning the Wheels..................................385
Vehicle Storage...........................................386
Body Styling Kits..........................................387
Wheels and Tires
General Information....................................388
Tire Care........................................................390
Using Snow Chains....................................404
Tire Pressure Monitoring System...........405
Changing a Road Wheel............................410
Technical Specifications.............................416
Capacities and Specifications
Engine Specifications..................................418
Motorcraft Parts............................................419
Vehicle Identification Number.................420
Vehicle Certification Label........................420
Transmission Code Designation..............421
Capacities and Specifications..................422
Bulb Specification Chart............................429
Audio System
General Information....................................432
Audio Unit.....................................................434
Satellite Radio..............................................436
5
Navigator (TB9) Canada/United States of America, enUSA, Edition date: 201808, First-Printing
Table of Contents
Page 49 of 645
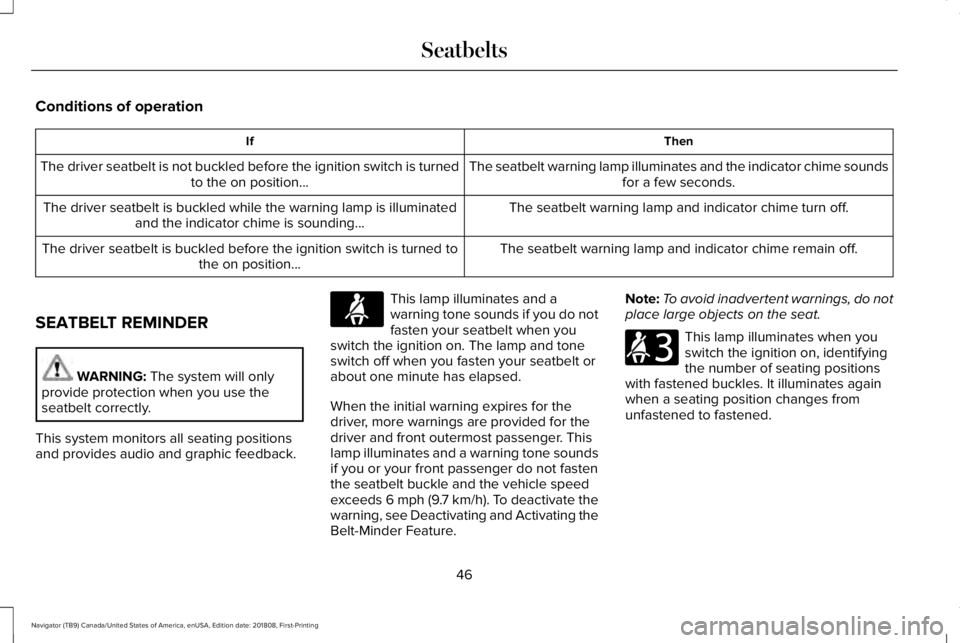
Conditions of operation
ThenIf
The seatbelt warning lamp illuminates and the indicator chime soundsfor a few seconds.The driver seatbelt is not buckled before the ignition switch is turnedto the on position...
The seatbelt warning lamp and indicator chime turn off.The driver seatbelt is buckled while the warning lamp is illuminatedand the indicator chime is sounding...
The seatbelt warning lamp and indicator chime remain off.The driver seatbelt is buckled before the ignition switch is turned tothe on position...
SEATBELT REMINDER
WARNING: The system will onlyprovide protection when you use theseatbelt correctly.
This system monitors all seating positionsand provides audio and graphic feedback.
This lamp illuminates and awarning tone sounds if you do notfasten your seatbelt when youswitch the ignition on. The lamp and toneswitch off when you fasten your seatbelt orabout one minute has elapsed.
When the initial warning expires for thedriver, more warnings are provided for thedriver and front outermost passenger. Thislamp illuminates and a warning tone soundsif you or your front passenger do not fastenthe seatbelt buckle and the vehicle speedexceeds 6 mph (9.7 km/h). To deactivate thewarning, see Deactivating and Activating theBelt-Minder Feature.
Note:To avoid inadvertent warnings, do notplace large objects on the seat.
This lamp illuminates when youswitch the ignition on, identifyingthe number of seating positionswith fastened buckles. It illuminates againwhen a seating position changes fromunfastened to fastened.
46
Navigator (TB9) Canada/United States of America, enUSA, Edition date: 201808, First-Printing
SeatbeltsE71880 E206718
Page 52 of 645
WARNING: Only use extensionsprovided free of charge by Lincoln MotorCompany dealers. The dealer will providean extension designed specifically for thisvehicle, model year and seating position.The use of an extension intended foranother vehicle, model year or seatingposition may not offer you the fullprotection of your vehicle’s seatbeltrestraint system.
WARNING: Never use seatbeltextensions to install child restraints.
WARNING: Do not use a seatbeltextension with an inflatable seatbelt.
WARNING: Do not use extensionsto change the fit of the belt across thetorso, over the lap or to make the seatbeltbuckle easier to reach.
If, because of body size or driving position,it is not possible to properly fasten theseatbelt over your lap and shoulder, anextension that is compatible with theseatbelts is available free of charge fromLincoln Motor Company dealers. Only Lincolnseatbelt extensions made by the samecompany which made the original equipmentseatbelts, should be used with Lincolnseatbelts. Ask your authorized dealer if yourextension is compatible with your Lincolnvehicle restraint system.
49
Navigator (TB9) Canada/United States of America, enUSA, Edition date: 201808, First-Printing
Seatbelts
Page 64 of 645
GENERAL INFORMATION ON
RADIO FREQUENCIES
This device complies with Part 15 of the FCCRules and with Licence exempt RSSStandards of Industry Canada. Operation issubject to the following two conditions:
•This device may not cause harmfulinterference, and
•This device must accept any interferencereceived, including interference that maycause undesired operation.
Note:Changes or modifications notexpressively approved by the partyresponsible for compliance could void theuser's authority to operate the equipment.The term "IC:" before the radio certificationnumber only signifies that Industry Canadatechnical specifications were met.
The typical operating range for yourtransmitter is approximately 33 ft (10 m).Vehicles with the remote start feature willhave a greater range. One of the followingcould cause a decrease in operating range:
•Weather conditions.
•Nearby radio towers.
•Structures around the vehicle.
•Other vehicles parked next to yourvehicle.
The radio frequency used by your remotecontrol can also be used by other radiotransmitters, for example amateur radios,medical equipment, wireless headphones,wireless remote controls, cell phones, batterychargers and alarm systems. If thefrequencies are jammed, you will not be ableto use your remote control. You can lockand unlock the doors with the key.
Note:Make sure you lock your vehiclebefore leaving it unattended.
Note:If you are within range of your vehicle,the remote control will operate if youunintentionally press any button.
Intelligent Access
The system uses a radio frequency signal tocommunicate with your vehicle andauthorizes your vehicle to unlock when oneof the following conditions are met:
•You touch the unlock sensor on the backof the door handle with the intelligentaccess key within 3 ft (1 m) of yourvehicle.
•You press the luggage compartmentbutton.
•You press the unlock button on thetransmitter.
If excessive radio frequency interference ispresent in the area or if the transmitterbattery is low, you may need to mechanicallyunlock your door. You can use themechanical key blade in your intelligentaccess key to open the driver door in thissituation. See Remote Control (page 62).
61
Navigator (TB9) Canada/United States of America, enUSA, Edition date: 201808, First-Printing
Keys and Remote Controls
Page 70 of 645
PRINCIPLE OF OPERATION
MyKey allows you to program keys withrestricted driving modes to promote gooddriving habits. You can program therestrictions to all keys except one. Any keysthat you did not program are administratorkeys or admin keys.
You can use admin keys to:
•Create a MyKey with certain vehiclerestrictions.
•Program certain MyKey settings.
•Clear all MyKey restrictions.
After you program a MyKey, you can viewthe following information through theinformation display:
•The total number of admin keys andMyKeys for your vehicle.
•The total distance a MyKey drivertraveled with your vehicle.
Note:Every MyKey receives the samerestrictions and settings. You cannotprogram them individually.
Note:For vehicles equipped with apush-button start switch: When both a MyKeyand an admin key are present when youstart your vehicle, the system recognizes theadmin key only.
Standard Settings
Not every vehicle includes the features listedbelow. If your vehicle has this equipment,then you cannot change the followingsettings when using a MyKey:
•Seatbelt reminder or Belt-Minder™. MyKeymutes the audio system until drivers, andin some instances, passengers, fastentheir seatbelts. Note: If your vehicleincludes an AM/FM radio or a very basicaudio system, then the radio may notmute.
•Earlier low-fuel warning. The low-fuelwarning activates earlier for MyKeydrivers, giving them more time to refuel.
•Certain driver alerts, stability systems orparking aids turn on automatically whenyou use the MyKey system. For example,Blind Spot Information System (BLIS),cross traffic alert, lane departure warningor forward collision warning. Note: MyKeydrivers may be able to turn the lanedeparture warning feature off, but thisfeature turns back on automatically withevery new key cycle.
•Restricted touchscreen operation in somemarkets. For example, MyKey mayprevent manual navigation destinationinput while the vehicle is in any gearother than park (P) or when the vehiclereaches a certain rate of speed.
•Satellite radio adult content restrictions,if this feature is available in your market.
Optional Settings
You can configure certain vehicle featuresettings when you first create a MyKey. Youcan also change the settings afterward withan admin key.
67
Navigator (TB9) Canada/United States of America, enUSA, Edition date: 201808, First-Printing
MyKey™
Page 71 of 645
Note:Not every feature applies to everyvehicle in every market. When they areavailable for your vehicle, then they appearin your information display, providing choicesto switch them on or off, or to select a morespecific setting.
•Various vehicle speed limits so theMyKey driver cannot exceed certainspeeds. The information display showswarnings followed by an audible tonewhen the MyKey driver reaches the setspeed. You cannot override the setspeed by fully depressing the acceleratorpedal.
WARNING: Do not set MyKeymaximum speed limit to a limit that willprevent the driver from maintaining a safespeed considering posted speed limits andprevailing road conditions. The driver isalways responsible to drive in accordancewith local laws and prevailing conditions.Failure to do so could result in accident orinjury.
•Various vehicle speed reminders soMyKey drivers know when their vehiclespeed approaches the limits. Warningsappear in your information display and atone sounds when the MyKey driversexceed the set vehicle speed.
•The audio system's maximum volumelimits to 45% so MyKey drivers canconcentrate on the road. A messageappears in the information display whenMyKey drivers attempt to exceed thelimited volume. MyKey also disables theautomatic volume control. Note: If yourvehicle includes an AM/FM radio or avery basic audio system, then the radiomay not limit.
•Always on setting. This setting forcescertain features to remain on and activefor MyKey drivers. For example, E911 oremergency assistance and the do notdisturb features stay on even if a MyKeydriver uses the feature's control to switchit off. When you select, you will not beable to turn off Advance Trac or tractioncontrol (if your vehicle has this feature).
CREATING A MYKEY
Use the information display to create aMyKey:
1. Insert the key you want to program intothe ignition. See Starting a GasolineEngine (page 192). If your vehicle isequipped with a push-button start, placethe remote control into the backup slot.See Passive Anti-Theft System (page83).
2. Switch the ignition on.
3.Access the main menu in the informationdisplay and then scroll through themenus to change the settings of yourMyKey. From the MyKey menu select theoption Create MyKey. See InformationDisplays (page 120).
4.When prompted, hold the OK button untilyou see a message informing you to labelthis key as a MyKey. The programmedrestrictions apply when you key off, openand close the driver door and restart yourvehicle with the programmed key ortransmitter.
68
Navigator (TB9) Canada/United States of America, enUSA, Edition date: 201808, First-Printing
MyKey™
Page 72 of 645
MyKey is successfully created. Make sureyou label it so you can distinguish it from theadmin keys.
You can also program configurable settingsfor the key(s). See Programming andChanging Configurable Settings.
Programming and ChangingConfigurable Settings
Use the information display to access yourconfigurable MyKey settings.
1.Switch the ignition on using an admin keyor transmitter you want to program.
2.Access the main menu in the informationdisplay and then scroll through themenus to change the settings of yourMyKey. See Information Displays (page120).
3. Follow the instructions in the display.
Note:You can clear or change your MyKeysettings at any time during the same keycycle as you created the MyKey. Once youhave switched the vehicle off, however, youwill need an admin key to change or clearyour MyKey settings.
CLEARING ALL MYKEYS
When you clear your MyKeys, you removeall restrictions and return all MyKeys to theiroriginal admin key status at once. To clearall MyKeys of all MyKey settings, use theinformation display.
1. Switch the ignition on using an adminkey.
2.Access the main menu in the informationdisplay and then scroll through themenus to begin clearing your MyKeyprogramming. See Information Displays(page 120).
3. Follow the instructions in the display.
4. A confirmation message appears in thedisplay after you finish clearing yourMyKeys.
Note:When you clear your MyKeys, youremove all restrictions and return all MyKeysto their original admin key status. You cannotremove the MyKey restrictions individually.
CHECKING MYKEY SYSTEM
STATUS
You can find information about yourprogrammed MyKeys by using theinformation display. See InformationDisplays (page 120).
MyKey Distance
Tracks the distance when drivers use aMyKey. The only way to delete theaccumulated distance is by using an adminkey to clear all MyKeys. If the distance doesnot accumulate as expected, then theintended user is not using the MyKey, or anadmin key user recently cleared and thenrecreated a MyKey.
Number of MyKeys
Indicates the number of MyKeysprogrammed to your vehicle. Use this featureto detect how many MyKeys you have foryour vehicle and determine when all MyKeyshave been deleted.
69
Navigator (TB9) Canada/United States of America, enUSA, Edition date: 201808, First-Printing
MyKey™
Page 75 of 645
LOCKING AND UNLOCKING
You can use the power door lock control orthe remote control to lock and unlock yourvehicle.
Power Door Locks
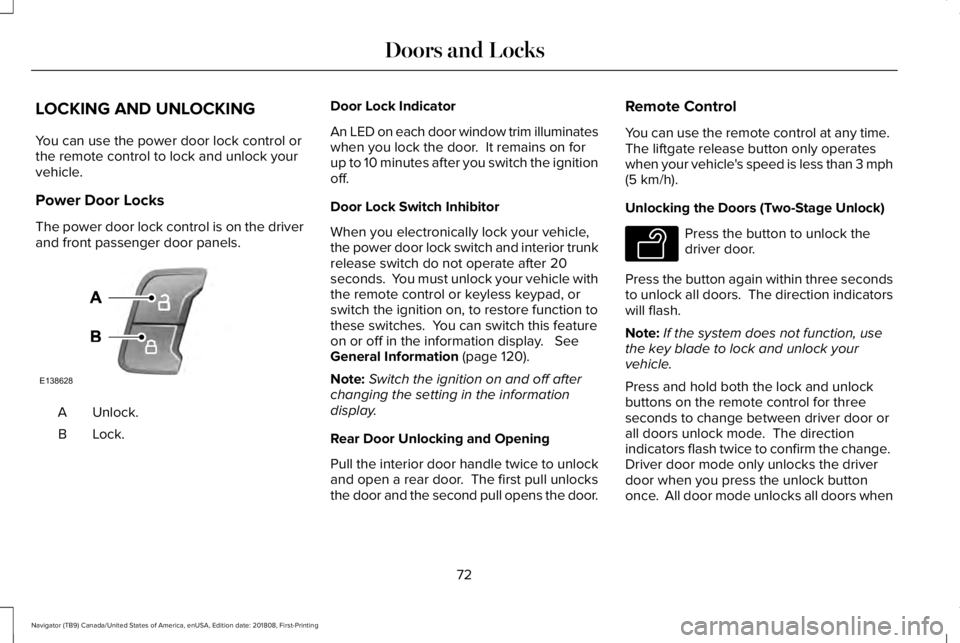
The power door lock control is on the driverand front passenger door panels.
Unlock.A
Lock.B
Door Lock Indicator
An LED on each door window trim illuminateswhen you lock the door. It remains on forup to 10 minutes after you switch the ignitionoff.
Door Lock Switch Inhibitor
When you electronically lock your vehicle,the power door lock switch and interior trunkrelease switch do not operate after 20seconds. You must unlock your vehicle withthe remote control or keyless keypad, orswitch the ignition on, to restore function tothese switches. You can switch this featureon or off in the information display. SeeGeneral Information (page 120).
Note:Switch the ignition on and off afterchanging the setting in the informationdisplay.
Rear Door Unlocking and Opening
Pull the interior door handle twice to unlockand open a rear door. The first pull unlocksthe door and the second pull opens the door.
Remote Control
You can use the remote control at any time. The liftgate release button only operateswhen your vehicle's speed is less than 3 mph(5 km/h).
Unlocking the Doors (Two-Stage Unlock)
Press the button to unlock thedriver door.
Press the button again within three secondsto unlock all doors. The direction indicatorswill flash.
Note:If the system does not function, usethe key blade to lock and unlock yourvehicle.
Press and hold both the lock and unlockbuttons on the remote control for threeseconds to change between driver door orall doors unlock mode. The directionindicators flash twice to confirm the change. Driver door mode only unlocks the driverdoor when you press the unlock buttononce. All door mode unlocks all doors when
72
Navigator (TB9) Canada/United States of America, enUSA, Edition date: 201808, First-Printing
Doors and LocksE138628 E138629
Page 76 of 645
you press the unlock button once. Theunlocking mode applies to the remotecontrol, keyless entry keypad and intelligentaccess. You can also change between theunlocking modes using the informationdisplay. See General Information (page 120).
Reprogramming the Unlocking Function
Note: When you press the unlock button,either all the doors are unlocked or only thedriver door is unlocked. Pressing the unlockbutton again unlocks all the doors.
Press and hold the unlock and lock buttonson the remote control simultaneously for atleast four seconds with the ignition off. Thedirection indicators flash twice to confirm thechange.
To return to the original unlocking function,repeat the process.
Locking the Doors
Press the button to lock all doors. The direction indicators will flash.
Press the button again within three secondsto confirm that all the doors are closed. Thedoor lock again, the horn sounds and thedirection indicators flash if all the doors andthe liftgate are closed.
Note:If the system does not function, usethe key blade to lock and unlock yourvehicle.
Mislock
If any door or the liftgate is open, or if
the hood is open on vehicles with an
anti-theft alarm or remote start, the horn
sounds twice and the direction
indicators do not flash. You can switch
this feature on or off in the information
display. See General Information (page
120).
Opening the Liftgate
Press twice within three secondsto open the liftgate.
Activating Intelligent Access
General Information
You can unlock and lock the vehicle withouttaking the keys out of your pocket or pursewhen your intelligent access key is within3 ft (1 m) of your vehicle. Intelligent accessuses a sensor on the back of the door handlefor unlocking and a separate sensor on theface of each door handle for locking.
The system does not function if:
•Your vehicle battery has no charge.
•The key battery has no charge.
•The key frequencies are jammed.
Note:The system may not function if the keyis close to metal objects or electronicdevices, for example keys or a cell phone.
Note:If the system does not function, usethe key blade to lock and unlock yourvehicle. See Remote Control (page 62).
73
Navigator (TB9) Canada/United States of America, enUSA, Edition date: 201808, First-Printing
Doors and LocksE138623 E267940