ECO mode LINCOLN NAVIGATOR 2023 Owner's Guide
[x] Cancel search | Manufacturer: LINCOLN, Model Year: 2023, Model line: NAVIGATOR, Model: LINCOLN NAVIGATOR 2023Pages: 660, PDF Size: 14.04 MB
Page 278 of 660
Switching Adaptive Cruise Control Off
Press the button when the systemis in standby mode or switch theignition off.
Note:When you switch the system off, theset speed clears.
ADAPTIVE CRUISE CONTROL
AUTOMATIC CANCELLATION
The system may cancel if:
•The tires lose traction.
•You apply the parking brake.
The system may cancel and set the parkingbrake if:
•You unbuckle the seatbelt and open thedriver door after adaptive cruise controlstops your vehicle.
•Adaptive cruise control holds yourvehicle at a stop continuously for morethan three minutes.
The system may deactivate or preventactivating when requested if:
•The vehicle has a blocked sensor.
•The brake temperature is too high.
•There is a failure in the system or arelated system.
SETTING THE ADAPTIVE CRUISE
CONTROL SPEED
Drive to the speed you prefer.
Press either button to set thecurrent speed.
Take your foot off the accelerator pedal.
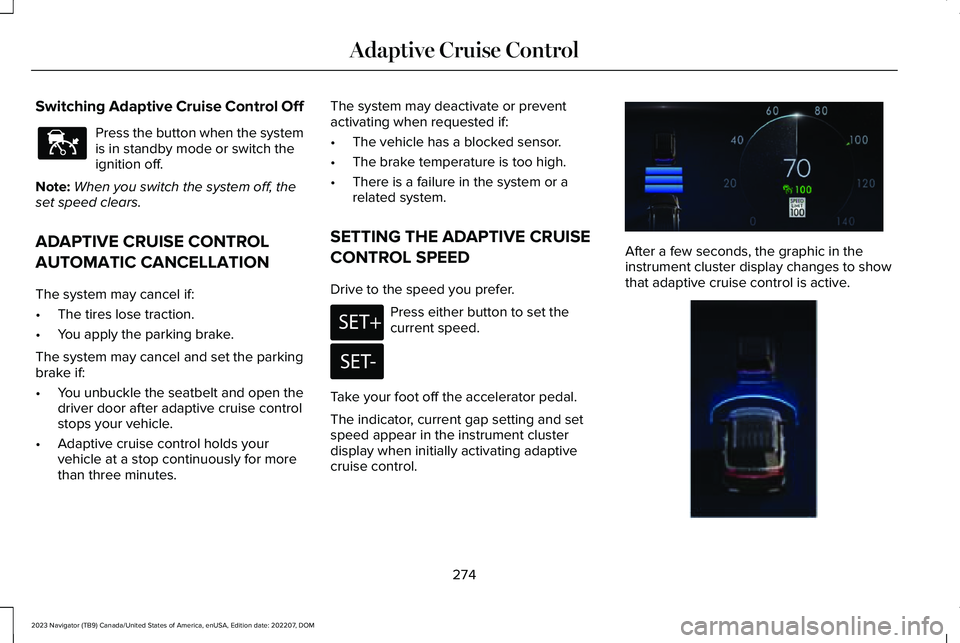
The indicator, current gap setting and setspeed appear in the instrument clusterdisplay when initially activating adaptivecruise control.
After a few seconds, the graphic in theinstrument cluster display changes to showthat adaptive cruise control is active.
274
2023 Navigator (TB9) Canada/United States of America, enUSA, Edition date: 202207, DOMAdaptive Cruise ControlE144529 E246884 E246885 E357760 E373414
Page 282 of 660
ActionMessage
Press and release the button or use the accelerator pedal to resumefollowing the lead vehicle.
Displays when on a limited access highway after following a vehicleto a complete stop. In this situation, your vehicle resumes followingthe lead vehicle without a button press or pressing the acceleratorpedal. The system can remain in auto-resume state for approximately30 seconds, after which it no longer automatically resumes.
Auto-Resume
OVERRIDING THE SET SPEED
WARNING: If you override the systemby pressing the accelerator pedal, it doesnot automatically apply the brakes tomaintain a gap from any vehicle ahead.
When you press the accelerator pedal, youoverride the set speed and gap distance.
Use the accelerator pedal to intentionallyexceed the set speed limit.
When you override the system, the greenindicator illuminates and the vehicle icondoes not appear in the instrument clusterdisplay.
The system resumes operation when yourelease the accelerator pedal. The vehiclespeed decreases to the set speed, or a lowerspeed if following a slower vehicle.
ADAPTIVE CRUISE CONTROL
INDICATORS
Illuminates when you switchadaptive cruise control on. Thecolor of the indicator changes toindicate the system status.
White indicates the system is on but inactive.
Green indicates that you set the speed andthe system is active.
SWITCHING FROM ADAPTIVE
CRUISE CONTROL TO CRUISE
CONTROL
WARNING: Normal cruise control willnot brake when your vehicle isapproaching slower vehicles. Always beaware of which mode you have selectedand apply the brakes when necessary.
278
2023 Navigator (TB9) Canada/United States of America, enUSA, Edition date: 202207, DOMAdaptive Cruise ControlE144529
Page 286 of 660
LANE CENTERING INDICATORS
Illuminates when you switch lanecentering on. The color of theindicator changes to indicate thesystem status.
Gray status indicates the system is on but instandby mode.
Green status indicates the system is enabledand applying steering assistance to keep thevehicle in the center of the lane.
Amber status with an audible tone, that thenchanges to gray status, indicates a systemautomatic cancellation.
INTELLIGENT ADAPTIVE CRUISE
CONTROL
HOW DOES INTELLIGENT ADAPTIVECRUISE CONTROL WORK
Lincoln Co-Pilot 360 and 360+
Intelligent adaptive cruise control combinesspeed sign recognition with adaptive cruisecontrol to adjust the cruise set speed to thespeed limit detected by the speed signrecognition system. As the system detectsnew speed signs, the set speed updates.
There are limitations that affect the accuracyof the speed sign recognition system and itsability to determine the current speed limit.The intelligent adaptive cruise control systemand its ability to determine the current speedlimit shares these limitations. See SpeedSign Recognition (page 332).
Note:The adaptive cruise control gap settingoperates normally.
INTELLIGENT ADAPTIVE CRUISECONTROL PRECAUTIONS
WARNING: You are responsible forcontrolling your vehicle at all times. Thesystem is designed to be an aid and doesnot relieve you of your responsibility todrive with due care and attention. Failureto follow this instruction could result in theloss of control of your vehicle, personalinjury or death.
INTELLIGENT ADAPTIVE CRUISECONTROL REQUIREMENTS
Traffic sign recognition must be enabled forintelligent adaptive cruise control to beactive.
INTELLIGENT ADAPTIVE CRUISECONTROL LIMITATIONS
The speed limit information provided by thenavigation map data could be inaccurate orout of date.
282
2023 Navigator (TB9) Canada/United States of America, enUSA, Edition date: 202207, DOMAdaptive Cruise ControlE297977
Page 287 of 660
The system may not detect and read speedlimit signs with conditional information, forexample, when a sign is flashing, duringspecific time ranges, or when children arepresent.
Note:The system does not set the vehiclespeed to speed limits shown with asupplementary traffic sign.
Under certain conditions, the system maynot adjust the vehicle speed until after yourvehicle passes the speed limit.
SWITCHING INTELLIGENT MODE ONAND OFF
1.Press Features on the touchscreen.
2.Press Driver Assistance.
3.Press Cruise Control.
4.Press Speed Sign Recognition.
ADJUSTING THE SET SPEEDTOLERANCE
1.Press Features on the touchscreen.
2.Press Driver Assistance.
3.Press Cruise Control.
4.Press Adaptive Cruise Control.
5.Press Speed Sign Recognition.
6.Press Tolerance.
7.Use + and - to set the tolerance.
Note:You cannot set the tolerance morethan 20 mph (30 km/h) above or below therecognized speed.
INTELLIGENT ADAPTIVE CRUISECONTROL ALERTS
If you increase the set speed beyond thespeed limit or speed limit plus a positivetolerance value, the set speed indicatorflashes.
The warning does not occur if:
•You override the set speed using theaccelerator pedal.
•The vehicle speed exceeds the set speeddue to being on a downhill slope.
INTELLIGENT ADAPTIVE CRUISECONTROL INDICATORS
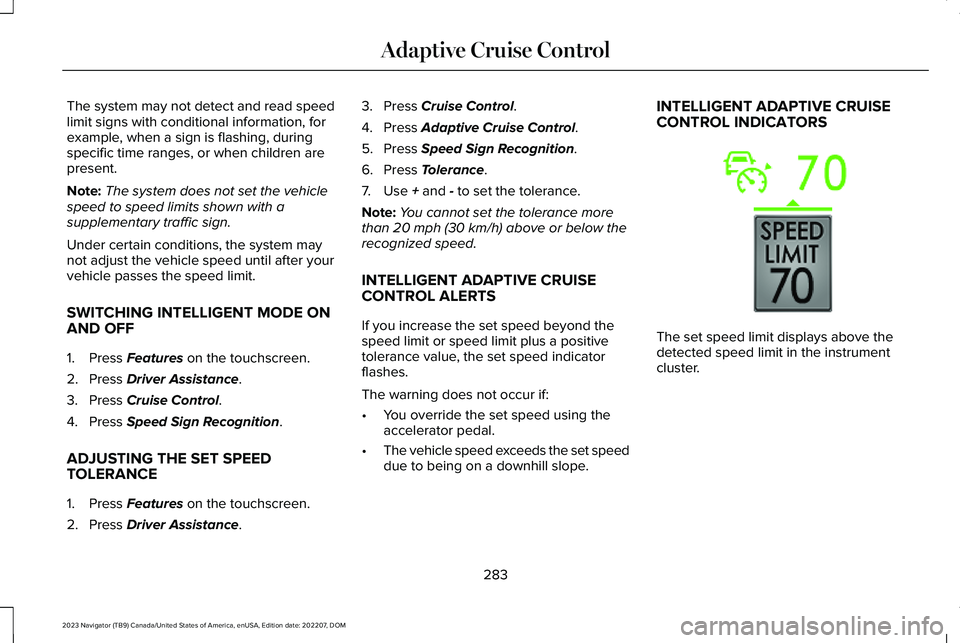
The set speed limit displays above thedetected speed limit in the instrumentcluster.
283
2023 Navigator (TB9) Canada/United States of America, enUSA, Edition date: 202207, DOMAdaptive Cruise ControlE353883
Page 293 of 660
The driver-facing camera may not operatecorrectly due to any of the following:
•If you have a pre-existing eye condition,such as an eye misalignment, or havehad eye surgery.
•You cover your facial features by a mask,hat or other items.
•The lighting conditions changesignificantly.
•You are not in the field of view of thecamera.
•You position or tilt yourself to one side.
•You are moving around extensively.
•You are wearing glasses or sunglassesthat are too dark or reflective.
Note:The system has limited steeringassistance and may not be sufficient for alldriving situations.
Note:In exceptional conditions, such asinclement weather or direct sunlight, thesystem could deviate from the center line.
Note:The information provided by thenavigation map data could be inaccurate orout of date.
ACTIVEGLIDE™ SETTINGS
Enabling ActiveGlide
1.Press Features on the touchscreen.
2.Press Driver Assistance.
3.Press Cruise Control.
4.Press Adaptive Cruise Control.
5.Press Lane Centering with Hands-Free.
Enabling Activation Prompts
1.Press Features on the touchscreen.
2.Press Driver Assistance.
3.Press Cruise Control.
4.Press Adaptive Cruise Control.
5.Press Activation Prompts.
SWITCHING ACTIVEGLIDE™ ON
AND OFF
Switching ActiveGlide On
The controls are on the steering wheel.
Using Activation Prompts
When the prompt appears, pressthe button to switch ActiveGlideon.
The indicator appears in the instrumentcluster. When the system is on, the color ofthe indicator changes to indicate the systemstatus.
Note:You must enable activation promptsin the touchscreen.
Using Steering Wheel Controls
Using the adaptive cruise controland lateral support buttons, makesure both systems are active.ActiveGlide activates.
Switching ActiveGlide Off
Press either the lateral support oradaptive cruise control buttonwhen system is active or instandby mode.
ActiveGlide turns off through eachignition cycle.
289
2023 Navigator (TB9) Canada/United States of America, enUSA, Edition date: 202207, DOMActiveGlide™ (If Equipped)E144529 E308131 E144529 E308131 E144529
Page 298 of 660
WHAT IS DRIVE MODE CONTROL
Your vehicle has various drive modes thatyou can select for different drivingconditions. Depending on the drive modethat you select, the system adjusts variousvehicle settings.
HOW DOES DRIVE MODE
CONTROL WORK
Drive mode control adjusts your vehicleconfiguration for each mode you select.
Changing the drive mode adjusts thesteering effort and feel of the steeringsystem.
The stability and traction control assist yourvehicle control in adverse conditions orhigh-performance driving.
Throttle control enhances the powertrainresponse, transmission controls becomeoptimized with shift schedules, andfour-wheel drive settings are optimized andtuned to each mode.
Changing the drive mode can engage ordisengage the electronic locking differentials.
Changing the drive mode changes thefour-wheel drive mode to the default settingfor the selected drive mode.
Note:The system has diagnostic checks thatcontinuously monitor the system for properoperation. If a mode is unavailable due to asystem fault, the drive mode system defaultsto normal. When the system defaults tonormal, the driveline settings remain thesame as prior to the system fault.
Note:The system reverts to the normalmode each time you start your vehicle. Atstartup the system also displays a prompton the instrument cluster display that givesyou the option to return to the previouslyselected drive mode during the last ignitioncycle. If you select yes, the system returnsto the last selected drive mode and thedefault driveline settings associated withthat mode. If you select no, the systemremains in normal mode and the drivelinesettings remain the same as selected in theprior ignition cycle. If you do not select yesor no, the system stays in normal mode andthe driveline settings remain the same asselected in the prior ignition cycle.
294
2023 Navigator (TB9) Canada/United States of America, enUSA, Edition date: 202207, DOMDrive Mode Control
Page 305 of 660
LANE KEEPING SYSTEM
LIMITATIONS
The lane keeping system only operates whenthe vehicle speed is greater than 40 mph(64 km/h).
The system works when the camera candetect at least one lane marking.
Note:When you select Aid or Alert and Aidmode and the system detects no steeringactivity for a short period of time, the systemalerts you to put your hands on the steeringwheel. The system may detect a light grip ortouch on the steering wheel as hands-offdriving.
The lane keeping system may not correctlyoperate in any of the following conditions:
•The lane keeping system does not detectat least one lane marking.
•You switch the turn signal on.
•You apply direct steering, accelerate fastor brake hard.
•The vehicle speed is less than 40 mph(64 km/h).
•The anti-lock brake, stability control ortraction control system activates.
•The lane is too narrow.
•Something is obscuring the camera or itis unable to detect the lane markings dueto environment, traffic or vehicleconditions.
•Entering or exiting a tight curve whendriving at high speeds.
The lane keeping system may not correctlane positioning in any of the followingconditions:
•High winds.
•Uneven road surfaces.
•Heavy or uneven loads.
•Incorrect tire pressure.
SWITCHING THE LANE KEEPING
SYSTEM ON AND OFF
To activate the lane keepingsystem, press the button on thesteering wheel.
To deactivate the lane keeping system, pressthe button again.
Note:When switching the system on or offa message appears in the information andentertainment display to show the status.
Note:The system stores the on or off settinguntil manually changed, unless it detects aMyKey™. If the system detects a MyKey™, itdefaults to the last setting for that MyKey™.
Note: If the system detects a MyKey™,pressing the button does not affect the onor off status of the system. You can onlychange the mode and intensity settings.
SWITCHING THE LANE KEEPING
SYSTEM MODE
The lane keeping system has differentsettings that you can view or adjust usingthe information display.
The system stores the last known selectionfor each of these settings. You do not needto readjust your settings each time youswitch on the system.
301
2023 Navigator (TB9) Canada/United States of America, enUSA, Edition date: 202207, DOMLane Keeping SystemE334922
Page 362 of 660
Note:The gain should be set to provide themaximum trailer braking assistance whilemaking sure the trailer wheels do not lockwhen using the brakes. Locked trailer wheelsmay lead to trailer instability.
Note:Setting adjustments are saved whena trailer profile is selected.
ADJUSTING THE INTEGRATED
TRAILER BRAKE CONTROLLER
MODE
Select the correct integrated trailer brakecontroller mode option using thetouchscreen.
Note:Trailer brake gain settings are savedto the active trailer profile.
Selecting the Trailer Brake Type
1.Press Default for trailers withelectromagnetic drum brake systems orpress Electric over Hydraulic for trailerswith electrically actuated hydraulic brakesystems.
2.Press Save.
Selecting the Trailer Brake Effort
1.Select a setting for your trailer.
Note:The default value is Low and is therecommended setting for most trailers.Select a different setting if your trailer'sbrakes require more initial voltage, or youprefer more aggressive trailer braking.
2.Press Save.
358
2023 Navigator (TB9) Canada/United States of America, enUSA, Edition date: 202207, DOMIntegrated Trailer Brake Controller (If Equipped)
Page 371 of 660
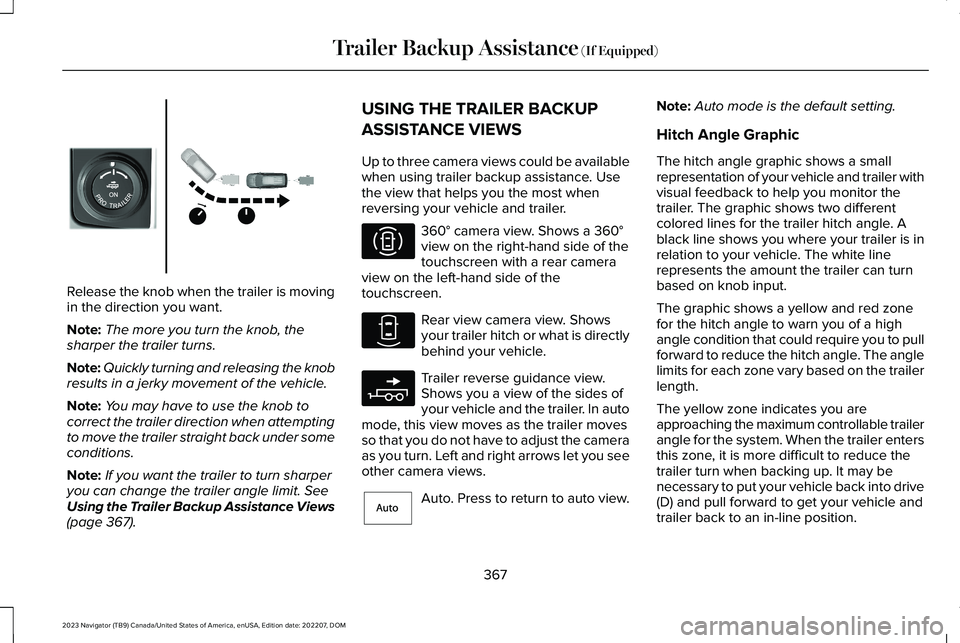
Release the knob when the trailer is movingin the direction you want.
Note:The more you turn the knob, thesharper the trailer turns.
Note:Quickly turning and releasing the knobresults in a jerky movement of the vehicle.
Note:You may have to use the knob tocorrect the trailer direction when attemptingto move the trailer straight back under someconditions.
Note:If you want the trailer to turn sharperyou can change the trailer angle limit. SeeUsing the Trailer Backup Assistance Views(page 367).
USING THE TRAILER BACKUP
ASSISTANCE VIEWS
Up to three camera views could be availablewhen using trailer backup assistance. Usethe view that helps you the most whenreversing your vehicle and trailer.
360° camera view. Shows a 360°view on the right-hand side of thetouchscreen with a rear cameraview on the left-hand side of thetouchscreen.
Rear view camera view. Showsyour trailer hitch or what is directlybehind your vehicle.
Trailer reverse guidance view.Shows you a view of the sides ofyour vehicle and the trailer. In automode, this view moves as the trailer movesso that you do not have to adjust the cameraas you turn. Left and right arrows let you seeother camera views.
Auto. Press to return to auto view.
Note:Auto mode is the default setting.
Hitch Angle Graphic
The hitch angle graphic shows a smallrepresentation of your vehicle and trailer withvisual feedback to help you monitor thetrailer. The graphic shows two differentcolored lines for the trailer hitch angle. Ablack line shows you where your trailer is inrelation to your vehicle. The white linerepresents the amount the trailer can turnbased on knob input.
The graphic shows a yellow and red zonefor the hitch angle to warn you of a highangle condition that could require you to pullforward to reduce the hitch angle. The anglelimits for each zone vary based on the trailerlength.
The yellow zone indicates you areapproaching the maximum controllable trailerangle for the system. When the trailer entersthis zone, it is more difficult to reduce thetrailer turn when backing up. It may benecessary to put your vehicle back into drive(D) and pull forward to get your vehicle andtrailer back to an in-line position.
367
2023 Navigator (TB9) Canada/United States of America, enUSA, Edition date: 202207, DOMTrailer Backup Assistance (If Equipped)E349264 E310996 E310967 E310965 E315644
Page 382 of 660
Note:During calibration, the systemdetermines the trailer length. The systemsupports trailer lengths of 6–33 ft(1.85–10.05 m) distance from the hitch pointto the center of the axle or axles. The systemis designed to work with drawbars that havea license plate to hitch ball centermeasurement of 9–18 in (23–46 cm) wheninstalled. Do not attempt to use drawbars ortrailers that have a length outside of thisrange as the system performance degradesand could cause improper system function.
Note:The touchscreen shows if you aregoing too slow or fast. Calibration pauses ifthe speed is outside the required range of2–9 mph (4–15 km/h).
Note:You need to complete at least a 90°turn, and longer trailers could require a 180°turn. Camera trailer tracking requires thesystem to locate the hitch ball as well asdetermine the trailer length. Some trailerscould require you to drive straight then turnmultiple times before calibration completes.The touchscreen provides instructions andnotifies you when calibration completes.
Note:For best results, do not calibrate thesystem at night.
SWITCHING TRAILER REVERSE
GUIDANCE ON AND OFF
Shift into reverse (R), press the rear camerabutton to expand the menu, press the trailericon and use the touchscreen to select theconnected trailer.
Note:If the trailer was connected just priorto turning the system on, you may need todrive forward to initialize the system. Followthe instructions on the touchscreen toactivate the system.
USING TRAILER REVERSE
GUIDANCE VIEWS
Up to three camera views could be availablewhen using trailer reverse guidance. Use theview that helps you the most when reversingyour vehicle and trailer.
360° camera view. Shows a 360°view on the right-hand side of thetouchscreen with a rear cameraview on the left-hand side of thetouchscreen.
Rear view camera view. Showsyour trailer hitch or what is directlybehind your vehicle.
Trailer reverse guidance view.Shows you a view of the sides ofyour vehicle and the trailer. In automode, this view moves as the trailer movesso that you do not have to adjust the cameraas you turn. Left and right arrows let you seeother camera views.
Straight backup mode. Showswhich way to turn your steeringwheel to keep the trailer straight.Use this view when you want to keep yourtrailer completely in line with your vehicle.
Note: It may be helpful to shift your vehicleinto drive (D), pull forward and straighten outthe vehicle and trailer before engagingstraight backup mode.
378
2023 Navigator (TB9) Canada/United States of America, enUSA, Edition date: 202207, DOMTrailer Reverse Guidance (If Equipped)E310996 E310967 E310965 E224484