tow MASERATI GHIBLI 2019 User Guide
[x] Cancel search | Manufacturer: MASERATI, Model Year: 2019, Model line: GHIBLI, Model: MASERATI GHIBLI 2019Pages: 384, PDF Size: 13.33 MB
Page 91 of 384
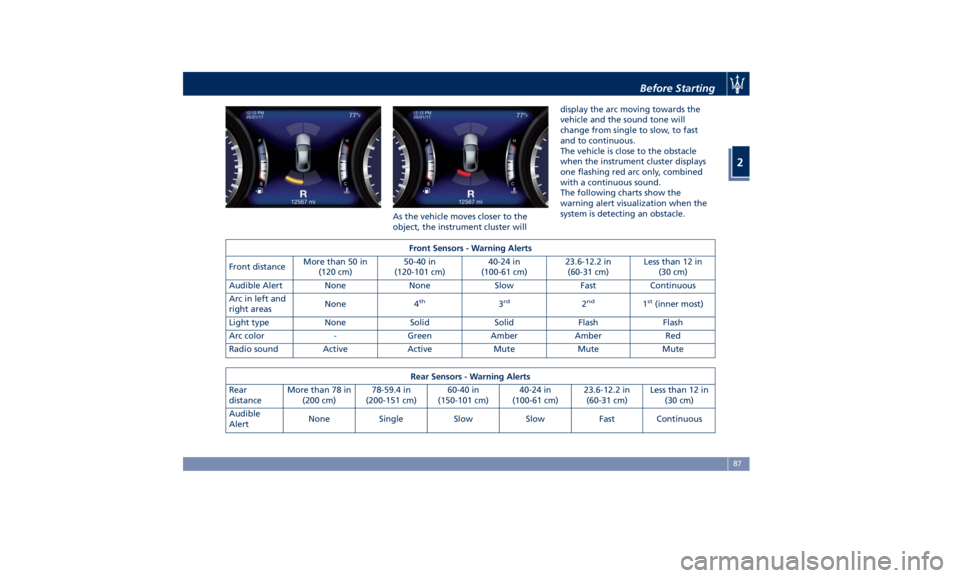
As the vehicle moves closer to the
object, the instrument cluster will display the arc moving towards the
vehicle and the sound tone will
change from single to slow, to fast
and to continuous.
The vehicle is close to the obstacle
when the instrument cluster displays
one flashing red arc only, combined
with a continuous sound.
The following charts show the
warning alert visualization when the
system is detecting an obstacle.
Front Sensors - Warning Alerts
Front distance More than 50 in
(120 cm) 50-40 in
(120-101 cm) 40-24 in
(100-61 cm) 23.6-12.2 in
(60-31 cm) Less than 12 in
(30 cm)
Audible Alert None None Slow Fast Continuous
Arc in left and
right areas None 4 th
3 rd
2 nd
1 st
(inner most)
Light type None Solid Solid Flash Flash
Arc color - Green Amber Amber Red
Radio sound Active Active Mute Mute Mute
Rear Sensors - Warning Alerts
Rear
distance More than 78 in
(200 cm) 78-59.4 in
(200-151 cm) 60-40 in
(150-101 cm) 40-24 in
(100-61 cm) 23.6-12.2 in
(60-31 cm) Less than 12 in
(30 cm)
Audible
Alert None Single Slow Slow Fast Continuous Before Starting
2
87
Page 109 of 384
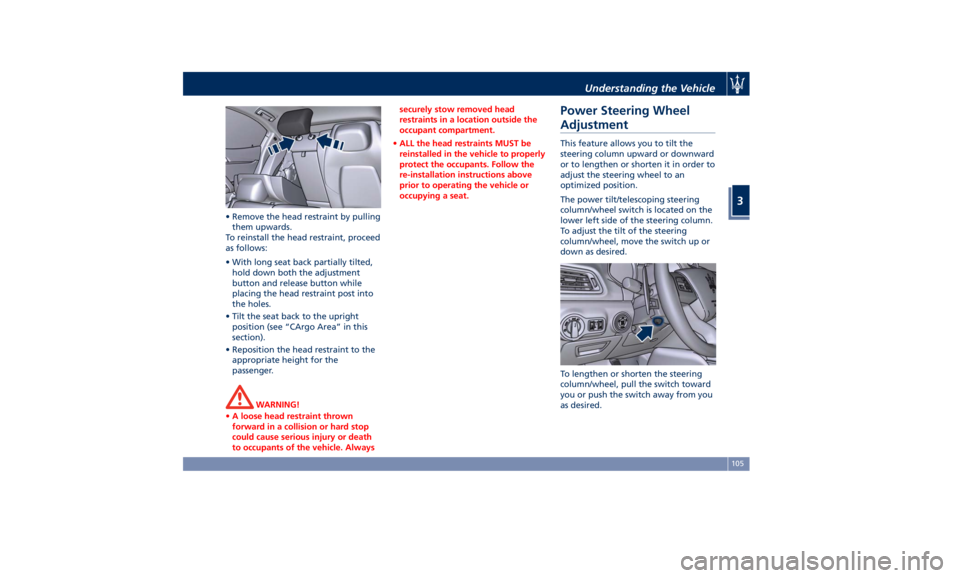
• Remove the head restraint by pulling
them upwards.
To reinstall the head restraint, proceed
as follows:
• With long seat back partially tilted,
hold down both the adjustment
button and release button while
placing the head restraint post into
the holes.
• Tilt the seat back to the upright
position (see “CArgo Area” in this
section).
• Reposition the head restraint to the
appropriate height for the
passenger.
WARNING!
• A loose head restraint thrown
forward in a collision or hard stop
could cause serious injury or death
to occupants of the vehicle. Always securely stow removed head
restraints in a location outside the
occupant compartment.
• ALL the head restraints MUST be
reinstalled in the vehicle to properly
protect the occupants. Follow the
re-installation instructions above
prior to operating the vehicle or
occupying a seat.
Power Steering Wheel
Adjustment This feature allows you to tilt the
steering column upward or downward
or to lengthen or shorten it in order to
adjust the steering wheel to an
optimized position.
The power tilt/telescoping steering
column/wheel switch is located on the
lower left side of the steering column.
To adjust the tilt of the steering
column/wheel, move the switch up or
down as desired.
To lengthen or shorten the steering
column/wheel, pull the switch toward
you or push the switch away from you
as desired.Understanding the Vehicle
3
105
Page 111 of 384
Adjustable Pedals (if
equipped) The adjustable pedals system is
designed to allow greater range of
pedals positions enabling driver
comfort with regard to the steering
wheel tilt and the seat position.
This feature allows the brake and
accelerator pedals to move toward or
away from the driver’s feet.
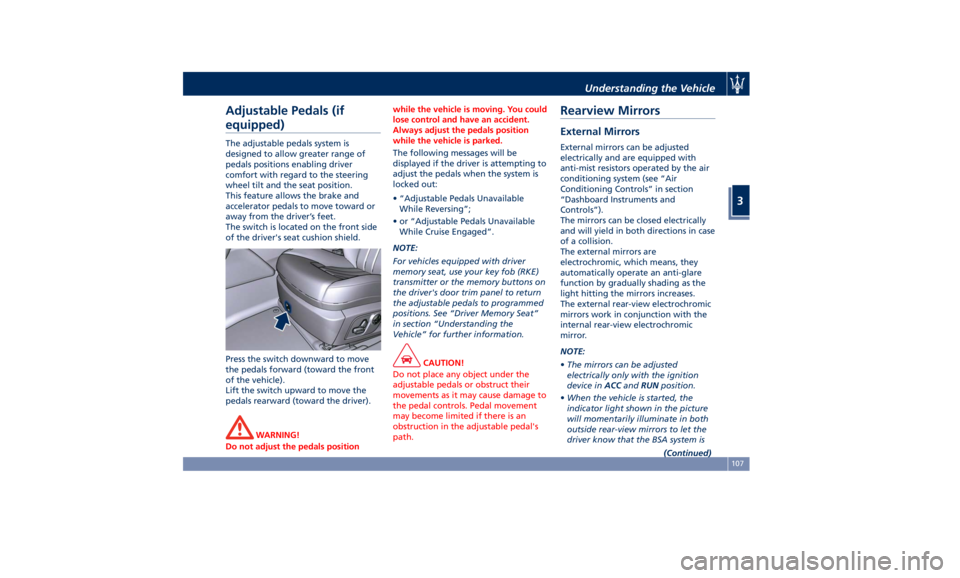
The switch is located on the front side
of the driver's seat cushion shield.
Press the switch downward to move
the pedals forward (toward the front
of the vehicle).
Lift the switch upward to move the
pedals rearward (toward the driver).
WARNING!
Do not adjust the pedals position while the vehicle is moving. You could
lose control and have an accident.
Always adjust the pedals position
while the vehicle is parked.
The following messages will be
displayed if the
driver is attempting to
adjust the pedals when the system is
locked out:
• “Adjustable Pedals Unavailable
While Reversing”;
• or “Adjustable Pedals Unavailable
While Cruise Engaged”.
NOTE:
For vehicles equipped with driver
memory seat, use your key fob (RKE)
transmitter or the memory buttons on
the driver's door trim panel to return
the adjustable pedals to programmed
positions. See “Driver Memory Seat”
in section “Understanding the
Vehicle” for further information.
CAUTION!
Do not place any object under the
adjustable pedals or obstruct their
movements as it may cause damage to
the pedal controls. Pedal movement
may become limited if there is an
obstruction in the adjustable pedal's
path.Rearview Mirrors External Mirrors External mirrors can be adjusted
electrically and are equipped with
anti-mist resistors operated by the air
conditioning system (see “Air
Conditioning Controls” in section
“Dashboard Instruments and
Controls”).
The mirrors can be closed electrically
and will yield in both directions in case
of a collision.
The external mirrors are
electrochromic, which means, they
automatically operate an anti-glare
function by gradually shading as the
light hitting the mirrors increases.
The external rear-view electrochromic
mirrors work in conjunction with the
internal rear-view electrochromic
mirror.
NOTE:
• The mirrors can be adjusted
electrically only with the ignition
device in ACC and RUN position.
• When the vehicle is started, the
indicator light shown in the picture
will momentarily illuminate in both
outside rear-view mirrors to let the
driver know that the BSA system is
(Continued)Understanding the Vehicle
3
107
Page 120 of 384

Turn Signals
Move the multifunction lever all the
way up or down until the stop
triggers.
The left or right arrow on the
speedometer and tachometer
instrument cluster respectively, flashes
to show proper operation of the front
and rear turn signal lights. To activate lane change function, tap
the lever up or down once, without
moving beyond the detent. The turn
signals (right or left) will flash three
times then automatically turn off.
This function is useful when
overtaking or changing lanes.
NOTE:
• If either light remains on and does
not flash, or flashes at a fast rate,
check for a defective outside light. If
an indicator on the instrument
cluster fails while moving the lever,
then the turn indicator could be
defective.
• The message that a turn signal is on
will appear in the instrument cluster
and a continuous chime will sound if
the vehicle is driven more than 1 mile
(1.6 km) with either turn signal on. High Beams and Flashing
To switch on the high beams with the
light switch in headlamp
or
“AUTO” position, shift the
multifunction lever onward.
The blue telltale
will illuminate on
the tachometer.
By pulling the lever backward (toward
the steering wheel) you switch off the
high beams and switch on the low
beams.Understanding the Vehicle
3
116
Page 121 of 384

You can signal another vehicle with
your headlights by lightly pulling the
multifunction lever toward you. This
will turn on the high beams headlights
until the lever is released.
Flashing occurs also with lights off
(lights switch in position “0”) if the
ignition switch is RUN position.
CAUTION!
The high beams can only be switched
on manually by pushing the
multifunction lever forward.
WARNING!
If the high beams are activated, they
will turn on automatically every time
the low beams are switched on either
manually or automatically. We
recommend therefore that you switch them off when they are no longer
necessary and every time the twilight
sensor deactivates the external lights.
Automatic High Beams (if equipped)
The
Automatic High Beam headlight
control system provides increased
forward lighting at night by
automating high beam control
through the use of the forward digital
camera mounted behind the rearview
mirror, which is the same one used
also by the Lane Departure Warning
(LDW) system. This camera detects
vehicle specific light and automatically
switches from high beams to low
beams until the approaching vehicle is
out of view. Furthermore, the digital
camera is able to detect the urban
areas and the inhabited centers and to
turn off the high beams when driving
near of one of them.
The high beam can be turned back on
if there are all the necessary
conditions and if the vehicle speed
exceed 21.7 mph (35 km/h).
The “Auto High Beam Assist” feature
can be turned on or off using the
MTC+ System. Refer to “MTC+
Settings” in section "Dashboard
Instruments and Controls" for further
information. The function is enabled only if the
brightness sensor detects the right
lighting conditions.
To activate this function:
• Shift the multifunction lever onward
.
• Put the headlight switch in “AUTO”
position.
• Enable the “Auto High Beam Assist”
function on MTC+.
After these steps, the green indicator
on the upper right side of the TFT
display comes on.Understanding the Vehicle
3
117
Page 129 of 384
Windshield Washers To use the washer on the windshield,
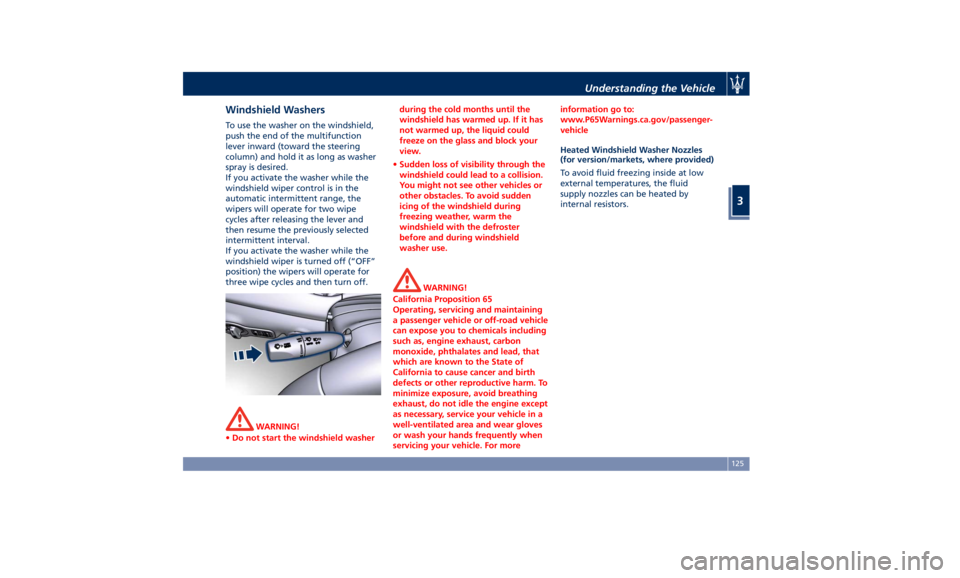
push the end of the multifunction
lever inward (toward the steering
column) and hold it as long as washer
spray is desired.
If you activate the washer while the
windshield wiper control is in the
automatic intermittent range, the
wipers will operate for two wipe
cycles after releasing the lever and
then resume the previously selected
intermittent interval.
If you activate the washer while the
windshield wiper is turned off (“OFF”
position) the wipers will operate for
three wipe cycles and then turn off.
WARNING!
• Do not start the windshield washer during the cold months until the
windshield has warmed up. If it has
not warmed up, the liquid could
freeze on the glass and block your
view.
• Sudden loss of visibility through the
windshield could lead to a collision.
You might not see other vehicles or
other obstacles. To avoid sudden
icing of the windshield during
freezing weather, warm the
windshield with the defroster
before and during windshield
washer use.
WARNING!
California Proposition 65
Operating, servicing and maintaining
a passenger vehicle or off-road vehicle
can expose you to chemicals including
such as, engine exhaust, carbon
monoxide, phthalates and lead, that
which are known to the State of
California to cause cancer and birth
defects or other reproductive harm. To
minimize exposure, avoid breathing
exhaust, do not idle the engine except
as necessary, service your vehicle in a
well-ventilated area and wear gloves
or wash your hands frequently when
servicing your vehicle. For more information go to:
www.P65Warnings.ca.gov/passenger-
vehicle
Heated Windshield Washer Nozzles
(for
version/markets, wher e provided)
To avoid fluid freezing inside at low
external temperatures, the fluid
supply nozzles can be heated by
internal resistors.Understanding the Vehicle
3
125
Page 138 of 384
(Continued)
collision.
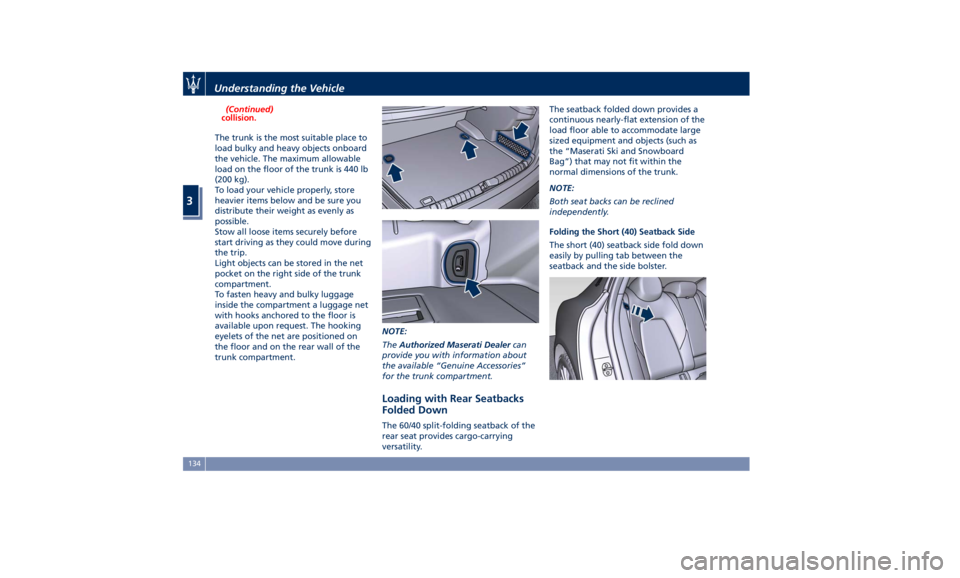
The trunk is the most suitable place to
load bulky and
heavy objects onboard
the vehicle. The maximum allowable
load on the floor of the trunk is 440 lb
(200 kg).
To load your vehicle properly, store
heavier items below and be sure you
distribute their weight as evenly as
possible.
Stow all loose items securely before
start driving as they could move during
the trip.
Light objects can be stored in the net
pocket on the right side of the trunk
compartment.
To fasten heavy and bulky luggage
inside the compartment a luggage net
with hooks anchored to the floor is
available upon request. The hooking
eyelets of the net are positioned on
the floor and on the rear wall of the
trunk compartment. NOTE:
The Authorized Maserati Dealer can
provide you with information about
the available “Genuine Accessories”
for the trunk compartment.
Loading with Rear Seatbacks
Folded Down The 60/40 split-folding seatback of the
rear seat provides cargo-carrying
versatility. The seatback folded down provides a
continuous nearly-flat extension of the
load floor able to accommodate large
sized equipment and objects (such as
the “Maserati Ski and Snowboard
Bag”) that may not fit within the
normal dimensions of the trunk.
NOTE:
Both seat backs can be reclined
independently.
Folding the Short (40) Seatback Side
The short (40) seatback side fold down
easily by pulling tab between the
seatback and the side bolster.Understanding the Vehicle
3
134
Page 141 of 384
• In a collision, there is a greater risk
of being thrown from the vehicle if
the sunroof is open. Always fasten
your seat belt properly and make
sure all passengers are properly
secured too.
• Do not allow small children to
operate the sunroof. Never insert
fingers, other body parts, or any
object through the opening sunroof.
CAUTION!
• In the event of rain, always close the
sunroof to prevent water
infiltrations from staining the
fabric/leather upholstery.
• Do not open the sunroof if there is
ice on it: risk of damage.
Slide Opening Sunroof • Full automatic express opening
Press the right rear button for more
than half second and the sunroof
will open automatically regardless
of any previous position. The
sunroof will open fully and stop
automatically. During this
operation, if any sunroof button is
pressed, the sunroof will stop. • Full or partial manual opening
To open the sunroof manually press
the right rear button for less than
half second to move step by step
the sunroof panel.
Venting Sunroof Press and release the left button, and
the sunroof will open to the vent
position. This is called “Express Vent”,
and will occur regardless of sunroof
position. During this opening
operation, any movement of the
button will stop the sunroof.
Pinch Protect Feature This feature will detect an obstruction
in the opening of the sunroof during
express close operation. If an
obstruction is detected, the sunroof
will automatically retract. If this
occurs, remove the obstruction then
press the right front button and
release to express close.
NOTE:
If three consecutive attempts to close
in express mode the sunroof result in
pinch protect reversals, the fourth
attempt will be manual, with pinch
protect feature disabled. Pinch Protect Override
If any obstruction (ice, debris, etc.)
prevents closing the sunroof, press the
right front button and hold for two
seconds after the reversal occurs. This
allows the sunroof to move toward
the closed position.
NOTE:
Pinch protection is disabled while
pressing the right front button.
Wind Buffeting Wind buffeting can be described as
the perception of pressure or a
helicopter-type sound. Your vehicle
may exhibit wind buffeting with the
windows down, or the sunroof in
certain open or partially open
positions. This is a normal occurrence
and can be minimised. If the buffeting
occurs with the rear windows open,
then open the front and rear windows
together to minimise the buffeting. If
the buffeting occurs with the sunroof
open, then adjust the sunroof opening
to minimise the buffeting.
Ignition Off Operation The power sunroof controls will
remain active for up to approximately
ten minutes after the ignition switch isUnderstanding the Vehicle
3
137
Page 170 of 384
Electronic Throttle Control (ETC)
Indicator
This indicator light indicates a
failure of the Electronic
Throttle Control (ETC) system.
If the indicator turns on while
driving (a torque decrease is possible),
have the system checked by an
Authorized Maserati Dealer .
When detecting a failure, the light
indicator will illuminate while the
engine is running.
If the indicator remains lit with the
engine running, you can still drive your
vehicle. However, contact an
Authorized Maserati Dealer as soon as
possible.
If the indicator is flashing while the
engine is running, immediate service is
required. You may experience reduced
performance, an elevated/rough idle
or engine stall and your vehicle may
require towing.
Trunk Lid and Hood Ajar Indicators
These light indicators will
illuminate to indicate that the
trunk lid and/or the hood are
ajar.
When the trunk lid or the
hood is open, a related
message will be displayed
besides the light if the vehicle is running at a speed of 5 mph (8 km/h)
or faster.
Low Fuel Indicator
When the fuel level reaches
approximately 4.2 Gallons (16
litres) this light under the fuel
gauge indicator will turn on,
and remain on until fuel is added
together with the related message. In
this condition the color indicating the
quantity of fuel in the tank, inside the
indicator on display, will go from
white to amber.
Refer to “Refueling” in section
“Driving” for fuel filling.
Windshield Washer Low Fluid
Indicator
This indicator will illuminate
for 5 seconds to indicate a low
level of the windshield washer
fluid. A related message will
be displayed.
See “Maintenance Procedures” in
section “Maintenance and Care” for
fluid filling.
Headlight Aiming System Failure
Warning Light
This warning light and the
related message indicate a
failure of the automatic
headlight aiming system. Please contact an Authorized Maserati
Dealer to check the system.
Automatic High Beam Failure Warning
Light
This warning light and the
related message illuminate to
report a failure of the
automatic high beam
headlights.
Contact an Authorized Maserati
Dealer as soon as possible.
Suspensions Failure Warning Light
This warning light and the
related message turn on while
driving if there is a failure of
the suspension system (only
with optional Skyhook active
suspension).
Please contact an Authorized Maserati
Dealer to check the system.
Ice Hazard Indicator
When the external
temperature falls below 38°F
(3°C), the temperature value
blinks for a few seconds, the
indicator light turns on, a message is
displayed and an acoustic signal is
triggered to warn the driver of the risk
of icy roadbed.
Under such conditions, we recommend
using the I.C.E. drive mode (seeDashboard Instruments and Controls
4
166
Page 198 of 384
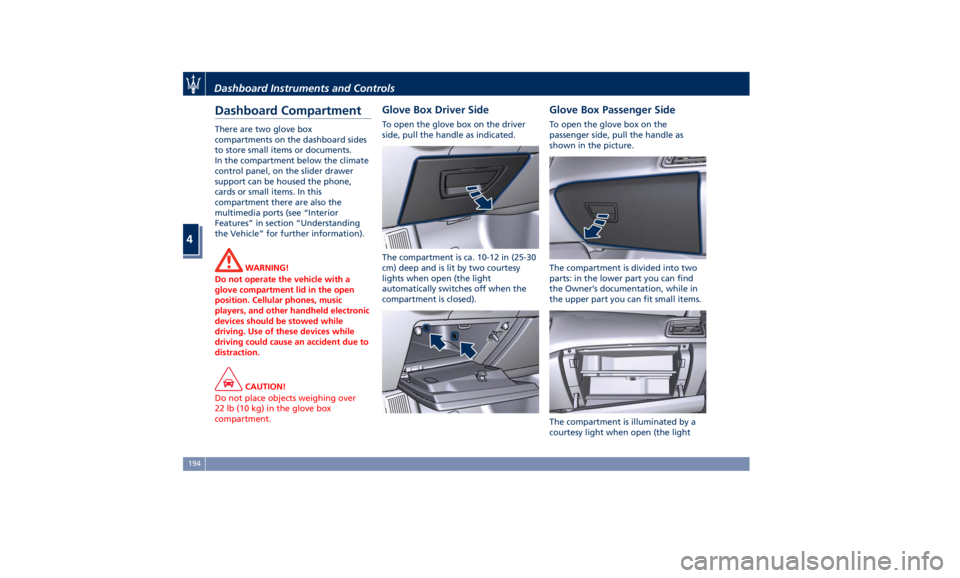
Dashboard Compartment There are two glove box
compartments on the dashboard sides
to store small items or documents.
In the compartment below the climate
control panel, on the slider drawer
support can be housed the phone,
cards or small items. In this
compartment there are also the
multimedia ports (see “Interior
Features” in section “Understanding
the Vehicle” for further information).
WARNING!
Do not operate the vehicle with a
glove compartment lid in the open
position. Cellular phones, music
players, and other handheld electronic
devices should be stowed while
driving. Use of these devices while
driving could cause an accident due to
distraction.
CAUTION!
Do not place objects weighing over
22 lb (10 kg) in the glove box
compartment. Glove Box Driver Side To open the glove box on the driver
side, pull the handle as indicated.
The compartment is ca. 10-12 in (25-30
cm) deep and is lit by two courtesy
lights when open (the light
automatically switches off when the
compartment is closed). Glove Box Passenger Side To open the glove box on the
passenger side, pull the handle as
shown in the picture.
The compartment is divided into two
parts: in the lower part you can find
the Owner’s documentation, while in
the upper part you can fit small items.
The compartment is illuminated by a
courtesy light when open (the lightDashboard Instruments and Controls
4
194