tow MASERATI GHIBLI 2019 Owner's Manual
[x] Cancel search | Manufacturer: MASERATI, Model Year: 2019, Model line: GHIBLI, Model: MASERATI GHIBLI 2019Pages: 384, PDF Size: 13.33 MB
Page 203 of 384
soft-key for cooler temperature.
Touch the red
soft-key for warmer
temperature. The driver's temperature
setting will be displayed on the MTC+
between the soft-key
and . The
MTC+ display can also be used to
adjust the temperature by touching
and sliding the bar towards soft-key
, to increase temperature, or
towards soft-keys
to decrease it.
During this phase, a small pop-up on
the side will show the corresponding
temperature. You can increase or
decrease the temperature using the
rocker switch on the climate control
panel.
NOTE:
In “SYNC” mode, this control will also
automatically and simultaneously
adjust the passenger temperature.
4. Passenger temperature control
Provides the passenger with
independent temperature control.
Touch the
soft-key for cooler
temperature. Touch the
soft-key for
warmer temperature. The passenger's
temperature setting will be displayed
on the MTC+ screen between the
soft-keys
and . You can increase
or decrease the temperature using the rocker switch on the climate control
panel.
NOTE:
Pressing the 4 button/soft-key while in
“SYNC” mode will automatically exit
“SYNC”.
5. Recirculation
Press to change the current setting,
the LED indicator on the button and
the relevant soft-key illuminates to
indicate which recirculation function is
activated. For further details, see
paragraph “Dual zone Climate Control
Functions” in this chapter.
6. Blower control
Blower control is used to adjust the
amount of air forced through the
climate system. Eight levels of blower
speed can be selected. Adjusting the
blower will cause automatic mode to
switch to manual.
On the climate control panel, push the
rocker switch up to increase blower
speed. Push the rocker switch down to
decrease blower speed. Pushing down
the rocker switch when set blower is
at the first speed, causes the A/C
system shutdown (OFF condition).
On the MTC+ display, touch the small
icon of the blower to decrease the
speed, or the big icon to increase it. Between the two icons, bars will
appear to show the number of the
corresponding selected speed.
The blower can also be activated/
regulated by touching the bars
between the two blower icons.
When the MTC+ is displayed in any
mode other than “Climate”, the
blower speed is indicated by the
bright segments in the climate icon.
7 - 8. AUTO
This function automatically controls
the interior temperature by adjusting
the air flow rate and the air
distribution respectively on the driver
and on the passenger zone. Press
“AUTO” to switch the ATC between
manual and automatic mode. The LED
on the button and the “AUTO”
soft-key illuminates when the “AUTO”
function is activated. See “Automatic
Temperature Control (ATC)” in this
chapter for more information.
9. MAX defrosting/demisting
Press the
button or the MTC+
soft-key to switch the airflow setting
to the windshield and the front side
windows to get quick defrosting/
defogging. The LED on the button and
the MTC+ soft-key illuminates when
this feature is activated. Operating
this function will cause the ATC toDashboard Instruments and Controls
4
199
Page 213 of 384
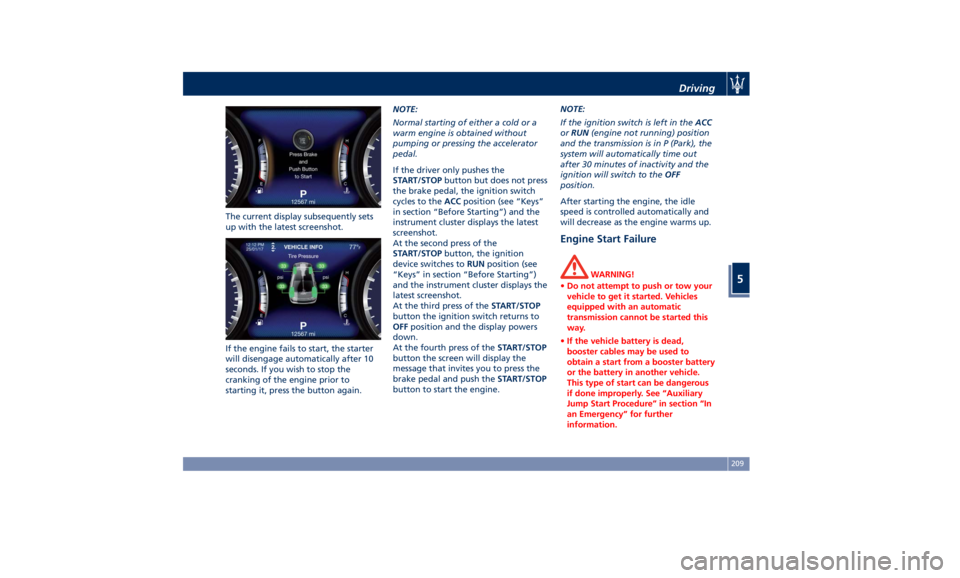
The current display subsequently sets
up with the latest screenshot.
If the engine fails to start, the starter
will disengage automatically after 10
seconds. If you wish to stop the
cranking of the engine prior to
starting it, press the button again. NOTE:
Normal starting of either a cold or a
warm engine is obtained without
pumping or pressing the accelerator
pedal.
If the driver only pushes the
START/STOP button but does not press
the brake pedal, the ignition switch
cycles to the ACC position (see “Keys”
in section “Before Starting”) and the
instrument cluster displays the latest
screenshot.
At the second press of the
START/STOP button, the ignition
device switches to RUN position (see
“Keys” in section “Before Starting”)
and the instrument cluster displays the
latest screenshot.
At the third press of the START/STOP
button the ignition switch returns to
OFF position and the display powers
down.
At the fourth press of the START/STOP
button the screen will display the
message that invites you to press the
brake pedal and push the START/STOP
button to start the engine. NOTE:
If the ignition switch is left in the ACC
or RUN (engine not running) position
and the transmission is in P (Park), the
system will automatically time out
after 30 minutes of inactivity and the
ignition will switch to the OFF
position.
After starting the engine, the idle
speed is controlled automatically and
will decrease as the engine warms up.
Engine Start Failure WARNING!
• Do not attempt to push or tow your
vehicle to get it started. Vehicles
equipped with an automatic
transmission cannot be started this
way.
• If the vehicle battery is dead,
booster cables may be used to
obtain a start from a booster battery
or the battery in another vehicle.
This type of start can be dangerous
if done improperly. See “Auxiliary
Jump Start Procedure” in section “In
an Emergency” for further
information.Driving
5
209
Page 218 of 384
Once it is set in the menu bar, the new
menu will be immediately operational.
NOTE:
The yellow LED on the button
indicates the disabled status of
Start&Stop system and vice versa.
If the driving conditions allow it, the
user can re-enable the Start&Stop
function at any time using one of
previous ways.
NOTE:
After user intervention, the Start&Stop
system will automatically update the
status of the function in all contexts
where it can be modified.
Start&Stop System Failure When the indicator light and the
related message illuminate on the TFT
display (see chapter “Instrument
Cluster” in section “Dashboard
Instruments and Controls”) there is a
malfunction in the Start&Stop system
and the engine cannot be switched off
and restarted automatically. To switch
off or restart the engine it is necessary
to push the START/STOP . Have the
vehicle checked at an Authorized
Maserati Dealer .Automatic Transmission The vehicle is equipped with an
electronically controlled 8-speed
automatic transmission, which
automatically changes gear according
to the vehicle's instantaneous usage
parameters (vehicle speed, road
gradient and accelerator pedal
position).
It is possible to change gear manually
thanks to the “M +/-“ (Manual)
position for the shift lever.
The electronic shift lever replaces the
conventional mechanical lever and has
no mechanical connection to the
transmission. The transmission is
operated by electrical actuators on the
hydraulic system and all commands to
the control system are transmitted by
the CAN network. The lever itself
represents a mere user interface. Gear
positions are simulated by solenoids
inside the lever body, which are
computer-controlled and enable or
disable certain positions of the lever.
The solenoids inside the shift lever
prevent the movement of the lever
towards invalid positions.
The electronically-controlled
transmission provides a precise shift
schedule. The transmission electronics
are self-calibrating, therefore the gearshift behaviour could become
perfect as expected after few
hundreds of miles/km.
CAUTION!
In order to properly use the automatic
transmission, it is essential that you
read through the whole chapter, so
that you can understand right from
the start what the correct and granted
operations are.
Damage to the transmission may occur
if the following precautions are not
observed:
• Shift into P (Park) only after the
vehicle has come to a complete stop:
this is the default position of the
lever. After engaged P (Park) it is
possible set the ignition switch to
OFF .
• Shift into or out of R (Reverse) only
after the vehicle has come to a
complete stop and the engine is at
idle speed.
• Do not shift between P (Park), R
(Reverse), N (Neutral) or D (Drive)
when the engine is above idle speed
• To effect any change from vehicle
stop to R (Reverse), D (Drive), 1 st
orDriving
5
214
Page 221 of 384
• The P (Park) mode can be
automatically enabled by pressing
the “P” button: if the shift lever was
in “M +/-“ position, will go to central
stable position automatically.
• If using the shift lever in M +/-
(Manual) mode, you can activate it
by moving the lever from D (Drive)
to the left and then forward towards
the “–“ symbol or back towards the
“+” symbol and the gear is shifted.
• To exit P (Park) mode, or to pass
from N (Neutral) to D (Drive) or R
(Reverse) position when the car is
stopped or is moving at a low speed,
the brake pedal must also be
pressed.
CAUTION!
• DO NOT accelerate while shifting
from P (Park) or N (Neutral) to
another mode.
• After selecting a transmission mode,
wait a few seconds before
accelerating. This precaution is
particularly important with a cold
engine. Transmission Status on the Instrument
Cluster
Display
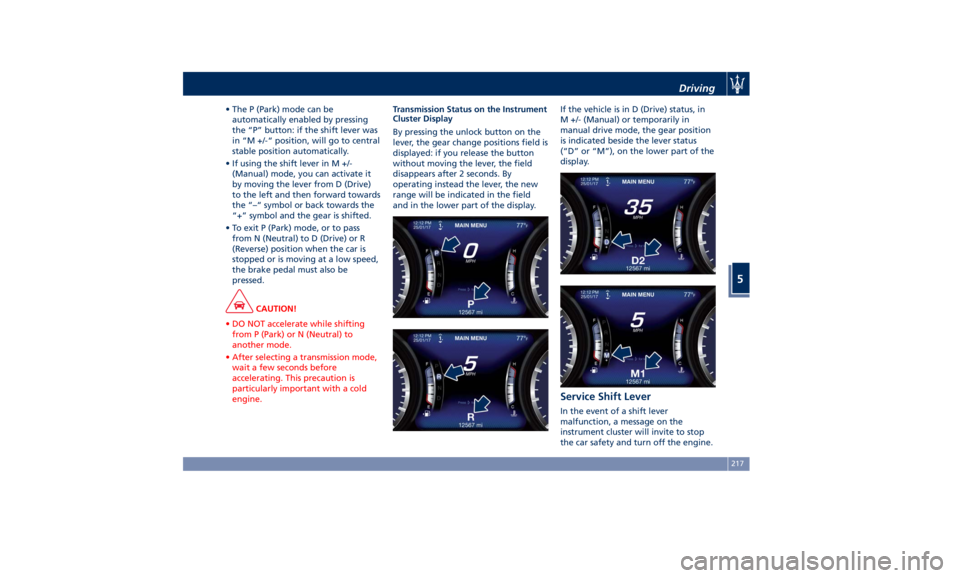
By pressing the unlock button on the
lever, the gear change positions field is
displayed: if you release the button
without moving the lever, the field
disappears after 2 seconds. By
operating instead the lever, the new
range will be indicated in the field
and in the lower part of the display. If the vehicle is in D (Drive) status, in
M +/- (Manual) or temporarily in
manual drive mode, the gear position
is indicated beside the lever status
(“D” or “M”), on the lower part of the
display.
Service Shift Lever In the event of a shift lever
malfunction, a message on the
instrument cluster will invite to stop
the car safety and turn off the engine.Driving
5
217
Page 222 of 384
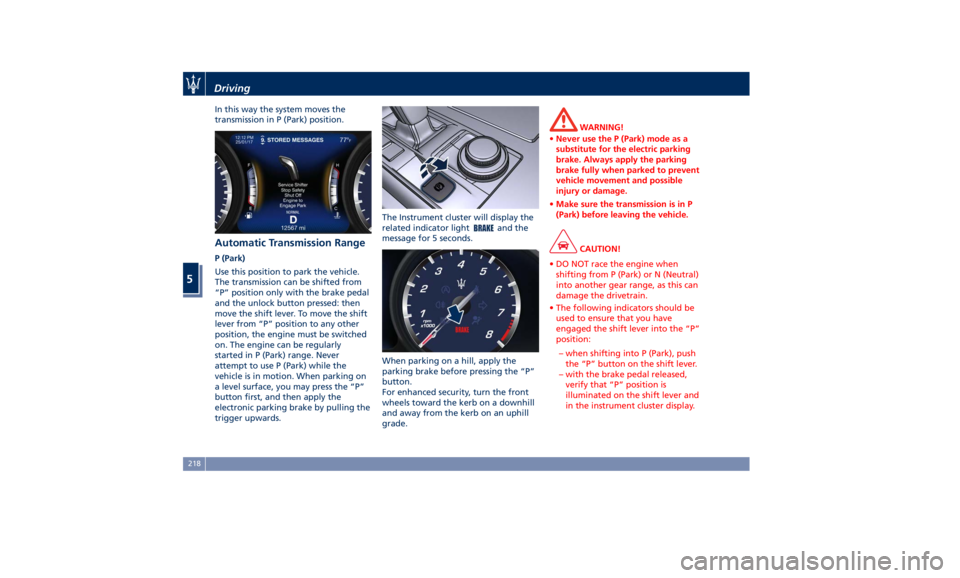
In this way the system moves the
transmission in P (Park) position.
Automatic Transmission Range P (Park)
Use this position to park the vehicle.
The transmission can be shifted from
“P” position only with the brake pedal
and the unlock button pressed: then
move the shift lever. To move the shift
lever from “P” position to any other
position, the engine must be switched
on. The engine can be regularly
started in P (Park) range. Never
attempt to use P (Park) while the
vehicle is in motion. When parking on
a level surface, you may press the “P”
button first, and then apply the
electronic parking brake by pulling the
trigger upwards. The Instrument cluster will display the
related indicator light
and the
message for 5 seconds.
When parking on a hill, apply the
parking brake before pressing the “P”
button.
For enhanced security, turn the front
wheels toward the kerb on a downhill
and away from the kerb on an uphill
grade. WARNING!
• Never use the P (Park) mode as a
substitute for the electric parking
brake. Always apply the parking
brake fully when parked to prevent
vehicle movement and possible
injury or damage.
• Make sure the transmission is in P
(Park) before leaving the vehicle.
CAUTION!
• DO NOT race the engine when
shifting from P (Park) or N (Neutral)
into another gear range, as this can
damage the drivetrain.
• The following indicators should be
used to ensure that you have
engaged the shift lever into the “P”
position:
– when shifting into P (Park), push
the “P” button on the shift lever.
– with the brake pedal released,
verify that “P” position is
illuminated on the shift lever and
in the instrument cluster display.Driving
5
218
Page 223 of 384
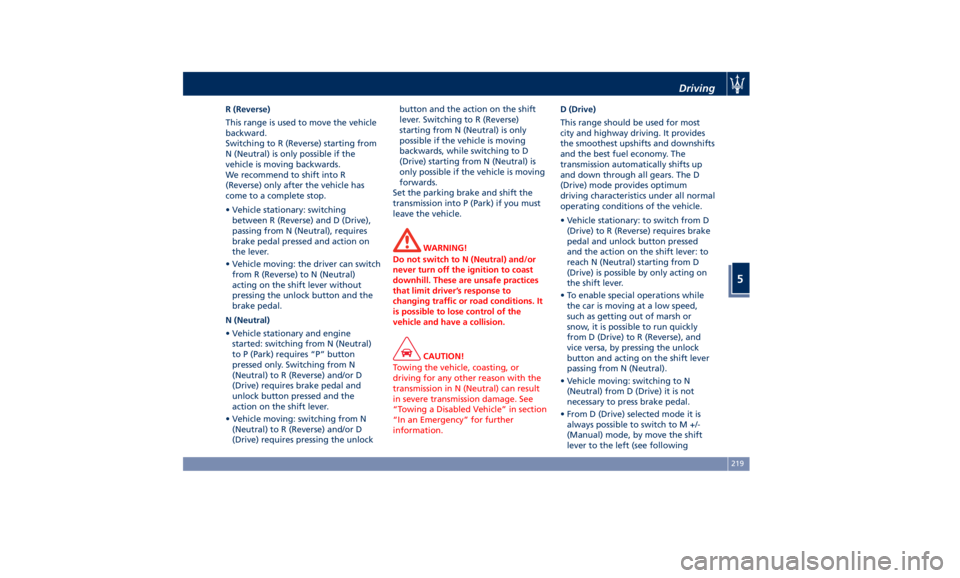
R (Reverse)
This range is used to move the vehicle
backward.
Switching to R (Reverse) starting from
N (Neutral) is only possible if the
vehicle is moving backwards.
We recommend to shift into R
(Reverse) only after the vehicle has
come to a complete stop.
• Vehicle stationary: switching
between R (Reverse) and D (Drive),
passing from N (Neutral), requires
brake pedal pressed and action on
the lever.
• Vehicle moving: the driver can switch
from R (Reverse) to N (Neutral)
acting on the shift lever without
pressing the unlock button and the
brake pedal.
N (Neutral)
• Vehicle stationary and engine
started: switching from N (Neutral)
to P (Park) requires “P” button
pressed only. Switching from N
(Neutral) to R (Reverse) and/or D
(Drive) requires brake pedal and
unlock button pressed and the
action on the shift lever.
• Vehicle moving: switching from N
(Neutral) to R (Reverse) and/or D
(Drive) requires pressing the unlock button and the action on the shift
lever. Switching to R (Reverse)
starting from N (Neutral) is only
possible if the vehicle is moving
backwards, while switching to D
(Drive) starting from N (Neutral) is
only possible if the vehicle is moving
forwards.
Set the parking brake and shift the
transmission into P (Park) if you must
leave the vehicle.
WARNING!
Do not switch to N (Neutral) and/or
never turn off the ignition to coast
downhill. These are unsafe practices
that limit driver’s response to
changing traffic or road conditions. It
is possible to lose control of the
vehicle and have a collision.
CAUTION!
Towing the vehicle, coasting, or
driving for any other reason with the
transmission in N (Neutral) can result
in severe transmission damage. See
“Towing a Disabled Vehicle” in section
“In an Emergency” for further
information. D (Drive)
This
range should
be used for most
city and highway driving. It provides
the smoothest upshifts and downshifts
and the best fuel economy. The
transmission automatically shifts up
and down through all gears. The D
(Drive) mode provides optimum
driving characteristics under all normal
operating conditions of the vehicle.
• Vehicle stationary: to switch from D
(Drive) to R (Reverse) requires brake
pedal and unlock button pressed
and the action on the shift lever: to
reach N (Neutral) starting from D
(Drive) is possible by only acting on
the shift lever.
• To enable special operations while
the car is moving at a low speed,
such as getting out of marsh or
snow, it is possible to run quickly
from D (Drive) to R (Reverse), and
vice versa, by pressing the unlock
button and acting on the shift lever
passing from N (Neutral).
• Vehicle moving: switching to N
(Neutral) from D (Drive) it is not
necessary to press brake pedal.
• From D (Drive) selected mode it is
always possible to switch to M +/-
(Manual) mode, by move the shift
lever to the left (see followingDriving
5
219
Page 224 of 384
paragraph); to return to “D”
position, move the shift lever to the
right. It is possible to shift from D
(Drive) mode to M +/- (Manual) mode
regardless of car speed.
• When in D (Drive) mode, using the
paddles behind the steering wheel (if
equipped), will cause the system to
enter a temporary function and
enable the manual shift mode. This
range is indicated with the symbols
“+/-” above and below “D” letter on
the gear range field of the display.
The system will then switch back to
automatic mode according to time
elapsed in “temporary” mode and
driving conditions.
At extremely cold temperatures (-23°F /
-30°C or below), transmission may be
affected by the low temperature of
the engine and transmission. Normal
operation will resume once the
transmission temperature has risen to
a normal level.
M +/- (Manual)
This mode is obtained by moving the
shift lever to the left in “M +/-“
position.
In this mode, the transmission interacts
with the driver in order to allow
manual shift and ensure increased
control of the vehicle. The current mode allows the transmission system
to optimise the engine brake action,
remove undesired shifting into higher
and lower gears and improve the
overall performance of the vehicle.
This mode allows you to move the shift
lever step by step forward “–“ or
backward “+” without pressing the
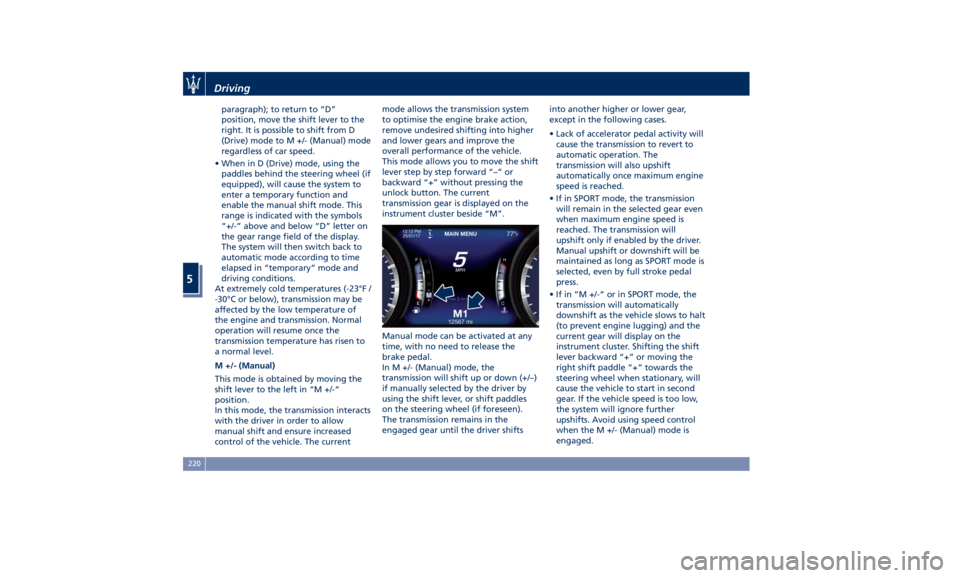
unlock button. The current
transmission gear is displayed on the
instrument cluster beside “M”.
Manual mode can be activated at any
time, with no need to release the
brake pedal.
In M +/- (Manual) mode, the
transmission will shift up or down (+/–)
if manually selected by the driver by
using the shift lever, or shift paddles
on the steering wheel (if foreseen).
The transmission remains in the
engaged gear until the driver shifts into another higher or lower gear,
except in the following cases.
• Lack of accelerator pedal activity will
cause the transmission to revert to
automatic operation. The
transmission will also upshift
automatically once maximum engine
speed is reached.
• If in SPORT mode, the transmission
will remain in the selected gear even
when maximum engine speed is
reached. The transmission will
upshift only if enabled by the driver.
Manual upshift or downshift will be
maintained as long as SPORT mode is
selected, even by full stroke pedal
press.
• If in “M +/-“ or in SPORT mode, the
transmission will automatically
downshift as the vehicle slows to halt
(to prevent engine lugging) and the
current gear will display on the
instrument cluster. Shifting the shift
lever backward “+” or moving the
right shift paddle “+” towards the
steering wheel when stationary, will
cause the vehicle to start in second
gear. If the vehicle speed is too low,
the system will ignore further
upshifts. Avoid using speed control
when the M +/- (Manual) mode is
engaged.Driving
5
220
Page 225 of 384
When the car stops in M +/- (Manual)
mode, the transmission automatically
moves the shift lever and inserts P
(Park).
If you enter the I.C.E. drive mode
when the gearshift is in “M +/-”
position, the system activates the
automatic return of the shift lever in D
(Drive) mode.
Shift Paddles
The driver can change gears with the
shift paddles behind the steering
wheel when in D (Drive) and M +/-
(Manual) mode.
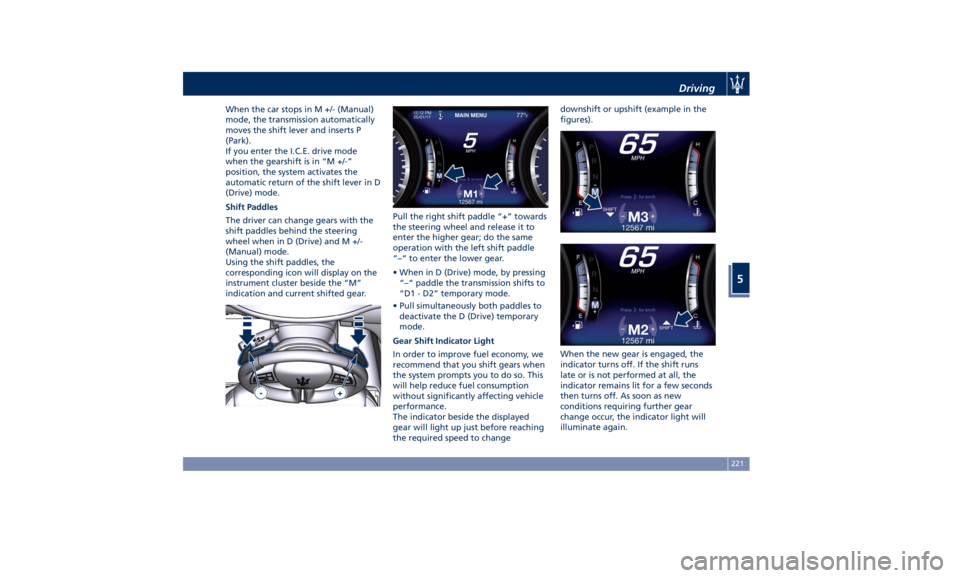
Using the shift paddles, the
corresponding icon will display on the
instrument cluster beside the “M”
indication and current shifted gear. Pull the right shift paddle “+” towards
the steering wheel and release it to
enter the higher gear; do the same
operation with the left shift paddle
“–“ to enter the lower gear.
• When in D (Drive) mode, by pressing
“–“ paddle the transmission shifts to
“D1 - D2” temporary mode.
• Pull simultaneously both paddles to
deactivate the D (Drive) temporary
mode.
Gear Shift Indicator Light
In order to improve fuel economy, we
recommend that you shift gears when
the system prompts you to do so. This
will help reduce fuel consumption
without significantly affecting vehicle
performance.
The indicator beside the displayed
gear will light up just before reaching
the required speed to change downshift or upshift (example in the
figures).
When the new gear is engaged, the
indicator turns off. If the shift runs
late or is not performed at all, the
indicator remains lit for a few seconds
then turns off. As soon as new
conditions requiring further gear
change occur, the indicator light will
illuminate again.Driving
5
221
Page 239 of 384
• It is advisable to keep the "Auto
Apply" function always active (On)
so that the vehicle is properly
secured with electric parking brake.
Deactivating Automatic
Operation The automatic engagement function
can be deactivated/reactivated by
selecting the menu item “Vehicle
settings” through the switch on the
right side of the steering wheel (refer
to “Instrument Cluster” in section
“Dashboard Instruments and
Controls”.)
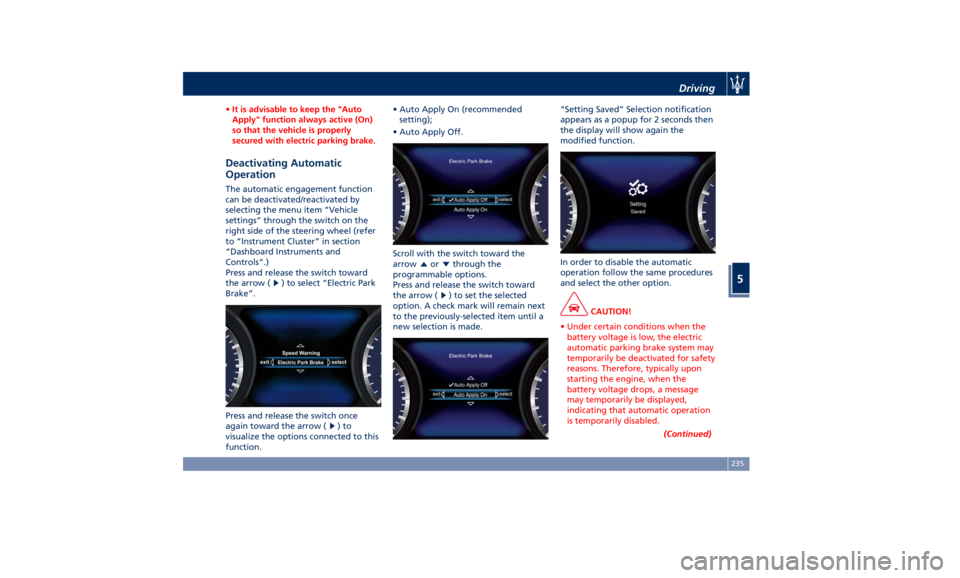
Press and release the switch toward
the arrow (
) to select “Electric Park
Brake”.
Press and release the switch once
again toward the arrow ( )to
visualize the options connected to this
function. • Auto Apply On (recommended
setting);
• Auto Apply Off.
Scroll with the switch toward the
arrow
or through the
programmable options.
Press and release the switch toward
the arrow (
) to set the selected
option. A check mark will remain next
to the previously-selected item until a
new selection is made. “Setting Saved” Selection notification
appears as a popup for 2 seconds then
the display will show again the
modified function.
In order to disable the automatic
operation follow the same procedures
and select the other option.
CAUTION!
• Under certain conditions when the
battery voltage is low, the electric
automatic parking brake system may
temporarily be deactivated for safety
reasons. Therefore, typically upon
starting the engine, when the
battery voltage drops, a message
may temporarily be displayed,
indicating that automatic operation
is temporarily disabled.
(Continued)Driving
5
235
Page 240 of 384
(Continued)
• In case of repetitive requests to reset
the EPB through the messages shown
on the TFT display, please contact an
Authorized Maserati Dealer .
Failure Indication In the event of electric parking brake
system failure, the warning light
on the display will light up and the
related message will show for 5
seconds.
WARNING!
In the event of an EPB failure, take
your vehicle to the nearest Authorized
Maserati Dealer as soon as possible.
Initialize the EPB System after
Re-connecting
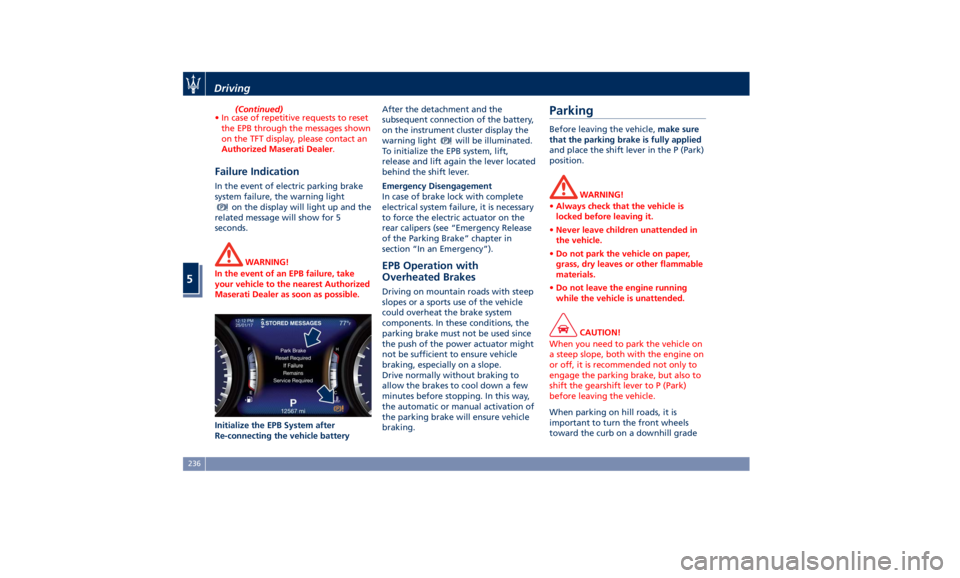
the vehicle battery After the detachment and the
subsequent connection of the battery,
on the instrument cluster display the
warning light
will be illuminated.
To initialize the EPB system, lift,
release and lift again the lever located
behind the shift lever.
Emergency Disengagement
In case of brake lock with complete
electrical system failure, it is necessary
to force the electric actuator on the
rear calipers (see “Emergency Release
of the Parking Brake” chapter in
section “In an Emergency”).
EPB Operation with
Overheated Brakes Driving on mountain roads with steep
slopes or a sports use of the vehicle
could overheat the brake system
components. In these conditions, the
parking brake must not be used since
the push of the power actuator might
not be sufficient to ensure vehicle
braking, especially on a slope.
Drive normally without braking to
allow the brakes to cool down a few
minutes before stopping. In this way,
the automatic or manual activation of
the parking brake will ensure vehicle
braking.Parking Before leaving the vehicle, make sure
that the parking brake is fully applied
and place the shift lever in the P (Park)
position.
WARNING!
• Always check that the vehicle is
locked before leaving it.
• Never leave children unattended in
the vehicle.
• Do not park the vehicle on paper,
grass, dry leaves or other flammable
materials.
• Do not leave the engine running
while the vehicle is unattended.
CAUTION!
When you need to park the vehicle on
a steep slope, both with the engine on
or off, it is recommended not only to
engage the parking brake, but also to
shift the gearshift lever to P (Park)
before leaving the vehicle.
When parking on hill roads, it is
important
to turn
the front wheels
toward the curb on a downhill gradeDriving
5
236