seats MASERATI GHIBLI 2019 Owner's Guide
[x] Cancel search | Manufacturer: MASERATI, Model Year: 2019, Model line: GHIBLI, Model: MASERATI GHIBLI 2019Pages: 384, PDF Size: 13.33 MB
Page 108 of 384
WARNING!
Be certain that the seat back is locked
securely into position. Otherwise the
seat will back is not will not provide
the proper stability for passengers. An
improperly latched seat back could
cause serious injury.
Rear Head Restraints Side seats are endowed with
not-adjustable head restraints.
The center seat head restraint can be
adjusted in two positions, up or down.
WARNING!
• All occupants, including the driver,
should not operate a vehicle or sit in
a vehicle’s seat until the head
restraints are placed in their proper
positions in order to minimize the
risk of neck injury in the event of a
crash.
• Head restraints should never be
adjusted while the vehicle is in
motion. Driving a vehicle with the
head restraints improperly adjusted
or removed could cause serious injury or death in the event of a
collision.
Center Rear Head Restraint
Adjustment
When
the center
seat is being
occupied the head restraint should be
in the raised position.
When there are no occupants in the
center seat the head restraint can be
lowered in order to provide the driver
for maximum visibility.
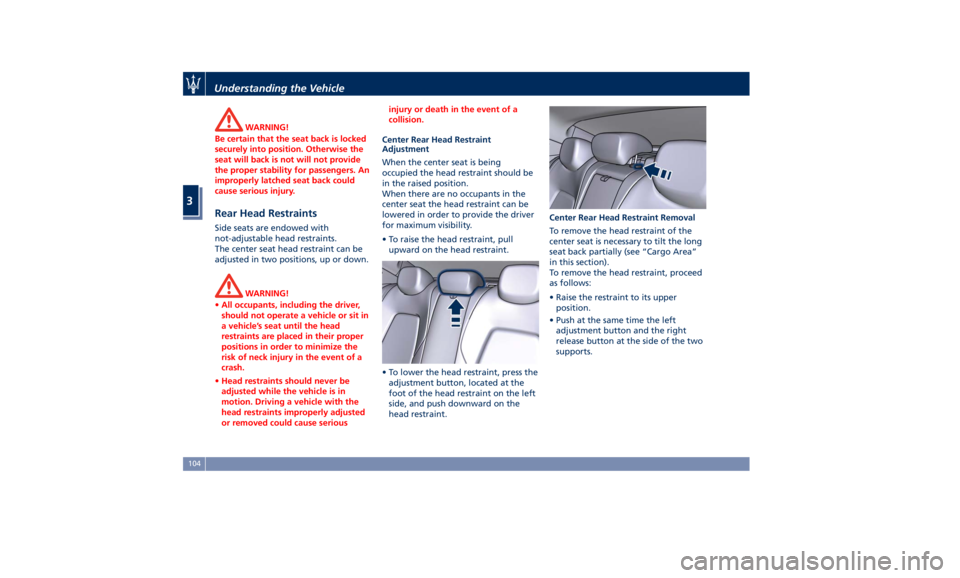
• To raise the head restraint, pull
upward on the head restraint.
• To lower the head restraint, press the
adjustment button, located at the
foot of the head restraint on the left
side, and push downward on the
head restraint. Center Rear Head Restraint Removal
To remove the head restraint of the
center seat is necessary to tilt the long
seat back partially (see “Cargo Area”
in this section).
To remove the head restraint, proceed
as follows:
• Raise the restraint to its upper
position.
• Push at the same time the left
adjustment button and the right
release button at the side of the two
supports.Understanding the Vehicle
3
104
Page 122 of 384
NOTE:
Broken, muddy, or obstructed
headlights and taillights of vehicles in
the field of view will cause headlights
to remain on longer (closer to the
vehicle). Also, dirt, film, and other
obstructions on the windshield or
camera lens will cause the system to
function improperly.
If the windshield or Automatic High
Beam headlight control mirror is
replaced, the mirror must be re-aimed
to ensure proper performance. See
your local Authorized Maserati Dealer .
Interior Lights The interior and exterior approach
lights turn on and off when
entering/exiting the vehicle (see
“Illuminated Entry/Exit” in section
"Before Starting" for further
information).
The brightness of the lights can be
manually adjusted with the regulator
positioned beside the light switch.
To protect the battery, the interior
lights will turn off automatically 10
minutes after the ignition switch has
been shifted to OFF . This occurs if the
interior lights were turned on
manually or by opening of a door. The
glove box light, share the same characteristics excepting the trunk
light.
To adjust interior lights, either turn the
ignition switch out of OFF or rotate
the multifunction lever out of “0”
position.
Courtesy Dimmable Lights
The following dimmable courtesy
lights, can be set with the regulation
device:
• instrument cluster dials and display;
• dome light (front/rear);
• inside door handle LED;
• doors and steering wheel backlight
controls LED;
• front footrest light;
• front seats night lighting.
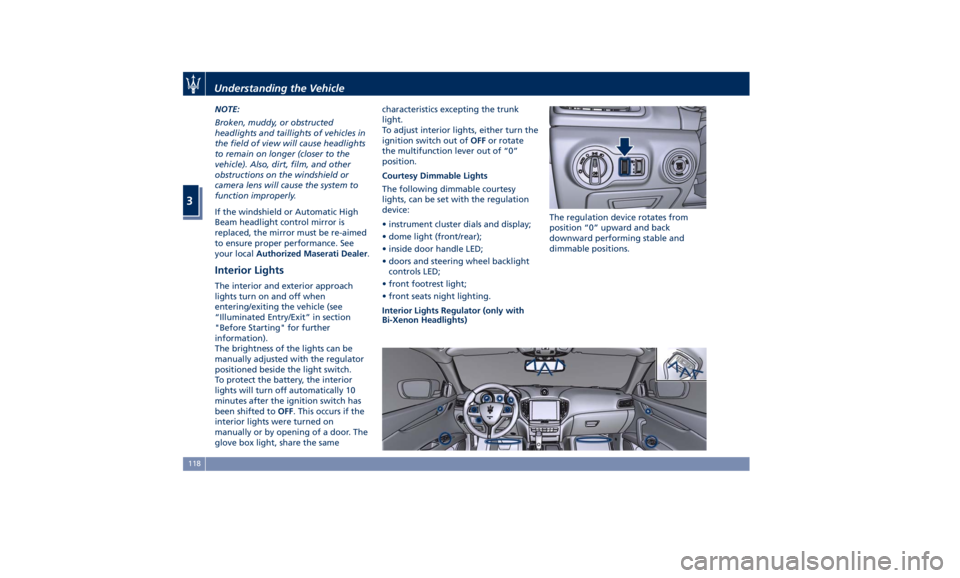
Interior Lights Regulator (only with
Bi-Xenon Headlights) The regulation device rotates from
position “0” upward and back
downward performing stable and
dimmable positions.Understanding the Vehicle
3
118
Page 124 of 384
Headlights Leveling (only with
Bi-Xenon Headlights) A correct headlights leveling is crucial
for the safety of the vehicle’s
occupants and of people in the street.
Moreover it is included in the road
regulation law.
In order to obtain the best visibility
conditions while driving with
headlights on, the headlight beam
must be properly leveled.
Headlights leveling must be adjusted
at every change of the weight and
position of the passengers and/or of
the load carried.
A heavy load will weigh the vehicle
down and, as a consequence, the light
beam will be raised. In this case it is
important to adjust the beam to a
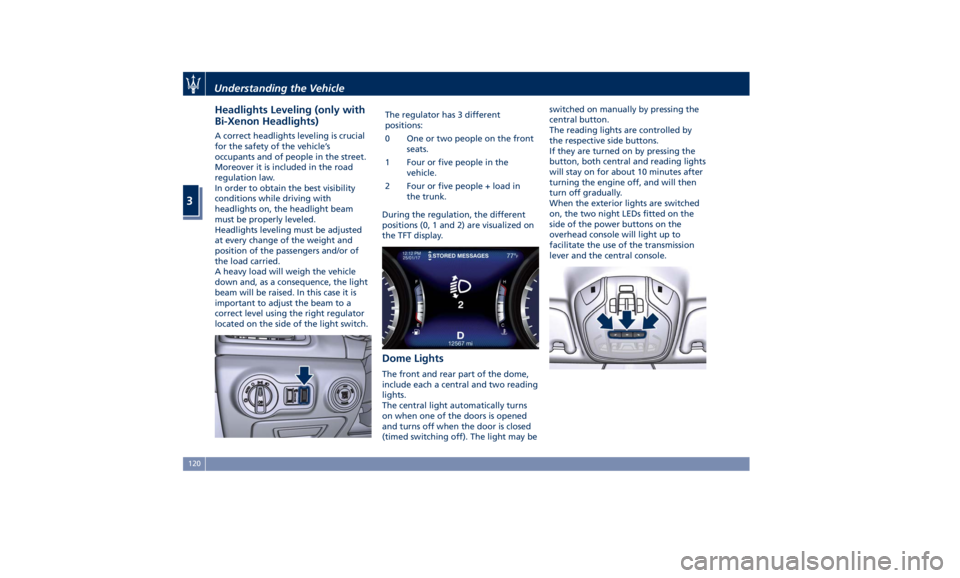
correct level using the right regulator
located on the side of the light switch. The regulator has 3 different
positions:
0 One or two people on the front
seats.
1 Four or five people in the
vehicle.
2 Four or five people + load in
the trunk.
During the regulation, the different
positions (0, 1 and 2) are visualized on
the TFT display.
Dome Lights The front and rear part of the dome,
include each a central and two reading
lights.
The central light automatically turns
on when one of the doors is opened
and turns off when the door is closed
(timed switching off). The light may be switched on manually by pressing the
central button.
The reading lights are controlled by
the respective side buttons.
If they are turned on by pressing the
button, both central and reading lights
will stay on for about 10 minutes after
turning the engine off, and will then
turn off gradually.
When the exterior lights are switched
on, the two night LEDs fitted on the
side of the power buttons on the
overhead console will light up to
facilitate the use of the transmission
lever and the central console.Understanding the Vehicle
3
120
Page 131 of 384
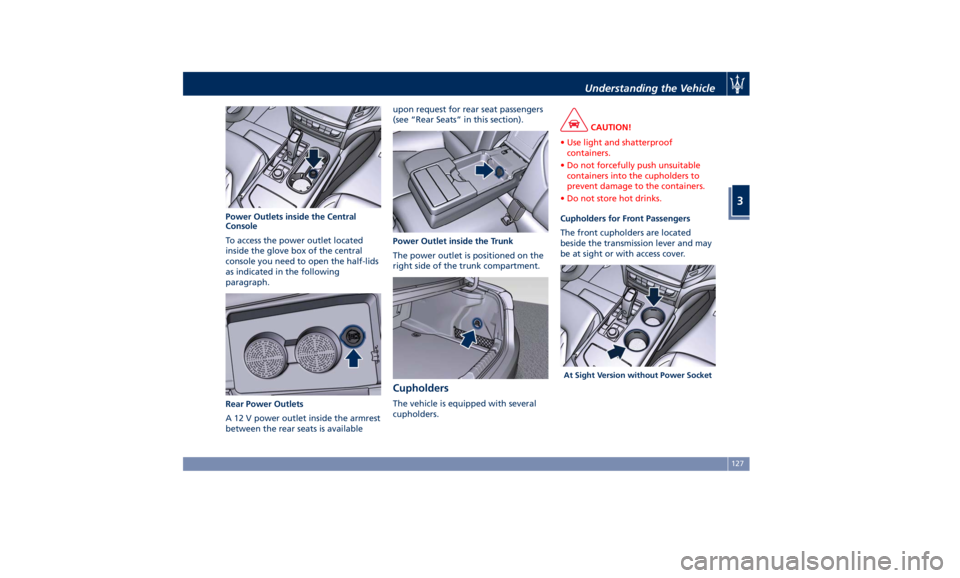
Power Outlets inside the Central
Console
To access the power outlet located
inside the glove box of the central
console you need to open the half-lids
as indicated in the following
paragraph.
Rear Power Outlets
A 12 V power outlet inside the armrest
between the rear seats is available upon request for rear seat passengers
(see “Rear Seats” in this section).
Power Outlet inside the Trunk
The power outlet is positioned on the
right side of the trunk compartment.
Cupholders The vehicle is equipped with several
cupholders. CAUTION!
• Use light and shatterproof
containers.
• Do not forcefully push unsuitable
containers into the cupholders to
prevent damage to the containers.
• Do not store hot drinks.
Cupholders for Front Passengers
The
front cupholders are located
beside the transmission lever and may
be at sight or with access cover.
At Sight Version without Power SocketUnderstanding the Vehicle
3
127
Page 132 of 384
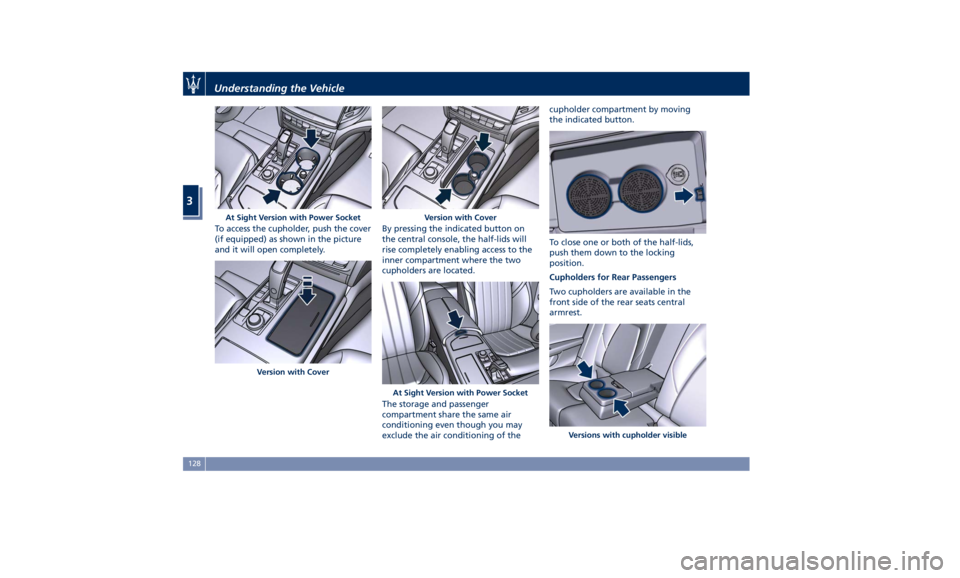
To access the cupholder, push the cover
(if equipped) as shown in the picture
and it will open completely. By pressing the indicated button on
the central console, the half-lids will
rise completely enabling access to the
inner compartment where the two
cupholders are located.
The storage and passenger
compartment share the same air
conditioning even though you may
exclude the air conditioning of the cupholder compartment by moving
the indicated button.
To close one or both of the half-lids,
push them down to the locking
position.
Cupholders for Rear Passengers
Two cupholders are available in the
front side of the rear seats central
armrest.At Sight Version with Power Socket
Version with Cover Version with Cover
At Sight Version with Power Socket
Versions with cupholder visibleUnderstanding the Vehicle
3
128
Page 134 of 384
device is turned OFF (“Active
Charging” feature). When this feature
is enabled, the USB port will be backlit.
In the dashboard compartment of the
central console there is also a SD
memory card input. Once inserted into
the slot, to extract it press lightly on
the card.
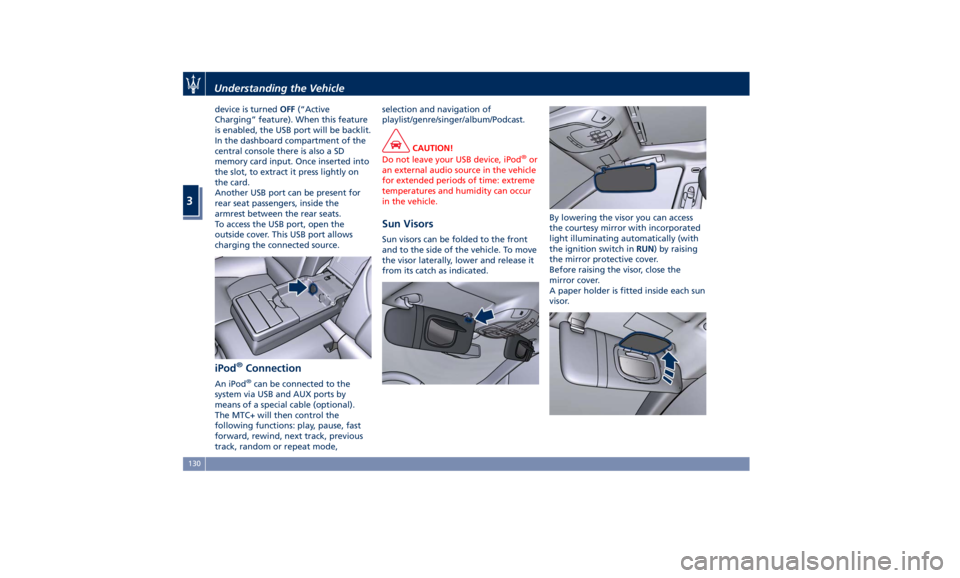
Another USB port can be present for
rear seat passengers, inside the
armrest between the rear seats.
To access the USB port, open the
outside cover. This USB port allows
charging the connected source.
iPod ®
Connection An iPod ®
can be connected to the
system via USB and AUX ports by
means of a special cable (optional).
The MTC+ will then control the
following functions: play, pause, fast
forward, rewind, next track, previous
track, random or repeat mode, selection and navigation of
playlist/genre/singer/album/Podcast.
CAUTION!
Do not leave your USB device, iPod ®
or
an external audio source in the vehicle
for extended periods of time: extreme
temperatures and humidity can occur
in the vehicle.
Sun Visors Sun visors can be folded to the front
and to the side of the vehicle. To move
the visor laterally, lower and release it
from its catch as indicated. By lowering the visor you can access
the courtesy mirror with incorporated
light illuminating automatically (with
the ignition switch in RUN ) by raising
the mirror protective cover.
Before raising the visor, close the
mirror cover.
A paper holder is fitted inside each sun
visor.Understanding the Vehicle
3
130
Page 135 of 384
Removable Ashtray and Lighter
(optional) The removable ashtray with cover for
front seats passengers can be inserted
inside the front cupholder.
The rear seat passengers can use the
removable ashtray by inserting it into
the rear door pocket.
Cigarette Lighter Use
Pressing the central button activates
the cigarette lighter. After about 20
seconds the button returns
automatically to the initial position
and stops the heating: now the
cigarette lighter is ready for use.
CAUTION!
After use, always make sure that the
cigarette lighter is switched off.
WARNING!
• The cigarette lighter reaches high
temperatures. Handle it carefully
and do not allow children to use it.
• The cigarette lighter may not be
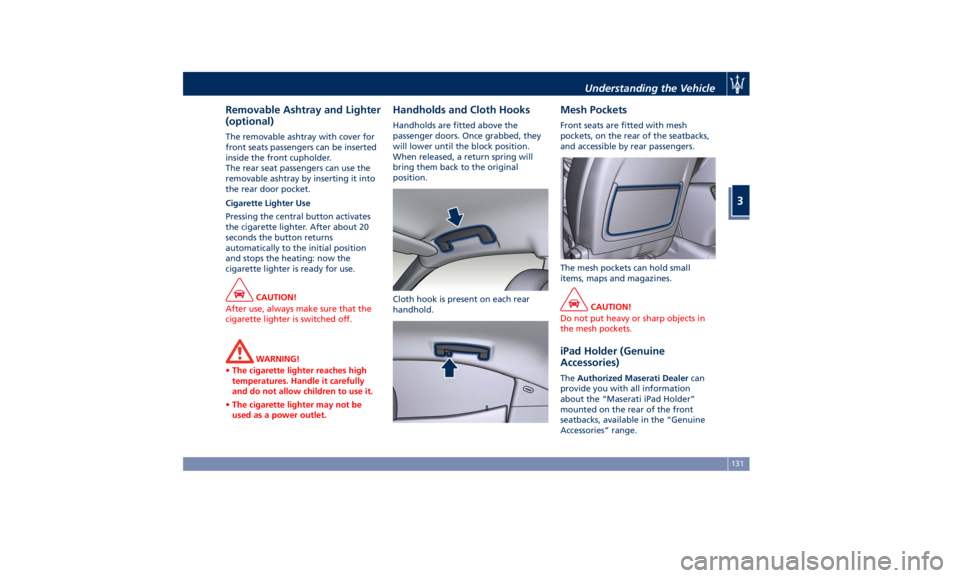
used as a power outlet. Handholds and Cloth Hooks Handholds are fitted above the
passenger doors. Once grabbed, they
will lower until the block position.
When released, a return spring will
bring them back to the original
position.
Cloth hook is present on each rear
handhold. Mesh Pockets Front seats are fitted with mesh
pockets, on the rear of the seatbacks,
and accessible by rear passengers.
The mesh pockets can hold small
items, maps and magazines.
CAUTION!
Do not put heavy or sharp objects in
the mesh pockets.
iPad Holder (Genuine
Accessories) The Authorized Maserati Dealer can
provide you with all information
about the “Maserati iPad Holder”
mounted on the rear of the front
seatbacks, available in the “Genuine
Accessories” range.Understanding the Vehicle
3
131
Page 137 of 384
please contact Client Service at
1-800-977.2107 or write to:
[email protected].
CAUTION!
When selling the vehicle, you should
contact the above mentioned Client
Service to have your device removed
from the list of activated devices
registered in your name. Do not
simply give your control unit password
to a new owner. To avoid improper
internet access in your name and
allow new owner registration you
must de-register with the service
provider. A new owner will not be
able to register the device if it still
appears registered in the prior
owner's name. If you are a subsequent
owner, the unit could be improperly
monitored (usage and location), if it is
still registered to a prior owner. Cargo Area WARNING!
To help protect against personal
injury, passengers must not be seated
in the rear cargo area. The rear cargo
space is intended for load carrying
purposes only, not for passengers,
who should sit in seats and use seat
belts.
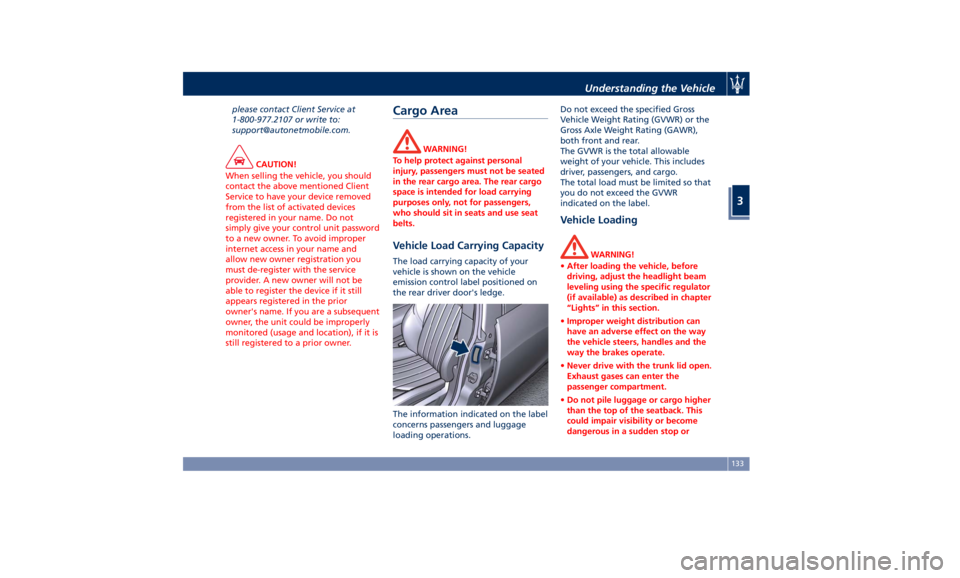
Vehicle Load Carrying Capacity The load carrying capacity of your
vehicle is shown on the vehicle
emission control label positioned on
the rear driver door's ledge.
The information indicated on the label
concerns passengers and luggage
loading operations. Do not exceed the specified Gross
Vehicle Weight Rating (GVWR) or the
Gross Axle Weight Rating (GAWR),
both front and rear.
The GVWR is the total allowable
weight of your vehicle. This includes
driver, passengers, and cargo.
The total load must be limited so that
you do not exceed the GVWR
indicated on the label.
Vehicle Loading WARNING!
• After loading the vehicle, before
driving, adjust the headlight beam
leveling using the specific regulator
(if available) as described in chapter
“Lights” in this section.
• Improper weight distribution can
have an adverse effect on the way
the vehicle steers, handles and the
way the brakes operate.
• Never drive with the trunk lid open.
Exhaust gases can enter the
passenger compartment.
• Do not pile luggage or cargo higher
than the top of the seatback. This
could impair visibility or become
dangerous in a sudden stop orUnderstanding the Vehicle
3
133
Page 140 of 384
pulling on the top of the seatback
above the seat strap.
NOTE:
When the seatback is tilted to the
upright position, reassemble the head
restraint of the center seat (see “Head
Restraints” in this section) make sure
the seatbelt of the rear central
position is in the proper condition for
use.
WARNING!
• Make sure that the seatback is
securely locked into position. If the
seatback is not securely locked into
position, the seat will not provide
the proper stability for child seats
and/or passengers. An improperly
latched seat could cause serious
injury.
• The cargo area in the rear of the
vehicle with the rear seatbacks in
the folded down position should not
be used as a play area by children
when the vehicle is in motion. They
could be seriously injured in a
collision. Children should be seated
and use proper restraint system. Power Sunroof with
Sunshade The sunroof is power controlled and
can only be operated with the ignition
switch in RUN position.
It can slide lengthways and be raised
at the rear (tilting).
By opening the sunroof a front flap
rises automatically in order to deviate
the air flow.
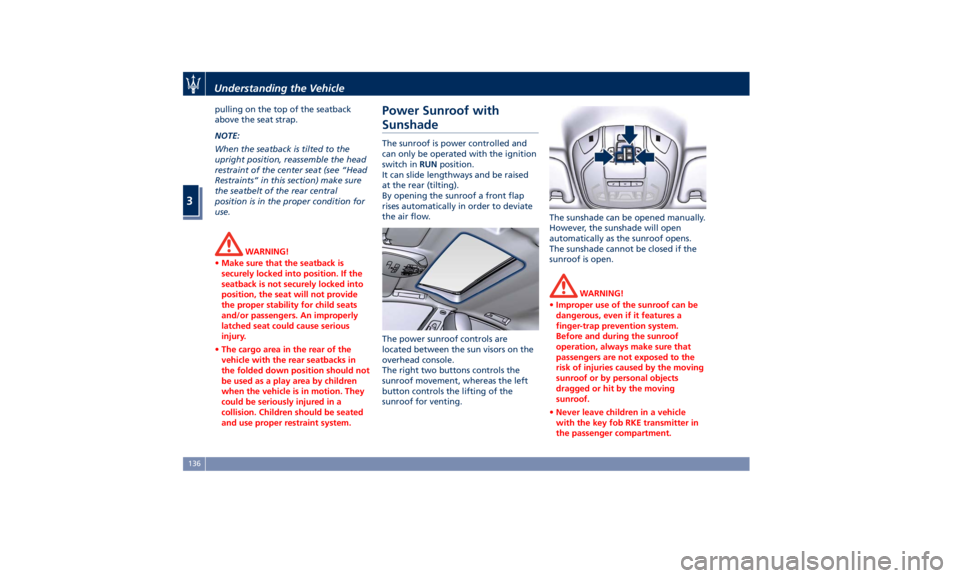
The power sunroof controls are
located between the sun visors on the
overhead console.
The right two buttons controls the
sunroof movement, whereas the left
button controls the lifting of the
sunroof for venting. The sunshade can be opened manually.
However, the sunshade will open
automatically as the sunroof opens.
The sunshade cannot be closed if the
sunroof is open.
WARNING!
• Improper use of the sunroof can be
dangerous, even if it features a
finger-trap prevention system.
Before and during the sunroof
operation, always make sure that
passengers are not exposed to the
risk of injuries caused by the moving
sunroof or by personal objects
dragged or hit by the moving
sunroof.
• Never leave children in a vehicle
with the key fob RKE transmitter in
the passenger compartment.Understanding the Vehicle
3
136
Page 147 of 384
Adjustable and fixed air vents allow
passengers to achieve the optimal
comfort conditions.
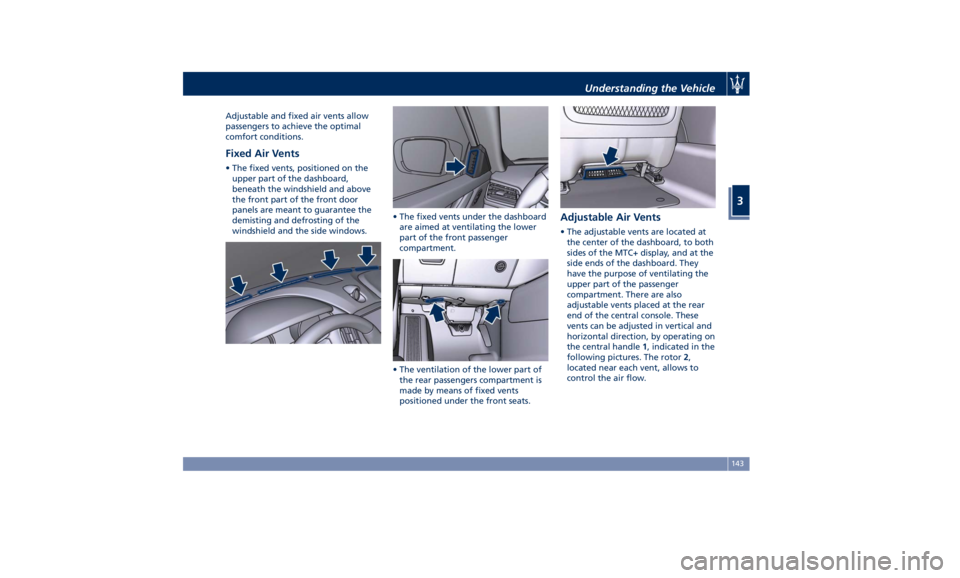
Fixed Air Vents • The fixed vents, positioned on the
upper part of the dashboard,
beneath the windshield and above
the front part of the front door
panels are meant to guarantee the
demisting and defrosting of the
windshield and the side windows. • The fixed vents under the dashboard
are aimed at ventilating the lower
part of the front passenger
compartment.
• The ventilation of the lower part of
the rear passengers compartment is
made by means of fixed vents
positioned under the front seats. Adjustable Air Vents • The adjustable vents are located at
the center of the dashboard, to both
sides of the MTC+ display, and at the
side ends of the dashboard. They
have the purpose of ventilating the
upper part of the passenger
compartment. There are also
adjustable vents placed at the rear
end of the central console. These
vents can be adjusted in vertical and
horizontal direction, by operating on
the central handle 1 , indicated in the
following pictures. The rotor 2 ,
located near each vent, allows to
control the air flow.Understanding the Vehicle
3
143