ECU MASERATI GHIBLI 2019 Service Manual
[x] Cancel search | Manufacturer: MASERATI, Model Year: 2019, Model line: GHIBLI, Model: MASERATI GHIBLI 2019Pages: 384, PDF Size: 13.33 MB
Page 252 of 384

safety system and is not designed to
prevent accidents.
The ACC allows driver to keep Cruise
Control active in limited or moderate
traffic conditions with no need to
constantly restore the Cruise Control.
The ACC uses a radar sensor, located
on the front grille behind the trident,
and the forward-facing camera behind
the internal rear-view mirror to detect
the presence of a vehicle ahead at a
close distance and moving in the same
direction.
This vehicle, in this chapter, will be
indicated as "target vehicle" or
"vehicle ahead".
NOTE:
• If the sensor detects no vehicle
ahead, the ACC system will maintain
set steady speed.
• If the ACC sensor detects a vehicle ahead, the ACC system automatically
kicks in by slightly accelerating or
braking (to avoid exceeding the
initially set speed) so that the vehicle
keeps present distance, trying to
adapt to the speed of the detected
vehicle ahead.
WARNING!
• The Adaptive Cruise Control (ACC) is
designed to increase vehicle driving
comfort. It must not be considered
as a means of replacing the required
attention of the driver. The driver is
always required to drive carefully.
The driver is always required to pay
utmost attention to driving
conditions (road, traffic, weather)
and style (speed, distance from
sensed vehicle ahead, brake use).
Driver has the full responsibility of
the vehicle therefore his attention is
crucial to keeping vehicle control, in
particular when approaching curves
and situations with heavy traffic.
Failure to follow these warnings can
result in a collision and death or
serious personal injury.
• In some driving scenarios, the ACC
could have detection problems. In
such cases, the ACC could kick in late or unexpectedly. The driver must be
careful since his/her intervention
could be necessary.
• It is always the driver’s responsibility
to obey speed limits and to keep
minimum legal distance to the
preceding vehicle.
• ACC system can decelerate only with
limited braking, it cannot execute
emergency braking.
The ACC system:
•
Does not activate/react in the
presence of pedestrians, bicycles,
incoming traffic from the opposite
direction and steady objects such as a
vehicle stuck in a traffic jam.
• Is meant for the use on highways and
well-built roads, not for city traffic or
mountain roads.
• May not have enough time to react
and/or decelerate sufficiently on
vehicles when lane is changed too
quickly or the relative speed is too
high. In such cases the driver has to
react appropriately and without any
acoustic/visual and warning.
• Cannot consider road, traffic and
weather conditions and might prove
limited when visibility is poor.
• Does not always fully recognize
complex driving conditions and thisDriving
5
248
Page 302 of 384
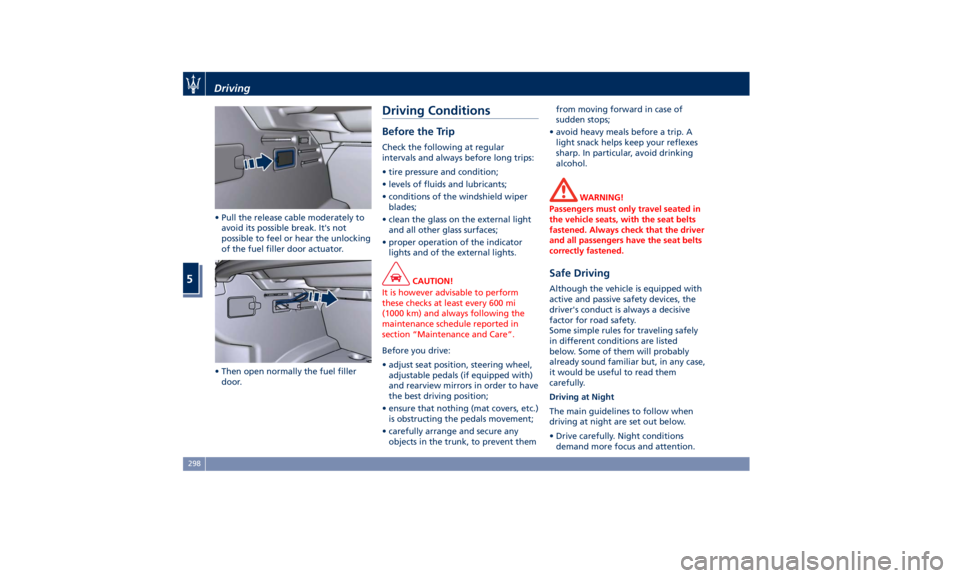
• Pull the release cable moderately to
avoid its possible break. It's not
possible to feel or hear the unlocking
of the fuel filler door actuator.
• Then open normally the fuel filler
door. Driving Conditions Before the Trip Check the following at regular
intervals and always before long trips:
• tire pressure and condition;
• levels of fluids and lubricants;
• conditions of the windshield wiper
blades;
• clean the glass on the external light
and all other glass surfaces;
• proper operation of the indicator
lights and of the external lights.
CAUTION!
It is however advisable to perform
these checks at least every 600 mi
(1000 km) and always following the
maintenance schedule reported in
section “Maintenance and Care”.
Before you drive:
•
adjust seat position, steering wheel,
adjustable pedals (if equipped with)
and rearview mirrors in order to have
the best driving position;
• ensure that nothing (mat covers, etc.)
is obstructing the pedals movement;
• carefully arrange and secure any
objects in the trunk, to prevent them from moving forward in case of
sudden stops;
• avoid heavy meals before a trip. A
light snack helps keep your reflexes
sharp. In particular, avoid drinking
alcohol.
WARNING!
Passengers must only travel seated in
the vehicle seats, with the seat belts
fastened. Always check that the driver
and all passengers have the seat belts
correctly fastened.
Safe Driving Although the vehicle is equipped with
active and passive safety devices, the
driver's conduct is always a decisive
factor for road safety.
Some simple rules for traveling safely
in different conditions are listed
below. Some of them will probably
already sound familiar but, in any case,
it would be useful to read them
carefully.
Driving at Night
The main guidelines to follow when
driving at night are set out below.
• Drive carefully. Night conditions
demand more focus and attention.Driving
5
298
Page 312 of 384
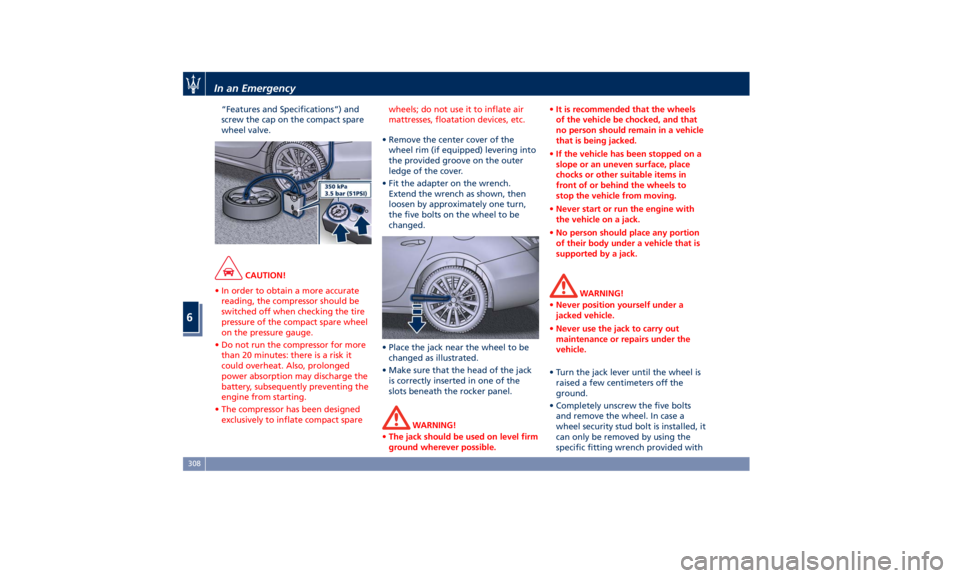
“Features and Specifications”) and
screw the cap on the compact spare
wheel valve.
CAUTION!
• In order to obtain a more accurate
reading, the compressor should be
switched off when checking the tire
pressure of the compact spare wheel
on the pressure gauge.
• Do not run the compressor for more
than 20 minutes: there is a risk it
could overheat. Also, prolonged
power absorption may discharge the
battery, subsequently preventing the
engine from starting.
• The compressor has been designed
exclusively to inflate compact spare wheels; do not use it to inflate air
mattresses, floatation devices, etc.
• Remove the center cover of the
wheel
rim (if equipped) levering into
the provided groove on the outer
ledge of the cover.
• Fit the adapter on the wrench.
Extend the wrench as shown, then
loosen by approximately one turn,
the five bolts on the wheel to be
changed.
• Place the jack near the wheel to be
changed as illustrated.
• Make sure that the head of the jack
is correctly inserted in one of the
slots beneath the rocker panel.
WARNING!
• The jack should be used on level firm
ground wherever possible. • It is recommended that the wheels
of the vehicle be chocked, and that
no person should remain in a vehicle
that is being jacked.
• If the vehicle has been stopped on a
slope or an uneven surface, place
chocks or other suitable items in
front of or behind the wheels to
stop the vehicle from moving.
• Never start or run the engine with
the vehicle on a jack.
• No person should place any portion
of their body under a vehicle that is
supported by a jack.
WARNING!
• Never position yourself under a
jacked vehicle.
• Never use the jack to carry out
maintenance or repairs under the
vehicle.
• Turn the jack lever until the wheel is
raised a few
centimeters off the
ground.
• Completely unscrew the five bolts
and remove the wheel. In case a
wheel security stud bolt is installed, it
can only be removed by using the
specific fitting wrench provided withIn an Emergency
6
308
Page 313 of 384
the “Wheel Security Stud Bolt Kit”,
available in the “Genuine
Accessories” range.
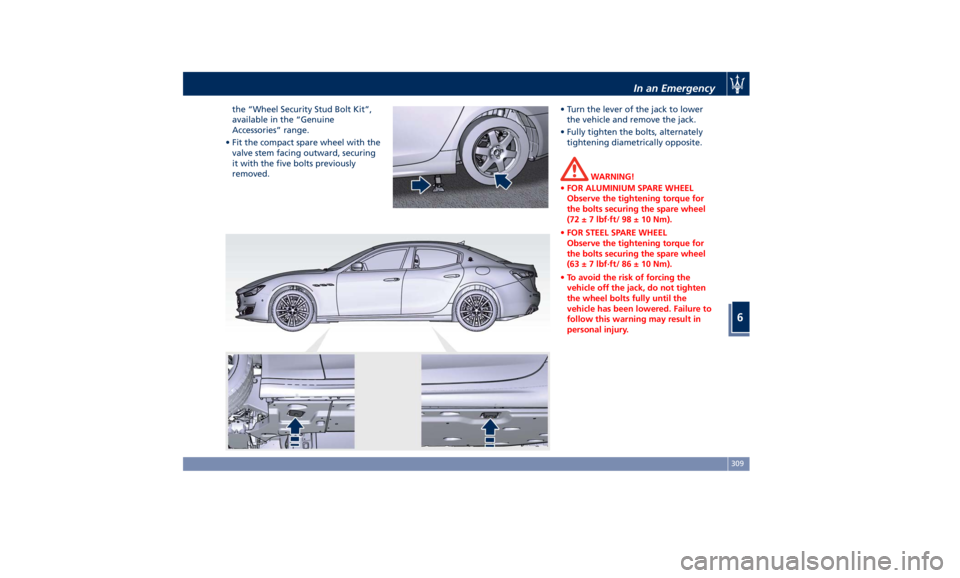
• Fit the compact spare wheel with the
valve stem facing outward, securing
it with the five bolts previously
removed. • Turn the lever of the jack to lower
the vehicle and remove the jack.
• Fully tighten the bolts, alternately
tightening diametrically opposite.
WARNING!
• FOR ALUMINIUM SPARE WHEEL
Observe the tightening torque for
the bolts securing the spare wheel
(72 ± 7 lbf·ft/ 98 ± 10 Nm).
• FOR STEEL SPARE WHEEL
Observe the tightening torque for
the bolts securing the spare wheel
(63 ± 7 lbf·ft/ 86 ± 10 Nm).
• To avoid the risk of forcing the
vehicle off the jack, do not tighten
the wheel bolts fully until the
vehicle has been lowered. Failure to
follow this warning may result in
personal injury.In an Emergency
6
309
Page 314 of 384
WARNING!
• The spare wheel is narrower than
standard wheels and must only be
used to travel the distance required
to reach a service station, where the
punctured tire can be repaired or
replaced.
• Do not exceed a maximum speed of
50 mph (80 km/h) when using the
compact spare wheel; when this
limit is exceeded, the stability, road
holding and braking of the vehicle
will be compromised. Avoid
accelerating to full speed, heavy
braking and fast cornering.
• The compact spare wheel must be
inflated to the recommended tire
pressure (see “Tire Inflation
Pressure” in section “Features and
Specifications”). • For safety reasons, it is absolutely
forbidden to drive with more than
one compact spare wheel fitted on
the vehicle.
• Snow chains cannot be fitted on the
compact spare wheel.
• The spare wheel can travel a
maximum of 1,800 mi (3.000 km).
To Refit the Standard Wheel with
Repair
ed or Replaced Tire
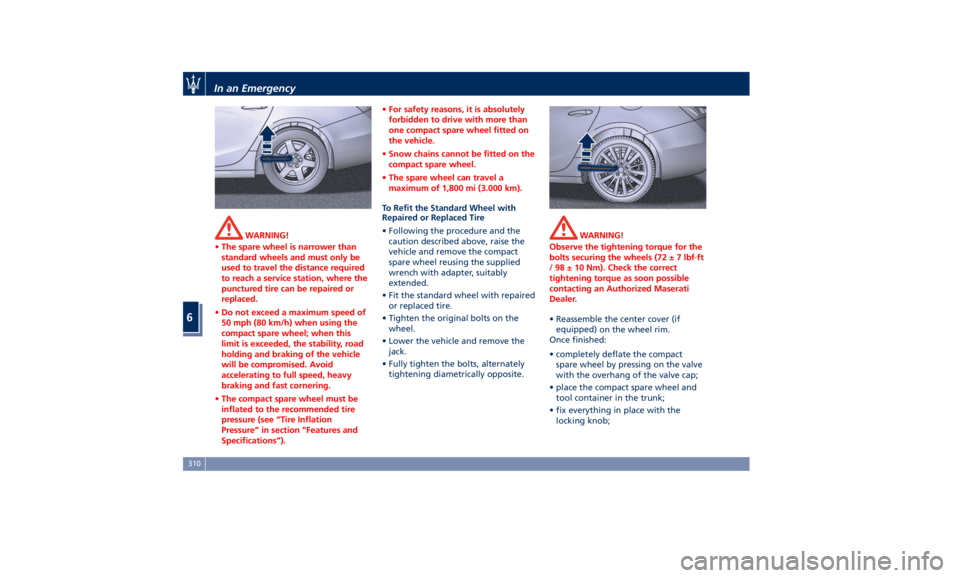
• Following the procedure and the
caution described above, raise the
vehicle and remove the compact
spare wheel reusing the supplied
wrench with adapter, suitably
extended.
• Fit the standard wheel with repaired
or replaced tire.
• Tighten the original bolts on the
wheel.
• Lower the vehicle and remove the
jack.
• Fully tighten the bolts, alternately
tightening diametrically opposite. WARNING!
Observe the tightening torque for the
bolts securing the wheels (72 ± 7 lbf·ft
/ 98 ± 10 Nm). Check the correct
tightening torque as soon possible
contacting an Authorized Maserati
Dealer.
• Reassemble the center cover (if
equipped)
on the wheel rim.
Once finished:
• completely deflate the compact
spare wheel by pressing on the valve
with the overhang of the valve cap;
• place the compact spare wheel and
tool container in the trunk;
• fix everything in place with the
locking knob;In an Emergency
6
310
Page 316 of 384
Transmission Manual
Release of P (Park)
Position The manual disengagement of the
shift from P (Park) has the purpose to
allow towing the vehicle if not
normally possible using the shift lever
(such as inability to start the engine).
This procedure is exclusively intended
for emergency situations, only!
WARNING!
Always secure your vehicle by fully
applying the parking brake, before
activating the manual park release.
Activating the manual park release
could allow your vehicle to roll away
if it is not secured by the parking
brake. Activating the manual park
release on an unsecured vehicle could
lead to serious injury or death for
those in or around the vehicle.
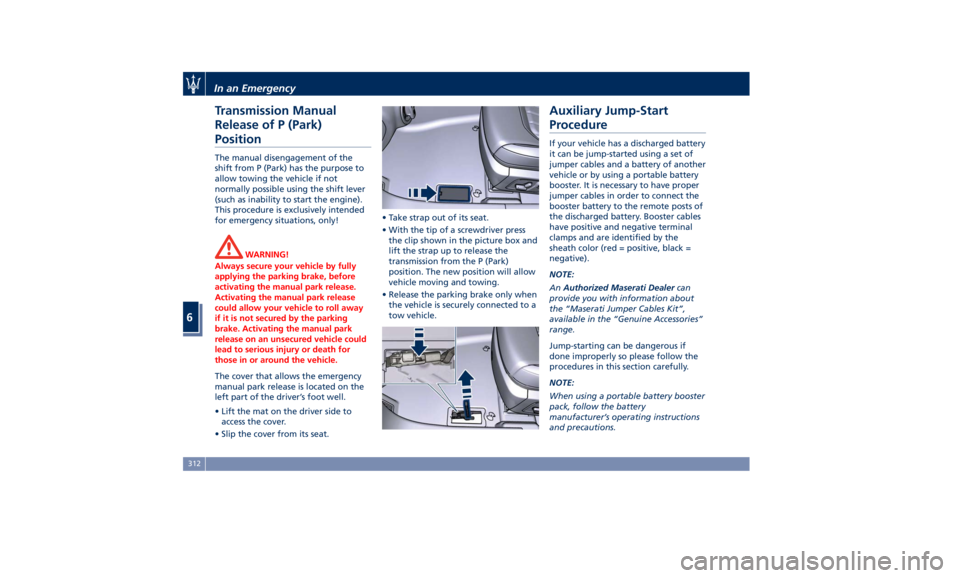
The cover that allows the emergency
manual
park release
is located on the
left part of the driver’s foot well.
• Lift the mat on the driver side to
access the cover.
• Slip the cover from its seat. • Take strap out of its seat.
• With the tip of a screwdriver press
the clip shown in the picture box and
lift the strap up to release the
transmission from the P (Park)
position. The new position will allow
vehicle moving and towing.
• Release the parking brake only when
the vehicle is securely connected to a
tow vehicle.Auxiliary Jump-Start
Procedure If your vehicle has a discharged battery
it can be jump-started using a set of
jumper cables and a battery of another
vehicle or by using a portable battery
booster. It is necessary to have proper
jumper cables in order to connect the
booster battery to the remote posts of
the discharged battery. Booster cables
have positive and negative terminal
clamps and are identified by the
sheath color (red = positive, black =
negative).
NOTE:
An Authorized Maserati Dealer can
provide you with information about
the “Maserati Jumper Cables Kit”,
available in the “Genuine Accessories”
range.
Jump-starting can be dangerous if
done improperly so please follow the
procedures in this section carefully.
NOTE:
When using a portable battery booster
pack, follow the battery
manufacturer’s operating instructions
and precautions.In an Emergency
6
312
Page 317 of 384
CAUTION!
• To jump start a vehicle do not use a
portable battery, a booster pack or
any other booster source with a
system voltage greater than 14 Volts
or damage to the battery, starter
motor, alternator or electrical system
of the vehicle with the discharged
battery may occur.
• Do not use a battery charger for
emergency starting under any
circumstances. You could damage
the electronic systems, particularly
the control units managing the
ignition and fuel supply functions.
• If the battery is completely
discharged when the windows are
fully raised, open the door with the
utmost care; do not close the door
again until it is possible to lower the
window.
WARNING!
Always secure your vehicle by fully
applying the parking brake, before
activating the manual park release.
Activating the manual park release
could allow your vehicle to roll away if it is not secured by the parking
brake. Activating the manual park
release on an unsecured vehicle could
lead to serious injury or death for
those in or around the vehicle.
NOTE:
If
you need
to disconnect the battery
from the vehicle electrical system, see
“Maintenance — Free Battery” in
section “Maintenance and Care”).
WARNING!
California Proposition 65
Operating, servicing and maintaining
a passenger vehicle or off-road vehicle
can expose you to chemicals including
such as, engine exhaust, carbon
monoxide, phthalates and lead, that
which are known to the State of
California to cause cancer and birth
defects or other reproductive harm. To
minimize exposure, avoid breathing
exhaust, do not idle the engine except
as necessary, service your vehicle in a
well-ventilated area and wear gloves
or wash your hands frequently when
servicing your vehicle. For more
information go to: www.P65Warnings.ca.gov/passenger-
vehicle
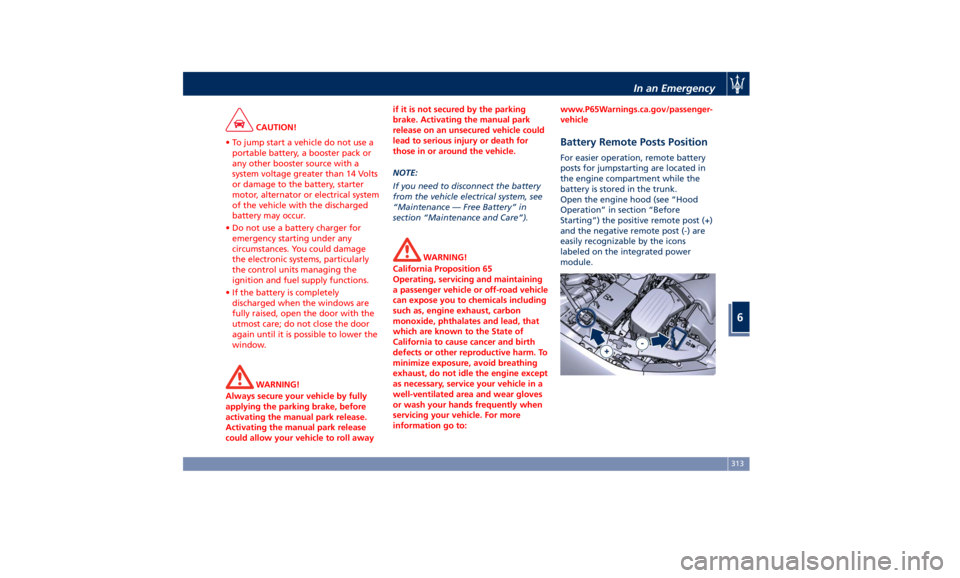
Battery Remote Posts Position For easier operation, remote battery
posts for jumpstarting are located in
the engine compartment while the
battery is stored in the trunk.
Open the engine hood (see “Hood
Operation” in section “Before
Starting”) the positive remote post (+)
and the negative remote post (-) are
easily recognizable by the icons
labeled on the integrated power
module.In an Emergency
6
313
Page 320 of 384
(Continued)
ignition switch is in the OFF position. If
this is not observed, when the ESC is
active, the ECU will store a
malfunction and the relative warning
light
will illuminate on the
instrument cluster display. This
requires the intervention of an
Authorized Maserati Dealer to reset
the system.
Towing an AWD Vehicle
WARNING!
Single axle towing or use of a tow
dolly is not allowed since it will
severely damage components of an
AWD vehicle.
WARNING!
Use of a tow dolly on front wheels is
strictly forbidden since front wheels
may still receive a residual amount of
torque and disengage the vehicle from
the tow dolly and affect safety of
both rescuers and other road users. Use the Tow Hook of the Tool
Kit CAUTION!
The tow hook should only be used for
towing the car on flat roads. Do not
use the tow hook to remove the car
that is stuck on off road stretches.
The tow hook is also used to tow the
vehicle
on the
platform of a tow truck.
The tow hook is contained in the tool
kit (see “Tool Kit” in this section) and
must be screwed in its seat accessible
behind the front grille, right-hand
side, after removing the protective
cap.
• Carefully clean the threaded seat
before screwing the hook.
• Screw the tow hook into its seat for
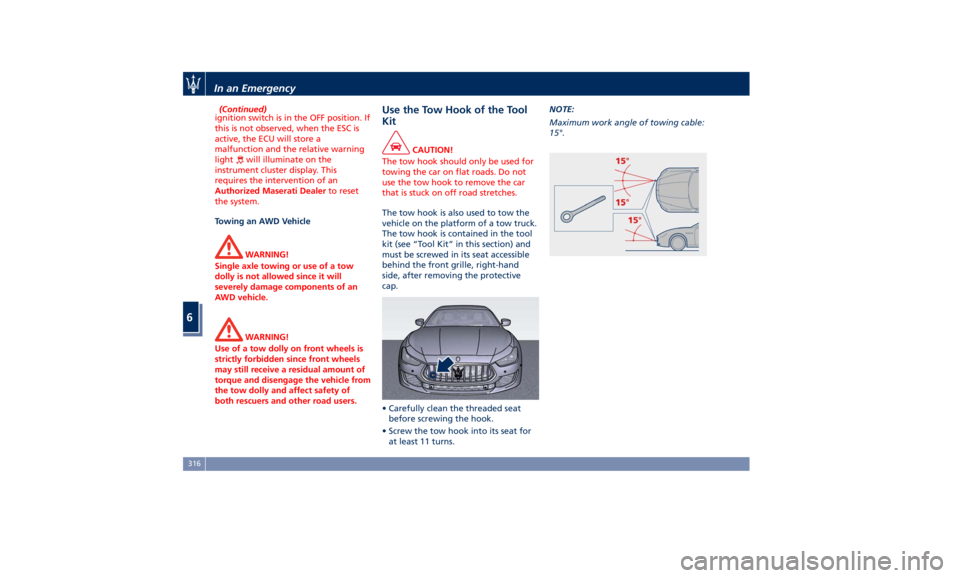
at least 11 turns. NOTE:
Maximum work angle of towing cable:
15°.
In an Emergency
6
316
Page 331 of 384
which are known to the State of
California to cause cancer and birth
defects or other reproductive harm. To
minimize exposure, avoid breathing
exhaust, do not idle the engine except
as necessary, service your vehicle in a
well-ventilated area and wear gloves
or wash your hands frequently when
servicing your vehicle. For more
information go to:
www.P65Warnings.ca.gov/passenger-
vehicle
Brake Fluid Level Check
Check
the fluid level immediately if
the brake system warning light
(USA) and the related message
turn on indicating a low level of brake
fluid.
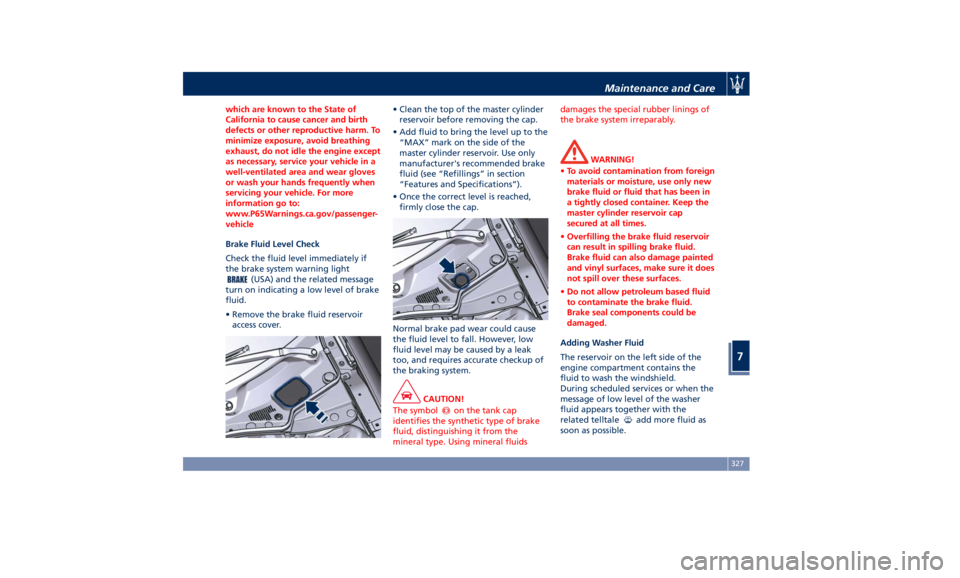
• Remove the brake fluid reservoir
access cover. • Clean the top of the master cylinder
reservoir before removing the cap.
• Add fluid to bring the level up to the
“MAX” mark on the side of the
master cylinder reservoir. Use only
manufacturer's recommended brake
fluid (see “Refillings” in section
“Features and Specifications”).
• Once the correct level is reached,
firmly close the cap.
Normal brake pad wear could cause
the fluid level to fall. However, low
fluid level may be caused by a leak
too, and requires accurate checkup of
the braking system.
CAUTION!
The symbol
on the tank cap
identifies the synthetic type of brake
fluid, distinguishing it from the
mineral type. Using mineral fluids damages the special rubber linings of
the brake system irreparably.
WARNING!
• To avoid contamination from foreign
materials or moisture, use only new
brake fluid or fluid that has been in
a tightly closed container. Keep the
master cylinder reservoir cap
secured at all times.
• Overfilling the brake fluid reservoir
can result in spilling brake fluid.
Brake fluid can also damage painted
and vinyl surfaces, make sure it does
not spill over these surfaces.
• Do not allow petroleum based fluid
to contaminate the brake fluid.
Brake seal components could be
damaged.
Adding Washer Fluid
The
reservoir on
the left side of the
engine compartment contains the
fluid to wash the windshield.
During scheduled services or when the
message of low level of the washer
fluid appears together with the
related telltale
add more fluid as
soon as possible.Maintenance and Care
7
327
Page 341 of 384
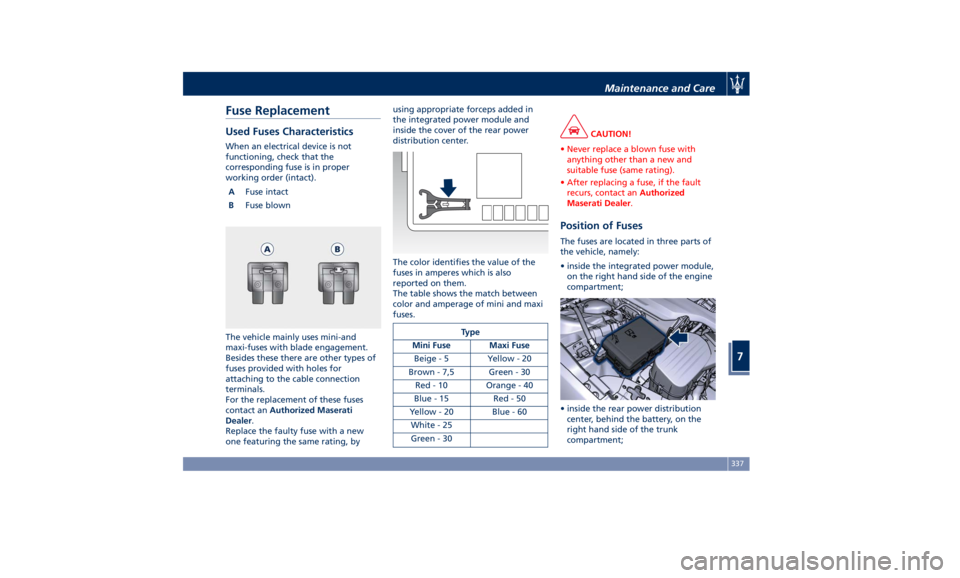
Fuse Replacement Used Fuses Characteristics When an electrical device is not
functioning, check that the
corresponding fuse is in proper
working order (intact).
A Fuse intact
B Fuse blown
The vehicle mainly uses mini-and
maxi-fuses with blade engagement.
Besides these there are other types of
fuses provided with holes for
attaching to the cable connection
terminals.
For the replacement of these fuses
contact an Authorized Maserati
Dealer .
Replace the faulty fuse with a new
one featuring the same rating, by using appropriate forceps added in
the integrated power module and
inside the cover of the rear power
distribution center.
The color identifies the value of the
fuses in amperes which is also
reported on them.
The table shows the match between
color and amperage of mini and maxi
fuses.
Type
Mini Fuse Maxi Fuse
Beige - 5 Yellow - 20
Brown - 7,5 Green - 30
Red - 10 Orange - 40
Blue-15 Red-50
Yellow - 20 Blue - 60
White - 25
Green - 30 CAUTION!
• Never replace a blown fuse with
anything other than a new and
suitable fuse (same rating).
• After replacing a fuse, if the fault
recurs, contact an Authorized
Maserati Dealer .
Position of Fuses The fuses are located in three parts of
the vehicle, namely:
• inside the integrated power module,
on the right hand side of the engine
compartment;
• inside the rear power distribution
center, behind the battery, on the
right hand side of the trunk
compartment;Maintenance and Care
7
337