ECU MASERATI GHIBLI 2019 Owner's Guide
[x] Cancel search | Manufacturer: MASERATI, Model Year: 2019, Model line: GHIBLI, Model: MASERATI GHIBLI 2019Pages: 384, PDF Size: 13.33 MB
Page 141 of 384
• In a collision, there is a greater risk
of being thrown from the vehicle if
the sunroof is open. Always fasten
your seat belt properly and make
sure all passengers are properly
secured too.
• Do not allow small children to
operate the sunroof. Never insert
fingers, other body parts, or any
object through the opening sunroof.
CAUTION!
• In the event of rain, always close the
sunroof to prevent water
infiltrations from staining the
fabric/leather upholstery.
• Do not open the sunroof if there is
ice on it: risk of damage.
Slide Opening Sunroof • Full automatic express opening
Press the right rear button for more
than half second and the sunroof
will open automatically regardless
of any previous position. The
sunroof will open fully and stop
automatically. During this
operation, if any sunroof button is
pressed, the sunroof will stop. • Full or partial manual opening
To open the sunroof manually press
the right rear button for less than
half second to move step by step
the sunroof panel.
Venting Sunroof Press and release the left button, and
the sunroof will open to the vent
position. This is called “Express Vent”,
and will occur regardless of sunroof
position. During this opening
operation, any movement of the
button will stop the sunroof.
Pinch Protect Feature This feature will detect an obstruction
in the opening of the sunroof during
express close operation. If an
obstruction is detected, the sunroof
will automatically retract. If this
occurs, remove the obstruction then
press the right front button and
release to express close.
NOTE:
If three consecutive attempts to close
in express mode the sunroof result in
pinch protect reversals, the fourth
attempt will be manual, with pinch
protect feature disabled. Pinch Protect Override
If any obstruction (ice, debris, etc.)
prevents closing the sunroof, press the
right front button and hold for two
seconds after the reversal occurs. This
allows the sunroof to move toward
the closed position.
NOTE:
Pinch protection is disabled while
pressing the right front button.
Wind Buffeting Wind buffeting can be described as
the perception of pressure or a
helicopter-type sound. Your vehicle
may exhibit wind buffeting with the
windows down, or the sunroof in
certain open or partially open
positions. This is a normal occurrence
and can be minimised. If the buffeting
occurs with the rear windows open,
then open the front and rear windows
together to minimise the buffeting. If
the buffeting occurs with the sunroof
open, then adjust the sunroof opening
to minimise the buffeting.
Ignition Off Operation The power sunroof controls will
remain active for up to approximately
ten minutes after the ignition switch isUnderstanding the Vehicle
3
137
Page 142 of 384
in OFF position. Opening either front
door will cancel this feature. The
ignition system timing can be set using
the MTC+ System (see “MTC+ Settings”
in section “Dashboard Instruments and
Controls”).
Sunroof Maintenance Use only a nonabrasive cleaner and a
soft cloth to clean the glass panel.
HomeLink ®
(optional) HomeLink ®
replaces up to three
hand-held transmitters operating the
automatic devices that open garage
doors and gates, enable/disable the
lighting or security systems. The
HomeLink ®
unit is powered by your
vehicle's 12 Volt battery. The
HomeLink ®
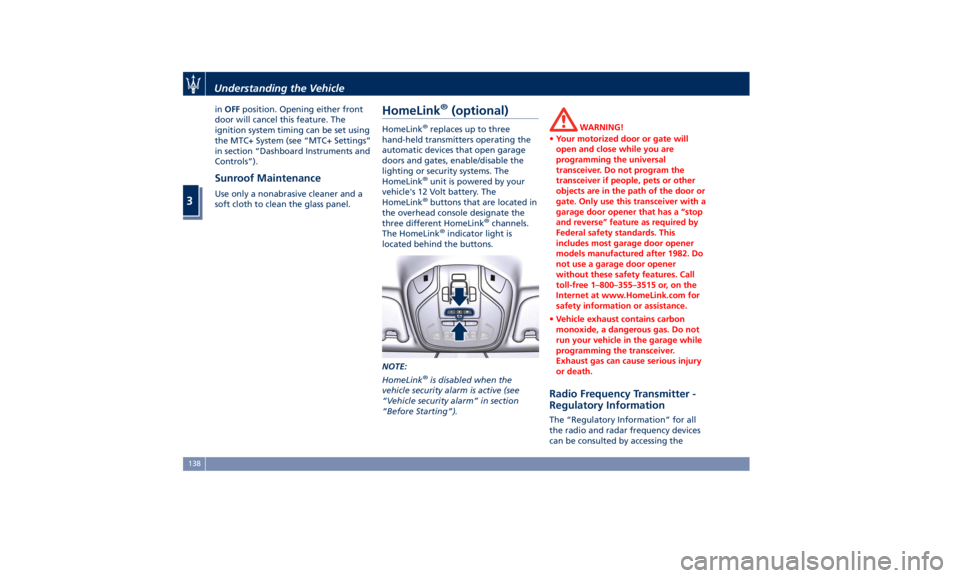
buttons that are located in
the overhead console designate the
three different HomeLink ®
channels.
The HomeLink ®
indicator light is
located behind the buttons.
NOTE:
HomeLink ®
is disabled when the
vehicle security alarm is active (see
“Vehicle security alarm” in section
“Before Starting”). WARNING!
• Your motorized door or gate will
open and close while you are
programming the universal
transceiver. Do not program the
transceiver if people, pets or other
objects are in the path of the door or
gate. Only use this transceiver with a
garage door opener that has a “stop
and reverse” feature as required by
Federal safety standards. This
includes most garage door opener
models manufactured after 1982. Do
not use a garage door opener
without these safety features. Call
toll-free 1–800–355–3515 or, on the
Internet at www.HomeLink.com for
safety information or assistance.
• Vehicle exhaust contains carbon
monoxide, a dangerous gas. Do not
run your vehicle in the garage while
programming the transceiver.
Exhaust gas can cause serious injury
or death.
Radio Frequency Transmitter -
Regulatory Information The “Regulatory Information” for all
the radio and radar frequency devices
can be consulted by accessing theUnderstanding the Vehicle
3
138
Page 145 of 384
• Press and hold the programmed
HomeLink ®
button.
If the garage door opener/device
activates, programming is complete.
To program the remaining two
HomeLink ®
buttons, repeat each step
for each remaining button. Do not
erase the channels.
Reprogramming a Single HomeLink ®
Button
To reprogram a channel that has been
previously trained, follow these steps:
• Place the ignition device to the RUN
position without starting the engine.
• Press and hold the desired
HomeLink ®
button.
• Without releasing the button
proceed with “Programming the
hand-held transmitters” from second
step and follow all remaining steps.
Using HomeLink ®
To operate, press and release the
programmed HomeLink ®
button.
Activation will now occur for the
programmed device (i.e., garage door
opener, gate operator, security system,
entry door lock, home/office lighting,
etc.). The hand-held transmitter of the
device may also be used at any time. Security It is advisable to erase all channels
before you sell or turn in your vehicle.
To erase the channels press and hold
the two outside HomeLink ®
buttons (I
and III) until the indicator light starts
flashing (after approximately 20
seconds).
The HomeLink ®
Universal Transceiver
is disabled when the vehicle security
alarm is active (see “Vehicle security
alarm” in section “Before Starting”).
Troubleshooting Tips If you are having trouble while
programming HomeLink ®
, here are
some of the most common solutions:
• Replace the battery in the original
hand-held transmitter.
• Press the LEARN button on the
garage door opener to complete the
training for a rolling code.
• Did you unplug the device for
programming and forgot to plug it
back in?
If you have any problems, or require
assistance, please call toll-free
1–800–355–3515 or, on the Internet at
www.HomeLink.com for information
or assistance. Understanding the Vehicle
3
141
Page 159 of 384
lines are present and turn-by-turn
navigation is on, main menu area will
automatically show navigation
information. For further details, please
refer to MTC+ guide.
2. VEHICLE INFO
Press and release the switch in the
or arrow directions until this
menu item is displayed.
Press and release the switch (
)to
access the submenus.
Press and release the switch in the
or arrow directions to scroll
through the following information
displays pressing and releasing the
switch (
) to display the selected
information.
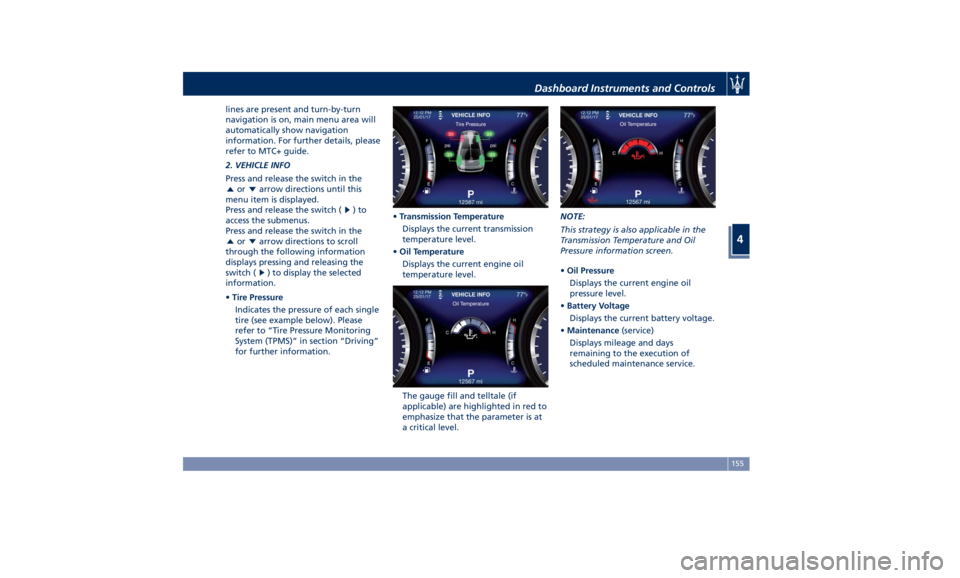
• Tire Pressure
Indicates the pressure of each single
tire (see example below). Please
refer to “Tire Pressure Monitoring
System (TPMS)” in section “Driving”
for further information. • Transmission Temperature
Displays the current transmission
temperature level.
• Oil Temperature
Displays the current engine oil
temperature level.
The gauge fill and telltale (if
applicable) are highlighted in red to
emphasize that the parameter is at
a critical level. NOTE:
This strategy is also applicable in the
Transmission Temperature and Oil
Pressure information screen.
• Oil Pressure
Displays the current engine oil
pressure level.
• Battery Voltage
Displays the current battery voltage.
• Maintenance (service)
Displays mileage and days
remaining to the execution of
scheduled maintenance service.Dashboard Instruments and Controls
4
155
Page 209 of 384
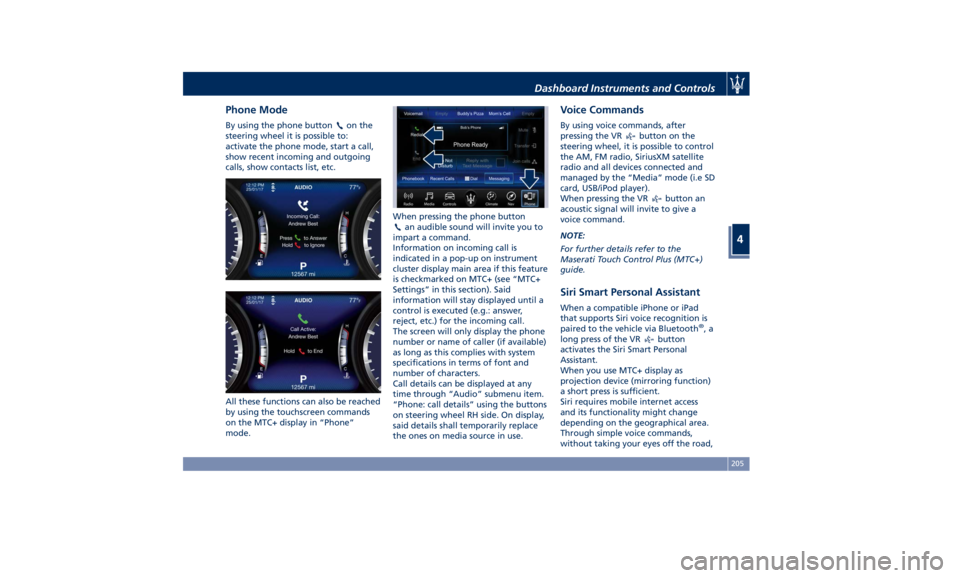
Phone Mode By using the phone button on the
steering wheel it is possible to:
activate the phone mode, start a call,
show recent incoming and outgoing
calls, show contacts list, etc.
All these functions can also be reached
by using the touchscreen commands
on the MTC+ display in “Phone”
mode. When pressing the phone button
an audible sound will invite you to
impart a command.
Information on incoming call is
indicated in a pop-up on instrument
cluster display main area if this feature
is checkmarked on MTC+ (see “MTC+
Settings” in this section). Said
information will stay displayed until a
control is executed (e.g.: answer,
reject, etc.) for the incoming call.
The screen will only display the phone
number or name of caller (if available)
as long as this complies with system
specifications in terms of font and
number of characters.
Call details can be displayed at any
time through “Audio” submenu item.
“Phone: call details” using the buttons
on steering wheel RH side. On display,
said details shall temporarily replace
the ones on media source in use. Voice Commands By using voice commands, after
pressing the VR
button on the
steering wheel, it is possible to control
the AM, FM radio, SiriusXM satellite
radio and all devices connected and
managed by the “Media” mode (i.e SD
card, USB/iPod player).
When pressing the VR
button an
acoustic signal will invite to give a
voice command.
NOTE:
For further details refer to the
Maserati Touch Control Plus (MTC+)
guide.
Siri Smart Personal Assistant When a compatible iPhone or iPad
that supports Siri voice recognition is
paired to the vehicle via Bluetooth ®
,a
long press of the VR
button
activates the Siri Smart Personal
Assistant.
When you use MTC+ display as
projection device (mirroring function)
a short press is sufficient.
Siri requires mobile internet access
and its functionality might change
depending on the geographical area.
Through simple voice commands,
without taking your eyes off the road,Dashboard Instruments and Controls
4
205
Page 214 of 384
Starting with a Cold Engine
Start-off slowly, avoiding sudden
acceleration and rev the engine up at
low medium speeds. High-
performance driving should be
avoided until the engine temperature
reaches 149-158°F (65-70°C).
Engine Turn-Off • With the shift lever in P (Park), D
(Drive) or R (Reverse) positions (see
“Automatic Transmission” in this
section) and vehicle standstill, press
and release the START/STOP button
to switch off the engine. A burst on
the accelerator pedal before turning
off the engine has no purpose and
increases fuel consumption.
• If the shift lever is in N (Neutral) and
the START/STOP button is pressed
once, the instrument cluster will
display a “Vehicle Not in Park”
message and the engine will remain
running.
WARNING!
Never leave a vehicle out of the P
(Park) position, as it could move. NOTE:
If
the ignition switch is left in the ACC
or RUN (engine not running) position
and the transmission is in P (Park), the
system will automatically time out
after 30 minutes of inactivity and the
ignition will switch to OFF position.
Engine Turn Off when in Automatic
Start&Stop
When the engine has been turned off
by the Start&Stop system, press and
release the START/STOP button. The
ignition switch will return to the OFF
position and the vehicle is off.
“Panic Stop” Strategy In panic conditions, if driver stops
engine in any non-standard manner
while driving at a speed over 2 mph
(3 km/h), the “Panic Stop” strategy can
manage the situation by checking
gearchange condition upon engine
cutting, driver’s action on brakes, road
condition (flat or slope) so as to set
gearchange to the most suitable
condition.
The “Panic Stop” strategy considers
that the driver should stop the engine
by pressing the ignition switch at least
3 times or holding it depressed for at
least 2 seconds.Automatic Start&Stop
System The Maserati Start&Stop system allows
the engine to automatically switch off
when the vehicle stops and to restart
when the driver intends to drive. This
feature helps reduce fuel
consumption. During the “Stop
(AutoStop)” phase the ignition is still
on and all security features are
available.
In order for the Start&Stop to activate,
the vehicle must be stationary and the
brake pedal adequately pressed.
NOTE:
If the brake pedal is not sufficiently
pressed the Start&Stop may not
function even if the vehicle is stopped.
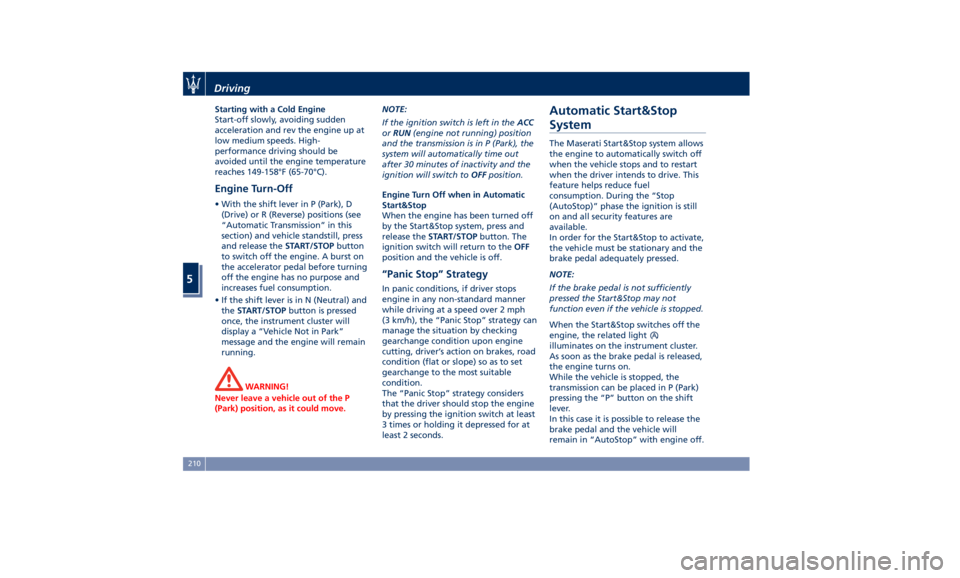
When the Start&Stop switches off the
engine, the related light
illuminates on the instrument cluster.
As soon as the brake pedal is released,
the engine turns on.
While the vehicle is stopped, the
transmission can be placed in P (Park)
pressing the “P” button on the shift
lever.
In this case it is possible to release the
brake pedal and the vehicle will
remain in “AutoStop” with engine off.Driving
5
210
Page 222 of 384
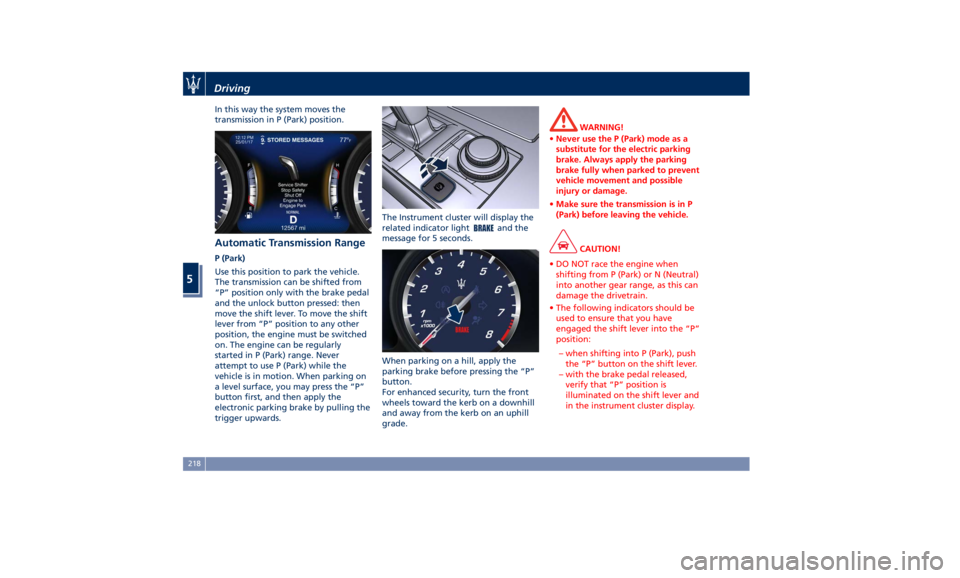
In this way the system moves the
transmission in P (Park) position.
Automatic Transmission Range P (Park)
Use this position to park the vehicle.
The transmission can be shifted from
“P” position only with the brake pedal
and the unlock button pressed: then
move the shift lever. To move the shift
lever from “P” position to any other
position, the engine must be switched
on. The engine can be regularly
started in P (Park) range. Never
attempt to use P (Park) while the
vehicle is in motion. When parking on
a level surface, you may press the “P”
button first, and then apply the
electronic parking brake by pulling the
trigger upwards. The Instrument cluster will display the
related indicator light
and the
message for 5 seconds.
When parking on a hill, apply the
parking brake before pressing the “P”
button.
For enhanced security, turn the front
wheels toward the kerb on a downhill
and away from the kerb on an uphill
grade. WARNING!
• Never use the P (Park) mode as a
substitute for the electric parking
brake. Always apply the parking
brake fully when parked to prevent
vehicle movement and possible
injury or damage.
• Make sure the transmission is in P
(Park) before leaving the vehicle.
CAUTION!
• DO NOT race the engine when
shifting from P (Park) or N (Neutral)
into another gear range, as this can
damage the drivetrain.
• The following indicators should be
used to ensure that you have
engaged the shift lever into the “P”
position:
– when shifting into P (Park), push
the “P” button on the shift lever.
– with the brake pedal released,
verify that “P” position is
illuminated on the shift lever and
in the instrument cluster display.Driving
5
218
Page 226 of 384
NOTE:
The gearshift indicator will only work
when the transmission is set in M +/-
(Manual) mode.
Transmission Malfunction and
Overheating Conditions Transmission Emergency Control
Transmission function is electronically
monitored to detect abnormal
conditions. If a condition that could
result in transmission damage is
detected, “Transmission Limp Home
Mode” will be activated. In this
situation, the transmission may
operate only in certain gears, or may
not shift at all. In some situations, the
transmission system may not
re-engage if the engine is turned off
and restarted.
A message in the instrument cluster
will inform the driver about the more
serious transmission conditions, and
indicate what actions may be
necessary.
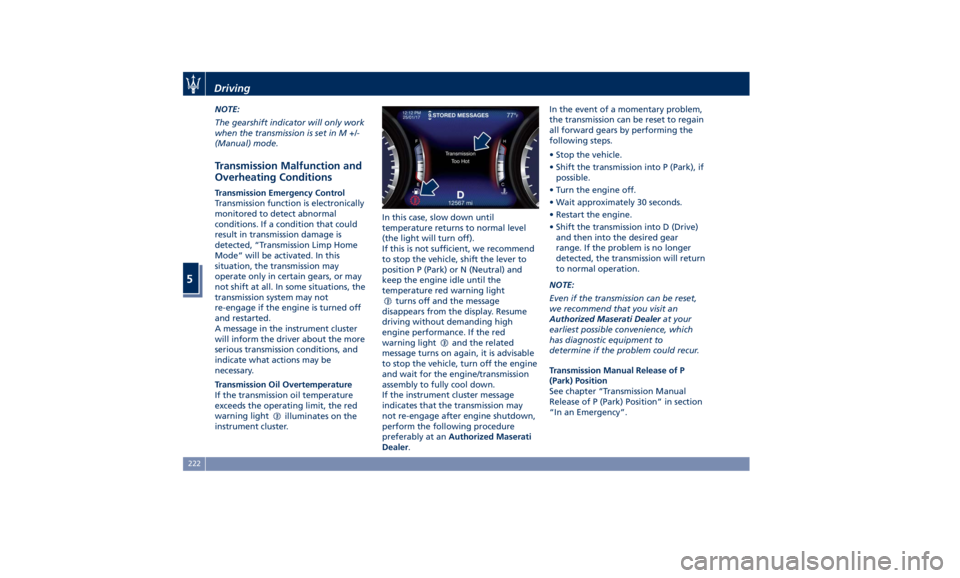
Transmission Oil Overtemperature
If the transmission oil temperature
exceeds the operating limit, the red
warning light
illuminates on the
instrument cluster. In this case, slow down until
temperature returns to normal level
(the light will turn off).
If this is not sufficient, we recommend
to stop the vehicle, shift the lever to
position P (Park) or N (Neutral) and
keep the engine idle until the
temperature red warning light
turns off and the message
disappears from the display. Resume
driving without demanding high
engine performance. If the red
warning light
and the related
message turns on again, it is advisable
to stop the vehicle, turn off the engine
and wait for the engine/transmission
assembly to fully cool down.
If the instrument cluster message
indicates that the transmission may
not re-engage after engine shutdown,
perform the following procedure
preferably at an Authorized Maserati
Dealer . In the event of a momentary problem,
the transmission can be reset to regain
all forward gears by performing the
following steps.
• Stop the vehicle.
• Shift the transmission into P (Park), if
possible.
• Turn the engine off.
• Wait approximately 30 seconds.
• Restart the engine.
• Shift the transmission into D (Drive)
and then into the desired gear
range. If the problem is no longer
detected, the transmission will return
to normal operation.
NOTE:
Even if the transmission can be reset,
we recommend that you visit an
Authorized Maserati Dealer at your
earliest possible convenience, which
has diagnostic equipment to
determine if the problem could recur.
Transmission Manual Release of P
(Park) Position
See chapter “Transmission Manual
Release of P (Park) Position” in section
“In an Emergency”.Driving
5
222
Page 239 of 384
• It is advisable to keep the "Auto
Apply" function always active (On)
so that the vehicle is properly
secured with electric parking brake.
Deactivating Automatic
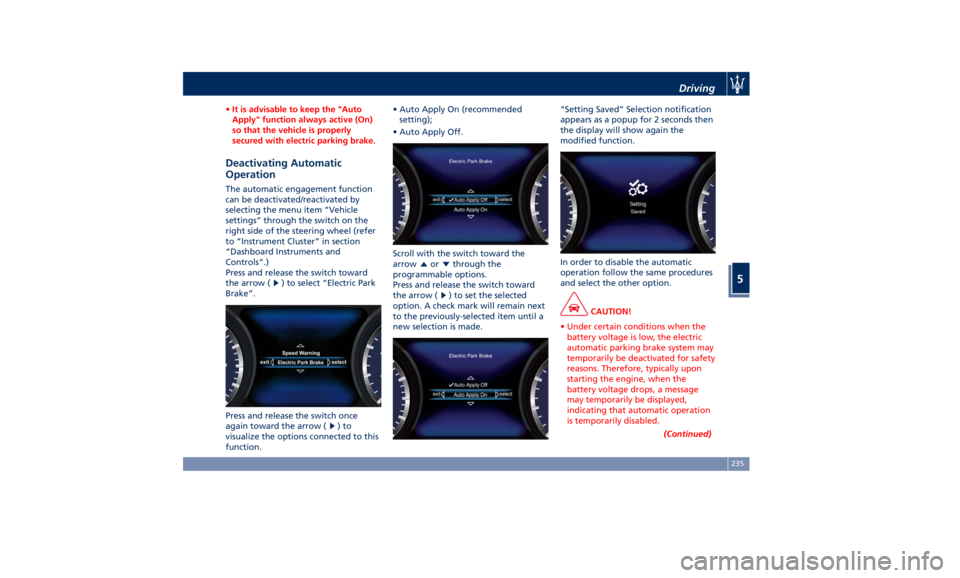
Operation The automatic engagement function
can be deactivated/reactivated by
selecting the menu item “Vehicle
settings” through the switch on the
right side of the steering wheel (refer
to “Instrument Cluster” in section
“Dashboard Instruments and
Controls”.)
Press and release the switch toward
the arrow (
) to select “Electric Park
Brake”.
Press and release the switch once
again toward the arrow ( )to
visualize the options connected to this
function. • Auto Apply On (recommended
setting);
• Auto Apply Off.
Scroll with the switch toward the
arrow
or through the
programmable options.
Press and release the switch toward
the arrow (
) to set the selected
option. A check mark will remain next
to the previously-selected item until a
new selection is made. “Setting Saved” Selection notification
appears as a popup for 2 seconds then
the display will show again the
modified function.
In order to disable the automatic
operation follow the same procedures
and select the other option.
CAUTION!
• Under certain conditions when the
battery voltage is low, the electric
automatic parking brake system may
temporarily be deactivated for safety
reasons. Therefore, typically upon
starting the engine, when the
battery voltage drops, a message
may temporarily be displayed,
indicating that automatic operation
is temporarily disabled.
(Continued)Driving
5
235
Page 243 of 384
deactivate the system see “Drive
Mode” in this section.
WARNING!
In SPORT mode the ESC control
thresholds are higher for maximum
performance on dry road surface. To
ensure maximum security of the ESC,
it is recommended not to activate
SPORT mode on surfaces with
medium- and low-grip (e.g., wet,
snow, dirt, etc..) with ESC system
active (
(ESC OFF) button not
pressed).
NOTE:
• When in “ESC off” mode, the TCS
functionality of ESC is deactivated
(except for the limited slip feature
described in the TCS paragraph of
this chapter). All other stability
features of ESC function regularly.
• To improve the vehicle's traction
when driving with snow chains, or
when starting off in deep snow,
sand, or gravel, it may be desirable
to switch to the “ESC off” mode by
pressing the
(ESC OFF) button and
remain in this operational mode no
longer than needed. Once the
situation requiring “ESC off” mode is overcome, turn the ESC on again by
pressing the
(ESC OFF) button.
This may also be performed while in
motion.
Anti-Lock Braking System (ABS)
and Electronic Brake-force
Distribution (EBD) The Anti-Lock Braking System (ABS)
provides increased vehicle stability and
brake performance under most
braking conditions. The system
automatically “pumps” the brakes
during severe braking to prevent
wheel lock-up.
The Electronic Brake-force Distribution
(EBD) prevents the rear wheels from
over-braking and provides greater
control of available braking forces
applied to the rear axle.
WARNING!
The ABS helps prevent the wheels
from locking, but it does not increase
the physical grip limits between the
tires and the road. Therefore, always
keep a safe distance from the vehicle
in front of yours and reduce your
speed when entering a curve. NOTE:
• When
the vehicle's speed is higher
than 7 mph (11 km/h), you may hear
a slight clicking sound as well as
other motor noises. The system is
performing a self-check cycle to
ensure that the ABS is working
properly.
• This self-check occurs each time the
vehicle is started and accelerated
past 7 mph (11 km/h).
ABS is activated during braking under
certain road or stopping conditions.
ABS-inducing conditions can include
ice, snow, gravel, bumps, railroad
tracks, loose debris.
You may also experience the following
when the brake system goes into Anti-
Lock:
• The ABS motor running (it may
continue to run for a short time
after the vehicle stops).
• The clicking sound of solenoid
valves.
• Brake pedal pulsations.
• A slight drop or fall away of the
brake pedal at the end of the stop.
These are all normal characteristics
of ABS functioning.Driving
5
239