fuel consumption MASERATI LEVANTE 2019 Owners Manual
[x] Cancel search | Manufacturer: MASERATI, Model Year: 2019, Model line: LEVANTE, Model: MASERATI LEVANTE 2019Pages: 436, PDF Size: 15.24 MB
Page 122 of 436
NOTE:
• Each time the adaptive headlight
system is turned on, the headlights
will perform a self-regulation cycle.
• All AFS features are available only if
the vehicle is moving forward.
• “Adaptive Front Light” function can
be turned on or off using the MTC+
System, refer to “MTC+ Settings” in
section “Dashboard Instrument and
Controls” for further information. “Full-LED” Headlight with AFS
(optional) These headlights combines the
“Full-LED” technology to the AFS
(Advanced Frontlighting System)
adaptive features, using a
forward-facing camera located on the
windshield behind the internal
rear-view mirror.
“Full-LED” Technology
This technology allows having
headlights with a simpler construction
and a more compact size compared to
those equipped with traditional or
Xenon light bulbs.
Other advantages are:
• a clearer light beam, with a cool
white tone that allows a better
perception of the contrasts thus
making the night vision more
efficient and less tiring;
• a longer duration equivalent at least
to that of the vehicle;
• a reduced current consumption. These features positively affect some
vehicle management economy aspects
by eliminating/reducing the light bulb
replacements and the fuel
consumption.
AFS Features
The system is able to process signals of
onboard systems and subsequently
start up five strategic steps in the
following situations:
• “motorway beam”;
• “country beam”;
• “town beam”;
• “adverse weather beam”;
• “tourist beam” (for example in
countries with circulation on the
opposite side). In this case this
function must be activated via the
menu of MTC+ (refer to “MTC+
Settings” in section “Dashboard
Instruments and Controls”).
The advantages offered by the AFS
system are perceived especially in case
of bad weather, fog and/or insufficient
road indications providing broader
illumination of the side zones, which
are normally left in the dark, and for
motorway driving.
This surely increases driving safety as it
offers less eye stress and increased
orientation for the driver and betterLighting Light flux
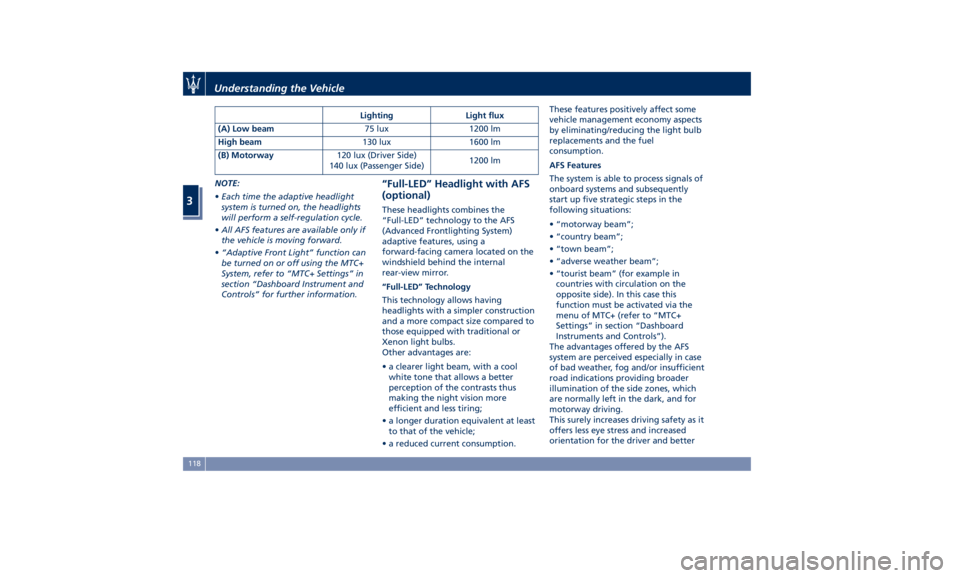
(A) Low beam 75 lux 1200 lm
High beam 130 lux 1600 lm
(B) Motorway 120 lux (Driver Side)
140 lux (Passenger Side) 1200 lm
Understanding the Vehicle
3
118
Page 165 of 436
Warning and Indicator Lights
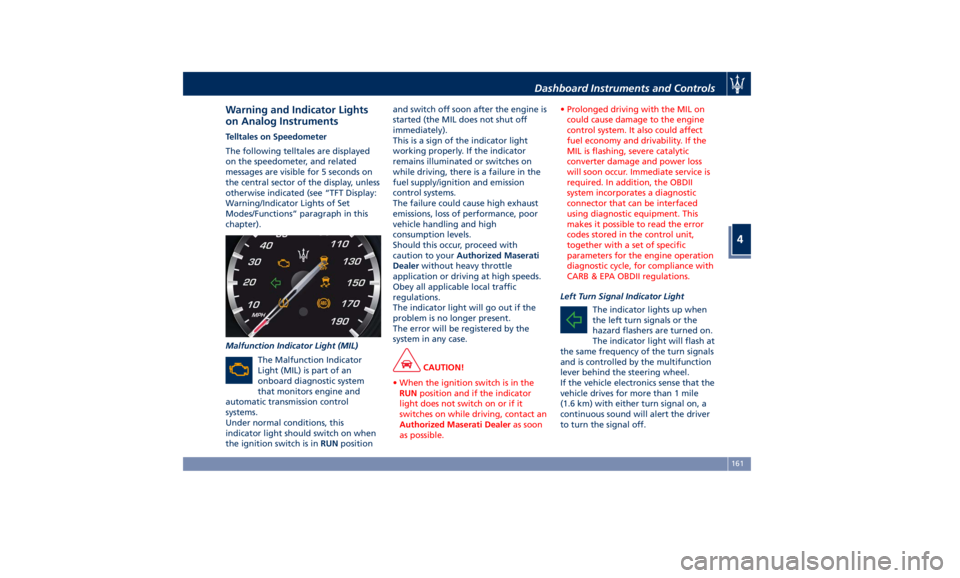
on Analog Instruments Telltales on Speedometer
The following telltales are displayed
on the speedometer, and related
messages are visible for 5 seconds on
the central sector of the display, unless
otherwise indicated (see “TFT Display:
Warning/Indicator Lights of Set
Modes/Functions” paragraph in this
chapter).
Malfunction Indicator Light (MIL)
The Malfunction Indicator
Light (MIL) is part of an
onboard diagnostic system
that monitors engine and
automatic transmission control
systems.
Under normal conditions, this
indicator light should switch on when
the ignition switch is in RUN position and switch off soon after the engine is
started (the MIL does not shut off
immediately).
This is a sign of the indicator light
working properly. If the indicator
remains illuminated or switches on
while driving, there is a failure in the
fuel supply/ignition and emission
control systems.
The failure could cause high exhaust
emissions, loss of performance, poor
vehicle handling and high
consumption levels.
Should this occur, proceed with
caution to your Authorized Maserati
Dealer without heavy throttle
application or driving at high speeds.
Obey all applicable local traffic
regulations.
The indicator light will go out if the
problem is no longer present.
The error will be registered by the
system in any case.
CAUTION!
• When the ignition switch is in the
RUN position and if the indicator
light does not switch on or if it
switches on while driving, contact an
Authorized Maserati Dealer as soon
as possible. • Prolonged driving with the MIL on
could cause damage to the engine
control system. It also could affect
fuel economy and drivability. If the
MIL is flashing, severe catalytic
converter damage and power loss
will soon occur. Immediate service is
required. In addition, the OBDII
system incorporates a diagnostic
connector that can be interfaced
using diagnostic equipment. This
makes it possible to read the error
codes stored in the control unit,
together with a set of specific
parameters for the engine operation
diagnostic cycle, for compliance with
CARB & EPA OBDII regulations.
Left Turn Signal Indicator Light
The
indicator lights up when
the left turn signals or the
hazard flashers are turned on.
The indicator light will flash at
the same frequency of the turn signals
and is controlled by the multifunction
lever behind the steering wheel.
If the vehicle electronics sense that the
vehicle drives for more than 1 mile
(1.6 km) with either turn signal on, a
continuous sound will alert the driver
to turn the signal off.Dashboard Instruments and Controls
4
161
Page 176 of 436
Press and release the button to
return to the main menu.
6. TRIP
Press and release the switch in the
or arrow directions until this
menu item is displayed.
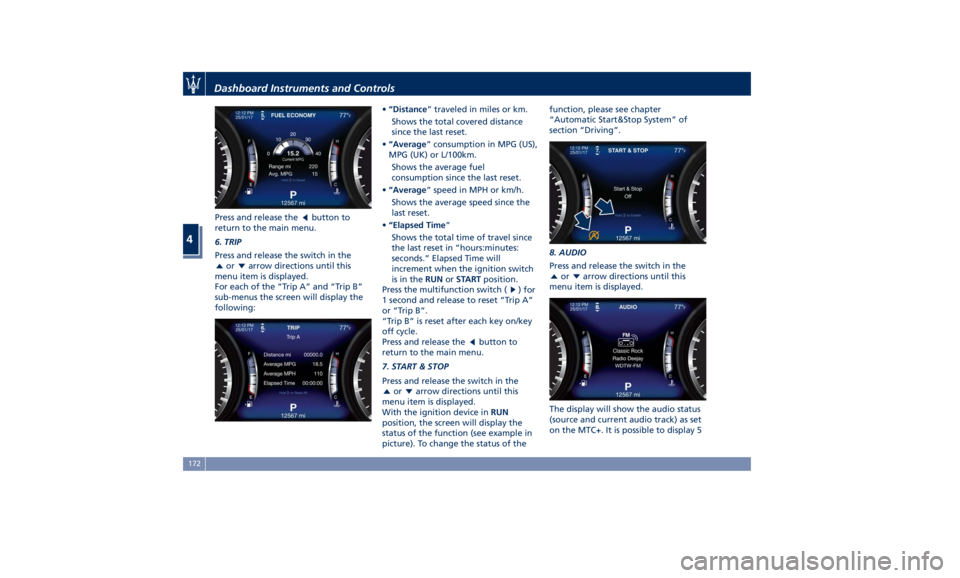
For each of the “Trip A” and “Trip B”
sub-menus the screen will display the
following: • “Distance ” traveled in miles or km.
Shows the total covered distance
since the last reset.
• “Average ” consumption in MPG (US),
MPG (UK) or L/100km.
Shows the average fuel
consumption since the last reset.
• “Average ” speed in MPH or km/h.
Shows the average speed since the
last reset.
• “Elapsed Time ”
Shows the total time of travel since
the last reset in “hours:minutes:
seconds.” Elapsed Time will
increment when the ignition switch
is in the RUN or START position.
Press the multifunction switch (
) for
1 second and release to reset “Trip A”
or “Trip B”.
“Trip B” is reset after each key on/key
off cycle.
Press and release the
button to
return to the main menu.
7. START & STOP
Press and release the switch in the
or arrow directions until this
menu item is displayed.
With the ignition device in RUN
position, the screen will display the
status of the function (see example in
picture). To change the status of the function, please see chapter
“Automatic Start&Stop System” of
section “Driving”.
8. AUDIO
Press and release the switch in the
or arrow directions until this
menu item is displayed.
The display will show the audio status
(source and current audio track) as set
on the MTC+. It is possible to display 5Dashboard Instruments and Controls
4
172
Page 189 of 436
Gear Shift Indicator Light
This indicator lights up to
indicate gear shift change in
order to optimize fuel
consumption.
See “Drive Mode” in section
“Driving” for further
information.
Performance "Launch Control"
Indicator (TROFEO version only)
This indicator lights up when
the car is launched in the
"Launch Control"
performance start procedure.
See chapter "Drive Mode" in section
"Driving" for "Launch Control"
procedure.
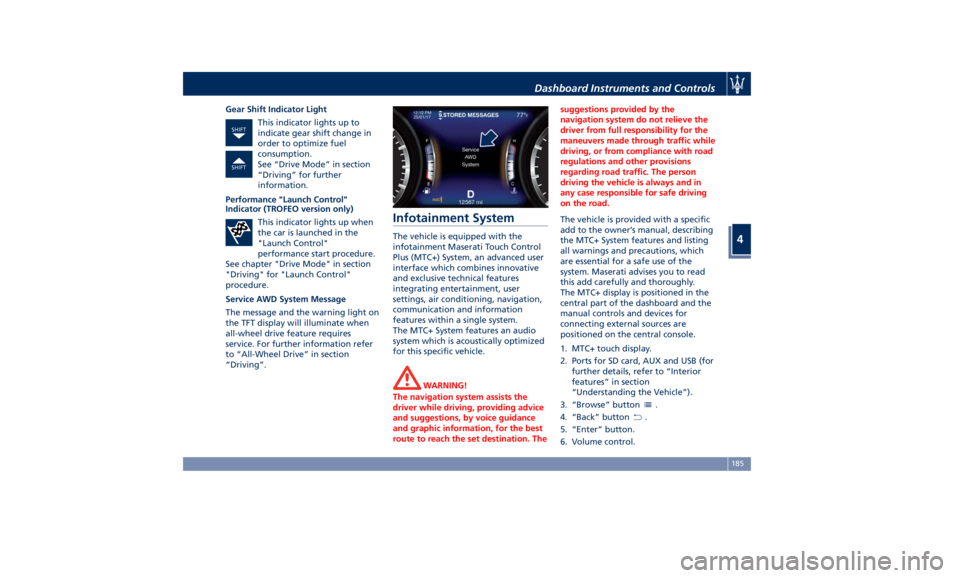
Service AWD System Message
The message and the warning light on
the TFT display will illuminate when
all-wheel drive feature requires
service. For further information refer
to “All-Wheel Drive” in section
“Driving”. Infotainment System The vehicle is equipped with the
infotainment Maserati Touch Control
Plus (MTC+) System, an advanced user
interface which combines innovative
and exclusive technical features
integrating entertainment, user
settings, air conditioning, navigation,
communication and information
features within a single system.
The MTC+ System features an audio
system which is acoustically optimized
for this specific vehicle.
WARNING!
The navigation system assists the
driver while driving, providing advice
and suggestions, by voice guidance
and graphic information, for the best
route to reach the set destination. The suggestions provided by the
navigation system do not relieve the
driver from full responsibility for the
maneuvers made through traffic while
driving, or from compliance with road
regulations and other provisions
regarding road traffic. The person
driving the vehicle is always and in
any case responsible for safe driving
on the road.
The vehicle is provided with a specific
add
to the owner’
s manual, describing
the MTC+ System features and listing
all warnings and precautions, which
are essential for a safe use of the
system. Maserati advises you to read
this add carefully and thoroughly.
The MTC+ display is positioned in the
central part of the dashboard and the
manual controls and devices for
connecting external sources are
positioned on the central console.
1. MTC+ touch display.
2. Ports for SD card, AUX and USB (for
further details, refer to “Interior
features” in section
“Understanding the Vehicle”).
3. “Browse” button
.
4. “Back” button
.
5. “Enter” button.
6. Volume control.Dashboard Instruments and Controls
4
185
Page 232 of 436
Normal Starting of the
Engine WARNING!
It is dangerous to run the engine in an
enclosed area. The engine consumes
oxygen and discharges carbon
dioxide, carbon monoxide and other
toxic gases in the atmosphere.
WARNING!
California Proposition 65
Operating, servicing and maintaining
a passenger vehicle or off-road vehicle
can expose you to chemicals including
such as, engine exhaust, carbon
monoxide, phthalates and lead, that
which are known to the State of
California to cause cancer and birth
defects or other reproductive harm. To
minimize exposure, avoid breathing
exhaust, do not idle the engine except
as necessary, service your vehicle in a
well-ventilated area and wear gloves
or wash your hands frequently when
servicing your vehicle. For more
information go to: www.P65Warnings.ca.gov/passenger-
vehicle
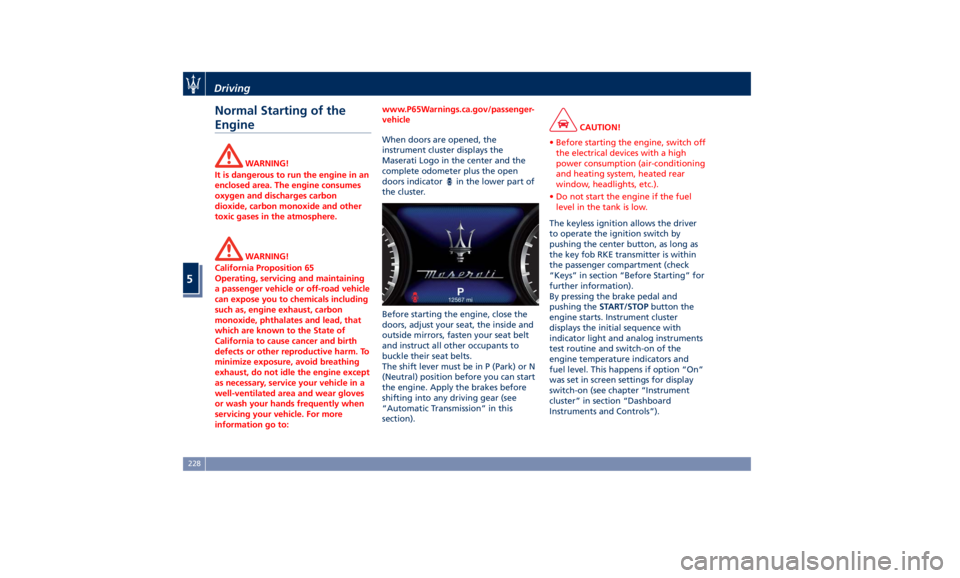
When doors are opened, the
instrument
cluster displays the
Maserati
Logo in the center and the
complete odometer plus the open
doors indicator
in the lower part of
the cluster.
Before starting the engine, close the
doors, adjust your seat, the inside and
outside mirrors, fasten your seat belt
and instruct all other occupants to
buckle their seat belts.
The shift lever must be in P (Park) or N
(Neutral) position before you can start
the engine. Apply the brakes before
shifting into any driving gear (see
“Automatic Transmission” in this
section). CAUTION!
• Before starting the engine, switch off
the electrical devices with a high
power consumption (air-conditioning
and heating system, heated rear
window, headlights, etc.).
• Do not start the engine if the fuel
level in the tank is low.
The keyless ignition allows the driver
to
operate the ignition
switch by
pushing the center button, as long as
the key fob RKE transmitter is within
the passenger compartment (check
“Keys” in section “Before Starting” for
further information).
By pressing the brake pedal and
pushing the START/STOP button the
engine starts. Instrument cluster
displays the initial sequence with
indicator light and analog instruments
test routine and switch-on of the
engine temperature indicators and
fuel level. This happens if option “On”
was set in screen settings for display
switch-on (see chapter “Instrument
cluster” in section “Dashboard
Instruments and Controls”).Driving
5
228
Page 234 of 436
Starting with a Cold Engine
Start-off slowly, avoiding sudden
acceleration and rev the engine up at
low medium speeds. High-
performance driving should be
avoided until the engine temperature
reaches 149-158°F (65-70°C).
Engine Turn-Off • With the shift lever in P (Park), D
(Drive) or R (Reverse) positions (see
“Automatic Transmission” in this
section) and vehicle standstill, press
and release the START/STOP button
to switch off the engine. A burst on
the accelerator pedal before turning
off the engine has no purpose and
increases fuel consumption.
• If the shift lever is in N (Neutral) and
the START/STOP button is pressed
once, the instrument cluster will
display a “Vehicle Not in Park”
message and the engine will remain
running.
WARNING!
Never leave a vehicle out of the P
(Park) position, as it could move. NOTE:
If
the ignition switch is left in the ACC
or RUN (engine not running) position
and the transmission is in P (Park), the
system will automatically time out
after 30 minutes of inactivity and the
ignition will switch to OFF position.
Engine Turn Off when in Automatic
Start&Stop
When the engine has been turned off
by the Start&Stop system, press and
release the START/STOP button. The
ignition switch will return to the OFF
position and the vehicle is off.
“Panic Stop” Strategy In panic conditions, if driver stops
engine in any non-standard manner
while driving at a speed over 5 mph
(8 km/h), the “Panic Stop” strategy can
manage the situation by checking
gearchange condition upon engine
cutting, driver’s action on brakes, road
condition (flat or slope) so as to set
gearchange to the most suitable
condition.Automatic Start&Stop
System The Maserati Start&Stop system allows
the engine to automatically switch off
when the vehicle stops and to restart
when the driver intends to drive. This
feature helps reduce fuel
consumption. During the “Stop
(AutoStop)” phase the ignition is still
on and all security features are
available.
In order for the Start&Stop to activate,
the vehicle must be stationary and the
brake pedal adequately pressed.
NOTE:
If the brake pedal is not sufficiently
pressed the Start&Stop may not
function even if the vehicle is stopped.
When the Start&Stop switches off the
engine, the related light
illuminates on the instrument
cluster.
As soon as the brake pedal is released,
the engine turns on.
While the vehicle is stopped, the
transmission can be placed in P (Park)
pressing the “P” button on the shift
lever.
In this case it is possible to release the
brake pedal and the vehicle willDriving
5
230
Page 245 of 436
automatic operation. The
transmission will also upshift
automatically once maximum engine
speed is reached.
• If in SPORT mode, the transmission
will remain in the selected gear even
when maximum engine speed is
reached. The transmission will
upshift only if enabled by the driver.
Manual upshift or downshift will be
maintained as long as SPORT mode is
selected, even by full stroke pedal
press.
• If in “M +/-“ or in SPORT mode, the
transmission will automatically
downshift as the vehicle slows to
halt (to prevent engine lugging) and
the current gear will display on the
instrument cluster. Shifting the shift
lever backward “+” or moving the
right shift paddle “+” towards the
steering wheel when stationary, will
cause the vehicle to start in second
gear. If the vehicle speed is too low,
the system will ignore further
upshifts. Avoid using speed control
when the M +/- (Manual) mode is
engaged.
When the car stops in M +/- (Manual)
mode, the transmission automatically
moves the shift lever and inserts P
(Park). If you enter the I.C.E. drive mode
when the gearshift is in “M +/-”
position, the system activates the
automatic return of the shift lever in D
(Drive) mode.
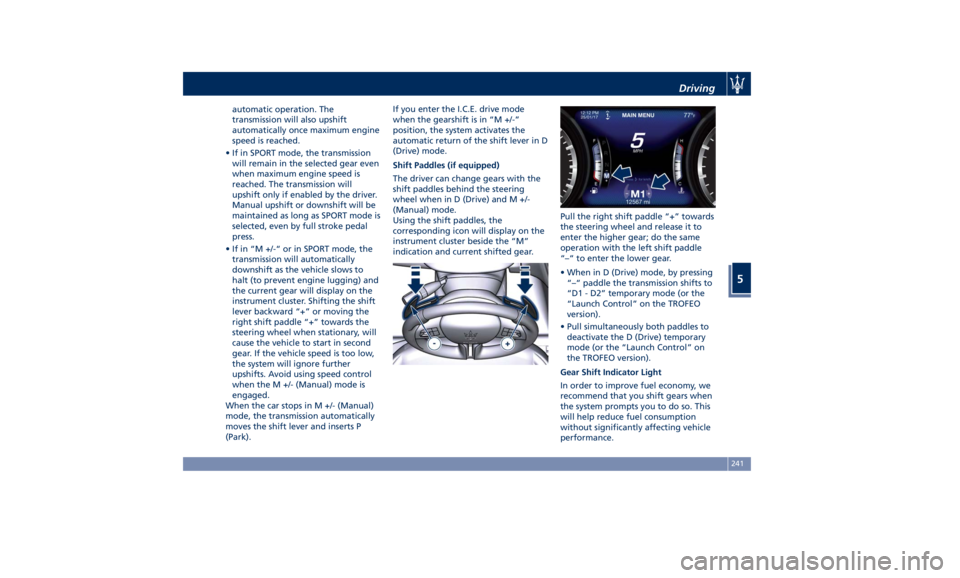
Shift Paddles (if equipped)
The driver can change gears with the
shift paddles behind the steering
wheel when in D (Drive) and M +/-
(Manual) mode.
Using the shift paddles, the
corresponding icon will display on the
instrument cluster beside the “M”
indication and current shifted gear. Pull the right shift paddle “+” towards
the steering wheel and release it to
enter the higher gear; do the same
operation with the left shift paddle
“–“ to enter the lower gear.
• When in D (Drive) mode, by pressing
“–“ paddle the transmission shifts to
“D1 - D2” temporary mode (or the
“Launch Control” on the TROFEO
version).
• Pull simultaneously both paddles to
deactivate the D (Drive) temporary
mode (or the “Launch Control” on
the TROFEO version).
Gear Shift Indicator Light
In order to improve fuel economy, we
recommend that you shift gears when
the system prompts you to do so. This
will help reduce fuel consumption
without significantly affecting vehicle
performance.Driving
5
241
Page 248 of 436
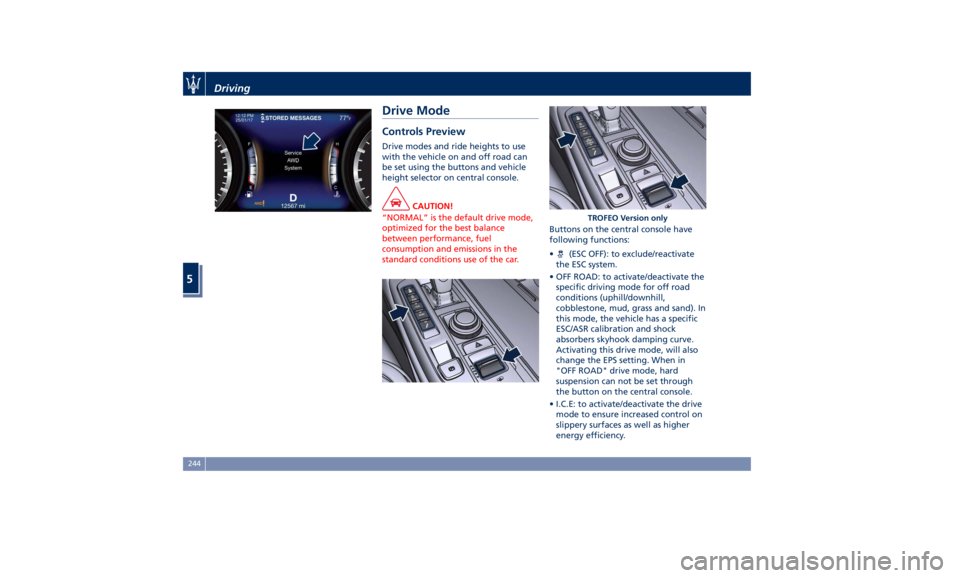
Drive Mode Controls Preview Drive modes and ride heights to use
with the vehicle on and off road can
be set using the buttons and vehicle
height selector on central console.
CAUTION!
“NORMAL” is the default drive mode,
optimized for the best balance
between performance, fuel
consumption and emissions in the
standard conditions use of the car. Buttons on the central console have
following
functions:
• (ESC OFF): to exclude/reactivate
the ESC system.
• OFF ROAD: to activate/deactivate the
specific driving mode for off road
conditions (uphill/downhill,
cobblestone, mud, grass and sand). In
this mode, the vehicle has a specific
ESC/ASR calibration and shock
absorbers skyhook damping curve.
Activating this drive mode, will also
change the EPS setting. When in
"OFF ROAD" drive mode, hard
suspension can not be set through
the button on the central console.
• I.C.E: to activate/deactivate the drive
mode to ensure increased control on
slippery surfaces as well as higher
energy efficiency. TROFEO Version onlyDriving
5
244
Page 250 of 436
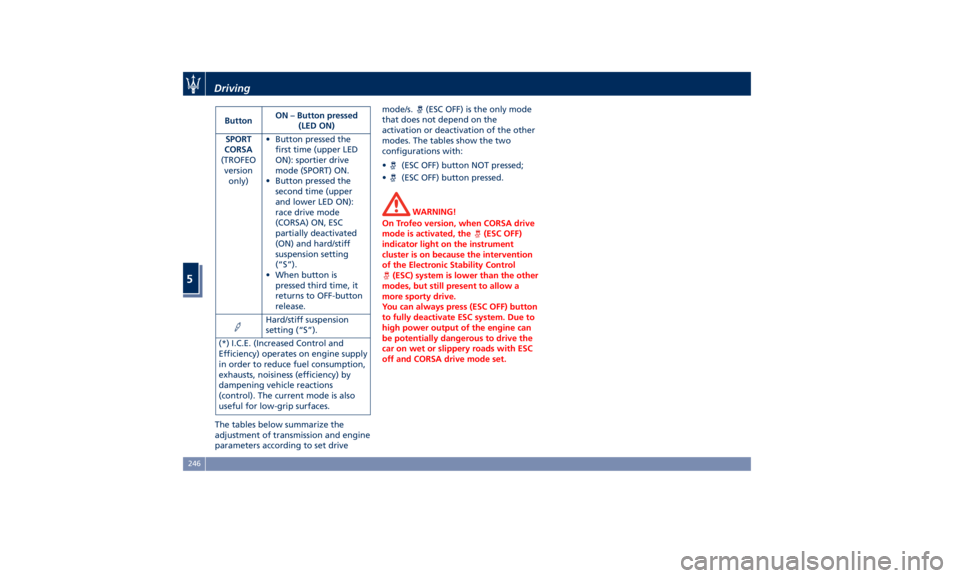
Button ON – Button pressed
(LED ON)
SPORT
CORSA
(TROFEO
version
only) • Button pressed the
first time (upper LED
ON): sportier drive
mode (SPORT) ON.
• Button pressed the
second time (upper
and lower LED ON):
race drive mode
(CORSA) ON, ESC
partially deactivated
(ON) and hard/stiff
suspension setting
(“S”).
• When button is
pressed third time, it
returns to OFF-button
release.
Hard/stiff suspension
setting (“S”).
(*) I.C.E. (Increased Control and
Efficiency) operates on engine supply
in order to reduce fuel consumption,
exhausts, noisiness (efficiency) by
dampening vehicle reactions
(control). The current mode is also
useful for low-grip surfaces.
The tables below summarize the
adjustment of transmission and engine
parameters according to set drive mode/s.
(ESC OFF) is the only mode
that does not depend on the
activation or deactivation of the other
modes. The tables show the two
configurations with:
•
(ESC OFF) button NOT pressed;
•
(ESC OFF) button pressed.
WARNING!
On Trofeo version, when CORSA drive
mode is activated, the
(ESC OFF)
indicator light on the instrument
cluster is on because the intervention
of the Electronic Stability Control
(ESC) system is lower than the other
modes, but still present to allow a
more sporty drive.
You can always press (ESC OFF) button
to fully deactivate ESC system. Due to
high power output of the engine can
be potentially dangerous to drive the
car on wet or slippery roads with ESC
off and CORSA drive mode set.Driving
5
246
Page 330 of 436
Three primary driving aspects are
affected by improper tire pressure:
Safety
WARNING!
• Improperly inflated tires can be
dangerous.
• Under-inflation increases tire flexing
and can result in tire overheating.
• Over-inflation reduces a tire's ability
to cushion shock. Objects on the
road and potholes can cause damage
that results in tire failure.
• Over-inflated or under-inflated tires
can affect vehicle handling and can
fail suddenly, resulting in loss of
vehicle control.
• Unequal tire pressures can cause
steering problems.
• Unequal tire pressures from one side
of the vehicle to the other can cause
the vehicle to drift to the right or
left.
• Always drive with each tire inflated
to the recommended cold tire
inflation pressure.
Economy
Improper
inflation pressures may cause
uneven wear patterns to develop across the tire tread. These abnormal
wear patterns will reduce tread life
resulting in a need for earlier tire
replacement. Under-inflation also
increases tire rolling resistance
resulting in higher fuel consumption.
Ride comfort and vehicle stability
Proper tire inflation contributes to a
comfortable ride. Over-inflation
produces a jarring and uncomfortable
ride.
Tire Pressure Checkup The proper cold tire inflation pressure
is indicated on the driver's side rear
door pillar and on the table “Tire
Inflation Pressure” in section “Features
and Specifications”.
Inflation pressure specified on the
table always refers to “cold tire
inflation pressure”. Cold tire inflation
pressure is defined as the tire pressure
after the vehicle has not been driven
for at least three hours, or driven less
than 1 mi (1.6 km) after a three hour
period.
Check tire pressures more often in case
of significant outside temperature
changes, as tire pressure varies
according to temperature changes.
The pressure should be checked and if
necessary adjusted; tire wear and overall conditions should also be
checked monthly. Tire pressures
change by approximately 1 PSI (0.07
bar) per 12°F (7°C) of air temperature
change. Keep this in mind when
checking tire pressure inside a garage,
especially in winter.
Example: If garage temperature = 68°F
(20°C) and the outside temperature =
32°F (0°C) then the cold tire inflation
pressure should be increased by 3 PSI
(0.21 bar) for every 12°F (7°C) for this
outside temperature condition.
Tire pressure may increase from 2 to 6
PSI (0.13 to 0.4 bar) during operation.
DO NOT reduce this normal pressure
build-up or your tire pressure will be
too low. After inspecting or adjusting
the tire pressure, always reinstall the
valve stem cap. This will prevent
moisture and dirt from entering the
valve stem, which could damage the
valve stem and the TPMS sensor
connected to it.
Tread Wear Indicators Tread wear indicators are in the
original equipment tires to help you
determine when your tires should be
replaced.
These indicators are molded into the
bottom of the tread grooves.Driving
5
326