interior lights MASERATI LEVANTE 2019 Owners Manual
[x] Cancel search | Manufacturer: MASERATI, Model Year: 2019, Model line: LEVANTE, Model: MASERATI LEVANTE 2019Pages: 436, PDF Size: 15.24 MB
Page 31 of 436
Radio Frequency RKE
Transmitter - Regulatory
Information The “Regulatory Information” for all
the radio frequency and radar devices
can be consulted by accessing the
"Services" section on the website
www.maserati.com.
Replacement Key fobs NOTE:
Only key fobs that are updated with
the vehicle electronics can be used to
start and operate the vehicle.
WARNING!
• Always remove the key fobs from
the vehicle and lock all doors when
leaving the vehicle unattended.
• Always remember to cycle the
ignition switch to OFF.
Duplication of key fobs may be
performed
by an Authorized Maserati
Dealer only .
This procedure consists of
programming a key fob that has never
been programmed to the vehicle’s
electronics. NOTE:
• When having the Sentry Key ®
Immobilizer System serviced, bring
all key fobs provided with the
vehicle with you to the Authorized
Maserati Dealer .
• When selling the vehicle, it is
necessary to provide the new owner
with all key fobs.
Vehicle Security Alarm The vehicle security alarm monitors
the vehicle doors and liftgate for
unauthorized entry and the
START/STOP button for unauthorized
operations.
The system includes a dual function
anti-intrusion sensor and vehicle
anti-lift sensor. The anti-intrusion
sensor monitors the vehicle interior
for motion.
The vehicle anti-lift sensor monitors
the vehicle for any lifting or tilting
actions (tow away, tire removal, ferry
transport, etc). A siren with battery
backup which senses interruptions of
power and communications is also
included.
While the vehicle security alarm is
enabled, interior door locks switches,
power liftgate and fuel filler door
release are disabled. If something
triggers the alarm, the vehicle security
alarm will provide the following
audible and visible signals:
intermittent buzzer, position lights
and/or turn signals and the vehicle
security light on the dashboard will
flash.
This light will fast flash for
approximately 15 seconds, when the
vehicle security alarm is being armed,Before Starting
2
27
Page 33 of 436
Liftgate Operation" in this section,
and repeat the arming operation, to
be able to arm the alarm system.
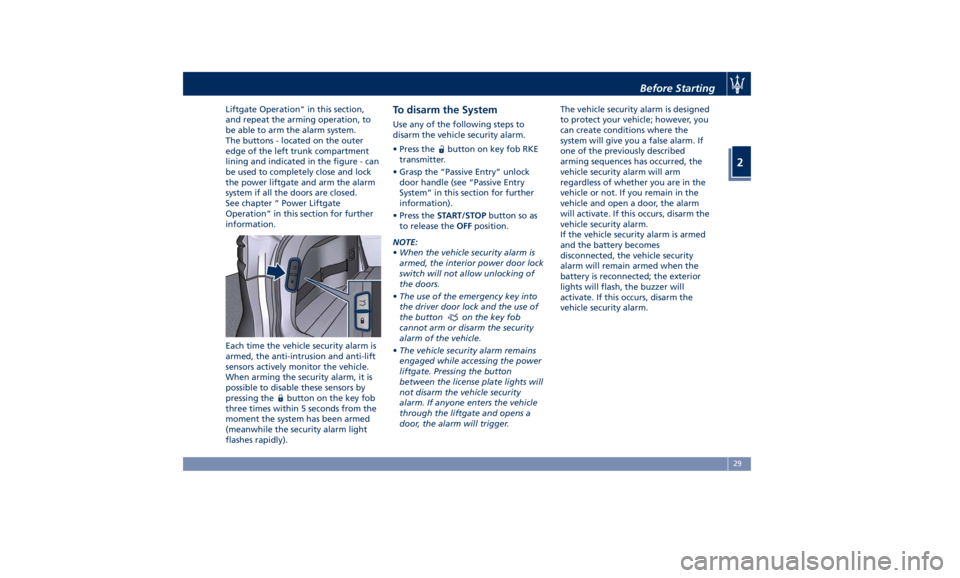
The buttons - located on the outer
edge of the left trunk compartment
lining and indicated in the figure - can
be used to completely close and lock
the power liftgate and arm the alarm
system if all the doors are closed.
See chapter “ Power Liftgate
Operation” in this section for further
information.
Each time the vehicle security alarm is
armed, the anti-intrusion and anti-lift
sensors actively monitor the vehicle.
When arming the security alarm, it is
possible to disable these sensors by
pressing the
button on the key fob
three times within 5 seconds from the
moment the system has been armed
(meanwhile the security alarm light
flashes rapidly). To disarm the System Use any of the following steps to
disarm the vehicle security alarm.
• Press the button on key fob RKE
transmitter.
• Grasp the “Passive Entry” unlock
door handle (see “Passive Entry
System” in this section for further
information).
• Press the START/STOP button so as
to release the OFF position.
NOTE:
• When the vehicle security alarm is
armed, the interior power door lock
switch will not allow unlocking of
the doors.
• The use of the emergency key into
the driver door lock and the use of
the button
on the key fob
cannot arm or disarm the security
alarm of the vehicle.
• The vehicle security alarm remains
engaged while accessing the power
liftgate. Pressing the button
between the license plate lights will
not disarm the vehicle security
alarm. If anyone enters the vehicle
through the liftgate and opens a
door, the alarm will trigger. The vehicle security alarm is designed
to protect your vehicle; however, you
can create conditions where the
system will give you a false alarm. If
one of the previously described
arming sequences has occurred, the
vehicle security alarm will arm
regardless of whether you are in the
vehicle or not. If you remain in the
vehicle and open a door, the alarm
will activate. If this occurs, disarm the
vehicle security alarm.
If the vehicle security alarm is armed
and the battery becomes
disconnected, the vehicle security
alarm will remain armed when the
battery is reconnected; the exterior
lights will flash, the buzzer will
activate. If this occurs, disarm the
vehicle security alarm.Before Starting
2
29
Page 37 of 436
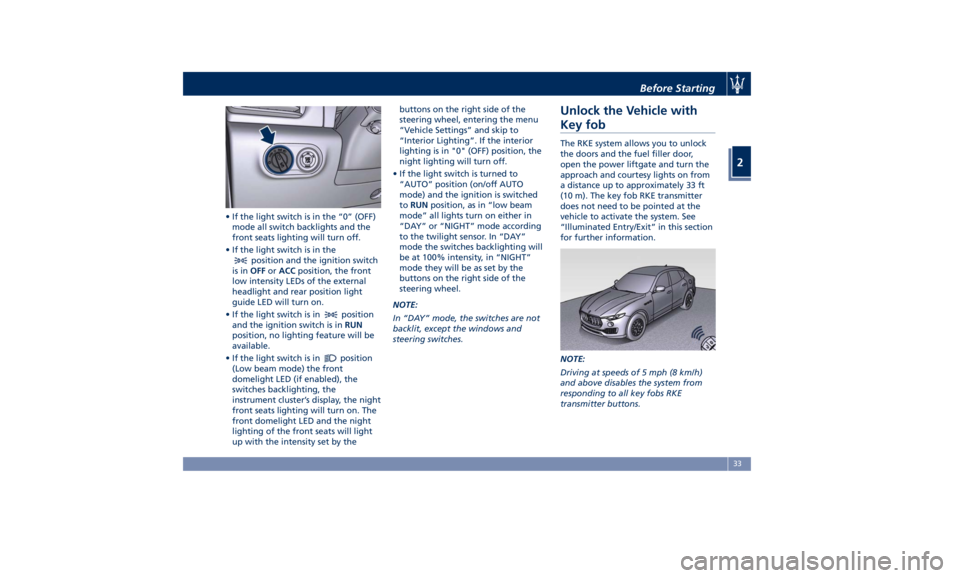
• If the light switch is in the “0” (OFF)
mode all switch backlights and the
front seats lighting will turn off.
• If the light switch is in the
position and the ignition switch
is in OFF or ACC position, the front
low intensity LEDs of the external
headlight and rear position light
guide LED will turn on.
• If the light switch is in
position
and the ignition switch is in RUN
position, no lighting feature will be
available.
• If the light switch is in
position
(Low beam mode) the front
domelight LED (if enabled), the
switches backlighting, the
instrument cluster’s display, the night
front seats lighting will turn on. The
front domelight LED and the night
lighting of the front seats will light
up with the intensity set by the buttons on the right side of the
steering wheel, entering the menu
“Vehicle Settings” and skip to
“Interior Lighting”. If the interior
lighting is in "0" (OFF) position, the
night lighting will turn off.
• If the light switch is turned to
“AUTO” position (on/off AUTO
mode) and the ignition is switched
to RUN position, as in “low beam
mode” all lights turn on either in
“DAY” or “NIGHT” mode according
to the twilight sensor. In “DAY”
mode the switches backlighting will
be at 100% intensity, in “NIGHT”
mode they will be as set by the
buttons on the right side of the
steering wheel.
NOTE:
In “DAY” mode, the switches are not
backlit, except the windows and
steering switches.Unlock the Vehicle with
Key fob The RKE system allows you to unlock
the doors and the fuel filler door,
open the power liftgate and turn the
approach and courtesy lights on from
a distance up to approximately 33 ft
(10 m). The key fob RKE transmitter
does not need to be pointed at the
vehicle to activate the system. See
“Illuminated Entry/Exit” in this section
for further information.
NOTE:
Driving at speeds of 5 mph (8 km/h)
and above disables the system from
responding to all key fobs RKE
transmitter buttons.Before Starting
2
33
Page 75 of 436
inflates. This especially applies to
children.
Supplemental Side Air Bag Inflatable
Curtain (SABIC) Inflator Units
During collisions where the impact is
confined to a particular area of the
side of the vehicle, the ORC may
deploy the SABIC air bags, depending
on the severity and type of collision. In
these events, the ORC will deploy the
SABIC only on the impact side of the
vehicle. A quantity of non-toxic gas is
generated to inflate the side curtain
air bag.
The inflating side curtain air bag
pushes the head/s of the occupant/s
seating in the outside seats from the
edge of the headliner out of the way
and covers the window. The air bag
inflates with enough force to possibly
injure you if you are not belted and
seated properly, or if items are
positioned in the area where the side
curtain air bag inflates. This especially
applies to children.
The SABICs may also help reduce the
risk of partial or complete ejection of
vehicle occupants through side
windows in certain rollover events
(because equipped with rollover
sensing). Front and Side Impact Sensors
In front and side impacts, impact
sensors can aid the ORC in
determining appropriate response to
impact events.
Enhanced Accident Response System
In the event of an impact causing air
bag deployment, if the
communication network and the
power remains intact, depending on
the nature of the accident, the ORC
will determine whether the enhanced
accident response system will have to
perform the following functions:
• cut off fuel to the engine;
• turn hazard lights and interior lights
on as long as the battery has power
or until the ignition switch is turned
off;
• unlock the doors automatically;
• disconnect the battery with a
pyrotechnic charge.
Air Bag Deployment Result
The advanced front air bags are
designed to deflate immediately after
deployment.
If you do have a collision which
deploys the air bags, any or all of the
following may occur: • The nylon air bag material may
sometimes cause abrasions and/or
skin reddening to the driver and
front passenger as the air bags
deploy and unfold.
• As the air bags deflate, you may see
some smoke-like particles. The
particles are a normal by-product of
the process that generates the
non-toxic gas used for air bag
inflation. These airborne particles
may irritate the skin, eyes, nose, or
throat. If these particles settle on
your clothing, follow the garment
manufacturer's instructions for
cleaning. Do not drive your vehicle
after an air bag has deployed. If you
are involved in another collision, the
air bags will not be in place to
protect you.
ENVIRONMENTAL!
Air bag inflation releases a small
amount of powder. This powder is not
harmful to the environment.
WARNING!
California Proposition 65
Operating, servicing and maintaining
(Continued)Before Starting
2
71
Page 97 of 436
3 – Understanding the Vehicle Interior Components ..................................... 94
Front Power Seats ....................................... 97
Driver Memory Seat ..................................... 101
Rear Seats ............................................ 103
Head Restraints ........................................ 105
Steering Wheel Adjustment ............................... 108
Adjustable Pedals (if equipped) ............................ 110
Rearview Mirrors ....................................... 110
Lights ................................................ 113
Wipers and Washers .................................... 129
Interior Features ....................................... 133
Cargo Area ........................................... 139
Front to Back Roof Rails (optional) .......................... 147
Power Sunroof with Sunshade (optional) ..................... 148
HomeLink (optional) .................................... 150
Air Conditioning Distribution ............................. 154
93
Page 129 of 436
By pulling the lever backward (toward
the steering wheel) you switch off the
high beams and switch on the low
beams.
You can signal another vehicle with
your headlights by lightly pulling the
multifunction lever toward you. This
will turn on the high beams headlights
until the lever is released.
Flashing occurs also with lights off
(lights switch in position “0”) if the
ignition switch is RUN position. CAUTION!
The high beams can only be switched
on manually by pushing the
multifunction lever forward.
WARNING!
If the high beams are activated, they
will turn on automatically every time
the low beams are switched on either
manually or automatically. We
recommend therefore that you switch
them off when they are no longer
necessary and every time the twilight
sensor deactivates the external lights.
Interior Lights The interior and external approach
lights turn on and off when
entering/exiting the vehicle (see
“Illuminated Entry/Exit” in section
“Before Starting” for further
information).
To protect the battery, the interior
lights will turn off automatically 10
minutes after the ignition switch has
been shifted to OFF . This occurs if the
interior lights were turned on
manually or by opening a door. The
glove box light, on the dashboard, shares the same characteristics
excepting the trunk and liftgate lights.
The brightness of the interior lights
(ambient lighting and backlighting of
controls and instruments) can be
adjusted by means of the buttons on
steering wheel right-hand side, enter
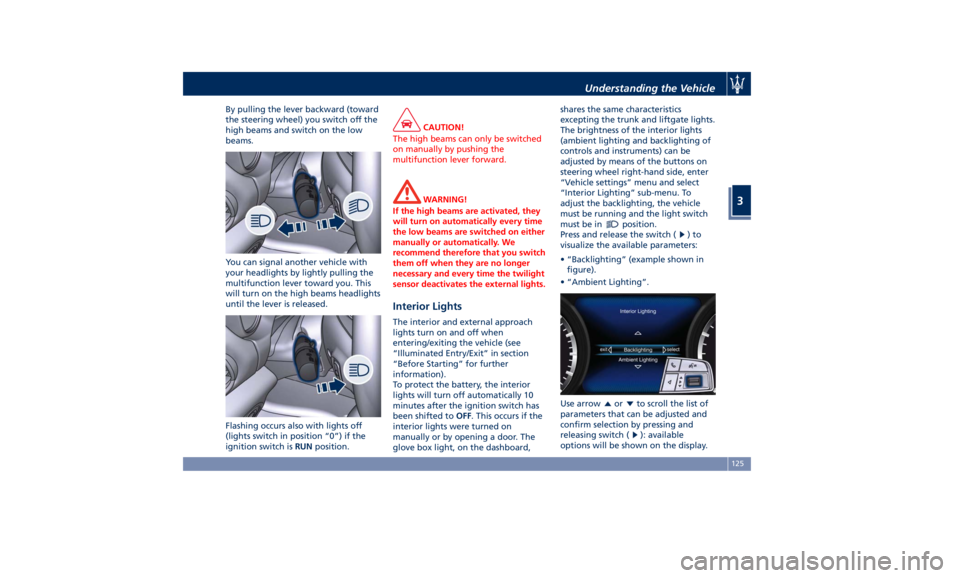
“Vehicle settings” menu and select
“Interior Lighting” sub-menu. To
adjust the backlighting, the vehicle
must be running and the light switch
must be in
position.
Press and release the switch (
)to
visualize the available parameters:
• “Backlighting” (example shown in
figure).
• “Ambient Lighting”.
Use arrow
or to scroll the list of
parameters that can be adjusted and
confirm selection by pressing and
releasing switch (
): available
options will be shown on the display.Understanding the Vehicle
3
125
Page 178 of 436
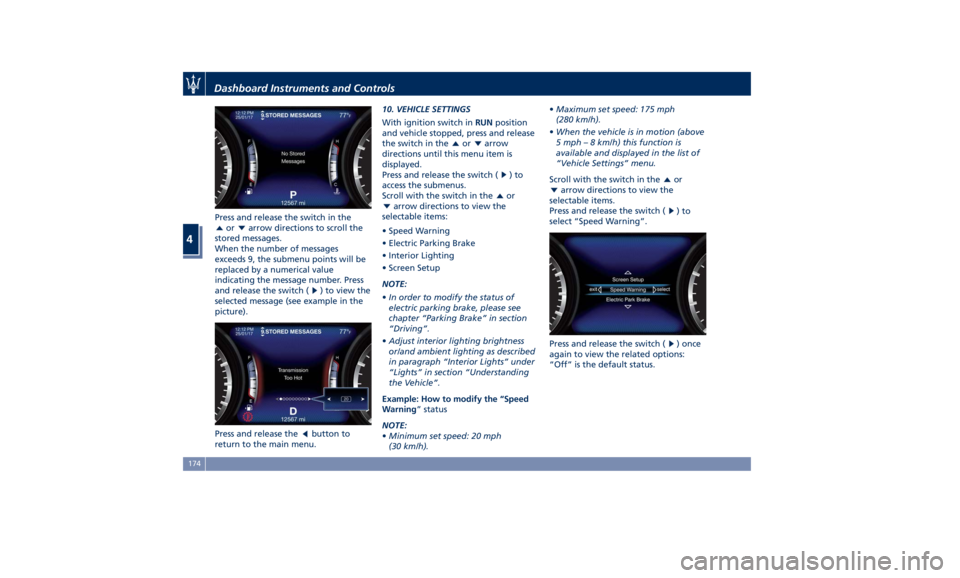
Press and release the switch in the
or arrow directions to scroll the
stored messages.
When the number of messages
exceeds 9, the submenu points will be
replaced by a numerical value
indicating the message number. Press
and release the switch (
) to view the
selected message (see example in the
picture).
Press and release the
button to
return to the main menu. 10. VEHICLE SETTINGS
With ignition switch in RUN position
and vehicle stopped, press and release
the switch in the
or arrow
directions until this menu item is
displayed.
Press and release the switch (
)to
access the submenus.
Scroll with the switch in the
or
arrow directions to view the
selectable items:
• Speed Warning
• Electric Parking Brake
• Interior Lighting
• Screen Setup
NOTE:
• In order to modify the status of
electric parking brake, please see
chapter “Parking Brake” in section
“Driving”.
• Adjust interior lighting brightness
or/and ambient lighting as described
in paragraph “Interior Lights” under
“Lights” in section “Understanding
the Vehicle”.
Example: How to modify the “Speed
Warning ” status
NOTE:
• Minimum set speed: 20 mph
(30 km/h). • Maximum set speed: 175 mph
(280 km/h).
• When the vehicle is in motion (above
5 mph – 8 km/h) this function is
available and displayed in the list of
“Vehicle Settings” menu.
Scroll with the switch in the
or
arrow directions to view the
selectable items.
Press and release the switch (
)to
select “Speed Warning”.
Press and release the switch (
) once
again to view the related options:
“Off” is the default status.Dashboard Instruments and Controls
4
174
Page 189 of 436
Gear Shift Indicator Light
This indicator lights up to
indicate gear shift change in
order to optimize fuel
consumption.
See “Drive Mode” in section
“Driving” for further
information.
Performance "Launch Control"
Indicator (TROFEO version only)
This indicator lights up when
the car is launched in the
"Launch Control"
performance start procedure.
See chapter "Drive Mode" in section
"Driving" for "Launch Control"
procedure.
Service AWD System Message
The message and the warning light on
the TFT display will illuminate when
all-wheel drive feature requires
service. For further information refer
to “All-Wheel Drive” in section
“Driving”. Infotainment System The vehicle is equipped with the
infotainment Maserati Touch Control
Plus (MTC+) System, an advanced user
interface which combines innovative
and exclusive technical features
integrating entertainment, user
settings, air conditioning, navigation,
communication and information
features within a single system.
The MTC+ System features an audio
system which is acoustically optimized
for this specific vehicle.
WARNING!
The navigation system assists the
driver while driving, providing advice
and suggestions, by voice guidance
and graphic information, for the best
route to reach the set destination. The suggestions provided by the
navigation system do not relieve the
driver from full responsibility for the
maneuvers made through traffic while
driving, or from compliance with road
regulations and other provisions
regarding road traffic. The person
driving the vehicle is always and in
any case responsible for safe driving
on the road.
The vehicle is provided with a specific
add
to the owner’
s manual, describing
the MTC+ System features and listing
all warnings and precautions, which
are essential for a safe use of the
system. Maserati advises you to read
this add carefully and thoroughly.
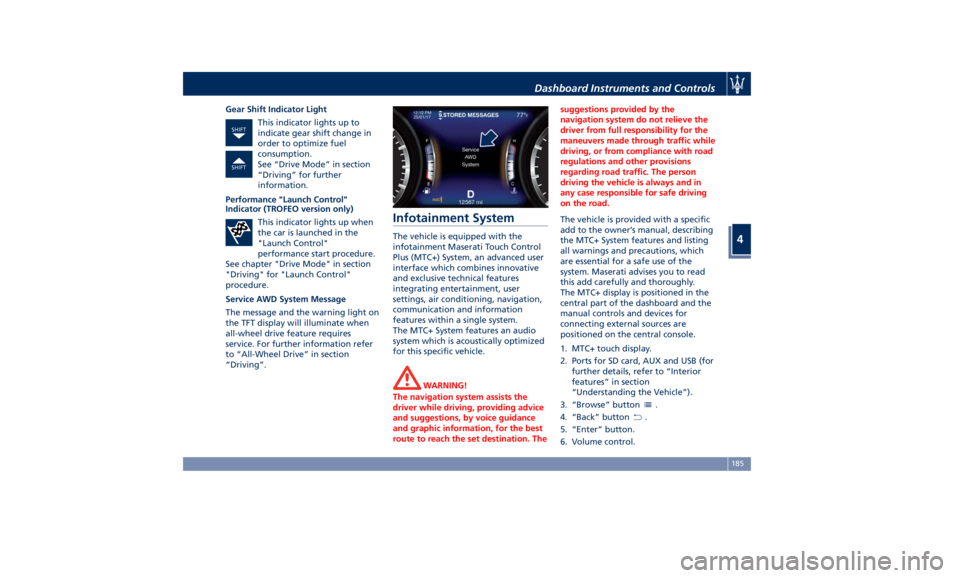
The MTC+ display is positioned in the
central part of the dashboard and the
manual controls and devices for
connecting external sources are
positioned on the central console.
1. MTC+ touch display.
2. Ports for SD card, AUX and USB (for
further details, refer to “Interior
features” in section
“Understanding the Vehicle”).
3. “Browse” button
.
4. “Back” button
.
5. “Enter” button.
6. Volume control.Dashboard Instruments and Controls
4
185
Page 223 of 436
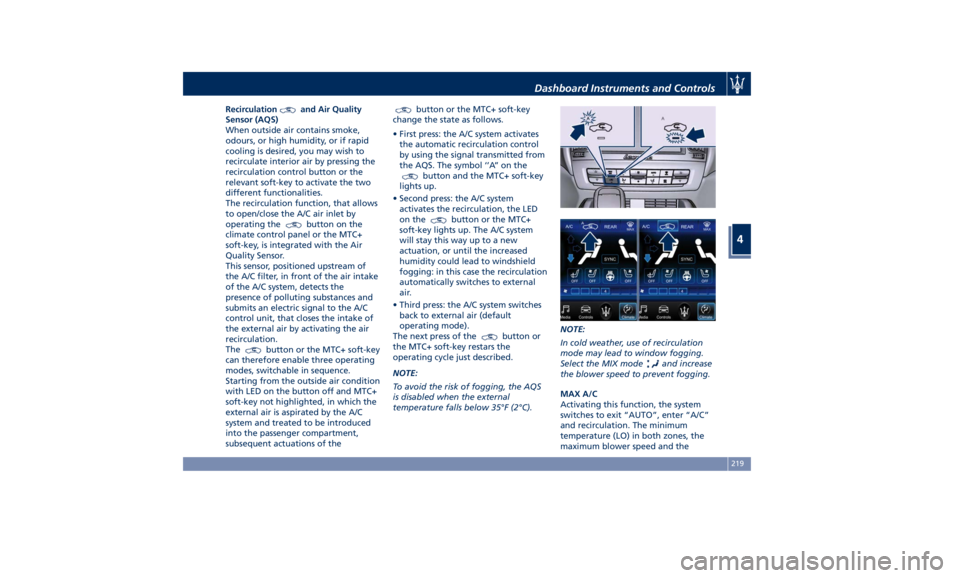
Recirculation and Air Quality
Sensor (AQS)
When outside air contains smoke,
odours, or high humidity, or if rapid
cooling is desired, you may wish to
recirculate interior air by pressing the
recirculation control button or the
relevant soft-key to activate the two
different functionalities.
The recirculation function, that allows
to open/close the A/C air inlet by
operating the
button on the
climate control panel or the MTC+
soft-key, is integrated with the Air
Quality Sensor.
This sensor, positioned upstream of
the A/C filter, in front of the air intake
of the A/C system, detects the
presence of polluting substances and
submits an electric signal to the A/C
control unit, that closes the intake of
the external air by activating the air
recirculation.
The
button or the MTC+ soft-key
can therefore enable three operating
modes, switchable in sequence.
Starting from the outside air condition
with LED on the button off and MTC+
soft-key not highlighted, in which the
external air is aspirated by the A/C
system and treated to be introduced
into the passenger compartment,
subsequent actuations of the button or the MTC+ soft-key
change the state as follows.
• First press: the A/C system activates
the automatic recirculation control
by using the signal transmitted from
the AQS. The symbol ‘’A’’ on the
button and the MTC+ soft-key
lights up.
• Second press: the A/C system
activates the recirculation, the LED
on the
button or the MTC+
soft-key lights up. The A/C system
will stay this way up to a new
actuation, or until the increased
humidity could lead to windshield
fogging: in this case the recirculation
automatically switches to external
air.
• Third press: the A/C system switches
back to external air (default
operating mode).
The next press of the
button or
the MTC+ soft-key restars the
operating cycle just described.
NOTE:
To avoid the risk of fogging, the AQS
is disabled when the external
temperature falls below 35°F (2°C). NOTE:
In cold weather, use of recirculation
mode may lead to window fogging.
Select the MIX mode
and increase
the blower speed to prevent fogging.
MAX A/C
Activating this function, the system
switches to exit “AUTO”, enter “A/C”
and recirculation. The minimum
temperature (LO) in both zones, the
maximum blower speed and theDashboard Instruments and Controls
4
219
Page 371 of 436
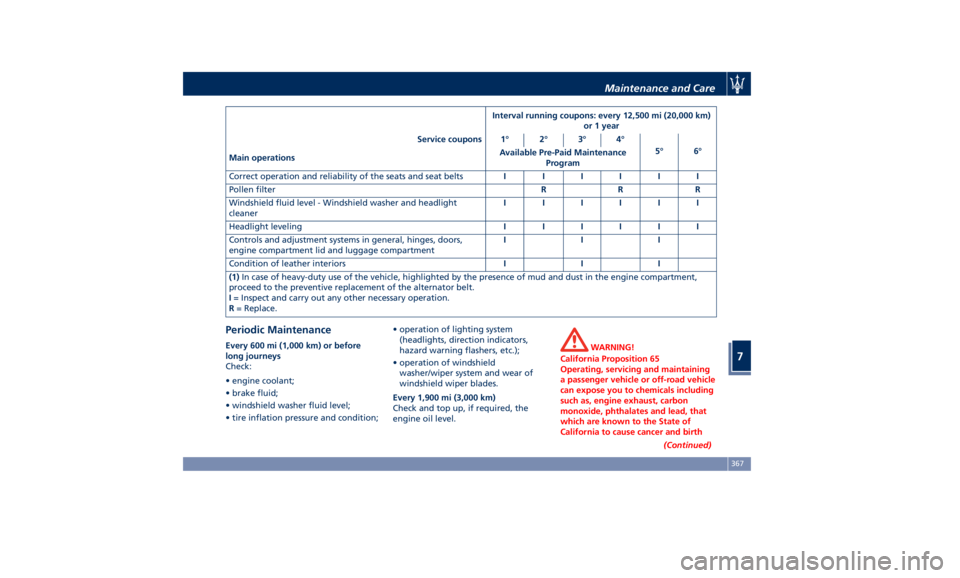
Interval running coupons: every 12,500 mi (20,000 km)
or 1 year
Service coupons 1° 2° 3° 4°
5° 6°
Main operations Available Pre-Paid Maintenance
Program
Correct operation and reliability of the seats and seat belts IIIIII
Pollen filter RRR
Windshield fluid level - Windshield washer and headlight
cleaner IIIIII
Headlight leveling IIIIII
Controls and adjustment systems in general, hinges, doors,
engine compartment lid and luggage compartment III
Condition of leather interiors III
(1) In case of heavy-duty use of the vehicle, highlighted by the presence of mud and dust in the engine compartment,
proceed to the preventive replacement of the alternator belt.
I = Inspect and carry out any other necessary operation.
R = Replace.
Periodic Maintenance Every 600 mi (1,000 km) or before
long journeys
Check:
• engine coolant;
• brake fluid;
• windshield washer fluid level;
• tire inflation pressure and condition; • operation of lighting system
(headlights, direction indicators,
hazard warning flashers, etc.);
• operation of windshield
washer/wiper system and wear of
windshield wiper blades.
Every 1,900 mi (3,000 km)
Check and top up, if required, the
engine oil level. WARNING!
California Proposition 65
Operating, servicing and maintaining
a passenger vehicle or off-road vehicle
can expose you to chemicals including
such as, engine exhaust, carbon
monoxide, phthalates and lead, that
which are known to the State of
California to cause cancer and birth
(Continued)Maintenance and Care
7
367