door lock MASERATI QUATTROPORTE 2019 Owner's Manual
[x] Cancel search | Manufacturer: MASERATI, Model Year: 2019, Model line: QUATTROPORTE, Model: MASERATI QUATTROPORTE 2019Pages: 396, PDF Size: 13.9 MB
Page 52 of 396
Power Sunshades on the
Rear Door Windows NOTE:
• The window switches also operate
the sunshades on the rear windows.
• The rear window lock button also
operates the rear power sunshades.
• Window and sunshade controls only
operate if the ignition switch is in
ACC or RUN position.
Operation of the rear windows and
related sunshades is done by pressing
or pulling the window switch and
depends on the position of the
windows prior to the command
operation.
As described for the opening and
closing functions of the power
windows (see chapter “Power
Windows” in this section), the window
switch has two functioning modes:
press and release the switch to the first
detent to partially move the window;
press and release the switch to the
second detent to move the window all
the way up or down. Operations WARNING!
Rear seat passengers must be careful
when operating the sunshades, since
there is the risk of being pinched
between the top of the sunshade and
the headlining, during raising, and
between the top edge of the sunshade and the door panel, during
lowering.
CAUTION!
Before activating the sunshade, make
sure that no objects can interfere with
its travel.
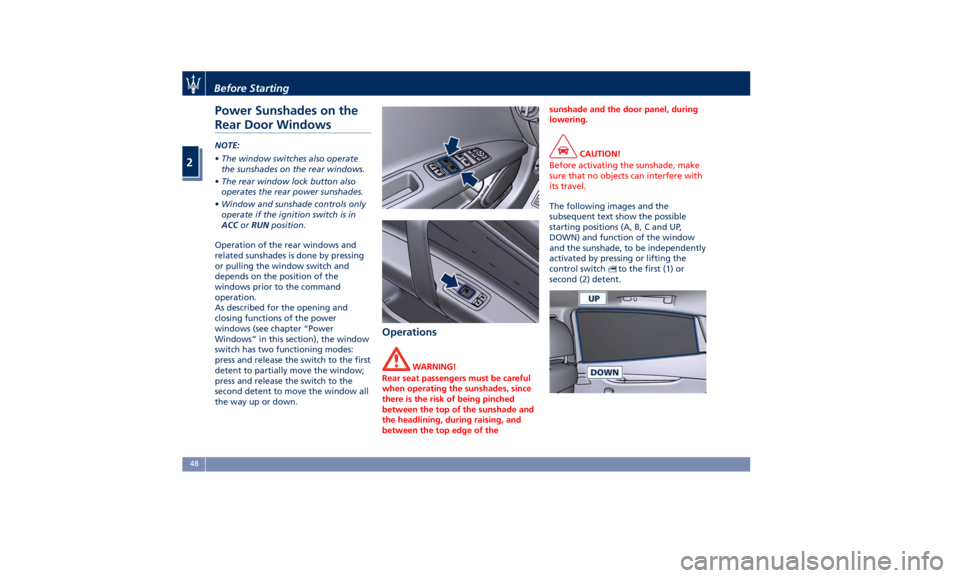
The following images and the
subsequent
text show
the possible
starting positions (A, B, C and UP,
DOWN) and function of the window
and the sunshade, to be independently
activated by pressing or lifting the
control switch
to the first (1) or
second (2) detent.Before Starting
2
48
Page 54 of 396
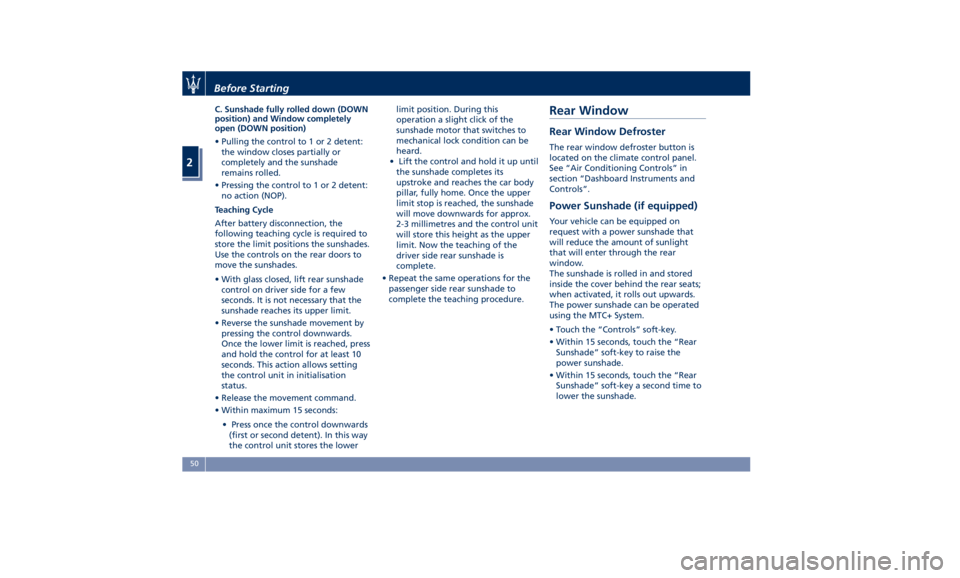
C. Sunshade fully rolled down (DOWN
position) and Window completely
open (DOWN position)
• Pulling the control to 1 or 2 detent:
the window closes partially or
completely and the sunshade
remains rolled.
• Pressing the control to 1 or 2 detent:
no action (NOP).
Teaching Cycle
After battery disconnection, the
following teaching cycle is required to
store the limit positions the sunshades.
Use the controls on the rear doors to
move the sunshades.
• With glass closed, lift rear sunshade
control on driver side for a few
seconds. It is not necessary that the
sunshade reaches its upper limit.
• Reverse the sunshade movement by
pressing the control downwards.
Once the lower limit is reached, press
and hold the control for at least 10
seconds. This action allows setting
the control unit in initialisation
status.
• Release the movement command.
• Within maximum 15 seconds:
• Press once the control downwards
(first or second detent). In this way
the control unit stores the lower limit position. During this
operation a slight click of the
sunshade motor that switches to
mechanical lock condition can be
heard.
• Lift the control and hold it up until
the sunshade completes its
upstroke and reaches the car body
pillar, fully home. Once the upper
limit stop is reached, the sunshade
will move downwards for approx.
2-3 millimetres and the control unit
will store this height as the upper
limit. Now the teaching of the
driver side rear sunshade is
complete.
• Repeat the same operations for the
passenger side rear sunshade to
complete the teaching procedure.Rear Window Rear Window Defroster The rear window defroster button is
located on the climate control panel.
See “Air Conditioning Controls” in
section “Dashboard Instruments and
Controls”.
Power Sunshade (if equipped) Your vehicle can be equipped on
request with a power sunshade that
will reduce the amount of sunlight
that will enter through the rear
window.
The sunshade is rolled in and stored
inside the cover behind the rear seats;
when activated, it rolls out upwards.
The power sunshade can be operated
using the MTC+ System.
• Touch the “Controls” soft-key.
• Within 15 seconds, touch the “Rear
Sunshade” soft-key to raise the
power sunshade.
• Within 15 seconds, touch the “Rear
Sunshade” soft-key a second time to
lower the sunshade.Before Starting
2
50
Page 55 of 396
If the sunshade is in the raised
position and the transmission lever is
positioned in R (Reverse), the
sunshade will automatically fully
lower.
When the transmission lever is shifted
out of R (Reverse) the sunshade will
automatically return to the fully raised
position after approximately five
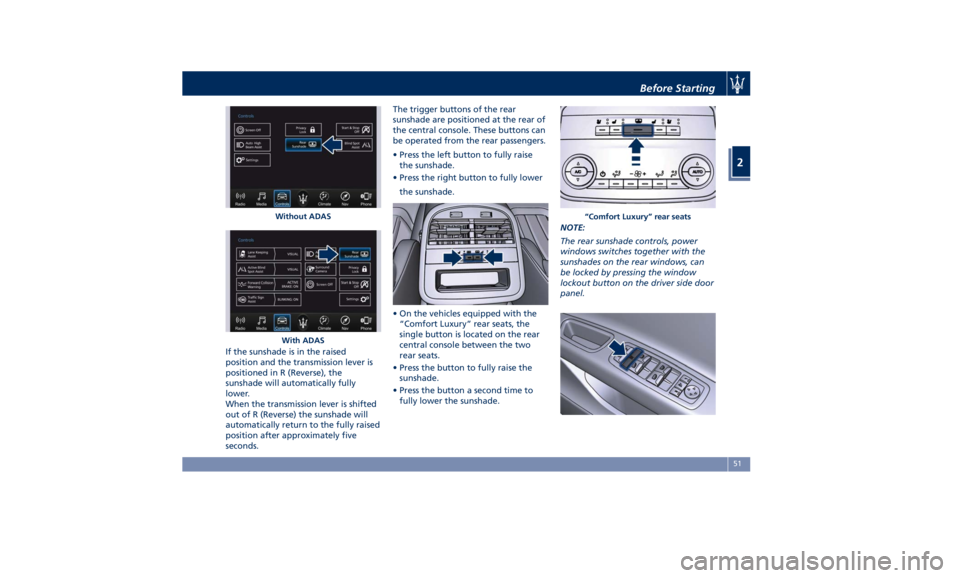
seconds. The trigger buttons of the rear
sunshade are positioned at the rear of
the central console. These buttons can
be operated from the rear passengers.
• Press the left button to fully raise
the sunshade.
• Press the right button to fully lower
the sunshade.
• On the vehicles equipped with the
“Comfort Luxury” rear seats, the
single button is located on the rear
central console between the two
rear seats.
• Press the button to fully raise the
sunshade.
• Press the button a second time to
fully lower the sunshade. NOTE:
The rear sunshade controls, power
windows switches together with the
sunshades on the rear windows, can
be locked by pressing the window
lockout button on the driver side door
panel.Without ADAS
With ADAS “Comfort Luxury” rear seatsBefore Starting
2
51
Page 57 of 396
Automatic Opening and
Closing Movement of the
Power Trunk Lid Automatic opening and closing
movement of the power trunk lid is
driven by electric actuators and a
motorized latch ensuring lid locking
upon closing.
The
button on key fob and button
on dome console not only allows user
to completely open the power trunk
lid, but also to stop it at any
intermediate position by pressing the
button again whenever you wish to
stop and resume the opening process.
In addition to these commands, it is
possible open and close the power
trunk lid, or stop its movement, by
simply moving your foot under the
rear bumper, as specified in the
paragraph “Hands Free Power Trunk
Release and Closing”. In this latter
case, the power trunk lid will be
opened and closed only if the “Passive
Entry” system acknowledges the
presence of the key fob RKE
transmitter within 3.3 ft (1 m) of the
power trunk lid.
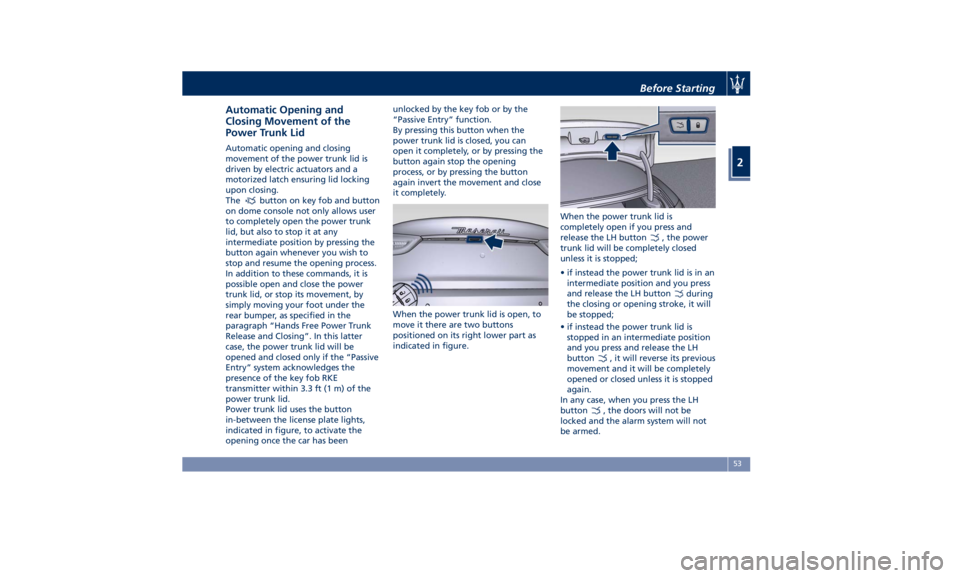
Power trunk lid uses the button
in-between the license plate lights,
indicated in figure, to activate the
opening once the car has been unlocked by the key fob or by the
“Passive Entry” function.
By pressing this button when the
power trunk lid is closed, you can
open it completely, or by pressing the
button again stop the opening
process, or by pressing the button
again invert the movement and close
it completely.
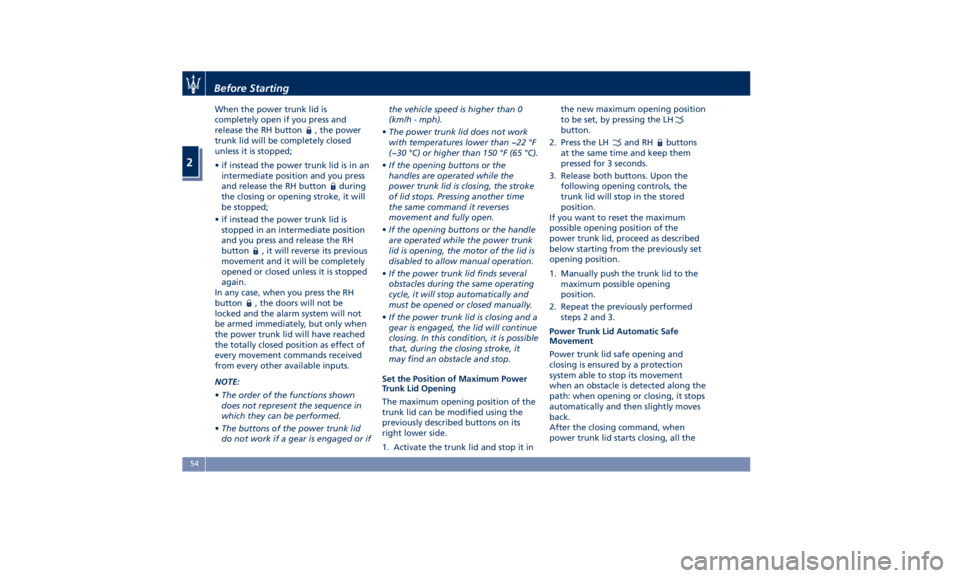
When the power trunk lid is open, to
move it there are two buttons
positioned on its right lower part as
indicated in figure. When the power trunk lid is
completely open if you press and
release the LH button
, the power
trunk lid will be completely closed
unless it is stopped;
• if instead the power trunk lid is in an
intermediate position and you press
and release the LH button
during
the closing or opening stroke, it will
be stopped;
• if instead the power trunk lid is
stopped in an intermediate position
and you press and release the LH
button
, it will reverse its previous
movement and it will be completely
opened or closed unless it is stopped
again.
In any case, when you press the LH
button
, the doors will not be
locked and the alarm system will not
be armed.Before Starting
2
53
Page 58 of 396
When the power trunk lid is
completely open if you press and
release the RH button
, the power
trunk lid will be completely closed
unless it is stopped;
• if instead the power trunk lid is in an
intermediate position and you press
and release the RH button
during
the closing or opening stroke, it will
be stopped;
• if instead the power trunk lid is
stopped in an intermediate position
and you press and release the RH
button
, it will reverse its previous
movement and it will be completely
opened or closed unless it is stopped
again.
In any case, when you press the RH
button
, the doors will not be
locked and the alarm system will not
be armed immediately, but only when
the power trunk lid will have reached
the totally closed position as effect of
every movement commands received
from every other available inputs.
NOTE:
• The order of the functions shown
does not represent the sequence in
which they can be performed.
• The buttons of the power trunk lid
do not work if a gear is engaged or if the vehicle speed is higher than 0
(km/h - mph).
• The power trunk lid does not work
with temperatures lower than −22 °F
(−30 °C) or higher than 150 °F (65 °C).
• If the opening buttons or the
handles are operated while the
power trunk lid is closing, the stroke
of lid stops. Pressing another time
the same command it reverses
movement and fully open.
• If the opening buttons or the handle
are operated while the power trunk
lid is opening, the motor of the lid is
disabled to allow manual operation.
• If the power trunk lid finds several
obstacles during the same operating
cycle, it will stop automatically and
must be opened or closed manually.
• If the power trunk lid is closing and a
gear is engaged, the lid will continue
closing. In this condition, it is possible
that, during the closing stroke, it
may find an obstacle and stop.
Set the Position of Maximum Power
Trunk Lid Opening
The maximum opening position of the
trunk lid can be modified using the
previously described buttons on its
right lower side.
1. Activate the trunk lid and stop it in the new maximum opening position
to be set, by pressing the LH
button.
2. Press the LH
and RH buttons
at the same time and keep them
pressed for 3 seconds.
3. Release both buttons. Upon the
following opening controls, the
trunk lid will stop in the stored
position.
If you want to reset the maximum
possible opening position of the
power trunk lid, proceed as described
below starting from the previously set
opening position.
1. Manually push the trunk lid to the
maximum possible opening
position.
2. Repeat the previously performed
steps 2 and 3.
Power Trunk Lid Automatic Safe
Movement
Power trunk lid safe opening and
closing is ensured by a protection
system able to stop its movement
when an obstacle is detected along the
path: when opening or closing, it stops
automatically and then slightly moves
back.
After the closing command, when
power trunk lid starts closing, all theBefore Starting
2
54
Page 62 of 396
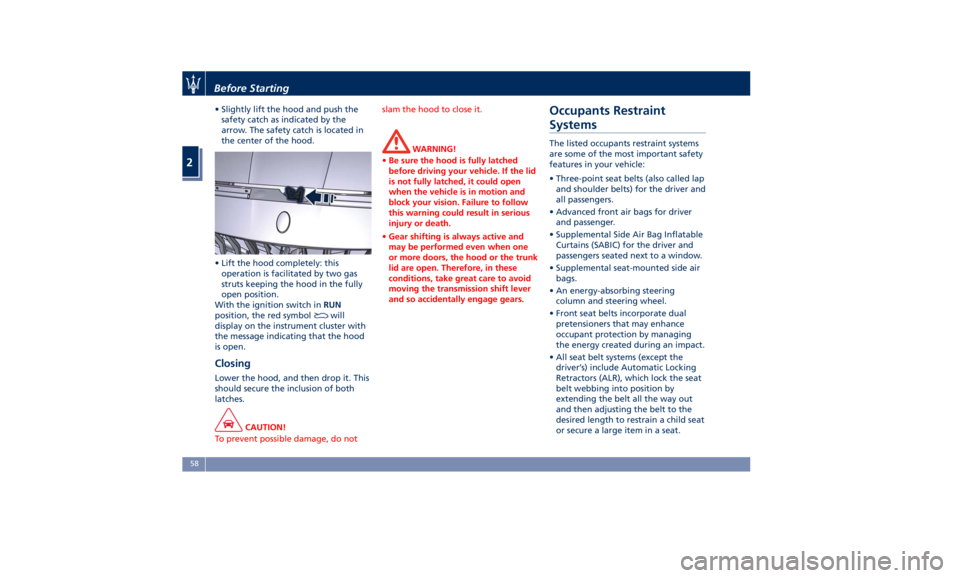
• Slightly lift the hood and push the
safety catch as indicated by the
arrow. The safety catch is located in
the center of the hood.
• Lift the hood completely: this
operation is facilitated by two gas
struts keeping the hood in the fully
open position.
With the ignition switch in RUN
position, the red symbol
will
display on the instrument cluster with
the message indicating that the hood
is open.
Closing Lower the hood, and then drop it. This
should secure the inclusion of both
latches.
CAUTION!
To prevent possible damage, do not slam the hood to close it.
WARNING!
• Be sure the hood is fully latched
before driving your vehicle. If the lid
is not fully latched, it could open
when the vehicle is in motion and
block your vision. Failure to follow
this warning could result in serious
injury or death.
• Gear shifting is always active and
may be performed even when one
or more doors, the hood or the trunk
lid are open. Therefore, in these
conditions, take great care to avoid
moving the transmission shift lever
and so accidentally engage gears.Occupants Restraint
Systems The listed occupants restraint systems
are some of the most important safety
features in your vehicle:
• Three-point seat belts (also called lap
and shoulder belts) for the driver and
all passengers.
• Advanced front air bags for driver
and passenger.
• Supplemental Side Air Bag Inflatable
Curtains (SABIC) for the driver and
passengers seated next to a window.
• Supplemental seat-mounted side air
bags.
• An energy-absorbing steering
column and steering wheel.
• Front seat belts incorporate dual
pretensioners that may enhance
occupant protection by managing
the energy created during an impact.
• All seat belt systems (except the
driver’s) include Automatic Locking
Retractors (ALR), which lock the seat
belt webbing into position by
extending the belt all the way out
and then adjusting the belt to the
desired length to restrain a child seat
or secure a large item in a seat.Before Starting
2
58
Page 64 of 396
• All occupants should always wear
their lap and shoulder belts properly.
• The driver and front passenger seats
should be moved back as far as
possible to allow the Advanced
Front Air Bags room to inflate.
• Do not lean against the door or
window. Your vehicle has
Supplemental Side Air Bag Inflatable
Curtains (SABIC) and Supplemental
Seat-Mounted Side Air Bags (SAB),
and if deployment occurs, the SABIC
and SAB air bags will inflate
forcefully into the space between
you and the door.
• If the air bag system in this vehicle
needs to be modified to
accommodate a disabled person,
contact an Authorized Maserati
Dealer.
WARNING!
• Relying on the air bags alone could
lead to more severe injuries in a
collision. The air bags work with
your seat belt to restrain you
properly. In some collisions, the air
bags won’t deploy at all. Always
wear your seat belt even though you
have air bags. • In a collision, you and your
passengers can suffer much greater
injuries if you are not properly
buckled up. You can strike the
interior of your vehicle or other
passengers, or you can be thrown
out of the vehicle. Always be sure
you and others in your vehicle are
buckled up properly.
• Be sure everyone in your vehicle is in
a seat and using a seat belt properly.
Occupants, including the driver,
should always wear their seat belts
whether or not an air bag is also
provided at their seating position to
minimize the risk of severe injury or
death in the event of a crash.
• Buckle up even though you are an
excellent driver, even on short trips.
Someone on the road may be a poor
driver and cause an accident that
includes you. This can happen far
away from home or on your own
street.
Statistics report that seat belts save
lives
and help reduce the seriousness
of injuries in an accident. Some of the
worst injuries happen when people are
thrown from the vehicle. Seat belts
reduce the possibility of ejection and
the risk of injury caused by striking the
inside of the vehicle. Everyone in a motor vehicle should be
belted at all times.
Three-Point Seat Belts All seating positions in your vehicle are
equipped with combination lap and
shoulder belts.
The belt retractor is designed to lock
during very sudden stops or impacts.
This feature allows the shoulder part
of the belt to move freely with you
under normal conditions, conforming
to the body of the occupants.
However, in an accident, the belt will
lock and reduce your risk of striking
the inside of the vehicle or being
thrown out.
The driver is responsible for respecting,
and ensuring that all the other
occupants of the car also observe the
local regulations concerning the use of
seat belts. Always fasten the seat belts
before starting the vehicle.
Seat belts are designed to be used by
persons whose physical characteristics
(age, height, weight) are provided for
by established legislation in each
country. Anyone who does comply
with these provisions may not travel in
the front passenger seat. This also
applies to children. Their heads are
proportionally heavier and larger than
those of adults, while their bones andBefore Starting
2
60
Page 76 of 396
will determine whether the enhanced
accident response system will have to
perform the following functions:
• cut off fuel to the engine;
• turn hazard lights and interior lights
on as long as the battery has power
or until the ignition switch is turned
off;
• unlock the doors automatically;
• disconnect the battery with a
pyrotechnic charge.
Air Bag Deployment Result
The advanced front air bags are
designed to deflate immediately after
deployment.
If you do have a collision which
deploys the air bags, any or all of the
following may occur:
• The nylon air bag material may
sometimes cause abrasions and/or
skin reddening to the driver and
front passenger as the air bags
deploy and unfold.
• As the air bags deflate, you may see
some smoke-like particles. The
particles are a normal by-product of
the process that generates the
non-toxic gas used for air bag
inflation. These airborne particles
may irritate the skin, eyes, nose, or
throat. If these particles settle on your clothing, follow the garment
manufacturer's instructions for
cleaning. Do not drive your vehicle
after the air bags have deployed. If
you are involved in another collision,
the air bags will not be in place to
protect you.
ENVIRONMENTAL!
Air bag inflation releases a small
amount of powder. This powder is not
harmful to the environment.
WARNING!
California Proposition 65
Operating, servicing and maintaining
a passenger vehicle or off-road vehicle
can expose you to chemicals including
such as, engine exhaust, carbon
monoxide, phthalates and lead, that
which are known to the State of
California to cause cancer and birth
defects or other reproductive harm. To
minimize exposure, avoid breathing
exhaust, do not idle the engine except
as necessary, service your vehicle in a
well-ventilated area and wear gloves
or wash your hands frequently when
servicing your vehicle. For more
information go to: www.P65Warnings.ca.gov/passenger-
vehicle
WARNING!
• Deployed air bags and seat belt
pretensioners cannot protect you in
another collision. Have the air bags,
seat belt pretensioners, and the
front seat belt retractor assemblies
replaced by a Maserati Service
Center. Also, have the Occupant
Restraint Controller (ORC) system
serviced as well.
• Have the air bag checked, serviced
and replaced only by an Authorized
Maserati Dealer.
Air Bag System Maintenance
WARNING!
• Modifications to any part of the air
bag system could cause it to fail;
thus you could be injured if the air
bag system is not there to protect
you. Do not modify the components
or wiring. Do not modify the front
bumper, vehicle body structure, or
add aftermarket side steps or
running boards.Before Starting
2
72
Page 96 of 396
• Check the tires (see “Tire Inflation
Pressure” chapter in section
“Features and Specifications”) for
proper cold inflation pressure.
Lights and Indicator Lights
• Have someone observe the operation
of exterior lights while you operate
the controls (see “Lights” chapter in
section “Understanding the
Vehicle”).
• Check turn signal and high beam
indicator lights on the instrument
cluster (see “Instrument Cluster”
chapter in section “Dashboard
Instruments and Controls”).
Door Latches
• Check for positive closing, latching,
and locking of doors and trunk lid
(see “Unlock the Vehicle with Key
fob” chapter in this section).
Fluid Leaks
• Check area under vehicle after
overnight parking for recent fluid
leaks (oil, fuel, etc.).
• If gasoline fumes are detected or
fluid leaks are suspected, contact the
Authorized Maserati Dealer . WARNING!
California Proposition 65
Operating, servicing and maintaining
a passenger vehicle or off-road vehicle
can expose you to chemicals including
such as, engine exhaust, carbon
monoxide, phthalates and lead, that
which are known to the State of
California to cause cancer and birth
defects or other reproductive harm. To
minimize exposure, avoid breathing
exhaust, do not idle the engine except
as necessary, service your vehicle in a
well-ventilated area and wear gloves
or wash your hands frequently when
servicing your vehicle. For more
information go to:
www.P65Warnings.ca.gov/passenger-
vehicleBefore Starting
2
92
Page 100 of 396
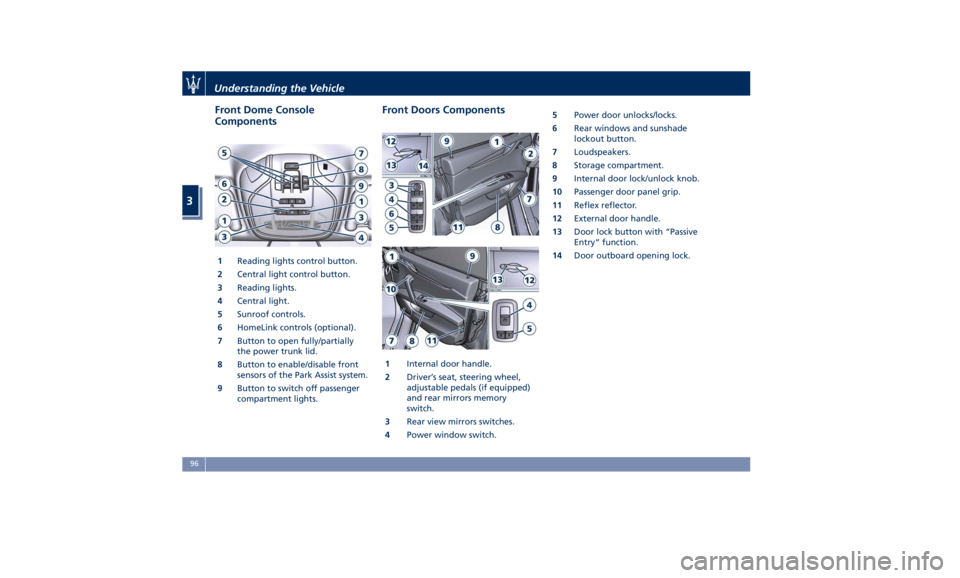
Front Dome Console
Components
1 Reading lights control button.
2 Central light control button.
3 Reading lights.
4 Central light.
5 Sunroof controls.
6 HomeLink controls (optional).
7 Button to open fully/partially
the power trunk lid.
8 Button to enable/disable front
sensors of the Park Assist system.
9 Button to switch off passenger
compartment lights. Front Doors Components
1 Internal door handle.
2 Driver’s seat, steering wheel,
adjustable pedals (if equipped)
and rear mirrors memory
switch.
3 Rear view mirrors switches.
4 Power window switch. 5 Power door unlocks/locks.
6 Rear windows and sunshade
lockout button.
7 Loudspeakers.
8 Storage compartment.
9 Internal door lock/unlock knob.
10 Passenger door panel grip.
11 Reflex reflector.
12 External door handle.
13 Door lock button with “Passive
Entry” function.
14 Door outboard opening lock.Understanding the Vehicle
3
96