door lock MASERATI QUATTROPORTE 2019 Owner's Guide
[x] Cancel search | Manufacturer: MASERATI, Model Year: 2019, Model line: QUATTROPORTE, Model: MASERATI QUATTROPORTE 2019Pages: 396, PDF Size: 13.9 MB
Page 102 of 396
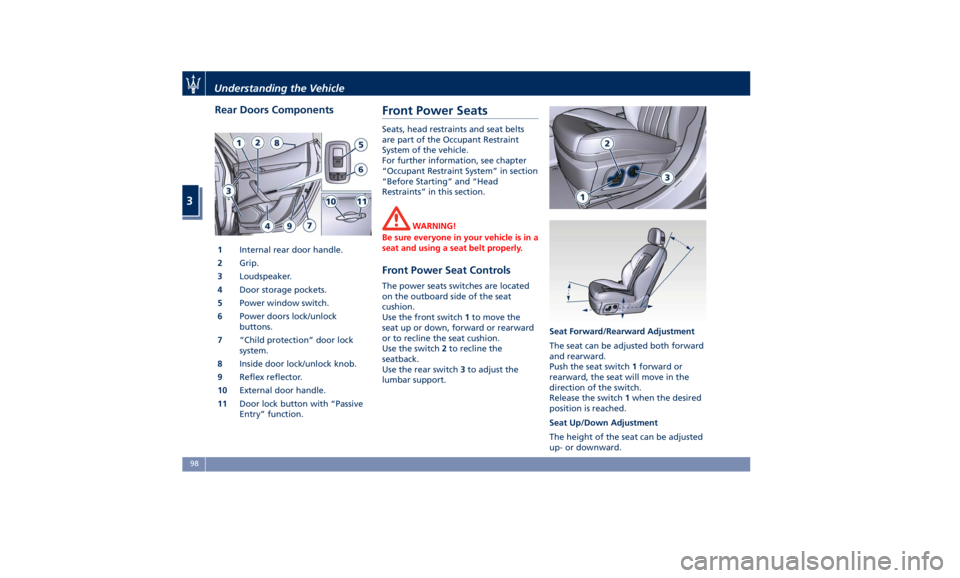
Rear Doors Components
1 Internal rear door handle.
2 Grip.
3 Loudspeaker.
4 Door storage pockets.
5 Power window switch.
6 Power doors lock/unlock
buttons.
7 “Child protection” door lock
system.
8 Inside door lock/unlock knob.
9 Reflex reflector.
10 External door handle.
11 Door lock button with “Passive
Entry” function. Front Power Seats Seats, head restraints and seat belts
are part of the Occupant Restraint
System of the vehicle.
For further information, see chapter
“Occupant Restraint System” in section
“Before Starting” and “Head
Restraints” in this section.
WARNING!
Be sure everyone in your vehicle is in a
seat and using a seat belt properly.
Front Power Seat Controls The power seats switches are located
on the outboard side of the seat
cushion.
Use the front switch 1 to move the
seat up or down, forward or rearward
or to recline the seat cushion.
Use the switch 2 to recline the
seatback.
Use the rear switch 3 to adjust the
lumbar support. Seat Forward/Rearward Adjustment
The seat can be adjusted both forward
and rearward.
Push the seat switch 1 forward or
rearward, the seat will move in the
direction of the switch.
Release the switch 1 when the desired
position is reached.
Seat Up/Down Adjustment
The height of the seat can be adjusted
up- or downward.Understanding the Vehicle
3
98
Page 116 of 396
• Within 15 seconds, touch the heated
steering wheel soft-key a second
time to turn it off.
WARNING!
• Persons with low skin sensitivity
because of advanced age, chronic
illness, diabetes, spinal cord injury,
medication, alcohol use, exhaustion
or other physical conditions must be
careful when using the seat heater. It
may cause irritation even at low
temperatures, especially if used for
long periods of time.
• Do not place anything on the
steering wheel that insulates against
heat, such as a blanket or steering
wheel covers of any type and
material. This may cause the steering
wheel heater to overheat. Adjustable Pedals (if
equipped) The adjustable pedals system is
designed to allow greater range of
pedals positions enabling driver
comfort with regard to the steering
wheel tilt and the seat position.
This feature allows the brake and
accelerator pedals to move toward or
away from the driver’s feet.
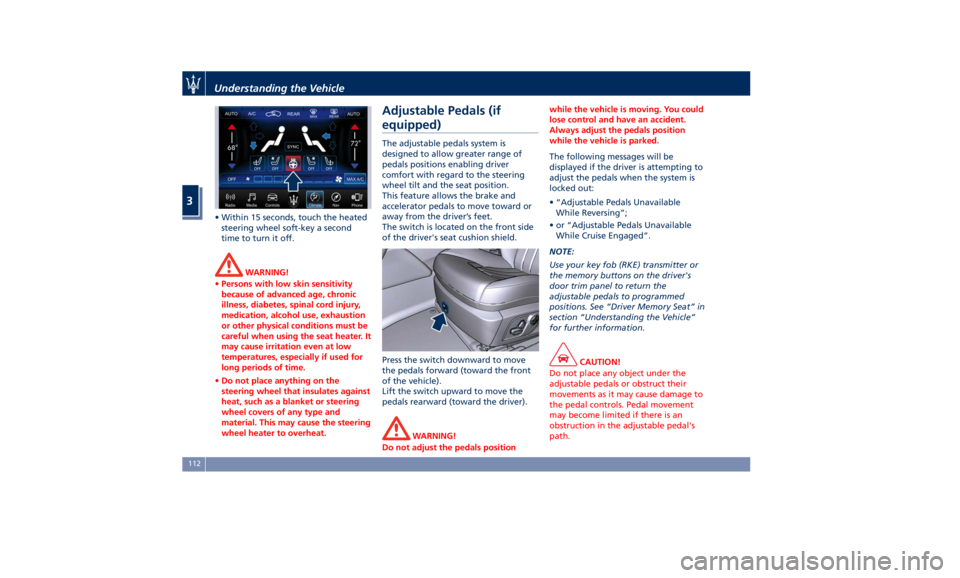
The switch is located on the front side
of the driver's seat cushion shield.
Press the switch downward to move
the pedals forward (toward the front
of the vehicle).
Lift the switch upward to move the
pedals rearward (toward the driver).
WARNING!
Do not adjust the pedals position while the vehicle is moving. You could
lose control and have an accident.
Always adjust the pedals position
while the vehicle is parked.
The following messages will be
displayed
if the
driver is attempting to
adjust the pedals when the system is
locked out:
• “Adjustable Pedals Unavailable
While Reversing”;
• or “Adjustable Pedals Unavailable
While Cruise Engaged”.
NOTE:
Use your key fob (RKE) transmitter or
the memory buttons on the driver's
door trim panel to return the
adjustable pedals to programmed
positions. See “Driver Memory Seat” in
section “Understanding the Vehicle”
for further information.
CAUTION!
Do not place any object under the
adjustable pedals or obstruct their
movements as it may cause damage to
the pedal controls. Pedal movement
may become limited if there is an
obstruction in the adjustable pedal's
path.Understanding the Vehicle
3
112
Page 118 of 396
the adjacent lane and get a partial
overlap with the visible image on the
inside rearview mirror.
Power mirror preselected positions can
be reset by operating the Memory
Driver Seat device. Check “Driver
Memory Seat” in this section for
further information.
WARNING!
Vehicles and other objects seen in the
external side convex mirror will look
smaller and farther away than they
really are. Relying too much on your
passenger side convex mirror could
cause you to collide with another
vehicle or object. Use the inside mirror
to judge the size or distance of a
vehicle seen in the external side
convex mirror.
Tilt Side Mirrors In Reverse
This
feature provides automatic
external rearview mirrors positioning,
allowing the driver to view the ground
area behind the front doors. The
external mirrors will move slightly
downward from the current position
when the shift lever is shifted into
reverse. The external mirrors will then
return to the original position when the lever is shifted out of the reverse
position. Each memory set of the
driver's seat (see "Driver Memory
Seat" chapter in section
“Understanding the Vehicle”)
corresponds to a mirror tilt position in
reverse.
NOTE:
The mirrors tilt in reverse can be
turned on and off using the MTC+
System, refer to “MTC+ Settings” in
section “Dashboard Instruments and
Controls”.
Folding Mirrors
By selecting this feature on MTC+ the
rear-view mirrors automatically fold
when the vehicle is locked by the key
fob and when the power trunk lid (if
equipped) is closed and locked by
pressing the
button on the right
lower parts of the lid.
When the vehicle and the trunk lid will
be unlocked and the ignition device is
set in RUN position, the rear-view
mirrors will automatically open in the
position they had before the lock.
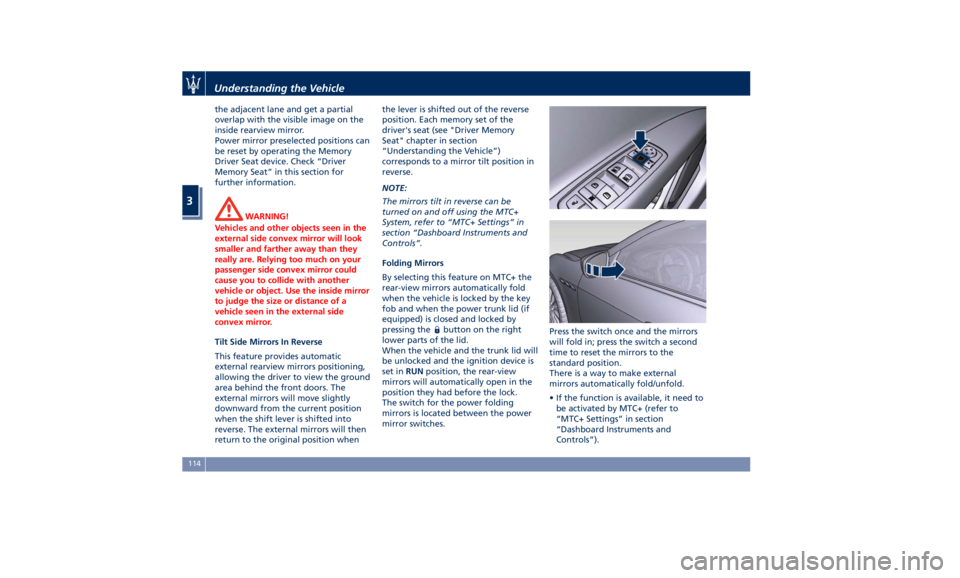
The switch for the power folding
mirrors is located between the power
mirror switches. Press the switch once and the mirrors
will fold in; press the switch a second
time to reset the mirrors to the
standard position.
There is a way to make external
mirrors automatically fold/unfold.
• If the function is available, it need to
be activated by MTC+ (refer to
“MTC+ Settings” in section
“Dashboard Instruments and
Controls”).Understanding the Vehicle
3
114
Page 119 of 396
• If the mirrors are automatically
folded after the last lock action,
then they will automatically unfold
when the ignition device is set on
ACC or RUN position.
• If the mirrors were manually folded
by the switch on the driver's door
panel, before a lock action, they will
need to be manually unfolded to
reactivate the automatic function.
CAUTION!
Never retract or open the mirrors
manually: it could damage the power
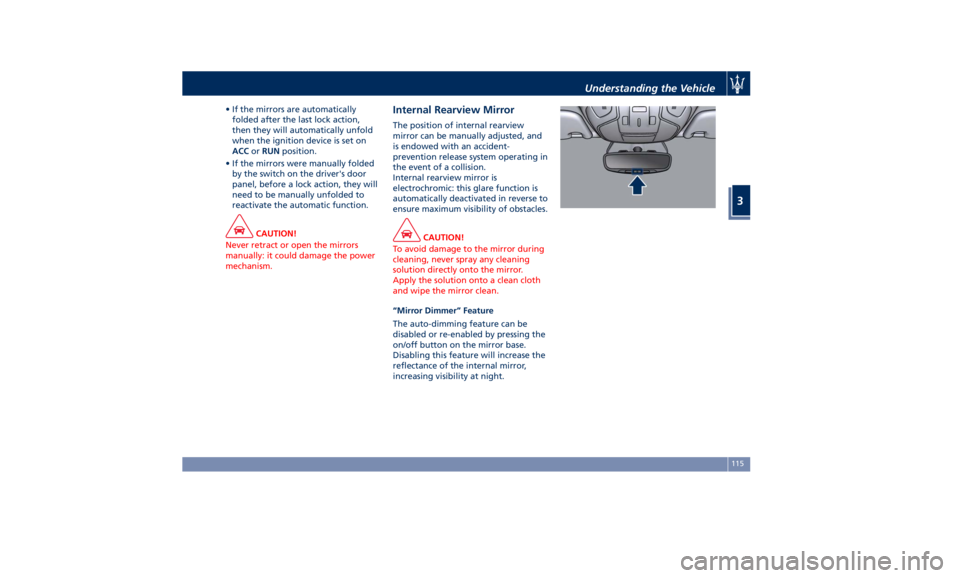
mechanism. Internal Rearview Mirror The position of internal rearview
mirror can be manually adjusted, and
is endowed with an accident-
prevention release system operating in
the event of a collision.
Internal rearview mirror is
electrochromic: this glare function is
automatically deactivated in reverse to
ensure maximum visibility of obstacles.
CAUTION!
To avoid damage to the mirror during
cleaning, never spray any cleaning
solution directly onto the mirror.
Apply the solution onto a clean cloth
and wipe the mirror clean.
“Mirror Dimmer” Feature
The
auto-dimming feature can be
disabled or re-enabled by pressing the
on/off button on the mirror base.
Disabling this feature will increase the
reflectance of the internal mirror,
increasing visibility at night. Understanding the Vehicle
3
115
Page 129 of 396
The right regulator has 2 different
positions:
0
(OFF) Stable position: front seat
lighting and front dome light
LED are turned off.
1 st
Dimmable position: allows
minimum to maximum
brightness tuning of the
front dome light LED and the
front seats lighting.
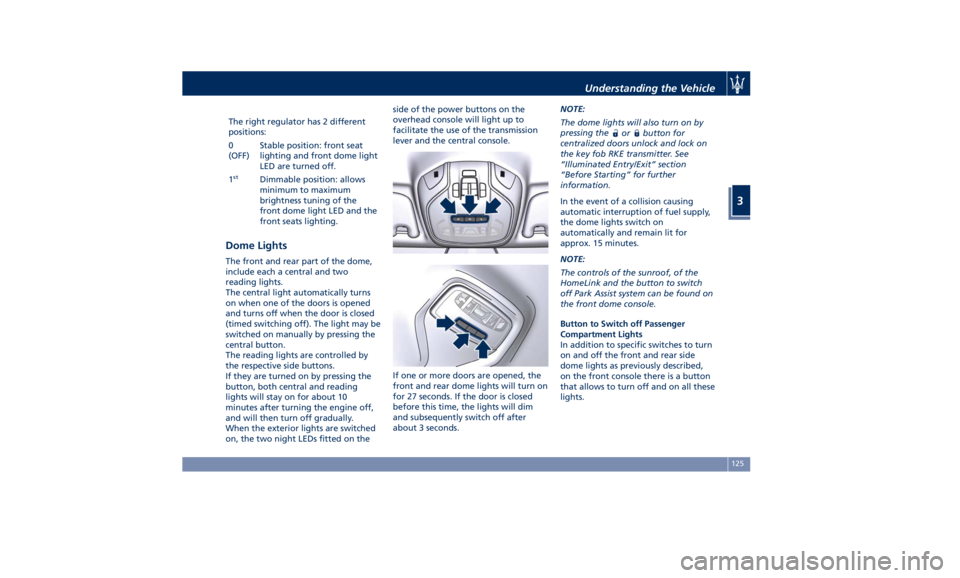
Dome Lights The front and rear part of the dome,
include each a central and two
reading lights.
The central light automatically turns
on when one of the doors is opened
and turns off when the door is closed
(timed switching off). The light may be
switched on manually by pressing the
central button.
The reading lights are controlled by
the respective side buttons.
If they are turned on by pressing the
button, both central and reading
lights will stay on for about 10
minutes after turning the engine off,
and will then turn off gradually.
When the exterior lights are switched
on, the two night LEDs fitted on the side of the power buttons on the
overhead console will light up to
facilitate the use of the transmission
lever and the central console.
If one or more doors are opened, the
front and rear dome lights will turn on
for 27 seconds. If the door is closed
before this time, the lights will dim
and subsequently switch off after
about 3 seconds. NOTE:
The dome lights will also turn on by
pressing the
or button for
centralized doors unlock and lock on
the key fob RKE transmitter. See
“Illuminated Entry/Exit” section
“Before Starting” for further
information.
In the event of a collision causing
automatic interruption of fuel supply,
the dome lights switch on
automatically and remain lit for
approx. 15 minutes.
NOTE:
The controls of the sunroof, of the
HomeLink and the button to switch
off Park Assist system can be found on
the front dome console.
Button to Switch off Passenger
Compartment Lights
In addition to specific switches to turn
on and off the front and rear side
dome lights as previously described,
on the front console there is a button
that allows to turn off and on all these
lights.Understanding the Vehicle
3
125
Page 140 of 396
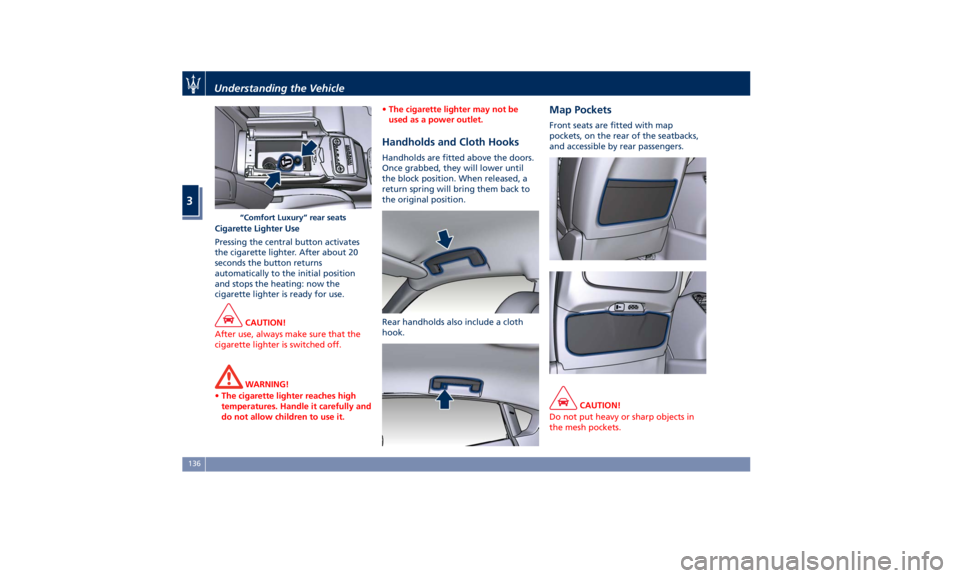
Cigarette Lighter Use
Pressing the central button activates
the cigarette lighter. After about 20
seconds the button returns
automatically to the initial position
and stops the heating: now the
cigarette lighter is ready for use.
CAUTION!
After use, always make sure that the
cigarette lighter is switched off.
WARNING!
• The cigarette lighter reaches high
temperatures. Handle it carefully and
do not allow children to use it. • The cigarette lighter may not be
used as a power outlet.
Handholds and Cloth Hooks Handholds are fitted above the doors.
Once grabbed, they will lower until
the block position. When released, a
return spring will bring them back to
the original position.
Rear handholds also include a cloth
hook. Map Pockets Front seats are fitted with map
pockets, on the rear of the seatbacks,
and accessible by rear passengers.
CAUTION!
Do not put heavy or sharp objects in
the mesh pockets.“Comfort Luxury” rear seatsUnderstanding the Vehicle
3
136
Page 150 of 396
NOTE:
The distance necessary between the
portable hand-held transmitter and
the HomeLink ®
in the vehicle depends
on the system you wish to program.
Probably it will be necessary to try
several times. Upon every attempt,
keep the setting position for at least
15 seconds before trying again.
• Press and hold the programmed
HomeLink ®
button.
If the garage door opener/device
activates, programming is complete. To
program the remaining two
HomeLink ®
buttons, repeat each step
for each remaining button. Do not
erase the channels.
Reprogramming a Single HomeLink ®
Button
To reprogram a channel that has been
previously trained, follow these steps:
• Place the ignition device to the RUN
position without starting the engine.
• Press and hold the desired
HomeLink ®
button.
• Without releasing the button
proceed with “Programming the
hand-held transmitters” from second
step and follow all remaining steps. Using HomeLink ®
To operate, press and release the
programmed HomeLink ®
button.
Activation will now occur for the
programmed device (i.e., garage door
opener, gate operator, security system,
entry door lock, home/office lighting,
etc.). The hand-held transmitter of the
device may also be used at any time.
Security It is advisable to erase all channels
before you sell or turn in your vehicle.
To erase the channels press and hold
the two outside HomeLink ®
buttons (I
and III) until the indicator light starts
flashing (after approximately 20
seconds).
The HomeLink ®
Universal Transceiver is
disabled when the vehicle security
alarm is active (see “Vehicle security
alarm” in section “Before Starting”).
Troubleshooting Tips If you are having trouble while
programming HomeLink ®
, here are
some of the most common solutions:
• Replace the battery in the original
hand-held transmitter.
• Press the LEARN button on the
garage door opener to complete the
training for a rolling code. • Did you unplug the device for
programming and forgot to plug it
back in?
If you have any problems, or require
assistance, please call toll-free
1–800–355–3515 or, on the Internet at
www.HomeLink.com for information
or assistance.Understanding the Vehicle
3
146
Page 181 of 396
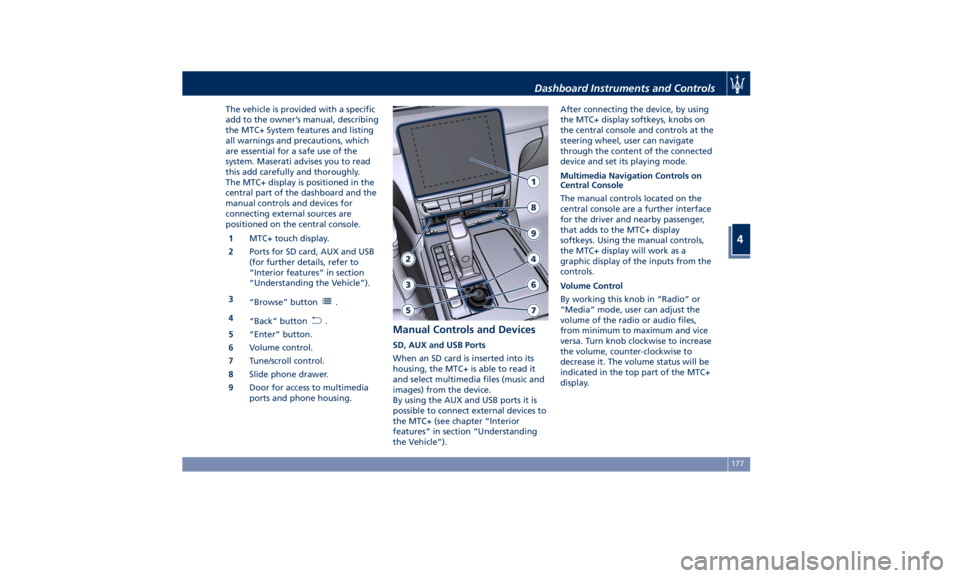
The vehicle is provided with a specific
add to the owner’s manual, describing
the MTC+ System features and listing
all warnings and precautions, which
are essential for a safe use of the
system. Maserati advises you to read
this add carefully and thoroughly.
The MTC+ display is positioned in the
central part of the dashboard and the
manual controls and devices for
connecting external sources are
positioned on the central console.
1 MTC+ touch display.
2 Ports for SD card, AUX and USB
(for further details, refer to
“Interior features” in section
“Understanding the Vehicle”).
3
“Browse” button
.
4
“Back” button
.
5 “Enter” button.
6 Volume control.
7 Tune/scroll control.
8 Slide phone drawer.
9 Door for access to multimedia
ports and phone housing. Manual Controls and Devices SD, AUX and USB Ports
When an SD card is inserted into its
housing, the MTC+ is able to read it
and select multimedia files (music and
images) from the device.
By using the AUX and USB ports it is
possible to connect external devices to
the MTC+ (see chapter “Interior
features” in section “Understanding
the Vehicle”). After connecting the device, by using
the MTC+ display softkeys, knobs on
the central console and controls at the
steering wheel, user can navigate
through the content of the connected
device and set its playing mode.
Multimedia Navigation Controls on
Central Console
The manual controls located on the
central console are a further interface
for the driver and nearby passenger,
that adds to the MTC+ display
softkeys. Using the manual controls,
the MTC+ display will work as a
graphic display of the inputs from the
controls.
Volume Control
By working this knob in “Radio” or
“Media” mode, user can adjust the
volume of the radio or audio files,
from minimum to maximum and vice
versa. Turn knob clockwise to increase
the volume, counter-clockwise to
decrease it. The volume status will be
indicated in the top part of the MTC+
display.Dashboard Instruments and Controls
4
177
Page 193 of 396
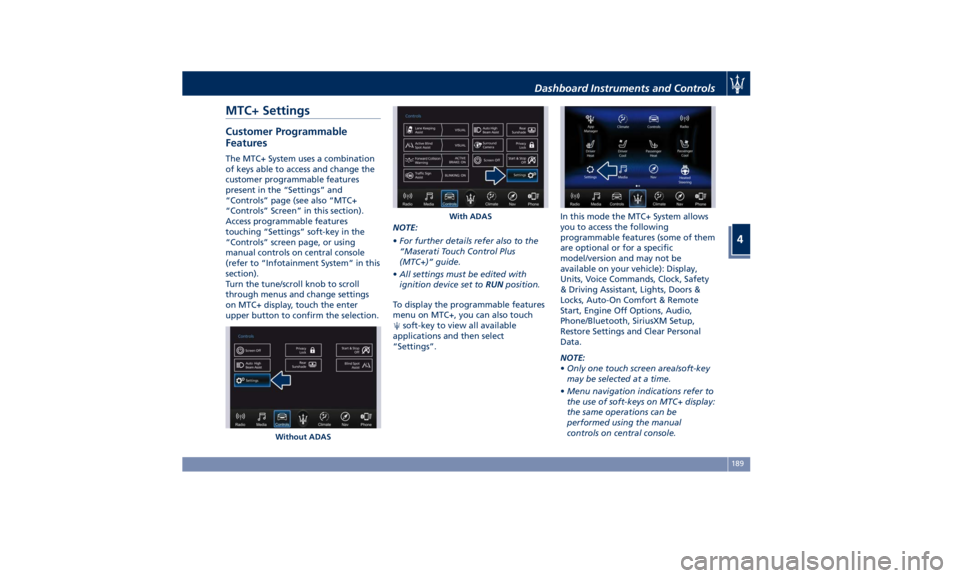
MTC+ Settings Customer Programmable
Features The MTC+ System uses a combination
of keys able to access and change the
customer programmable features
present in the “Settings” and
“Controls” page (see also “MTC+
“Controls” Screen” in this section).
Access programmable features
touching “Settings” soft-key in the
“Controls” screen page, or using
manual controls on central console
(refer to “Infotainment System” in this
section).
Turn the tune/scroll knob to scroll
through menus and change settings
on MTC+ display, touch the enter
upper button to confirm the selection. NOTE:
• For further details refer also to the
“Maserati Touch Control Plus
(MTC+)” guide.
• All settings must be edited with
ignition device set to RUN position.
To display the programmable features
menu on MTC+, you can also touch
soft-key to view all available
applications and then select
“Settings”. In this mode the MTC+ System allows
you to access the following
programmable features (some of them
are optional or for a specific
model/version and may not be
available on your vehicle): Display,
Units, Voice Commands, Clock, Safety
& Driving Assistant, Lights, Doors &
Locks, Auto-On Comfort & Remote
Start, Engine Off Options, Audio,
Phone/Bluetooth, SiriusXM Setup,
Restore Settings and Clear Personal
Data.
NOTE:
• Only one touch screen area/soft-key
may be selected at a time.
• Menu navigation indications refer to
the use of soft-keys on MTC+ display:
the same operations can be
performed using the manual
controls on central console.Without ADAS With ADASDashboard Instruments and Controls
4
189
Page 197 of 396
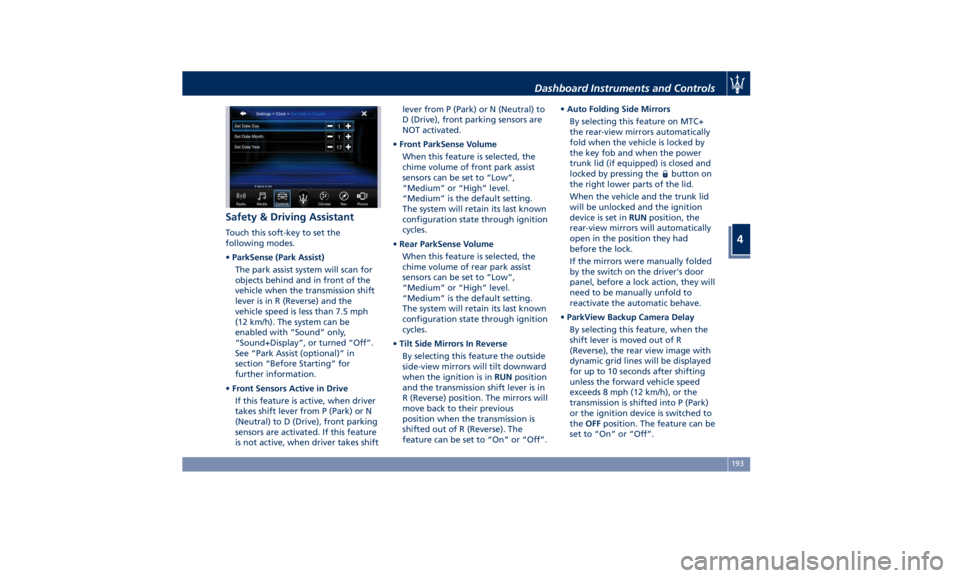
Safety & Driving Assistant Touch this soft-key to set the
following modes.
• ParkSense (Park Assist)
The park assist system will scan for
objects behind and in front of the
vehicle when the transmission shift
lever is in R (Reverse) and the
vehicle speed is less than 7.5 mph
(12 km/h). The system can be
enabled with “Sound” only,
“Sound+Display”, or turned “Off”.
See “Park Assist (optional)” in
section “Before Starting” for
further information.
• Front Sensors Active in Drive
If this feature is active, when driver
takes shift lever from P (Park) or N
(Neutral) to D (Drive), front parking
sensors are activated. If this feature
is not active, when driver takes shift lever from P (Park) or N (Neutral) to
D (Drive), front parking sensors are
NOT activated.
• Front ParkSense Volume
When this feature is selected, the
chime volume of front park assist
sensors can be set to “Low”,
“Medium” or “High” level.
“Medium” is the default setting.
The system will retain its last known
configuration state through ignition
cycles.
• Rear ParkSense Volume
When this feature is selected, the
chime volume of rear park assist
sensors can be set to “Low”,
“Medium” or “High” level.
“Medium” is the default setting.
The system will retain its last known
configuration state through ignition
cycles.
• Tilt Side Mirrors In Reverse
By selecting this feature the outside
side-view mirrors will tilt downward
when the ignition is in RUN position
and the transmission shift lever is in
R (Reverse) position. The mirrors will
move back to their previous
position when the transmission is
shifted out of R (Reverse). The
feature can be set to “On” or “Off”. • Auto Folding Side Mirrors
By selecting this feature on MTC+
the rear-view mirrors automatically
fold when the vehicle is locked by
the key fob and when the power
trunk lid (if equipped) is closed and
locked by pressing the
button on
the right lower parts of the lid.
When the vehicle and the trunk lid
will be unlocked and the ignition
device is set in RUN position, the
rear-view mirrors will automatically
open in the position they had
before the lock.
If the mirrors were manually folded
by the switch on the driver's door
panel, before a lock action, they will
need to be manually unfold to
reactivate the automatic behave.
• ParkView Backup Camera Delay
By selecting this feature, when the
shift lever is moved out of R
(Reverse), the rear view image with
dynamic grid lines will be displayed
for up to 10 seconds after shifting
unless the forward vehicle speed
exceeds 8 mph (12 km/h), or the
transmission is shifted into P (Park)
or the ignition device is switched to
the OFF position. The feature can be
set to “On” or “Off”.Dashboard Instruments and Controls
4
193