sensor MASERATI QUATTROPORTE 2019 Workshop Manual
[x] Cancel search | Manufacturer: MASERATI, Model Year: 2019, Model line: QUATTROPORTE, Model: MASERATI QUATTROPORTE 2019Pages: 396, PDF Size: 13.9 MB
Page 291 of 396
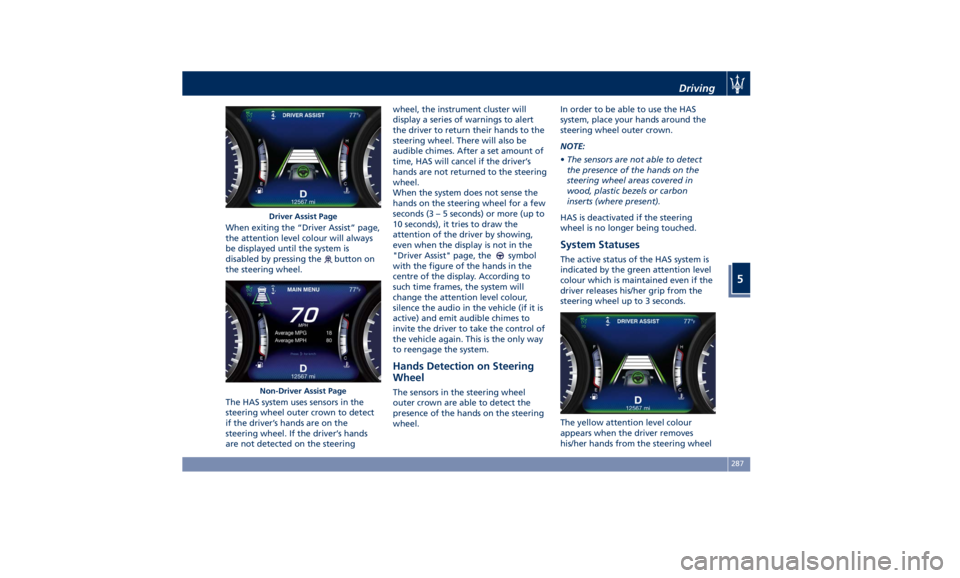
When exiting the “Driver Assist” page,
the attention level colour will always
be displayed until the system is
disabled by pressing the
button on
the steering wheel.
The HAS system uses sensors in the
steering wheel outer crown to detect
if the driver’s hands are on the
steering wheel. If the driver’s hands
are not detected on the steering wheel, the instrument cluster will
display a series of warnings to alert
the driver to return their hands to the
steering wheel. There will also be
audible chimes. After a set amount of
time, HAS will cancel if the driver’s
hands are not returned to the steering
wheel.
When the system does not sense the
hands on the steering wheel for a few
seconds (3 – 5 seconds) or more (up to
10 seconds), it tries to draw the
attention of the driver by showing,
even when the display is not in the
"Driver Assist" page, the
symbol
with the figure of the hands in the
centre of the display. According to
such time frames, the system will
change the attention level colour,
silence the audio in the vehicle (if it is
active) and emit audible chimes to
invite the driver to take the control of
the vehicle again. This is the only way
to reengage the system.
Hands Detection on Steering
Wheel The sensors in the steering wheel
outer crown are able to detect the
presence of the hands on the steering
wheel. In order to be able to use the HAS
system, place your hands around the
steering wheel outer crown.
NOTE:
• The sensors are not able to detect
the presence of the hands on the
steering wheel areas covered in
wood, plastic bezels or carbon
inserts (where present).
HAS is deactivated if the steering
wheel is no longer being touched.
System Statuses The active status of the HAS system is
indicated by the green attention level
colour which is maintained even if the
driver releases his/her grip from the
steering wheel up to 3 seconds.
The yellow attention level colour
appears when the driver removes
his/her hands from the steering wheelDriver Assist Page
Non-Driver Assist Page Driving
5
287
Page 293 of 396
• Press the HAS enable button on
the steering wheel.
• Begin steering manually.
• Press brake pedal.
• Turn off ACC.
• Unbuckle the driver’s seat belt.
• Press ACC Gap button for two
seconds to enable CC system.
• Shift out of the (D) Drive gear.
• Enter an Autonomous Emergency
Braking (AEB) event (See chapter
"Forward Collision Warning - FCW"
in this section).
• Turn signal activated.
System Cancellation The HAS system will cancel (without
driver intervention) if either of the
following actions occur:
• Curve that is too tight.
• When leaving the grip of the hands
on the steering wheel.
• Vehicle exits the highway or limited
access freeway.
• Lane line markers aren’t detected by
the forward facing camera.
• Any ADAS system faults.
• ACC cancellation.
• Vehicle speed exceeds the maximum
limit. • Lateral accelerations exceeds the
limits.
NOTE:
• When HAS cancels, the
symbol
will turn red then grey.
• The presence of the hands on the
steering wheel is detected by a logic
combination of a capacitive sensor
installed in the steering wheel and
the measured applied torque at the
steering column. This leads to a
more robust hands detection.
System Limitations HAS is unable to guide the vehicle
when the following conditions occur.
• Lane markings are not clear or
visibility is poor (i.e. heavy rain,
snow, fog, etc.).
• Obstructed, covered or damaged
forward-facing camera or sensor.
• When driving on hills or sharp
curves.
• When approaching toll booths.
• When the highway entrance or exit
is wider than 20 ft (6 meters).
• Bright light (ex. direct sunlight or
glare) facing the forward camera. WARNING!
Many unforeseen conditions can occur
that can affect the performance of
Highway Assist (HAS). Always keep
this in mind and drive attentively. It is
the drivers responsibility to keep
control of the vehicle at all times.
Radar Device - Regulatory
Information The “Regulatory Information” for all
the radio frequency and radar devices
can be consulted by accessing the
“Services” section on the website
www.maserati.com.Driving
5
289
Page 301 of 396
Safety
WARNING!
• Improperly inflated tires can be
dangerous.
• Under-inflation increases tire flexing
and can result in tire overheating.
• Over-inflation reduces a tire's ability
to cushion shock. Objects on the
road and potholes can cause
damage that results in tire failure.
• Over-inflated or under-inflated tires
can affect vehicle handling and can
fail suddenly, resulting in loss of
vehicle control.
• Unequal tire pressures can cause
steering problems.
• Unequal tire pressures from one side
of the vehicle to the other can cause
the vehicle to drift to the right or
left.
• Always drive with each tire inflated
to the recommended cold tire
inflation pressure.
Economy
Improper
inflation pressures may
cause uneven wear patterns to
develop across the tire tread. These
abnormal wear patterns will reduce tread life resulting in a need for
earlier tire replacement. Under-
inflation also increases tire rolling
resistance resulting in higher fuel
consumption.
Ride comfort and vehicle stability
Proper tire inflation contributes to a
comfortable ride. Over-inflation
produces a jarring and uncomfortable
ride.
Tire Pressure Checkup The proper cold tire inflation pressure
is indicated on the driver's side rear
door pillar and on the table “Tire
Inflation Pressure” in section
“Features and Specifications”.
Inflation pressure specified on the
table always refers to “cold tire
inflation pressure”. Cold tire inflation
pressure is defined as the tire pressure
after the vehicle has not been driven
for at least three hours, or driven less
than 1 mi (1.6 km) after a three hour
period.
Check tire pressures more often in
case of significant outside
temperature changes, as tire pressure
varies according to temperature
changes.
The pressure should be checked and if
necessary adjusted; tire wear and overall conditions should also be
checked monthly. Tire pressures
change by approximately 1 PSI (0.07
bar) per 12°F (7°C) of air temperature
change. Keep this in mind when
checking tire pressure inside a garage,
especially in winter.
Example: If garage temperature = 68°F
(20°C) and the outside temperature =
32°F (0°C) then the cold tire inflation
pressure should be increased by 3 PSI
(0.21 bar) for every 12°F (7°C) for this
outside temperature condition.
Tire pressure may increase from 2 to 6
PSI (0.13 to 0.4 bar) during operation.
DO NOT reduce this normal pressure
build-up or your tire pressure will be
too low. After inspecting or adjusting
the tire pressure, always reinstall the
valve stem cap. This will prevent
moisture and dirt from entering the
valve stem, which could damage the
valve stem and the TPMS sensor
connected to it.
Tread Wear Indicators Tread wear indicators are in the
original equipment tires to help you
determine when your tires should be
replaced.
These indicators are molded into the
bottom of the tread grooves.Driving
5
297
Page 302 of 396
When the tread is worn to one of the
tread wear indicators, the tire should
be replaced.
WARNING!
The wet performance (aquaplaning
resistance) will decrease
proportionally to the thickness of the
tread.
Tires Durability The service life of a tire depends on
various factors including, but not
limited to:
• driving style;
• tire pressure;
• distance driven.
WARNING!
Tires and the spare tire (if equipped)
should be replaced after six years,
regardless of the remaining tread.
Failure to follow this warning could
result in tire failure. Replacement Tires NOTE:
In order to maintain high performance
and safety level under all driving
conditions, Maserati strongly
recommends to use tires equivalent to
the originals in size, quality and
performance when replacement is
needed.
For the size designation of your tire
see the label on the driver's side rear
door pillar or see table “Wheels” in
section “Features and Specifications”.
The “Load Index” and “Speed Symbol”
for your tire will be found on the
original equipment tire sidewall.
NOTE:
Maserati recommends Maserati
Genuine Tires marked with “MGT”
logo specifically designed for its
models.
It is recommended to replace the two
front tires or two rear tires as a pair.
Replacing just one tire can seriously
affect your vehicle’s handling.
If you ever replace a wheel assembly,
make sure that the wheel’s
specifications (valve, TPMS sensor and
tire) match those of the original
wheels. Failure to use equivalent replacement tires may adversely affect
the safety, handling, and ride of your
vehicle.
Your Authorized Maserati Dealer is
available to provide suggestions as to
the types of tires most suited to the
use foreseen by the Customer.
WARNING!
• Do not use a tire, wheel size or
rating other than that specified for
your vehicle. Some combinations of
unapproved tires and wheels may
change suspension dimensions and
performance characteristics,
resulting in altered steering,
handling, and braking operations of
the vehicle. This can cause
unpredictable handling and stress to
steering and suspension
components. Use only the tire and
wheel sizes with load ratings
appointed for your vehicle.
• Never use a tire with a smaller load
index or capacity, other than what
was originally equipped on your
vehicle. Using a tire with a smaller
load index could result in tire
overloading and failure.
• Always check the maximum speed
rating on the tire sidewall on anyDriving
5
298
Page 305 of 396
WARNING!
The TPMS warns the driver that the
tire pressure has decreased. This
warning does not exempt the driver
from periodically checking the tires
and from complying with the
prescribed tire pressure levels.
CAUTION!
• The TPMS has been optimized for
the original equipment tires and
wheels. TPMS pressures and
warning have been established for
the tire size equipped on your
vehicle. Undesirable system
operation or sensor damage may
occur when using replacement
equipment that is not of the same
size, type, and/or style. Aftermarket
wheels can cause sensor damage. Do not use aftermarket tire sealants
or balance beads if your vehicle is
equipped with a TPMS, as damage
to the sensors may result.
• The system can temporarily
experience radio-electric
interference emitted by devices
using similar frequencies.
• After inspecting or adjusting the tire
pressure, always reinstall the valve
stem cap. This will prevent moisture
and dirt from entering the valve
stem and damage the TPMS internal
sensor.
NOTE:
• Driving
on a significantly
underinflated tire causes the tire to
overheat and may lead to tire
failure. Under-inflation also reduces
fuel efficiency and tire tread life, and
may affect the vehicle’s handling and
stopping ability.
• The TPMS is not a substitute for
proper tire maintenance, and it is
the driver’s responsibility to maintain
correct tire pressure using an
accurate tire pressure gage, even if
under-inflation has not reached the
level to trigger illumination of the
TPMS light
.
• Seasonal temperature changes will
affect tire pressure, and the TPMS will monitor the actual tire pressure
in the tire.
Premium System The TPMS system uses wireless
technology with wheel rim mounted
electronic sensors to monitor tire
pressure levels. Sensors mounted to
each wheel as part of the valve stem
transmit tire pressure readings to the
receiver module.
The TPMS consists of the following
components:
• receiver module;
• four TPMS sensors;
• various TPMS messages, which
display on the instrument cluster;
• warning light
.
Tire Pressure Low Warning
The TPMS light will illuminate in
the instrument cluster and an acoustic
signal will notify that tire pressure is
low in one or more of the four tires.Driving
5
301
Page 306 of 396
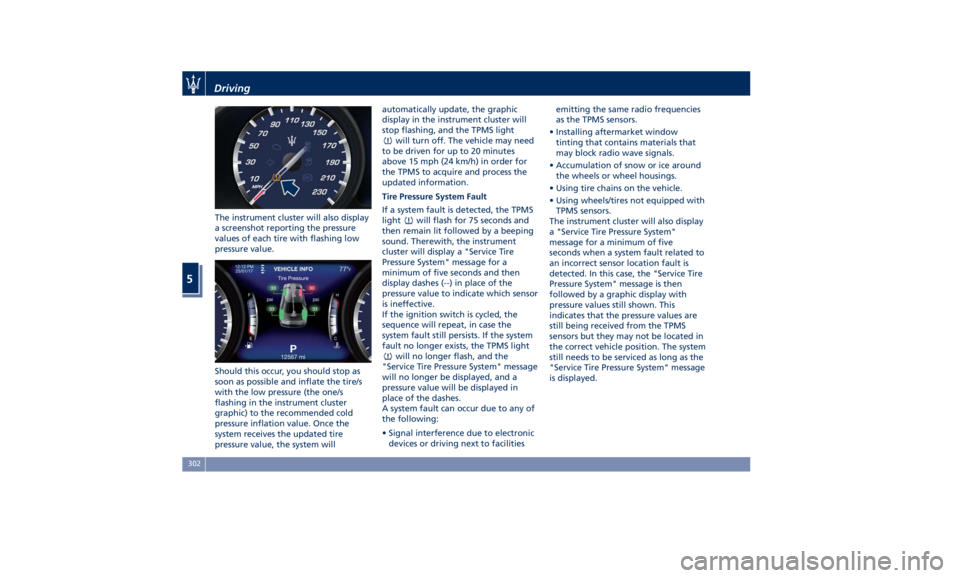
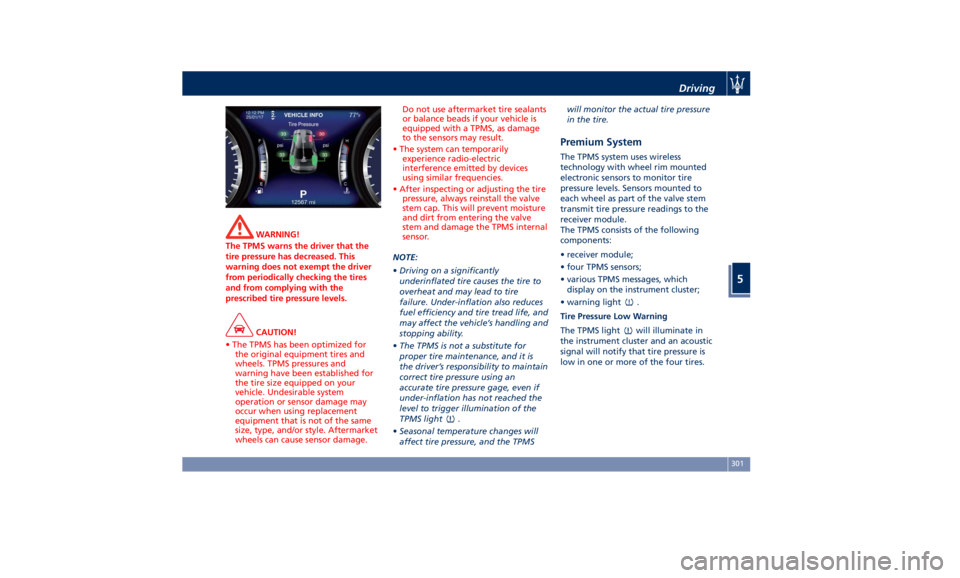
The instrument cluster will also display
a screenshot reporting the pressure
values of each tire with flashing low
pressure value.
Should this occur, you should stop as
soon as possible and inflate the tire/s
with the low pressure (the one/s
flashing in the instrument cluster
graphic) to the recommended cold
pressure inflation value. Once the
system receives the updated tire
pressure value, the system will automatically update, the graphic
display in the instrument cluster will
stop flashing, and the TPMS light
will turn off. The vehicle may need
to be driven for up to 20 minutes
above 15 mph (24 km/h) in order for
the TPMS to acquire and process the
updated information.
Tire Pressure System Fault
If a system fault is detected, the TPMS
light
will flash for 75 seconds and
then remain lit followed by a beeping
sound. Therewith, the instrument
cluster will display a "Service Tire
Pressure System" message for a
minimum of five seconds and then
display dashes (--) in place of the
pressure value to indicate which sensor
is ineffective.
If the ignition switch is cycled, the
sequence will repeat, in case the
system fault still persists. If the system
fault no longer exists, the TPMS light
will no longer flash, and the
"Service Tire Pressure System" message
will no longer be displayed, and a
pressure value will be displayed in
place of the dashes.
A system fault can occur due to any of
the following:
• Signal interference due to electronic
devices or driving next to facilities emitting the same radio frequencies
as the TPMS sensors.
• Installing aftermarket window
tinting that contains materials that
may block radio wave signals.
• Accumulation of snow or ice around
the wheels or wheel housings.
• Using tire chains on the vehicle.
• Using wheels/tires not equipped with
TPMS sensors.
The instrument cluster will also display
a "Service Tire Pressure System"
message for a minimum of five
seconds when a system fault related to
an incorrect sensor location fault is
detected. In this case, the "Service Tire
Pressure System" message is then
followed by a graphic display with
pressure values still shown. This
indicates that the pressure values are
still being received from the TPMS
sensors but they may not be located in
the correct vehicle position. The system
still needs to be serviced as long as the
"Service Tire Pressure System" message
is displayed.Driving
5
302
Page 307 of 396
Vehicles with Compact Spare Tire
• The compact spare tire does not
have a TPMS sensor. Therefore, the
TPMS will not monitor the pressure
of the compact spare tire.
• If you replace a tire having pressure
below the low-pressure warning
limit, with the compact spare tire, on
the next ignition switch cycle, the
TPMS light
will illuminate
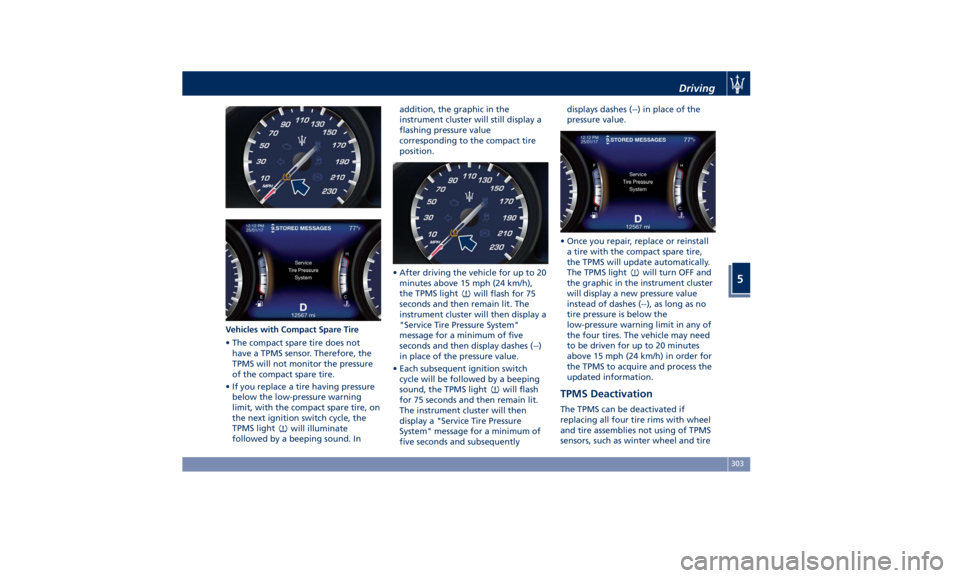
followed by a beeping sound. In addition, the graphic in the
instrument cluster will still display a
flashing pressure value
corresponding to the compact tire
position.
• After driving the vehicle for up to 20
minutes above 15 mph (24 km/h),
the TPMS light
will flash for 75
seconds and then remain lit. The
instrument cluster will then display a
"Service Tire Pressure System"
message for a minimum of five
seconds and then display dashes (--)
in place of the pressure value.
• Each subsequent ignition switch
cycle will be followed by a beeping
sound, the TPMS light
will flash
for 75 seconds and then remain lit.
The instrument cluster will then
display a "Service Tire Pressure
System" message for a minimum of
five seconds and subsequently displays dashes (--) in place of the
pressure value.
• Once you repair, replace or reinstall
a tire with the compact spare tire,
the TPMS will update automatically.
The TPMS light
will turn OFF and
the graphic in the instrument cluster
will display a new pressure value
instead of dashes (--), as long as no
tire pressure is below the
low-pressure warning limit in any of
the four tires. The vehicle may need
to be driven for up to 20 minutes
above 15 mph (24 km/h) in order for
the TPMS to acquire and process the
updated information.
TPMS Deactivation The TPMS can be deactivated if
replacing all four tire rims with wheel
and tire assemblies not using of TPMS
sensors, such as winter wheel and tireDriving
5
303
Page 308 of 396
assemblies. After replacing all four
wheel and tire assemblies (road tires)
with tires not equipped with Tire
Pressure Monitoring System sensors,
drive the vehicle for 20 minutes above
15 mph (24 km/h). The TPMS will
chime, the TPMS light
will flash on
and off for 75 seconds and then
remain on and the instrument cluster
will display the “Service Tire Pressure
System” message and then display
dashes (--) in place of the pressure
values. Beginning with the next
ignition switch cycle, the TPMS will no
longer chime or display the “Service
Tire Pressure System” message in the
instrument cluster but dashes (--) will
remain in place of the pressure values.
To reactivate the TPMS, replace all four
wheel and tire assemblies (road tires)
with tires equipped with TPMS sensors.
Then, drive the vehicle for up to 20 minutes above 15 mph (24 km/h). The
TPMS will chime, the TPMS light
will flash for 75 seconds and then
turn off. The instrument cluster will
then display the “Service Tire Pressure
System” message.
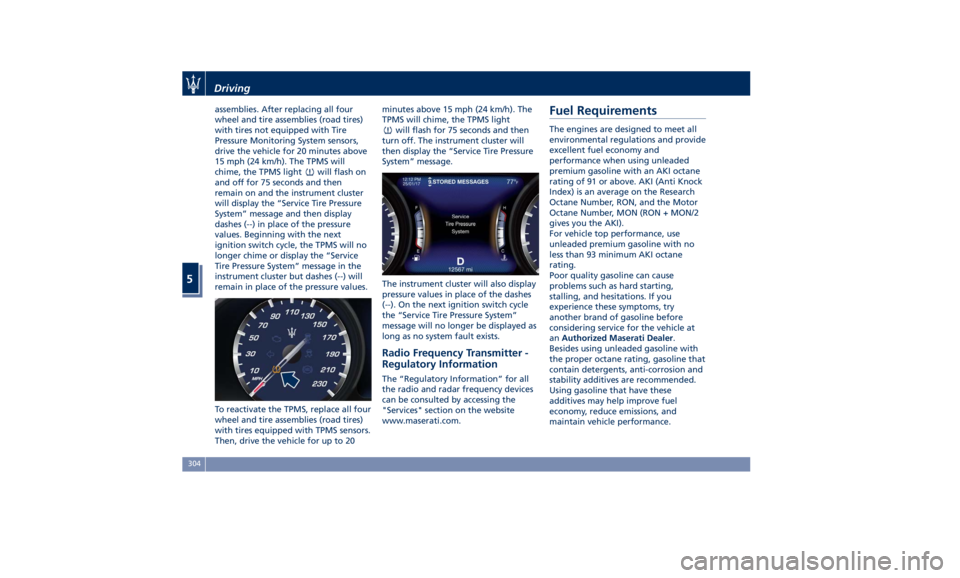
The instrument cluster will also display
pressure values in place of the dashes
(--). On the next ignition switch cycle
the “Service Tire Pressure System”
message will no longer be displayed as
long as no system fault exists.
Radio Frequency Transmitter -
Regulatory Information The “Regulatory Information” for all
the radio and radar frequency devices
can be consulted by accessing the
"Services" section on the website
www.maserati.com.Fuel Requirements The engines are designed to meet all
environmental regulations and provide
excellent fuel economy and
performance when using unleaded
premium gasoline with an AKI octane
rating of 91 or above. AKI (Anti Knock
Index) is an average on the Research
Octane Number, RON, and the Motor
Octane Number, MON (RON + MON/2
gives you the AKI).
For vehicle top performance, use
unleaded premium gasoline with no
less than 93 minimum AKI octane
rating.
Poor quality gasoline can cause
problems such as hard starting,
stalling, and hesitations. If you
experience these symptoms, try
another brand of gasoline before
considering service for the vehicle at
an Authorized Maserati Dealer .
Besides using unleaded gasoline with
the proper octane rating, gasoline that
contain detergents, anti-corrosion and
stability additives are recommended.
Using gasoline that have these
additives may help improve fuel
economy, reduce emissions, and
maintain vehicle performance.Driving
5
304
Page 347 of 396
to lift the arms for cleaning or
replacing the wiper blades.
WARNING!
It is dangerous to operate or service
the wiper blades with the windshield
wipers in an active position (any
position different from “OFF”) and
with the ignition switch in the RUN
position. The rain sensors may
suddenly activate the wipers. Always
use the “Service” position for any
intervention on the windshield wiper
blades.
Windshield Wiper Maintenance
Life
expectancy of wiper blades varies
depending on the geographical area’s
weather conditions where the car is
used and frequency of use. Poor
performance of blades may be present
with chattering, marks on the glass,
water lines or wet spots. If any of
these conditions are present, clean the
wiper blades or replace if necessary.
Clean the rubber edges of the wiper
blades and the windshield/rear
window glasses periodically with a
sponge or soft cloth and a mild
nonabrasive cleaner. This will remove
accumulations of salt or road film. Operation of the wipers on dry glass
for long periods may cause
deterioration of the wiper blades.
Always use washer fluid when using
the wipers to remove salt or dirt from
a dry windshield.
Avoid using the wiper blades to
remove frost or ice from the
windshield. Keep the blade rubber out
of contact with petroleum products
such as engine oil, gasoline, etc.
Spray nozzles
If the jet does not work, first check
that there is fluid in the tank (see
paragraph “Level checks” in this
section) then check that the nozzles
are not clogged.
Windshield Wiper Blades Replacement
• Move the wiper arms into “Service”
position, (see chapter “Windshield
Wipers and Washers” in section
“Understanding the Vehicle”) and
lift them.
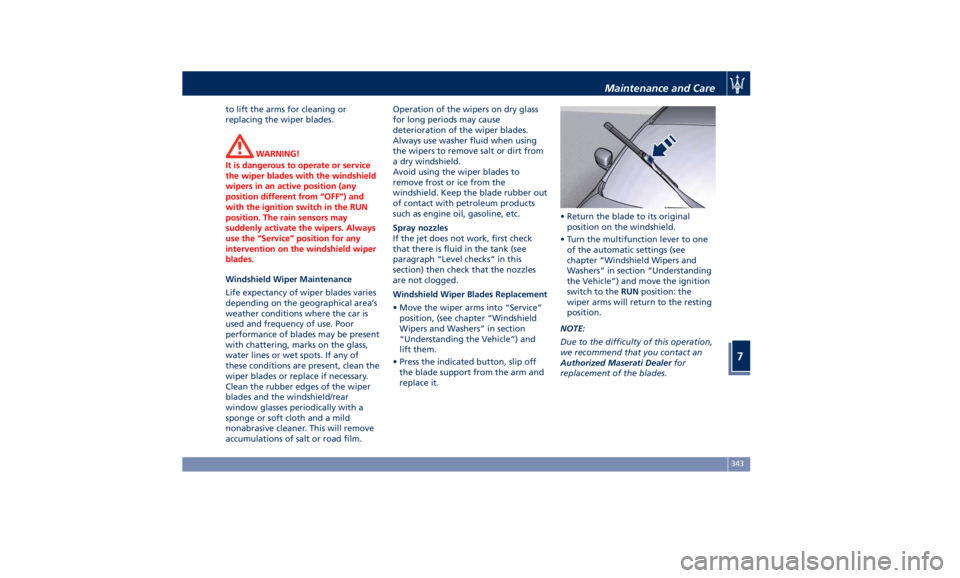
• Press the indicated button, slip off
the blade support from the arm and
replace it. • Return the blade to its original
position on the windshield.
• Turn the multifunction lever to one
of the automatic settings (see
chapter “Windshield Wipers and
Washers” in section “Understanding
the Vehicle”) and move the ignition
switch to the RUN position: the
wiper arms will return to the resting
position.
NOTE:
Due to the difficulty of this operation,
we recommend that you contact an
Authorized Maserati Dealer for
replacement of the blades.Maintenance and Care
7
343
Page 351 of 396
for short trips or if it is equipped with
power-absorbing devices that remain
permanently on even when the
ignition switch is off. This applies
above all if these devices have been
retrofitted ("Aftermarket" services).
If the vehicle is not used for long
periods of time, please see “Vehicle
Stored for Long Periods” in this
section.
Battery Recharge WARNING!
The process of charging or recharging
the battery produces hydrogen, a
flammable gas that can explode and
cause serious injuries. When charging
or recharging the battery, follow the
recommended precautions at all
times.
• Before using a charger device
always check that this tool is
suitable for the installed battery,
with constant voltage (lower than
14.0 V) and low amperage
(maximum limit 15 A).
• Recharge the battery in a
well-ventilated environment.
• Never charge or recharge a frozen
battery. • Ensure that any sparks or open
flames are kept well away from the
battery while it is charging.
• Before using a charger to charge or
maintain the battery charge status,
carefully follow the instructions
provided to ensure the charger is
connected to the battery safely and
correctly.
It is possible to recharge the battery
without
disconnecting the
cables of
the vehicle electrical system.
• To access the battery lift the ground
coverage of the trunk compartment
and remove the access cover as
previously shown (see paragraph “To
Disconnect the Battery" in this
chapter).
• Remove the protection cover and
connect the terminal clamp of the
charger positive cable (typically in
red) to the positive post (+) of the
battery.
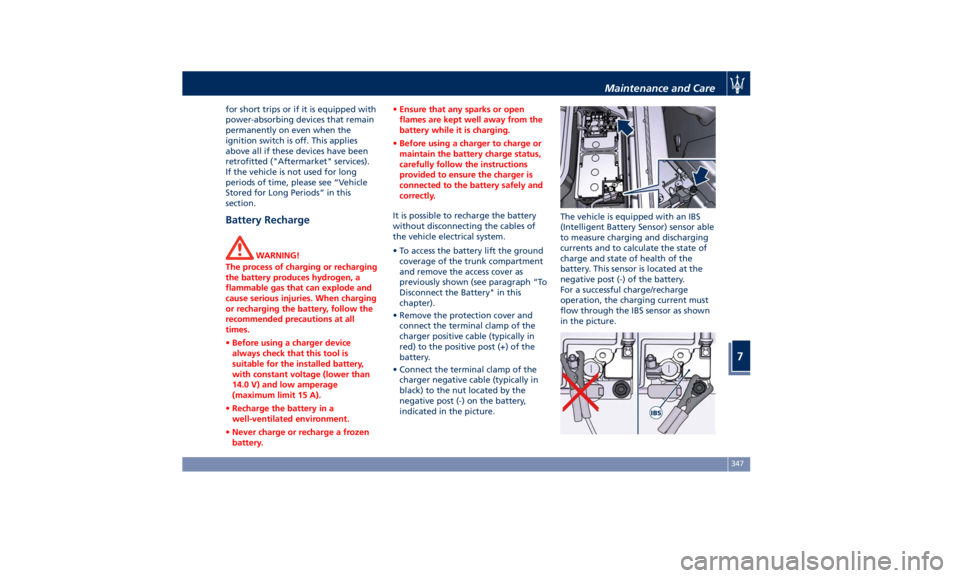
• Connect the terminal clamp of the
charger negative cable (typically in
black) to the nut located by the
negative post (-) on the battery,
indicated in the picture. The vehicle is equipped with an IBS
(Intelligent Battery Sensor) sensor able
to measure charging and discharging
currents and to calculate the state of
charge and state of health of the
battery. This sensor is located at the
negative post (-) of the battery.
For a successful charge/recharge
operation, the charging current must
flow through the IBS sensor as shown
in the picture.Maintenance and Care
7
347