electrical MAZDA MIATA 1991 Factory Owner's Manual
[x] Cancel search | Manufacturer: MAZDA, Model Year: 1991, Model line: MIATA, Model: MAZDA MIATA 1991Pages: 392, PDF Size: 29.45 MB
Page 298 of 392

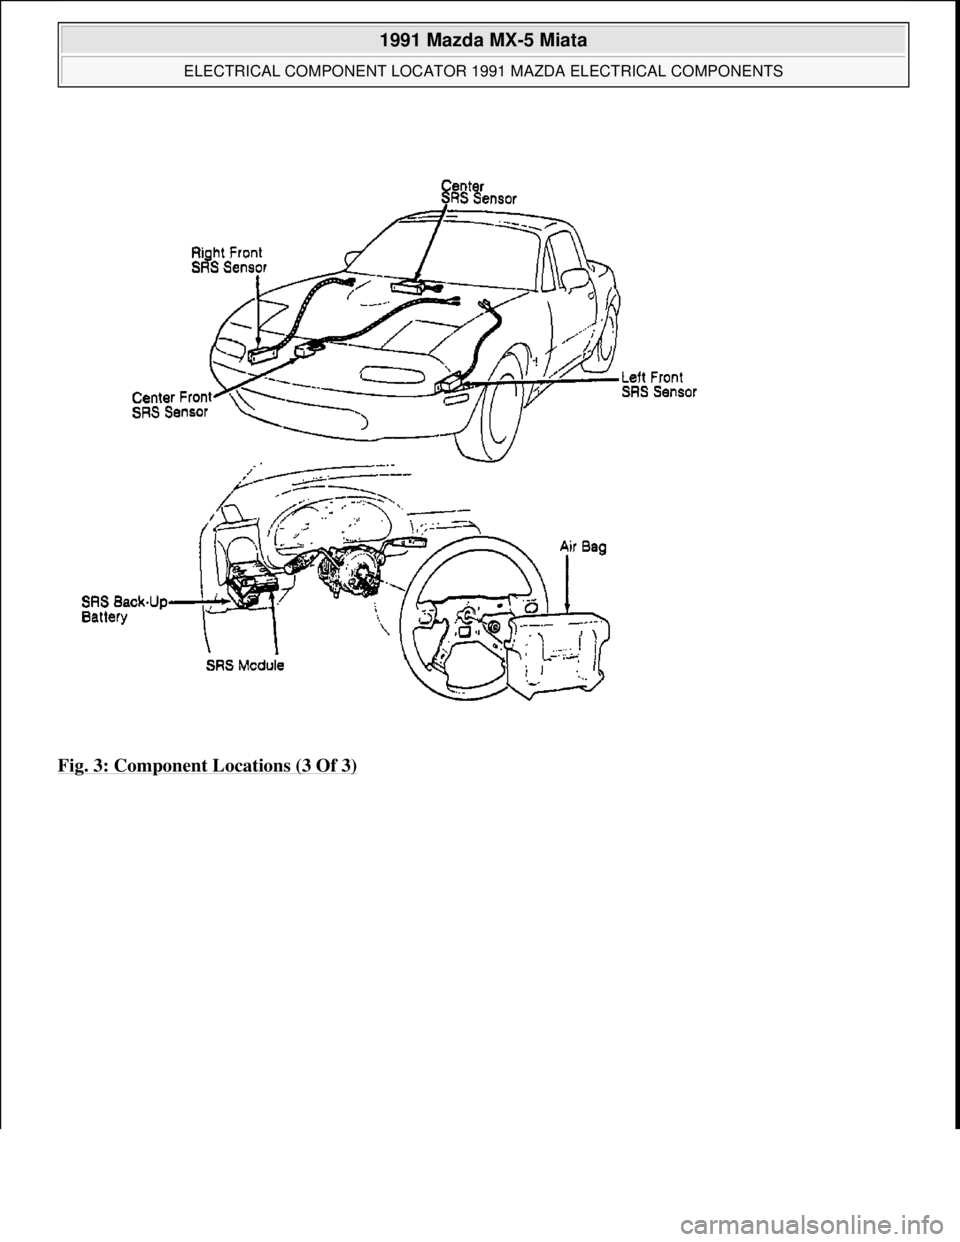
Fig. 3: Component Locations (3 Of 3)
1991 Mazda MX-5 Miata
ELECTRICAL COMPONENT LOCATOR 1991 MAZDA ELECTRICAL COMPONENTS
Microsoft
Sunday, July 05, 2009 2:15:23 PMPage 6 © 2005 Mitchell Repair Information Company, LLC.
Page 319 of 392

ANTI-LOCK BRAKE SYSTEM
The anti-lock brake system contains electronic equipment that can be susceptible to interference caused by
improperly installed or high output radio transmitting equipment. Since this interference could cause the
possible loss of the anti-lock braking capability, such equipment should be installed by qualified professionals.
On models equipped with anti-lock brake systems, ALWAYS observe the following cautions:
DO NOT attempt to bleed hydraulic system without first referring to the appropriate ANTI-LOCK
BRAKE SYSTEM article in the BRAKES Section.
DO NOT mix tire sizes. As long as tires remain close to the original diameter, increasing the width is
acceptable. Rolling diameter must be identical for all 4 tires. Some manufacturers recommend tires of the
same brand, style and type. Failure to follow this precaution may cause inaccurate wheel speed readings.
Use ONLY recommended brake fluids. DO NOT use silicone brake fluids in an ABS-equipped vehicle.
BATTERY WARNING
REPLACING BLOWN FUSES
Before replacing a blown fuse, remove ignition key, turn off all lights and accessories to avoid damaging the
electrical system. Be sure to use fuse with the correct indicated amperage rating. The use of an incorrect
amperage rating fuse may result in a dangerous electrical system overload.
BRAKE PAD WEAR INDICATOR
Indicator will cause a squealing or scraping noise, warning that brake pads need replacement.
CATALYTIC CONVERTER
Continued operation of vehicle with a severe malfunction could cause converter to overheat, resulting in
possible damage to converter and vehicle. service.
WARNING:R-134a service equipment or vehicle A/C systems SHOULD NOT be
pressure tested or leak tested with compressed air. Some mixtures of
air/R134a have shown to be combustible at elevated pressures. These
mixtures are dangerous and may cause fire and/or explosions. See AIR
CONDITIONING SERVICE article in GENERAL INFORMATION section.
WARNING:When battery is disconnected, vehicles equipped with computers may
lose memory data. When battery power is restored, driveability problems
may exist on some vehicles. These vehicles may require a relearn
procedure. See COMPUTER RELEARN PROCEDURES article in GENERAL
INFORMATION section.
1991 Mazda MX-5 Miata
FUSES & CIRCUIT BREAKERS Fuses & Circuit Breakers 1990-95 Mazda
Microsoft
Sunday, July 05, 2009 2:15:54 PMPage 6 © 2005 Mitchell Repair Information Company, LLC.
Page 320 of 392

Any modification to the exhaust system on turbo models, which reduces exhaust backpressure, will lead to lean
fuel mixtures and excessive spark advance. This could cause serious engine damage.
ELECTROSTATIC DISCHARGE SENSITIVE (ESD) PARTS
ENGINE OIL
FUEL SYSTEM SERVICE
HALOGEN BULBS
Halogen bulbs contain pressurized gas which may explode if overheated. DO NOT touch glass portion of bulb
with bare hands. Eye protection should be worn when handling or working around halogen bulbs.
HEADLIGHT RETRACTOR
RADIATOR CAP
RADIATOR FAN WARNING:Many solid state electrical components can be damaged by static
electricity (ESD). Some will display a warning label, but many will not.
Discharge personal static electricity by touching a metal ground point on
the vehicle prior to servicing any ESD sensitive component.
CAUTION: Never use non-detergent or straight mineral oil.
WARNING:Relieve fuel system pressure prior to servicing any fuel system
component (fuel injection models).
CAUTION: If headlight retractor freezes during cold weather operation, DO NOT
attempt to force mechanism. Headlights should be kept raised at all times
in cold weather. To raise them, use only headlight retractor switch. DO
NOT use headlight switch.
CAUTION: Always disconnect the fan motor when working near the radiator fan. The
fan is temperature controlled and could start at any time even when the
ignition key is in the OFF position. DO NOT loosen or remove radiator cap
when cooling system is hot.
WARNING:Keep hands away from radiator fan. Fan is controlled by a thermostatic
switch which may come on or run for up to 15 minutes even after engine
is turned off.
1991 Mazda MX-5 Miata
FUSES & CIRCUIT BREAKERS Fuses & Circuit Breakers 1990-95 Mazda
Microsoft
Sunday, July 05, 2009 2:15:54 PMPage 7 © 2005 Mitchell Repair Information Company, LLC.
Page 327 of 392

A/C-HEATER SYSTEM - MANUAL
1990-92 Manual A/C-Heater Systems
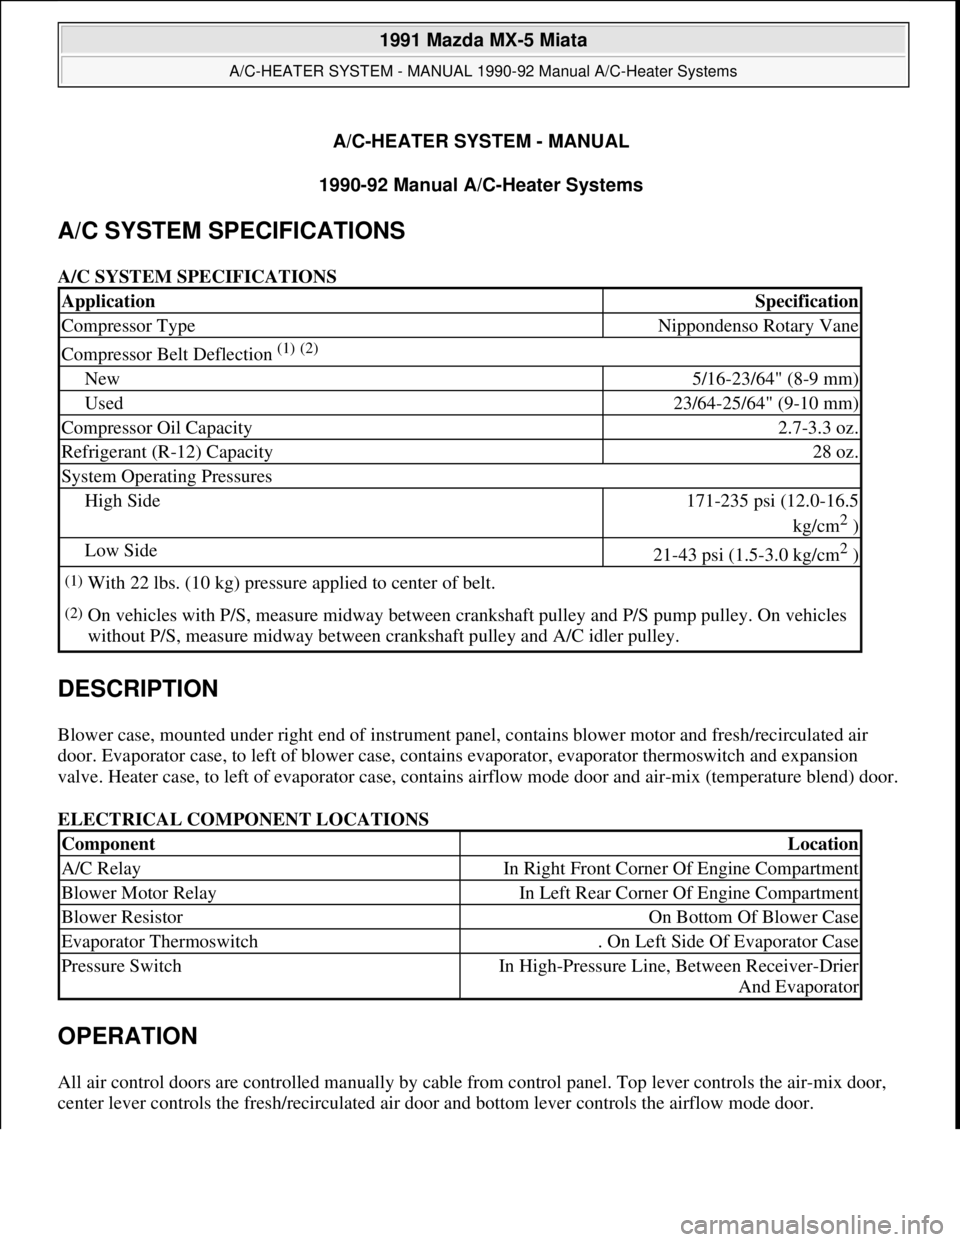
A/C SYSTEM SPECIFICATIONS
A/C SYSTEM SPECIFICATIONS
DESCRIPTION
Blower case, mounted under right end of instrument panel, contains blower motor and fresh/recirculated air
door. Evaporator case, to left of blower case, contains evaporator, evaporator thermoswitch and expansion
valve. Heater case, to left of evaporator case, contains airflow mode door and air-mix (temperature blend) door.
ELECTRICAL COMPONENT LOCATIONS
OPERATION
All air control doors are controlled manually by cable from control panel. Top lever controls the air-mix door,
center lever controls the fresh/recirculated air door and bottom lever controls the airflow mode door.
ApplicationSpecification
Compressor TypeNippondenso Rotary Vane
Compressor Belt Deflection (1) (2)
New5/16-23/64" (8-9 mm)
Used23/64-25/64" (9-10 mm)
Compressor Oil Capacity2.7-3.3 oz.
Refrigerant (R-12) Capacity28 oz.
System Operating Pressures
High Side171-235 psi (12.0-16.5
kg/cm
2 )
Low Side21-43 psi (1.5-3.0 kg/cm2 )
(1)With 22 lbs. (10 kg) pressure applied to center of belt.
(2)On vehicles with P/S, measure midway between crankshaft pulley and P/S pump pulley. On vehicles
without P/S, measure midway between crankshaft pulley and A/C idler pulley.
ComponentLocation
A/C RelayIn Right Front Corner Of Engine Compartment
Blower Motor RelayIn Left Rear Corner Of Engine Compartment
Blower ResistorOn Bottom Of Blower Case
Evaporator Thermoswitch. On Left Side Of Evaporator Case
Pressure SwitchIn High-Pressure Line, Between Receiver-Drier
And Evaporator
1991 Mazda MX-5 Miata
A/C-HEATER SYSTEM - MANUAL 1990-92 Manual A/C-Heater Systems
1991 Mazda MX-5 Miata
A/C-HEATER SYSTEM - MANUAL 1990-92 Manual A/C-Heater Systems
Microsoft
Sunday, July 05, 2009 2:11:52 PMPage 1 © 2005 Mitchell Repair Information Company, LLC.
Microsoft
Sunday, July 05, 2009 2:11:56 PMPage 1 © 2005 Mitchell Repair Information Company, LLC.
Page 333 of 392

Disconnect electrical connectors from blower case. Remove glove box. Loosen seal plate between blower motor
case and evaporator case. Remove blower motor case nuts. Remove case and seal plate. To install, reverse
removal procedure.
COMPRESSOR
Removal & Installation
1. Disconnect negative battery cable. Discharge A/C system using approved refrigerant recovery/recycling
equipment. Disconnect compressor clutch connector. Disconnect refrigerant lines from compressor.
Remove drive belt.
2. Raise and support vehicle. Remove compressor mounting bolts and remove compressor. To install,
reverse removal procedure. Adjust drive belt to specified tension. Evacuate and charge system.
CONDENSER & RECEIVER-DRIER
Removal & Installation
Discharge A/C system using approved refrigerant recovery/recycling equipment. Raise and support vehicle.
Remove splash shield and air guide. Remove condenser and receiver-drier as an assembly. To install, reverse
removal procedure. Evacuate and charge system.
CONTROL PANEL
Removal & Installation
Remove rear console assembly. See Fig. 4 . Remove vent outlets from center panel assembly. Remove center
panel assembly. Remove control panel screws. Pull control panel from hole. Disconnect door control cables
from back of control panel and remove panel. To install, reverse removal procedure.
EVAPORATOR CORE & THERMOSWITCH
Removal & Installation
1. Discharge A/C system using approved refrigerant recovery/recycling equipment. Remove condenser and
receiver-drier as an assembly. Disconnect low-pressure and high-pressure pipes from evaporator tubes at
engine compartment firewall.
2. Remove right undercover and glove box. Disconnect thermoswitch electrical connector. Loosen left seal
plate (between heater case and evaporator case). Loosen right seal plate (between evaporator case and
blower motor case).
3. Remove evaporator case. Disassemble evaporator case, and remove evaporator core and thermoswitch.
See Fig. 3
. To install, reverse removal procedure. Evacuate and charge system.
1991 Mazda MX-5 Miata
A/C-HEATER SYSTEM - MANUAL 1990-92 Manual A/C-Heater Systems
Microsoft
Sunday, July 05, 2009 2:11:52 PMPage 7 © 2005 Mitchell Repair Information Company, LLC.
Page 357 of 392

STARTER - DIRECT DRIVE
1990-92 ELECTRICAL Mazda Starters - Direct Drive
DESCRIPTION
Nippondenso direct drive starter is a conventional 12-volt, 4-pole, brush-type starter. The integral solenoid is
attached to the drive housing. The overrunning clutch pinion drive is mounted directly on armature shaft drive
end.
TROUBLESHOOTING
TESTING (ON VEHICLE)
CIRCUIT TESTING
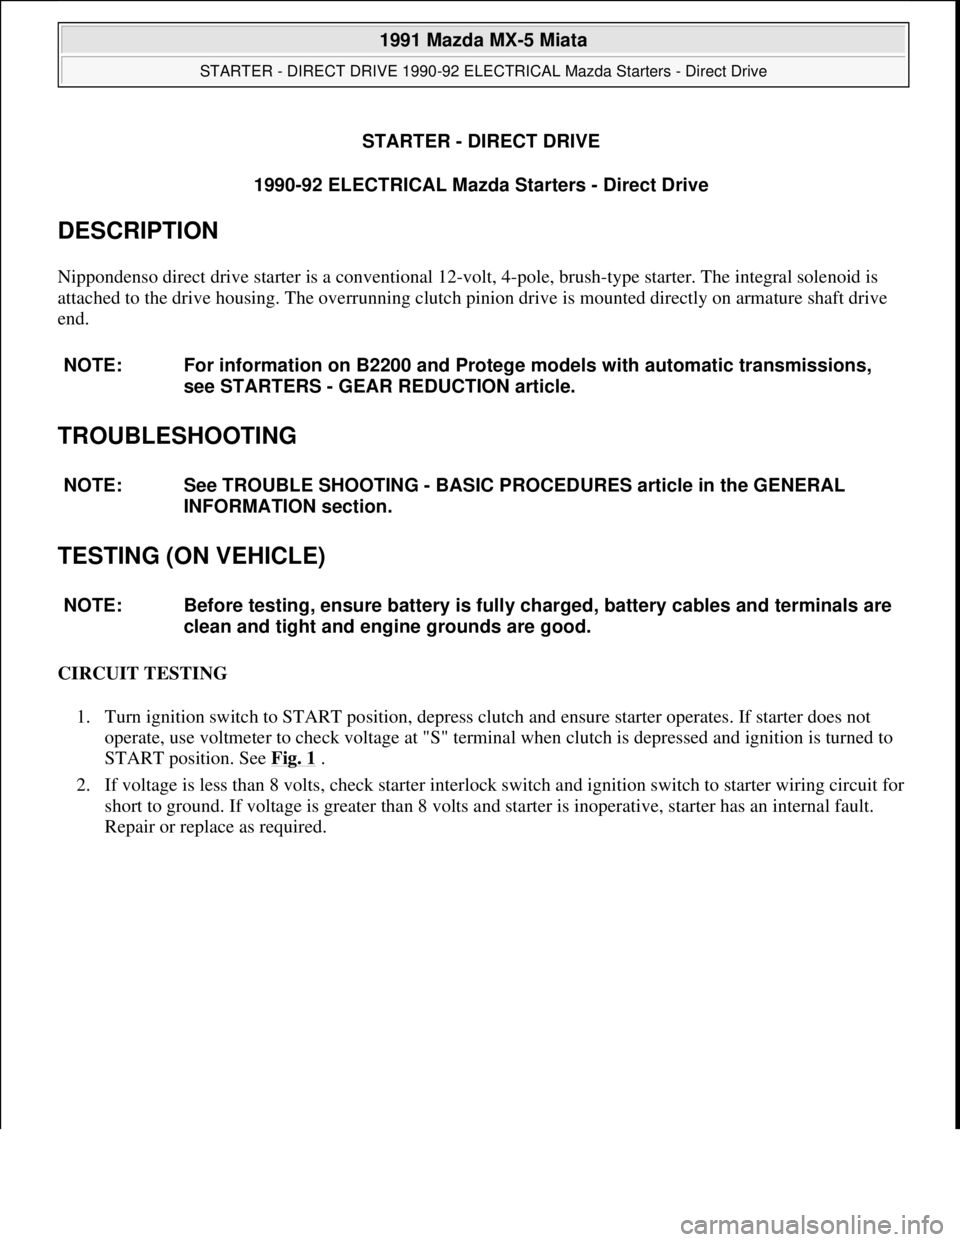
1. Turn ignition switch to START position, depress clutch and ensure starter operates. If starter does not
operate, use voltmeter to check voltage at "S" terminal when clutch is depressed and ignition is turned to
START position. See Fig. 1
.
2. If voltage is less than 8 volts, check starter interlock switch and ignition switch to starter wiring circuit for
short to ground. If voltage is greater than 8 volts and starter is inoperative, starter has an internal fault.
Repair or replace as required. NOTE: For information on B2200 and Protege models with automatic transmissions,
see STARTERS - GEAR REDUCTION article.
NOTE: See TROUBLE SHOOTING - BASIC PROCEDURES article in the GENERAL
INFORMATION section.
NOTE: Before testing, ensure battery is fully charged, battery cables and terminals are
clean and tight and engine grounds are good.
1991 Mazda MX-5 Miata
STARTER - DIRECT DRIVE 1990-92 ELECTRICAL Mazda Starters - Direct Drive
1991 Mazda MX-5 Miata
STARTER - DIRECT DRIVE 1990-92 ELECTRICAL Mazda Starters - Direct Drive
Microsoft
Sunday, July 05, 2009 2:13:20 PMPage 1 © 2005 Mitchell Repair Information Company, LLC.
Microsoft
Sunday, July 05, 2009 2:13:24 PMPage 1 © 2005 Mitchell Repair Information Company, LLC.
Page 358 of 392

Fig. 1: Direct Drive Starter Circuit Diagrams
Courtesy of MAZDA MOTORS CORP.
STARTER INTERLOCK SWITCH (CLUTCH START SWITCH)
Switch is mounted on bracket near top front of clutch pedal. Disconnect switch harness connector. Using
ohmmeter, ensure continuity exists between switch connector terminals when clutch pedal is depressed. If
1991 Mazda MX-5 Miata
STARTER - DIRECT DRIVE 1990-92 ELECTRICAL Mazda Starters - Direct Drive
Microsoft
Sunday, July 05, 2009 2:13:20 PMPage 2 © 2005 Mitchell Repair Information Company, LLC.
Page 359 of 392

continuity does not exist, adjust or replace switch.
BENCH TESTS (ASSEMBLED)
NO-LOAD TEST
Connect fully-charged 12-volt battery, voltmeter and ammeter to starter. See Fig. 2
. Using remote starter wires
or jumper, engage solenoid. Starter should spin smoothly. Note/record meter readings and check no-load
specification. See NO-LOAD TEST SPECIFICATIONS table. If not within specification, disassemble and
inspect starter components.
NO-LOAD TEST SPECIFICATIONS
ApplicationSpecification
B2200 (M/T), Miata, Protege (M/T) & 323
Voltage11.5 Volts
Current60 Amps Maximum
Shaft Speed6500 RPM
1991 Mazda MX-5 Miata
STARTER - DIRECT DRIVE 1990-92 ELECTRICAL Mazda Starters - Direct Drive
Microsoft
Sunday, July 05, 2009 2:13:20 PMPage 3 © 2005 Mitchell Repair Information Company, LLC.
Page 360 of 392

Fig. 2: Testing Direct Drive Starter Circuits
Courtesy of MAZDA MOTORS CORP.
SOLENOID TESTS
1991 Mazda MX-5 Miata
STARTER - DIRECT DRIVE 1990-92 ELECTRICAL Mazda Starters - Direct Drive
Microsoft
Sunday, July 05, 2009 2:13:20 PMPage 4 © 2005 Mitchell Repair Information Company, LLC.
Page 361 of 392

SOLENOID PULL-IN TEST
Connect positive battery lead to solenoid "S" terminal and negative battery lead to solenoid case. Starter pinion
drive gear should extend quickly and maintain this position. If starter pinion drive gear does not extend, replace
solenoid. See Fig. 2
.
SOLENOID RETURN TEST
Connect positive battery lead to solenoid "M" terminal and ground negative battery lead to starter body. Using
screwdriver, pry overrunning clutch pinion drive outward. Release screwdriver and ensure overrunning clutch
pinion drive returns to original position. See Fig. 2 .
SOLENOID
1. Disconnect all wires to solenoid. Using ohmmeter, ensure continuity between "S" and "M" terminals, and
between "S" terminal and solenoid body. See Fig. 1
. If continuity does not exist between these terminals,
solenoid must be replaced.
2. Next ensure continuity does not exist between "M" and "B" terminals. If continuity exists between these
terminals, solenoid is shorted and must be replaced.
PINION GAP ADJUSTMENT
1. Ensure field wire is disconnected from solenoid "M" terminal. Connect positive battery lead to "S"
terminal and negative battery lead to starter case. Starter pinion drive gear will extend outward and stop.
2. Quickly measure pinion gap clearance between end of pinion drive and circlip retainer. See Fig. 3
. DO
NOT operate starter solenoid for more than 10 seconds. Pinion gap clearance should be .02-.08" (0.5-2.0
mm).
3. If pinion gap clearance is not within specification, adjust by increasing or decreasing thickness of
solenoid shims located between solenoid and drive housin
g. NOTE: Solenoid tests must be performed with starter assembled and field lead ("M"
terminal wire) disconnected at the solenoid.
CAUTION: Do not engage starter solenoid for more than 10 seconds during testing or
damage to coil winding may result.
1991 Mazda MX-5 Miata
STARTER - DIRECT DRIVE 1990-92 ELECTRICAL Mazda Starters - Direct Drive
Microsoft
Sunday, July 05, 2009 2:13:20 PMPage 5 © 2005 Mitchell Repair Information Company, LLC.