buttons MAZDA MODEL 5 2006 Owners Manual
[x] Cancel search | Manufacturer: MAZDA, Model Year: 2006, Model line: MODEL 5, Model: MAZDA MODEL 5 2006Pages: 426, PDF Size: 7.18 MB
Page 198 of 426
Black plate (198,1)
qOperating the Radio
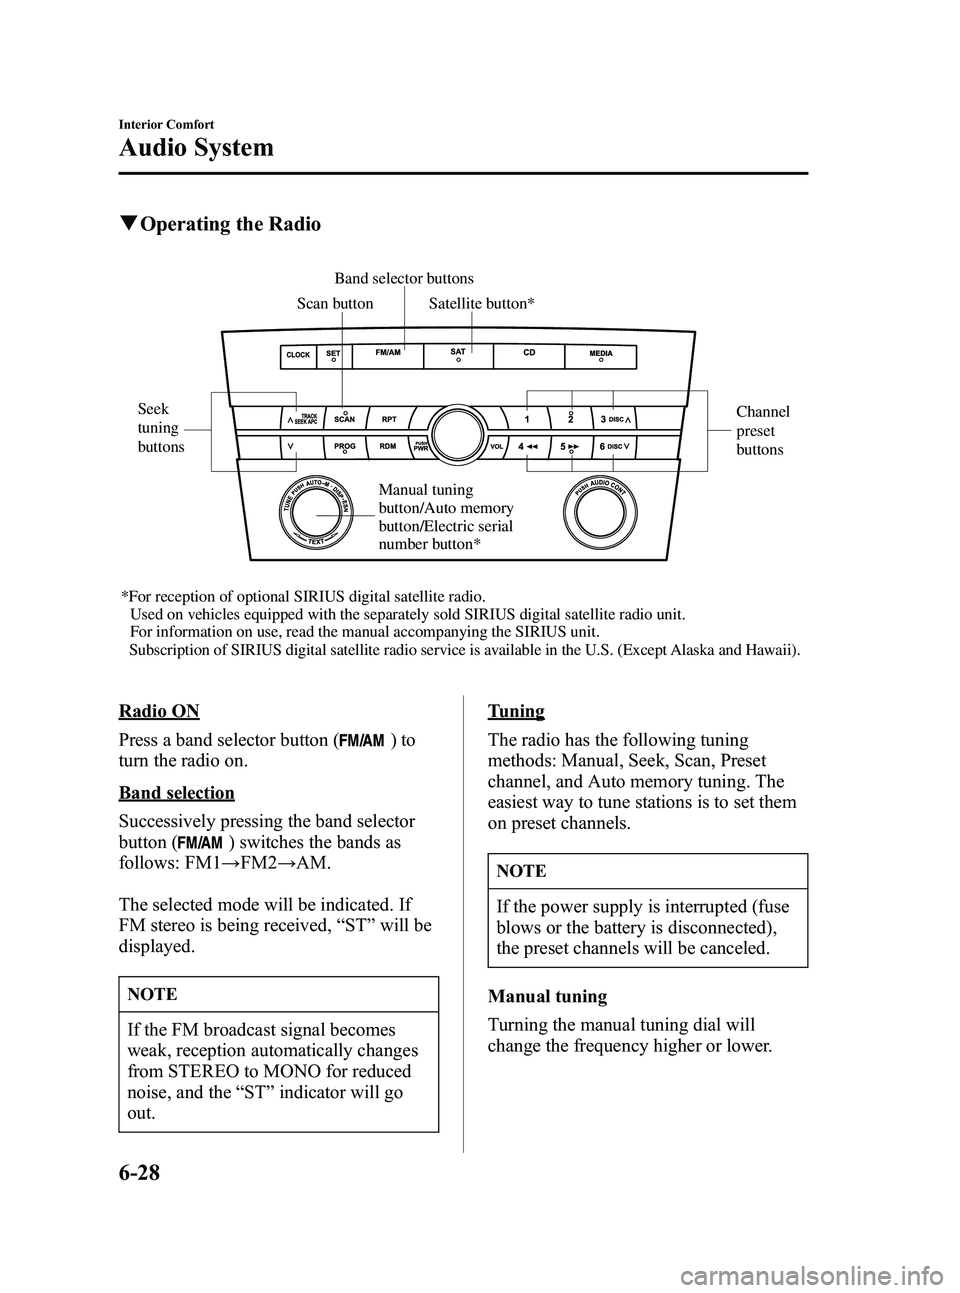
Scan button Band selector buttons
Seek
tuning
buttons Channel
preset
buttons
*For reception of optional SIRIUS digital satellite radio. Used on vehicles equipped with the separately sold SIRIUS digital satellite radio\
unit.For information on use, read the manual accompanying the SIRIUS unit.
Subscription of SIRIUS digital satellite radio service is available in the U.S. (Except Alaska and Hawaii). Satellite button*
Manual tuning
button/Auto memory
button/Electric serial
number button*
Radio ON
Press a band selector button (
)to
turn the radio on.
Band selection
Successively pressing the band selector
button (
) switches the bands as
follows: FM1 →FM2 →AM.
The selected mode will be indicated. If
FM stereo is being received, “ST ”will be
displayed.
NOTE
If the FM broadcast signal becomes
weak, reception automatically changes
from STEREO to MONO for reduced
noise, and the “ST ”indicator will go
out.
Tuning
The radio has the following tuning
methods: Manual, Seek, Scan, Preset
channel, and Auto memory tuning. The
easiest way to tune stations is to set them
on preset channels.
NOTE
If the power supply is interrupted (fuse
blows or the battery is disconnected),
the preset channels will be canceled.
Manual tuning
Turning the manual tuning dial will
change the frequency higher or lower.
6-28
Interior Comfort
Audio System
Mazda3_8U55-EA-05G_Edition3 Page198
Tuesday, September 13 2005 10:42 AM
Form No.8U55-EA-05G
Page 383 of 426
11
Getting started
●The Current Position screen appears.
Note
●You can select the language by select and press . You can also change the
selected language using Language Selection. ( page 45)
● The CAUTION screen remains on the display unless you select and press .
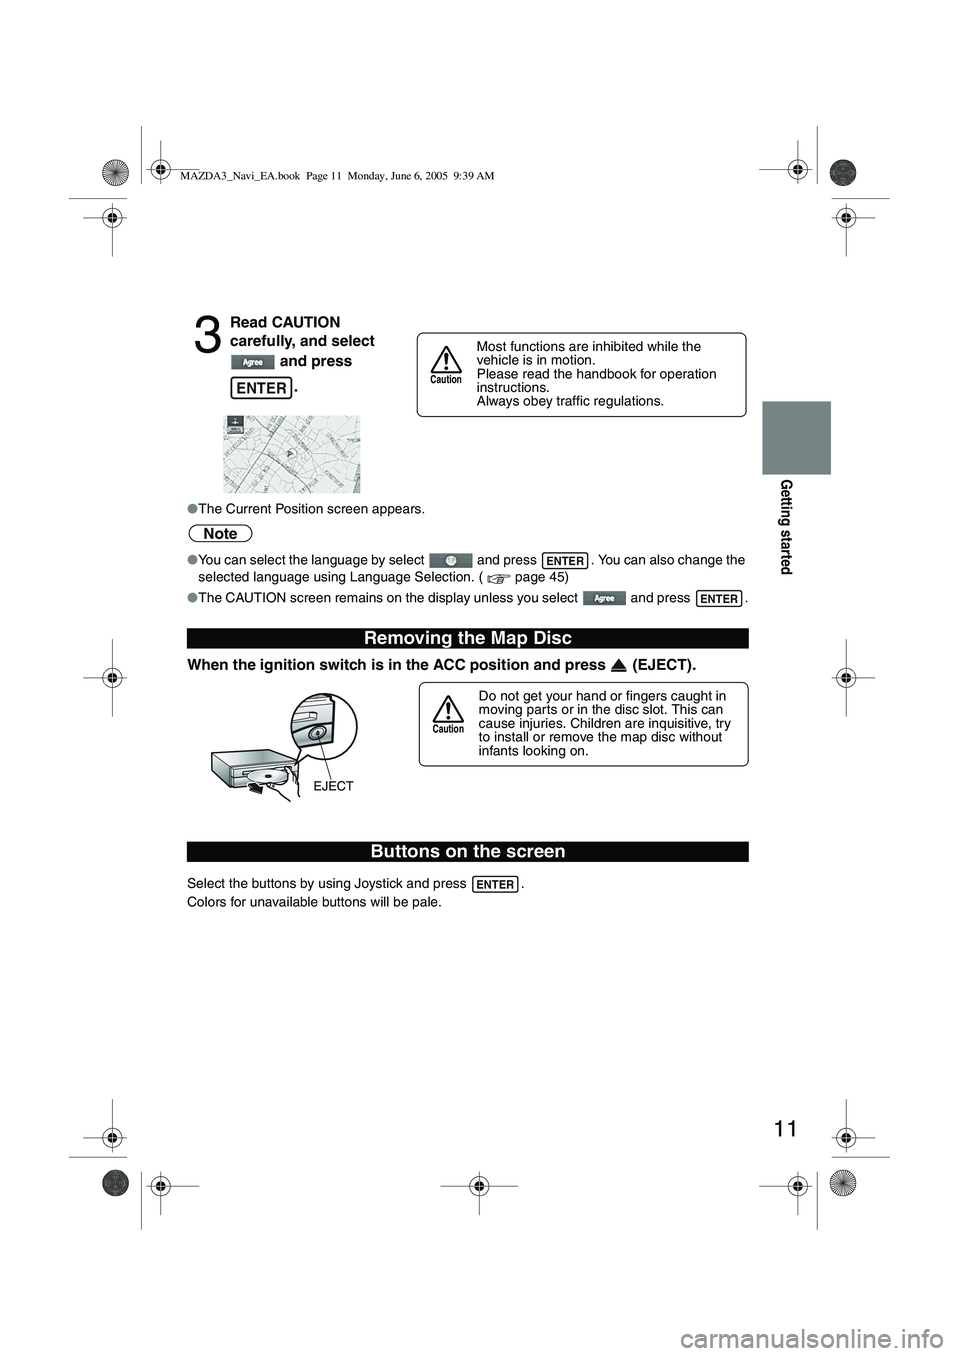
When the ignition switch is in the ACC position and press (EJECT).
Select the buttons by using Joystick and press .
Colors for unavailable buttons will be pale.
3
Read CAUTION
carefully, and select
and press
.
Removing the Map Disc
Buttons on the screen
ENTER
Most functions are inhibited while the
vehicle is in motion.
Please read the handbook for operation
instructions.
Always obey traffic regulations.
Caution
ENTER
ENTER
Do not get your hand or fingers caught in
moving parts or in the disc slot. This can
cause injuries. Children are inquisitive, try
to install or remove the map disc without
infants looking on.
Caution
ENTER
MAZDA3_Navi_EA.book Page 11 Monday, June 6, 2005 9:39 AM
Page 385 of 426
13
Getting started
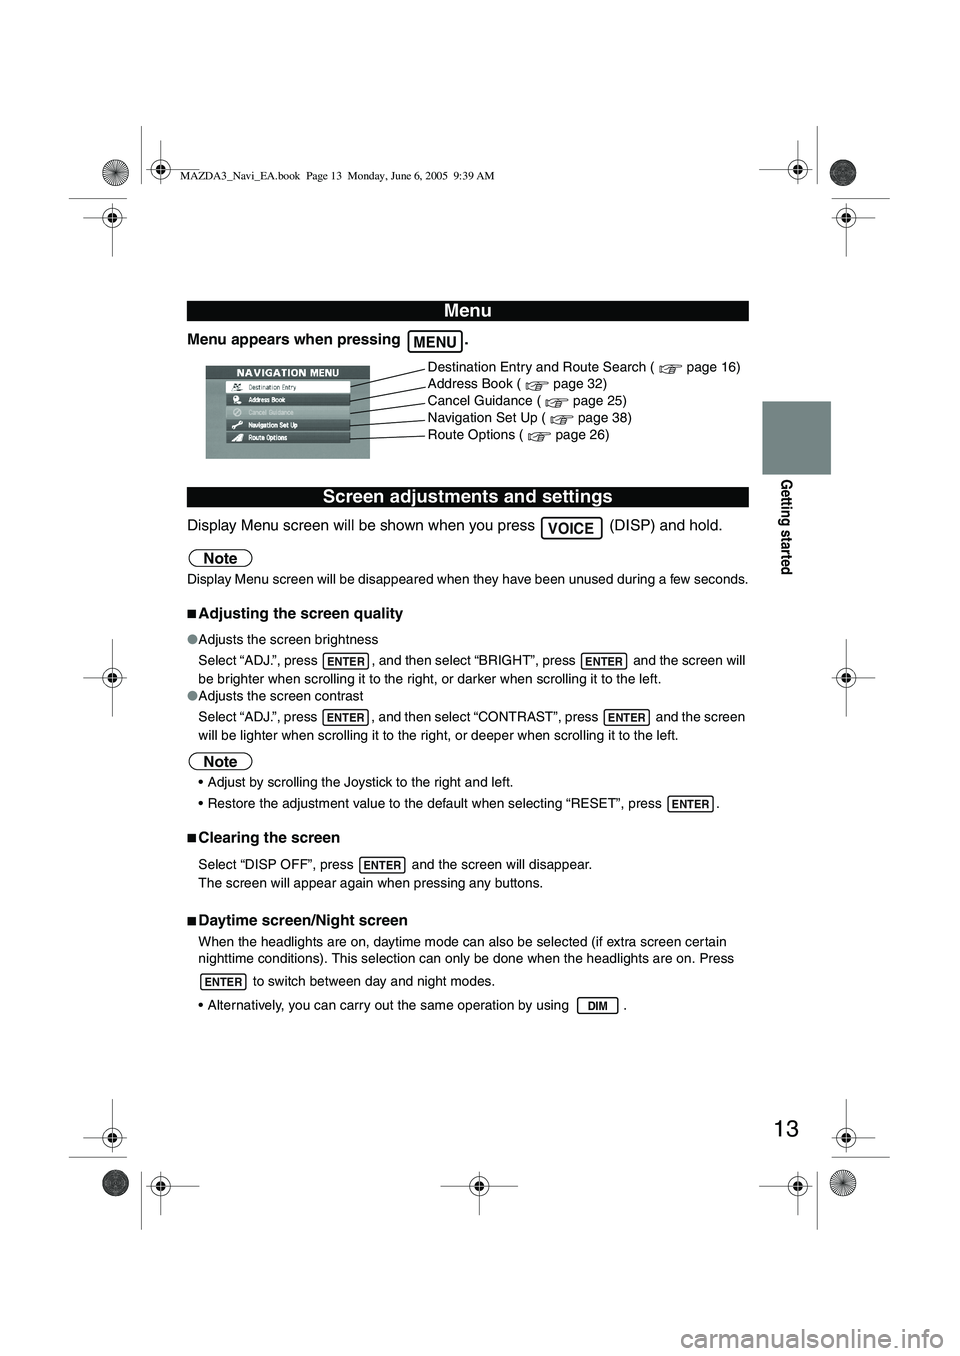
Menu appears when pressing .
Display Menu screen will be shown when you press (DISP) and hold.
Note
Display Menu screen will be disappeared when they have been unused during a few seconds.
■Adjusting the screen quality
●Adjusts the screen brightness
Select “ADJ.”, press , and then select “BRIGHT”, press and the screen will
be brighter when scrolling it to the right, or darker when scrolling it to the left.
● Adjusts the screen contrast
Select “ADJ.”, press , and then select “CONTRAST”, press and the screen
will be lighter when scrolling it to the right, or deeper when scrolling it to the left.
Note
Adjust by scrolling the Joystick to the right and left.
Restore the adjustment value to the default when selecting “RESET”, press .
■Clearing the screen
Select “DISP OFF”, press and the screen will disappear.
The screen will appear again when pressing any buttons.
■Daytime screen/Night screen
When the headlights are on, daytime mode can also be selected (if extra screen cer tain
nighttime conditions). This selection can only be done when the headlights are on. Press
to switch between day and night modes.
Alternatively, you can carry out the same operation by using .
Menu
Screen adjustments and settings
MENU
Destination Entry and Route Search ( page 16)
Address Book ( page 32)
Cancel Guidance ( page 25)
Navigation Set Up ( page 38)
Route Options ( page 26)
VOICE
ENTERENTER
ENTERENTER
ENTER
ENTER
ENTER
DIM
MAZDA3_Navi_EA.book Page 13 Monday, June 6, 2005 9:39 AM
Page 400 of 426
28
Routing
Route Options
Before Steps select
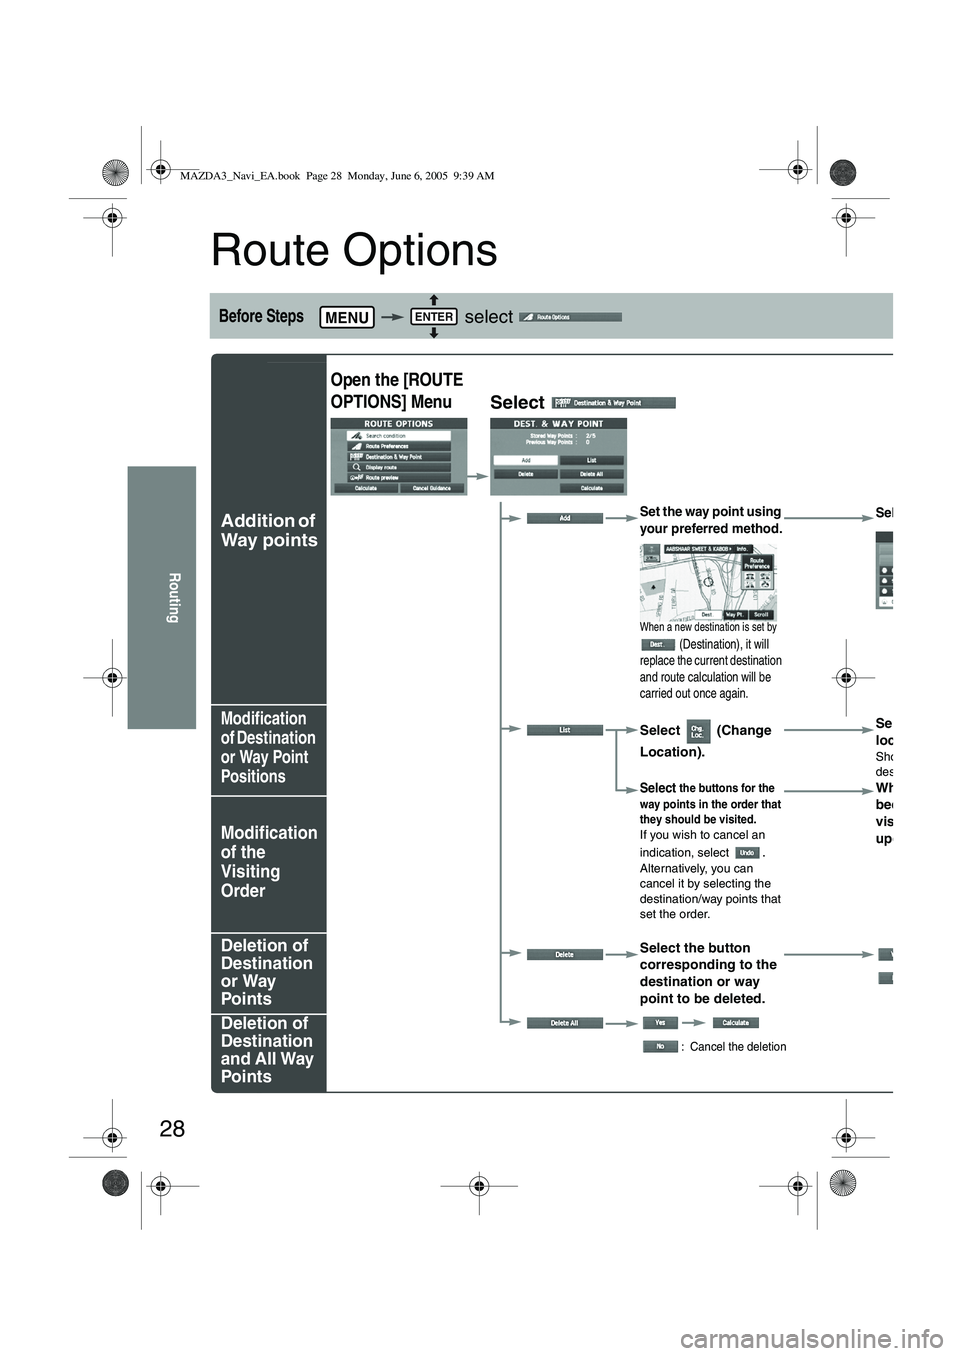
Addition of
Way points
Modification
of Destination
or Way Point
Positions
Modification
of the
Visiting
Order
Deletion of
Destination
or Way
Points
Deletion of
Destination
and All Way
Points
MENUENTER
Open the [ROUTE
OPTIONS] Menu
Select
Set the way point using
your preferred method.
When a new destination is set by
(Destination), it will
replace the current destination
and route calculation will be
carried out once again.
Select
Select (Change
Location). Select the
location to
Shows the m
destination/w
Select the buttons for the
way points in the order that
they should be visited.
If you wish to cancel an
indication, select
.Alternatively, you can
cancel it by selecting the
destination/way points that
set the order.
When the
been comp
visiting or
updated a
Select the button
corresponding to the
destination or way
point to be deleted.
:Ca
: Cancel the deletion
MAZDA3_Navi_EA.book Page 28 Monday, June 6, 2005 9:39 AM
Page 401 of 426
29
Routing
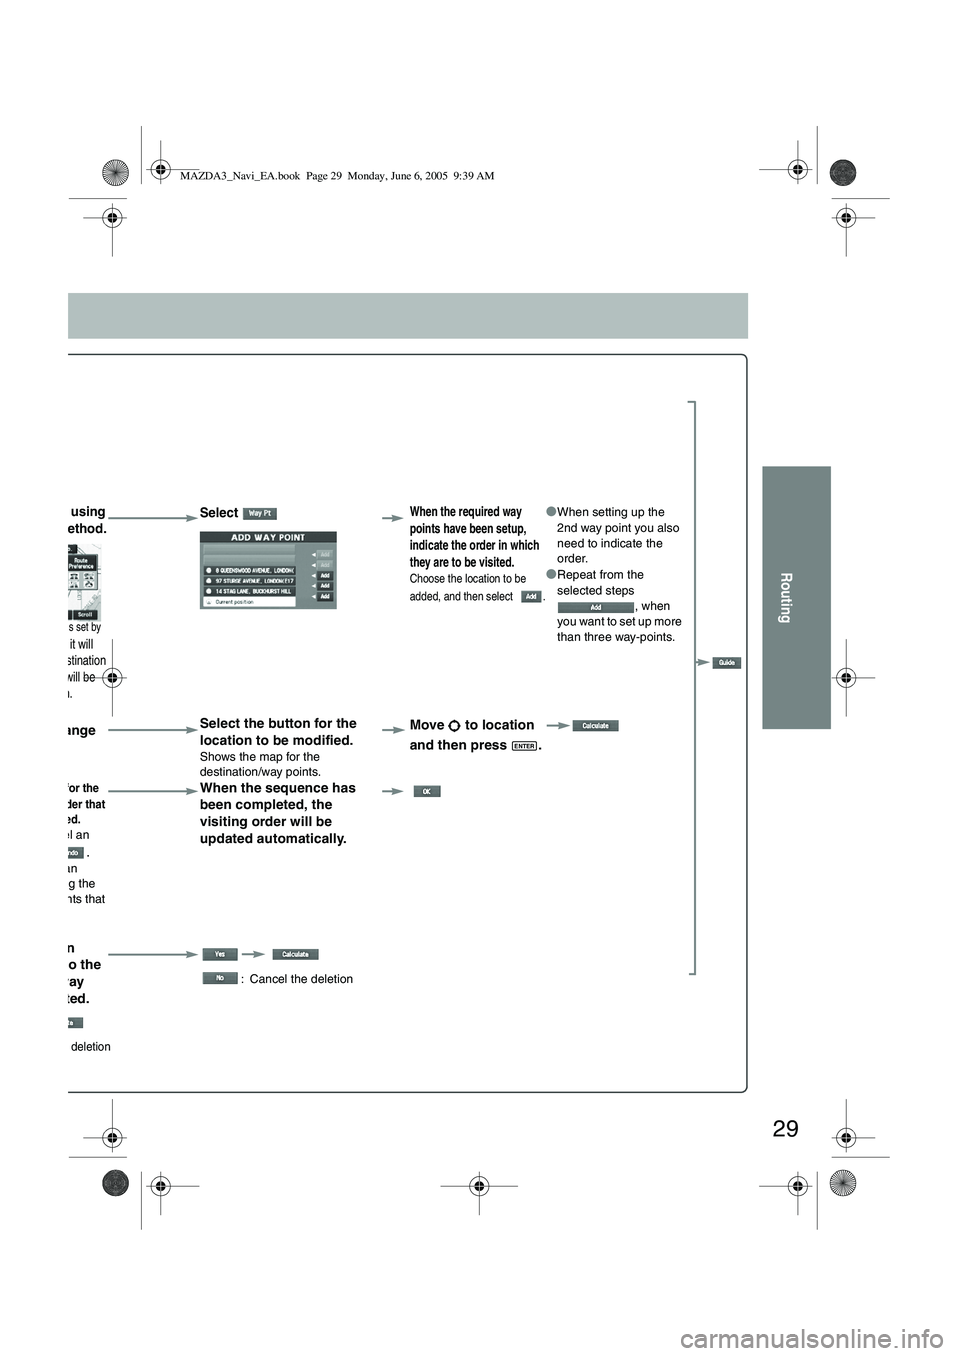
ay point using
erred method.
destination is set by
stination), it will
current destination
alculation will be
once again.
Select When the required way
points have been setup,
indicate the order in which
they are to be visited.
Choose the location to be
added, and then select
.
●When setting up the
2nd way point you also
need to indicate the
order.
●Repeat from the
selected steps , when
you want to set up more
than three way-points.
(Change
). Select the button for the
location to be modified.
Shows the map for the
destination/way points.
Move to location
and then press .
buttons for the
in the order that
d be visited.to cancel an
select
.ly, you can y selecting the n/way points that
er.
When the sequence has
been completed, the
visiting order will be
updated automatically.
e button
onding to the
on or way
be deleted.
: Cancel the deletion
Cancel the deletion
ENTER
MAZDA3_Navi_EA.book Page 29 Monday, June 6, 2005 9:39 AM
Page 403 of 426
31
Routing
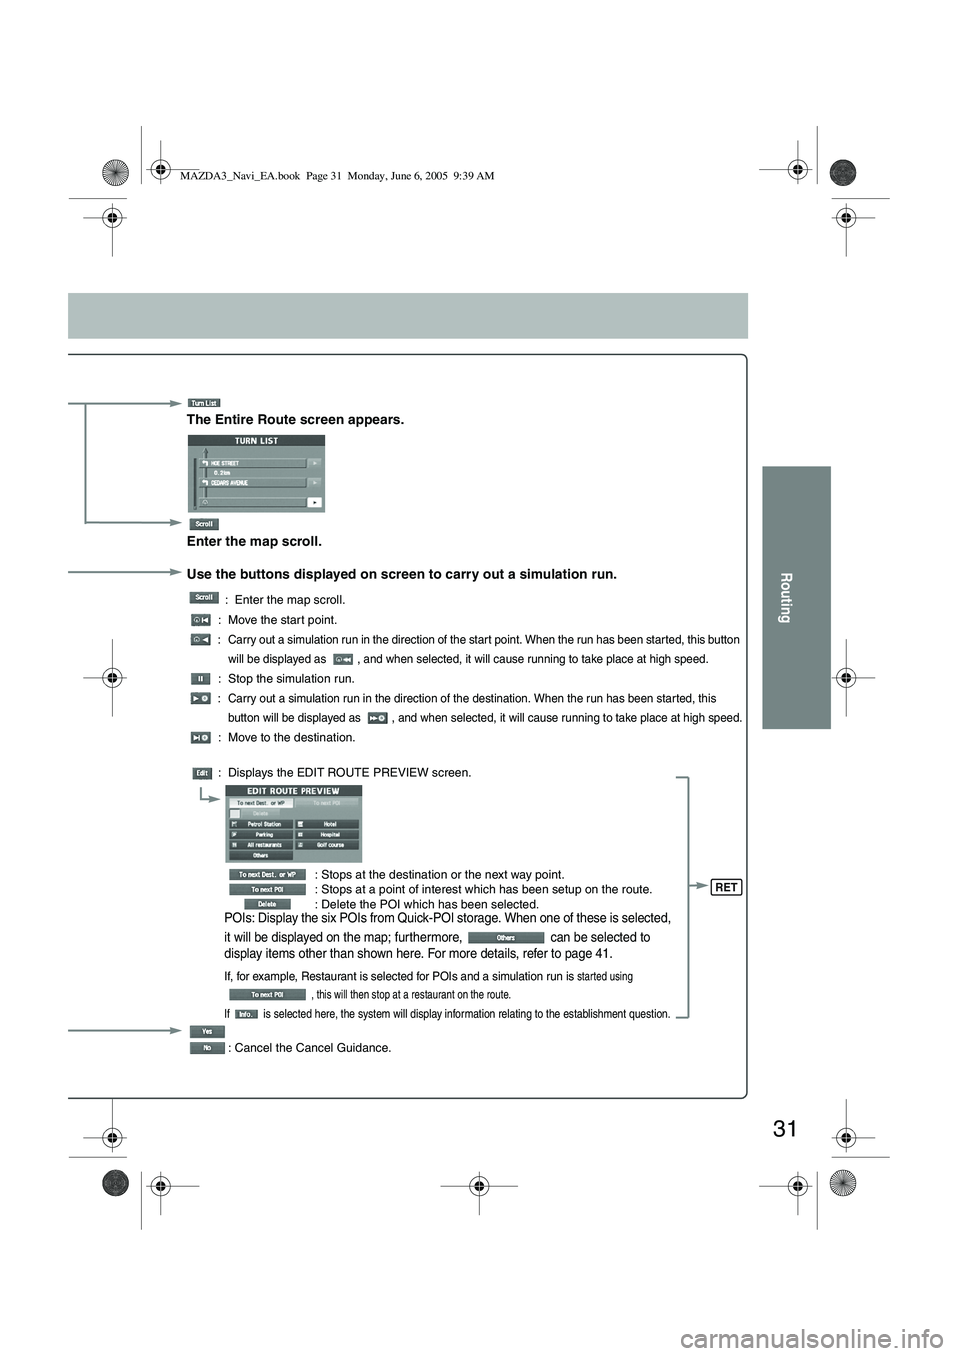
The Entire Route screen appears.
Enter the map scroll.
Use the buttons displayed on screen to carry out a simulation run.
: Enter the map scroll.
: Move the start point.
: Carry out a simulation run in the direction of the start point. When the run has been started, this button will be displayed as , and when selected, it will cause running to take place at high speed.
: Stop the simulation run.
: Carry out a simulation run in the direction of the destination. When the run has been started, this button will be displayed as , and when selected, it will cause running to take place at high speed.
: Move to the destination.
: Displays the EDIT ROUTE PREVIEW screen.
: Stops at the destination or the next way point.
: Stops at a point of interest which has been setup on the route.
: Delete the POI which has been selected.
POIs: Display the six POIs from Quick-POI storage. When one of these is selected,
it will be displayed on the map; furthermore, can be selected to
display items other than shown here. For more details, refer to page 41.
If, for example, Restaurant is selected for POIs and a simulation run is started using
, this will then stop at a restaurant on the route.
If is selected here, the system will display information relating to the establishment question.
: Cancel the Cancel Guidance.
RET
MAZDA3_Navi_EA.book Page 31 Monday, June 6, 2005 9:39 AM
Page 423 of 426
51
As necessary
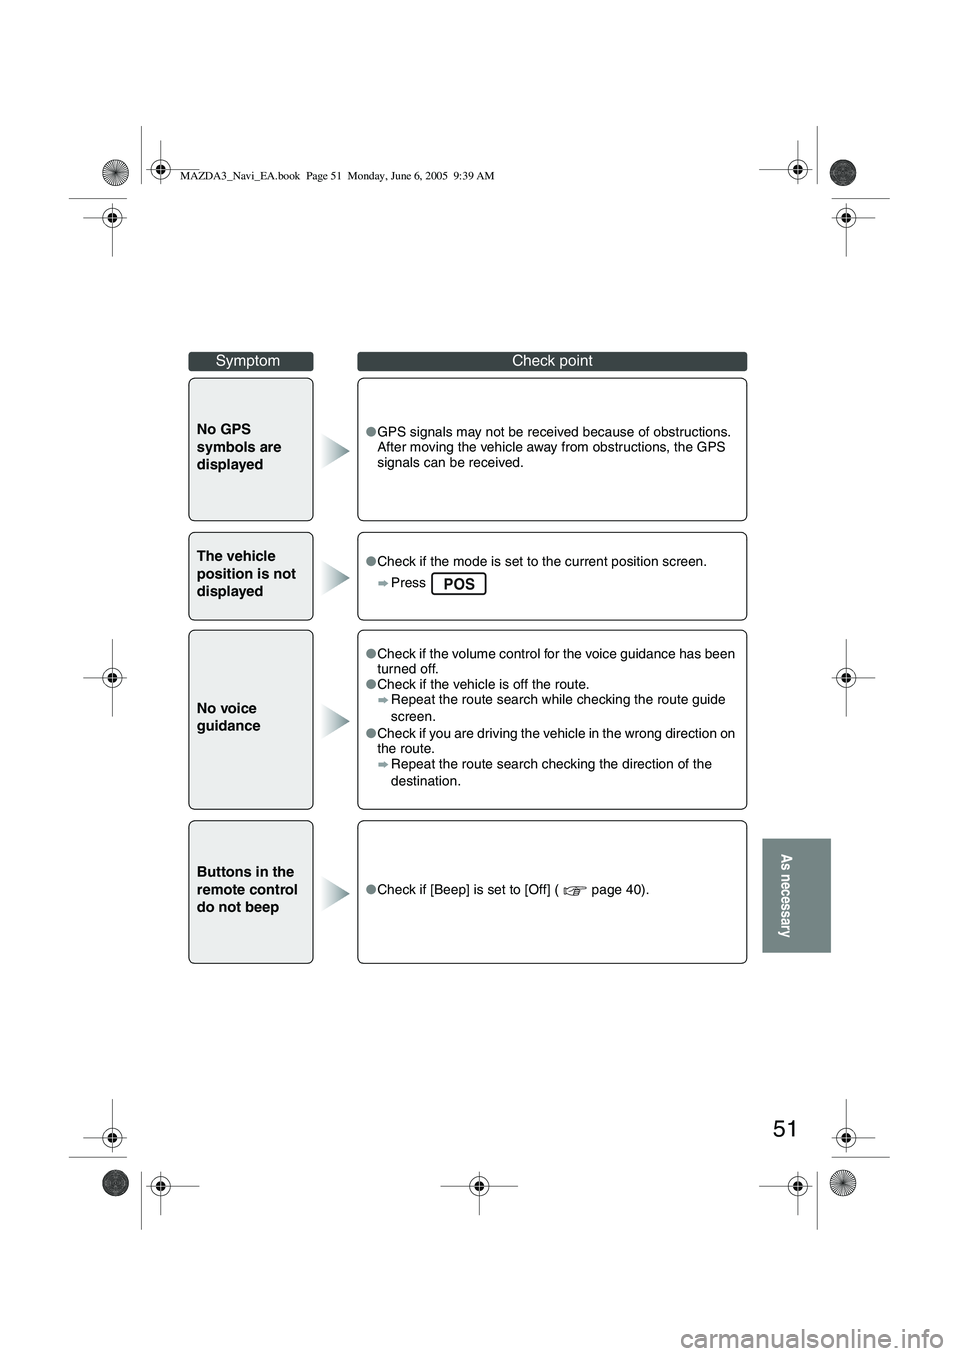
No GPS
symbols are
displayed●GPS signals may not be received because of obstructions.
After moving the vehicle away from obstructions, the GPS
signals can be received.
The vehicle
position is not
displayed●Check if the mode is set to the current position screen.
Press
No voice
guidance
●Check if the volume control for the voice guidance has been
turned off.
● Check if the vehicle is off the route.
Repeat the route search while checking the route guide
screen.
● Check if you are driving the vehicle in the wrong direction on
the route.
Repeat the route search checking the direction of the
destination.
Buttons in the
remote control
do not beep
●Check if [Beep] is set to [Off] ( page 40).
SymptomCheck point
POS
MAZDA3_Navi_EA.book Page 51 Monday, June 6, 2005 9:39 AM