set button MAZDA MODEL 6 2010 Navigation Manual (in English)
[x] Cancel search | Manufacturer: MAZDA, Model Year: 2010, Model line: MODEL 6, Model: MAZDA MODEL 6 2010Pages: 136, PDF Size: 1.78 MB
Page 44 of 136
![MAZDA MODEL 6 2010 Navigation Manual (in English) 44
Before
UseGetting
started
Routing
Route Options
Before Steps select
Display
Route
Route
Preview
Setting the
conditions
for
simulation
run
MENU
Open the
[ROUTE
OPTIONS] Menu
Select
Select MAZDA MODEL 6 2010 Navigation Manual (in English) 44
Before
UseGetting
started
Routing
Route Options
Before Steps select
Display
Route
Route
Preview
Setting the
conditions
for
simulation
run
MENU
Open the
[ROUTE
OPTIONS] Menu
Select
Select](/img/28/13569/w960_13569-43.png)
44
Before
UseGetting
started
Routing
Route Options
Before Steps select
Display
Route
Route
Preview
Setting the
conditions
for
simulation
run
MENU
Open the
[ROUTE
OPTIONS] Menu
Select
Select
Use the buttons display
: Move to the start poi
: Carry out a simulation r
will be displayed as
: Stop the simulation r
: Carry out a simulation r
button will be displayed
: Move to the destinati
: Displays the [EDIT R
: Sto: Stop: DelPOIs: Display the six PO
it will be displayed on thdisplay items other than
Page 45 of 136

45
Before
UseGetting
started
Routing
Use the buttons displayed on screen to carry out a simulation run.
: Move to the start point.
: Carry out a simulation run in the direction of the start point. When the run has been started, this button
will be displayed as , and when selected, it will cause to take place at high speed.
: Stop the simulation run.
: Carry out a simulation run in the direction of the destination. When the run has been started, this button will be displayed as , and when selected, it will cause to take place at high speed.
: Move to the destination.
: Displays the [EDIT ROUTE PREVIEW] screen.
: Stops at the destination or the next way point.
: Stops at a point of interest which has been set up on the route. : Delete the POI which has been selected.POIs: Display the six POIs from Quick-POI storage. When one of these is selected,
it will be displayed on the map; furthermore, can be selected to
display items other than shown here. Fo r more details, refer to page 19.
RETURN
Page 47 of 136

47
Before
UseGetting
started
Routing
Address Book
Set a memory
point using your
preferred method.
Select a memory
point to be modified. : Allows the display icon to be
selected. Page 1 and 2 contain
standard icons, whereas the
With Sound page contains icons
which also playback sounds.
(With direction icon function)
The beep alert only activates when
the vehicle approaches to within
about 500 m (1640 ft) of the memory point
from the set direction.
: Allows the name to be changed. When editing has been
completed, select .
Furthermore, select to
display names on the map, or
if these names are not to
be displayed.
: Allows memory points to be checked and modified on the
map screen.
: Allows the telephone number to be modified. When editing has
been completed, select .
Select a memory
point to be stored in
Preset Destinations
or Home.
: The order of the
displayed list can
be changed.
:Allows the
storage category to be
changed. Select the
button corresponding to
the new category.
:Press the Del.
button to clear the
category previously set.:Changes the
category to Home
:
Select a memory
point to be
deleted.
: Cancel the deletion.
: Cancel the deletion.
Show all icons or
Categories can be
registered using
the preset
destination buttons
(1 to 5).
Page 51 of 136

51
Before
UseGetting
started
RoutingAddress
Book
Voice Recognition
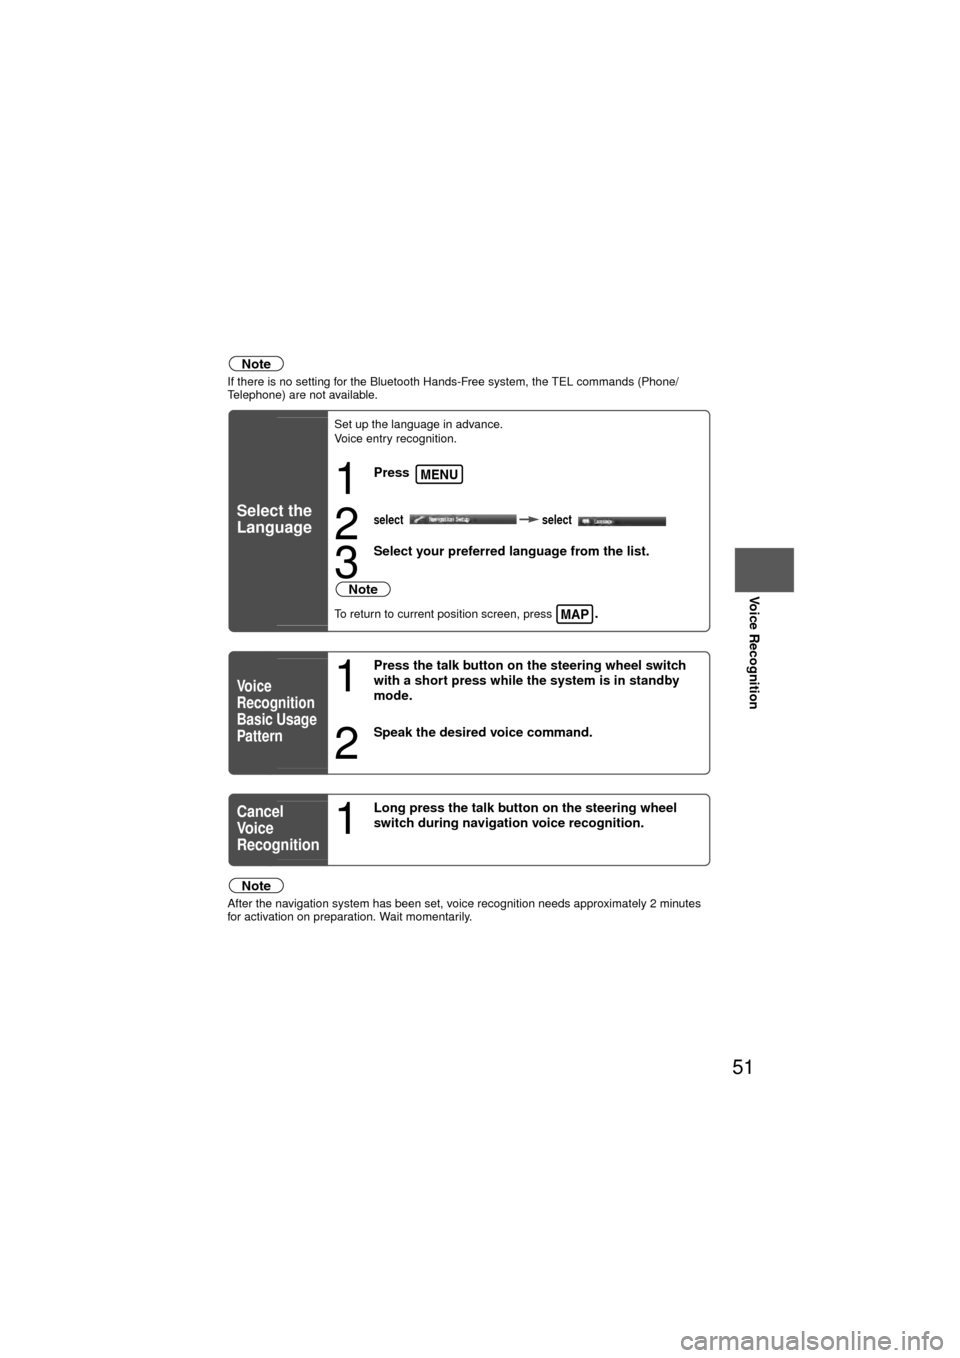
Note
If there is no setting for the Bluetooth Hands-Free system, the TEL commands (Phone/
Telephone) are not available.
Note
After the navigation system has been set, voice recognition needs approximately 2 minutes
for activation on preparation. Wait momentarily.
Select the
Language
Set up the language in advance.
Voice entry recognition.
1
Press
2select
select
3
Select your preferred language from the list.
Note
To return to current position screen, press .
Vo i c e
Recognition
Basic Usage
Pattern1
Press the talk button on the steering wheel switch
with a short press while the system is in standby
mode.
2
Speak the desired voice command.
Cancel
Vo i c e
Recognition
1
Long press the talk button on the steering wheel
switch during navigation voice recognition.
MENU
MAP
Page 58 of 136
![MAZDA MODEL 6 2010 Navigation Manual (in English) 58
Before
UseGetting
started
RoutingAddress
Book
Vo i c e Recognition
Vo l u m e
Volume
You can adjust the volume control for the voice guidance.
Before StepsselectMENU
Open the [VOLUME] screen
1
S MAZDA MODEL 6 2010 Navigation Manual (in English) 58
Before
UseGetting
started
RoutingAddress
Book
Vo i c e Recognition
Vo l u m e
Volume
You can adjust the volume control for the voice guidance.
Before StepsselectMENU
Open the [VOLUME] screen
1
S](/img/28/13569/w960_13569-57.png)
58
Before
UseGetting
started
RoutingAddress
Book
Vo i c e Recognition
Vo l u m e
Volume
You can adjust the volume control for the voice guidance.
Before StepsselectMENU
Open the [VOLUME] screen
1
Select the appropriate button to set the
volume to between (minimum) and
(maximum).
:Sound output will be muted.
2
Press the button to return to the
current vehicle position screen.MAP
Page 69 of 136

69
Before
UseGetting
started
RoutingAddress
BookVoice
Recognition
Navigation
Set Up
If necessary
No GPS
symbols are
displayedl
GPS signals may not be received because of obstructions.
After moving the vehicle away from obstructions, the GPS
signals can be received.
The vehicle
position is not
displayedlCheck if the mode is set to the current position screen.
Press
No voice
guidance
lCheck if the volume control for the voice guidance has been
turned off.
l Check if the vehicle is off the route.
Repeat the route search while checking the route guide
screen.
l Check if you are driving the vehicle in the wrong direction on
the route.
Repeat the route search checking the direction of the
destination.
Buttons on the
remote control
do not beeplCheck if [Beep] is set to [Off] ( page 27).
SymptomCheck point
MAP
Page 82 of 136

82
Before
UseGetting
started
RoutingAddress
Book
Voice Recognition
Navigation
Set Up
RDM-TMC
Audio Operation
Navigation
Set Up
nPower ON/OFF
Switch the ignition switch to the ACC or ON position.
Press the POWER/VOLUME dial to turn the audio system on.
Press the POWER/VOLUME dial again to turn the audio system off.
Note
To prevent the battery from being discharged, do not leave the audio system on for a long
period of time when the engine is not running.
nVolume adjustment
To adjust the volume, turn the POWER/VOLUME dial.
Turn the POWER/VOLUME dial to the right to increase
volume, to the left to decrease it.
nAudio sound adjustment
1.Press the SOURCE button.
2.Select the desired on-screen button corresponding to one of the following modes.
• on-screen button : Audio mode (AM band)
• on-screen button : Audio mode (FM band)
• on-screen button : Satellite radio
• on-screen button : CD mode
• , on-screen button : Image and Sound playback is possible using a portable audio player connected to an external input terminal.*
• on-screen button : iPod mode
• on-screen button : BT-Audio mode
Power/Volume/Sound Controls
LOAD /
PUSHPOWERPUSHAUDIO
VOL
SOURCE
SCAN
SEEK
TRACK
MAP
DISP
MENU
VOICE RETURN
TUNE
POWER/VOLUME dial
SOURCE button
Page 83 of 136

83
Audio Operation
*The external input terminal is not equipped on your vehicle because it is not standard equipment.
3.Press the TUNE AUDIO dial to display the sound adjustment screen.
4.Select the on -screen button to display the sound adjustment screen.
nSound quality adjustment
TREBLE (treble sound)
Select the on-screen button to increase treble, and to decrease.
BASS (low pitch sound)
Select the on-screen button to increase bass, and to decrease.
nVolume balance adjustment
Front/back volume balance
Select the on-screen button to increase the volume at the front, and on-screen
button to increase the volume to the back.
Left/right volume balance
Select the on-screen button to increase the volume to the right, and on-screen button
to increase the volume to the left.
Note
l Pressing an on-screen adjustment button for 0.5 seconds or more progressively changes
the adjustment range towards +/–, up/down, or left/right.
l While an adjustment button is selected in this manner, the level indicator will momentarily
stop at the medium range position and a beep sound will be heard before proceeding.
l Select the on-screen button to reset bass, treble, and balance.
l To return to the previous screen, select the on-screen button.
Page 84 of 136

84
Before
UseGetting
started
RoutingAddress
Book
Voice Recognition
Navigation
Set Up
RDM-TMC
Audio Operation
Navigation
Set Up
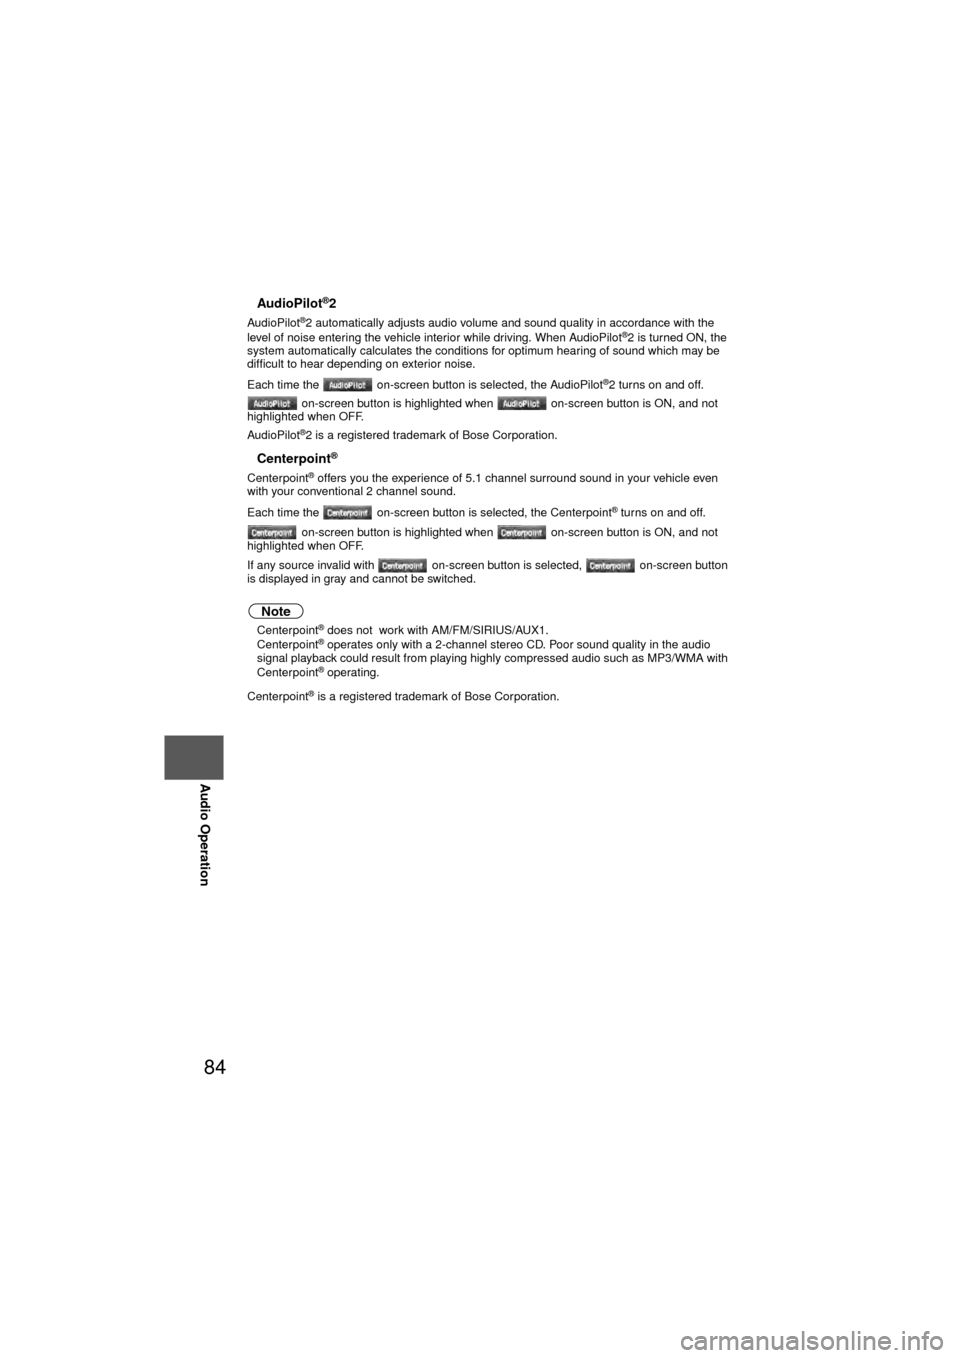
nAudioPilot®2
AudioPilot®2 automatically adjusts audio volume and sound quality in accordance with the
level of noise entering the vehicle interior while driving. When AudioPilot®2 is turned ON, the
system automatically calculates the conditions for optimum hearing of sound which may be
difficult to hear depending on exterior noise.
Each time the on-screen button is selected, the AudioPilot
®2 turns on and off.
on-screen button is highlighted when on-screen button is ON, and not
highlighted when OFF.
AudioPilot
®2 is a registered trademark of Bose Corporation.
nCenterpoint®
Centerpoint® offers you the experience of 5.1 channel surround sound in your vehicle even
with your conventional 2 channel sound.
Each time the on-screen button is selected, the Centerpoint
® turns on and off.
on-screen button is highlighted when on-screen button is ON, and not
highlighted when OFF.
If any source invalid with on-screen button is selected, on-screen button
is displayed in gray and cannot be switched.
Note
l Centerpoint® does not work with AM/FM/SIRIUS/AUX1.
l Centerpoint® operates only with a 2-channel stereo CD. Poor sound quality in the audio
signal playback could result from playing highly compressed audio such as MP3/WMA with
Centerpoint
® operating.
Centerpoint
® is a registered trademark of Bose Corporation.
Page 85 of 136

85
Audio Operation
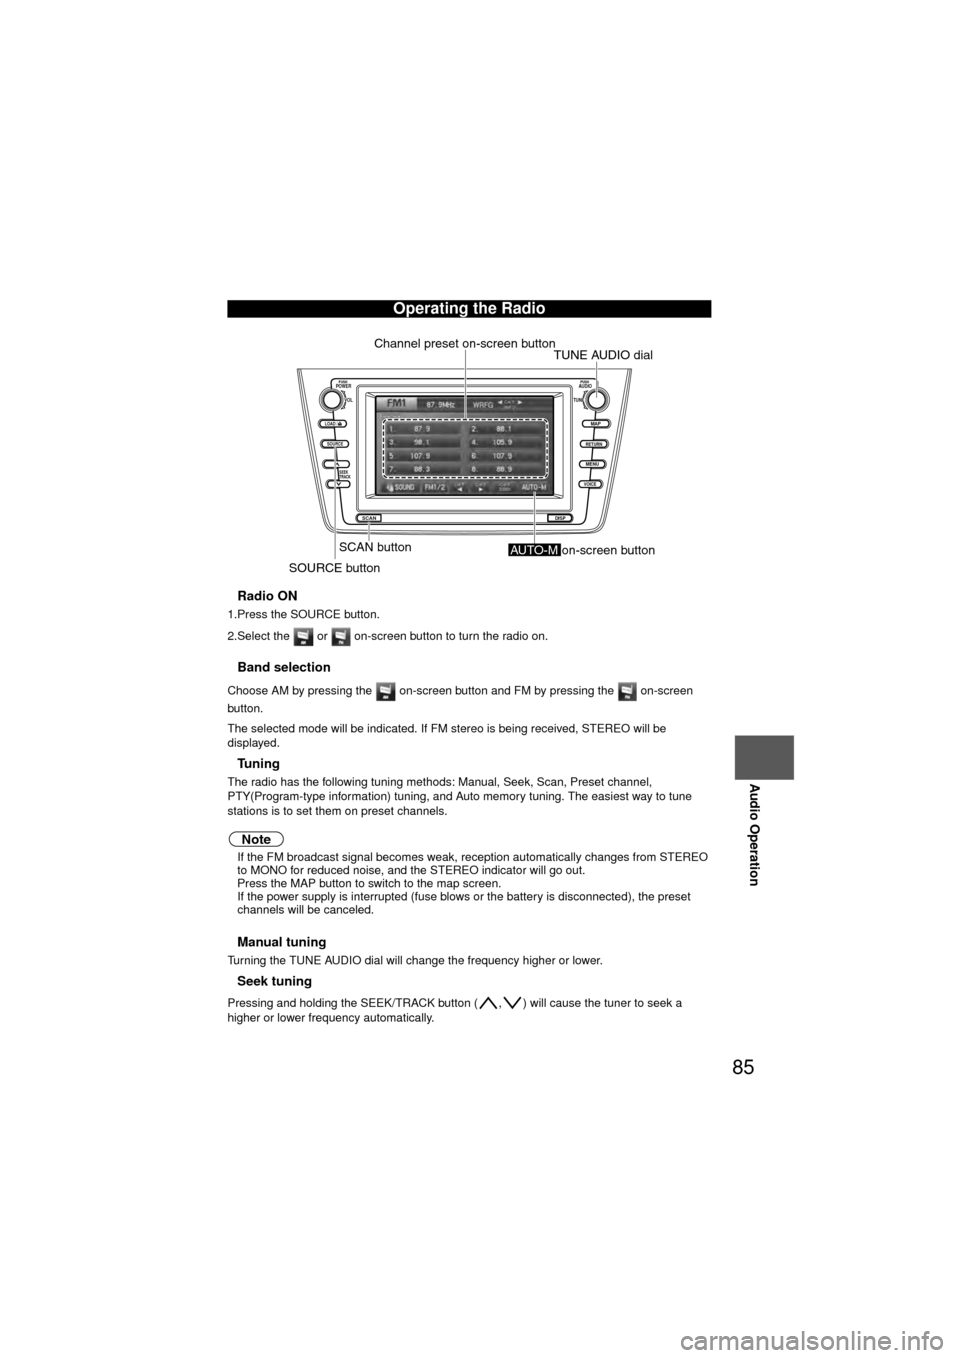
nRadio ON
1.Press the SOURCE button.
2.Select the or on-screen button to turn the radio on.
nBand selection
Choose AM by pressing the on-screen button and FM by pressing the on-screen
button.
The selected mode will be indicated. If FM stereo is being received, STEREO will be
displayed.
nTu n i n g
The radio has the following tuning methods: Manual, Seek, Scan, Preset channel,
PTY(Program-type information) tuning, and Auto memory tuning. The easiest way to tune
stations is to set them on preset channels.
Note
l If the FM broadcast signal becomes weak , reception automatically changes from STEREO
to MONO for reduced noise, and the STEREO indicator will go out.
l Press the MAP button to switch to the map screen.
l If the power supply is interrupted (fuse blows or the battery is disconnected), the preset
channels will be canceled.
nManual tuning
Turning the TUNE AUDIO dial will change the frequency higher or lower.
nSeek tuning
Pressing and holding the SEEK/TRACK button ( , ) will cause the tuner to seek a
higher or lower frequency automatically.
Operating the Radio
LOAD /
PUSHPOWERPUSHAUDIO
VOL
SOURCE
SCAN
SEEK
TRACK
MAP
DISP
MENU
VOICE RETURN
TUNE
Channel preset on-screen button
SCAN button
SOURCE buttonTUNE AUDIO dial
AUTO-M on-screen button