mirror MAZDA MODEL 6 2010 Smart Start Guide (in English)
[x] Cancel search | Manufacturer: MAZDA, Model Year: 2010, Model line: MODEL 6, Model: MAZDA MODEL 6 2010Pages: 16, PDF Size: 4.67 MB
Page 7 of 16

Feature Highlights
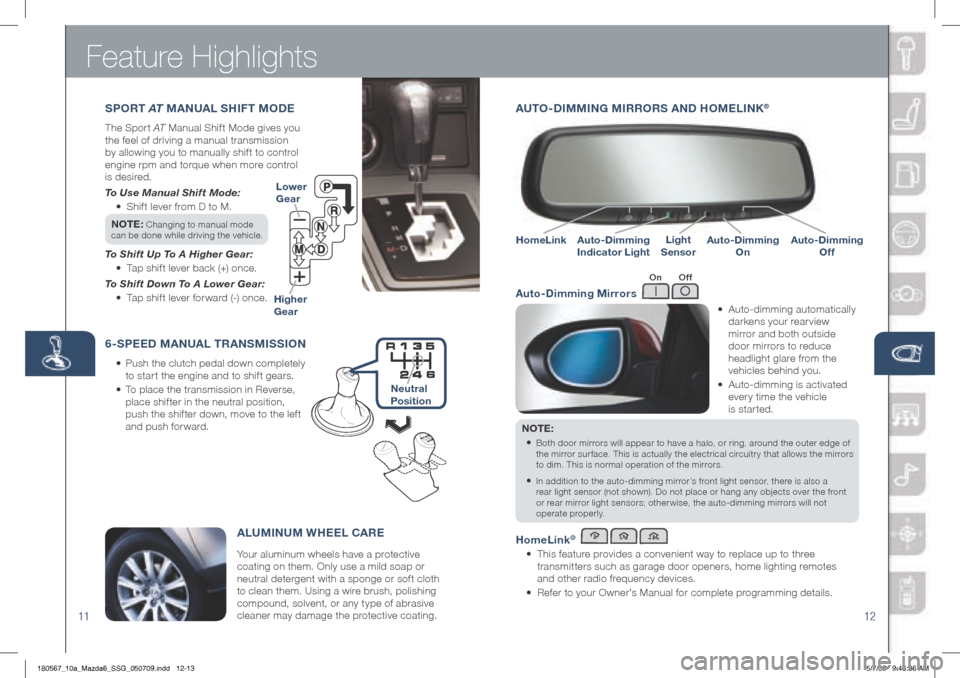
AUTO -DIMMIN g MIRRORS AND hOME LINK®
•
Auto-dimming automatically
darkens your rearview
mirror and both outside
door mirrors to reduce
headlight glare from the
vehicles behind you.
• Auto-dimming is activated
every time the vehicle
is started.
NOTE:
•
Both door mirrors will appear to have a halo, or ring, around the outer edge of
the mirror surface. This is actually the electrical circuitry that allows the mirrors
to dim. This is normal operation of the mirrors.
• In addition to the auto-dimming mirror’s front light sensor, there is also a
rear light sensor (not shown). Do not place or hang any objects over the front
or rear mirror light sensors; other wise, the auto-dimming mirrors will not
operate properly.
homeLink®
•
This feature provides a convenient way to replace up to three
transmitters such as garage door openers, home lighting remotes
and other radio frequency devices.
• Refer to your Owner’s Manual for complete programming details.
Auto-Dimming Mirrors
Auto-Dimming
Indicator LightAuto-Dimming
On
homeLinkLight
SensorAuto-Dimming
Off
On Off
6-SPEED MANUAL TRANSMISSION
Push the clutch pedal down completely
•
to start the engine and to shift gears.
To place the transmission in Reverse,
•
place shifter in the neutral position,
push the shifter down, move to the left
and push forward.
Your aluminum wheels have a protective
coating on them. Only use a mild soap or
neutral detergent with a sponge or soft cloth
to clean them. Using a wire brush, polishing
compound, solvent, or any type of abrasive
cleaner may damage the protective coating.
ALUMINUM WhEEL CARE
Lower
gear
h igher
g ear
11 12
SPORT AT MANUAL Sh IFT MODE
The Sport AT Manual Shif t Mode gives you
the feel of driving a manual transmission
by allowing you to manually shif t to control
engine rpm and torque when more control
is desired.
To Use Manual Shift Mode:
• Shift lever from D to M.
NOTE:
Changing to manual mode
can be done while driving the vehicle.
To Shift Up To A Higher Gear:
• Tap shift lever back (+) once.
To Shift Down To A Lower Gear:
• Tap shift lever forward (-) once.
Neutral
Position
180567_10a_Mazda6_SSG_050709.indd 12-135/7/09 9:46:36 AM
Page 8 of 16

Feature Highlights
13
NOTE: Do not rely completely on the BSM system and be sure to look over
your shoulder before changing lanes:
• The BSM system can assist the driver in confirming the safety of the surroundings,
but is not a complete substitute.
• The driver is responsible for ensuring safe lane changes and other maneuvers.
• Always pay attention to the direction in which the vehicle is traveling and the
vehicle’s surroundings.
• The BSM system does not operate when the vehicle speed is lower than about
20 mph (32 km/h).
Turning BSM System Off
To manually turn the BSM system off, push the BSM OFF switch on the dash.
The BSM OFF indicator will illuminate in the instrument cluster when the BSM
system is off. The BSM system will automatically turn on the next time the
vehicle is started.
14
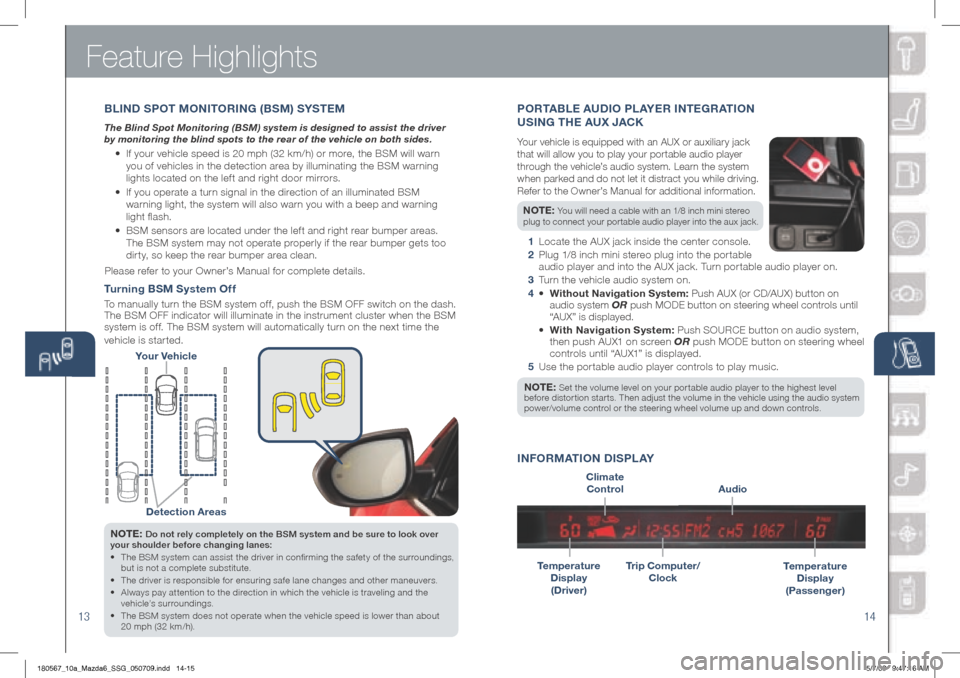
Your Vehicle
Detection Areas
PORTABLE AUDIO PL AYER INTE gRAT ION
USIN g ThE AUX JACK
Your vehicle is equipped with an AUX or auxiliary jack
that will allow you to play your portable audio player
through the vehicle’s audio system. Learn the system
when parked and do not let it distract you while driving.
Refer to the Owner’s Manual for additional information.
NOTE: You will need a cable with an 1/8 inch mini stereo
plug to connect your portable audio player into the aux jack.
1 Locate the AUX jack inside the center console.
2 Plug 1/8 inch mini stereo plug into the portable
audio player and into the AUX jack. Turn portable audio player on.
3 Turn the vehicle audio system on.
4 • Without Navigation System: Push AUX (or CD/AUX) button on
audio system OR push MODE button on steering wheel controls until
“AUX” is displayed.
• With Navigation System: Push SOURCE button on audio system,
then push AUX1 on screen OR push M ODE button on steering wheel
controls until “AUX1” is displayed.
5 Use the portable audio player controls to play music.
NOTE: Set the volume level on your por table audio player to the highest level before distortion starts. Then adjust the volume in the vehicle using the audio system
power/volume control or the steering wheel volume up and down controls.
Temperature
Display
(Driver)
Audio
INFORMATION DISPLAY
Temperature
Display
(Passenger)Trip Computer/
Clock
Climate
Control
B LIND S POT MONITORIN g (BSM) SYSTEM
The Blind Spot Monitoring (BSM) system is designed to assist the driver
by monitoring the blind spots to the rear of the vehicle on both sides.
• If your vehicle speed is 20 mph (32 km/h) or more, the BSM will warn
you of vehicles in the detection area by illuminating the BSM warning
lights located on the left and right door mirrors.
• If you operate a turn signal in the direction of an illuminated BSM
warning light, the system will also warn you with a beep and warning
light flash.
• BSM sensors are located under the left and right rear bumper areas.
The BSM system may not operate properly if the rear bumper gets too
dirty, so keep the rear bumper area clean.
Please refer to your Owner’s Manual for complete details.
180567_10a_Mazda6_SSG_050709.indd 14-155/7/09 9:47:16 AM
Page 15 of 16

SALES CONSULTANTCUSTOMER
All items in the Customer Delivery Checklist have been reviewed with the customer and
the first maintenance appointment has been scheduled:
*if equipped
Signed copy must be placed in dealer jacket
DEALERShIP DAT E
SALES CONSULTANT CUSTOMER’S NAME
VIN E-MAIL
Smart Start g
uide
• Remove this checklist from
Smart Start Guide
Warranty Information
•
Basic Vehicle –
36 months/36,000 miles
• Roadside assistance program
MyMazda.com
•
Offer to register customer on
MyMazda.com
• Tell the owner about the
(“how-to”) videos that will help
them get acquainted with the
vehicle’s features
Owner’s Manual
•
Personalization Features
(refer to enclosed postcard
or your Owner’s Manual)
P RESENTATION OF O WNER’S M ATERIALS :
Review the following items with the customer
SERVICE D EPARTMENT
Introduce Service Manager;
Provide business cards
Review Ser vice and Par ts Depar tment
hours of operation
Explain free initial Full Circle
service inspection.
Schedule first maintenance service
Scheduled Maintenance
Windshield Cling Reminder
Affix to inside windshield
Customer Delivery Checklist
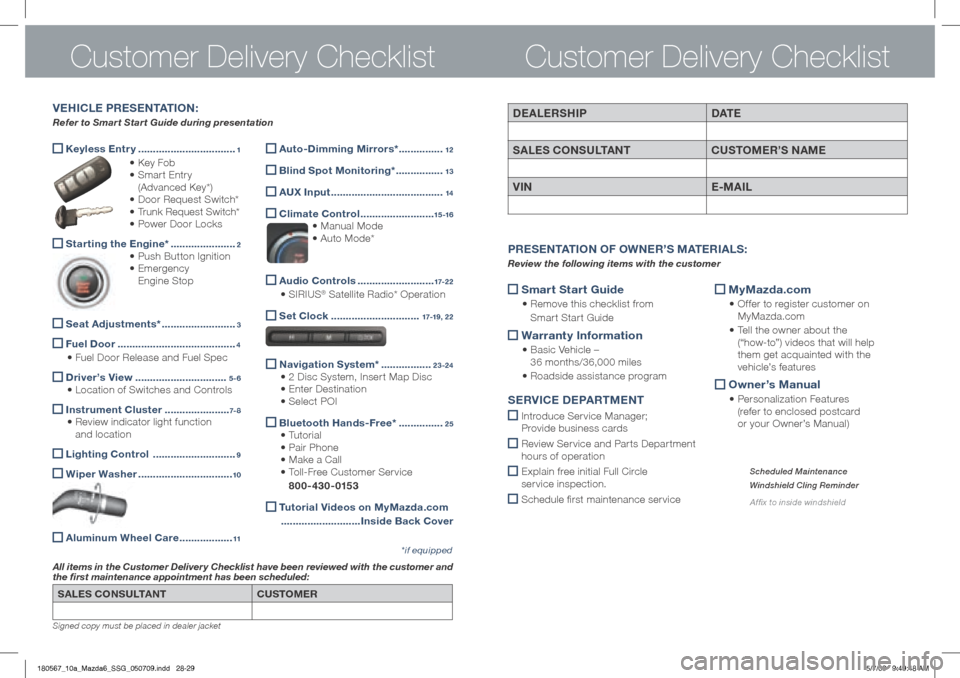
Keyless Entr y
.................................1
• Key Fob
• Smart Entry
(Advanced Key*)
• Door Request Switch*
• Trunk Request Switch*
• Power Door Locks
Starting the Engine*
......................2
• Push Button Ignition
• Emergency
Engine Stop
Seat Adjustments*
.........................3
Fuel Door
........................................4
• Fuel Door Release and Fuel Spec
Driver’s View
...............................5-6
• Location of Switches and Controls
Instrument Cluster
......................7- 8
• Review indicator light function
and location
Lighting Control
............................9
Wiper Washer
................................10
Aluminum Wheel Care
..................11
VE h ICLE PRESENTATION :
Refer to Smart Start Guide during presentation
Customer Delivery Checklist
Auto-Dimming Mirrors*
...............12
Blind Spot Monitoring*
................13
A
UX Input ......................................14
Climate Control
.........................15 -16
• Manual Mode
• Auto Mode*
Audio Controls
..........................17-2 2
• SIRIUS® Satellite Radio* Operation
Set Clock
..............................17-19, 22
Navigation System*
.................23-24
• 2 Disc System, Insert Map Disc
• Enter Destination
• Select POI
Bluetooth
hands-Free* ...............25
• Tutorial
• Pair Phone
• Make a Call
• Toll-Free Customer Service
800-430-0153
Tutorial Videos on MyMazda.com
........................... Inside Back Cover
180567_10a_Mazda6_SSG_050709.indd 28-295/7/09 9:49:48 AM